
Leaderboard


Popular Content
Showing content with the highest reputation on 30/07/22 in all areas
-
When I started making 1/48 scale kits I started with a Canberra PR.9 and painted her in grey / green camo. A Hunter and Lightning followed, also in grey/green. This theme developed until I had a Tornado, Jaguar, Harrier, Hawk and a Phantom. That only left a Buccaneer todo but they were difficult to get hold of and expensive. Then I realised that Italeri did a Hercules - wrap around grey/green it had to be! I couldn’t do the trainers in camo, so red and white for a second Hawk, Jet Provost and a scratch built Dominie. Then this year produced the new Chipmunk kit which quickly got added. Leaving just the Buccaneer to do which I finished a few weeks back. Now I can’t think of any further regular kits of RAF aircraft from this period with the exception of the Tarangus Bulldog. I could do with a Jet Provost T5 but that’s about it. I could, with unlimited funds that I don’t have, get a 3D printed Vulcan, Victor and Andover. But that’s not likely. I do, however, have a Sanger a form Shackelton to build. The quality of them is, er, variable! I was learning along the way! Some have bits of after market, most are out of the box. Some have lights and two have motorised props. Anyway, this is how they look I couldn’t leave the non-grey/green ones out though. So added in a Tornado F3, couple of grey Phantoms, a grey Jaguar and a green Harrier GR.5 So there we have it. I still have another FGR2 to build, plus the Shack. And must get a Bulldog. But that’s my 80s RAF17 points
-
Hi folks Another F-4 finally off the bench tonight, the venerable Hasegawa kit from the 1990s. I used the Egypt1 boxing that I picked up from a well known auction site as it contained quite a few spare decals for the spares box, but I was surprised that it had raised panel lines. I'm not so phased by raised details anymore and besides it means I can skip the tedious panel line wash process. 😁 Built completely OOB. For this particular aircraft I used aftermarket decals from 'Hi Decal' to represent an aircraft from 184th TFW Kansas ANG in European 1 camouflage. The aircraft had been flown by Brig. Gen. Robin Olds hence the mig kill markings. Paints were from Xtracrylix, Gunze and Tamiya. Hope you enjoy. Thanks for looking 🙂16 points
-
This was a really nice kit to build, fitting together well apart from some filler needed around the wing root fillets. Airfix did a superb job on the cockpit, engines and gun bays, with no aftermarket parts used at all for this one. I did snap the pitot tube, however, so used a thin wire instead, other than that it’s completely out of the box, including the decals. All comments and learning points very welcome!15 points
-
Hi folk's sadly it's culling time for some older kits the dust is getting everywhere and a lot are fading like the real thing in the sun through the Skylight. I am keeping these few 1/48 kit's and have washed and repaired them for boxing up so thought I might put a few photo's up. Special Hobby Seafire. Tamiya Vb as one of Zumbach's mounts. Airfix Vb Nightfighter. Airfix pre war Mkl. BoB Memorial flight Vb Airfix kit and decals. Thanks for looking next shelf is Hurricane filled!15 points
-
Here it is at last! Finished the decals yesterday and varnished them; I applied the matting down this morning, added the turrets, the propellers, and its finished! I've been at this one a while now with a few ups and downs including my holiday in June and a few other things, its all settled down again in our house and so I have been able to get in and do some modelling. I'm pleased to see it completely finished, it took a while but the wait was worth it! I've gone for all guns blazing on this one, lower turret extended, crew hatches and ladders down, bomb bay doors open with bomb load, lowered flaps and lots of nose weight so that it can stand on its own! There was alot of detail added to this kit at manufacture, Airfix have reworked this model into a fabulous kit with lots of options! Every part just seemed to fit to the next with NO issues at all, and I'm VERY pleased with it indeed. I am glad I changed the way I paint by thinning down because it really gives a nice solid colour over 4 coats of paint. Each coat needs 24hrs to dry before the next one is added which is a great patience builder! In modelling, patience is a big factor, if you want a great looking model you just do things in an orderly fashion and take your time with details, the decal on the nose wheel was added before I fitted the leg to the model and the pilots instrument panel also has a decal. Things were a bit different with the clear parts on this one; they all fitted quite precisely and crisply, and normally windows in the fuselage are fitted from the inside BUT not on this one! I fitted them from the outside on this model, used a little PVA to affix them in place. As you know I already have two other B-25's but this one has the glass nose! Only issue I had was attaching the glass dome to the top turret, the glue has bloomed it a little at the mounting points, I've tried to disguise it a bit, with a little paint. I've decided that its NOT going to spoil this build, or this model! I decided to paint the model in desert colours this time (I found 3 tinlets of the Humbrol 250 in a shop and snapped them up; that decided the colour of this one since it was an option); this aircraft "Desert Warrior" was crewed by Cptn. Ralf Lower; P/O. Anthony Arthur Martin (of the RCAF); Sgt. John R Dawdy; Sgt. J. B. Saragalo; Lt. Floyd R. Pond; Lt. T. R. Tate and W/o Lt. W. O. Seaman. It was an aircraft of the 81st Bombardment Squadron (Medium), 12th Bombardment Group (Medium) at Bolling Field, Washington DC, July 1943. They transited with their aircraft from the southern route to North Africa and became part of the 9th USAAF. The 9th USAAF were based in Cairo in Egypt at the start of the desert war, later once the war was won in the desert and they had worked up into Italy, the 9th moved from Cairo and became based in England where it grew exponentially. Many of the groups were either moved with the 9th or were transferred to the 12th USAAF. The 12th Bomb Group moved to the 10th USAAF in India in April 1944 until the end of the war when they returned home to USA, May 1945. Enjoy! I rather like the little circular decal on the window on the nose! I added a little dark silver onto the ladder rungs. The decals on this model were outstanding especially the ones on the nose, all went on very nicely indeed using Micro Industries DecalSet and DecalSol. Only one decal on the underside but a fair few stencils on the underside and on the nacelles. Its daunting to look at a pile of decals that all have to be applied to a model but once you get into it and find a way of working with them, then they're fine. I tend to set all of my decals and stencils into groups, do a group and then take a break, it all works out, might take time but there is NO hurry is there? The lower turret turns freely, I used a very fine detail pen with a high precision point and permanent ink to add the details on the turret. These are windows for camera so that the gunner had a turrets eye view and aid accuracy. I always file an edge of a landing gear door, just one side; it gives a better idea of where they meet on the nacelle. I had hoped to catch the red and white lights just inside the top of the tail bubble but the shine on it seems to hide it.15 points
-
Hi, guys... It's been a while since I posted here on Britmodeller, so I thought you might like to see the latest addition to my collection. This is the wonderful Gotha G.IV kit from Wingnut Wings. It's a large kit when finished, with a wingspan of almost three feet, but like any other model, spend a little time and you'll likely end up with a good outcome. So, to begin with, I painted and assembled the fuselage floor, bulkheads and cockpit area. Everything you see in this first image comes from the kit and I especially liked the seatbelts, oxygen bottles and the instrument decals, all of which bring great realism to the model. The floor was given an enamel undercoat of pale khaki, then overpainted using burnt sienna oil paint from the Cass Art range. I was very pleased with the wood effect on the floor and bulkheads. In this next photo, the framing around the cockpit has been added in and its rigging shows up well. The 'steering wheel' control mechanism is well produced, as are the integrally-moulded fuselage frames, although some of the cockpit areas in my kit had a lot of ejector pin marks. These were in tricky areas in some instances, but all were easily enough removed. The majority were on the right side of the fuselage, so had to be addressed, as they would have been very prominent if left unattended. I took this photo after the fuselage was closed up, and you can see some of the detail in the gunner/bomb-aimer's forward position including the bomb release mechanism and the oxygen bottle. Once I was happy with the internal areas of the fuselage, I moved on to building the engines, leaving one covered and the other without its engine panels in order to show the detail. The central section of the bottom wing was also painted up and the walkways painted metallic and then blackwashed to give a bit of a 'worn' look. I liked the fine detail on the radiator grills and the exhaust pipes came up very well with their grungy appearance; this was oil paint used again, and blackwashed. After varnishing the fuselage, the relevant decals were attached and the external fuselage rigging - which extends to the tail and connects with the control surfaces - was added on at this point and later tidied up when the elevators and rudder were attached. The few transparent pieces included in the kit are small, but are very clear and fit well. Some additional blackwashing was applied to both the panels and small fitments on the fuselage sides, and the engine cowlings. Moving on to the wings, both upper and lower surfaces were painted in the dark grey-blue, with the exception of the underside of the top wing, which like the engine covers, struts, wheel hubs and fuselage and nose panels, were left in the extremely pale blue shade, almost an off-white tone. Adhesive tape was added to cover the wing ribs after a whilte undercoat had been applied, thereafter being oversprayed in dark brown in a non-uniform manner before the tapes were removed. When this happened, the original white undercoat was again uncovered on the ribs, and these were later given an overspray in the relevant camouflage colour... ...which in turn, was a process that was helpful in drawing back any excess of the brown paint and also helped to remove the white and bring the ribs, generally speaking, back to the appropriate colour. I deliberately left them slightly 'untidy' in their appearance as I felt this gave a good final presentation. Once varnished, the national markings were applied. So, in the following image, you can see the extent of the wingspan with the lower wing sections now in situ; the cabane struts have also been attached. The Gotha's wings had noticeable dihedral and on such a large kit, you may think this would be difficult to effect properly, but the lower wings have the correct dihedral built into them and have quite a bit of 'play' as well, and the top wing, after securing the rather flimsy lower central section into place, rests easily on the cabane struts and engine frame struts without any additional support required at this stage. Now you can see that I have started to attach the interplane struts; I rigged the inner areas between the engines and fuselage first as these are the most difficult to get access to and some of the rigging crosses over other lengths of rigging diagonally and therefore, awkwardly... patience is definitely needed here, and possibly a leather mouthpiece to bite into if/when things don't go according to plan - you don't want to scare the neighbours with aggressive yelling, cursing and swearing at the top of your voice! 🤬 🤣 The cabane struts and each section, moving gradually out towards the wing tips, were rigged in their entirety before moving on to the next. The struts themselves were easily inserted into their location holes due to the 'play' in the wings, and this flexibility was very much instrumental in making the whole rigging process much easier. I resisted all thoughts of turning the kit upside down to complete the rigging under the top wing, instead electing to use two blocks of upholstery foam to support the model while accessing these areas in order to attach the turnbuckles into the leading and trailing edge points. The larger block of foam, which stood about four inches tall, allowed me to tilt the model forward onto its nose, thus giving better access to the trailing edge. The thinner strip of foam was used to support the undercarriage and raise the front of the kit, thus giving better access to the leading edges. In the latter process, it's good to remember to position the tail against something solid in order to support the model and minimise the likelihood of it slipping off the foam, and this should be done before attaching the tail control surfaces. All of the above negates the requirement to move the model around as it takes on more and more weight and size, and also reduces the need, in my opinion, to go boring right through the upper wing to draw rigging through before secuing it. I have seen this done online and admire modellers who use this method, but I wouldn't have confidence to try that, and given the rarity and cost of obtaining the model nowadays, I feel my method is every bit as effective. The rigging was completed using elasticated thread and the turnbukles came from the excellent GasPatch range. These last few photos show the model in its final stages of construction. All control surfaces are attached and rigging finished; upper wing fuels tanks, MG mounts and the guns themselves, the bombsight and all external ordinance has been added, and only a space in the cabinet needs to be found! All enamel paints used were from the Humbrol range and markings largely from the WnW kit itself, although the 'Lori2' markings were taken from the Pheon decals after-market offering for this model. So, I hope you have enjoyed seeing the photos from my build. There is a more extensive build article which you can access here: https://imodeler.com/groups/imperial-german-air-service-luftwaffe-group-build-may-1st-1910-to-present-day/forum/topic/wnw-gotha-g-iv-1-32-scale/, and I've made a YouTube video which you may also find interesting, available to view here https://www.youtube.com/watch?v=yQqvVuxKUyM. Thanks for looking in... ;-). Regards, Paul12 points
-
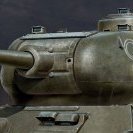
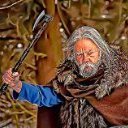
I have been studying the Russian Civil War lately and found the involvement of early armored vehicles to be particularly interesting. The very presence of these steel beasts was capable of turning the tide of battle, boosting the morale of friendly troops and causing the enemy to despair, much the same effect that the arrival of armored knights on the battlefield had in centuries past. Using both the Mk.III and Mk.IV boxings of this kit, I built two armored cars that appear to both have Mk.III features. The first depicts the car bestowed with the name "Ataman Bogaevsky," in honor of the last independent Ataman (leader) of the Don Cossacks, who held that title from early 1919 until his death in exile in 1934. According to the Osprey New Vanguard publication of White and Allied armor of the Russian Civil War, this vehicle was attached to Lieutenant General Shkuro's Cossack cavalry corps and participated on the advance on Moscow during the summer and autumn of 1919, and was lost during the subsequent retreat south. It carries both the roundel of the Don Army (black triangle in a circle) and the Russian tricolor, as a symbol of the Don Army's participation as part of the Armed Forces of South Russia. The vehicle appears to carry a disruptive camouflage pattern, which I have tried my best to reproduce. The inner linings of the front wheel wells are missing and supported only by metal struts, which are my only scratch-built contributions to the kit. The second car, carrying the name "Shvidkiy" ("Speedy" or "Swift" in Ukrainian), was one of 27 armored cars used by the Ukrainian National Republic during its short-lived independence from 1918-1921. A cossack from long ago seems to have snuck into frame. Thanks for looking!11 points
-
Hello everyone. This is the last of a pair of Sea Vixen FAW.1s that I started building as a project in 1/72 scale back in 2019 in order to go beyond what was available in kit form in terms of quality and detail. The first of these aircraft - XJ481 - was completed last October in her Martel trials livery and can be seen here. The aircraft represented here - XN708 from 890 NAS - crashed into Lyme bay killing both crew on the night of 25th Nov, 1964. A fuller history of both aircraft, as well as the build log for designing and printing them, can be found here: Source materials used in developing the CAD designs comprised of the Sea Vixen maintenance manuals cross-referenced with photographic imagery, a combination I've come to rely on in terms indexing what you see against its actual function. Aside from printed resin, the build also required the use of vacforming for the pilot's canopy and the production of homebrew PE for a range of internal and external features. All markings are painted using custom mask sets. Walkaround: Wingfold: Radar and nose area. (Yes, the scanner dish moves...) Engines: I've a list of people already who want a copy of this to make a FAW.1 for themselves so I'm going to be producing it as a multimedia kit in resin, brass and vacform over the coming months, to include all the details shown here. If you like what you see and want to register an interest in having a a copy as well, please feel free to drop a PM. As ever I'd like to finish simply by thanking all those forum members who gave so generously of their time, humour and expertise in following along with this project: it's always chastening to realize that no matter how certifiable my ramblings, there are other equally disturbed individuals out there prepared to read them. All power to you, and of course, peace. Tony Ps. The pair of them together...11 points
-
Here's another one I finished a while back. I've always loved the Corsair, but it took a little while to get the colour right. I tried a few new techniques, some of which worked, and others not so much. Overall I like how it turned out, and I'm thinking of building a bigger one in the future, maybe with folded wings. I painted it up with Tamiya acrylics and weathered it with Abteilung oils. Enjoy!11 points
-
Hi all I thought this was nice, I have been working on the Tiggie and went out in the garden yesterday morning for a leg stretch and found this flying around, it's a Tiger Moth I think. Was lovely Back to work though Aileron control cables, turnbuckles are from stretched cotton bud tubes Bob's Buckles eyelets are used as upper elevator cable guides PE Aileron actuators soldered to .45mm brass rod, so they're not just flat And with the prop and cabin doors on she is finally finished I will get some RFI photos done soon, busy playing on the car tomorrow and out at a car show Sunday. Have a great weekend and thanks for looking in, I had better get that Swordfish started now. Chris11 points
-
B-1B Lancer 9th Bomb Squadron, USAF – Dyess, Texas, 2014 Panda 1/144 scale kit / Caracal decals With the release of the newish Academy B-1B in 1/144, the kit I used here is redundant, but I was already half way through it so decided to carry on. It was really the release of the Caracal decal sheet that encouraged me to retrieve it from the attic where it had been part started for many many years. There aren’t many kits that I would actually call bad. This is the exception – it’s a bad kit! To start with the whole fuselage around the cockpit area just looked wrong. I decided to forgo a clear windscreen and added Milliput all over the front fuselage to reshape it, then added the ‘transparent’ bits with paint, 1/144 airliner style. Then there are the exhausts. If you were doing and early B-1B with turkey feathers you could just about get away with filling and sanding the kit exhausts, but later aircraft had the naked nozzle workings on display so I had a go at scratch building that lot (there is a resin replacement available for lots of dosh but I didn’t think this kit was worth it). Wheels were the next thing – those provided in the kit were ridiculously small. I had actually built a Minicraft B-1A years ago, wheels up, so I could use the wheels on the B-1B. Nowadays there are resin wheels available which maybe I should have bought. What’s next – ah yes, the wing section! The outer wings have so much camber that they could have come from a Sopwith Camel. I actually left this untouched because it's not that visible from the top and the engraved detail was very nice. The decals – oh, the decals. They look so nice on the sheet and have lots of good detail, but they had that too good to be true glossiness about them. Sure enough, they took an age to release from the backing, then just fell apart when touched. I tried coating them with Klear but it made little difference. Anyway that was before Caracal came along with a brilliant sheet so thankyou Caracal. Despite all of the above, and I’m sure there are more tales of woe if I think about it, out the end came a passable B-1B as part of my US bombers project in 1/144. Next up are a couple of B-47s which should be less challenging. Or should I go for the B-36 – or maybe B-58? That’s the great thing about this hobby – there’s always the next one….10 points
-
Still alive and well - all done with that silly pneumonia thing. Better yet, the Demon is entering the home stretch. This part of the build is always the fiddly stuff, so here is a quick list of the additions: All gear doors painted, edged with a red Sharpie, and added to the model. Lightening holes were drilled into the interior surfaces of the nose gear doors. The vents on the nose gear doors are homemade decals, as are all of the antennae (the gold coloured circular and octagon-shapes on the underside and the port nose gear door) and the vents for the cannons. Added wing spoilers. Added catapult bridle hook. Added the arresting hook (stripes are decals) and the tail bumper. Added four rocket pods (with aero covers), two Sidewinder pylons and AERO1A launchers. Wheels and tyres added to landing gear (yes, the nose wheel actually looked like a simple disc). Tailplanes mounted in typical drooped position. Black Future wash applied to turtle deck to bring out some detail in the resin. Shell ejection chutes added by decals, deflector shields are from card stock. Decals applied to speed brakes and mounted to fuselage. Engine compartment cooling inlet on top of spine (aft of the turtle deck) simulated with homemade decal - I know it's cheating but that was a lot easier than trying to open those holes up in the plastic. Fuel dumps on lower aft fuselage modified from kit parts which were straight - actual fuel dumps had a bend in them. Mount (made from brass tubing) added to top of starboard outboard wing to hold the static pressure boom. Model received an overall coat of MRP Super Clear Matt finish. Some pix: Several tasks left to finish: Add exhaust nozzle Add ejection seat and control column Add instrument panel and coaming Add windscreen and canopy Add static pressure boom (which has an odd bend at the front end) Add AIM-9B Sidewinder missiles Add beacon to top of spine Add navigation lights to wings I may add the photoetch covers for the top two cannon ports - maybe not and whatever else I forgot... So that's where we are. There is light at the end of the tunnel, and it's not a train. It's one of those boring machines with lots of sharp grinding teeth. Cheers, Bill10 points
-
Hello fellow modellers, I would like to show you this model of a rare aircraft. Air France used four converted military C-160s for postal flights from 1973 to 1978 between Bastia (Corse) and Paris. The service was very reliable. Some sources say, they were called C-160F, others say C-160P. The kit is a full resin kit by french manufacturer F-RSIN and was ....well,... a challenge. The wings were drooped at the end and bent. Treatment with warm water and hot air did not help at all. So I sawed off the outer wings, corrected the angle and glued them back on again. Not perfect, but much better than before Otherwise the Transall would have looked like an Antonov An-12 with its typical hanging down wing tips. The decals were very sensitive, so some repairs were necessary. All the walkway markings were not included, so I made them using black decal stripes. Some antennas and pitot tubes were also adde. The air intake in the right sponson was way too big and located at he wrong place, so I filled the hole and drilled a new one. Would I build another one? Guess! Well I got another one in my stash in German Air Force markings. (Should I sell or should I build? The Clash) Enjoy the photos. Greetings from Germany, Norbert . Size comparison to An-129 points
-
A very nice kit, built mostly from the box A fun kit, with imaginary markings Thanks for looking9 points
-
Here is the Daco Skyline Boeing 737-500 finished as LN-BRC “Håkon IV Håkonsson“ of Braathens S.A.F.E. in the second version of the airline’s red white and blue stripe livery. About 30 years ago my wife and I flew with Braathens on what should have been the short hop across the North Sea from Bergen to Newcastle but because of fog we were diverted to Manchester along with most other flights bound for airports in the east of England. The handling companies were inundated and obviously scraping the barrel to get road transport. I still shudder at the memory of the three hour journey to Newcastle in darkness and fog on a clearly unroadworthy bus with no heating, stinking of diesel and driven by a delightful individual who responded to a mild complaint from one passenger by threatening to dump everyone on the hard shoulder of the M62. The passengers included several large, hairy and disgruntled Norwegians, probably oilmen, so it was maybe just as well for him that he didn’t actually try! Anyhow, the nightmare bus journey was in no way the fault of Braathens and I have been “going to get round” to a model ever since. The one poor quality photo of the aircraft which I snapped at Bergen suggests it was LN-BRC hence the choice of registration. The build is pretty much OOB apart from the addition of a few small fairings from plastic strip and replacement of some of the small detail parts with photo-etch. Paint is Halfords Appliance Gloss White and Racking Grey with AK Interactive aluminium on the lower forward fuselage. Other metallics are by Tamiya and Revell. Livery decals are a mixture of an ancient Liveries Unlimited sheet (copyright date 1996) and the more recent Lima November sheet 144-506. Detail decals are from the kit and windows are by Authentic Airliners. Thanks for looking and constructive criticism is always welcome. Dave G I IMG_1231 by David Griffiths, on Flick Just for fun, a full set of Daco 737s -300, -400 and -5009 points
-
Morning all, My latest build is a bit of a beast, Trumpeter's Backfire. I've built this kit before, but was asked by a friend to build his own for him, which I was only too happy to do. Built completely OOB, warts and all- there are a few inaccuracies, but I had neither the time nor ability to sort most of them. Regardless, it still builds into an impressive model of this monster jet, and best of of all, it's new owner was delighted with the result Thanks for looking, comments welcomed Shaun9 points
-
Hi fellow modellers, this is my second attempt at the Arma Hobby kit, this time in the recon version. The markings was chosen from the box and it depicts Lt. Col. E.O.McComas machine flown in late 1944 over China. The was painted with Gunze SM and Aclad II shades. This time I can't avoid using some aftermarkets: Eduard direct print of the exhausts and resin wheels. The opened canopy sections were replaced for vacformed items I scratch built from a clear foil. Cheers Libor9 points
-
This is my first RFI post, so it might all go horribly wrong as I'm a bit of an IT numpty.... anyway, press on. This is the kit, Airfix's 2019 re-release of the Jet Provost T4, with markings for an aircraft of No 79(R) Squadron at RAF Chivenor in 1989. The unusual but attractive scheme drew me in... I had intended to suppress my instincts to faff-about and build it straight out-of-the-box, and just enjoy the process. This was going swimmingly, a nice easy build, just a few sink marks around the tail are the only issues I can remember. The thing was primed, the yellow fuselage stripe painted, almost done, but then..... one evening I started googling for photos of the aircraft, and finished-up looking at the walk-arounds right here on BM. I realised there were a few missing features that were quite prominent and I couldn't stop myself from trying to get them onto the model. I added 3 air scoops to the top of the fuselage, and one on the starboard side just below the canopy, from laminations of microstrip filed to shape. A red (anti-collision?) lamp to the top surface from painted sprue, and a new tail lamp from clear sprue. The trim tab actuators were simple solid wedge shapes, whereas the real things sit noticeably proud from the surface, so these were carved away and new ones fitted from bits of strip and sprue. (Curiously the actuator on the underside of the starboard tailplane was in totally the wrong position.) There are a number of aerials on the undersides, but I couldn't establish where they all attached so I opted to stay away from that. The model is finished in Xtracrylix paints, airbrushed, with detail painting in various Vallejo and Citadel colours. A thin coat of satin varnish to finish off. Medium Sea Grey uppers, Barley Grey below. The kit supplies a single piece decal for the yellow and black fuselage stripes, but I couldn't see that working out very well as it would have to wrap around the tapered body and the fin fillet, so I painted the whole thing. I nearly overlooked the medium sea grey outline to the roundel and squadron bar – I realised this very late in the day and had to resort to some fiddly masking to get that done. The additions I made were not difficult, but to me they made the world of difference to the look of the finished model, and to the fun of building it, so I'm glad I went to the extra trouble. I'd recommend the kit to anyone, straightforward to build and an attractive scheme. Thanks for looking! Dave8 points
-
I just popped in here for a breather - I needed something to take my mind off that 504 for a week or two and I thought that something nice and simple, something nice and easy, with little or no no scratchbuilding or rigging or printing would fit the bill nicely. I had been on the lookout for a Man from UNCLE Piranha for a number of years and almost succumbed to paying the crazy price those old kits were going for - anywhere from $150 to $300 or so. There seemed no other way as (afaik) the original molds had been revamped to produce some drag racer based on the original Piranha so there was little chance of it ever being released again... until a year or two ago when Round 2 picked it up and re-re-vamped the molds to take it back to the original Spy Car. A quick search picked up a new version for about $20 which was a much more welcome price. As you do when you get a new kit, you look in the box and turn a few pieces over in your hands and make some ooh and ahhh noises, but I never gave it much more than that and duly threw it into the stash. After the butt-kicking that my 504 gave me the other week it seemed that now would be a good time to pull out the PIranha and have a little detour. Out of the box - that's the key - keep it simple. That was my plan. Out of the box it came. and I started looking a little bit closer at the parts. Hhhmmnnn... not so good. Lots of flash and when you look closer, a lot of mold parting line mismatch. The detail is very soft and some of the parts are very questionable - they look nothing like the part depicted in the instructions. Out of the box I said. Lets start cleaning things up and see how we get on then. One thing I did notice was there there appeared to be a lot of chromed parts. A lot of them. I'm not a great fan of chromed kit parts, and they never work anyway as you've usually got to put glue somewhere and the finish gets all messed up. I dumped all the chrome parts in an ammonia bath for a day or two, and this was the result after some scrubbing. Nope, the parts aren't wet. The ammonia did it's job of eating all the chrome finish but it didn't do a very good job of removing the underlying nickel/copper base - I was left with a bunch of plastic with a horrible brownish looking snot in all the nooks and crannies. Oh well, out with the oven cleaner this time and everything was dumped in a poly bag of oven cleaner for a day. More scrubbing ensued and the parts looked a bit better but were still not something to write home about. The reason I attempted this de-chroming early on is because the very first block of instructions are to build the engine and there were a lot of chintzy looking chromed parts on the engine. Very little else can be assembled until the engine is in place so I was between a rock and an even bigger rock. After a few hours work I had a bunch of plastic lumps purporting to be an engine of sorts. Optimism set on full I started assembly. I use the term very loosely. The more I looked at the parts, the more dismayed I became. Some locating holes weren't actually holes, and those that were tended to fall off the part leaving only half a hole behind. Then the pins... the pins.... I know I said out of the box, but there's a limit to my self inflicted masochism. This may well have been the shortest period I've ever considered an out of the box build. Fire up the laptop of an evening and using the kit parts as reference... Now I know the kit engine isn't correct for a real Piranha, but I'm not building a real Piranha I'm revisiting my childhood and I'm building the Man from UNCLE spy car, and there's some things on that kit engine which are needed to make it a spy car ( which I'll try to remember to reference at an appropriate 'later') A quick trial print looked promising - certainly much better than the kit offering. I know I've already deviated from the out of the box thing (I don't even know why that phrase in is my vocabulary to be honest - it bites me every time.) but I'm not going overboard on this build. I'm not. Honest. I just wanted a Man from UNCLE car to go with my 007 DB5 and my Batmobile. A sort of 60's vehicular trilogy. As much as I was a fan of the series I really cannot remember the car at all though it was definitely used, albeit very infrequently. Anyways, I thought it might be worthwhile to exercise my google-fu and have a look at some other builds to see if I could pick up any tips. I think the best tip I found was to try and avoid the kit at all costs. It seems this is a real pig of a kit and should really just be kept in the box and never built. Too late, I've started, so I'll finish. More kit exploration led to more and more "what on earth"? Take the wheels for instance. Round2 give you two options on the same rubber tire. A Goodyear type effort and a simple red sidewall version - the red sidewall is correct for Napoleon & Illya but.... the tire opening is different on both sides. The wheel fits very snuggly on the Goodyear side, but falls right though on the red side wall side. huh? Nice idea but dreadful execution by Round2. so guess what? Can I get much further away from out of the box? Stay tuned. Look! I did a bit of assembly. When checking what few references there are for this car I noted that there are some paneling features missing on the kit and since I couldn't assemble the engine yet, it made sense to add those. Then the engine was printed. I chose to print the engine in an almost complete state as I had determined that I was not, I repeat not going overboard on this build... this is merely a diversion til I get my 504 mojo back in working order again. Printing it all as one lump seemed like a shortcut and a bit of a time saver. I sprayed it black using the remnants of my Alclad black primer - a dangerous choice I know, but it seemed wasteful just to chuck it in the bin. Maybe I should have though... it was so thick I had to mix it with quite a bit of acetone before I could get it to spray. Maybe the acetone will give it a nice bite and get the alclad to actually stick this time around. I mentioned shortcut and time saver above didn't I? In the same sentence too. I can be a real idiot at times. It sure saved time on assembly but added about two hours of endless aizu & tamiya tape fun trying to mask up for the parts I'd decided should be chromed. . Rather than have just a black blob with some chrome bits stuffed in the engine compartment I thought I should add some more color. I used flat aluminum for the cylinders and starter motor and some metallic blue for the distributor cap - it is an American engine after all, so I'm allowed to make it look gaudy or kitsch. I Alclad chromed the fan on top because... when you fit the engine cover plate it is about the only thing left visible. All that work, and I could just have printed a box with a hole in the top and achieved the same end. While all that was going on, the printer was doing it's stuff printing out a number of wheels with slightly different diameters, and one of them worked! The tire doesn't fall off any more If I thought painting that engine was difficult, painting those wheels are going to be downright impossible. I just chromed the one above to see what it looked like in Alclad - the 1:1 was actually fitted with chromed plastic clip on's over the basic steel wheel - that can be seen in this shot below. As much as I'd like to get away with just a plain old chromed wheel I think it would look much better with that grey of the steel wheel behind it. I may look into splitting the chromed part of the wheel off as a separate printed part, It might be difficult but not totally impossible. I shall leave you with this parting shot. That "thing" that I'm grasping in the tweezers there is part of the suspension. The suspension of disbelief I think. Try as I may, I just cannot see that lump of plastic as a coil over shock absorber. And there's 4 of them. I should probably also test fit that engine cos if that through hole is in the wrong place, the axle is going to be in the wrong place which in turn means that the wheels are going to be in the wrong place and so on and so on. That 504 is looking a darned sight more attractive now.8 points
-
Greetings! Recently completed from the original 1968 Revell kit. A beautiful machine, the Boeing SST project was abandoned without any actual aircraft being built, just a full scale mock-up. There are two complete models included in this kit, one in high-speed cruise configuration, and one in landing configuration. I completed the high-speed cruise configuration first to be followed later by the landing configuration version in TWA markings.. A simple kit with sparse surface detail and poor parts fit requiring much seam work. Kit engine parts have been modified with added details from the spares bin. Kit display stand not used (it supports both models on one base), replaced with custom built display stand with Pan Am logo. Kit decals from 1968 substituted by superb Pan Am set from DRAWdecal along with some spare decals. Many thanks for having a look, questions and comments always welcome. Bill8 points
-
This afternoon I completed my build of the first of my Mark2 Models R Class builds. Finished as Heinrich Mathy's L31and displayed alongside a fragment of the ship's wreckage. One end of the fragment shows signs of bubbling where the metal had begun to melt. Thanks for looking. Martian 👽 PS: I am posting each of the Zeppelin builds separately in order toavoid confusion between them.8 points
-
Hi All, Some good progress on the Intruder today! I'd managed to steal a couple of hours during the week to mask the glazing, which was a little painful without a mask set, but nothing that a fresh scalpel blade and a roll of 6mm Tamiya tape couldn't manage! So with that in hand, final bits of filling, scribing and masking were taken care of, and some interior green applied to the glazing: There was also a rather large gap between the leading edge of the port wing and the nacelle, which was duly filled: You can also see where I've applied Tamiya filler to the rear of the nacelle to take care of the large gap there. I had intended to leave the tail light until after painting, but on closely examining the great information provided by @Carl V above (thanks again Carl!), I noted that the lens was only a part of the component as supplied. I therefore attached it and masked the relevant area: I forgot to get a photo of primer, so here's a photo with aluminium applied to the leading edges to allow for weathering. Now although the scheme suggested by Carl V suggests MSG/DG over Night (i.e. the standard Night Fighter scheme later applied to the Mosquito and Beaufighter), I have been reliably informed that the scheme was actually an experimental OG/DG over Night - I have chosen to go with this combination, as I believe that the contrast shown in the above photos are more likely to be OG/DG. Also closer examination of Carl's information told me that AL468 did not have the cheek gun blisters fitted (the aircraft shown in the experimental scheme in the photos is TH*D, and NOT TH*O - an easy mistake to make!). I have therefore not fitted these components. Next up was pre-shading: And then a coat of Ocean Grey to the upper surfaces: Not displeased with that - I've also applied a highlight coat slightly lightened with white. Here's the masking with DG applied: And here after unmasking: I think that actually looks better than last time around - I put a few more contours into the camouflage compared to what was shown on the kit scheme, which I think is more reflective of the likely camouflage. I then masked up for the undersides, which were painted with Nato Black: I had a bit of trouble with spatter from the airbrush, which was later fixed after a cleanout. So here's the state of play after a busy day: Pretty happy with the way that's looking. More to follow tomorrow, Thanks for looking, Roger8 points
-
After a prolonged WIP designing two of these from scratch on the forum and after requests from a number of members wishing to make copies themselves, I've decided to offer this aircraft for sale as a multimedia kit at 1/72 scale. You can see the finished result here portrayed as XN708, which shows pretty much everything the kit would come with: https://www.britmodeller.com/forums/index.php?/topic/235113133-sea-vixen-faw1-xn708/ Prospectus: Parts will be printed in Elegoo grey resin and supplied on their printing supports (as shown here) in order to protect them from damage prior to use: PE (this will be commercially manufactured to maintain quality control): Brass arrestor hook, refuelling probe and jury struts: What is not included in the kit: decals* pitot tubes (in my opinion these ones by Master look superior to anything I could produce without a lathe) transparencies for observer's door and side window (Micro Krystal Klear or similar recommended for this scale) *for an additional charge I can cut you custom paint masks for the larger markings such as the roundels and wing and boom lettering, however the small tail numbers and squadron badges you'll need to source/print yourself. I can also provide outline masks for the airbrake and boom/flap intersection should you wish to draw out your own panel lines on the underside as I did on the above build. Cost of kit: £93.00 STG. excl. P&P + import fees (where applicable). Additional masks (if required): Roundel, wing, boom and nose lettering/numbers (aircraft codes to be supplied by buyer): £13.00 Outline masks for airbrake and flap/boom intersection: £4.00 I would anticipate being in a position to begin manufacture of these kits by about October of 2022 as I'm going to get the PE produced commercially and am also waiting on another printer. Due to the demands of my day job I'll be producing each kit on a bespoke basis and will therefore notify each person who has registered an interest when a kit is available for purchase. I can ship internationally and will let you know in advance the cost of various shipping options. Once payment is received the kit will then be sent out to you. Those forum members who have already PM'd me are already in the queue for a kit; anyone else who would like a copy can similarly PM me and I'll add you to the list. Kind regards, Tony7 points
-
Across the line... Well finally the beastie is finished! it was an epic build and my first all resin kit. Jetmads did a piece of wonder there even though it shows that they still have kinks to work out. For a resin kit it was humanely priced at $190 for a preorder. They kept the price down with using 3D printing technology and that was a mixed blessing. Even though it got cheaper it demanded more work to remove printlines, I suppose you have to reach compromise of speed and resolution when you have to fill hundreds of orders. Though I think they could have done things a bit better by aligning the parts as to minimize the printlines. For example the cockpit and it's parts suffers greatly from printlines and they are hard to remove. It was actually so bad that the printlines in many cases ruined the fantastic details they put into the model. I found that the best way to remove lines was to brutally scrape with scraping tool or knife. This meant in turn that details on the fuselage had to be removed to asure the best surface treatment. The hardest part was the joining of the fuselage and main wings, it ate lots of putty and was hindered by the hot air exhausts on the fuselage as they were always in the way and got damaged in the blending process. They would have benefitted from being separate parts. The next thing I didn't like that much was the decals, The big sheets were good quality and printed by Cartograf, though they skipped a lot of stencils! As a nerd I frown upon such short cuts! But the air wing insignias were terible, I had a friend print new ones for me that truly made them justice. The resin pitot tubes and probes was another headache...they snapped as fast I looked at them, I finally managed to replace them with brass from Masters 1/32 Gripen set It sounds like I bash Jetmads but I don't really, their product is fantastic and with a wee bit of extra tinkering it would be absolutely, incredebly awesome! My suggestions for improvement is as follows: New instruments, preferably 3D printed acrylic ones like Red Fox or Quickboost. Metal parts for pitot tubes and probes And add the fuselage hot air exhausts as separate parts instead of molded on to the fuselage. Improve the decal sheet These are the big things....all the small things you just have to deal with as a model builder Finally, I truly enjoyed the build and I learnt a lot about working in this media and in the end I got pretty close to what I wanted to achieve.... This is NOT my last Gigant Viggen! Cheers and thanks for all the support during the build!7 points
-
Hello mates, here my new Debbie, Early Operation Granby 1991, Model 1:72, Revell/Italeri/Heller/Hasegawa Kitbash plus Aires, Pavla, PJ and more... Heavily converted 100 hrs+ to get it look like the real Cat! All Slats and Co. are partially out on taxiing. Hope you will like it like i do! Cheers, Tom New pic with bigger clear window...7 points
-
Hi all after a long time of inactivity as a consequence of lot health issues, finally back on track :). Finished Academy F-86 in colours of John Glenn machine from Korea war period. Academy is well known "plastic", good details, fit, and overall look, no real issues there. Colours AK real colours, very nice to work with. I had big issue with final layer of gloss varnish, It was almost disaster, silver colour start cracking, so some parts removed to plastic surface, again airbrushed......so this will not be a model for some contest, but i am happy at the end. I hope you will like it also. Till next model, best regards, Djordje7 points
-
I'm with Craig here, I'm not sure the exhausts would be worth the expense. The kit ones look OK to me! The AIM-9s in the kit are the 'P' variant and I required an 'L' or 'M' variant so that's why it was changed over. I found the kit ACMI pod to be a little bland and thick. Anyhoo, managed to get the cockpit painted. The 'hood' at the rear is just tacked on to get an idea of fit. Ejection seat painted. A must have for the kit! I had, like others it seems, an issue with the fit of the forward fuselage panels. Some trimming and sanding was required. Closed up. The fit is pretty good I have to say! Sorry for the photos, don't know what was going on today! I'm hoping to get both parts of the fuselage attached tomorrow. More soon and stay safe Dave7 points
-
I did get quite a bit done today, but I'm calling quits now. I'm starting to rush things and that's never good. Besides, it's nice weather so having a beer in the back yard is a priority. First, I gave the hubs orange paint, then clearcoated the chassis. Then, some dust was sprayed over it (Tamiya flat earth, very thin). Engine glued in, exhaust system in place and weathered (for now). Mostly, I weathered the transmission, because that is what will be seen with the cab on. Started dirtying up the chassis. And made a start on the wheels. Because the hubs are orange, I decided to go with standard colour wheels. These tyres are from on old salvaged kit which I bought for €5, for the chassis. These tyres are actually old and worn themselves so they fit nicely on this truck. I gave the interior some vague cheap looking '80's grey, it will need dirtying up a little and then it's done. I'll probably spray some desert yellow on it, which always makes for nice dust. Lots more to do but today went well.7 points
-
I see it’s not maintaining altitude, as was typical for the type.😁7 points
-
Greetings Folks, My latest built the Hasegawa F-4N, It was a great kit however some parts the details were so mild that a little sanding it is gone, I guess the mould must have been worn out. Painted using Tamiya XF series. Will keep it short, thank you for watching, cheers.6 points
-
Thanks! That’s Vallejo metallic, they’re pretty good once you get the hang of them. I did not have a good Qantas experience outbound to Perth. The highlight was almost four hours at the gate in Melbourne after boarding, before finally pushing back. Coming back they somewhat redeemed themselves by actually answering the phone at 4.30am so I could change my home bound itinerary from the one they foisted on me when the flight from Perth was delayed. No travel next week, the week after that we try again… Enough of that though. I painted the remaining markings today. I used the masks I designed last week and was mostly pleased with how they came out. The “4” was a bit skinny compared to the “A” so I had to adjust that but because I’d used an off-white mix it took a bit of fiddling to get the touch ups to match nicely. It think the 4s are still a bit brighter than the As but I can fix that with the later treatments. The roundels and fin flashes went well, though there’s a few lumps and bumps in the fuselage there that I had to be careful on to make sure the mask stayed stuck. I opted of a position more or less directly under the gunner’s position as that seemed to be where it looked to be in the one photo I’ve seen of 4A before it was lost. I only needed one small touch up on the starboard side. I created slightly off-round masks for the roundels to represent that the hand painted black distemper surrounding them wasn’t necessarily perfect. Looking at them now, I’m not completely convinced of the logic in how I’ve painted the black just slightly higher than the roundels but it’s a small thing and I can live with it. The fin flashes were a bit tricky because each colour is only 2mm wide but with patience I got there with only a minor correction needed at the end. I painted a light grey box for the serial number and then painted the number itself with a mask. I decided on P4014 as the serial number because that was/is @iang’s suggestion. Whether this airframe was or was not a replacement we don’t know, so it is what it is. The mask worked out ok, numbers and letters that small are a bit tricky to cut masks for - I’m still perfecting the method. I also painted the wing walk lines using masks. A bit extravagant perhaps it’s all practice. There aren’t any stencils or other decals required on the fuselage so next session I’ll be weathering it. Not much of that required, so I may even start the rigging, such as it is on the fuselage. There’s still the matter of the fuel tank too. Plenty to be getting on with, but I think I’m much closer to a finish that it appears. Cheers.6 points
-
6 points
-
I suspect the only unmodified part will be the box the kit came in. Very impressive modelling going on here though. The Corvair motor had a weird fan belt arrangement. The belt ran around the pulleys at the rear of the car but did a flip to horizontal and then looped around the fan assembly. It was usually the first thing a new Corvair owner showed off!6 points
-
After getting all the bulkhead panels painted I assembled them to the interior setion All the lights, switches and knobs were painted variously with Tamiya transparent Blue, Red, Yellow, Orange, and Green. With the undercoat of Mirror gives a coloured glass effect. In the center front of the cockpit where the pilot and co-pilot are, sits a lonely little screen. I don't think its there for inflight movies but who knows. After filling in a massive sink hole it also got a coat of mirror and then a coat of clear Yellow then a coat of very thin coat of green to give off a cathode tube vibe. BUt I looked at this and said to myself "Self.. These guys ain't got no gauges or instruments. How in the name of Arthur Curry are they supposed to know where they're going? Don't tell me the script writers told them where to go." But tere is just too much negative space here so it need filled up. I took some thin card and made two instrument panels and painted some pseudo dials, switches and what not and then took a little more card to make a dash top. There that's better. maybe not correct mind you, but none the less better.6 points
-
Hello there folks, a little update on my progress so far. After the base coat I sprayed the model with a satin varnish, then proceeded doing a pin wash using Burnt Umber oil paint. I wanted to distress all the panels, so I applied small dots of oil paint, namely White, Yellow Ochre, Prussian Blue and Olive Green to small areas at a time then blended them all together. That's now the base for all the other work to follow from now on. I then added a matt varnish to seal everything and to give a good surface for all the other effects that I want to apply. Here are a few photo's So I can now continue with rust, scratches and other detail painting. I'll be back when I have more to show. all the best and as always, thanks for looking in. Ed6 points
-
Good morning, My Helldiver is ready to paint now: For convenience I have already painted the underside in white, but I will have to do some touching up: I improved the exhaust pipes, as well as the cooling flaps of the oil cooler: to be continued. Regards, Erci-Snafu356 points
-
First I'm going to give you a link to a very interesting site, The Kent History Site. https://kenthistoryforum.com/index.php?topic=459.0 This will give you, probably, as much as you'll ever need to know about this lovely little ship, which seems to have led quite an exciting life. So, onto the model. It is going to take me so far out of my comfort zone, I just hope I can complete it. It certainly won't be a quick build. As you can see from the title, this kit is produced by Shipyard Models and what surprised me went I first saw it, is that it's a PAPER/CARD model and me getting it came about, primarily, from watching @Bertie McBoatface build his superb wooden ships. Now, I've always wanted to build a wooden model but the cost firstly of the model and then the extra tools etc I'd need, placed them out of reach. Then I saw these models which are around half the price of wooden ones and don't require a special tools. But enough of my jabbering here are some 'sprue' pictures, as you can see there is everything in the box apart from glue. Jon First the box And its contents. Some of the paint Even brushes Gun barrels and copper wire. The barrels used to be brass, but now I think are probably 3D printed or resin. Sails.Made from a very fine cloth. Unfortunately they are only printed on one side. Some of the parts. Some are on card and some on paper. There are few more, but I'll show those as the build progresses. So, that's about it, just need to stick it together. I've not seen a paper/card build on this forum, but I doubt I'm the first, so if anyone out there can offer any tips I will be forever in your debt. Right then, I'm off to read and try and understand the instructions, English translation of Polish is a bit vague at times. Jon P.S. One last thing. I'm trying to find a copy of this book The only copies I've been able to find have been given silly prices, more than the kit cost. If anyone knows where I can get a copy at a reasonable price, I will again be ion your debt. Jon5 points
-
Hello friends. I thought it would be natural after my Macchi 200, to present the legend of the Italian Air Force, the Macchi 202. In fact this model was done some times ago for a customer and I did recover the pictures only recently. I will not repeat myself for what has to be done to do a correct 202, WIPs are abundant enough on the web. This plane was the mount of Marquis de Briona when flying with the 74° Squadriglia, 23° Gruppo, 3° Stormo, wearing the "Angry wasp"unit emblem and the mid-production Breda elaborated branched out mottling. The superb SBS cockpit was used as the welcome Eduard's wheels bay to improve the poor parts of the kit. The individual code is inside the white triangle on the fin, an unusual feature. Best regards. 7B7CC310-DE12-4E95-9298-E5416380AF5D by jean Barby, sur Flickr 94073B4C-7CF2-4766-9E2F-B6F12DE4E63E by jean Barby, sur Flickr 4742F88B-28CD-464C-96A3-8A2219BB8227 by jean Barby, sur Flickr 2BD889C2-605D-4B3C-B823-736CA57B13AC by jean Barby, sur Flickr B147A827-77FF-4C0A-AEC5-14D1574C6974 by jean Barby, sur Flickr A23F2A26-EC79-438F-9129-8953DD9ED4FE by jean Barby, sur Flickr 25A30866-3316-4306-945F-6F6E349232F4 by jean Barby, sur Flickr 40E6F1EF-8680-400A-B932-FD7209FCC0C8 by jean Barby, sur Flickr5 points
-
When talking about armored fighting vehicle, people always think about tanks, or some tracked vehicles, but after cold wars (?), more and more countries change to develop modular wheeled vehicles which using the same framework to install different components that could match different aspects in battlefield and reduce the manufacturing cost in the same time. For this one, an anti-tank missile carrier in the Stryker family. btw, i feel the QC of this red dragon's M1134 is not so good ... This time i haven't paint camo, just practice weathering and dust effect on lower part of hull. M1134 STRYKER ATGM Product Photos: Working Photos:5 points
-
Not perfect but I haven't built the perfect one yet. Just happy to have i finished after staring at the box for years....5 points
-
Here is my 1:72 Su-27UBM-1 "Blue 67" Ukrainian Air Force. Trumpeter kit (not very good) with Eduard PE set, Pavla resin ejection seats, Aires resin aux air intakes, Master metal Pitot tube and some parts from old Heller kit. Foxbot decals and paint masks. Painted with Hataka Orange. It took me hundreds of hours to finish it and I`m still not very happy with a result. But looks nice in this camo. 😎 Thanks for watching!5 points
-
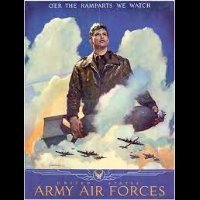
Hi Gareth I watched one of these attacks. I cannot recall at the moment whether I was on Mt Kent or Mt Harriet at the time; which means I can't be certain whether the target was Mt Harriet or Mt Tumbledown. We were advised of the strike in advance, I was able to watch the Harrier come in very low, below us and to our right, just as it came abreast of us is suddenly climbed in a perfect loop. When it reached almost halfway up the circle of the loop, the pilot lobbed the bomb which continued skywards for a while before arching down towards the opposite mount. Trying to watch two things at the same time: follow the bomb or the Harrier was difficult so I watched the bomb. It landed half way up the mount and exploded amongst the Argies who were out in the open. When the Harrier was about 2/3 up the loop, and almost upside down, it flipped over and started firing off chaff flare before flying off to our right and back out to sea. Cheers, Mike5 points
-
True Craig,thankfully she's up on her feet,seat fitted ready for the stencils!5 points
-
Great pictures in this thread! Oh yes, the natural light is great so I try also outdoor picture for my finished models. Here some examples: Sopwith Camel (Eduard 1/48) More here: https://www.britmodeller.com/forums/index.php?/topic/235105971-sopwith-camel-eduard-148-new-tool-hinchliffes-donner-wetter/ Fokker D.V (Special Hobby 1/48) More here: https://www.britmodeller.com/forums/index.php?/topic/235085302-fokker-dv-special-hobby-148/ Cheers, Frank5 points
-
Dear friends, On 1967-1968 the Chilean Air Force (FACH) received the first of 54 Hawker Hunter Mk.71 that served in the skies of my country until December 1994. Worldwide known are the images of the coup de etat of September 1973, when a flight of Hunters shot Sura P-4 rockets on the Presidential Palace helded at the time by the socialist President Salvador Allende, who commited suicide later that day. The accuracy of the Chilean pilots to hit the Palace located at the centre of Chile's capital, Santiago, and surrounded by taller buildings was a piece of crafted markmanship. Later, on 1978, the Hunters played a starring role on the Beagle Conflict with Argentina, a few of them being armed with the israeli Shafrir II missile, as the model that I show you here. They contributed to avoid an all-scale war with our neighbours. After the Falklands conflict in 1982, Chile received 14 Hunters (mostly FGA.9) from Britain as a gift for the help provided to UK during the short war at the South Atlantic. Hunter J-702 was part of the first batch received in late 1967, and served until 1994, now been at exhibition as a Monument at the Ala de Abastecimiento. Colors on Hunter J-702 are the same as the British cammo, with Dark Sea Gray and Dark Green as the upper colours and Light Aircraft Grey as the down side color. Hope you like it, a few differences with the FGA.9, and some twicks have to be made on the good Airfix kit to really represent a Chilean Cazador. Cris.5 points
-
A small beginning, the stand. I make it to test the new glue, which is very good, and to see how things work. So onto the build proper this is the centre, keel I suppose. And the ribs. First of many A while later A deck which adds rigidity Stern And the first layer of the deck, the deck proper with printed planks goes on top. That's it for now, going to let the glue harden off. I have to say, all the parts come out of the sheets with great ease and fit together better than a lot of plastic kits. I think I could like this paper modelling See you soon. Jon5 points
-
Hi Folk's,got the wheel wells and equipment painted and glossed.Leaving it for a few days as the front wheel and horseshoe shaped piece is seperate to the leg so just but joints together which is a recipe for disaster so hope the super glue does the trick!5 points
-
Some progress to report. First, a basic cockpit: Looks better to the eye (the zoom does it no favours!), but yes, fairly simple, and I forgot to give it a light wash before glueing it in place. As others have remarked, how the cockpit sits within the nose and in relation to the nose undercarriage bay is not particularly clear in the instructions. So I did a bit of dry fitting to make sure the canopy lid closes on the ejection seat box - it's pretty tight. So this is how its sits in the nose for future reference. Looking at @Mr T's build thread in this GB and @billn53's recent thread on his Red Baron F-104 were particularly useful. If in doubt, search Britmodeller!5 points
-
The Airfix intake ring is larger than the Academy version, so in order to 'encourage' the Academy fuselage into shape, I glued some narrow gussets around the intake rim. The Airfix nose gear bay is a tad shorter than the Academy aperture, so I have extended the gear bay aft to meet the extra length (white plastic): The effect of all of this is that there is a tapered gap on top of the nose, which will need to be filled. I've also started scratch-building the cockpit section (the Airfix and Academy items were donated to the respective TF-86 and CAC Sabre conversions). The main instrument panel is an Eduard "Look" item.5 points
-
Whose Manchester kit? As I recall, it was a Matchbox one. Steve.5 points


a.thumb.jpg.58d92d116b0315dc55d352fd191d65e4.jpg)


.thumb.jpg.cfc129272ffec824439b15e6013d5952.jpg)

This leaderboard is set to London/GMT+01:00