
Leaderboard


Popular Content
Showing content with the highest reputation on 24/07/22 in all areas
-
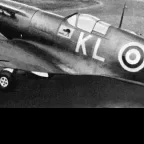
Afternoon all, Here's the latest model to take off from my bench - the new-tool Airfix 1/72nd Avro Vulcan BMk2. After grafting on some very long-term projects of late I decided I needed something relatively straightforward for a system reset and mojo reboot and this proved to be just the project. I found it an absolute delight to build - actual construction only took four evenings and the whole model was completed in just under two weeks. In fact, it's the first model I can remember in absolutely ages that I didn't put down for a few weeks and return to it later as I'd lost interest - I just wanted to keep going! As with most of Airfix new-tool kits, tolerances are very tight indeed and therefore I gave each surface to be glued a quick swipe with a sanding pad and this meant an almost perfect fit for all components. I was really impressed with how the intakes went together, and with a quick swipe of Milliput White they look seamless with the minimum of effort. I wanted to do a later version than is currently supplied in the box so bought an Xtradecal sheet to make a 101 Squadron machine based at RAF Waddington in the mid 1970s. Two type of jet pipes are provided in the kit, and I had no idea which were fitted to this aircraft so went with the same as the one currently preserved at Duxford as they seemed of the same vintage. The kit's bomb bay is beautifully rendered and with some careful painting comes up beautifully out of the box. If you build this kit, don't waste your time detailing the interior of the cockpit as next to nothing can be seen - I just did the absolute basics. Xtracolor enamels were used throughout and I gave it a satin varnish as these machines seemed very well maintained in service and other than a few streaks and stains here and there, I kept her reasonably clean as period photos suggest. I recommend this kit to anyone looking for a large and impressive model in their display cabinet but not requiring a huge amount of effort - it's a pleasure! Tom30 points
-
Hello all – here’s another completion just off the bench; a ‘What if” Fokker Dr.1 seaplane, based on the 1/48 Eduard Dr.1 kit. This one was just for a bit of fun (so apologies to those who aren’t fans of ‘what if’ subjects). I added floats, extended the cowl to fit a Oberursel Ur.III twin row rotary engine (from Small Stuff; this engine is a kit in itself), added a vertical stabiliser, added some cockpit details, and replaced the guns with some from Gaspatch. I also scratch built the beaching trolleys and trestles. The German naval lozenge is from Aviattic, and decals are from the Eduard kit and the spares box. Some in-progress pics (the full build log is here - https://forum.ww1aircraftmodels.com/index.php?topic=12812.0 ) This was an enjoyable little project, and looks rather unique in the display cabinet. Thanks for looking! Cheers, BC24 points
-
Hi all, This is the excellent Hobbyboss 1/48 D-9 kit, finished as 'Blue 18' of I./EKG(J), based at Pilsen towards the end of the war. EKG(J) was a training unit, tasked with converting ex-bomber pilots to single seaters. There have been many representations and profiles of this a/c as having red numbers, although the evidence now points to them being blue. I would probably have pressed on with red markings, had it not been for some very helpful discussion with @SafetyDad, @MDriskill and @tempestfan a few weeks ago. Painted with the usual mix of Vallejo and Mig acrylics, and using Montex masks for everything except the octane triangles and the smaller stencils. Blue 18 seems to have been quite an old D-9 with the early canopy, which came from an Italeri A-8 kit. Interestingly, I had plenty of Eduard 'standard' canopies but these were all way too long in the tail. Whether the Hobbyboss dimensions are undersize, or the Eduard dimensions are oversize, I couldn't say. Anyway, hope you like the pics ------------------------------------------------------------------------------- ok - here's some (hopefully) improved pics, taking into account some of the suggestions down-thread..24 points
-
Konnichi wa shinai naru modeler! Here's my latest finish for the 'Turning Japanese' GB here on the forum. The build thread is here but to recap: Kit: Sword U-125A kit number 72127 Scale: 1/72 Build: OOB (5g weight in nose) Paints: Tamiya Acrylics, Klear, panel line wash, Satin varnish Decals: From the kit The lower fuselage paint should be more green/sky than sky and the decals (printed by Technod) had a terrible time accepting any kind of curves...,lots of shattering/splintering on the nacelles followed by touch-ups with blue paint. The u/c gear fit is also a bit iffy. But despite all that, really happy how it turned out and can't wait to build their Sabreliner kit! Thanks for looking, take care and happy modelling Dermot23 points
-
This is the 1:72 Revell F-4J Phantom II build from earlier this year. The kit itself is old and poor fitting. Overall, it was primed in UMP Grey primer, Vallejo Model Air black to pre shade/mottle. Then Vallejo Model Air White and Gull Grey for base colours. Decals were applied with UMP Decal solutions. Weathering was performed with UMP washes. There is also a video build over on YouTube of this - Thanks for looking/watching.22 points
-
Here's my Sova-M 1/72 U-36A Learjet, just finished in the Turning Japanese GB. Build thread is here. OOB build, SMS lacquer paints, no aftermarket used (not that there's much available). As with most recent Amodel kits the larger parts are quite nice, with some nice surface details, but the detail parts aren't great. If I did this again I'd probably 3D-print better parts for the undercarriage and the RM-30 target towing pod. Decals worked quite nicely, but with one obvious issue - the orange cheat line is higher on the fuselage behind the engines than in front, and the decals don't cater for the transition between the two - this was easy to deal with though as there was enough spare decal (the sheet includes spares for most of the main decals) to adapt and address it. thanks for looking Julian22 points
-
Apologies in advance for all the greasy thumbprints on your replies; am writing this in the middle of a big feed of afternoon tea and crumpets, albeit on the cusp of that point once faced by the eminent Steven Maturin of being 'in a state of high grease', but just one more..... That's the nicest thing anyone's said to me in ages Alan. 😁 Can you add nothing to nothing Ian & Steve? @Navy Bird - there must be a quote from the original Greek or Roman to cover this philosophical emergency..... Thank you for inspiring me to go and look up in detail the difference between those two states Jospeh (h=-12° vs. h=-18°)! The dynamic subtleties of light and colour in the sky are an infinite fascination to me but when it comes to the raw formulae, Kaler's: never lets you down. His doctor has told him to avoid it due to a inflammation of the F'nar gland. Indeed. Where to start? Where to end? Sorry John: on my honour I won't do it again. At least not with twin booms.... 😁 You should have seen what things were like when @hendie was building the luxuriant fixtures and fittings for his Pullman carriage Mark. Hours lost looking at cushions and lampshades.... That'll do for me you three.. Dear friend, you have an exquisite sensibility and felicity of phrase that compels me to post just two more shots of same for your delectation ; this time with the bare chrome calmed down to more accurately resemble the general appearance of those shiny knuckles of titanium when anointed with PX-7: The only two colour reference photographs I have showing the wingfold in this red-coloured lubricant condition both show the jack/linkage looking a lot 'cleaner' (in relative terms) than the more intense hues of surrounding regions on ribs 4 & 4a, so to retain this distinction I used some red acrylic cut with NATO brown, very heavily watered down with Galeria satin and thinner to the point it was barely pigment at all. This was then gradually built up on the linkages with the airbrush at 15psi but with minimal paint flow to produce varied reddish non-opaque tint only (I recall Alan describing PX-7 as looking 'translucent red' in appearance when applied in a thin layer on a real aircraft) through which the metal lustre was still present: Then it was on to methodically depleting the bits box of remaining parts for as long as patience would allow. Due to needing to handle an aircraft with an increasingly delicate array of bits being attached to it, I'd mentally rehearsed a sequence that I hoped wouldn't let any previous task cumulatively make it harder to carry out subsequent ones, so the pitots went on to start with: Being soldered together from various diameters (I've forgotten which ones but there were three, probably 0.3/0.5/0.7mm) of brass tubing, mine aren't as nice as the Master ones. This was followed by what I knew would be a tricky bit to fit - the port inspection hatch for the radar bay. I only just remembered to paint the remaining part of the numeral '2' on it first: - followed by some necessary grime accents to the interior panelling: This door has a diagonal supporting strut fitted on the right hand side, however, my original plan of sticking the door on followed by the strut made from scrap brass tube didn't work out due to the fragility of the hinge of the door at the top, so I had to reverse this procedure and stuck the strut to on to the door first at the required angle, then used this as a support to hold the door in place whilst I zapped the hinge at the top with the laser to fix it onto the aircraft. Door: Door & strut: This was swiftly followed by the refuelling probe added on to the port wing as well. Pleased to say that the 1.4mm diameter of the brass used for the shaft of the probe fitted perfectly into the opening in the wing. The closing stage of today's session was one of the bits (along with the wingfold) that had really been an obsession of mine on this build in terms of getting better than I'd seen on other kits offerings, namely the radar. This image from Wikipedia shows the main features of the scanner dish off quite comprehensively: I had to do a little drilling with a 0.3mm bit as the resin had shrunk just enough on the brown tip and conical base part that it wouldn't slip onto the brass central arm which I'd soldered onto the dish previously. Happy to report though that this was really just a matter of clearing out the existing channels with the bit rather than actually drilling it out per se: Base and tip on the antennae and painted up: With that done it was time to mount the scanner and altitude mechanism onto the azimuth arm: I'd designed those parts with a 0.4mm vertical opening running straight down through the two sections of the altazimuth assembly so that I could insert a metal pin which enables the scanner dish to rotate freely in azimuth. Which it does! In the above shot you can also partially make out the mounting arrangement which allows mounting of this scanner unit onto its supporting arm inside the radar bay, namely a round (visible) and square (hidden by cocktail stick) opening in the rear of the altazimuth unit that matches a square and round peg sticking out the the front of the supporting arm. This was necessary as I anticipated the need to have a reliable method of attaching this rather delicate set of parts onto the front of the aircraft in the correct vertical/horizontal orientation, without faffing around having to finesse it from all sides: Some purely gratuitous shots to follow of the dish rotating on the vertical axis: The fit of the metal pin holding it in place is so snug that no gluing is necessary. At close of play and it's getting Vixen-er: Remaining to to do: Add rear canopy. Add arrestor gear. Add radome. Once those jobs are done I can look to pinning this onto the hangar floor: The wooden base is actually salvaged from some grotty local television award I found lurking in a cupboard at work that I sanded down an repurposed into a concrete floor using paints, varnishes and dirt: To commemorate @Pete in Lincs and @hendie clarifying the use and appearance of PX-7 on aircraft and - in doing so - giving me the confidence to colour that wingfold so forthrightly, I added two reddish streaks on the hangar floor, thus immortalizing them both: she'll get finished this week. Tony14 points
-
Hello Everyone, Marcel Albert was one of the best pilot of french air force regiment, Normandie Niemen who was fighting in Russia. He scored 23 victories and was awared Hero of the soviet Union. At the End of the war, Stalin gave them permission to return to France with their arms - their Yak-3. This is my interpretation of the aircraft oh this great man. I rebuilt the flaps with an aluminium sheet and I added some details in the cockpit. I hope you enjoy it. Regards Providence14 points
-
The latest off my work bench. I added a lot of extra detail inside the plane which can be seen through the many windows. All markings masked and painted except for the tail marking which I opted to use the decal for.13 points
-
Here some pictures of my new build: La-11 by Hobby Boss in 1:48. Built it OOB, just add the nice Quinta 3D decals for the Cockpit.13 points
-
Here we have the frame with front suspension arm and wheels rigged up so I could take all necessary measurements and sit down in my work office in the next room to start creating parts. I first made 3D dummy models of the rear frame and rear axle, and then I created the brake drums, suspension linkages and springs with shock absorbers. While the parts will probably not be a perfect fit they will be close enough to work without too many modifications when printed. I may also need to give the brake drums a second look when the 3D-wheels are finished. With some more work I also had a front spring/shock, steering arms, wiper, mirrors, fuel cap, gear lever and hand brake. They could probably all be improved but they will do the job well enough for my needs I think. When the wheels and tyres are done this lot will be printed. When my build is done and eventual adjustments are made a 3D-part set will be made available. The supplied rear axle is a little bit too narrow for my need, so it was cut apart and rebuilt with a piece of grey sprue for the axle tubes. The brake shields are still separate so I can slide the rear suspension on when it's done. Next it was time to look at the engine. Not much will be seen and I don't plan an open display of the model, but I still thought I would do a little work. Generator, fan and fan belt with pulleys, starter motor and distributor was added. Some adjustments were needed to the frame and radiator to make it all fit, but not much. Fitting windows well to a resin kit like this can be a challenge. In this case they will all have to be fitted from inside. I used the Dremel to thin down all edges from behind to get the glass in good level. This is a little scary work and requires care and a steady hand. To reach up into the area of the rear screen was not easy. I did a little damage in one place, but it was easy to fix with a little filler. The windows have been cut with a very narrow overlap on the inside. This is also a job that needs some patience and care, but it's not difficult. At least as long as there is spare material so one can make a new piece. Bases for the license plates have also been cut from thin sheet styrene. Here is the test fitting of the rear plate. This is where I am today. There will be a small rest until wheels/tyres and 3D-printing is done. Although I still have the decals to draw and print, so I'm not entirely out of work...13 points
-
I'm calling this one done. Full WIP available HERE. I hope you'll like it: A few taken from frog's perspective : Cheers Mick12 points
-
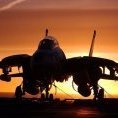
Hello again! My wife and I had a lovely time at Duxford today. I was told that it was a sell-out and that 6000 tickets were available, 4800 of which went free of charge to IWM Members, with the staff member adding that as a result, IWM would not make any money! I hope that the shop and cafe income made up for the lack of ticket sales! The harsh light and heat haze made for tricky photographic conditions! Before the show, "Porky II" formated on a Classic Wings Dragon Rapide for a "Wing to Wing" experience The U.S. Air Force 48th Fighter Wing's new heritage F-15E Strike Eagle flew through before the show. The jet celebrates the Wing’s 70th year of flight operations, as well as the USAFE’s 80th anniversary and the US Air Force’s 75th anniversary. Thanks for looking. I hope you enjoyed them!12 points
-
I've recently built a 1/48th scale Avro Manchester using the Tamiya kit's fuselage coupled with a set of Sanger vacform wings, engines, tail and landing gear. The Tamiya parts fitted fine as you would expect, but the Sanger parts proved to be a bit of a struggle with poorly fitting parts and the wing profile being totally off. Lots of filling, sanding and perseverance eventually meant I got there, but it was hard graft at times! I used Xtracolor enamels with decals from various sheets I had to hand to complete the markings. This model represents a Manchester MkI from 97 Squadron (5 Group) at Conningsby during the early part of 1941. By January 1942 the Lancaster had come into service with 97 Squadron and they had moved to Woodall Spa, so it was a very short period of service for the ill-fated Manchester. Regards to all, Rob12 points
-
Finally finished and after some wax will go into the cabinet. I wish I ordered a second one as the Batman livery would have been a nice addition. Added some extra details, 3D printed bits here and there. Decals are from Cartograf so are superb.11 points
-
Hi guys, I've been vacationing for the past couple of weeks, went to France, then crossed the border to Germany. I don't know how it came about but I visited no less than 3 car museums. In France, I went to the National Automobile Museum in Mulhouse which holds the Schlumpf private collection of about 500 cars. It was awesome, and highly recommended when you're in the neighbourhood 🙂 Link to their website here. Then, in Germany, because @desert falcon recommended it to me, I went to the Porsche museum in Stuttgart. While I was there, I went to the Mercedes-Benz museum as well because it's just a couple of km's from there! I must say, I liked the Porsche museum, but I liked the Mercedes museum even more because of the variety of cars (and trucks, yay!) they have there. I went to Stuttgart with my family last week on the hottest day which was best spent indoors anyway, so what better place to be 😎 Here are some pics I shot, they're just snaps on my phone so not very well taken. From Mulhouse: They have a lot of Bugatti's there! The brand originates from the region. These 2 are amazing... Those wheels are 91 centimeter in diameter. Some other brands as well... This is an Aston Martin, apparently the most expensive car in the world back then ('80's), because of the technology used. Then, after we moved our base to Germany, the Porsches. Johnny has shown a lot of them already here, these are some of my favourites. A drive through Stuttgart later, and there's the Mercedes museum, which is rather nice as a building as well. There are loads of historic cars. This one has been built beautifully a couple of times on this site. Some absolute classics, also well represented on this site. Just as nice as @CrazyCrank's recent rendition 🙂 And this one, which is my favourite SL. Afterwards, it appeared to me that we'd been looking at a 143 mln dollar car... A friend of mine sent me the article. https://www.motor1.com/news/586960/mercedes-benz-300-slr-uhlenhaut-coupe-143-million/ There are loads more beautiful cars. A staff member just finished a quick polish before I took the picture. And trucks as well! This one, I was especially interested in because I'll be building a SWB 1628s tanker for Revell GB. Also, buses, specialist vehicles, too much to show here. Highly recommended, definitely worth a trip. I took 100's of pictures. If you would like to see more, just PM me and I'll send you a link to the files.11 points
-
Hello all, this is my latest completion, Arma Hobby's 1/72 F4F-4 Wildcat, built in the markings of John.L ."Smitty" Smith's aircraft, White 2 (Guadalcanal, 1943). This kit was the most complex one I've built yet, there were lots of small and thin parts for the internal structure and landing gear (which I broke by accident, but managed to fix by inserting a metal pin to reinforce it). The detail in the kit is great and the engine is fantastic. The model was painted with Ak real colors acrilycs; the decals used are the kits', though I modified the numbers because this scheme doesn't come in the box. The model was weathered with a silver pencil, tamiya weathering powders and tamiya enamel washes. The aftermakets used were eduard PE and brass tube for the gun barrels. The figure is from the CMK set, US Navy F6F Hellcat Pilot and Mechanic Hope you enjoy it! Oompa Loompa10 points
-
JMSDF U-36A Learjet - Sova-M 1/72 kit, OOB. Build thread is here cheers Julian10 points
-
Here's mine, a Lynx HAS2 XZ729 of HMS Broadsword, damaged in the air attacks of 25 May. Build thread is here but to recap: Kit: 1/72 Airfix Lynx HAS2 (Mk 8 boxing) Build: OOB except for scratchbuilt MAD fairing and nose damage from card and fuse wire Paints: Tamiya Acrylics, Klear, Flory Models Wash, Satin varnish Decals: From kit. Airfix_Lynx_HAS-2_Done (11)R by Dermot Moriarty, on Flickr Airfix_Lynx_HAS-2_Done (10)R by Dermot Moriarty, on Flickr Airfix_Lynx_HAS-2_Done (9)R by Dermot Moriarty, on Flickr Airfix_Lynx_HAS-2_Done (8)R by Dermot Moriarty, on Flickr Airfix_Lynx_HAS-2_Done (20)R by Dermot Moriarty, on Flickr My respects to all who served during the conflict. Thanks for all the comments, take care and happy modelling. Der10 points
-
This is from around '93/ '94. Whilst I enjoyed the build and the new challenges a mixed media kit introduced, some of the choice of materials were to say the least mystifying. Much of the kit was diecast metal and very hard to clean up. This was OK for the engine but useless for the frame, the slightest attempt to straighten it ending up in a breakage - and the frame was very distorted. After it ended up in an extra four or five pieces, I gave up and fabricated most of it in brass tube, using the original as a template. Flexible plastic was used for a seat - no idea why, but as I decided not to use it, it wasn't a problem. My immediate thought was to make a racer and use the alternative fuel tank provided, scratch building any other parts required. This was to prove difficult but necessity helped to keep a focus! I found a perfect illustration in a book and began................. Changing the kit to represent a race bike wasn't just a matter of leaving off the road bits. I had to make the seat and tank pad from scratch. Also the number plates, brackets, fly-screen and various extra details. The bike already had an Amal GP carburettor so that just required detail adding. The biggest challenge was the reverse cone megaphone exhaust. In the end, I made this from the standard Goldie silencer provided. This was an aluminium turning. As I didn't possess a lathe, I used a standard Black & Decker DIY drill - I don't recommend this but it worked! I sawed off the tailpipe and the back section, hollowed the rear section out and reattached it to the remaining body of the silencer with adhesive - one reverse cone megga! The rest of the exhaust pipe was made from polished aluminium tube. The Dow front brake was turned in the same way using files and abrasive paper and a metal backplate as a stiffener. The wheels were spoked with a thinner gauge wire instead of the insect pins provided. I think I read an article by a wheel builder that said 3mm spokes were used on bikes while 4mm/5mm spokes were used on cars and I've used that as a rough guide ever since. Overall, I very much enjoyed the build and the choice of subject and scale is second to none. Dave9 points
-
Hasegawa 1/72 Mitsubishi F-2B DXM decal set "JASDF Matsushima A.B. Viper Zero Anniversay set. JASDF Mitsubishi F.2B 21.Sqn 30th Anniversary Matsushima A.B. 2006 Wolfpack update set - seamless intake wheel bays & exhaust. Pavla ACES2 seats. MrColor JASDF paint set. Half way through building this researching the airframe, I found that this aircraft crashed. No fatalities, but I think the first F-2 crash but the second model I've built this year which crashed. My other build earlier this year, the Czech MiG-21UM crashed as well.9 points
-
I’ve never built an IBG kit before. I realise they're generally better known for their 1/35th scale stuff. The Scammell was an impulse buy at a show. What’s it like in the box? Lots of tiny and delicate parts, all neatly laid out in four frames of light grey plastic. Frames D, F and the pair of Js must be common to all the Scammell variants IBG make, while Frame A contains the bodywork for this variant. A small PE fret, some acetate with the glazing printed on it, and a decent selection of markings for three different vehicles. One vehicle is for the 52nd (Bedfordshire Yeomanry) Heavy Regiment, Royal Artillery, III Corps, British Expeditionary Force, France in 1940. I’ll be quite happy using those markings for a UK-based unit, but I will check any BEF specific parts. The instructions are A4 size, CAD generated and printed on glossy paper. Each step has an exploded diagram, and a diagram that shows what it’s supposed to look like when the step is completed. One thing I noticed was the parts are laid out in each frame, and numbered sequentially. I've never encountered this before, and I had to check whether any Big Name kits were laid out similarly. Italeri came close in their recent Fiat CR.42 tooling, but the frame I checked got lost in the mid-teens. Airfix was all over the shop in the Beaufort box. No wonder it takes me ages to locate parts when I’m building planes! Full marks to IBG. Here are the first seven sub-assemblies, all on the first page of the instructions. I wasn’t initially going to fit the PE to the engine, but then I thought better of it. It’ll never show, but I even twisted the cooling fan blades to look more like the real thing. The PE parts for the winch assembly were a bit fiddly, but steady hands, good tweezers, good lighting and my Optivisor all helped. I haven’t lost anything to the carpet monster - yet. The next five steps are the stowage box under the cab, winch fittings in the rear roof, and the chassis. That’s a bit fiddly, and it was a worry that it might end up twisted as all the crossmembers are separate. It seems to be straight and fairly true, so that’s good. The final steps on page two cover more winch detailing, with PE parts and styrene rollers. Apologies for the blurriness, but this stuff is tiny. Did I note the tow hitches are separate parts? The tiny hooks are attached to the leaf springs. A pair of infinitesimal rollers are fitted in PE brackets on the front of the chassis, too. Insane, but utterly satisfying when it fits together and stays in place! IBG have done an amazing job of reducing their 1/35th scale Scammell designs down to this scale. A final shot of the chassis sub-assembly. I’m going to leave this all to harden off. The next stages bring all the previous sub-assemblies together on the chassis.9 points
-
Good day, ladies and gentlemen! I present you my next model.8 points
-
Thanks mate! I've made a start. All the cockpit parts were assembled and now ready for painting: Quickboost seat: Looking through the instructions, I wasn't feeling the way AFV Club would have you assemble the horizontal stabilisers; fitting them before closing up the fuselage. This, in my view, makes painting of the metallic areas a little more difficult. Wallop. Pioneering modification I know. I moved on and pinched both an AIM-9 and ACMI pod from the spares. The former is from a Tamiya F-16, the latter from a Hasegawa weapons set. The missiles provided with the kit are AIM-9Ps and too old for my timeframe, whilst the kit's ACMI pod is a bit chunky. I'm not planning to add a centre fuel tank for this one - I've seen pictures of the jets with and without them. I hate fuel tank seams, so the latter wins hands down. I moved on and started assembling the main fuselage. The fit was so great that within a matter of hours this appeared: The airbrakes needed a little sanding to sit flush but I must say I'm very pleased with the ease of assembly. Just a little clean up here and there required. Note I also added a slight 'droop' in the ailerons, as per some reference pictures. Speaking of which, I came across this: http://www.clubhyper.com/reference/f5dp_1.htm Some nice shots there. More soon and stay safe Dave8 points
-
I thought I'd join in the fun as I have an Airfix kit on the shelf - I think I messed the last one up so bad it got binned....hey-ho, can but try! Nothing aftermarket, just out of the box..it comes with the Humbrol Acrylic paints that I will not use... Any of you Aggressor experts know of the FS paint numbers of the 2 tone browns? I have used paint matcher at it mentions Hum 148 Radome Tan citing Mr Color C318 97% match and Mr Paint MRP-324 (not so sure!) 96% match as close matches? Most of the pics I can find are of a 3 colour scheme.... For the darker brown 186 Brown, is says MRP-166 at 98%.... Box and Sprue pics... VMFT-04 website - 'hoo - ah'.... https://www.marforres.marines.mil/Major-Subordinate-Commands/4th-Marine-Aircraft-Wing/Marine-Aircraft-Group-41/Marine-Fighter-Training-Squadron-401/ First bits of work...fill in the pylon holes.. Quite a bit of flash to sort with a stanley blade...8 points
-
Many thanks Alan for the picture and to you and everyone else for the links and interesting information on inaccuracies to be addressed. I've decided to address the exhausts / engine cowlings / props before starting anything else. Here are the pieces involved. The cooling louvres on the cowlings in front of the exhaust outlets look OK, the large exhaust pipe can also be used if I check/fettle the fit to the depression in the cowling then I just need to work out what to use and how to fit in a smaller exhaust pipe, which I think comes from the turbocharger each side behind that. For the engine cowlings, it looks like these are thick mouldings so I'm going to try a little sanding to shape more steeply down to the circular opening. I may try altering the shape of the 'smile' for the intakes with a little filler at the corners. Possible a grille behind the opening below the back piece which has some of the engine on it. I should also file/sand off all the 'cuffs' on the prop blades but I don't know yet if I'm brave enough for that - a lot can go wrong on 16 blades! Here are the same parts from the 1/72 Airfix B-29 kit - I'm looking for inspiration in terms of shapes. That kit also only provides one exhaust pipe per side but those extra sprue bits attached to each which require removal look interesting.....8 points
-
Evening all. Very nearly there and now the weather has calmed down I should be able to get it finished soon. A bit more weathering, proper painting of stowage and a few touch ups here and there. The gun is slightly askew and no amount of pressure will move it without the risk of really breaking something.8 points
-
This was not planned at all. Not at all. In fact I didn't know of its existence a few weeks ago. As I finished the Moynet LM 75 just about a month ago I was already toying with a small pile of boxes to start another project. It just wasn't clear which one of them it would be. Then I packed a pile of finished models a few days later and went to the GGG show in Borensberg, Sweden. And from there I returned home with this new little box of 1/24 scale resin from Air Trax of Finland. What a nice surprice! And nothing like what I thought I would start next... They call it a conversion kit as other parts are needed to complete it, and the small text at the side of the box mentions a Tamiya Mini as a recommended donor. We'll see about that. Here is what's in the box. The parts look pretty good and well cast with almost no air bubbles, much better than expected. There is a clear sheet for the windows, under protective film, and set of decals that do look like short run printing, but still is a nice touch as many might struggle with the needed decals otherwise. The only parts I can see needed from a Tamiya Mini are three tyres. There is also a need for some detail parts for the interior and exterior and parts to complete the front and rear suspension. There are two sets of rear wheels provided to cover both the standard steel wheels with hub caps (that I didn't know was ever fitted) and the more commonly seen aluminium wheels, that were either Exacton or Dunlop D1, depending on assembly date (which I didn't know before starting this project). However the kit wheels are not an exact match for either, even if they look close. Both types of steering wheels fitted to the cars depending on version are also supplied. There is even an engine for those who like that sort of detail. This will be a joy. My plan is to develop my own set of 3D-printed parts to complete the model, where my good friend Johan Brusefält will most likely do the tyres and rear wheels, as he is a master with vast experience and well established methods for that. He would have to anyway as I wasn't the only one who bought a kit. I will also draw and print my own decal sheet as I think I can improve there. This is one of those very rare occasions when a new kit never makes a round into my stash. I have already made a fair bit of work, but not come round to starting a WIP-thread. Right now I'm a bit stuck in progress, so maybe it's time to sort out what's been done so far. Here are the three main parts after some quick cleaning and minor filling. They fit together very well and it looks very much like the real thing I think. That moulded in wiper will have to go though. The few parts supplied for the interior were quickly cleaned up and the steering wheel got a new column that is long enough. Pedals and fluid containers where scratched using some scrap box parts as an aid. Here it's test fitted with tape and blue tac. I forgot to place the engine cover for photo. It didn't take long to clean up the rest of the parts. All in all it was a positive experience. Here are the clear moulded resin parts, head lights, front indicators and rear lights. To be able to continue my work without the correct tyres and wheels I went into my 1/1 scale work shop and turned myself three dummy tyres from an acrylic rod I found in my material supply. I fitted the front suspension with thin metal axles so I could vary the ride height as I measure and develop the rest of the suspension parts in my 3D CAD. To get the frame to fit at the correct level/angle I had to glue some thin sheet styrene pieces to the rear locating points. Then I placed the body and frame on my usual set of "ground clearance set up plastic sheets" to try to figure out what I'm supposed to do next. Yes, the cars did have a ridiculous amount of air between the wheels and the rear arches. Work has gone a bit further, more in the next post.7 points
-
One you don't see often.Bought on E bay as part started.Stripped down & removed paint that had been applied. Was a decent kit to work on.7 points
-
Hello everyone! New to this forum, I feel it would be a good idea to jump in by presenting what I'm currently working on. The French R35 from Tamiya. Coming from Miniatures and figure painting, I've wanted to try something new. I've always wanted to try scale model. I'm more use to work with acrylics from GW or Vallejo. So working on an armour model, everything is new to me. The paint, the enamels, the weathering technics, pigments... I haven't tried to be historically or realistically accurate. I'm just trying to understand the process and to finish it. The plan is to finish the tank, and then to build a small diorama to put it on. I'm open to critics and advices !7 points
-
Hello everyone. Here is my entry for this GB. I've bought this set from a friend a while ago, and did'nt no what to do with it, but now I've decided to make one flying in Saudi Arabian marking. I've been told, and have read in several threads in this GB, that the AFVclub F-5E is a great kit, so it will be a nice relief from the other more "basic" sets I normally do for my iranian fleet in 1/72 So I'm really looking forward for this build, so lets get started with some photos! The kit: Aftermarket part: AGM 65 missiles from en Hasegawa kit, Quickboost seat, and a resin pitot (hard to see in the bag) The decals:7 points
-
More 3d printing ... this time, tubes to act as sockets, within the jet pipes, for the acrylic rods. Calling these cigar tubes for want of a better name. They'll fit inside the airframe, roughly where the engines live IRL I have been working on the kit, too, 'onest. Jet pipes, wings, nose (x3), seat, cockpit tub, pilots & coke bottles. The coke bottles were a pleasant surprise. Last time I built a similar kit (Kinetic's F-5B), the replacement fuel tank was thinner than the duplicates on the weapons sprue; this time, it looks the same size.7 points
-
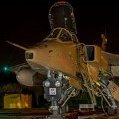
Some shots today of the nitrogen trolley, all macro focus stacked images. Despite the recent cooling in temp, the studio lights were still overcooking after numerous shots, causing a few thermal trip-outs. I'll try to get some more done tomorrow.7 points
-
Following the excellent advise from @noelh about the front of the propellors not really getting any wear and tear I used some liquid mask to protect the decals… …and masked the hub and tips with some Tamiya tape… …before applying some MRP-077 NATO black… …followed by MRP-366 dark grey. The masks were then removed and chipping was applied along the prop edges with a sponge. I made a wash from Abteilung ABT505 coagulated blood to simulate “bug splatter” on the rear of the prop, once again I’d like to thank @noelh for the idea 👍 Before: After: Next I’ll be adding the “tape and repair” detail to the rudder. until next time as always, any suggestions, criticisms or comments will be gratefully received. rgds John(shortCummins)7 points
-
I built the model straight out of the box. I only added a couple of wires to the landing gear and wheel bay. F-14b vf-102 I made th model by combining a late and d versions. I haven't finished the model yet. I need to paint and install the nozzles. Fighter Town Decals are fantastic.7 points
-
Finally finished the base, some different length autumn and meadow grass to add some variety; Name plate from 'Name It'; Vehicles installed; That's all for this one. I'll post some pics, take in natural light, over on the RFI page. Thanks to everyone who followed & commented through the build and especially @Dads203, @Hamden, @Swiftnbold & @metadyne for your help with the details, much appreciated. Cheers Nick7 points
-
Cockpit assembled. Trumpeter provide decals for the panels, decided to paint them. Just cut out the part of the decal for the computer display. As hoped the kit went together well and quickly. A bit of tidying up and it will be ready for paint. Taking inspiration from the interweb photos I have found I will be finishing it with the rear canopy closed, front canopy raised with a single pilot. Just need to find a suitable pilot from the spares box.7 points
-
Gallery updated. An enjoyable GB. Thanks.7 points
-
F-104A Starfighter. 319th FIS, Patrick AFB, May 1965 1/72 Italeri kit with Wolfpack Decals. Build thread.7 points
-
Indeed, Chris, absolute gold. I’m switching to a torpedo armed 815 airframe, so you have a clear path on the Bomber. All we need to do now is get @Dunny to build a flare bird and we have the set. Ian, it’s beyond just helping, it’s all the missing info. Thank you very much. I’m very intrigued now by 4B and wondering if I can make a mask that will work for it. I was erring towards 4A as 4M is well modelled already - and there’s at least the wreck photo of 4A as something of a guide. I’m not far off having to make that decision. Today I completed the wings to a base level. There’s work still to do but the steps today took me through base coating the black, adding the texture to it, as well as fading. The black isn’t finished, the subsequent treatments will wear it further, but the canvass is ready. I flipped the wings over and painted the EDSG and DSG. I used the colours “neat” for the upper wing and mixed 5:1 base colour with light grey for the shadow effect. The photo below shows a stark difference under the seal coat, when it weather down to the final finish that contrast will became a measure subtler. With the base colours in place, I textured with a lighter and darker filter of each colour, plus a very light post shade around the control surfaces and access panel on the upper port wing. Then, I went to the computer to make the masks for the markings. The roundels were simple but I also did the fuselage and fin flash. For the fuselage roundels I distorted the outer edge a little to represent the black hand painted around it, but I may in the end go with a clean roundel because I think they may have made sure it was well painted, not hurriedly done so. no about that. I painted the roundels using mixes of the artist acrylic I like because they dry so well and quickly that I can literally mask over them five minutes after application. I’m not very patient :). As I painted the roundels I added texture to them as well. Finally, and just before being called to the dinner table, I sealed all that work under a light clear coat. In the photo below much of what I’ve described has been obliterated by the sealing coat and reflection, but it’ll all come back to life when I put the finish coats on. After that lengthy description I have but one photo to show for it all, I was so in true zone that I didn’t take a single in-progress shot. Some WIP thread author I turned out to be…. 🤦♂️ Cheers.7 points
-
Morning BMs Making a mould: First of all I painted my plug (the turn and slip gauge body). I find that when you make a cast from silicon, the replica takes on everything of the original, including its texture. In this instance a satin texture! You'll see what I mean later. Here's the item painted and ready: I cut out a blocker the same size as the glass would be because this will be a 2 part mould. I don't want anything coming in beyond the glass at this stage! I used a spacer I'd 3D printed to secure the blocker in place. The item I'm casting now needs positioning facing upwards and gluing to the plastic base to reduce bleed through (I use plastic magic for this). I now build a wall around the plug using Lego and pritstick it in place. I also put keyways in 3 of the corners so it will only go together one way when making the cast. I use CS25 silicone for my mould making. I do a rough calculation of the area I need to cover then weigh it out as the mix is 5/100 (catalyst to silicone). Then mix together. I start in one corner pouring from a height. Once the plug is covered, I let it settle. To prevent bleed out through the base of the Lego, I simply add weight on the Lego wall. This morning the silicone had cured perfectly so I peeled of the plastic base from the bottom. Its a good mould, very little bleed out under the plug itself. I removed the simulated glass blocker and applied Vaseline to the silicone parts of the first mould (this is so the next part of the mould does not stick to itself, ie silicone to silicone!) An extra Lego wall was added to capture the next layer of silicone. And finally, another batch of silicone was mixed and poured over the first part of the mould and back of the plug (hope you're following this). Give it 12 hours and I should have a nice 2 part mould?? See you in 12...........7 points
-
Good pictures of a very nicely built up example from the Airfix website:7 points
-
RAF BE2C 1/32 Lukgraph The journey is over and I have to admit I have enjoyed it thoroughly. The BE2 is an extremely interesting subject and the CDL , woodgrain and metal is something I simply love. I find the kit to be the best by Lukgraph so far. No issues and and an extremely enjoyable to build. Painted with AK RC, AK 3GEN, Gunze, Tamiya and other. Weathering with AK pencils and oils. The propeller is hand-carved and as always with help of Michał Jakś (laser cut outline) and the hub is by Proper Plane.6 points
-
Another Belkits build , this time a works Skoda Fabia S2000 rally car from the 2012 International Rally Challenge , a short lived , but well supported rally series . This car is driven by Finn Juho Hanninen . It has a 2 litre non turbo engine and 4 wheel drive . I’ve now built a few Belkits and regular followers will know I find them annoying and satisfying at the same time to build ; poor instructions and over complicated parts fitment my main grumbles . However , most of the parts do fit really well and the end result is really excellent . A full build story is on the WIP section of the forum , here’s the finished photo call . Thanks for looking Gary .6 points
-
More work done, and the model is ready for a primer coat. The wing tanks and tailplanes have been left off in case there is more filling and sanding to do. This must be one of the fastest builds I have done in a long while.6 points
-
Radiator made - I didn’t expect ten fiddly parts! The underside (which you can hardly see) is made from three bits of card - much better!6 points
-
With only hours to spare, my Pucara is finished! Once again I say...COIN/FAC GB please! Here's the WiP... OOB...Vallejo Air, Vallejo Model...Airfix box and a SuperHobby mould. Thank you to the mods for a very fine and fun GB. This aircraft is due for a kit upgrade in the Gentleman' Scale, imho...😉 Now off to more GB fun! --John6 points
-
It may appear lower (and the centre axis of the Griffon propeller is lower than that of the Merlin) but that isn't the full story and it has nothing to do with the output gearbox. The thrust line on the Merlin is parallel to and slightly above the fuselage datum (bottom edge of cockpit entry door) The thrust line on the Griffin crosses the fire wall at about the same point as the Merlin thrust line (ie above the fuselage datum) but the line angles down a few degrees as it moves forward so that the propeller axis is well below the fuselage datum. There were aerodynamic advantages to providing downthrust on the Griffin - with the original Spitfire design max takeoff power was around 1000hp, but with the Griffon this had increased to around 2000hp. Doubling the power on the same thrust line would induce significant nose up trim when power is applied, introducing downthrust counteracts this. The Griffon was also a larger engine with a larger frontal area, this could be accommodated at the firewall, but if installed on the same thrustline as the Merlin would introduce more volume high up in the nose behind the spinner, reducing the pilot's already poor forward visibility even further. Introducing downthrust had it's drawbacks though, as it reduced the available effective propeller diameter that could safely be used without risking "pecking" (propeller tips striking the ground during takeoff and landing). This lead to broader chord propeller blades, and the introduction of the 5 bladed propeller to effectively convert available engine power to thrust. The gearbox could have been redesigned to raise the propeller axis further above the engine datum to allow a larger propeller diameter and retain the downthrust, but this would have raised the frontal area at the propeller and reducing forward visibility. As with most things aviation, the final design was a compromise to achieve the the required desirable characteristics with the fewest drawbacks.6 points
-
Lovely ‘osses. And….. “Dow ferget ter keep arrt the oss road” Blimey it’s hard to “Spake” Black Country with auto correct. And yes I’m fully aware that Brum isn’t actually the Black country and has a totally different dialect but I guess an Oss is an oss wherever yow am. 😉 looking sharp Bill. 😍6 points
-
@Stuart This rotating bar is normally used to support another antenna which can be seen here in horizontal position: Thanks to the followers, it encourages me for the continuation of the painting and especially the lettering. My USN decals in stock are either too small or too big, 8mm is needed here, so I decided to do the thing with paint and my Silhouette Profil 3 cutter. Also there is some shading to do. The decals I have in stock are white without shading. I still found in China and ordered for stock the rare pearl, but it will take a long time to come: https://www.ebay.fr/itm/174705688389 So I started the "building site", one afternoon was not too much . But it's so much better painted. Cutting of the mask with a USN font that you can find here: https://fontmeme.com/polices/police-usn-stencil/ First, airbrush the black background. Do not dilute the paint, at least as little as possible, apply it with low air pressure, to avoid possible drips under the mask. If this is not successful, the gray should be repainted etc.. Put a new mask to paint the white (Tamiya XF-2, too white). Do not dilute it, it is already very liquid in this brand. Low pressure and go gently without hurrying in several small successive layers, wait 1 minute between each layer. Attenuation of white and shading with Modern Haze grey, a very light veil well diluted is enough once the last mask is removed, low air pressure. As a result, the lettering fits better aesthetically in the bed, it should not dominate, a good balance must be found. Concentrate on this last step and don't fall, otherwise...6 points


.thumb.jpg.a37f58c722b8c85e02b63a0e2058d7c2.jpg)


This leaderboard is set to London/GMT+01:00