Leaderboard
Popular Content
Showing content with the highest reputation on 27/06/22 in all areas
-
I guess we will see a lot of these being posted soon, as I understand the kits are flying off the shelves. This is the ICM "Ghost of Kyiv" kit, produced by Kyiv based ICM under wartime conditions (and ICM are donating 50% of profits to the Ukrainian Armed Forces). As a build it has all the familiar hallmarks of ICM - lovely detail, but a little fragile and fiddly to assemble. The decals are very good though. With an Italeri Polish MiG-29 Fulcrum A:29 points
-
First and last - Supermarine Spitfire -1:48 Eduard Mk. 1 & Airfix Mk. 22 Not my usual area of subjects but I just could not resist Eduards 'First of the Few' dual combo boxing of the Spitfire. It did not disappoint, being an absolute joy to build. Naturally this led to me wanting a late mark spitfire to compare it with, so the Airfix 22/24 was purchased to go with it. I'm not into excessive weathering, preferring a lighter and more subtle approach with 'less is more!' No more intro is really needed, so on with the photos. Spitfire Mk.1 19 Squadron RAF Duxford 1938 Spitfire F. Mk.22 No. 607 (County of Durham) Squadron And because the Eduard kit is such a lovely model to build, I've started on a few more! 19 Squadron RAF Fowlmere 1940. F/Sgt George Unwin. Shades of the old Airfix 1:24 kit, 54 Squadron RAF Hornchurch May 1940. P/O Al Deere RNZAF. Now, time to get on with the Eduard Vb and IX in the stash! Thanks for looking, John25 points
-
Howdy All, Me again, come to bother you all with some photo`s of my recently completed Tenzan ( Jill ) My second attempt at Hasegawa`s 1/48 kit, from the `with folded wings boxing` Built as usual 99.9% OOB With just aerial wires, brake pipes and some seat belts added I realise the flaps and underside gun position probably wouldn`t have been deployed on the ground but I like them....... ....so just pretend it`s having some last minute maintenance 🙂 The paint guide suggested that the undersides of Jill`s later in the war were painted silver, so I went with that.... and mixed the Metallic Blue for the wheel wells and wing folds from odd paints until it looked close enough Hope you enjoy the pic`s, thanks for looking Cheers Russ22 points
-
Hi mates This time I built the model of a very special plane! One of the unique planes in Iran air force history. McDonnell Douglas RF-4E in 1/48 scale from Hasegawa. RF-4s were used by 11th tactical reconnaissance squadron based in Tehran Mehrabad Air Base. They played a key role during 8-year war with Iraq in several important army operations. This model is dedicated to legendary reconnaissance squadron commander Col.Fereydoon Zolfaghari who lost his life in war. Colors are from Tamiya and Mr.Hobby Decals are from Modeller decal and Eduard stencils. Ejection seat are from quick boost. Hope you like With regards Barzin IMG_5392 by Freddy Pilot, on Flickr IMG_5404 by Freddy Pilot, on Flickr IMG_5397 by Freddy Pilot, on Flickr IMG_5394 by Freddy Pilot, on Flickr IMG_5393 by Freddy Pilot, on Flickr IMG_5391 by Freddy Pilot, on Flickr IMG_5398 by Freddy Pilot, on Flickr AnyConv.com__IMG_4842 by Freddy Pilot, on Flickr IMG_5402 by Freddy Pilot, on Flickr AnyConv.com__IMG_4857 by Freddy Pilot, on Flickr AnyConv.com__IMG_4830 by Freddy Pilot, on Flickr IMG_5399 by Freddy Pilot, on Flickr IMG_5400 by Freddy Pilot, on Flickr IMG_5405 by Freddy Pilot, on Flickr AnyConv.com__IMG_4855 by Freddy Pilot, on Flickr IMG_5407 by Freddy Pilot, on Flickr IMG_5403 by Freddy Pilot, on Flickr AnyConv.com__IMG_4850 by Freddy Pilot, on Flickr IMG_5401 by Freddy Pilot, on Flickr IMG_5408 by Freddy Pilot, on Flickr AnyConv.com__IMG_4853 by Freddy Pilot, on Flickr IMG_5396 by Freddy Pilot, on Flickr With his E version mate!! AnyConv.com__IMG_5346 by Freddy Pilot, on Flickr AnyConv.com__IMG_5347 by Freddy Pilot, on Flickr AnyConv.com__IMG_5348 (2) by Freddy Pilot, on Flickr AnyConv.com__IMG_5354 by Freddy Pilot, on Flickr Real planes 2019_08_20_IMG_5947 by Freddy Pilot, on Flickr 2017_11_07_IMG_2827 by Freddy Pilot, on Flickr exhaust section its a video click on it:👇👇 IMG_4650 by Freddy Pilot, on Flickr21 points
-
This is my rendition of the IAR 80 A from the Romanian Air Force in WWII. Having built the superlative IAR 81C from Icaerodesign, I did get myself a Hobby Boss IAR 80A, basically the same airframe with different wings an armament. To speak the truth this model is very decent and dimensions and details are pretty good. If you want to explore those nice sleek looking fighters, buy the Radu Brinzan book on the subject published by SAM Publications, as everything, and I mean everything is inside this book. Depending on the serial number of your model, you will find precisely what to do. The whole plane was riveted. Mine is number 135, and on this serie the reinforcement on the fuselage just after the canopy must be sand as it was riveted from inside. The main mistake is in the space between the wheel wells which is too short by 1mm and a half. A little surgery and a plastic shim to get the proper spacing will do the trick. I have also used for the first time the set dedicated to the IAR 80 from Quinta Studio, and I was surprised about how good and easy it was to use! And so here is n° 135 from Esc 47Vt/Gr.9Vt based in Pipera in August 42! DSC_0001 by jean Barby, sur Flickr DSC_0003 by jean Barby, sur Flickr DSC_0002 by jean Barby, sur Flickr DSC_0004 by jean Barby, sur Flickr DSC_0005 by jean Barby, sur Flickr DSC_0008 by jean Barby, sur Flickr DSC_0007 by jean Barby, sur Flickr DSC_0006 by jean Barby, sur Flickr20 points
-
I believe this is the largest aircraft model I have ever attempted (and probably the last one this size that I'll ever do!). It's a Canadian RAF "Sub Killer" that I built using the Monogram/ Revell PBY/ OA-10A 1/48 kit along with an Eduards "Big Ed" photoetch and mask set, white metal landing gear, resin wheels and engines and a set of excellent decals and reference materials from Aviaeology ("RCAF Canso A (PBY-5A) Collection 1: The Sub-Killers Of 162 (BR) Squadron"). Tamiya acrylic paints were airbrushed throughout except for Tamiya rattle can fine white primer and bare metal undercoat and a little Alclad on the prop centers and my favorite semi-gloss clear coat, Vallejo Satin. I attempted some chipping on the undersides of the "hull" using the hairspray technique but I think it came out a little too understated than I had hoped. This particular aircraft #9816 was based in Iceland and had the following amazing history: - 11 March 1944: ferried to Reykjavík, F/L Leadbetter and crew as 162 Sqn maintenance rotation replacement aircraft. - 3 June 1944: F/L MacBride and crew attack and sink U-477. 4x D/Cs used. Nose guns used. - 13 June 1944: W/C Chapman (co-captain & 1st pilot F/O McRae) and crew attack and sink U-715. 4x D/Cs used. Nose guns used. 9816 was shot down (3 killed) in 2nd (guns only) attack as damaged sub was sinking. Thoughts and "things learned" from this build: - I used a 1" wide x 5/16" thick hollow rectangular aluminum channel to act as an internal wing strut support based on other builds that recommended adding something inside the wing assembly to prevent sagging and cracking. I found this aluminum material at a home improvement store, I believe it is sold for use for screen door frames. Its was pretty easy to install and made the wind assembly rock solid. - I decided to skip adding weight to the nose to address the tail dragger issue and glad I did. I've read that one must use a A LOT of nose weights and this model is "structurally challenge" as it is due too it's size. I'm ok with the temporary support dowel shown in the photos and will remove it once I hang this beast over my work bench. - I also did not address the tail width issue that many do by splicing in the resin correction and applaud those that do this mod to this kit. I can see how the fuselage looks a little too wide just in front of the tail from the top view but from the side profile, it look's like a PBY to be so I'm happy with it "as is" out of the box. - I used a white metal aftermarket landing gear set and still had problems with the main gear on the right breaking several times after both epoxy and CA bonding as well as bending. I can't imagine building this kit with the kit supplied styrene landing gear. - The biggest assembly issue I had was getting the four wing struts to fully seat into the mating notches in the fuselage and underside of the wing. All four appeared to be too short by about 1/2 mm which I suspect was because the wing didn't "sag" due to the aluminum spar that I added (Anyone else happen to have this issue on this kit after adding wing reinforcement?). If I built this kit again, I would pre-bond the struts to the fuselage and remove the bumps on the wing ends of each strut and just bond the struts flat to the wing undersides and fill any exposed notches on the wing later. Conclusions: Next time I build a large aircraft like this, I think I"ll stick to 1/72 or smaller! This one was just too awkward for me to handle during painting and assembly, required a ton of paint and when completed is much too big to put anywhere in our house! I would also highly recommend Aviaeology.com for decals, I have never had such excellent reference materials supplied with a set of decals before (a beautifully illustrated color booklet pdf with amazing details and history on a multitude of aircraft cane be downloaded and printed after you receive the decals). Despite the kit size and structural challenges, this one was a lot of fun. Never get tired of PBY's! Hope you like it! Cheers, John15 points
-
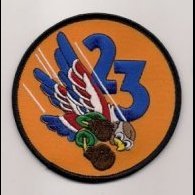
I'm calling this one done. It's the Revell boxing of the Hasegawa Phantom F-4M, or FGR.2, in 1/48th. It represents XV434 "J" when it flew with 23 Squadron in the mid 1970's. I have always admired the green/gray RAF camo and thought my first FGR should honor the "classic" RAF camo. Of course there are a few "oops" moments with the kit. No fault of Hasegawa, but some blame to Revell for the decals. A few of the stencils silvered. I used the kit wheels (incorrect for the RAF) but I hated the rubber tires that came with either this kit or the Hasegawa kit that I also have. I have one set of Aires RAF Phantom wheels that I plan to use on my next build. Please forgive me for using the American wheels. I don't get to uptight over wheels anyway. Also I waited to install the canopy sections until the very end because I wanted to add the Eduard photoetch canopy details. I should have at least put on the windscreen and center section so I could get them set and blended in before painting. There is a Work in Progress entry but it quickly moves down in the pages. I just don't know how to link it. If interested you can search for this: Phantom FGR.2 Hasevell 1/48 (britmodeller.com) If you have any questions please ask. The weapons load is what I read was typical for UK based air defense, 4x4 AIM-7/9 with 3 bags for extra range.14 points
-
This is the third installment in my quest to build all of the major variants of the Panzer III gun tanks. This build is the excellent Miniart PzKpfw III Ausf. D/B backdated to a straight Ausf. D as it would have appeared in Poland in September, 1939. I currently have an Ausf. A on the workbench and will hopefully get to the Ausf. E before too long, so I can have all of the “grey and browns” out of the way. I have previously completed the Minart Ausf. B and Ausf. C and posted them in “Ready For Inspection” as well. Ausfs B, C and D for comparison:13 points
-
Hi all - this is Academy's 1/48 Bf109K-4 kit, finished in the colours of '265' - a machine discovered at Amberg at the end of the war and carrying no unit markings - just the last three digits of the werk nummer roughly sprayed onto the fuselage sides. Several b/w pics of this plane (unusually of both sides) are in circulation, so the markings and camo pattern are easy enough to identify. The actual colours, not so much. I did build this a/c a couple of years ago from a Hasegawa kit, but it got trodden on recently during some redecoration work at home (the less said about that, the better). So a couple of years on and this is a chance to 're-imagine' some Luftwaffe late-war camo colours, and un-painted (but not necessarily 'bare metal') undersides and put a replacement '265' back on the shelf. Anyway, enough chat, here's the pics..12 points
-
Well this little thing took longer than expected but now ready to hand over to the gentleman who's father served on this ship around Burma in WW2 i hope he likes it. WIP https://www.britmodeller.com/forums/index.php?/topic/235109055-byms-2168-churchills-pirates/ Stay Safe now to get Gorleston finished beefy11 points
-
Dear fellow Britmodellers, this is the new 1/72 Spitfire PR Mk.XI kit, presented at Moson Model Show in Hungary, at the end of April. Built from the box, painted with Mr.Hobby acrylics. Photos by Wolfgang Rabel. This kit is an all-new tooling and comes in various boxings with different marking options. I chose the "USAF" version because I didn't have a Spitfire with "stars and bars"! Markings are from the box, representing an aircraft from 14th Photographic Squadron, 7th Photographic Group, at Mount Farm airbase in 1944. Some PR Spitfires were painted in "PRU Blue". To represent this color shade I used Mr.Hobby H42 Grey Blue (which I found to be the best match). Exhaust stains were applied with my airbrush. The quality of surfaces and fit of parts is very good, the build was smooth and free of trouble. The only thing I wasn't happy with are the stencils, which come on a seperate sheet. The walkways are a bit heavy, inscriptions are oversized and fuzzy, so I replaced them with markings from an Eduard stencil sheet (designed for the Mk.IX). The camera lenses are represented as shallow depressions on the lower fuselage. I painted the lenses gloss black to simulate glass. Thanks you very much for your interest, best greetings from Vienna! Roman10 points
-
Here is the Moynet LM 75 that took an unexpected 2 litre class win at Le Mans 24h 1975 in the hands of Marianne Hoepfner, Christine Dacremont and Michèle Mouton. The kit is 1/24 scale resin by Profil 24. Apart from some added details, mainly in the engine compartment, it's more or less built OOB in around two enjoyable weeks without much trouble. I hope you enjoy. The WIP-thread with more info can be found here.9 points
-
Fujimi 1/72 F-14A Tomcat OOB other than Custom printed decals, and safety pin for the AoA probe. Paint from Ammo MIG's Modern US Navy Paint set. The kit started of as a build for local group build here, but I passed the deadline. Depicting "Voodoo 1" from the well known "documentary" of the most dramatic air-air engagement in post-vietnam war US Navy history. Above the indian ocean, in 1986, Voodoo 1 was able to defend against 6 enemy migs and even score a kill despite being damaged from enemy gun fire. The pilot, who was a top graduate from the Navy Fighter Weapons School prior to the engagement, will ultimately reach the rank of admiral as the US Pacific Fleet Commander later in his career. A deep review of the engagement by The Operations Room channel on YouTube can be seen here; With the adversary 1/72 Hobbyboss "Mig-28" Cheers, Mario9 points
-
This F11F was entered in the Artwork Group Build with the sharkmouth decoration. This model was more or less built OOB, with a full rescribe and some extra detail added. Cheers, Luka8 points
-
Hi folks, after completion of the S-199 I could not resist and built the two-seater training version of the same. The kit obviously shares the same parts except a new frame with fuselage and some smaller details. Avias were painted with mixture of lacquer varnish with aluminium pigment in it, so I followed the same approch for the kit. It was airbrushed with Gunze SM07 with about 20% of light grey. The machine belonged to a training unit located in 1952 in Slovak area of the Czechoslovakia and it is documented with this markings after a crash landing (quite usual fate of many aiframes given the rather poor handling characteristics). Cheers Libor8 points
-
Good afternoon all, here is my latest completion. The upper surfaces paints are from the AK Real Colors set for the Luftwaffe 1960s and 1970s and the underside is Vallejo Metal Color Aluminium. The stencil decals are from the Revell boxing and the main decals are from APC Decals via hobbyshop.cz. hobbyshop.cz have a number of decal sheets replicating many of the old Matchbox and Heller/Smer kit decals. They are printed on extremely thin continuous film decal paper and the colours are very opaque. They adhere beautifully on a gloss surface and react perfectly to Micro Set and Sol. Because the film is so thin they do not respond kindly to handling on the model and need to be floated into just about the right position and very gently floated if adjustments are needed, but don't try big adjustments or they'll stretch or fold in to themselves. I found out the hard way and had to purchase a second set, but they're relatively inexpensive (even with postage), definitely worth it and delivery is quicker than from some UK suppliers. The windscreen fit is appalling and lots of filling, sanding and polishing was required. Additional interior detail is limited to front seatbelts from foil and the Revell instrument panel decal; nothing can be seen of the cabin. Steps and fin aerials are from copper wire and the pitot is brass tube with NiSi wire inside. The wire aerial is Ezline Fine. There is no landing light cut-out on the kit so this was added with a little-lenses 'light' and clear tape for the cover. The forward blade aerial is a piece of plasticard and the anti-col light is from stretched clear sprue with Tamiya clear-red to give colour. Here's the model...8 points
-
Many years ago - as a kid - I built a Frog Marauder: As I didn’t have the paints required I had to do the French version - but in fact it was the SAAF Marauder I preferred. So 45 years later here it is: I used the Hasegawa B-26C kit with Eduard PE interior set and resin wheels. The serial and "L" are Frog decals, the insignias are from an Xtradecal sheet. All paints are Gunze, weathered with Tamiya weathering sets, a Karisma color silver pencil and AK washes.8 points
-
It's been a fairly busy day on the workbench with the Aston Martin. Test fitting the bonnet again, it hinges on curved tracks in the inner wing panels and with these (dry) fitted the bonnet fit is pretty appalling. The hinge pins were filed and thinned down but things still weren't right. You can see that with the bonnet where it needs to be the hinge on the left of the pictre actually sits below the track in which it should move. Out with the razor saw, banking on the thickness of the cut being just enough to reduce the length of the hinge, so it was cut off and immediately glued it back in place. Re-fitting with a little bit of styrene strip added to the leading edge of the bonnet and it's looking more like something made by the artisans at Newport Pagnell. While studying the instructions I noticed that part 127 is designed to hold the boot hinge. I eventually found the appropriate part and attached it to the floor/interior tub. Checking the fit of the chassis parts, it looks like my plan to insert the rear section of the chassis as a separate part should work. So I can paint the body with the valances fixed in place. More test fitting, I'm not sure about the boot, it's not practical to add material as that would foul the opening. I might see if I can tweak the hinge a little but it might still end up being glued shut. Interior trim panels were glued in place, to ensure they fit properly into the body. I've also installed the pedals and fixed the front and centre parts of the chassis together. The engine was part assembled and there were a few loose pieces rattling around the box, to these were attached before they got lost. I must admit I've not seen any real DB4s with a belt driven device (looks like it might be a water pump) in that location. I wonder if Aurora's example car was non-standard in some way. I've also noticed that a lot of Series IV DB4s (which this one is) have three SU carburettors, I'm not sure if I've seen one with twin SUs even though earlier DB4s used this arrangement. It would be rude not to add plug wires, so I did. More plumbing added to the outside of the engine. Other side of the engine, lots of painting needed.8 points
-
Here is one of my latest builds from the Academy F-86F Sabre, the QF-86E drone aircraft. As one of the founding members of the IPMS Target facilities SIG, I thought I should set cracking and build some aircraft that were appropriate to this SIG. After all, we will have a table to fill at Telford going forward! Other BM members include @Martian, @corsaircorp, @Corsairfoxfouruncle and @general melchett. Others always welcome! Apart from the internet, one of the most useful reference sources for the build was the excellent book by Duncan Curtis , Naval Fighters No 58 on the QF-86E/F/H/Sabre. These aircraft were full scale aerial targets converted from numerous different marks and origins of Sabre. Thanks to @Sabrejet for an excellent reference publication. The Academy kit is an F with the later ‘6-3’ root chord extension wing which was also fitted to the RCAF Canadair Sabre 5, from which this conversion originally came, becoming the QF-86E. So this was a reasonable choice for this model. All QF-86E drones seem to have been acquired for US Army use, and the serial I chose 23215 was eventually to meet a gruesome end from a US Army Patriot missile, during 1979! The main driver for choosing this aircraft was that amongst my stash of Microscale decals, I had sheet 72-288 with markings for two F-86’s and a QF-86 23215. The Academy kit went together well and seems to be reasonably good on surface detail. I usually use Alclad for NMF finishes like this but I tried out the AK Extreme metallics for the first time, and they seem to be very good. After airbrushing their gloss black primer, a combination of various colour metallic shades were airbrushed onto various different panels to try and achieve a realistic pure metallic look. The orange tail and wing marking were applied using MRP’s excellent International Orange Lacquer, over a white undercoat. MRP’s gloss varnish was applied prior to decals, and after decals, followed by some very light oil washes. A final coat of MRP’s semi-gloss varnish sealed everything in. These MRP varnishes have become one of my favourite solutions for finishing coats. Some initial pictures during construction And onto the completed model I daresay there will be future builds of a US Naval QF-86F and a USAF QF-86H. Comments/questions welcome Thanks for looking. T7 points
-
Background: I like the look of the BMW M1 Procar but I could not find a single real-life livery I wished to model so I decided to make one up with the help of some custom-printed decals and a bit of inspiration from the Williams FW08 from the late 1970s - the right time period at least. I thought the car could use with a little more modernisation too, brakes and wheels. Pros: There's an engine. The decals are nicely printed. Little else. Cons: A lot of work is needed to make this kit fit together properly - so many parts have no mounting points and need improvisation. Scruffy looking mouldings that seem like they were not even that great back when this kit was first released by ESCI in 1979. No side windows. Instructions are not clear in parts, not well illustrated and include at least one part shown mounted 180 degrees from what would be correct. Verdict: Mostly garbage. Despite both Revell and Italeri re-releasing this kit even in 2015-2020, the moulding need to be retired permanently. I'm an experienced modeller and I found it a slog to build at times. It'd put a relative newcomer off entirely. It is a scruffy, untidy model kit. Build notes: Built over the space of about 6 weeks in May-June 2022. Custom decals created by myself in Adobe Illustrator, and printed by Indycals - following the colour scheme (somewhat) of the Williams FW08 and some other decals I thought fitted with it. The front brakes are Tamiya, as are the replaced wheels and tyres. There's wiring added to the engine and seatbelts added in the interior, plus P/E bonnet pins and an electrical shut-off lever near the windscreen. It is a damn cool looking car in this livery and with these wheels, even though I say it myself. Aside from the problems building it, it's turned out exactly as I'd imagined.7 points
-
7 points
-
Argentine Skyhawk 3-A-305 returns to ARA Veinticinco de Mayo following a reconnaissance mission over the South Atlantic in 1982. The 1/72 Airfix Douglas A-4B/Q Skyhawk kit finished in the markings of the 3o Escuadrilla Aeronaval de Caza y Ataque. I added a replacement pilot, a couple of aerials, dropped the flaps and the tail hook, but otherwise it's out of the box. Mounted on a base from Coastal kits with an arrestor cable made from 0.4mm brass wire - Job done! The real aircraft was lost in an accident over BACE on 22 May 1986, but the pilot managed to eject safely. Thanks for looking. mike7 points
-
Rat Fink got a bit of Tamiya gold spray paint as an undercoat for clear topcoats on Saturday afternoon. A bit of topcoating followed. A problem immediately surfaced. If I carry on painting as planed, all I will end up with is a copy of a RF I already have! A change of direction is called for. I'll have a stab at airbrushing the figure with solid colours instead. Still bright and in 'yer face, but not the way I did on RF Mk1. The card garage is all one bit now as well. I like it and will definitely be using it for Roth related stuff. Quite why Revell added it to a Rat Fink figure is anyone's guess. He's more connected with the tshirt side of Ed Roths output. The building has more of an affinity with the pinstriping and car painting side of things. Roths flamed '57 Chevy would be a natural here, the fink stuff less so. Nitpicking from me really, I should just be happy to have the thing. Sunday saw me at a model show in Littleport, just up the road from me. A first class event and highly enjoyable from every angle. My club had a stand, and I brought along a few display items. A couple of Finks and some of the kits built for the just finished Matchbox GB. There were plenty of trade stands there and a lot of under the table selling going on. I struck pure gold under one table. What's the chances of finding Roth stuff at more than reasonable prices? Not only Roth, the same private seller also had the other car kits shown. The PT boat was a fiver, found under another table on about my fifth circuit of the hall. The prizegiving was going on when I found it, so it had sat there un noticed for the whole day! My GB building schedule now needs modifying a bit to accommodate these goodies.7 points
-
Thanks Chris, that's very kind. The hardest thing seems to be eliminated the boneheaded stuff (see below), and also how a lot of techniques seem to take a good while to 'get'. No end of times I think I have something down, but find the next time that it doesn't work out quite as well. But aside from the obvious slightly dodgy execution, I feel my finish is always a little 'flat' and toylike, so perhaps some more efforts with layering and colour depth are in order in the future. In the end, I did go for a proper gloss layer over the existing decals and the remaining surface. Of course, I'm entirely unable to do anything without making an ordeal out of it and in this case, I got a little heavy handed at one point, causing a bit of excess on the top wing to pool on the trailing edge of the lower. I attempted to 'flow' that forward along the lower wing surface with my final pure MLT spray, but overdid it, stripping the gloss and running a little paint there. That required a tidy up with sky (which I seem to be doing about as often as knocking off those confounded cannon barrels), and another quick layer of gloss. Anyway the transfers are all on. That Tamiya stuff really is a revelation, and it mostly went off pretty well. I think not trying to do it in one sitting helped a lot, allowing decals that I obviously was going to stick my finger into to dry. The decals are pretty good, quite robust, but not excessively thick, and sit down nicely. The stencils are maybe a touch bold, and the squadron insignia was misprinted a little, but otherwise perfect. I buggered up the 'P' on the tail and had to resort to some xtradecal spares. But again, we couldn't have a build update without some top quality muppetry... I put the blinking underside numbers on the wrong way around, laying aft of the wheel bays rather than forward. I think when it kinda fit one way my brain was incapable of processing symmetry and so I assumed that it must be right since surely it could only fit one way. I noticed reasonably quickly, but the decal was already pretty well sat and cured, so peeling it off was guaranteed to end in tears. I could've gone with a different serial number (not be particularly picky on the historical accuracy), but the side serial number was already on. In the end I decided to double down on the error and have the numbers too far aft, which requires some decal surgery on the wheel bay parts, and will need some bits of numbers to be filled in with black paint laters. Eeesh what an eejit!🤣 so here we are, I'll let them cure, then it's a case of when to panel wash and when to seal. As I've said, I've struggled with poorly defined panel lines owing to excessive glossing and sanding back, so I may try the was over the decals, or at least try to seal with a minimal layer. In any case, I'll certainly try to wash before I sand back the decal bumps, as I think this is also contributing to the ill defined lines. I think then the various repair work with black paint can wait until just before the final matt/satin layer, as I don't want to sand it off. Well, we're getting there slowly! Cheers, Andy7 points
-
This model was begun as part of the 2021 F6F Hellcat STGB. Finally, it is finished. Another abandoned project done. Construction details in the link below. I hope that you enjoy these images of the completed model. Don6 points
-
Hi, I just finished my TUI Germany 737-8 Max. Was definitely one of my quickest builds ever as I think I did the whole plane within 4 weeks from start to finish. Upon holidays in beautiful Madeira where we actually took Tuifly on our way towards there I saw a TUI 737-8 Max there and realised how cool it actually looks in that livery, IMO the livery is rather underrated. So I spontaneously had the idea of building one for the time after the holidays with a Max that was previously destined to be an Icelandair in my collection. Also had the beautiful TUI 757 of Ian Woodard as an inspiration that I once saw here. The decals are from DRAW decals for the livery and they are excellent, really opaque and the carrier film basically disappears once they are dried. Windows and details are from Authentic Airliners. All blues are painted. The light blue was kind of tricky, as all light blue I could find were rather too cyan, so I ended up mixing Mr. Hobby 45 with quite some red (to make it less cyan) and also some white. For the tail colour and winglets the same mix + even more white. The dark blue is Tamiya X-3. There's acutally a decal for the dark blue part, but it would be against my personal modelling values to not paint it and I guess it would never look really good as the area is too large and complex for a decal. I imagined the painting tricky with its curves and getting both sides look the same, but with a small "trick" (that others used before) it was much easier than I thought. I took a real photo that was mroe or less exactly side on. I then resized the shot to the same size as the model on Photoshop and printed it twice (mirrored it for the other side). I cut the light blue part out on paper and put it on the plane with masking tape. I used certain reference points above or under the doors and then drew lines with a pencil on both sides upon the white plane and then its about using flexible masking tape. For the dark blue part one already has this as a reference so this isnt hard anymore. Overall I am really satisfied. The kit is excellent and easy to build. The only downpoint is that a Max has 4 distinctive features compared to a normal 737NG. The larger engines, the different winglets, the APU-section that is 787 style AND the much higher front gear. Yet the Zvezda only has the normal front gear of 737 NG, where I feel that already on the rregula -700 or -800 kit it sits a bit too low (or likely the nose door gears are just too large). Personally I felt the front didnt look like a proper Max anymore. So I used some spares that I had to make it 2mm higher. But yeah with knowing that (I wasnt aware) one can easily make it higher, in the end some polysterene would also do the trick. For the pitots on front I used some Microdisin photoetched parts. Generally these sets arent really worth buying for me as I always end up only using veeery few parts of it, but I thought it was a cool feature. The finish was done done with Tamyia X-22 and then a pass of Mr Hobby's GX-112 to protect it from UV light (although of course other than for those photos it wont see the sun) and some Tamyia polishing compound. Enough said (likely even too much ;-), here are the photos. Thanks for looking, appreciate any comments. Julien6 points
-
After a long time, I also upload pictures of the finished model. Model is Special Hobby 1/48 Aeromacchi C.200 serie I. It is a model that represents the plane of the famous Italian ace Maresciallo GianLino 'Giri' Baschirotto (more about him on the following LINK). The model is decent for the shortrun of that period, but it cannot be compared with Italeri C.200 (newer and already outdated in terms of quality). The painting was done with acrylic and weathering with pigments, Tamiya panel liner products, oil paints, wooden watercolor paints and a silver ink pen. Critics and suggestions are more than welcome.6 points
-
Hi guys, after the great Matchbox GB which I enjoyed a lot I’m going to try another oldie - Revell’s P-38/F-4. I have had the kit for a long time and as you can see the bottom wing parts were cemented to the upper half. Some interior green has been sprayed but everything will be repainted. I would like to build something like this: The colors remain a mystery but we can discuss them later 🤣6 points
-
Just a bit of dryfitting. The body will be Revell 52 blue, the seat will be black. I don't know about the inner side of the floor in front of the seat. Also blue? Or black? For the engine and components I will try different shades of silver. I have dechromed most parts like fire wall and dashboard.. They will be airbrushed with silver or aluminium. The brakes will be blue. The chrome wheels will get a coat of matt varnish, so they may look like polished aluminium. The fit of the parts is good.6 points
-
Worked on the cockpit tub this afternoon, and painted the bang seat. The kit comes with two options of seat, one without all the belts, but rather than aftermarket on the plain seat I used the kit one with the belts.6 points
-
Right, main scheme on yesterday, followed by a touch up of the weapons bay. Today I applied some dry brushing in the weapons & undercarriage bays to try to show off the lovely detail provided OOB. I wish I had the guts/ability to apply a wash but my skills simply don't extend that far. I added the undercarriage, where the instructions are a little nebulous regarding exact location of the retraction struts for the main gear but reference to an online walk around helped me to get it right. Also added the airbrakes in the open position. The weapons bay lateral bulkheads with attached doors are ready for installation if I can remember which side is which!6 points
-
Hello all, this is the last of the three builds I’ve had on the go over the last few weeks (F-86D, TF-104G, Su-17). The aircraft was designed in the 1960’s to be an improvement on the earlier SU-7. In fact the early Su-17 was pretty well an Su-7 with swing wings fitted to it. The kit is short run and took quite a bit of cleaning up before the parts would fit well. It’s straight out of the box and is finished using my usual metallic paints of choice, Humbrol 27002 and 27003.with a sealing coat of satin Xtracolor varnish, Without further ado, here are some pics. Thanks for looking Pete6 points
-
more like 02 /71 02/70 would be very high contrast. See photos below In field repaints were common in 1940, raising the underside colour up the sides, finding 70/71 too dark and replacing (usually) 70 with 02, later experiments with grey schemes for over water use, eventually leading to the 74/75/76 scheme. this is summed up here http://109lair.hobbyvista.com/articles/camo/bob/bob_camo.htm written by Dave Wadman , here as @tango98 @G.R.Morrison is good on Luftwaffe colours. We also get contribution from @David E. Brown Wick is hardly an obscure subject, and given the German propaganda service, there must be more images of Wick's planes as well as other of JG 2. OK, put Bf109 e Helmut Wick into google this is one of the hits http://falkeeins.blogspot.com/2009/12/helmut-wick-his-me-109-wnr-5344.html Done by @FalkeEins And has various photos of Bf109 wnr 5344, at various dates, as shown by the rudder scoreboard.. for the purpose of the upper surfaces, this should help, from the blog linked above "The 44th bar has been added... this is between 29 Oct and 5 November, again note no tactical markings on the wingtips:" "Close-up of the nose... note the worn finish on the spinner, and the very irregular camo demarcation along the leading edges of the wings... note also that what you can see of the leading edge of the port wing appears to not display any wingtip tactical markings at all, just a continuation of the camo:" Note the image of Wnr 5344 posted above has been retouched, from the ebay image and another this shows Wick's plane with 47 rudder bars and this with 43 from here https://www.asisbiz.com/il2/Bf-109E/JG2-Stab.html I don't tend to rust the captions, but lots of images I don't know of color images of Wicks plane, but this is of 9/JG52, which back up that 5344 is likely has been repainted in field to first 71/02 uppers with high 65 side, and then has the side toned down with sponge applied mottle of 71. the contract between Gelb 04 and gelb 27 has been shown to be more then expected by some color film that turned up recently as well. (I posted a link to it) often reproduced washed out this may have more https://www.amazon.co.uk/HELMUT-WICK-Illustrated-Biography-Jagdgeschwader/dp/0764322176 though the cover shows yellow wing tips, as does the profile posted above, and the photos don't. HTH6 points
-
Hi All, I made a proper start on the Glad today, as I had a cheeky day off work (yay!). Although I'd thrown some primer around a couple of weeks ago, there really wasn't much to show for it. The first painting operation was simulating the doped linen colour in the rear fuselage (not sure if it'll be seen, but just in case!). So here's the linen colour mist-coated with some red-brown: Next I sprayed all of the interior grey-green components - here's the fuselage halves after unmasking: Looks quite smart? The very first assembly step calls for the insertion of the 2 fuselage-mounted machine guns. After painting and weathering them I decided to be hyper-organised, and prime and paint the external portions of the ports, so I could subsequently mask over before painting the main camouflage. However, on closer inspection the AK Interactives Light Earth I'd sourced looked, well, far too LIGHT! Here it is: That didn't look right to my eye. The Light Green (Mr Hobby RLM82), on the other hand, looked about 'right' to me. For the LE I therefore decided to go with a home brew of 50:50 Dark Earth: Mid-Stone. Here's the result for both colours: I've shown with the AK LE just to show how 'off' it looks - I'm pretty happy with both colours so will stick with that combo. Here's the port MG in position: Here's a final couple of shots showing the barrels in position: Not displeased with that. Also, whilst I was spraying the MGs I also painted all of the turret components for my Sunderland, so that is technically progressing too!! Thanks for looking, Roger6 points
-
Another longish break - this time due to illness. On the mend now. Added the aerials from guitar string cut to length and painted black. Some washes of Vallejo European Dust, and a bit of oil dry brushing on the padding on the roof section. Almost done.6 points
-
I added the tools at the back (none of them will be visible after I put the canvas cover). Glued the tow cable in place, nice that Dragon provides it in authentic metalic color, no need to paint it, as in other brands. Idler wheels should be metal, not painted, the right one is done, they´ll need retouch later. PE parts for the tow cable supports are really nice! Applied a wash of artist oils diluted in mineral spirits, around 50-50 of light yellow and white. Then some rubbing with AK Splash mud and thick mud, finally applying flat varnish. Some effects like the stains of fuel and rust were added using either artist oils or pigments. The wash gives the impression of fine dust accumulated in recesses. I went on painting and weathering the tracks, first Anthracit, then Burnt umber, some rust, rubbing AK Splash mud, yellow-white-grey pastels, and sealing flat. Some retouches were necessary afterwards with anthracit in areas where the color was deteriorated due to rubbing. The Sherman I am representing, circulated mostly on streets, so mud is limited to a thin layer around the suspension and tracks, no thick mud. I assembled the link-by-link tracks in 4 long segments and 6 short ones. . Gluing the track segments in place was easier said than done. Nothing really difficult with the long upper segments, the difficult part was matching the front end to the track around the sprocket wheels. After some sanding, trimming and a lot of pressure, the track was glued in place around the sprocket wheels. And I hope that was the most difficult part of gluing the tracks in place, completing the lower segments and smaller ones looks easier, we´ll see. Marco6 points
-
With only a month left I thought I had better make a start on this so I am going to do some work on the fuselage - this is what I have at the moment! Unlike the later models such as the Do-17Z the early ones did not have the deepened front section making a sort of gondola for the ventral gun, and therefore only had as fairly shallow floor. In fact Airfix have missed it out almost entirely mounting the front seats onto the fuselage and only provide a sort of "footboard" with the stick and pedals. They provide 2 seats of which only the right hand one for the navigator/bomb aimer has survived so I will be using one out of the spares box for the pilots seat. The Radio operator/dorsal gunner had a small circular seat squab mounted on a frame so that it could be folded away, presumably for when he was working the ventral gun, and that has been lost as well, as has the IP, though I do have a Yahu one for the IPM Do-215B which may fit with a bit of work. I will also make up a rear bulkhead. The one real problem will be the ventral gun but I may be able to fit that later to avoid it being broken - if not I will have to try and put some sort of shield round it to minimise the risk of damage. More as and when. Pete6 points
-
Here is my build of Eduard's BF109 G-6 in 1/48 scale, not much to comment really on this kit, everything went together really well and no issues at all I can really mention. Any critique and comments more than welcome.6 points
-
You can see them in this cropped image, there on the wheel hubs. On the deck, they’re always aligned with the ground plane, but I suppose they then become vertical when the wheels are retracted. They’re an odd feature I’ve not seen on other planes of the period. Well, that was a fun couple of hours. I think a bit of refining of edges here and there, and I’ll call that satisfactory. I noted a fairly soft edge to the three-colour patterns in some period photos. While these soft edges might better suit a larger scale, I’m fairly happy. They say practice makes perfect. Looking back to the D.XXI build in this thread, I was getting very frustrated with the airbrush. Since then, I’ve replaced that model with one that has a screw stop for the needle. I still need to perfect the MAC valve and screw stop combinations, and getting just the right mixture of paint and thinners, but I feel pretty confident doing freehand stuff like this now.6 points
-
A lot of rattlecan grey primer got sprayed about yesterday. Having left it all overnight, I gave everything a look over for remedial work. For a change, I couldn’t see anything obvious. I set up the airbrush for the first camo colour. As I was airbrushing the T.V underside in chocolate brown, I noticed the port engine was definitely wonky. This is a real problem where things don’t have a positive location, and something that bugs me. I managed to prise it off without further damage and continued spraying. By the time the fourth day of the England vs New Zealand Third Test started I had got to here. Things will be left to dry for a while before I begin to consider the camo patterns. I’m tempted to try masking and airbrushing, but I fear I may well end up with the good old hairy stick. We shall see.6 points
-
Between bigger projects, I like to assemble once in a while one of these 1/144 kits. I have had this SA330 Puma in my stash for years already, I think it was the first 1/144 kit that I bought, time to give it a try. Finely molded, has a representation of the interior appropriate for the scale, including cockpit with controls, instrument panel, etc. I have still not decided whether to represent the Tigermeet option as shown on the box, or the more standard two'green camo version included as option, too. I will add crew converting some Preiser figures (1/160 scale). Tiny kit, definitely. i assembled the interior an painted following instructions. Gled it in place without issues, everything OOB. A dry-fit of the figures, they still need some modifications to resemble pilots and crew. i like the details for the scale. So far, Revell has not disappointed me with these nice tiny kits. marco5 points
-
Heollo. I'd like to add this drone. So, this is the Italeri F-104A/C, which I think is still the only F-104A in 1/72. The kit decals are on the left and on the right are Carpena decals for the QF-104A. These are at the top of the sheet and so are for the earlier paint scheme on these. Latterly I think they were international orange with black serials, but initially they seem to have been red-orange dayglo with white serials. There is quite a bit of quite confusing stuff about the colour on-line, as you can imagine. I like the more red colour and have gone for this fairly lurid number: Gunze C171 "fluorescent red". It's still a bit orange in spite of its name. In an effort to complete a GB on time I thought I wouldn't post till I'd got this well started. The box and bits picture above is 11 days old but work kicked off rather last week with Covid-absences and I've only now got this to the point of some paint: In the middle are bits to paint before completing construction. The seat has been brushed up a bit with extra belts and an ejection handle from sprue. The canopy needed some marks polished out with tamiya compounds and I'm sorry I didn't take before and after pictures. The most work has been blending the "A" tail and rear fuselage into the common front fuselage. This was glued on as best as possible and then the join filled/covered with stretched sprue and then sanded back and panel lines restored. I'm sorry I didn't photograph the stretched sprue stuck in but I'm pretty happy with the end result. It hasn't all been polished up because I'll have to repeat that on the centre-line joint and so forth. This week work is not kicking off for me at all. I'm stuck at home caring, covid-19 negative, for my covid-19 positive son...so I might progress this. Thanks for looking, Alan5 points
-
This is ticked off my bucket list I had as a Christmas present when it first came out and have always wanted to have another try and here's the results pity about the faded decals. And the larger decals on the trailer sides went on in one piece.5 points
-
Re: the wingtips mentioned by Mr. Smith WNr.5344 was much-photographed, as "gelbe 2' having been used by Wick with the 3./JG 2, then briefly with the 6./JG 2, then re-marked as "Doppelwinkel" with the I/JG 2, and finally and fatally as Kommodore of the JG 2. There are at least two photos which reveal the yellow wingtip(s), one from 2 o'clock and another from 10 o'clock, with 32 Abschußbalken displayed on the rudder. These also show the crosses on the wing's underside have had the white angles narrowed, similar to those on the fuselage. I don't have a photo-hosting service so cannot insert them here, but if curious followers of this thread wish to get a copy, send me your email in a PM, I'll forward them. Artist Claes Sundin chose to also depict a white band abutting the yellow wingtip underside -- I'm skeptical without more evidence emerging. As to 'What shade of paint?,' I try to avoid making pronouncements on color as eyes are not only subjective, they also tend to see what they're looking for. GRM5 points
-
In the case of those dampers, I chose the individual parts, including the nut. I was fascinated by the fact that everything is movable and can be applied under a matrix decal. It was worth the effort ...5 points
-
The cockpit was then fitted. There is plenty of room for ballast in this model. The fuselage was closed up and the lower wing assembly fitted. The instructions recommend it be fitted in this manner. In my previous Voodoo build a completed thhe wing and then fitted it, causing some problems. So this time I followed the instruction sequence. I then fitted the upper wing surfaces. It is essential that they be fitted so the leading and trailing edges match up correctly. This will leave quite a wide gap at the wingroots, which I filled with plastic car shims and filler. It's very blurry, but you get the gist. Don't attempt to close up the gaps by fitting the upper wing surfaces touching the fuselage. This will just leave you with odd steps where the wing leading and trailing edges and the wingtips don't meet. But with a bit of careful work it looks okay.5 points
-
Here are the photos of my completed Fw 190D-9 in 1:48 from Tamiya. A kit that is buildable, but with some fit issues in the wings and fuselage. There're better alternatives to it though, in the shape if the Hobby Boss Dora family. That's all for now! Next model will be Italeri's 1:48 Mirage V Dagger. It has already been started, I drilled holes on the main landing gear struts to add metallic clips. This will hopefully improve the stability of the gear.5 points
-
Finally got the rivets completed on the upper hull, so time for primer – hurrah! Unfortunately my experiment with superglue in lieu of TET was a bit of a fail – numerous splodges and clumps around the rivets – grrr. It’s not great, but I think I’ll have to live with it – I just can’t face tearing them all off and redoing them. A bit of paint, wear and tear and assorted muck and dust and hopefully they won’t be too obvious. Lesson learned though….. At least the inside looks ok – no rivets!5 points
-
like a belligerent Yorkshireman (I am sure there are other varieties of Yorkshireman available although I don't believe I've ever met one)5 points
-
As WWI drew to a close in 1918 the O/400 was replacing the O/100 in Squadron service and the much bigger 4 engined V/1500 was just starting to enter service, as was the smaller DH 10 sometimes called the Amiens and the Vickers Vimy. As I mentioned earlier the RAF decided that the Vimy was the best plane for their peacetime needs and so the other 3 soon were phased out. From then on the need for a heavy bomber was somewhat minimal and so a period of relative stagnation followed until the early 1930's. Before I go any further I will once more say that comparing speed and range of planes is not an exact science as there are too many variables, particularly bomb and fuel load, which are seldom given in the various reference books. All data below is from my Putnams book on the RAF. The Vimy was replaced in around 1925 by the slightly larger Vickers Virginia, which was developed through numerous marks, the last of which was the Virginia X, by which time engine horsepower had gone from the 2 x 360HP or so in the Vimy and O/400 to around 2 x 570HP, but the speed seems to have remained at around 100mph, albeit with a somewhat heavier bombload. In parallel, HP produced their twin engined Hyderabad and later Hinadai which had a bombload of around 1500lb and with 2 x 440HP Jupiters the speed increased slightly to around 122 mph. Both the Virginia and Hinadai were replaced when the last RAF biplane bomber, the HP Heyford, arrived in late 1933. This rather curious looking machine had a pair of 575HP R-R Kestrel engines and carried a bombload of between 1500lb and 3500lb at speeds up to 142mph, but the days of the biplane were numbered with specifications issued in 1932 that would result in the Hampden and Wellington, and a 1934 spec that led to the Whitley. The next Handley Page bomber after the Hereford was therefore the Hampden which entered service in 1938, 20 years after the O/400 and had a normal bombload of 4000lb, a max of 6000lb over short ranges, and two 1000HP Pegasus engines giving a top speed of 254mph. Once more the threat of a future war had driven rapid improvements in performance. As you may have guessed, this rant is a lead- in to a few “family group” photos! 15 years after the O/400 the Heyford entered service - this is the Matchbox Heyford Mk II from 1935 and is painted in NIVO. Just 4 years later the Hampden arrived - this is the old Airfix kit. It looks tiny by comparison with the O/400, which would not be matched in size until the arrival of the Stirling, Halifax and Manchester. Not a bad kit though I have had a few alignment problems, partly due to the modular construction method Airfix suggest. I am fairly pleased with the result. Pete5 points
This leaderboard is set to London/GMT+01:00


.thumb.jpg.d17ff607fc7e89ed057e63fcb6f2a888.jpg)
