
Leaderboard


Popular Content
Showing content with the highest reputation on 20/06/22 in all areas
-
The subject is supposed to be easy, the smallest jet in the world, but it can be made difficult. On the basis of two Airfixes I built a serial T.1 and converted the second one into HAL Ajeet. I used some extras: cockpit and control surfaces from CMK, PE Eduard, whells SBS, pitot Master, decals from Aeropoxy (Ajeet). HAL Ajeet - reworked wings with different mechanization and controls (different wingspan and string), reworked fins, reworked intakes with gun, reworked cockpit section with radar, riveting two models Anyway, the photos show it all, invite28 points
-
Hello! Not including much info on this build, one of my fastest yet (17 days) and I'm very happy with it. WIP thread: anyway, without further ado, here she is, EE Lightning F.2A XN793 92Sqn. RAF Gütersloh, ~1972: Here she is with my other two lightnings!25 points
-
Hello everyone. VMA-311 ‘Tomcats’ April 1985. After just a 40 year wait I’ve finally got myself a Scooter that was knocking around as I was growing up. With the Hasegawa kit not being really available for some time, the box art of the Hobby Boss kit was a good selling point for me. Sadly everything went down hill from here on in, with my build strewn with errors and too many accessories it’s made me feel a little stupid. 🤨. The M ‘Mike’ boxing is frankly a disaster zone, it’s missing the best part of two sprue’s, the clear parts missing are the anti-col lights, and a good chunk of aerials and air scoops. The wings don’t come with the prominent ‘slats’ which is a deal breaker for a lot of modellers. It comes with a vast selection of weapons, sadly not applicable for this A/C. Accessories used: ResKit wheels. (Didn’t enjoy these rascals.) Eduard Multiple Ejector Launcher. (Lovely - but time consuming to build.) Eduard Mk 82 Snake Eye with retardant tails. (Lovely but horrible to assemble.) Eduard cockpit etch set. (Really lovely.) Attack Squadron/Arma Hobby Douglas 150 Gal fuel tanks. (Ggggrrrrr - never again.) Quick Boost 48-574 F-105 Thunerchief aerials. (For missing kit parts.) Quick Boost intake covers. (Lovely.) Quick Boost 48-574 Kfir C2-C7 air scoops. (For missing parts.) Quick Boost refuelling probe. (I managed to snap the kit part off and couldn’t get it to stay back on.) Anti-col lights. Spares box. (Just not funny H.B 😲) Two Bobs 48092 Lo-Vis Mikes Pt I. (Out of production, really would like to see as set of 1/32 Tomcats decals low-vis.) Plus Models F-4 Phantom pilot set. (Pilot has his side arm weapon removed.) This dark and moody photo is where some of the model features became a prerequisite - intake blanks and white fuel tanks. Inspiration for paint colours and weathering. The air brakes have been depicted as just cracked as per reference photos. Many missing and much needed aerials and scoops are shown here. I’ve gone for a sun bleached weathered look. It might be just a grey colour scheme but, red intake blanks, yellow steps, blue bombs and black cat art lift things. This IPad is really struggling to create a decent photo. One of the problems with the underside, is well, it might not be seen. But I’ve given the bomb bodies a sun bleached look and a greasy grubby looking lower surfaces. The fuel tanks this time around being mostly clean. Now if I could make an OA-4M to go with this kit I’d be very happy, but Hasegawa TA-4J is rarer than hens teeth. Thanks for looking. 😉24 points
-
Hi guys, the fifth part of my Falklands war collection, starting with the British machines. The first batch took part in secret recon missions, in case of the Canberra the rumors of it flying over the Argentine have not yet been confirmed. But it certainly came close to it 🙂. The ACME missions of the 51 Squadron's Nimrods from San Felix island were also no less interesting though. Canberra PR.9, Xtrakit kit: Nimrod R1. Airfix kit:21 points
-
Unfinished, I mean, fitting out, yes fitting out, DD-445 (PK-063 / 05127) USS Fletcher: Build log here: David21 points
-
Just got the Dornier finished in time. Got to play with propblurs (photo etch replacement props that attempt to represent motion) and the water base. Nothing went entirely according to plan, but all of it was good practice for doing better next time around. Build thread here19 points
-
Greetings from Ukraine! Let me introduce a novelty of the Ukrainian company Clear Prop Models - kit CP72023 Soviet fighter I-16 type 5 of the 30s in the 1/72 scale. First of all I would like to show sprues. Sprue A. Details: Sprue B. Details: Sprues C. Represent a late type of wing. Sprue E. Represents an early type of wing. Sprue Z. As a test build, I chose a variant with Spanish markings: Model assembly. Assembling does not cause any difficulties. Everything fits together very well. Here are some images during the build process: Result: Hope you like this model!18 points
-
Many years ago - as a kid - I built a Frog Marauder: As I didn’t have the paints required I had to do the French version - but in fact it was the SAAF Marauder I preferred. So 45 years later here it is: I used the Hasegawa B-26C kit with Eduard PE interior set and resin wheels. The serial and "L" are Frog decals, the insignias are from an Xtradecal sheet. All paints are Gunze, weathered with Tamiya weathering sets, a Karisma color silver pencil and AK washes.18 points
-
Note quite finished, and no base or weathering. See build link for story of the markings. 50620293 by losethekibble, on Flickr 50620292 by losethekibble, on Flickr 50620290 by losethekibble, on Flickr 50620298 by losethekibble, on Flickr and with the one I made around 1978.... 50620294 by losethekibble, on Flickr Build here18 points
-
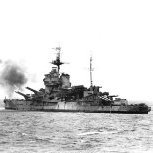
PK352 HMS Duke of York straight from the box. Build thread https://www.britmodeller.com/forums/index.php?/topic/235107082-pk-352-hms-duke-of-york/15 points
-
PK301 Aston Martin Ulster 1/32 Back from holiday and as promised here are the photos of my build. Almost entirely OOB. The build thread can be found here - Cheers15 points
-
Hello all, Here is my recently completed 1/48 Kinetic Sea Harrier FRS.1, marked as XZ451 of 801 Naval Air Squadron (formally of 899 NAS), which was credited with downing an Argentine Dagger and Hercules during the Falklands conflict in 1982. The build thread is below. Extras used included Eduard etch, Eduard mask, Neomega ejection seat, Aires exhaust nozzles, Flightpath FOD inserts, Flightpath 1000lb bomb and Master pitot tube. The paint is mainly Tamiya acrylic (XF-77 for the Extra Dark Sea Grey) with the weathering done using a mixture of Flory wash, Abteilung oils and Tamiya sets. I added some details to the cannon pods along with adding the rudder strakes and correcting a few issues with the kit. As this was an 899 NAS machine up until 4th April 1982, it felt only right to display it with both squadron patches: There are better finished models out there, but I'm happy to finally have a SHAR in my collection. Thanks for looking and stay safe Dave14 points
-
Despite the "assistance" proffered by the latest additions to Martian Towers; the latest being them deciding to have one of their rough and tumbles (claws extended) around my lower tentacles while I was trying to take them, we now have some pictures as to where things stand with the first batch of Zeppelin models. So, and with absolutely no thanks to either Nest or Tinker, here is where we are at: L.48 placed temporarily on her base, overflying the air station at Orfordness on 17th June 1917 and from whence the aircraft that were to shoot her down later that night came. Zeppelin L.31 Zeppelin L.15 (Takom kit). And Zeppelin L.21 (Takom kit). All the builds can be removed from their stands at the moment and will remain so until I have fitted the rear gondolas nad rigged the lower half of each ship. The models now live in a large and kittenproof Really Useful box and are taken out one at a time when I want to work on them. This has had the benefit of freeing up enough space on the bench for a start to be made on another Mark 1Models R Class, this will be completed as L.33of which I have a reasonable sized piece of to display alongside it. I also have made a start on a Mark 1 Models P Class kit which will be completed as L.19 of the previously discussed "King Stephen Incident". This will be displayed alongside a replica of the Karl Goetz medallion that was struck in Germany to commemorate the event. I an going to try out one or two new ideas on the L.33 build and will keep you all posted as and when I get to try them out (kittens permitting of course!). Although I have had multiple cats at any one time before, I have only ever had to raise on kitten at a time and have been completely unprepared for the bedlam that has descended upon the normally peaceful Martian abode. It's enough to drive a Martian to drink: oh, guess what that splendid Mrs Martian has placed in front of me. Thanks for looking. Parched of Mars 👽14 points
-
Hello all, another of the three projects (F-86D, TF-104G, Su-17) from the shed which have all come to completion around the same time. The kit is from the box and went together very well. It was an ebay purchase that came with a microscale sheet and a resin detail set which I didn’t use (it was for a single seater ). Had a bit of a mare with the rear end as I unknowingly got thinners onto my neoprene gloves, this stripped off the metal paint work where I was holding it while doing final touch ups. This meant masking and respraying with decals already on so it’s not as I would have liked but will have to do. It’s finished with Humbrol 27002, darkened for the rear end metalwork. The decals are from all over the shop, Microscale, Aeromaster, Fantasy Print Shop, with a few from the kit sheet. The aircraft depicted is a TF-104G from the 418th Tactical Fighter Training Squadron. Hope you like it. Thanks for popping by Pete13 points
-
I've always liked the F-111 especially since seeing it, as an Aussie kid, doing the infamous "dump and burn" manouevre. To the non-Aussies I am sure this sounds like something we do when caught without a loo at a friend's barbecue...but no, it's releasing jet fuel straight out the back of the plane while the afterburner is on, leaving a huge crackling plume of raw flame behind the plane. When I was about, well I don't know, very early 20s, my grandfather (an ex-RAAF pilot from WW2) was very ill. He and I had been to the Avalon Air Show a few years prior, and he was too unwell to come to this one. It was to end with a night display of the dump and burn by the F-111. I am pretty sure by this time Australia had the -G as well as the -C, but either way the plane that did it was a dark grey one. So I called him up on a cellphone as the display was beginning (cells were not that common in those days, I think I had bought it so I could be in constant touch with family as his condition deteriorated). He was in and out in those days, just a few weeks before he died, but he was awake enough to realize who I was and what I was doing and I basically said, with about three seconds to spare, "hey, listen to this". The F-111 ripped past at what seemed like basically no height at all, then as it pulled back and raced skywards it did the dump-and-burn. The night sky lit up like day, you could feel the heat on your face, and that thing went up like a rocket - I mean the night launch of Apollo 17 was kind of boring compared to this, you know? The whole time I held the phone out towards it and then I said "DID YOU HEAR THAT?!?" and all I could hear was him laughing happily down the phone. That was in 1995. So fast-forward to September 2020. I had just managed to get my family back to Australia from the US where we'd been having a pretty rough time of things in Washington DC. As I am sure many of you will agree, something about those long days of lockdown pre-vaccines in 2020 with all the uncertainty just prompted a huge wave of nostalgia, and this F-111 dump-and-burn episode came back to me one late despairing night after our flights had been cancelled and my then 5 year old daughter was inconsolable because she thought she would never see her grandparents again (for those wondering what that's about, it was then and almost until the end of 2021 incredibly difficult and insanely expensive to get back to Australia due to COVID border closures and their associated impact on flight capacity and ticket prices). So once we were back here after 15 years away I just decided to pay the absolutely outrageous price they wanted for it at the LHS and go ahead and build the kit. Conveniently not long after that there was the ANZAC Group Build so I joined that and made some decent progress. But because of the back story (and the insane price of this kit) I wanted to try really hard to do a good job. So I missed the end of the GB and just kept plugging away. I finished it this April just gone. My now 7 year old daughter asked to help when i was taking photos yesterday in the sun, so of course I found a way to let her help. She took a few snaps and then told me in no uncertain terms that the set up "didn't look like an airport". "Let me get my chalk Dad, you need to make some lines on the ground so it looks realistic. And we need some more planes too". Here she is after drawing her concept of an airport apron trying to plant a weed as a realistic tree in the back corner. This represents a little known RAAF bare bones base up north, where the F-111 and F-18 refuel during their missions on Exercise Bright White. This exercise is the similarly little known off-year activity between the biennial Exercise Pitch Black. This was the scene by the time she was satisfied. She even pinged me for placing that piece of equipment with the yellow hose in front of the plane - Dad! It's going to run over that hose when it drives out if you put it there! Um, good point kiddo. Anyway, while it's not without its flaws (most notably a distinct lean to one side due to the u/c being slightly out of alignment, something I have tried to hide in this images), I am pretty happy with this one. I like the personal association I have with it, and it's really one of the better models I have ever built. The very dragged out build thread is here: Thanks for looking!12 points
-
PK 109 Junkers 188 I have depicted this beautiful German warbird in a peaceful role as used by the Aeronavale (French Navy) in the late 1940s. The overall colour is Humbrol Gloss 15 blue and French decals provided by an anonymous donor (THANK YOU). I had an Italeri canopy given to me a few years ago by my friend Trevor who died young, so after a bit of fuselage modification I used it, and it is in his memory that this model is dedicated12 points
-
Good evening, dears. It's my next model.11 points
-
Afternoon folk's.My annual armour build(I really should do more) courtesy of the Sherman GB which has just ended.It's a bit of an oldie now but Tamiya's kits never seem to age quality wise.I wanted to show her with the winter wash almost worn off.Many thank's for looking in.11 points
-
PK 403 Heinkel 111 modified to depict an aircraft fitted with Daimler Benz 601 engines I just can't do something straight out of the box. For this reason I chose to modify the basic Matchbox kit by changing the engines to the Daimler Benz ones fitted experimentally. The annular radiators certainly make this aircraft look quite different from the rest. I had a lot of fun fiddling with it Above image from He 111 book by Heinz Nowarra11 points
-
Hello all, this will be my entry into this Group Build: The instructions say it was copyright Revell 1959, but there is a date stamp on the moulding which says 1988. This was a re-issue from about 2008/9 when Revell were celebrating 50 Years. I will post photographs of the box contents later, that will give you time to locate some sunglasses for the very bright green plastic most of it is moulded in! I bought this from Kingkit quite a long time ago as I was going through a bit of a nostalgia trip. A long time ago, I lived in Aden and as a youngster I had a lot of Corgi, Dinky and Matchbox cars. One of those was a Ford Fairlane and it was amazing, because if you pressed down on the front left or right on the bonnet, the wheels turned in that direction! It is incredible what pleases a 7-year-old mind! Anyway, back to the then present. At my local Model Club we had a member who was into his car models and was always bringing them along, and that prompted me to see if I could do a car too. I checked online and found two Fairlanes, one was a '64, and the other was this '59. I ended up buying both! The '64 got built quite some time ago (I will see if I have a picture) but this one was reduced to the stash. I had bought some Halfords sprays ready for this, I wonder if they will still work... I always find Group Builds to be a great inspiration, and nearly always leave my more important builds (or challenging ones) to the GB's as there is always that extra spur to get them done. This build could quite easily have gone into the 'Not My Comfort Zone' GB. Anyway, enough of that, I am really looking forward to the start of this. Al the best everyone with your builds, Ray10 points
-
Good afternoon all, here is my latest completion. The upper surfaces paints are from the AK Real Colors set for the Luftwaffe 1960s and 1970s and the underside is Vallejo Metal Color Aluminium. The stencil decals are from the Revell boxing and the main decals are from APC Decals via hobbyshop.cz. hobbyshop.cz have a number of decal sheets replicating many of the old Matchbox and Heller/Smer kit decals. They are printed on extremely thin continuous film decal paper and the colours are very opaque. They adhere beautifully on a gloss surface and react perfectly to Micro Set and Sol. Because the film is so thin they do not respond kindly to handling on the model and need to be floated into just about the right position and very gently floated if adjustments are needed, but don't try big adjustments or they'll stretch or fold in to themselves. I found out the hard way and had to purchase a second set, but they're relatively inexpensive (even with postage), definitely worth it and delivery is quicker than from some UK suppliers. The windscreen fit is appalling and lots of filling, sanding and polishing was required. Additional interior detail is limited to front seatbelts from foil and the Revell instrument panel decal; nothing can be seen of the cabin. Steps and fin aerials are from copper wire and the pitot is brass tube with NiSi wire inside. The wire aerial is Ezline Fine. There is no landing light cut-out on the kit so this was added with a little-lenses 'light' and clear tape for the cover. The forward blade aerial is a piece of plasticard and the anti-col light is from stretched clear sprue with Tamiya clear-red to give colour. Here's the model...10 points
-
Hello all, I managed to pick this kit up from a bootfair so i was expecting some issues with bit missing....and it turned out the most of the engine was missing, which wasnt a major drama but it would have been nice to be able to have this opened up. I used Tamiya paints for this one with MLT and they worked like a dream, then used Mr Colour varnishes to finish it off. It was straight out of the box with no additions. All comments are welcome but of note is there is no wire aerial attached due to travelling issues i.e. keep falling off 🙂10 points
-
Not posted for a while but quite pleased with this so here goes …… I found this kit while clearing a cupboard that hadn’t been accessible until recently for some years, I started it back in 2002 got fed up trying to do the wood effect so gave up. I decided to give it another go stripped the bodged wood effect to give the oil paint method a try don’t think it’s come out too bad. First go at rigging as well, it’s too fine but I’m not redoing it !!! I think I may have to try another one now, possibly an old Toko Hansa Brandenberg DI I’ve got in the stash somewhere. Albatros DII Jasta 24 Western Front March 1917 flown by the Austro-Hungarian ace Godwin Brumowski during his training on the Albatros Roden 1/72 kit: Reddog base : aerobonus figure10 points
-
Indeed. Of course, with my personal predilection, some aircraft simply don’t exist beyond the old Matchbox moulds. Early Lysanders, Seafoxes, and what about Heyfords and Stranraers? Thank goodness for Matchbox having the courage to produce them back in the day.9 points
-
Hi folk's last day of the GB and last one from me,109 number three this time in Slovak air force colour's with the original MB decals.9 points
-
 OK, here we go - I can't even think of a catchy title because I don't know which aircraft I'm actually going to build yet, so it's just a Surprise at the moment So, another surprise on opening the box, found a bunch of AM - the interior set maybe helpful - think I bought these around 2002 Just to prove I didn't jump before the gun (which was tempting….) And into the wash tank we go (no - I didn't buy that, my son bought it for car parts but has never used it) Thanks to @Corsairfoxfouruncle and @Troy Smith for suggestions on AM I may use the interior set above 48207 (and Troy's suggestion), and/or the 491181 (Corsair's suggestion), or bits of 49360 which is a G set for HKM - hmm decision, decisions My plan is... ...at some stage decide which aircraft to build - I like the silly bright green bits on the Belle - were they normal? Or real? The film version doesn't *seem* have them! May build the Belle exactly as depicted in the film! Put the waist doors on closed, so more or less nothing visible there, as Troy says just minimal detail required Ignore the cockpit, tail gunner and radio interiors (again I'm figuring they will be barely visible) Focus on what is actually visible through the plexiglas nose, which seems to be mainly the Norden bombsight Put most effort into the exterior The mgs do look pretty crummy, perhaps a set of metal ones, we'll see - I don't think the Eduard armament set ones will help too mucj - may look into them Well, it's all going to plan so far...8 points
 -
I really don't know where to start with this GB. There are so many kits I could enter that the GB would need to be a couple of years long at least to even make a dent. I've been building and collecting Monogram kits for many years now and the stash is well stacked with potential entries. The mint and boxed stuff is trembling at the thought that I might build a few, the restorers, part builts and builder kits are all trying to catch my eye. There's a rumblin' in that there loft! I might as well dive in with a biggie then, and go with the flow from there. Monograms Big T fits the bill perfectly. Here's my unbuilt boxed example, bought about ten years ago at IPMS Telford. I saw it as I walked into the first hall and it was mine about four seconds later. The built car in front of it is an original, found on USebay back in dial up days. That's well over twenty years ago now. The model has attended many shows over the years along with quite a few house moves and in and out of boxes and storage units. It's looking quite shabby now. Along the way, I've picked up another one, as you do. This one also needs bringing back to life urgently. Here's the sad looking models as they sit this morning. Plans are to restore my first one to factory fresh condition and bring it back to life. It deserves it. I'll be stripping the whole thing down and starting afresh with it all. I'm looking forward to rechroming everything that has dulled over the years. It will also get a store display made up for it, following the original as close as I can. I have no idea what colors they were but a bit of detective work should turn something up. Dean Milano's site will be my first port of call. The second kit will get use made of the optional grill and also go topless along with a suitable paintjob. If I manage that lot I will have finally achieved my dream state with this particular model. An unbuilt one, a built, out the box version with a dealer display and a fully built and painted one. Deep Joy. There are a few more I have in the 1.8 scale range that need similar treatment. The only thing stopping me from firing up another couple of threads is the room these things take up. If this pair turn out OK, more will follow. More as it happens. Tony8 points
-
It's done. The "in progress" stream can be found over in the, well, "In Progress" topics. It is basically OOTB, with the only changes made were "busying up" the basic kit supplied interior and opening up the drivers little armoured hatch in the glacis plate. I could have wired the smoke projectors or put the fuel line on the spare tank, but like I said, it's OOTB. I built it mostly to test out doing the Malta "pseudo rock wall" camo pattern. The figure is from the Tamiya Humber a/c kit as the Bandai kit, which I got from a vender at a show, did not have the crew figures. Anyhoo, done and done.8 points
-
From components of 2 Hasegawa P3 kits and OneManModel components, here is the finished model The build detail is here if anyone is interested Untitled by Harry Follas, on Flickr Untitled by Harry Follas, on Flickr Untitled by Harry Follas, on Flickr8 points
-
Not sure if updates are still of interest to others...but work is still progressing. First up...the rear radiator stone guards. In the pic are the three iterations...1 (far left) too big in scale and size...2 (middle) better scale but too small in size...3 (far right) good scale and size..... Then it was time to get all the bits and fixings onto the sub frame...including the above stone guards..... Another area to receive detailing/modifying...the rear wing stays. Instead of using the plastic stubs (moulded onto the gearbox for mounting) they now have proper bolts as per the 1:1...and the kit plastic cross brace has been replaced with metals and end fixing bolts..... Along with the above...work continues on the engine/gearbox assembly. I had to revise and remake the brake lines...the first attempt interfered with the wing stays!...ooopsie. The first of the metal tie bars are bolted in place...along with some added cables and wires..... Still a lot more to be added...but beginning to take shape. to be continued............8 points
-
PK-35 Curtiss SBC-4 Helldiver USS Enterprise 1940 Who needs low-viz markings? In the late 30s there was no mistaking the arrival of US Navy aviation! This has been a great build, Matchbox kits always went together well back in the day. Many thanks to @Marklo who kindly sent me a home produced front canopy which was missing from my kit. Cheers Will8 points
-
Like Giorgio I invested in some of the Limino following in Bill's footsteps - which is a clear resin and I think it'll be jolly useful; but as Bill said I used the printing resin - Mars 3 for the use of - for the windscreens: Printing resin (500ml) plus some decanted into a sealable test tube, Limino bottle (60 grams) and some Mr Surfacer 1500 for the next stage.... For printing it's more cost effective to get the 1 litre bottles, but I got this 500ml just cos I wanted to see how it compared with the water washable resin I've been using. Unless/until you get your printer Terry , I can't see that it'd be worthwhile buying a bottle of printing resin. I tell you what keith, I think I'm gonna use it for a lot of the tasks I previously used super glue for. Like repairing/sharpening up the corners of wing tips/ailerons etc. Or 'Fintips' as here. Blob of resin. Cured and sanded: In my limited experience it's definitely better to only partially cure the resin (max 15 secs) before sanding; and then fully cure afterwards as fully cured resin is quite hard and takes a lot more sanding down! At the risk of repetition I'm really pleased with how well the liquid resin worked as a filler on the windscreens. I was nervous of the whole process cos it's such a noticeable and yet delicate area to work in. Anyways the next stage was to slosh some Mr Surfacer around the windscreens as a check and final blend. Post sloshing - pre sanding - Valley Hawk: Post sloshing - pre sanding - TWU Hawk: Practically no residual blemishes shown up by the Mr Surfacer. How often does that happen? (Well for me the answer is not often .... you chaps probably have quite a different experience ). And smoothed right back with Tamiya 1000 and 2000 sanding sponges (used wet) and micromesh 4000 (also wet). I've tried to show how smooth the result is by catching the light on the filled area in the following photo's - not terribly successfully (sorry): You'll probably just have to trust me when I say the result is nice and smooth On the 1:1 Hawk there's a reasonably visible join line where the windscreen frame meets the fuselage, which I think (following in Tony's @TheBaron footsteps) I'll add in after painting using a fine graphite pencil, rather than risk mucking things up/going grossly over scale by trying to scribe it in now. It's been a lot of effort on these windscreens (understatement?) - not to mention re-profiling the noses - but I'm beginning to think (hope) it's been worthwhile. So we have 2 Hawks with sharpened corners protected with paper strips and ready for.... well possibly ready for painting... Beginning to look quite pretty I think. (Also looks just a bit like everyone has banged out to avoid the imminent mid-air collision ). Or prap's I'll find summat to do on the canopys - or undercarriage or other details and put off the scary business of painting just a bit longer.... We're off the Canada (Nova Scotia/Newfoundland) for a week and a half next weekend. Wouldn't want to start something I couldn't finish before then after all8 points
-
Here's the placeholder offering whilst I get on with the DC-5 in the Turning Japanese GB. It's a 2005 re-pop of the kit first released in 1968. It's a Tom Daniel design. Why this you might ask? Well as a child who was a loyal Airfix customer, these odd American designs always had my attention, however I was never able to save enough of my pocket money to close the deal. The November 1969 issue of Scale Models has an advert from Argyle Models in Glasgow where the Monogram 1/24 1955 Chevy is 32 shillings, and BMW Models had both the new Airfix Harrier and Cessna 0-2 at 2/9 - what was a boy to do? So for my first 1/24 'Funny' it's this fella. Moulding and decals look good, no doubt the chrome will have to be stripped, and I've got a box of 1/24 aftermarket somewhere that will hopefully let me detail the engine up. I can't wait to get stuck in.7 points
-
I started this kit about 5 years ago and was 99% finished when life events put it on hold and I didn't go back to it as it was stored away at my parents house. All finished now, it's my second GWH Mig-29 kit and I'll be doing more as there great kits. Begemot decals used and everything else is OOB. Edit; In fact just realised I started this build as part of a double Fulcrum build for the Mig-29 Group Build in June 2017!🤦♂️7 points
-
Today was an awesome father's day treat, with nine, totally unexpected sportscars at the Bicester Scramble. They comprised three Lolas; a Sauber C11, the 1988 Le Mans-winning Jaguar XJR-9; a road-legal Porsche 962, a Peugeot 908, Bentley EXP Speed 8 and a Gibson/Morgan. There were also a few GTs sprinkled in there, but here are the sportscars first...7 points
-
I'm loving this GB already because of the variety of topics coming up; 3 sailing ships already @airfixpeter I assume something went wrong with the tinternet but if you're really do a beagle double build that's 4 ships early on I'm not convinced about this GB because taking classic as pre 1989, I'd already been married for 2 years by then which makes me older than classic and likely to turn up in kingkits salvage scrapyard section any day now 🫣7 points
-
turned a funny colour (as long as its not Olive Drab, nobody will get the right shade )7 points
-
Hi to everyone! Time for another update on my 1:72 scale Spitfire....... I could have quite easily glued the two fuselage halves together but somehow I knew I couldn't resist having a go at detailing the rear!....I have actually done this before on a 1:24 scale Spit years ago and was very pleased of the out come ,so I just had to see if it was at all possible in such a small scale! If I was to add detail then I had to make it a cutaway model. As I did years ago I cut away some of the port side of the rear of the fuselage leaving the starboard side in tact! Most of the scratch built detail will be on the inside of the starboard fuselage and so it was time to don my big boy strong glasses and get to work...starting with the ribs! With the two halves together...this is what it will look like.... Here is the battery!....... The rest of the detail was then scratch built. All done except for the control cables........ Time to paint the parts. Before painting I added the control cables made from fuse wire.....it was almost a challenge too far!....Aluminum for the interior walls and a few other colours thrown in to bring out the detail! Here's the inside of the port fuselage half showing the oxygen bottles and the teeny TR9D radio....blink and you'll miss it!! Here it all is with the two halves temporarily tacked together....... ......and of course the scale shot! That is as far as I have got so far! I am trying to get it done as far as I can so that I can pack it in a packing case as I am in the process of re locating back to Blighty after years of living in Bulgaria!....I will miss this work shop of mine but as long as I have a work desk plonked somewhere in my flat........model on! Thanks for looking in and see you on the next post! Cheers Fozzy7 points
-
My entry for this GB is Revell-Monograms Grumman F3F, first produced as the civilian Gulfhawk in 1960. So the moulds are older than me, just! First surprise was discovering two kits in the box when I opened it, I don’t remember buying a second copy. One (loose) in silver plastic and one (bagged) in grey. Looks like the original decals have had it, so will be using the Yellow Wings aftermarket decals which I also don’t recall purchasing. As I said the kit was originally released as the Gulfhawk, from reading around now the internet it appears Monogram did update the the cowling to depict the F3F-3 but didn’t update the upper wing. The F3F had a 32’ wingspan compared to the Gulfhawk’s 28’7” wingspan. Lone Star Models did make a wing correction but doesn’t seem to be available any more. A change to the cockpit is also required as the as kit retains the DF loop behind the pilot's head as fitted to the Gulfhawk but the F3F-3 has a headrest there instead. Got some thinking to do, do I use the second kits to extend the wings or do I except them as is and build them both (easier to fit into the cabinet). Decisions, decisions. I do like the instructions from the older boxing.6 points
-
Thanks for watching and have nice weekend6 points
-
Not perhaps bought by me but as Father's Day was yesterday, whilst my wife and I were returning from Portugal our youngest son left this in the lounge with a card... And whilst away I saw this and bought it for further inspiration already having a few VW kits on the shelf..6 points
-
The 2K clear went on this morning. I'm continuing to work with a mix of full gloss and semi-gloss as I want to bring the full gloss down a bit. This could still be a little less glossy, but I think it will do.6 points
-
A big thanks to Pat and Dave ( @JOCKNEY and @Rabbit Leader ) for running this GB. It was great to see so many vintage kits getting built and to see the different approaches taken to them by the builders. Although I only got one build done this was all I'd committed to because we moved house right in the middle of the the GB's time period. I'd have liked to have done another, possibly a Skyray or Northrop F-5, but I can always have a bash at those another time when I can actually do some kit-ruining. The Meteor I built was full of frustrations but I was quite pleased with the end result, even if the model is 30% filler and 15% swearing. It was good to build alongside you all and to look through the gallery at all of the finished articles was a real pleasure. Thanks, JRK6 points
-
Dear all, Well that seemed to go really quickly!! Thank you all for your support of this GB, plus your kind comments, but I am sorry some of you weren't able to finish in time. If you didn't manage to finish in time, please don’t stop building. You can continue to post in the WIP section here or ask a moderator to move your build thread to the Armour WIP section. I will try and get a poll up and running over the next couple of days (hopefully today, if I get time). So please keep checking back and please take the time to vote when the poll appears. Thank you to Dennis for his kind help as co-host. I haven't had as much time as I would have liked to spend hosting, so Dennis' help has been invaluable. Thank you Dennis! Finally, well done to everyone who got their build into the Gallery! I reckon our Gallery has one of the finest collection of builds of any of the STGB! Let's do this again sometime! Kind regards, Stix PS - At the moment, as far as I can see, there is only the Leopard STGB that could possibly get into the GB calendar for next year! If we want to keep these AFV STGBs running please make sure you vote for that one in the bunfight at the end of the year.6 points
-
When I started this thread I did mention that I was not sure if I had another model in me. After my last update in January I tackled the sideskirts but by the time I had them sorted and was confronted by the tow cable clamps I suddenly lost interest. So the poor little thing has been sitting neglected waiting for the day when I can muster up some enthusiasm. Unfortunately the jobs that need doing are ones I dont want to do! The engine deck mesh covers, the aforementioned tow cable bits and the headlight assemblies are the major jobs. The other stuff is really just fiddly bits like the drivers hatch stay and guides, rear view mirrors and the like. I have gathered six potential crew members and a choice of heads/headgear but I am hoping to get some definitive evidence of the gear they would have worn before tackling them. So I decided to assemble the bits I have got in the hopes that it may just give me a push in the right direction. Decided the Tamiya driver deserved change from being stuck to a sprue so let him give it a go but resisted the temptation to go Brrmm, Brmmm!6 points
-
Yes, and I love it for the sake of simplicity and the absence of natural beauty in the system! "By definition, Nr. 36 AWG is 0.005 inches in diameter, and Nr. 0000 is 0.46 inches in diameter, or nearly half-an-inch. The ratio of these diameters is 1:92, and there are 40 gauge sizes from the smallest Nr. 36 AWG to the largest Nr. 0000AWG , or 39 steps. Each successive gauge number decreases the wire diameter by a constant factor. Any two neighboring gauges (e.g., AWG A and AWG B ) have diameters whose ratio (dia. B ÷ dia. A) is 92 39 ≈ 1.12293 , {\displaystyle {\sqrt[{39}]{92}}\approx 1.12293\;,} while for gauges two steps apart (e.g., AWG A, AWG B, and AWG C), the ratio of the C to A is about (1.12293)² ≈ 1.26098 . The diameter of an AWG wire is determined according to the following formula: d n = 0.005 inch × 92 ( 36 − n ) / 39 = 0.127 mm × 92 ( 36 − n ) / 39 . {\displaystyle d_{n}=0.005\;{\text{inch}}\times 92^{(36-n)/39}=0.127\;{\text{mm}}\times 92^{(36-n)/39}~.} (where n is the AWG size for gauges from 36 to 0, n = −1 for Nr. 00, n = −2 for AWG 000, and n = −3 for AWG 0000. See rule below.[a]) or equivalently: d n = e ( − 1.12436 − 0.11594 n ) inch = e ( 2.1104 − 0.11594 n ) mm = ( 0.324860 inches ) ( 0.8905287 ) n = ( 8.25154 mm ) ( 0.8905287 ) n . {\displaystyle {\begin{aligned}d_{n}&=~e^{(-1.12436-0.11594n)}\,{\text{inch}}&&=~e^{(2.1104-0.11594n)}\,{\text{mm}}\\&=~\left(0.324860{\text{ inches }}\right)\,\left(0.8905287\right)^{n}~&&=~\left(8.25154{\text{ mm }}\right)\,\left(0.8905287\right)^{n}~.\end{aligned}}} The gauge number can be calculated from the diameter using the following formulas:[c] Step 1 Calculate the ratio R {\displaystyle \,{\mathcal {R}}\,} of the wire's diameter d {\displaystyle \,d\,} to the standard gauge (AWG #36 ) R = d [inch] 0.005 inch = d [mm] 0.127 mm {\displaystyle {\mathcal {R}}={\frac {\;d_{\text{ [inch] }}\;}{0.005\,{\text{ inch }}}}={\frac {d_{\text{ [mm] }}}{\;0.127\,{\text{ mm }}\;}}} where the middle expression with d [inch] {\displaystyle \,d_{\text{[inch]}}\,} is used if d {\displaystyle \,d\,} is measured in inches, and the right-hand expression with d [ m m ] {\displaystyle \,d_{\mathrm {[mm]} }\,} when d {\displaystyle \,d\,} is measured in millimeters.[d] Step 2 Calculate the American wire gauge number n using any convenient logarithm; pick any one of the following expressions in the last two columns of formulas to calculate n; notice that they differ in the choice of base of the logarithm, but otherwise are identical: n = − 39 log 92 ( R ) + 36 = − 39 log 10 ( R ) log 10 ( 92 ) + 36 = − 39 ln ( R ) ln ( 92 ) + 36 = − 39 log e ( R ) log e ( 92 ) + 36 = − 39 log 2 ( R ) log 2 ( 92 ) + 36 = − 39 l o g B ( R ) log B ( 92 ) + 36 , {\displaystyle {\begin{aligned}n=\;-39\log _{92}({\mathcal {R}})+36\;&=\;-39{\frac {\log _{10}({\mathcal {R}})}{\;\log _{10}(92)\;}}\,+36\;&&=\;-39{\frac {\ln({\mathcal {R}})}{\;\ln(92)\;}}\;\;\,+36\;\\\\&=\;-39{\frac {\log _{e}({\mathcal {R}})}{\;\log _{e}(92)\;}}\;+36\;&&=\;-39{\frac {\log _{2}({\mathcal {R}})}{\;\log _{2}(92)\;}}+36\;\\\\&=\;-39{\frac {\ log_{B}({\mathcal {R}})}{\;\log _{B}(92)\;}}+36~,\\\end{aligned}}} In general, the calculation can be done using any base B strictly greater than zero.[e] and the cross-section area is A n = π 4 d n 2 ≈ ( 0.000019635 inch ) 2 × 92 ( 36 − n ) / 19.5 ≈ ( 0.012668 mm ) 2 × 92 ( 36 − n ) / 19.5 . {\displaystyle A_{n}={\frac {\pi }{4}}d_{n}^{2}\approx \left(\,0.000019635{\text{ inch }}\,\right)^{2}\times 92^{(36-n)/19.5}\approx \left(\,0.012668{\text{ mm }}\,\right)^{2}\times 92^{(36-n)/19.5}\;.} The standard ASTM B258-02 defines the ratio between successive sizes to be the 39th root of 92, or approximately 1.1229322.[3] ASTM B258-02 also dictates that wire diameters should be tabulated with no more than 4 significant figures, with a resolution of no more than 0.0001 inches (0.1 mils) for wires larger than Nr. 44 AWG, and 0.00001 inches (0.01 mils) for wires Nr. 45 AWG and smaller. Very fat wires have gauge` sizes denoted by multiple zeros – 0, 00, 000, and 0000 – the more zeros, the larger the wire, starting with AWG 0. The two notations overlap when the 2 step formula for n , above, produces zero. In that case the gauge number n is zero, it's taken as-is. If n is a negative number, the gauge number is notated by multiple zeros, up to just under a half-inch; beyond that point, the “wire” may instead considered a copper bar or rod.[a] The gauge can be denoted either using the long form with several zeros or the short form z "/0" called gauge "number of zeros/0" notation. For example 4/0 is short for AWG 0000. For an z /0 AWGwire, use the number of zeros z = − n + 1 for n < 0 , {\displaystyle \;z=-n+1~{\mathsf {\text{ for }}}~n<0\;,} and similarly n = − z + 1 for z > 0 . {\displaystyle \;n=-z+1~{\mathsf {\text{ for }}}~z>0~.} in the above formulas. For instance, for AWG 0000 or 4/0, use n = − 4 + 1 = − 3 . {\displaystyle \,n=-4+1=-3~.}" and "Rules of thumb The sixth power of 39√92 is very close to 2,[4] which leads to the following rules of thumb: When the cross-sectional area of a wire is doubled, the AWG will decrease by 3 . (E.g. two AWG Nr. 14 wires have about the same cross-sectional area as a single AWG nr. 11 wire.) This doubles the conductance." It is so much easier than the metric system, but there is next to no reference to the magical number 12 in the system and it would have been so much nicer to have a system corrseponding to shot guns https://en.wikipedia.org/wiki/Gauge_(firearms) Something like 12 x 12 divided by the number of 1 inch long drill bits needed to weigh as much as a lead ball that fits into a 1/2 inch (outer diameter) pipe ...6 points
-
Hello Everyone... Welcome to the Revell/Monogram Classic group build. This build is open to anything produced by Revell, Monogram, and Aurora from their creation as corporations to our cut off date of 1989. 1. A 'WiP' thread for each model with regular updates showing your progress within the GB timescale is required. 2. As in all classic builds any kit from Revell, Monogram, and Aurora are allowed. Of course all scales, mediums, aftermarket, and other goodies will be allowed. This includes re-issues post 1989, so long as the original kit was issued prior to the cut off of 1989. 3. Please keep comments within these threads respectful. If you can't be nice then please be quiet. 4. If you have any issues with anything or anyone please bring it to stevej60 or myself. We will attempt to resolve them. If this fails Enzo Matrix or another Moderator will get involved. 5. A gallery is available for the display of models completed within the GB timescale. Please limit the number of photos to five for each subject. 6. No Buying, Selling, or trading in the threads. There are dedicated locations for this. Positively no exceptions ! 7. Do not hesitate to ask questions about anything either Steve or myself will try to get you an answer as soon as we can. 8. Last but definitely not least, Please have fun, finishing is always nice but not important. We want you to enjoy your time here in the group build. THANK YOU THE HOST’S6 points
-
We are on our 10th page of builds in the Gallery, an unbelievable achievement everyone Cheers Pat6 points
-
Tamiya 1/35 M4A3E8 "Easy Eight" with Miniart US Tank Crew. George6 points


.thumb.jpg.ba34a9f6ddce411193946dbdcc7b5fe8.jpg)


.thumb.jpg.cfc129272ffec824439b15e6013d5952.jpg)


This leaderboard is set to London/GMT+01:00