Leaderboard
Popular Content
Showing content with the highest reputation on 31/05/22 in all areas
-
This build of the 1/72nd Revell kit is rather unique in so far as it is my first ever try at a civvie airliner and the first attempt in forty years at a 72nd model.................... (my eyes are not the same any more!) The build of this well engineered kit went well with a lot of interior parts omitted, as they are invisible from the outside anyway.. Kitchen and Bare Metal foil were applied overall except for the painted top fuselage and blue of the livery. The South African Airways decals that came from Transport Wings are laser printed and special care had to be taken during application. Finally the whole lot was covered in two coats of Future. It was a most enjoyable project but I doubt if I shall tackle a 72 scale again........🤔 Cheers, Etienne.45 points
-
Hello fellow Britmodellers, this is my first completion of the year, and my first build thread in a while that actually leads to the Ready for Inspection section. It's the new 1/72 Arma high back Mustang kit, and it definitely lived up to expectations. It's depicting famous Polish ace, Jan Zumbach's Mustang III when he was commander of 133 Wing. Thanks for looking!32 points
-
AIMS 1/48 Do 217 N-2/R22 conversion Hi everyone, well just did a little everyday with gritted teeth (due to bad hands) but it is done. Thanks to ICM for such a nice N-1 kit and thanks to CMK for their fantastic Navigation lights. Thanks also to Gas Patch for their wonderful FuG 202 set - ok the receivers are not to scale thickness wise but as good as it is ever going to get without using thin wire! My model is finished as 3C+HR of 7./NJG 4 using decals form AIMS 48D022 and using mostly Mr Paint colours. Please note that the Yellow 3rd Group stripe above the NJG badge cannot be seen in the photo due to angle of photo but is on sister ships. Spinners also out of view in photo but again sister ships have them in the Staffel colour. Please also note that 3C+HR appears to not be using the flash eliminators on the 4x upward firing MF 151s and finally note that the photo shows 3C+HR with white prop tips! This can be seen on Do 217 N-2/R22 3C+IP that landed at Dubendorf and can also be seen on a Bf 110 G-4 C9+CB - in both cases tips are white only on the back and so I have made the tips white also only on the back of 3C+HR. Thanks for looking31 points
-
Eduard kit + Eduard photoetched set + Eduard resin wheels. Regards, Alex, Russia26 points
-
Finally finished for your viewing pleasure, Italeri's 1/48 H-21 Flying Banana. Mostly OOB with the BigEd H-21 P/E masking set. Some extra decals from my spare box to give this little chopper Edwards AFB Test Center Rescue Chopper livery late 1950's. Paint a mixture of Model Master, Tamiya, and AK Interactive. Lower portion is Bare Metal Foil Chrome. [ You can find the WIP here: Thanks for stopping by and having a look see. All comments, suggestions, and critiques' are always welcome.19 points
-
Thanks James, Steve, Giorgio, Ian, Biggles, Dennis, Johnny, Phil, Roger, Simon, Rob and John for the birthday greetings! Many treats were had… Now you two, move along there, nothing to see here… Cheers Pete You obviously needed more tools: Despite BMers suggesting I could find 'things the right diameter' it was not to be, so these cheap things got ordered. Just right for the tricky bendy bits: Completed just now: Right, that's enough of that birthday diversion, back to the B-17s.15 points
-
I reviewed this model and as I didn't even finish a single complete kit last year, I wanted to get at least a couple done this year, which I've now managed It's the Dora Wings Vultee Vengeance Mk.II in 1:48, and it was painted up with Gunze Mr Color of the Aqueous and the other ones (I forget the name - they start with C, rather than H). It's pretty much OOB apart from a few bits that I lost and had to replace by scratch-building them. I'm going to have to have a word with that wormhole on my workbench soon Anyway - it's picture time! Note: the tail-wheel went for a lie down just before I took this pic. ...and that me old dears is it. I hope you enjoyed looking at the pics as much as I did building the kit, and if it encourages you to pick one up, just go for it. The fit is good, the finish is excellent, and it's a doozy of a kit of a weird and ugly looking aircraft, which is probably why it appealed to me You can look back over the build here if you're curious about any aspect of it Next up is the painting of the Special 1:48 Hobby V-1 Reichenberg and the delayed completion of the Eduard 1:48 Zero from the tail-end of last year. if you can bear to watch along, I'd be glad to see y'all14 points
-
Gah, I left out a word! Please note in your copies that the sentence should read "What would happen if someone who'd watched far too many Marvel movies decided to spend one hundred and twenty-six million dollars to make the biggest, dumbest knock-off of Back to the Future they could conceive of?" I didn't hate it, but I'm very weird about movies, since finding ninety-plus minutes of uninterrupted linear time is very rare for me, and due to some defect in my brain I prefer to do only one thing until it's done and then do another thing, and that much time out of an evening pretty much shuts down most "other things". Also, my taste in movies veers to extremes: either very (well, maybe only pretty) good, or very, very, very, very bad. Also! I completely forgot, what with all the impalement, I made my normal Memorial Day trip.13 points
-
Thanks Terry! As mentioned above. all I did was glue it on. Got the landing gear attached: And added the fabric gun covers using painted tissue paper: Sorry, I didn't do a very good job documenting the final steps, but they included: - Desaturating the decals with chalk pastels applied with a cotton bud - dry brushing the exhausts with a little grey and then dry brushing the shiniest roundel once the mix was right - weathering the wing roots with poster paint - dabbing each of the nave lights with a chrome paint marker and then going over that with a Sharpie - toothbrush bristle aerial - probably some other stuff? But she's done!13 points
-
Indeed, a weekend spent with Cookie is something to be savoured. One of my very happiest memories. Mrs P, on hearing the two of us talk together before leaving for the UK, remarked with disgust, "oh god, there's two of you," but this is very unfair to Cookie who is much nicer, handsomer, and more talented. It's really kind of unreal, they seemed almost not to have cared at all. But I guess if frie jags were so rewarding professionally, and until Spitfires showed up in the desert, so nearly entirely devoid of risk, why not? The RAF on the other hand reverted to what it had learned in the 1914-1918 war, accepting hideous losses of single-seaters to allow the tactical aircraft to accomplish their missions. Anyway! Long weekend, in every sense, including not one, not two, but three visits to my parents' house, which always age me a few years. We went yesterday for a belated birthday dinner for Mrs P which she neither requested nor wanted, then out of noblesse oblige, after folding all the laundry and watching Das Untergang, I went over again that same night to see a movie with my folks, The Adam Project, which could best be described as "What would happen if someone who'd watched far too many Marvel movies decided to spend one hundred and twenty-six million dollars to make the biggest, dumbest knock-off of it they could conceive of?" Then today we went over for much of the holiday afternoon, and I got to see Winston flail into my mother so hard that he drove a knitting needle two inches into her forearm, which ranks pretty high on the list of damndest things I've ever seen, and is just part of his continuing ability to (a) exhibit a strong entropic field, and (b) to inflict grievous bodily harm on my mom, whose occipital he fractured on a prior occasion with a headbutt and who once tripped over him and broke numerous bones. My mother is in astonishingly poor health, but even so, I didn't even think it was physically possible for a knitting needle to penetrate human skin unless shot from a railgun. That marvellousness aside, I did get a smidgeon of time to work in the Grotto, mainly wrestling with the Eduard photoetch, which is pretty gnarly. I finally got the seat to this point only after accidentally pulling it apart and having to start over almost from scratch, a hideously frustrating experience that saw the foundations of the house sent aquiver by a steady stream of mighty oaths. The photoetch landing gear wells are especially stressful, because large amounts of material need to be removed from the wing inboard of both bays, which, I mean, ha ha, what could go wrong? Using a pencil, a scalpel, and my trusty micro-chisel, I had to hew away quite a bit of stuff for very dubious gains, and I very much doubt I'd ever bother with this again. Mercifully, the fit of the kit parts is good, so all you need to do is hack away until you can get the PE bits in (without destroying the wing), with not a ton of other things to worry about.13 points
-
I've just finished this lengthy project and posted my finished pics way, way down in the 'Other Modelling Genres/Locos, Trains and Layouts' where hardly anyone ever goes. As a wee lad growing up in Scotland I saw a few of the P2's in the late 40's and 50's (yes, I'm old) and always liked the look of them. Having already built two display models of (to me) Gresley's finest designs Flying Scotsman and Union of South Africa I talked myself into doing a Mikado P2. This is a 'never was' engine so some liberties were taken and I've named it after a famous Scot as all of the class were. My original idea was that I'd 3D print all of the fiddly 'motion' (the rods and levers that go round with the wheels) and hand make everything else. Well, I couldn't get the plastic 'motion' to look like metal ... my painting skills aren't great and I decided to just make it all from scrap real metal as I did for the other two engines. In the meantime I'd gotten pretty handy with the design software Fusion 360 and started printing various bits ... cab, all the wheels, tender etc and by the time I was done I'd printed the entire engine and made real metal motion ... the exact reverse of my plan! As Robert Burns wrote ... the schemes of mice and men gang aft a-gley. Here's just a couple of samples for you. More are at the above named page. Frank12 points
-
I have had this in the stash for the last two years and have finally found the will to finish it.10 points
-
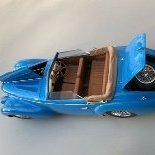
PK-452 Rolls Royce Phantom 1 (1928 Rolls-Royce 40/50HP Phantom I Sportsman Saloon) Wip here:10 points
-
An update from the trenches, small though it may be. Life has really been getting in the way around here recently but I think I have it beaten... almost. The basement renovations are complete... almost. Tiles have been laid in the past week. I fitted the toilet back after the bathroom was tiled only to find that the shi... sewage pump had packed in . I fixed it last time (a few years ago now) but after these last few months I wasn't about to open up that hole again so called the plumbers - the good one's, not the one's who attempted to do the bathroom. Once that was all taken care of I had to fit a new storm door on the walkout, only to find that when the storm door was closed, there wasn't enough room to close the outside entrance to the basement. . Off it came and I had to build out the whatever it's called of the door frame to create enough space for both doors to live in harmony. Then the wife forced me to do some gardening. Gardening in over 90 degrees is no fun, take it from me. All I have left to do now is apply sealant around the bottom of the toilet, and fit a vanity unit. That is if I can ever find one that is affordable and doesn't look like it was made from fold-up cardboard and drawing pins. A job for another day. To celebrate still being alive after all that the family in a rare display of unity decided to go out for dinner last night. There we were, sitting on the banks of the Chesapeake Canal waiting for the starters to arrive when one of these things approached with some rather loud engines grumbling away What was it? It was one of these apparently - an LARC. Look at the size of those tires! a LARC (<- linky) which stands for Lighter, Amphibious, Resupply, Cargo. They're having a larf surely... Lighter ? According to Wikiwotsit: It could carry up to 100 tons of cargo or 200 people, but a more typical load was 60 tons of cargo or 120 people Anyways, I shouldn't really be polluting my thread with floaty things, especially noisy floaty things. So... between all the chores, other chores, and even more chores, and chores still do do, and chores still to be thought of, I managed to steal some time to get out of the basement to do some modeling of the digital kind. and I made one of these. Which goes inside amongst all these bits of wood and helps the drivers steer up in the sky. The interior is not accurate by any stretch but compromises had to be made as everything was done by eye as there was no hard data to work from I also revisited the upper wing and added the control cable pulley's which I had missed previously. then created a bunch of STL's to play with and set things a printing last night before I headed out. It was still doing its thing at lunchtime today so this evening I should see some results. All the modeling is complete with the exception of the propellor which I have been kind of avoiding as a) I don't enjoy modeling them, and b) I'm not very good at them. Those two things could well be connected. Sadly I now have to get back to work as lunchtime is over and I'm probably late for a meeting.9 points
-
Never a problem with me, I just rattle on down the rickety wrong path all the time. Consider countless silent movies with mining trucks on rocking wooden trackways and hapless folks' arms waving in the air. Describes most of my existence.😲9 points
-
My new Matchbox's model. Fairey Swortfish Mk.III 1/72 Oil cooler are resing. Pilot and radar operator cockpit are handmade. Dacal are from Revell kit. Its Swordfish NR995/G from 838 Sqn. I'm not made a RATOG rockets. I'm just lazy.9 points
-
Reini's Century Series - F-105G Thunderchief Trumpeter kit. I've built the single seater years ago, but this is the two seater SAM-hunting 'Wild Weasel' variant. Pile-o-plastic - it's a decent looking kit. I'm not really happy with the Trumpeter decals, I've had issues where they are just the wrong size, usually too large. Like the ejection seat warning markings. They are quite prominent in the real thing, but these look just way too big! Caracal seems to be making a decent looking decal sheet, so I might pick that up. Wheels and pitot tube. I do have some items still missing from this kit, mainly related to the loadout. Trumpeter's AGM-45 Shrike and AGM-78 Standard ARM that come with the kit are apparently wrong size, But I have yet succeeded in finding replacements for them. This is my earlier work on the Trumpeter F-105 kit. From years back, brush painted and all.8 points
-
Since the last update it has just been detail painting and assembly, not very exciting for posts. I looked over @CliffB's superb build of this kit found here and used the photos of the original from Bonham's site, which can be found here if you're interested, to guide the overall build. Gloss black is courtesy of Humbrol enamel Gloss 21 and the red is Mr Color C100 Wine Red. The kit 'chrome' was stripped and resprayed with Alclad Chrome and the 'chrome' trim is Bare Metal Foil Ultra bright Chrome. The tinted visors were sprayed with Tamiya clear blue to impart the errr... blue tint. Detail painting is mostly done with Vallejo, and the interior details are only just visible with a bright torch so most of the effort put in to the painting on those parts is all but invisible. The price tag on the kit box was 2:99 and I paid the princely sum of 4:45 plus postage from that well know auction site way back in 2010, when you could still get bargain priced kits there. I 'misplaced' the registration plate decals, if indeed there were ever any with the kit when I got it, so the letters and numbers are from the 1/35 Motobitz number plate decal sheet. The two chrome vents in front of the windscreen are shown facing the windscreen in both the Matchbox instructions and box illustrations, but on the Bonham's site the vents face forward; so I modelled them as per the Bonham's photos. The bullet sidelights on the wings are moulded solid, but I filed off the front end and attached Little-Lenses pieces to represents the lights. A massive 'thank you' to Pat and Dave for looking after this excellent GB, and congratulations to all who took part and turned their boxed Matchbox classics in to great models. More photos in the Gallery.8 points
-
There are many famous gaps in the world. Heavitree in Australia, Manawatu in New Zealand, Kali Gandaki in the Himalayas, Cumberland in the United States, Birling and Watford a bit nearer to home. Perhaps, one day, scholars will wax lyrical about the Great Valom Nacelle Gaps. I knew the fit would be, let’s be charitable, a bit difficult. I knew there would be some filler required. I didn’t expect to be able to virtually drive a coach and horses through them! Rather than spend ages carefully reprofiling the nacelles to fit the wing shape - obviously the best answer - I ended up with brute force, strong pegs and lots of liquid cement where the things touched the wings. It’s going to take a while to make joints good, so perhaps revising the shape might have been the better option after all. One set of undercarriage had to be extracted, though this wasn’t anything to do with the gaps. It was because some eejit had glued it in at the wrong angle. After the fairly good run over the weekend, then, perhaps it’s time to put it all back on the Shelf of Doom for a while.8 points
-
Thanks. 😇 I’ll strive to fix them down in the future. Just in case. Shush Penfold. 😉 True. We could all do with getting out more. And wow!!!! 🤗 I bet that was fun. It is a pilots Leather helmet. I was at Yeovil FAA. It didn’t have goggles alas. I used that “new profile pic” app. Just tidied it up in photoshop afterwards. Looks like something from MAD magazine. 😆 Just a side step. I was at my folks house the other day looking for some old toys in the loft when I came across this. Must have been nine or ten when I made it. Any ideas from the hive mind what make it is? It would be great to get the kit again and see what the difference is thirty odd years later. Wheels up too. With silver tyres. 🫣🫣 And all those lines. I used to paint everything in Humbrol gloss. Even dinosaurs. 😆 I’d smather them in blood. Even the herbivores. My chief bug bear when I was a kid was I couldn’t understand how you could paint the cockpit and pilot after it was finished. 😆 Now I know better. @corsaircorp I hope these gave you a bit of a chuckle. johnny8 points
-
It’s always hard to come up with something that isn’t repetitive or clichéd in this thread. ….…. …… …. … .. Nah. Got nothing, I second the foregoing comments. 🤷♂️8 points
-
See you in a week and a half or so then G I know. I was practising an overly subtle form of diversionary self-deprecation. Sometimes it’s possibly to be just too British, even for the British….8 points
-
Some time this afternoon to glue some bits together. The clear parts have been masked using the supplied vinyl masks. A little bit of filler at the leading edge wing root which is probably* my fault somewhere down the line. Some may be needed on the intake joins and possibly at the forward wing to fuselage join. Thanks for looking, Cheers, Alistair * certainly.8 points
-
7 points
-
Hi all... I'm cheating slightly here, in that I'm not actually building a model of a Century Fighter, just part of one! I've enjoyed building the Eduard Instrument Panel kits, and while I expect this to be a bit more complicated, and take a bit longer, I think it's a great idea for a model kit. Here are some pics... As can be seen, there's a fair bit of plastic, and some good Instrument Panel details etc. There are decals for the IPs and Helmet, and also some "fabric" stickers for the seat belts. I reckon the key to this build will be the detail paint, getting each switch etc. just right. I've barely looked at the instructions yet, but we'll see how it goes! Not sure when I'll start either, this weekend is a busy one for me! Thanks...7 points
-
After three months, mainly trying to achieve a reasonable finish, I have completed the second of 2021's Christmas presents. As I was aiming at 1 completion a month, I am somewhat behind schedule. Anyway, this was a present from my in-laws. Tamiya's rather nice kit of the Heritage 370z. As usual with Tamiya it went together easily, most of the problems are of my own making. Negative points: A few inclusions in the paint or clear that still show after multiple reworks, at some point you have to call it a day A palmprint appears in the roof strip in certain lighting! I think it must be several layers of clear down as it won't polish out. A crack in the roof black stripe, as the decals are thick but brittle, and very grabby The black stripes are slightly pearlescent in certain lights - I clearly didn't clean my airbrush out sufficiently after silver before clearing! The orange/silver blanking decals on the headlights curled up and died, so are now absent! The headlight covers are somewhat proud at the front corner. Not sure what is wrong, Tamiya suggest "snapping" into place, but after multiple attempts I gave up as I was worried I would snap the whole thing to pieces in the process. Positive points Apart from the points above, it fits together marvellously The chrome parts are very nice, I oversprayed the door handles and wheels to better match the Heritage Edition. The mirrors look great using the stick on chrome, admittedly the rear view mirror had to be refitted several times due to carelessness. Superb tyres. Its very yellow. Here is the result: Hope you all like the cheery colour scheme! This is the sort of car its essential to wear shades to drive. Despite my moans above I have enjoyed the build, have learned some useful techniques, and have plenty more cars in the stash to apply them to! Cheers Will7 points
-
Hi, Please find the Dora wings CW-21b. A nice little kit of a not so well known fighter. Thanks to Eugen at @dora for the replacement canopy and excellent service. Paints used: -Tamiya fine surface primer -AK faded olive drab -Gunze Dark green H-73 -Highlights Tamiya Flat green XF-5 -Tamiya Buff thinned for filter -Tamiya TS-17 Gloss aluminium (underside) -Tamiya X-22 -VMS satin coat Sorry, for it being a little picture heavy. Please also find the WIP: That’s all, thanks for watching. Regards, Rob7 points
-
Dear fellow Britmodellers, here's my 1/72 Tamiya Bf-109 G6 in markings of the Romanian Air Force in 1945. Painted with acrylics from Mr.Hobby, photos by Wolfgang Rabel. I got this kit for birthday a few weeks ago - thank you, Gerhard! I built almost straigt from the box. My only additions are the headrest armor (a photo-etch part from Brengun) and the antenna under the fuselage (stretched black sprue). Markings are from DK Decals "Romanian Roundels Over Czechoslovakia" (DK72088). "Tumpi-Bumpi Flostomok" was the mount of Lt. Baciu from Grupul 1 Vanatorare, in May 1945. The Tamiya kit is clever in design and easy to build. The kits marking options, however, are rather drab, so I chose this colorful bird of the Romanian Air Force. The upper side camo was free-handed using my Harder & Steenbeck Evolution with 0,15mm nozzle. Thank you for your interest. Roman7 points
-
@Spiny as a comparison size wise, a Toyota Corolla just fits nicely into the load area Quick mock up, hopefully final fix of panels later7 points
-
So i think using the pipes that Tamiya gives you for the intake and outlet for the filters needs some work...i decided to order some surgical tube and see if i could make something a little more convincing. The original pipes have a ridged look along their length as well as segmented sections to allow for flexibility, the ridges i thought i could do with very fine copper wire glued down the length, as for the flexi segments i wasn't sure what or how i was gonna do this until i saw a advert for alloy tape....so i ordered some and went to work. The tubes ..top to bottom the bare tube ...the tube with the wire glued on.... and finally the wrap of tape going on The two smaller tubes ready for modding The two finished ones , i think they will do... the flexi ridges aren't great but better than just a piece of rubber7 points
-
Adding some more bits and pieces. The boat platforms are extremely fragile PE, if you made a mistake bending anything, there is not a second try, parts break. They look very nice at the end, though! One of the boat platform and PE ladder in place. And this platform is giving me trouble, it is already glued in place, but the issue is that on the left side of it, there is a connection to a ladder running down on the side of the funnel. Only thing, a liferaft is on the way. There was no indication for not installing the raft, and it is impossible to remove it now without damaging the funnel. The kit provides this part in PE, but Eduard´s is more complete. And the anchors in place, will benefit later of some dirt-rust effects (as will the hull) Marco7 points
-
Workbench update. The interior is comming together. Weathering, streaking, dirt deposits and the stowage/ammo are added. Radio's and equipement have been detailed. The harsh chipping you saw in earlier photo's is toned down and, for me, it looks good so far.... I dry fitted the upper hull to check if all the segments come together colorwise and to check the overal look. For now i'll leave the interior and focus on the exterior..... soon i'll start with the tracks and drivetrain. I'll keep you guys posted. Cheers! 👍👍👍7 points
-
The Tupolev Tu-104 (NATO code Camel) was an airliner developed on the basis of the Tu-16 bomber. The Tu-104 was also the second commercial jet airliner after de Havilland Comet. In the Soviet Union the plane type was widely used until the late1970’s. The Tu-104 A version was an improvement of the original prototype. The capacity of the plane grew to 70 seats, and a total of 80 of that particular model were built. The Czechoslovakian state airline, ČSA, acquired six aircraft in its fleet in 1957, and ČSA was also the only foreign airline to operate the Tu-104 in addition to Aeroflot. I built my model from an Amodel 1/144 scale, limited-run kit. Despite my doubts, it was surprisingly good in quality and detail, although I had to do quite a bit of puttying and sanding. The smallest parts, such as the antennas and pitot tubes were quite thick and ill molded and that’s why I ordered an NH Details photoetch set to replace them. I decided to build the CSA Tu-104A with the registration number OK-LDA (Praha). Since I had chosen to fill the cockpit and cabin windows, I had to get new decals and windows from the aftermarket. The BOA Decals sheet was very nice and detailed and they also had a very stylish livery to choose from. That was the scheme to commemorate the airline's 40th anniversary with the coat of arms of the city of Prague and the 40 years of the airlines' operation. There were also antenna wires that ran from the tail of the plane to the front of the fuselage. I modelled them from a 0.08 millimeter fishing line. I painted the white areas of the model with Tamiya's Fine Surface primer, which I then coated with Tamiya’s gloss varnish rattle can spray TS-13. The metal coloured areas I painted with Alclad Aluminum and I also used several Vallejo and Humbrol shades for the smaller details. This an interesting photo I took with my crappy camera from the observation deck of the Stockholm Arlanda airport in the summer of 1969. I was at that time an active 14 years old plane spotter. After a close scrutiny of the picture (where the register code is not visible) I found out that the plane, despite its similar livery to my model is not a Tu-104 but a shortened version i.e. Tu-1247 points
-
Thanks Terry [The rest of this post contains a health warning] While I'm getting all philosophical (hah!) I've been propounding a method that maintains my lifestyle. I think we all know that a 'level of fitness' needs to be maintained. If you stop maintaining it, your fitness level deteriorates. But maintenance takes time that you don't get back (except perhaps in the nursing home). I'm currently fit for nothing and feel I can maintain that for some time, if not continuously. A view not shared by my family, as shown by the birthday card my eldest sent me. I like that bear, after my own heart. Google Liz Como cards - they're a hoot!7 points
-
After a coat of aqua flat I added some AK gauzy agent to the instrument dials. Then the various parts were glued together. The cockpit sub-assembly was nailed into the fuselage which then had both halves joined together. Next I’ll be making a start on the engine. until next time as always, any suggestions, criticisms or comments will be gratefully received. rgds John(shortCummins)7 points
-
I have finally got round to doing one as I have done plenty of enterprise's not a lot of parts but I have added a lighting kit.6 points
-
The Gigants have wandered off into temporary hibernation. That is a big project and it will be prone to occasional lapses of focus. Sooo, why not crack out a few 109s. The first is a Tamiya 109 G-6 with a very slight modification. This plane had the Erla starboard cowl with its extra bump and vent. I clipped the addition from a Hobby Boss kit and shaped it to fit the Tamiya gun bump. The vent is a section of stretched sprue cut at an angle. I'm always looking for the unusual in 109 schemes (not really a challenge) and found a gem. It shouldn't be difficult, but are there any guesses out there? It's not German, but that's obvious. Bonus points for identifying the specific aircraft. 298659F2-37D6-477A-9EAC-A7184AED7E57_1_201_a by Barry Numerick, on Flickr 7714102D-F362-4877-8F8C-4065D25AD0CF_1_201_a by Barry Numerick, on Flickr 6EE80A32-BCFB-4E23-B47E-43BF65716765_1_201_a by Barry Numerick, on Flickr6 points
-
Back out to the garage and some light coats of Tamiya white with some drops of Buff added later..... Excuse the pics but the flash seems to have washed everything out and caused some glare. Just wanted to get these up tonight before we head off for Bob's Burgers. Tomorrow some ESDG. Thanks for looking, Cheers, Alistair6 points
-
Here is my build of the Matchbox PK-125 UC-64 Norseman. Finished in the markings of one used by the 490th Bomb Group, based at Eye in Suffolk. This was something I had wanted to do for ages, after seeing the profile in my Hacks - Utility Planes of the Mighty Eighth book, and this group build provided the perfect opportunity! My first group build too, but will definitely do more. Thanks to @JOCKNEY and @Rabbit Leader for hosting. Sadly ran out of time to try and do my Buckeye, but pleased with how the Norseman turned out. Built OOB, apart from Techmod decals for the serial number and code letter. Link to WIP here; 20220531_144714(1) by Dan Hardy, on Flickr 20220531_144724 by Dan Hardy, on Flickr 20220531_144731 by Dan Hardy, on Flickr 20220531_150213 by Dan Hardy, on Flickr 20220531_150756 by Dan Hardy, on Flickr6 points
-
The Quickboost resin engine was removed, razor-saw, from its casting block and holes were drilled in preparation for adding the ignition leads. I had to modify the kit part that the engine will sit on. Small strips of plastic tube were cut to length and glued in place to depict the push rods. Thin lead wire was then added for the ignition leads. The final resin pieces were attached and everything was then given a coat of Stynylrez black primer. Next I’ll be adding some paint to the engine. until next time as always, any suggestions, criticisms or comments will be gratefully received. rgds John(shortCummins)6 points
-
Thanks Cookie, for both comments Oh PC, you are awful… wait! I was about to quote Dick Emery (oh, no, now I've used a…) but I fear that someone will read the post in years to come and cancel me Of course it's unlikely they would use their real name 'cos critics are rarely among the brave, those cold and timid souls. * Very kind of you, as usual. I shall look forward to the postie with bated breath (whatever that is). The Mandrels are, like most of my tools, a good compensation for cack-handed people like me who can't model without help. Lots of it. Both from that place that people, for some reason, won't name but make reference to long rivers in South America. Branded 'The Beadsmith'. Cheap too. Guess where they were made? The metal ones (about £6) are well made and go from 1.5mm then 2mm and 1mm steps to 10mm. The bigger ones (about £8) don't state a size but there's a round one, a square one, a triangular one and a round one (that'll get the rugby players singing) with a swappable handle. They helped me finish The Falcon in no time at all. Go on, 'cos you're worth it! (Pity someone doesn't cancel the advertising people that are brainwashing the population…) Oi, Bufton, stop moaning and get on with those models… * “It is not the critic who counts; not the man who points out how the strong man stumbles, or where the doer of deeds could have done them better. The credit belongs to the man who is actually in the arena, whose face is marred by dust and sweat and blood; who strives valiantly; who errs, who comes short again and again, because there is no effort without error and shortcoming; but who does actually strive to do the deeds; who knows great enthusiasms, the great devotions; who spends himself in a worthy cause; who at the best knows in the end the triumph of high achievement, and who at the worst, if he fails, at least fails while daring greatly, so that his place shall never be with those cold and timid souls who neither know victory nor defeat.” - Theodore Roosevelt.6 points
-
6 points
-
Morning everybody I've achieved to scratch a more realistic rear tubular chassis to replace the kit's I made it with 0.8 mm aluminium tube sections, glued together with CA gel, and maintained in position with 0.4 mm piano wire. It wasn't a fun party ! It remains to fabricate two crossmembers, which will be glued later, and to scratch new mounting cups for the spare wheels . I haven't be capable to do better than that ! I would have liked to be closer of the real, but the design of the kit structure and the size of the fuel ank prevented me from doing so. And consequently , the wheels, even if I cheat using the 300 SL Tamiya ones, still can't be placed in the trunk . That's why I decided to cheat even more, decreasing the thickness of the tyres, removing their 2 central strips. Hopefully they ill fit now. After priming and before sanding to correct defects : With the tyres: That's all for now.. I'm tired and am going to bed Stay tuned for nexts steps6 points
-
first mud effects on the lower surfaces, I'm counting on this drying and cracking like the mud on an autumn ex on Soltau. there's more subtle layers to go on the track. the long exercises on the Soltau Luneburg extension could go from this.... (taken by me in 1981) to this back of the throat dust that gets into everything. taken in 1987 back to the model, and more subtle applications of mud to go on the track.6 points
-
Well now Ian. Maybe not; but I did make an alternative c*ck-up - albeit one that requires a certain overly-pedanticness to worry about . Which I’m pleased to report that none of you possess Exhibit one - photo from earlier: How was it missed that the retractable stopwatch mount on the rear coaming of the Valley Hawk was back to front? The real thing hinges along the flat edge and so if the 1/72 backseater tried to raise it he’d be staring at the rear of it…. When I first modelled the rear coaming in Fusion I cut and pasted the stop watch mount from the front coaming and pasted it backwards through inattentiveness. I didn’t notice it until I’d printed a few. One of em must have found it’s way into the paint pile. Quality control eh…. Swapped it for a correct one now. Exhibit two: Dunno if I’m more embarrassed about the error - or about being a pedant enough to notice it and then being bothered enough to do something about it What would I have done if I hadn’t got a ready painted correct spare…. Would I have been anal enough to print and paint a correct one? Don’t want to think about it…..6 points
-
Thanks for the kind comments Second layer of planking completed on the port side. Stbd just needs tidying I'm happy with the results In the words of Voltaire " Perfect is the enemy of good " Thanks for dropping by Kev6 points
-
See - this is what happens when I go on hols - the mods have to sort you lot …. I of course have never given a school-boy snigger when passing either of these fine Old Norse named settlements when in Orkney or Shetland, being much to grown up… Speaking of Orkney; the weather was mainly glorious (takes luck that does). Old Man of Hoy anyone? With the Stromness-Scrabster ferry photobombing to boot. It’s one of my favourite Orkney walks. Ferry from Stromness to Moaness on Hoy and then there and back across Hoy. Great views. Anyroad up. We’ve been back a week and I finally found some time time to move the Hawks (a bit) forward. Fixed the vac-formed windscreen to the printed and painted frames. Did two of each colour so I’ve got a practice piece/spare for each Hawk. They look neat enough at the mo’ and as Iong as I can keep from damaging/interfering with the internal edges of the frames where they meet the windscreen, so I don’t have to mask and re-paint those areas, I’ll be happy. Thanks Chris; I’ve got some PVA in the garage; that said, isn’t Gator’s Grip a similar sort of glue? Anywhichway my glue of choice for fixing frames various to the PETG vac forms was thin Gator’s Grip, thinned with tap water to a consistency that I could use an old flex-I-file CA applicator to apply it and leave capillary action to do its stuff. Ages ago I bought a bag-load of tattoo ink cups, which are perfect for mixing up small quantities of liquid like this. So I now have 3 canopies with the printed MDC/internal frame glued in place. 2 and a spare. At this stage I haven’t removed the little printed support links - which can still be seen in the photos at the front and rear ends of the MDC. The next task will be to mask and paint the external canopy framing. Hopefully that will finish them off nicely. The middle canopy in this photo approximates the potion the open canopies will be posed in. And after a certain amount of angsty test fitting and checking that the windscreens did indeed fit over the top, I finally glued the printed front coamings in place and dry fitted the rear ones. The fit of the printed rear coamings seems fine so I’ll just leave them in place and run some thin CA around the edges to do the fixing. Valley Hawk. Chivenor Hawk - with weapons sights. On second thoughts I might leave the rear coaming off of the Chivenor Hawk a bit longer, otherwise I can see the weapons sight support arms getting knocked off. The front ones’ll be ok as the windscreen, once fitted, will shield them from clumsiness… Thats it I’m afraid. Next job is to fix and blend in the windscreen…..6 points
-
Both my ‘63 Corvettes are done now, or at least done as far as I’m going to take them at the moment. There’s always a bit more that can be added, but now’s a good time to halt. The kits themselves are quite crude, with no chassis detail other than the one piece casting that provides everything underneath. The interior is similar, with the seats moulded into the pan. The kits date from 1963 though and are of their time. The shape though! The Corvette for ’63 was a bombshell of a car, the styling was a million miles from the earlier car. It’s one of my favourite American cars. AMT did a good job of catching the lines. It looks right from all angles to me. I can forgive the crudeness of the rest of the mouldings if the lines of the car are right. The actual modelling done by me is a bit basic. I’ve ignored the engine and underside on both builds and just worked on what can be seen. It’s the shape that does it for me here, not the oily bits. The blue car is factory stock, the gold one is somewhat modified with a tunnel rammed big block setup poking through the hood, radiused rear arches and big and little tire combo. I’ve thinned the wheel arches right down, shaved the screen frames back a fair bit and added new glass using overhead projector sheet clear film. It’s better that the kit glazing, but not perfect. Properly fitting moulded screens are still eluding me. The blue car got replacement wheels and tires. The wheels are recast Airfix/MPC Mako Shark ones. The tires origins are uncertain. I used them as they have a recessed bit for adding the white lines. The candy car got replacement rolling stock from the spares box. The paintjobs are both Tamiya spray can jobbies, pearl blue on one, and clear orange over gold on the other. The paint went on fine. Both cars have had clear coats over them but neither have been colour sanded and polished. The bodyshells are covered in curves and sharp edges, the thought of cutting through to primer or plastic anywhere kept me from chasing a mirror finish. If I get brave later on, I'll cut the paint back and polish it up some more. All the chrome trims, wheels and bumpers are done with Molotow ink. The bumpers are half their original thickness, AMT made then a bit on the chunky side. Here’s the models… Build thread here:6 points
-
Hi all. I just finished the 1/48 Eduard offering of the Hasegawa 1/48 F-104G starfighter kit. This is the basic Hasegawa kit with some of Eduard's goodies included in the box. I added the CMK avionics bay set, resin underwing fuel tanks, and Eduard resin wheels. The model was painted with Mission Models paints and weathered with AK grey wash and some pastel powders. Thanks for watching. René5 points
This leaderboard is set to London/GMT+01:00












.thumb.jpg.d3635a7ef6507d35f372dd09671fe96f.jpg)

