Leaderboard
Popular Content
Showing content with the highest reputation on 02/05/22 in all areas
-
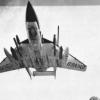
Didn't get round to taking many progress pics of this build as a couple of other builds raced ahead & got finished first one of which being my infamous Ukrainian Tornado, oh & a certain cartoon rendered MiG-21. Started late last year & used the very nice CMK 1/72 cockpit set which fit the Airfix kit very well. Far better detail than what's on offer in the kit. Decals from the Xtradecal X72308 sheet & paints from the Hataka Red Line RAF paint set No.2. Wheels were the Eduard Brassin resin set. Not sure if RAF Buccaneers had their wings folded especially with items attached to the wings, but the ever helpful artistic licence came in handy. 😉 The obligatory dead parrot pose. 🤣 Thanks for looking, now which shelf of shame build shall I revive? Martin40 points
-
G'Day All Latest off the bench and Number 2 for the year is the old Accurate Miniatures 1/48 B-25C/D finished as an Mitchell II belonging to 320 SQN 2T.A.F. This kit was an original AM boxing, and was not the easiest build. A lot of filling and rescribing was needed along the fuselage top seam and around the carburettor intakes I also managed to fudge the canopy at the final hurdle requiring a replacement to be faired in at the last minute (not too successfully!) The model is not quite accurate in regard to all details, it should have a fixed .50 in the nose as well as the hand held gun, the bombsight should be a sperry, not the norden and I managed to add the wrong serial, but Im not fixing it now. Paints are by Gunze and MRP with multiple layers of different hued O.D until I got the desired look. The stripes were added using Mission Model Paints thinned with water, then scrubbed off the top surfaces. Decals are by Eagle-Cals and machine gun barrels by master models. The staining and oil leaks were attained using thinned oil paint A longer description on the build is at my blog listed in my signature. Definitely need a palette cleanser build next! Thanks for looking Bruce36 points
-
Hi all. 2021 was quite a productive year for me but l just found l forgot to share a number of them here on Britmodeller. The first l'd like to show is Airfix's 1/48 Hunter F4. I used a pre-coloured pe set from Eduard, resin seat and new decals from Xtradecal. To make the look a bit more interesting, I added rivets on wings and fuselage. The flaps in the kit lack any detail on th inside, so l scratchbuilt new ones from plastic sheet and rod. The model was painted with MrHobby paints over a base of black primer from Alclad. A wash was made from Abteilung 502 oilpaint and AK white spirit. Thank you for watching.28 points
-
.... next up, a dirty mud-moving Phantom, trying its best to do Air Defence. 111 Sqn formed up on the FGR.2 Phantom at RAF Coningsby in 1974, but quickly moved to RAF Leuchars as the Phantom took over most Air Defence activities from the Lightning. In comparison to 43 Sqn's (RN surplus) FG.1s already at Leuchars, the FGR.2 was optimised for ground attack and reconnaissance and not quite so suited to QRA. As soon as ex-RN Phantoms became available in 1979 as HMS ARK ROYAL Paid off, 111 swapped over to the FG.1. This and the RN's extra dark grey Phantoms are what I envisage whenever someone says Phantom. Ugly and mean looking, they convey brute strength and aggression in a way that no modern aircraft can do. These are a mix of Xtradecal markings with a few smaller Modeldcal ones thrown in to backfill those that were missing. I've fitted a gorund attack weapon load just to emphasise that it is not an FG.1. I asume that 111 retained this capability throughout their time on the FGR.2 and certainly one of the roles of the Leuchars based aircraft was support to RN ships, for which it would be a reasonable load (not as good as a Buccaneer though!). Once again, I really love these Fujimi kits, this one being the improved (H19) version with dropped flaps and corrected auxiliary air intakes. I didn't use the vinyl wheels as I have heard that they deteriorate quickly with age. As usual, paints are Humbrol enamel, applied by hairy stick and trembling hand..... FredT With a"pretty" F-4N: When the sun comes out and i can find a bigger table, I will do another group shot with the rest of my F-4s,25 points
-
A 1/48th Vengeance has been on my wants list for many years now (OK I know there's the AZ one but I think the best said about that the better?) so I was delighted when Dora Wings announced their new one a couple of years ago. Back in February I decided to take up their offer of a presale price and delivery and of course of I was chomping at the bit to get my hands on one...And then of course it all went terribly wrong with the Russian invasion (pretty much on the day they were supposed to be dispatched). I then resigned myself to a very long wait. However, out of the blue early in April a parcel arrived containing the model. To say I was surprised would be an understatement and I can only commend Dora Wings for their determination to get the models out despite what must be a terrible and traumatic existence for them and indeed the whole country at the moment. Anyway, onto the model itself. Moulded in a hard, dark grey plastic, parts are very nicely detailed and fit together with the minimum of fuss. Not perfect by any means but nothing that can't be overcome. In fact I didn't use any filler. Cockpit detail is very nice indeed but only a closed canopy is provided for. It's not really possible to slide the necessary parts back as they'll just sit too high. The canopy parts however are extremely clear and shows of the detail nicely. Although vinyl masks are provided these were not very good (particularly on the curved parts) as they kept curling up from the edges. I decided to replace most of them with Tamiya tape. I also chose not to use the supplied seatbelts as I thought they were a little basic and quite thick. Eduard came to the rescue here as usual. There are some very tiny brass parts for levers and switches.. be warned. Engine detail is good too but I must admit I'm not a fan of photo etch cowl flaps and found them difficult to use and get the correct angle. In fact I made a right pigs ear of them originally so I removed them, straightened them out and started again. I've only tacked the whole assembly on, so, if someone does a proper resin cowling set I'll be there. I was also expecting the same problem with the brass airbrakes on the wings too, but, to my surprise these fitted very well (up to a point) Still not perfect but acceptable. Wheel well are nicely detailed but I think treaded tyres should be the order of the day (from photos I have) so hopefully someone will do these too The rather large bomb bay is also nicely detailed. The actuating struts fit snugly into the small holes and it's quite a strong bond. Unfortunately, I also just couldn't get the brass bomb fins to look right so I replaced them with bombs from my spares box with fins already attached. The wings only attach to the fuselage via a 2mm deep 'butt joint' so this needs a while to set to keep it strong. After a quick re scribe of most of the panel lines It was ready for some AK primer. 4 sets of markings are given which are all Brown/ Foliage green over pale blue. I had my heart set on building a white tailed aircraft so ended up doing the one on the box art. Although I've put the fin flashes on, the instructions shows the aircraft without. They can be found on other white tailed aircraft so if anyone can prove they're not there I'll take them off. I just couldn't find a decent picture of that particular aircraft. So, I'm now a happy bunny and can highly recommend it. Shape wise, I think it looks pretty much spot on and despite my dislike of brass I'd be quite willing to build another sometime. Maybe all over Foliage green? So, there we are and thanks for looking. V1 V2 V3 V4 V521 points
-
Hi all This is Tamiya's rather nice 1/48 He 219 - my first Tamiya kit for a while, and what a pleasure it was to build. No fit issues anywhere, and no problems that weren't of my own making. The decals were the only headache, being nowhere near as co-operative as the rest of the kit. Built OOB and finished in the markings of 'G9+TH' of 1./NJG 1, discovered at Westerland Sylt in April 1945. The majority of He219s were finished in various types of 'wellenmuster' camo pattern, typically of RLM76 or '84' over a base of RLM75. The pics of G9+TH show quite a lot of reflection, so do not show any detail of the upper surface pattern, so my pattern here is a guess. I'll let others judge whether it works or not This particular 219 was found with props removed, so again, I'm guessing with the colours here. Previous builds have finished the spinners in either RLM70, or black with a spiral - so I did mine in white with a spiral just to be different.. Anyway, on to the pics...20 points
-
Lightning F3 XP719/D of 56 Squadron, RAF Lakenheath 1965. This one is the old Airfix F3. I replaced the cable ducts with longer, fatter ones. I shortened the tailplanes and added some card to represent the arrestor hook. The decals are a mix of Xtradecal and Modeldecal who both make sheets for this scheme. The IFR and Firestreaks were stolen from an MBox T55 kit. I really botched the canopy - it ended up pretty frosty. Same wobbly freehand anti-dazzle panel as the T4! David18 points
-
Hello, This my latest build, made from the SH and the Eduard boxings. Why 2 kits ? Simply because I screwed up part of the first build and, because I never give up and like the type, decided to carry on the build and bought another kit 😬 Pretty good kit, despite some minor inaccuracies with the engraving under the fuselage. I was not fond of the decals as colors are not always well aligned - especially for the stencils. I did peel off the varnish top layer on the decals to get that "painted on" look. This has to be done gently otherwise you might end up tearing off the paint as well. Color scheme is from the Pakistanese Air Force.17 points
-
Nearly there, after a day of two steps forward and one step back: Just rigging, step, torpedo sights and aerial to go.17 points
-
My second finished kit. Top notch Eduard quality. Easy cartograph decals. Any mistakes and inaccuracies are my fault, not Eduard's 😇 lost one gunbarrel, used piece of copper instead. Don't be judgemental please it's my second build and the learning curve is long. Enjoy guys.16 points
-
Dear fellow modellers, I would like to show you my latest finished model. I had been working on it for a long time and was reluctant to do some of the necessary additions, like the stabilizers on the elevator, the triangular part and the strake at the rear of the aircraft and of course ALL the antennas. I also added the windshield wipers, because they are very distinctive on the original. But two days ago I just started doing it and everything went very smooth and quickly. I was surprised to find fotos showing that the Nimrod has a more glossy finish. I used Revell Aqua Colours as usual. Only two were used. RAF Hemp was mixed using 4 parts 371 Light grey and one part or so of Africa brown. The lower side is painted with 371 Light grey. The model is a tailsitter which is unusual for Anigrand. Normally they are constructed so that no weight is necessary. I added chocks at the rear of the main wheels and that did the trick. More chocks on the front side are also needed, I know. The first try to do the dirt and oil traces of the Avon engines was a little overdone. So I resprayed the area and with some oil paint and soft pencil it looks a bit cleaner now. The panel lines are created very deep by Anigrand. I did not like that and tried to fill them but of no avail. Neither super glue nor Mr. surfacer would fill the deep lines. So I just accepted them. They are like you can see them now, I did not emphasize them. I also tried to take some pictures using a background picture, but I think the neutral dark grey background looks the best. I hope you like the model of this iconic airplane. Thanks for looking! Greetings from Germany!15 points
-
Hey BMérs With 2022 being an Anniversary I'm planning a few Falklands/Malvinas builds. These are the first ones. I've ended up in a bit of an unintended buddy build with Calum Gibson. This is my rendition of an A-4Q built from the Hasegawa A-4B with Cat 4 resin bits, Decals are from Aztec. I used a TER with Mk82 Snake eyes on the centreline as a MER covered the spot I wanted for the in flight mounting. The other is a bit of a bonus and was a nemesis of the A-4's - its is the Takom 1/35 Sea Dart Missile launcher. Built out of box with the red drill missiles loaded. I had to scrounge some white letters for the missiles from spares. Hope you like my take on the subjects, Thanks for looking.13 points
-
At last, associated with Bill! It's not in terms of talent, but I'll take it. It's absolutely worth it. Their best kit yet, which is saying something. HOWEVER, I am feeling very salty about the flaps, since I just went through my references to see if the portion that's exposed when they're dropped was the upper fuselage colour or not, and found, since I needed the opposite, dozens of photos of P-51Bs on the ground with the flaps up. I feel this is something the aftermarket world could stand to address, or which perhaps might be included at least for their hopefully forthcoming P-51D/K. That brings me to the flaps. After running 3.5 miles at not great speed (9 minutes and fifty seconds a mile, atrocious), I made it down to the grotto full of piddle and vinegar. Can we say piddle here? Hm, no, apparently not. Side note: when I headed to Telford in 2019, I was terribly worried that people would think less of me after they discovered how often I swore in person. They hid it well. I added Alclad to the parts of the flaps that are exposed only when dropped, based on (DANGER WILL ROBINSON) some photos of a restored flying example. PXL_20220502_031728019 by Edward IX, on Flickr At the same time, I opted to paint the 75-gallon drop tanks Aluminium as well. PXL_20220502_031736830 by Edward IX, on Flickr The kit advises to paint them neutral grey, and I think there's some evidence to support either paint scheme, but (a) I didn't want to change colours again, and (b), it adds "visual interest". I also did the wheel hubcaps, but didn't take a photo of them. I then masked off the prop tips and painted it Gunze gloss black. PXL_20220502_031741454 by Edward IX, on Flickr Tomorrow I'll mask it off again and use rubber black on the cuffs. The difference in real life is so subtle I don't think I've ever noticed it on the approximately one billion P-51Ds I've seen at airshows here (though I don't really care about P-51Ds and a lot have uncuffed props nowadays, so I may have missed it), but it will hopefully look cool and make me seem like a very competent modeller, which I am not, as this thread has shown several times over. Oh, right, and one other thing: PXL_20220502_031830739 by Edward IX, on Flickr HA HA HA HA HA HA HAAAAAAAAAAAAAAAA That sordid part of this saga is now hopefully well behind us. Jeepers Fancy Christmas. Also: researching "Black Friday", the 29 December 1944 massacre of III/JG54, for my next build. I am certain prior researchers looked at all the same combat reports I'm poring over, plus had access to some still-living participants (well...on the RAF side, anyway), and whatever German records survived, but I think I may (if I don't get lazy) be able to produce a fairly detailed narrative from the Allied perspective of somewhat greater length than the ones in 2nd TAF Volume III or either the Smith/Creek Fw 190 or Crandall Fw190D books, and I almost wonder if it wouldn't be worth trying to turn it into a magazine article of some sort, though I haven't the foggiest idea how to approach that.13 points
-
Anyways, to all them as I bribed to be nice - the cheque is in the post (promise ) and to them as was just gratuitously nice - aw shucks And to both camps - thank you very much - means a lot - 'specially from such an august bunch (need a Uriah Heep I'm ever so 'umble emoji here ) So. It's been a busy couple of weeks with that horrible intervening thing called work; plus with spare time taken up with (somewhat belatedly) with changing over 12V halogen ceiling recessed downlighters to 240V LED ones. We live in a barn conversion with lowish ceilings downstairs and there are (were) dozens of bl**dy halogen downlighters. 12 in the kitchen alone. And for every dratted one, it means pulling out the spring retained recessed unit - which invariably damages the ceiling plaster meaning filling and re-painting - and taking out the 12V transformer and wiring in the new leads. All whilst perched precariously on a step ladder. Still the environment and my energy bill will hopefully benefit..... Whinge over... But I have done bits and bobs. Tinkered with the design of the canopy internal framing and MDC. Added a frangible link to buttress the central section of the MDC (to give it a bit of strength during handling after the supports are removed): And added a sacrificial base to the two bottom edges of the frame, linked to the frame with a line of 0.2mm rods spaced every 2mm or so thus: The idea being that the printing supports then attach to the sacrificial bases and not the canopy frame, and so (in theory): (i) the sacrificial base suffers all the distortion inherent with closely spaced supports and (ii) I don't have the hassle of trimming away the supports and cleaning up the resultant stubs from the bottom of the frame, but can just run a craft blade along the gap between the sacrificial base and the canopy cutting through the 0.2mm connectors and leaving a nice clean finish. And in practice?....: Worked fine: Such little things please my little mind (sorry). Anyways. I couldn't avoid painting the thing for ever....but could do so long enough to print a quick paint mask to help me spray the cream-coloured-canopy-binding-tape-thingy in the middle without getting any paint on the MDC . So. Printed mask: Printed mask in use: Results: (I used tamiya racing white decanted from a rattle-can; looked a decent match to photos various.) And another printed mask to mask of the tape and the MDC so I could airbrush the frame Nato Black: And then fill-in any bits of frame not reached using a brush and the 50/50 thinned Nato black mixture - almost like a wash. I should perhaps have said that I absolutely hate brush painting - especially fine or delicately detailed bits - I just can't get a neat finish I should perhaps also have said that the raw grey resin looks to my eyes a pretty good match for the plastic grey sheathing around the MDC so no need to paint the MDC (bonus). After the 2 x mask rigmarole: And after detaching the rest of the supports and brush painting: Outside: (nb there's the external framing and cream-coloured-canopy-binding-tape-thingy to go - which I'll probably mask and paint; so that should finish it off neatly). Inside (canopies to be posed opened remember): I need to gently dry brush the frame with some light grey to get the edges and details to 'pop'. It's a good job I printed and painted a few spares; because even trying to be very careful in handling I managed to rip open the MDC on a couple of frames. And whilst I was at it I painted a bunch of coamings and windscreen frames: Remembering ( @Terry1954 ) that the Valley Hawk windscreen had a black/white and not a red frame! I can stick the vac-formed windscreens in the windscreen frames once painted. I'll obvs. have to fill and repaint the bits of the frames where they meets the fuselage - but hopefully won't now have to mask/paint the frame where it meets the clear windscreen. And experimented with drybrushing on a spare valley rear coaming: Details popped nicely (and no visible print lines/striations - so must have lucked in on the best orientation (although to be fair did print a few at different orientations and chose the best for best as it were). So the next task is the paint shop to finish off the frames and coamings before sticking them to the Hawks. BUT before that..... There's that business of the noses being insufficiently curvaceous wot I mentioned a few pages back. Needs to be tackled before sticking vulnerable bits and bobs into the cockpit area. So. As I am a million miles away from having Bill's skill, technique and confidence to slather on 'filler of choice' and file and carve it to the proper profile - it called for some skill-replacing planning. Some may remember that way back on page 148 I designed and printed some profile 'slithers' as guides to help me get the correct curve: So step one. Attach the profile 'slithers': Step two. Mask off the areas that need building up a bit to capture the curves (call that the basic masking): Steps 3 and 4. Further mask off a smaller area just either side of the 'slithers' that will need the greatest depth of filler and give a few liberal coats of Hycote filler-primer from a rattle can: Steps 5 and 6. Move the further masking out a few mm and give a couple more coats of Hycote - and then a final couple of coats of Hycote with just the basic masking. The theory behind the 3-stage masking being that the filler primer is thicker around the slither and tapers away towards the edges - thereby already beginning to capture the 'feathering' required and relieving the muppet that is me of the need to exercise Bill level of craftsmanship achieving the same.... And post-masking: I think the plan is working (although no plan survives first contact with the enemy they say....). It certainly looks a bit chubbier, and seems to have captured the correct sort of curve. It's now up to the muppet with the sanding stick and micromesh to try and refine it.... Gentle filing reveals the slither guide But I'm now going to leave the Hycote to harden for a few days before doing my mini-Bill impression and trying to smooth it down. And that's where matters rest at the mo'.12 points
-
12 points
-
Hello all, This model was built by my dad, it represents one of the B-25s that took part in the Doolittle Raid on April 18th 1942, 80 years ago this year. The model was painted with AK real colors, Gunze and Tamiya acrilycs. Dk decals were used along with the kit's own decals and PE was used for the interior. The kit was weathered with Tamiya enamel washes and a fine silver pencil for chipping effects. Numerous scratch-built improvements were added to the model. Hope you enjoy, Comments welcome! me!11 points
-
Lightning T4 XM973/Z of 23 Squadron, RAF Valley August 20, 1965. This is the MatchBox T55 kit cross-kitted with the wings and belly fuel tank from the old Airfix F3 kit. The fin was cutdown to the earlier F1/F2/T4 shape, the cable ducting shortened and a nominal arrestor hook added. Other than that, it's OOB. The decals are a mix of Xtradecal and home made serials. The aluminium paint gave me no end of trouble so I didn't dare mask over it - hence the somewhat wobbly edges to the freehand painted areas like the anti-dazzle panel. David11 points
-
Here's my effort on one of Dekno's latest kits, the 1/72 Travel Air 6000B. The 3D-printed parts in this kit are very nicely done! -Dan11 points
-
Hi guys, second part of my Falkland Islands war collection to commemorate its 40-th anniversary. This time it's the Argentinian machines that operated from the airfield on Pebble Island until their stay was rudely interrupted by the SAS raid on the night of 14 May 1982 IA.58A Pucara, Airfix kit: Short Skyvan, Airfix kit: T-34 Turbo Mentor:11 points
-
Spitfire 22 of 603 (City of Edinburgh) Sqn RAuxAF Airfix 1/72 Kit, Tamiya Paints.11 points
-
11 points
-
Finally finished this one, it's one of the most fiddly and fragile models I've ever built, if I'd have tried when I was younger I don't think I would have had the patience or the superglue to complete it. It's been difficult at best and has fought me all the way, but as it was the only one in the GB I needed to finish it. The paint is Tamiya laquer paints and acrylics for the hairy stick bits. I coated the decals before with microscale decal film and they held together well, I know they're yellowed, but they are what they are as I couldn't source any that would deliver to the UK and I hadn't got the skills or experience to print my own. I haven't gloss coated them for 2 reasons, 1 being that I have no idea how they'd react and 2 I might find or print more decals in the future, so they'll be easier to remove. I've enjoyed the GB and am glad to have added my 2 builds to the pot so to speak, there are a lot of other super builds that have bought back happy memories11 points
-
or The original 'White van man' of the desert 😎 My second Gecko MW build and equally frustrating and rewarding. Gecko make amazingly detailed kits but they do have their quirks to say the least. Anyway this build was inspired by the classic photo of a Rhodesian photographic unit in North Africa.In particular the driver who does have a certain air of smugness about him. So on to the build. This is an early version with the aeroscreens and is depicted somewhere in North Africa around 1941 and is complete with the Caunter scheme. The driver is a keen fan and amateur driver in the Voiturette class. (This is the rabbit hole for this build, thankfully not too deep!) This was a popular class pre and post war, similar to formula 3 where drivers cut their teeth. He's a driver and takes the opportunity when whizzing around the desert to relive his sporting days back home complete with flying helmet, goggles and white scarf. This is depicted between deliveries and he is reading a few old copies (1939 to be precise) of Motor Sport sent to him from home. You will notice on the bonnet front that he has replaced the Bedford logo with an ERA badge as he is a big fan of the mark who were one of the top teams pre war. If you want to know more about Voiturette racing theres a few sites including Wiki - https://en.wikipedia.org/wiki/Voiturette Here's the build. Forgive the figure, it's my first since I was a nipper and you can see why I don't do them 🙄 The caunter Scheme isn't quite right on the back. There is actually a diagonal paint line up the side of the rear deck however the differences in the AK paints is very minor and disappears once weathered. The engine has pretty much disappeared as well which is a shame. I added a couple of Brass plates which were on the bulkhead. Scratch built aeroscreens as one was missing in the kit and they are way to thick anyway Ooooh! I've just noticed how that '3' decal edge stands out!!! Grrrrrrrrr Slightly startled expression! I left the wires from the broken off side light dangling out the bracket 😁 I laso hand turned the horn which our driver has added God he's awful 🤬 You can only see the difference in paints on the bonnet. Enjoyed this one as well as it was a nice change from SCC15 etc. WIP is here: As always thanks for looking and on to the next one 🤓 Andrew10 points
-
PK-83 SdKfz 251/1 Ausf B Hanomag 7th Motorised Company, 17th Panzer Division, Panzergruppe Guderian, Operation Barbarossa, Ukraine, 1941. Build log: https://www.britmodeller.com/forums/index.php?/topic/235109448-pk-83-sdkfz-2511-hanomag-finished/#comment-439234210 points
-
10 points
-
1/48 Kinetic GR.3 Harrier extras: eduard cpu-123 bombs / anyz cockpit dials9 points
-
Thank you Johnny, glad you like it! The waitress should be around any minute with your drink... 'evening all, I only have some meager progress to report - busy WE and all There were only two things missing on the HASEGAWA kit before painting, to wit the central fixed canopy portion and the slime lights. The former still needed the addition of the relevant PE frames (which I haven't done as of yet), while for the latter I have PE parts from the Eduard set, like these: I only have one set for one aircraft, though, so I decided to replicate them with aluminium tape for the other. I cut them out using my Curio (this tape is surprisingly easy to cut) I decided, for no particular reason, to use these on the HASEGAWA kit (to be completed with their decals), while I will use the PE lights on the FM kit, and paint the lights in. ANyway, here they are in place, port: and starboard That's it for this update, I'm afraid. All comments welcome Ciao9 points
-
The Bat is done, A thoroughly enjoyable build, I don't do figures often so I'm glad with how its turned out, that yellow on the face is not there in real life, don't know why my camera picks up on it? As mentioned in the WIP, sketched and 3d printed chest emblem and base. Painted with with all sorts from Humbrol enamels to Halfords acrylics. Here he is, in that we'll known natural bat habitat of the garden. Cheers, Andy.8 points
-
Greetings folks, My latest project, an awesome Eduard Fw-190 1/72 the kit was just awesome but not so sure about my modelling skills tho. German aircraft especially ww2 is vey hard for me as German camo look very difficult plus don't have the exact paints so I eyeballed it. Apologies for any errors. Thank you for watching, cheers8 points
-
Bit of drybrushing with ocean grey enamel has helped highlight the structure to lend interest. Ready for a clear coat. Then a jet black pin wash might help too... Then I can snip away the little frangible links helping support the MDC - and think about the best glue to use.....8 points
-
Here's my build of Hasegawa's 1/24 VW T1 pick-up. A very enjoyable build indeed! You'll find the build here:8 points
-
PK-173 LRDG Chevrolet 30 cwt and Jeep. Truck finished as the 6th Vehicle of T (New Zealand) Patrol Long Range Desert Group C Troop 1942. Jeep presumably of same Patrol Group. Built OOB and brush painted with Lifecolor Light Stone. Then matted down with some Liquitex matt varnish.8 points
-
PK-22 P-47 Thunderbolt SEAC Thunderbolt FL749 One of my laser printed decal disintegrated, so the starboard side does not have FL749.8 points
-
I finished this kit after several months of work. It was a difficult build, and definitely has its flaws, but overall I am happy with it. I had been waiting for some time in the hopes that MFH would release a 1/12 917/30, as I think it is one of the all time coolest racing cars. I figured it was in the vein of the sorts of kits MFH produces, and ultimately my wait paid off. Thanks for looking.7 points
-
I usually build space stuff and aircraft but I wanted to do something Ukrainian so here is my quick build of the Skif 1/35th T-64BV. Equipment and markings are an amalgam of real vehicles and models on Britmodeller. Not up to the standard of most of the great stuff on here but I'm quite pleased with it.7 points
-
Hi All, Okay so maybe it's not the conversion job of the century but more on that later.. Here's Tamiya's Early M4 Sherman. I had built this as the American gun tank OOB about 5 or 6 years ago but was never happy with it so it sat on the shelf of doom collecting dust in the corner until Star Decals Set 35-C 1245 British D-Day Shermans came across my bench one day. Being heavily inspired by the more colourful looking marking options here, I dunked the Sherman into Clutch oil and left it submerged for 2-3 days. This worked to strip the paint etc. off the model without damaging the actual plastic. I then rinsed it thoroughly and repared bits that had broken off over the years. Next I got hold of a commonwealth style stowage bin for the back of the tank which I found left over from a Black Dog Models stowage set. Adding to this, I scratch built a first aid box out of a resin pouring stub and some scrap brass, before adding two welded on repurposed ammo cans to the rear glacis. Adding to this I also added a spare wheel to the turret side, again using spare scrap etch to make up a securing band. Albeit not a perfect conversion, I was quite happy with it at this stage as whilst it wasn't a Sherman I down to every last rivet, it encompassed the general changes and look I was aiming for. I painted the model using Humbrol 155 Enamel Olive drab, again whilst not a perfect colour match for the British SSC 15 being too light, I was quite happy with the colour for my personal interpretation of scale effect, which was dry-brushed, decalled, filtererd and washed, before oil streaks and other weathering including some chipping was applied. The model was matte-coated using Xtracolour Enamel Matte Varnish. Stowage was from the spares box, including items from MiniArt, Tamiya and Blackdog. The stowage on the rear deck was secured using painted solder which had the malleability to make it more 'rope-like' without the overscale fraying seen with twine, string or thread. Overall the jury is still out with this method so it's something I might reconsider for the next one. Thanks for looking! Again, Thanks for looking, Sam 😀7 points
-
Hi folk's done and dusted,great fun and well done everyone for a cracking mini GB.7 points
-
Airfix Aichi D3A1 "Val" A fast build (for me) which was actually fun, even with the minor disaster part way through Build thread here And finally, with the gang Thanks for looking /P7 points
-
Thanks, and I am looking forward to yours! The Arma Hurricane kits are amazing, and they improved on the Mk I with the Mk II. I've heard great things about the Arma Mustang too, so I'm sure you'll enjoy! Cheers! A little progress.... I've painted some silver in the wheel well and cockpit floor and put the wings together... I am so amazed with these Arma kits, the wings just click together perfectly.7 points
-
The man of the bar has just raised the bar once again. Absolutely sublime work Steve. The detail and craftsmanship that has gone into just those canopies alone is simply breathtaking. And printing masks too! The boundaries have been pushed yet again. I can't wait for these Hawks to be finished - but only because I'm really intrigued by what wonders you'll come up with starting from ground zero on a Jaguar build. In the meantime I'll sit back and savor the immaculate Hawkery as it continues ...7 points
-
This first two shots are after clearcoat but before polishing. Probably I'll go with these wheels. The boxed wheels are not so great. After an hour's polishing. The interior is a sea of masking as it's in both two shades of grey and black. Parcel shelf given texture with sandpaper and double sided tape, as usual. Just one set of masking/spraying left: the black. Completed underbody.7 points
-
Ok a quick update on this beast, have been a bit distracted on other builds, so sort of let this one slip a little bit, was meant to start painting her last weekend!! Just more fiddling around doing prep work on her. The front canopy was fitted, both canopies have been a pain! The mould ridge in bother was huge and took quite a bit to remove and after polishing they still were a bit dull. I had some canopy clear so tried that, came out amazing….but!!! It turns out to be quite soft, even after curing for 3 day I found it would mark really easily, especially with fingerprints. Being soft you couldn’t just buff them out. So after 3 attempts I’ve given up, it just would handle the masking process. So she’s been given a quick undercoat of Tamiya XF-19 Grey (my fav for this sort of work), and then my usual squiggly panel-line work. I’ll give her the first coat of grey FS.36375 tomorrow, I will then have to do some masking for the next colour, FS.36230. These are the basic colours of the JSDAF, the digital scheme was just applied over the top of this scheme. These new 3D cans just look amazing, they’ve just had a first coat of Stainless Steel, I still have more painting to go, but the detail is just so good. They’re expensive but wow they well certainly finish the model! Plus I’m still working on this baby, sort of pushed aside as I’m not 100% happy with the decals, they are awesome, but a fully painted scheme would be so much better so I’m waiting for a set of Foxbot masks for the Ukraine. Along with quite a bit of other stuff as well (more masks and decals). The 2 shops I deal with are open and sending stuff, take less than a day from time of order to being posted (prob transported by a T-64 to Poland), awesome service. In the meantime I’ve also painted a few bit in the underside Blue, turns out I have all the lacquer colours I need to! Plus I may have bought a 1/48th MiG-25PD & MiG-29S 9.13....and am seriously looking at a Su-27UB....must keep off evilBay!7 points
-
Calling this one done. Happy with the way it came out. Decals needed a lot of setting solution to bed down. Just a light panel wash. A very enjoyable build. Thanks.7 points
-
Hawker Tempest Mk V Series I JN879/RH, the personal mount of ACM Roderic Hill Metropolitan Communications Squadron, RAF Northolt August 1947 Kit: Airfix 1/72 02109 Decals: taken from KP kit 72221 Build thread: https://www.britmodeller.com/forums/index.php?/topic/235109511-post-war-tempest-mk-v/7 points
-
7 points
-
Following on from my Wellington build, a Halifax now gets a chance to show off in the Gallery. A smooth enough build, virtually straight out the box. I did snip the fuel dump pipes off level with the trailing edge though, as I couldn't find one shot of the type Matchbox provide. That compromise kept the spirit of an out the box build but also kept me happy as the pipes sticking out back looked decidedly odd to me. I'm more familiar with the later Mk Airfix kit and this build seemed like an altogether different aircraft to me. Once the black undersides were added and the plane was on its undercarriage it really did start to take on a personality, if that makes any sense. It became a very functional bomb lorry with an almost primitive feel to it. No styling flairs or subtle curves, just pure function. I enjoyed the build quite a bit. So much so that I'll probably build another in Costal Command colours. Enough waffle, here's the model... Build thread here:7 points
-
Hi, A mobilized basically civil interwar German machine Klemm KL 25, here in colors of Romania during WW2. The kit is that by Huma (now new kit is announced by Avis I think), in 1/72. I followed scheme provided in Kora's kit in 1/48 (decals from drawer with spares). Comments welcome Regards Jerzy-Wojtek #14/20226 points
-
Hello all , Here ı uploaded my last work in 1/35 scale. The scene presents a Jagdpanther moving around Caen during 1944 summer. The kit is Tamiya, all the rest is scratch using various thickness of XPS foam, wooden sticks, real garden soil, etc.. Sorry for the poor quality, still to be improved my photographing skills. As usual , thanks for all the constructive comments. cheers6 points
-
As promised, paint! ☀️😍 There were still a few passes to get the custard where I wanted it. I’d say probably about five passes. I’ll go from start to end in three to show you how the layers built up. pass one on the SAAF And now the Navy one. Yellow never cuts through the underlying paint I’ve found so hitting it with many layers gets the subtlety you need but it also shows that you need a god base colour. If I’d have used black I would have gone full bruised banana. 🍌 SAAF pass three Navy pass three. You can see how the colour of the base coat still shows even now. SAAF pass five or maybe six. 🤪 Navy. That is where I’m leaving it. I know some don’t like pre shade but for me it’s something that makes me happy so I’m sticking with it. 😀 Quick check in the day light to make sure. SAAF Navy 🤩🤩🤩 super happy with the Tamiya acrylics they have gone on really well. i need to let that dry even though they are dry to touch I’ve learned that rushing into gloss will cause splitting. So maybe I’ll work on Dewie later on? 🤔 I have made a few purchases to help with my victory build too so maybe a lazy Bank holiday read? Hope you’re all having a splendid day. Take care and as always. Happy modelling. Johnny.6 points
-
I'm declaring this one finished On to another of my entries before doing one of the other 109s6 points
This leaderboard is set to London/GMT+01:00





a.thumb.jpg.58d92d116b0315dc55d352fd191d65e4.jpg)


