
Leaderboard


Popular Content
Showing content with the highest reputation on 29/04/22 in all areas
-
Hello everyone, I was looking forward to this build, because I find A9 quite an interesting tank and I read good stuff about Gecko's kit. And I needed something pleasant to build after my experience with Vulkan's Vickers Light Tank. It turns out that what I heard about Gecko's kit was true. It is one of the best kits I have ever built. Especially regarding the details, which are absolutely fantastic. A9 was quite an interesting vehicle. It was not very reliable and was prone to braking down quite often. It's recognizable by two auxiliary turrets housing Vickers MGs. However, they were rarely used, because turrets were extremely hot in desert conditions. They were used to stow additional ammunition instead. It was also plagued by the underpowered AEC bus engine. Overall, it was the beginning of the long and troublesome way to find the successful cruiser tank design that ultimately lead to great designs by the end of the war. This model should represent 1RTR, 'A' squadron tank. The photo I used as a reference was tankan in April 1941 in Derna Pass. It's interesting to me that this photo was probably taken at the same time and at the same place as the photo of Panzer III Ausf. G that I was building a few moths ago. However, A9 was probably abandoned earlier this year, during the Operation Compass, because the 1RTR was not present in this area after February 1941. Abandoned tank was probably moved to the side of the road to clear the passage for the advancing columns. Model was built out of the box, with only some very minor changes, like registration plate (which was mounted differently on this particular tank) and some wiring added. Kit provides quite nice interior, and with so many hatches, I decided to keep them open. Tracks are indy links and are fabulous! Model was painted with MRP lacquers for camouflage painting and combination of Gunze and Vallejo for detail painting. This tank was painted in standard Caunter Scheme (Portland Stone, Silver Gray, Slate), although there are some deviations compared to the official scheme, especially on the frontal side of the tank. This was quite common at the time and Caunter Scheme was simplified by the army painters. And here are some details. I tried to capture some of the interior. I heard some cracking noise while attaching the turret to the hull, but I was not able to determine did I break something. Until I saw photos of course That's when I noticed that turret plates separated a bit. But I'll leave that to be fixed some other time. And at the end, the real thing. Thanks for watching and looking forward to your feedback. Cheers, Nenad22 points
-
Here's my build of a 'classic' 1968 1/72 Aurora Cessna 337 SkyMaster... I used vac-form windscreen and props from spares box (Khee-Kha C185 leftovers) & replaced the rest of the cabin glazing. Apart from the scratch-built pannier the rest is original Untitled by Harry Follas, on Flickr Untitled by Harry Follas, on Flickr Untitled by Harry Follas, on Flickr Untitled by Harry Follas, on Flickr22 points
-
I joined Britmodeller in 2009 and this is my first RFI. I think I have completed a total of eight models in that time. This kit was started in 2014 in a 'Less than a tenner' group build. I finally finished it yesterday gluing on the pitot tubes. It is out of box except for decals from Xtradecal that performed like you might expect from 20 year old decals. I rescribed the kit by just following the kits original raised panel lines. It was a very difficult process for me with many mistakes (why do the lightest slips in scribing show up no matter what you do to fill them, but the intended scribes needs going over six times to be seen?). I also hacked out the flaps to pose them in the dropped position to add a little extra interest to the model. It's a bit rough, but looks ok if you stand well back. And that applies to the model as a whole really. It was painted (using about the same amount of paint as on the real thing) with Mr Surfacer 1500 black and a mix of Mr Hobby Aqueous and Tamiya blacks, such as tire black, flat black, semi gloss black, NATO black. An entirely black kit is quite a challenge I found, although, aside of it looking a bit boring, it is difficult to mess up like camo is. The photography is as crude as the model, but here it is.18 points
-
#10/2022 And already the next finished French one by my dad. Tamiya A-1H converted to an AD-4, early inner wing racks and tanks taken from an old Esci Skyraider kit, Berna decals, painted with AK Xtreme Metal White Aluminium. Build thread here https://www.britmodeller.com/forums/index.php?/topic/235107683-guerre-dalgérie148-douglas-ad-4-skyraider-armée-de-l’air/ Model shows an aircraft of EC 1/20 "Aurès-Nementcha" in 1961. France used Skyraiders in the Algerian War from the late 50ies to the early 60ies. When they were withdrawn from combat, some were still used as recon birds. DSC_0001 by grimreaper110, auf Flickr DSC_0002 by grimreaper110, auf Flickr DSC_0003 by grimreaper110, auf Flickr DSC_0004 by grimreaper110, auf Flickr DSC_0005 by grimreaper110, auf Flickr DSC_0006 by grimreaper110, auf Flickr DSC_0007 by grimreaper110, auf Flickr DSC_0008 by grimreaper110, auf Flickr DSC_0009 by grimreaper110, auf Flickr DSC_0010 by grimreaper110, auf Flickr DSC_0011 by grimreaper110, auf Flickr DSC_0012 by grimreaper110, auf Flickr DSC_0013 by grimreaper110, auf Flickr DSC_0014 by grimreaper110, auf Flickr DSC_0015 by grimreaper110, auf Flickr DSC_0016 by grimreaper110, auf Flickr DSC_0017 by grimreaper110, auf Flickr DSC_0018 by grimreaper110, auf Flickr DSC_0019 by grimreaper110, auf Flickr DSC_0020 by grimreaper110, auf Flickr DSC_0021 by grimreaper110, auf Flickr DSC_0023 by grimreaper110, auf Flickr DSC_0024 by grimreaper110, auf Flickr DSC_0026 by grimreaper110, auf Flickr DSC_0027 by grimreaper110, auf Flickr DSC_0028 by grimreaper110, auf Flickr DSC_0029 by grimreaper110, auf Flickr DSC_0001 by grimreaper110, auf Flickr17 points
-
Latest off the bench is the ICM 1/48 Bronco. Really nice little kit that went together very well. Fully recomended. Please feel free to comment etc. Thanks for looking Dick14 points
-
Hi all, here is my newest small scene, it is an Italeri AB41 in 1/35 scale, here is the work in progress... Comments and criticisms are welcome! Cheers Alessandro13 points
-
Hello folks! Today I would like to share with you the pictures of my PK 77 Wasp on the current Matchbox GB. When I saw the box art in a small shop almost 40 years ago, model making fever infected me immediately. This is a tribute to Lesney and the memory of a beautiful childhood. I have brought the original Dio base somewhat up to today's standards and the fictional DAK version to an real Italian ground. From the palm tree to the fighting compartment, everything has been reworked a bit, the building was made of styrofoam as usual. Doors and windows from the 3D printer, grids are made from old PE parts or wire. You can find the building report in the current Matchbox GB... BTW: this was the first (and last) time I used rubber band tracks. 😁 Enjoy the pictures! MD A little bit of nostalgia 😉 ☮️12 points
-
Hi all. Kinetic's latest Mirage derivative is the two seat, South Africa built, Atlas Cheetah D. The kit is based on the Mirage kit from 2017. To create a Cheetah model, a load of sprues are packed in the box. I presume several were picked from not only the Mirage kit, but also the Kfir kit. On top of that, 2 new sprues are included for Cheetah specific parts. I built this one straight from the box, apart for the seatbelts which I made from 1mm wide tape. The build is pretty straight forward but because of the large amount of extra parts, and even 2 different C and D sprues, The build can be a bit confusing and you will end up with a huge amount of spare parts. 3 South African Air Force and 1 Ecuador version decals are included in the kit. The model was painted with MrHobby H305 and H307 over Alclad black primer. A wash was made from Abteilung oilpaint and AK white spirit. Thanks for watching, René12 points
-
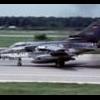
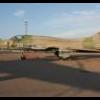
My latest. Casa CASA 212-200 reg no N963BW, part of Blackwater Av Now called Xe Services.This aircraft was in Afghanistan and crashed in the mountains there leading to an inquiry.Anyway here she is all comments welcome.12 points
-
Urg, I'm going to call this one (almost) finished. I ran into some issues at the end (see the WiP) in a disastrous session, entirely caused by my haste in wanting to get this one done so that I could open some shiny new toys. The exhausts got lost in the final mayhem and with no replacement available in the near term, I think I'll put that bit aside until they turn up or I find something that can be bodged in. I might have at it a little with oils and smoke stains and perhaps touch up some of the mistakes if that ficticious day ever appears; but in the meantime it's probably sensible to, as they say, stop when the fun stops. So I hope people don't mind me posting a model with blimming great holes in it in the RFI. This is my difficult second model. I've learned a lot about paint thinning for mottles (never enough!), and while it turned out a little starker that I'd hoped, I'm broadly happy and know how I might do better next time. I think the overriding lesson though is actually (aside from 'dont rush!'), maybe 'do less'. I probably went through more stages than entirely necessary, which if you're an inexperienced butterfingers like me, just leads to more (rough) handing, more smudge creation, more dust collection, and gives more opportunity to mess up. The kit itself was an absolute joy, and I for one don't feel any guilt savouring a kit that has been engineered and manufactured so well and fits together so precisely. The build and markings are entirely OOB (save some Eduard belts) and painted primarily in Tamiya acrylics with the rather disappointing mixtures called out in the instructions. An odd decision perhaps to go with the ubiquitous JG-54 over the interesting 'eyeball on the G-6 blisters' JG51 scheme, but I've never done a Grunhertz scheme personally, and I've always liked the green with blue stripe (That and I always picked JG54 in Aces over Europe). That stripe incidentally, was supposed to be painted, but it turned out so dark that I ended up with the decal, which I never got to bed down quite as I'd have hoped. So anyway, thanks to those who helped along the way, thanks for looking; all criticisms welcomed! Cheers, Andy WIP:11 points
-
Here is my build of the Sword 1/72 Northrop T-38C Talon advanced trainer. This kit has a reputation of being hard to build and while it is probably not for the beginner I think it went together pretty well. The kit consists of 22 plastic, 19 resin, and 3 clear parts along with a color photo etch sheet. The entire interior is made up of resin parts including exquisitely cast control sticks, which unfortunately were impossible to remove from their pours without breaking them. The color photo etch was of Eduard quality and fit the resin very well. The finished cockpit fit into the fuselage perfectly. Unfortunately things went down hill from there. The 2 main issues were the canopy fit and the wings attachment. They really, really want you to pose the canopies open and have molded them that way. If you want to have them closed the fit is bad and needed a lot of filling and sanding. The wings are a butt joint to the fuselage with no indication of exactly where they go, and the instructions were were no help with vague drawings. Also while they supply you with a resin pitot tube the instruction make no mention of installing the part. I ended up using a Master brass one. For paint I used Humbrol 125 for the FS 16118 and AK Real Color ADC Grey for the FS 16473. The decals were nicely printed, but I have found Sword decals being very problematic in the past so I also got a Wolfpak sheet 72-041 as a backup. As it turns out the Sword decals worked very well for the most part, but a couple broke while removing them from the paper so I used a mix of the Sword and Wolfpak ones. I had a problem with both type silvering, but was able to fix that. So here it is: Next up in my arcane schedule should be the North American T-39 Saberliner, and I have the Anigrand kit, but with the recent announcement of the Sword kit I am going to wait for that first. So next will be the Wolfpack T-2C Buckeye. Enjoy11 points
-
Today I'm sharing a bit of a blast from the past for me. This is the second aircraft I built (as an adult), the Trumpeter 1/32 Eurofighter Typhoon. I was new to a lot of skills when I built this, including using an airbrush and made quite a few mistakes. The main mistake I made was trying to use a putty to weight the nose, which reacted with the plastic and created a massive indentation in front of the cockpit which I then had to fill back in - hence the slightly odd marks under the front of the cockpit. The panel lines were a bit of an accidental achievement, I was trying to highlight the lines, but didn't really know what I was doing. I still managed to crudely create the right effect (with thinned enamel paint), but I couldn't replicate it again for years until I started using proper panel line washes, I still can't really tell how I managed it here but not on later kits. I think I'd have another go at this kit at some point in the future now I've had a bit more practice, but only if the rest of my stash starts diminishing significantly. For now this Typhoon looks good on the shelf with my other RAF jets, even if they were completed much more recently and steal the show a little - but then most have more interesting schemes than the modern low-vis grey and pastel roundels as well which make them stand out a bit more even without the greater skill level.11 points
-
Win dropped trou at school yesterday in front of all of his classmates, and the school administrator sent a nastygram to Mrs P about it. She doesn't send them to me, ever, even though I'm two minutes away and can actually come get him, possibly because she can detect my simmering, near-pathological hatred for petty bureaucrats in positions of power over small children and my natural crypto-authoritarian's aversion to anyone else getting to tell people what to do. However, in this case she would have been on safer ground, because the only thing I hate more than her is public nudity. When Win got home, he knew he was in trouble, and in for experiencing the greatest punishment of all: my undivided, undiluted attention. Like many children who know they done fouled up, he does not like to be looked at when being talked to, and so we had to use The Talking Box. PXL_20220427_200143538 by Edward IX, on Flickr I explained to Winston that punishment was only a tool: the goal was that he understood what he did wrong, and didn't do it again. If I can get that without the punishment [he so richly deserved], then that works for me just as well. BUT if I need to punish him to get that result, well: so be it. Hopefully nobody else is exposed to his block and tackle for another twenty or thirty years. I've begun showing him 1970s episodes of Doctor Who in order to ensure this is so. Today I had a second interview for a social media manager position at a medical startup, which I think I totally bombed, but oh well. I was only ever planning on using any potential offer they made to leverage a raise out of my tight-fisted employer, maybe even -- dare to dream -- getting my pay to keep up with inflation. At least tonight I finally made it down to the grotto. I masked and airbrushed the tail recognition stripes and the flaps, as well as getting the spinner at the same time: PXL_20220429_012334515 by Edward IX, on Flickr PXL_20220429_014151822 by Edward IX, on Flickr At this juncture I realized I'd forgot the little actuators for the inner undercarriage doors, which is a single U-shaped part. No problem! Buoyed by a confidence borne of ignorance, I ugga-duggaed it into position using simple tools (a pocket knife nail file) and boundless ignorance, a winning combination that was 110% successful in this instance. PXL_20220429_024501398 by Edward IX, on Flickr Hopefully tomorrow night we'll have time for a gloss coat and to start thinking about (ulp) weathering.11 points
-
A Mosquito of No. 60 squadron SAAF, Italy 1944. Tamiya from the box, I have added just Eduard seatbelts and a Master pitot tube. Decals are from the Xtradecal sheet. Gunze Dark Green and Sea Grey Medium paints, Tamiya NATO black bottom. This plane had the armament removed and a camera was placed under the navigator’s seat.10 points
-
This month's phixation is the F-4 Phantom. This is the Fujimi F-4N kit in a very colourful set of US Navy markings for VF-111 Sundowners. Fujimi F-4s are always a delight to build and although this one is not as nicely detailed as their British Phantoms, it was still a lot of fun. My decals were a bit iffy, with several disintegrating as they hit water. Next up - another Fujimi F-4, this time an FGR.2 of 111 Sqn at RAF Leuchars (see what I've done there!) which should finish next week10 points
-
My latest completion is the 1/72 High Planes Models Dassault Mirage 50DCM Pantera, this fought me all the way and is probably best viewed from about 6 feet away, I just wanted to get it finished in the end, decals from the kit and finished with MRP Paints. IMGP9218 by Phillip Wilmshurst, on Flickr IMGP9220 by Phillip Wilmshurst, on Flickr IMGP9228 by Phillip Wilmshurst, on Flickr IMGP9232 by Phillip Wilmshurst, on Flickr IMGP9235 by Phillip Wilmshurst, on Flickr10 points
-
No. I don't even know when I might start it. For now, it will be put into the stash. Chris9 points
-
Hello, Here is my completed IL-2 M3 from Accurate Miniatures. It was quite a handful. All the Best! Don9 points
-
These two kits were started in early 2021,but just got finished recently. 2020 saw the 50th anniversary of both the Lockheed L-1011 TriStar and the McDonnell Douglas DC-10,so these were built,a bit late I know 😊 ,as part of my anniversary builds. The DC-10 Demonstrator is already here on the RFI. This is the original Otaki kit released somewhere around 1970-1972 and is the most accurate TriStar injection moulded kit. They are being sold for silly prices on some well known sites because of their rarity status. I did not mention the Eastern Express kit here,because its more or less a copy of the Otaki kit,with some slight modifications and added parts.The exception is the -500. It features recessed panel lines and lots of details everywhere on the parts. They are a tad too deep,but nothing that sandpaper cant fix and with paint on,its quite ok. A nice feature that comes with the kit are the air stairs.Otaki provides not only one but two ! and also a display stand is included. The decal has options for the TWA twin globe livery and the All Nippon Airways "mohican" livery. They are nicely printed,a bit thick though. Due to their age,the carrier film has a bit yellowed but otherwise they are fine. For my builds I chose the Demonstrator version and the Air Canada delivery scheme. The demonstrator decals are from Classic Airlines by Nick Webb. They are of good quality,durable and fit on the model with just minor adjustments. Some extra parts are included if something goes wrong or does not line up properly. The Air Canada decals are from 26 and are wonderful as well. A big plus there is the detail sheet with everything necessary provided. The windows are from Authentic Airliners. Paints are from Tamyia and Gunze. Cheers Alex8 points
-
Hi all. This is my last work. Due to the pandemic and lot of problems at work , my production is at its lowest level....anyway...i enjoyed this kit. hope you like it. add ons are a Sparkit ejection seat, some PE from EDUARD, and the Reskit nozzle ( a pure wonder ). i did a light riveting. Time to see the pics : one real Mirage : My model :8 points
-
Hi all Finish this aircraft on March end and finally found some time to take photos of it. Not very satisfied with the photo quality, so just very few shots. Painting scheme: Su-27P "Flanker-B" serial number: 36911027920 (means the 20th airframe of 27th batch), 689th GvIAP, Baltic Fleet, Russian Navy, Autumn 2003 Kit: Great Wall Hobby GWH L4824 1/48 Su-27 "Flanker-B" Accessories: Detail & Wonder Studio 480601 Su-27 highli detailed 3D print landing gear set Master 48113 brass static dischargers Tempmodels AL-31F exhaust nozzles This will be finalized as a diorama, so let me show you the final version of photos later one. If you are interested in the in-progress thread, you can find it here: https://www.britmodeller.com/forums/index.php?/topic/235103573-gwh-148-su-27-flanker-b-heavy-fighter-building-record/ Comparison with "Red 01" in real life.8 points
-
Hello all 🥳 Many thanks in advance for your comments!! After a longer interruption, we are now going full steam ahead with the M12 😅 Today I would like to show you the current status of the construction, mainly I have spent the last days and weeks with the earth spade. After assembling the kit parts, I noticed in the reference photos that nothing was quite right here. So I studied the photos for hours and decided to rebuild the entire spade. Since I want to show the M12 in motion, this part is clearly visible fron the unterside and must therefore, in my opinion, correspond to the original (even if not 100%). I first considered using plastic card, but then switched to 3D printing. It took 3 attempts until everything fit well, but the end result is impressive. A second construction site was the rear of the M12. Academy also simplified everything here, which I didn't really like for an open vehicle. Plastic card was used here. I also took this opportunity to change the front fenders. The bogies were redetailed and missing holes were added using a template. At the moment I'm working on the gun, and there are a few things that need to be touched up. See you soon! MD The plastic is far too thick and the construction does not correspond to the original. The teeth are also too short. This support is not reproduced in the kit. The teeth in the original. Here you can clearly see that the two beams have been welded from plates to form a U-shape. This important detail is missing from the kit. You can also see the supports. The CAD model. The print preview. Much better! Now the mountings for the hinge bolts are also correct. The comparison of old to new. In some places the material is only 0.5mm thick. The riffle plate is made of PE sheet. Details like the framing of the crew seats. New front fender including the beads. New air filter and rear parts with some welded seams. Test fit with the new spade. Missing holes were completed with a template. Plus the new track support. The original socket has holes. These were completed with a mini tool. The gun barrel is good to use. After sanding, everything is perfect. ☮️8 points
-
Belatedly, the after effects of Covid having slowed all Martian activity down considerably, but as promised, we have the pictures of the improved outriggers as fitted to my P Class kit. The increased height of the outriggers now means that the the kit propellers should fit without needing any modifications. Although the assembly looks complicated, it seems to get easier each time I make it and this set were done in a single session, albeit one of about four of your Earth time periods (Hours is what you call it?). The key to making these things seems to be making the Y frame accurately and here the time spent sitting down with drawing board to lay out the frame has certainly paid dividends. All that is necessary is to tape the three parts of the frame down over the plan cand carefully apply a small amount of solder. Interestingly, the heat transference from the flux to the paper is so small that, even though this is the fourth set I have made if one includes the first set that failed, I reckon I can get at least four more sets of frames from the one drawing. The only job left to do on the outriggers on the Takom kits is to popon a brass sleeve to the drive shafts to cover the gap between the gondolas and the driveshafts. This gap is intentional as I need to be able to fit and remove the gondolas during both the construction phases of the builds. I like these Takom kits a lot and another Q Class landed at Martian Towers yesterday with an extra P Class winging its way from the Orient as I write these words. I think I may well add another Takom build to this thread, incorporating all of the shortcuts to making an easier build that I have worked out thus far on the project. I then expect to be able to sit back and enjoy watching some of you have a bash at this kit (Mentioning no names in particular @Chief Cohiba ). Anyway let's get down to the pictures and as always, thanks for looking. Martian 👽8 points
-
First time trying the chipping effect, it was a bit hit and miss. Overall enjoyable build, trying to pickup some new techniques. The canopy turned out better than expected as it was mostly done by freehand as I couldn't find a suitable mask. It was just a shame that the canopy finish is different to the fuselage as this was painted with a brush. Slight issues with getting the decals to sit down. There are still some techniques that I would like to use, mainly WW2 weathering, and aircraft weathering in general. EDIT: Added some additional pictured taken in better light.7 points
-
My all time favorite author. GNU Terry Pratchett7 points
-
Good morning, ladies and gentlemen. Let me present you my next model. Link to model on Google drive7 points
-
Small pleasant model that I had chosen to clear my mind after my first Mirage IIIE Modelsvit, to make a "quickly done" model.... Well, not so easy for me.... six months anyway ! This does not come from the model but only from me, which drags me miserably. The kit itself is very easy, no pitfalls, super assemblies. I also took a little time to have fun doing a two-tone camouflage (while the green suited him very well too...). And also to try various patina techniques. On a tank, we risk less. On the historical side, this SS-23 was designed at the end of the 1970s, entered service in 1979. Its fatal purpose was to transport nuclear tactical missiles. Intended to replace part of the Scub-B fleet, it was reputed to be very effective and made it a formidable weapon. The entire SS-23 fleet was disbanded in 1987 following the US-Soviet FNI disarmament agreements of 1987. And now photos : I hope you will like it. Complete set of photos can be find there and the work in progress there. Alain.7 points
-
Release expected in May 2022 - ref. 72140 - Mikoyan i Gurevich MiG-29 "Fulcrum" - Ukrainian AF - Ghost of Kyiv Source: https://www.facebook.com/ICM.Models/posts/pfbid0VZ7FxHQCSAMX2iwiiGYFAaMw9Rf5qBdw91Cp26d5fS437LusBoNzUsyyvuT6JfwVl V.P.7 points
-
Job done with the milling machine used as a driller, with the help of the crossing table, which precision is 0.05 mm. Here, the difficult was to space each group of 2 holes of a length a bit higher than the distance between two holes of the same group, and cover a total length of 10.5 mm (to keep 1,5 mm log free of holes at the end of each flute)@ So 2 holes of the same group ares spaced by 1.3 mm, and each group by 1.8 mm As you can see on this magnified pictures, the surface of the flute is still rough. I'm going to sans and polish them, and then....no electroplating ! Metal primer, Aluminum paint and mat varnish ! To be continued ...7 points
-
I think humans could learn a thing or two Holly and rolo enjoying a cuddle.7 points
-
Gentlemen! Takoms T54B in PAVN version during the advance on Saigon at the end of the Vietnam War. This is one of my most elaborate projects, which started with the cinema idea and ended with music. Special attention has been paid to the effects and weathering, which make up a large part of the work. I would like to thank all the fans of this tank for the nice comments and hope that you like the model as much as I do 👍 Have fun! MD ☮️6 points
-
This was the build that was started last year, and nearly shelved for ever. This was the first of a few practice builds before I take on some bigger projects. It worked out ok as a build that I wanted to try and freehand the air brushing, There are a few areas that I would have done differently, canopy was a bind, but hey, that's what practicing is all about.6 points
-
and some WiP photos:6 points
-
I usually build space stuff and aircraft but I wanted to do something Ukrainian so here is my quick build of the Skif 1/35th T-64BV. Equipment and markings are an amalgam of real vehicles and models on Britmodeller. Not up to the standard of most of the great stuff on here but I'm quite pleased with it.6 points
-
I posted pictures of the Bandai A-Wing I've built here a couple of days ago, so it makes sense that I add the other Bandai Star Wars models in my collection as well. TIE Starfighter this time (the original series version rather than the Force Awakens variety). As with the A-Wing, I've used the base that the kit comes with for now, but want to add it to a diorama in the future so will remove the base when the time comes for that. The Bandai kits are wonderful, my only real regret is that I've built most of them now so I don't have many more I can put together So there's a little artistic license taken for the painting, to break up the plain gray a little. I deliberately chose not to weather the TIE, it doesn't have shields both the craft and pilots were intended to be disposable so most wouldn't last long enough to become weather beaten and battle scarred (I know, it's science-fiction, but that's the storytelling for them).6 points
-
The decals are all on, some with difficulty, and final assembly is underway. The pylons are on, and await their stores and the undercarriage is on, although doors and wheels are to be fitted. The aircraft is one from 31 Sqn. This may be the last update, as hopefully only a couple of hours or so of work left on it.6 points
-
Yup, it's all a compromise and in almost every aspect. From designing a greeble to laying the model out for print. As you pointed out in the Hawk thread, you have to determine what compromises to make in detail between what can feasibly be printed, what can be scaled, and at the end of the day, how is it going to print. That means in some cases detail may need to be over emphasized while in other instances just a suggestion of a feature may be appropriate. It've very easy to get tied down in the minutia of detailing a greeble where the technology just isn't capable (yet). Sorry Steve, no tutorial this time around. It's all just yer basic extrudes and cuts. This is just a brief greeblefest to get me through the week. The upper wing center section got decorated with a few nuts n stuff as well as the wing locating holes and 4 little locating nubs for the fuel tank. which will sit bang in the middle like this. The fuel tank can be offset from the center when the gun is fitted but the one shot I have of 28's 504 doesn't have the gun fitted, and as far as I am aware that particular 504 was just a Squadron runaround at Ambala so was unlikely to ever have the gun fitted. I revisited the tail and reworked the rib taping and threw on a few more greebles visible in reference shots. Originally I had the entire tailplane as a single item, but that was going to be problematic when deciding how to chop the airframe up for assembly, so we now have a discrete port and starboard tail plane which will be joined through the fuselage by brass rods... much like the 1:1 A few more nuts added at the wing root and I have since created a couple of rigging holes in the fuselage sides More work completed on the engine. Last time around (Wapiti) I printed the cylinders separately and had fun trying to put it all together. This time I may try and print the engine as a single object. I know it will be a challenging support job if I go down that route so I'm still mulling that over to see what makes sense. Note to self - remember to rework the fins - I forgot to make them more prominent on that last session. According to the model, it does all fit together with no interferences, but I think there will still be a few tweaks to come on the engine before that job is complete. The cabane struts were modeled up. All straightforward stuff, however I think I am going to have to tweak the fuselage mounting locations a little. The struts are only 0.8mm thick - which is about as thin as I can take them and there's still a little bit of interference on the fuselage. Rigging this area is going to be a whole load of fun. My plan is to print the struts with a hole down the center to allow me to insert a piece of rod in the hope that it will provide some strength. With the Wapiti, the struts were just over 1mm thick and I managed to get some 0.5mm rod inserted into each strut and it worked. However I think I was really working at the limits of the old Mars with those struts - I ended up printing dozens of struts before I got a set that I could work with. Most of the time the through holes were blocked at some point. With the Mars 3 I think this task will be more successful though I may still have to increase the overall thickness of the struts as I believe 0.8mm is really pushing the limits here.6 points
-
A few wood and leather components, painted with oil paints. The brand used (Michael Harding) is an artists' quality paint, which is more interesting to use than the high street brands we usually see. Seat, kick board(?), dashboard/firewall (?), and steering wheel I wasn't totally happy with the seat, so I stripped it back And repainted it Freshly painted (very wet) in this image, I'll give the seat a few hours, and see is I want to make it darker.6 points
-
UPDATE Don't you just love Facebook 🤔 Following some feedback and further research it has come to light that the scheme I have done above is as the car appears in the Heritage collection. The car on the event had slightly different and addtional sponsor decals. Well now I've corrected that and done a further four iterations. Beginning with the car as it appeared on the start line, two verions with additional decals applied at different stages en-route and the car for the post race photo shoot when 'FINLAND' appeared across the bonnet.6 points
-
There is a raised script on top of the SU float chamber - It says "S.U. Adderley Park Birmingham" and it's curved to fit the top. Like this Fusion 360 has recently been upgraded to easily etch or raise lettering on curved surfaces. Unfortunately only on single curves, and the float chamber lid is part of a sphere. I tried a 2d engrave of the lettering but it didn't look right. I was discussing this with the guy who gave me the original 3d model and he offered to do it for me! Said - it's my job, I do this sort of thing every day. I sent off the 3d model of the lid and it came back with the script on it - marvellous! Then I discovered that there are two different lids - they are handed with fuel inlet being effectively mirror imaged. That isn't a problem, however the script won't mirror... I solved it by taking a spherical cut of the lid, leaving only the script, and then joined it to the mirrored lid. It seems to work - and - it is just readable in 1/8 scale. I have been printing parts as I go along, and because I've got big fingers and the parts in 1/8 scale are small, I've printed them in 1/4 scale as well. It's much easier to see where any fit problems are, and also how to split the parts for assembly and painting. I've started to model the rocker gear, but I have a feeling I'm going to be making four different rockers... The model so far - this a test piece, so I've only painted it for a quick look.... Drive side Timing side Carbs and inlet manifold (a deep breath when I fitted the manifolds - there is a gap between them - just). And the first valve rocker. The whole thing is split into 3 components so that it can be assembled. I still have no idea how the full size ones are fitted.... As you can see, there are castellated nuts! I had no idea they were standard in Fusion so I started to make my own - see the timing gear on the back of the crankcase. Then I did a search and found them - and in Imperial sizes too. Jo PS - looking at the pictures I realise that I have the SU script upside down. Ho hum....6 points
-
Further progess on the cockpit I'll let this dry overnight then get the fuselage together.6 points
-
PK-052 Sea Harrier FRS.1 SD6 points
-
F-4N Phantom II Tamiya 1:32 It is basically an F-4D set with a few modifications that I have introduced to make it externally resemble the F-4N version.5 points
-
Hi All I got in a few quality me-time hours over the past few days and here we have the result of a lot of googling followed by a lot of cutting, sanding, drilling and gluing in that order. As you can see, I spent the time making Gatling guns (not a sentence I use very often) and here we have the result. Two 6 barrel guns, to be mounted on either side of the nose. The barrels are sprue, roughly 2mm diameter. The brackets that hold the barrels are made of tank wheels glued to styrene backing plates. By pure chance these wheels contain 6 holes, so this made the job a little easier. The central tube is styrene tube (I bought a bundle of styrene tubes and rods off Mr Amazon). The ammo boxes are made of slabs of 3mm styrene glued together and sanded into the required profile. I had to VERY carefully drill 0.5mm holes in the ends of the 'barrels'. I used my new Ikea battery drill for this, a very useful piece of kit and dirt cheap (no I don't work for Ikea). The swivel brackets on top are made from 1mm styrene with more sprue, these will be glued underneath the stub wings on the nose. The 'pistons' were made from styrene tube with a tiny length of what I think is supposed to be an arial. In the last shots you can see filler which needs to be sanded off. I still need to add more greeblies, maybe a hydraulic pipe or two, but I'm quite pleased with how they turned out so far. Hope you like, cheers for now. Monty5 points
-
Thanks Roger, I appreciate that comment very much. Well I reckon we’re on the same page, yes. Thanks for posting that, more options for anyone following along later who might use this thread as a resource in their own build. Thanks Chris, I enjoy the staining and have to force myself to stop sometimes! This evening’s session saw the completion of the underside. The only drama was self inflicted when I had a small spill of gunmetal paint which I somehow managed to smear on a wingtip. Otherwise, aside from phaffing around with the main gear it didn’t lose anything, nor drop a dollop of CA glue where it ought not be. The kit provided PE for the antennas and aileron braces(?) which I didn’t paint but did heat to red hot to give them a natural metal look. I used brass rod for the cannon barrels instead of the kit plastic. It was in painting them that I had the spill…. I have an idea on how to represent a hollow barrel with paint which I’ll try tomorrow. With the bits and pieces added, I finished it all off with a final coat of flat future and set it aside to dry. I have a sneaking suspicion that I’ll finish this one tomorrow, the next update may well include the bench-top finish shots. Cheers.5 points
-
It was time to deal with the main gear last night - i.e. the making of the parts to replace the stowed gear that the Hurricane originally came with. Using a photo of the Airfix parts in Onshape I designed and printed simplified gear struts (not as fine as the originals but at least they are stronger) and the gear doors. A file was used to tidy the top of the strut and a drill to clean the hole in the wing. The two fitted together nicely so the same was done to the other side which also fitted very well. Sprue-goo was used to fit them in position. 1mm styrene rod was used to make the axles - deliberately cut long but they can be trimmed once the wheels are on. The gear doors were also fitted using more sprue-goo and they were painted with Mr Color Sky. The wheels were printed using the Fairey Gannet wheel design. I just resized them. They looked ok when I cleaned them up a bit, but once dry fitted they were too thin - so an adjustment was made to match the Matchbox Hurricane wheel size and they were reprinted this morning. The glue has set and the landing gear is solid. I just need to tidy the reprinted wheels, paint them and the gear legs and fit them to the Hurricane.5 points
-
I have some tough decisions to make. What “pose” do I put the tank in? Main boom up, using the winch at the front or the rear boom?? Also spoked or pressed wheels? I have references for both types of wheels been used. Anyway, test fitted the crew compartment floors today. Nothings glued in yet. I have also glued in a very crude drive shaft as a small part of this will be seen under the cable roller. I have also added some wiring to the rear firewall and radio.5 points
-
I agree wholeheartedly Boats and some of the rigging... Cheers Mick5 points
-
My D4Y2 is finished and here it is along with the D4Y3 and B6N1 I have been building in the background. Competent enough aircraft but they arrived too late due to a combination of the loss of 4 main carriers at Midway and the subsequent struggle against better USN planes in larger numbers. The tide of war had turned against them and they are perhaps not too well known outside of Japan. Pete5 points
-
I love the research that goes into learning about the history of a set of markings, or conversely, the hunt to find markings that correspond to an individual or historical event that's come to my attention. I love peeling the masking off to reveal a camouflaged model. I love looking at a completed aircraft. I like trying new techniques (WHEN THEY WORK). I like figuring out how I'm going to approach some tricky bit and actually getting it right. I love knowing that as bad as I am at it, I'm leagues better than I was when I first started out. Most of all, I think, I love the people I've met in the last twelve years of building models through this site. Who could have imagined the simple act of joining a forum to ask about the Indian Ocean Raid could lead to two trips to the UK and one to New Mexico and meeting some of the best friends I could ever have?5 points


This leaderboard is set to London/GMT+01:00