
Leaderboard


Popular Content
Showing content with the highest reputation on 08/03/22 in all areas
-
Hello everyone! This it is my recently finished He 111H-16 (German bomber), scale 1/48. The ICM kit (No48263) it was pretty good I can say. The model is brush painted and the colors used were a mix of Tamiya and Vallejo Model Air. Marking: He 111H-16, 5./KG 4, Eastern Front, Winter 1942-1943. Small description from the instructions: In the beginning of 30s It was appeared in the world an idea of high-speed bomber that could outstrip contemporary fighters. One of the objectifications of this conception became the twin-engine bomber He 111 designed by German Heinkel Flugzeugwerke AG company. Since the December of 1942 it were produced He 111H-16 planes with liquid-cooled Jumo 211F-2 engines of increased power, with VS wooden wider horde propellers and more powerful armament. This variant could carry up to 3000 kg bombs internally and externally, The He 111H-16 was the last mass produced variant of Heinkel's medium bomber. It were produced approximately 1155 aircraft up to the end of 1943. He 111H-16s saw service on all fronts as night bombers, transports and glider tugs. I hope you like it and thanks for watching!24 points
-
Hi everybody Here you are my latest job, AIRFIX GLADIATOR straight from the box ecept decals from old sheet CARPENA ref 72-49. Hope you will like it Cheers Thierry21 points
-
The Swedish-built single-engine trainer Saab 91 Safir made its first flight in November 1945. The Safir resembled the German Bücker Bü 181 Bestmann due to the fact that the two planes were designed by the same person, i.e. the Swedish Anders J. Andersson. A total of 323 Safirs were produced in five different versions. The Finnish Air Force used a total of 36 Safirs between the 1960’s and 80’s. When the planes were phased out, 14 of them were sold for civilian use. Saab Safirs were also used in the Swedish, Norwegian and Austrian Air Forces. I built my model from the Swedish Tarangus kit, which was of very good quality for a limited-run kit. The model was easy to assemble, although some puttying and sanding was needed. One challenging part was getting the one-piece canopy sit seamlessly on the frame. Since the model is very rear-weighted, a lot of extra weight had to be added to the nose. I also purchased a Maestro Models photo-etch fret and painting masks for the canopy and I scratch built a lot of extra details. Perhaps the most challenging part in painting the model were the red day-glo areas. I first primed them with white Tamiya fine surface primer since the day-glo paint is very translucent. For the paint I used Vallejo fluorocent red. I covered the surface in several thin coats and in the end the painted areas looked ok in my opinion. I primed the machine with Mr. Surfacer 1000 and then sprayed the surface with Alclad White aluminum. After attaching the decals, I covered the model with Mig’s satin acrylic varnish to achieve the right sheen of the Saab Safir’s aluminium body.17 points
-
Hello fellow modellers, this is my attempt at the recent SH kit I commissioned for the upcoming reprint of Valiant Wings title. Built mostly OOB, I added etched seat belts and brass barrels. Overall, I was quite happy with the kit although its somehow 'overengineered' nature did not promise an easy build - eventually, it was not the case and the kit went together fairly well. She was mount of G.Schöpfel of JG26 who shot down a quartet of Hurricanes within couple of minutes over Canterbury in August 1940. Cheers Libor17 points
-
I told my partner we would need to cuddle up under the duvet a lot more because I couldn't afford the heating bill. Strangely, she's now agreed to pay the bill herself.17 points
-
One of my many ongoing projects I am working on. The very old Aurora/Monogram 737-100,it must be 50+ years old and was for many years the only 1/72 Boeing 737. There is now the much more detailed BPK kit,which I also have in my stash,along with the -200. The reasons why I bought this old kit was because I was interested in that kit for a long time,it has the very early engines and it was sold at a reasonable price. This was the Monogram boxing with United Airlines decals. United never had this version in their fleet,so I was thinking what to do. As I already built a LH 737,it had to ve a bit different. Solution was found in one of my books about the 737;one of the test aircraft,it was already painted in LH colors although with the old logo on the tail. Upon delivery the fin was repainted in the familiar all blue with the yellow circle and the crane logo in it. As there is no decal sheet available in that scale for this livery,I had to paint all by myself. One of the reasons why I put it back more than once and worked on other projects. Getting the tail logo and the rest of the livery painted was a tedious time consuming measuring and masking job,as there is/was not much detail on the fuselage to refer to for the layout. The build of the kit itself was mostly straight forward. I only tried to reshape the front a bit to make it more accurate and the engines needed a bit of work too. The fanblades had to be installed a bit further back and under the engine exhaust,some kind of reverser fairing (is it called that way?) had to be added. The kit is fairly basic,no wheel wells or much other detail,but I did not bother too much as I also intended to keep the character of this old kit. Paints used were Gunze white primer,sealed with Gunze Premium clear,Testors silver and aluminium for the fuselage underside. Gunze chrome aluminium and burnt metal for the engines. Testors voodoo grey for the wings and wingbox. Coroguard panels are done with my own mix of Tamyia metallic grey and light grey. The decals come from the BPK 737-100/200 kits,the crane in the fin was cut out from a Revell A310 LH sheet and the windows are from Authentic Airliners. A lot of work,but I am pleased how it came out. Cheers Alex A comparison between the 737-800 (BPK) and the -100 gives a good impression on the types evolution16 points
-
For once a large revell kit that I didn't have any fit issues in fact it's probably one of my better builds.13 points
-
Here we go, Matchbox PK-308 Porsche 935, bought as a part-started kit from eBay. Most of the body and part of the engine was assembled and there were no decals. It's almost completely as Matchbox supplied apart from some styrene strip used to add some texture to the transaxle moulding. Decals came from Indy Decals in the USA and aren't completely right for this version of the 935 as the cut-outs for the NACA ducts in the rear wings don't line up and require some cutting and splicing. It also lacks the "Martini Porsche" decal that is shown on the front bumper in the box art. The build thread is linked below:13 points
-
Tugboat USS Nokomis YT-142, December 7, 1941, Pearl Harbor 1941 This 1/100 model was made from scratch by myself. Documentation was not easy to find. I started this project with a rather succinct plan of the torques and the water lines of the hull in order to model it in 3D. It was not easy because of the low resolution of the plan. At the beginning this project was planned for a 1/350 scale. But the result was really exciting, so I decided to continue and to realize a model in 1/100, my scale of preference with the 1/200. Other plans were more complete, allowing me to continue the design of this historical ship. Thanks to Roland for his documentary contributions. A good documentation is essential for a serene realization. Thanks to Bernard Huc for his 3D help on the "Tug pudding", the front fender of the tug. It was a real pleasure of creation and assembly. My most successful 3D project so far. The design subject that lasted several months here: History: USS Nokomis (YT-142/YTB-142/YTM-142) was a Woban class harbor tug built in Charleston, South Carolina in 1939-40. General characteristics Class and type Woban class Type: District port tug Displacement: 218 tons Length: 100' 10" ( 30,5 mt ) Width: 25' ( 7,62 mt ) Draft: 9' 7" (3 mt) Propulsion: Double Enterprise Diesel electric, single propeller Speed: 12 knots Crew: 8 members He was assigned to Pearl Harbor, Hawaii, in 1940. The Nokomis was present during the Japanese attack on Pearl Harbor on December 7, 1941. She was the first ship on the scene to assist the USS Arizona, and left the area due to the impending explosion of the battery below deck. It was then assisted to ground the USS Nevada, with the Hoga (YT-146), and the YT-153. December 7, 1941, just minutes after the attack was over: The grounding of the Nevada prevented the blocking of the entrance to Pearl Harbor. Then the USS Nokomis fought the fires and dried out the battleship USS California for three days. This effort made the California salvageable, to be put back into service later in the war. The Nokomis was also the last ship to move the surviving YC-699 barge before the Japanese attack on Pearl Harbor. The Nokomis accompanying the CV-8 Hornet returning to Pearl Harbor after its raid on Tokyo After the war, the Nokomis continued to serve the Pearl Harbor ships until she was de-commissioned in May 1973 and then sold to Crowley, San Francisco. She was renamed Sea Serpent and served for many years in San Francisco Bay as a tug and pump boat. In 1989, after the Loma Prieta earthquake in the San Francisco Bay Area, the Nokomis and the Hoga (which had served the City of Oakland as a fireboat) again fought fires alongside each other. The Nokomis was renamed Panamanian and abandoned, like many other tugs, to decay and rust. It was rediscovered in mid-2002, in the mud flats of Hunters Point, San Francisco, by tugboat captain Melissa Parker. It was purchased at an auction for $50 to benefit the Historic Tugboat Education and Restoration Society (HTERS) and was originally moored at Pier 80 in San Francisco. The 501 nonprofit organization was dedicated to historical research, hands-on engineering education programs for disadvantaged Bay Area youth, and cooperative programs among historic ship organizations in the San Francisco Bay Area and beyond. HTERS acquired an operational sister tug, the USS Wenonah, with the intention of using the Wenonah as a floating class to generate interest in HTERS to help raise funds to restore the Nokomis. After falling behind on dock rental fees, the two tugs were moved to Treasure Island, but dock rental and insurance fees continued to accrue, eventually costing the Historic Tugboat Education and Restoration Society both vessels. Sinking of the Wenonah (Sister Ship) The Wenonah was turned over to the Coast Guard for disposal, and Bay Ship & Yacht in Alameda took over the lease of Pier 1 at Treasure Island, which included taking possession of the Wenonah and Nokomis. Both vessels were scrapped in 2010 in Alameda. The Wenonah was a sister ship to the Hoga. It would have been a great resource of parts to restore it. The Nokomis was the oldest surviving naval vessel from the Pearl Harbor attack. The barge YC-699 in SF Bay and the tug YT-153 on the East Coast, along with the Hoga, are now the last surviving naval vessels from Pearl Harbor. http://www.runcornmodelboats.co.uk/USS_Hoga.html Some photos of this beautiful, typically American tug in 1/100 scale. Thank you all for your encouragement throughout this exciting project. The Nokomis' display case completed in February 2023:12 points
-
Since Zvezda released their superb Boeing 757 kit,Minicrafts effort sank even more in the favour of airliner modellers. As I had 2 of those in my stash,I thought if they cant be sold I might build them as well so I started work on both simultaneously. On both I chose to use the kits decals as they seemed nicely printed and I liked the respective liveries. The Eastern 757 was planned to build factory fresh as I found some pictures on the internet showing the 757 highly polished. First thing I did on the kit was correcting somehow the tail fin. It should be straight at the top and not raising from front to end. I sawed off a piece of it to get it levelled. The interlocking mechanism of the wings were cut off as well,it makes the alignment much easier. The most work was spent on the engines; As they come,they look terrible and if built and glued to the wings oob,the face upwards like on the 737MAX ,but more steep. First thing I did was sanding out the inlets on both halves,then inserting a piece of plasic tube to create a new seamless inlet. The nacelle also has a enhightened top were the engine mounts will be glued on to. Those were sanded off and that area flattened,so that the engine mounts will sit flush on the nacelles. Then the rear of the mounts were pressed down to sit on the hot section,glued on with CA glue. The mounts were cut down a bit to have a pointy end and straightened out.So if the engines are glued on the wing they will sit straight. The engine inlet and outlet rings were recreated by using evergreen 0.5mm plastic sheet,glued to the front,resp. end of the engines. Once hardened for about 2 days,the plastic sheet can be drilled open and then sanded to shape. This way no seam will be seen at the end. A lot of work but it improves the appearance of the engines tremendously,if you dont want to spend money on replacement parts. Some slight correction work was also done on the nose section to get it more 757 like. Here some putty and sanding did the job. The rest of the build is more or less by the book. For the metallic finish,I used Gunze chrome with some aluminium areas,with a gloss black base. The grey for the wings and tailplanes is Gunze grey 315 and the coroguard my own mix of Tamyia metallic grey and light grey. The windows are from Authentic Airliners and some metallic decal stripes were added to the fuselage to give a bit more detail to the metallic finish. Sealed with a thin layer of Gunze Premium gloss on the fuselage and semi-gloss on the wings. Cheers Alex With the AA 757,which can be seen in the other RFI...12 points
-
This is the Hasegawa 1/48 scale kit built completely out of the box.The decals for the last flight of a finnish Draken are from maestro decals. Saluti Giampiero12 points
-
Rockwell Buckeye T2C of VT19 of the US Navy based at NAS Meridian in 1975. Finished OOB with Citadel Ceramite White and Xtracrylix Signal Red. All brought together with Liquitex Satin Varnish.12 points
-
Here's my first completion of the Group Build , the Percival Provost . Built OOB and with mostly kit decals . Just had to replace the roundels with Modeldecals .12 points
-
My last Star Wars logo jet. I had this one finished some weeks ago but not yet photographed for the RFI. Now here it is finally. The build was straight forward without issues like the other 777s. Most fiddly parts are the landing gears with their detailed but also tiny parts. The decal sheet is from BS MODELLE. I used decals from him before,so I was a bit surprised with the problems I faced here. Some decals are wrongly designed and shaped so lots of cutting and aligning was necessary. Some elements were impossible to get in the exact location otherwise issues would occur in other places. It doesnt affect the overall appearance so I can live with it. The windows are from Authentic Airliners,details from the kits decals and spares. Paints are Gunze white primer for the fuselage,gloss coated with Gunze Premium gloss before and after decaling. Grey is Gunze grey 315 and metallics are Gunze chrome,aluminium and burnt metal. I wanted to take a group shot with all 3 Star Wars themed models but the space was not big enough...😊 May the force be with you Alex10 points
-
Here is my second Sea Vampire rescued from the dust bowl. This one is XG775, an Admiral's Barge in the Station Flight at RNAS Yeovilton in 1967. It's the Airfix Vampite trainer built OOB although it does have replacement aftermarket undercarriage legs to replace those that were broken. Brush painted with Humbrol Oxford Blue over Citadel Ceramite White. Transfers a mix of those in the kit and some left over from a Czech Master Resin build. And glossed up with Klear. And here along with its soulmate XA16010 points
-
Messerschmitt Me 410 1. Staffel "Edelweiss", Kampfgeschwader 51, Beauvais France 1944 Though I suppose she never was in the Alps I lke the background photos courtesy KaleuNW, Switzerland. Build thread . .10 points
-
This is an extended set of photos from the Matchbox 50th anniversary group build. I'd have preferred one of the other car subjects, but it was one of the last car kits that no-one had picked and I wanted to help fill out the range of kits built. The kit I had came from eBay and the multi-part body was partially assembled (wonky but I managed to mostly correct it). The decal sheet was absent but I bought a decal sheet from Indycals in the USA, these weren't an exact match for the originals as I think they were scaled down from decals to fit a kit of a slightly different 935. You can (or, at least, I can) spot where some splicing was required and places where the decal didn't quite want to go where I wanted it. The kit itself is very nicely moulded with no flash and what seems like a good level of detail. Fit was quite good although some holes needed opening up and the mating surfaces for parts could be very small. Probably the worst part to build was the front suspension, which is very fine and very fiddly. Anyway, here are the pictures: Tyre lettering was picked out first in white paint, then with matt yellow. The side stripes are made of three separate pieces, this side was the second one I did and turned out slightly better as a result. I found some Humbrol number 15 Midnight Blue as a good match for the Martini dark blue. This was used on the wheels, headlamp surrounds, wing end plates (the original kit decals included the background, but the replacements do not) and even touched up a few gaps in the decals. The multi-part body caused some problems with bits breaking off, you can see one of the cracks here. This is probably the best view of the modification made to the stripes to fit the NACA ducts. The engine looks a little crude here but could probably be detailed up. The engine looks a bit better from underneath, I added the ribbing to the transaxle as I didn't like the look of the plain moulding. I'm pleased that at least one of the exhaust pipes lines up, the other (wastgate?) pipe was a nightmare that only fitted where it touched a couple of other parts. It would probably be better to cut out the tail pipes from the bumper and fit some tubes to the ends of the exhaust system. You can't see much of the interior as it's mostly black, but I went for Tamiya NATO black for the seat to provide a little variety, a touch of light brown for the gear lever knob. It looks like the clear coat reacted with the decals slightly but only at the top of the bonnet/boot lid. Despite the issues, it has to be said that this built up into quite a satisfying little model.9 points
-
Here's my completed Skyservant not sure how to add a link to the build. Dave9 points
-
8 points
-
..thought there might be some interest in seeing the new(ish) 72nd IBG Dora built up. It was a fairly straight forward build with a fair bit of etch (especially the undercarriage bays), not my favourite medium. I was amazed at the level of detail - full engine, cowl MGs etc - and even more so as the fuselage halves closed up neatly with no hassle. Even the exhausts lined up with the openings in the fuselage halves even though I wasn't too sure of their placement (!). Finished in Xtracolor enamels - the contrast between the 'braun violett' and the green was so low I resprayed the green a bit 'greener' and I may even have got the colours the wrong way round. I've not put all the stencils on either as they were grey and very faint and not visible in this scheme, including the various 'Nicht breteten' (No step). Would have been 'better' in red ...8 points
-
Here's one that I started building a couple decades ago before taking a hiatus from model building. It's a Hobbycraft Canada kit, if I recall correctly. I dug it out of storage and cleaned it up, and then I decided that the tragedy of the Avro Arrow need not be the end of the story. I wanted to do the beast up as though it had enjoyed a long career defending the West, so I painted it up to look like it was still flying in the late sixties, maybe based in Germany with a three-colour scheme and the old Canadian roundels. I modified it with some external pylons and some better ordnance than what it was originally designed for. It's finished with Tamiya acrylics and weathered with Abteilung oils. Enjoy!8 points
-
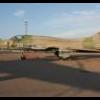
Welcome one and all to my next build, Revell's venerable 1/72 SR-71 Blackbird. I've seen some fantastic 48th scale blackbirds built around these parts in the last few months and was inspired to have a go at my own version of this amazing aircraft. I pondered long and hard at which kit to buy as all the 1/72 versions seem to have their issues... In the end Revell's boxing was relatively cheap, quick to be delivered and had a nice cockpit, with pilots(!), which I'm a sucker for, even if i they're going to be pretty much invisible. The kit turned up in a slightly battered state, though the box art is lovely: Everything is in black plastic, there are raised panel lines, a bit of flash and first impression is that the cockpit, indeed, is great, but the rest is going to need wrestling together. I'm already envisaging a fair bit of sanding and filling and that'll probably lead to a load of rescribing, how much I'm not sure yet, but I'm really keen to get a clean, crisp finish which is going to require a fair bit of elbow grease! So far I've just got the cockpit and pilots done. This was a mix of airbrushing the base coats followed by detail painting, shading and highlighting with brushes. Not going to see much of this with the canopies on but at least I'll know the pilots are well turned out in there! I'll try and keep regular updates going on this one but won't bore you with too many gory details of ill fitting parts and lashings of sprue goo... Thanks for dropping by! Sam7 points
-
Kit - Kinetic 1:48 Paint - All Tamiya acrylics Decals - Kit Extras - Missiles from RoG Rafale kit, Pavla resin 'Dash 5' nose, Aires resin & etch MB10 seat. Mirage 2000C-9 United Arab Emirates AF Al Dhafra AB 2010. Had this kit for a long time but like a couple of other recent builds, been waiting for my 'skills' to get to a point where I feel confident enough to have-at-it !!. It's not a straightforward build by any means, and the crude instructions (with no paint call outs) do not help much. But because I've built the Kinetic F-5A & Alpha Jet, I was sort of prepared for a more challenging build process. Where this kit excels is the surface detail, it is exquisite with beautifully refined panel lines, sharp trailing edges and crystal clear canopy parts. There's A LOT in the box, including four separate fins and many of the sprues from the 2000D/N kit of which for this version you only need one of the fins - because those parts were moulded even better than the 'fighter' parts, where possible I swapped them over. The very pale camouflage grey was mixed using the (in)famous Mk.I eyeball method and the darker tone is Tamiya Medium Sea Grey (XF-83) straight from the bottle. I freehanded the pattern at first using my new Dragonair AB with a 0.2 needle/nozzle but it was just a little too 'vague' so I masked the edges with Blue-Tac and redefined the edges which was absolutely the best call, glad I did it. Not too much in the way of weathering as every photo that I went to showed UAE Mirages in fairly immaculate condition. I added a few streaks under the fuselage with dry-brushed oil tones and more heavily on the underside of the drop-tanks where the cr*p would be kicked-up from the runway surfaces. Not too much else to say, yes it's a bit of an effort to get built but given that the 1:48 alternatives are the Jurassic Era kits from Esci & Monogram or the very rare Heller kit then this is the 'only way to go' if you want a Mirage 2000 on your shelf - and I really did ! - feel free to comment, criticise or ask any questions. Following very soon will be something British in 1:72, in the meantime all the best from New Zealand. NOTE: I'm aware of the scratch on the left side of the canopy and am slowly reducing it with gentle sanding and polishing... it already looks better than in the photos. Ian.7 points
-
Built this for the F-14 STGB but ended up finishing it in the KUTA! An absolute pleasure to build. Any mistakes are all my doing! Build thread here: Untitled by Arthur Filippis, on Flickr Untitled by Arthur Filippis, on Flickr Untitled by Arthur Filippis, on Flickr Untitled by Arthur Filippis, on Flickr Untitled by Arthur Filippis, on Flickr Untitled by Arthur Filippis, on Flickr Untitled by Arthur Filippis, on Flickr Untitled by Arthur Filippis, on Flickr7 points
-
It's been a while, mostly due to other projects, but progress has picked up on this one again. But first, such interest in the poor old Vosper......... Thank you Ian. Perhaps you and @Courageous should have a treat, there you go ...... The Vosper hasn't been coming along at all for a while, mostly due to loss of Vosper mojo, but when the Viking, QF-86 and P-51H are complete (all due to be ready for the April Poole Viking show), I do intend to re-commence work on the Vosper, and maybe even get it finished for Telford 22. Beers all round if that happens! And other distractions in the form of joining a new model club, the BDAC (Boscombe Down Aviation Collection at Old Sarum) and a very quick visit to the Boscombe Down collection itself last Sunday morning (Huge thanks to Mrs T for getting me up there and back). Longer visits are still off the cards until I get my veins zapped and can manage more than a few hours on my feet! Hopefully after my operation, we can do the full visit to BDAC and Middle Wallop @CedB and @Ex-FAAWAFU! Some pictures for those interested, perhaps @Navy Bird for the Raspberry Ripples. If you click on the picture it will take you to my (growing) collection of BDAC pictures on Flickr.... Meanwhile the two fixes to the Viking in the form of: 1. Corrected Tailplane 2. Filled in and repainted airbrakes on top of the wing Next task was to have been masking for the dayglo. I made a start taking measurements from the 172 plans provided in the kit, but subsequently discovered from looking at pictures of the real thing, I had the white spanwise gap, too far back, by just a visible tad. The masking so far: The real thing showing more dayglo red behind the spanwise white section than ahead of it. Will need to redo the initial masking to match and complete the other wing, then dayglo paint will follow!. This photo was is on 18rmt Flickr stream, and appears through posting the link. I will remove if 18rmt requests. Terry7 points
-
MikroMir 🇺🇦 Bison update some work on the complex landing gear assembly the parts are small and detailed , but the plastic is not brittle, so very workable! some PE to make everything even more complex fi seems good, but not glued yet, as I need to do more paint work first..... cheers, Werner7 points
-
Work has commenced with the assembly of the wings and engine nacelles. DSCF3142 by timothy jones, on Flickr DSCF3143 by timothy jones, on Flickr The undercarriage has been assembled and painted. Painting the wheels needed a bit of care as did removing them from the sprues and cleaning them up as the main wheels are only about 4mm diameter. I still need to pant the tyres on the nose gear. DSCF3144 by timothy jones, on Flickr I've added some weight to the nose and closed up the fuselage. DSCF3150 by timothy jones, on Flickr Next on the agenda is to sand down the seams and get the wings on.7 points
-
This is the rolled up side 'window' of the Tilly tilt. I cut the material from a Philadelphia Cheese tub because I liked the texture. In life it doesn't look like a cross between a Swiss roll and a waffle. The straps were cut lead foil from a wine bottle capsule. Note the use of the 123 block as a gravity clamp. Authentic? Prob not, but it's interesting, which is the point really. Ah, here's a bit of a random photo. Who misses the good old plastic cotton buds? The ones that didn't lose their heads half way through cleaning the airbrush. Well, I found the answer. We can still buy wooden ones, bamboo to be precise, and until wood is considered environmentally unsound, they do a great job in tough modelling situations. The base, sprayed with white primer from above. It looks a little more chalky now. More importantly, it now has deep shadows where the gigantic boulders block the sun, which my little pebbles don't do without painted assistance. This update jumps about a bit, as I've been working the base and Tilly alternately all day. Rusty wheel arches under primer. I think they already look a lot better. I'm dying to get at them with a fine brush! I just finished an airbrushing session, mostly freehand without masking which is a lot more fun. I'll tidy up later with a brush. I painted the inside with Cockpit green, which I have seen in many old vehicles. It's probably not 'correct' for a Tilly in 1944 but it's absolutely bang on for my model car in 2022! Once I freed myself from my old perfectionism about stuff like shades of paint, moddelling regained all of its old pleasure. Later on, but before the photo, I dirtied up the load bed and shaded some of the cab, when I noticed that the colour in the airbrush might be good for that. Is it brown? Is it green? Both actually. I say it began the war in brown, was later painted green and now it's not sure what it is. I'm really going for the dilapidated truck look here. Same for the tilt but there's a bit more fading expected on canvas. The doors appear to have linings like my old Ford Anglia, so I made them as dirty as it was when I bought it and will continue to weather them until they are as dirty as when I sold it. The underneath is now a colour which has no name at all. Whenever I found myself with a surplus cupful of paint in the trusty Infinity, rather than throw it into the bin, I sprayed it on the base. I feel that things are starting to happen there. It took ages because I was on a 0.15mm nozzle but tomorrow, I'll be loaded with a 0.4mm and fifty shades of green (and brown, and grey) Vallejo paint. That's the kind with the perfume included and it's so non-toxic that I may have it for breakfast. That will be far more pleasant than an evening spent spraying Tamiya lacquer. This project must be finished by the start of the M3/M4 GB on the 19th of this month. That's less than two weeks away 😱. Or to put it another way, I've got more than a whole week to spend on this and this alone.🙃 Things should move pretty fast now so stay tuned, and don't miss a minute of it!7 points
-
Hi all, just fineshed the new Tamiya F-4B in 1:48 - one of the best kits I ever had in my hands! Used some Eduard parts like Brassin wheels, seats, early fin cap, exhaust nozzle and TER`s, Bronze undercarriage as well as Decals for a VMFA-323 aircraft. Further I add the Quinta Studios 3D Cockpit Decals.6 points
-
Some Bedfords, CMPs and a Scammell all in 1/87 scale. Manufacturers are ADP, Artitec, Trident and Wespe Pictures from the workbench: *KLICK* Cheers Macki6 points
-
Evening all.......finally finished the Elephant........ It's been on the bench since March 2019, nearly as long as it took to design and build these things in the first place.... I'm still pondering some additional dried splashed mud or not.....I need to be in the right frame of mind to not over do it, if I do at all. Anyway, here she is with a figure to give it some scale. Cheers all.... Simon.6 points
-
As mentioned in the RFI for my Eastern Airlines 757,I worked on both kits simultaneously. The mods I did are explained in the Eastern 757 thread,for the AA version I added the winglets,which come from a Eastern Express kit. They needed a fair amount of work to fit on the Minicraft wings...I always assumed the EE kits are simply copies of the Mincraft 757,but it seems not entirely. For the AA 757 I chose a more weathered look as pictures I found showed a quite worn and tired looking 757. The metallic look was created with Tamyia aluminium with a thin overspray Tamyia Mica silver from a spray can. Some silver decal stripes were added for more detail.The decals are from the kitwith the exception of the cockpit window being from Authentic Airliners. The cabin windows were printed on the stripes,so I could not use AA cabin windows. The coroguard panes are from a Flying Colors detail set,that I found in my spares box as well as some other details. The "AA.COM" logos on the winglets come from a Hasegawa 737-800 kit.They are a bit smaller than they should be but it was all I had in my stash.Most important that the logos are there at all... 😉 I sealed the fuselage with a light coat of Tamyia semi-gloss to tone down the metal and Tamyia matte varnish for the wings and engines. Weathering was done by using Humbrol graphite powder. Cheers Alex6 points
-
This is the Special Hobby's Bell XP-77 fighter. I built it back in August 2014 before I started posting RFI's, but I needed to take a picture of it for another thread, so I figured I would post it now. The XP-77 was conceiver as a lightweight point defense fighter made with nonstrategic materials, but it had a long gestation period, did not meet performance expectations and was tricky to fly, so the project was canceled. Note that since it was made from nonstrategic materials it is not a NMF but aluminum paint, Enjoy.6 points
-
I got a little bit sidetracked with a few other projects, but finally got stuck into it again and finished. Here it is… After some time tormenting myself on exactly what colour should be used (the whole 357th fg US or RAF colours argument), I landed on both. AK real colours Dark OD 41 with 10% Tamiya buff for top, and tamiya raf medium sea grey unlighted for underneath. I used montex vinyl masks and decals. A fantastic product, but I didn’t see the funny side to it not having the subject’s serial number in the decals - the project number tag thing below cockpit. I used a tamiya decal instead. So serial numbers wrong but whatever. You’ll need a magnifying glass to notice it. for the invasion stripes on the fuselage I ripped the masking tape in the straight line so that the edge would resemble it being crudely painted on like they were. Happy with result. according to my research and pics I’ve found these things leaked like a Land Drover on the underside. Simple oils paints were used to replicate this. Surprisingly the ammo wasn’t too hard to paint. I use citadel base gold paint and dry brushed it on so it didn’t foul the colour underneath. barracuda placards and a few lead wires to spruce things up. The Eduard “look” dashboard was a nice addition too. Not too fussed about painted dashboards so it definitely made life easier. very happy with the kit, outstanding engineering. The I very much appreciate the clever use of magnets and screws for things like landing gear. Nothing worse than botching a glue job right at the end when attaching landing gear etc. it was one less headache. Highly recommend this kit.6 points
-
Afternoon! More progress on the Halifax, which is coming together now. The photos hopefully show whats what. Last pic shows the wings attached but not glued in position as i have still to paint the uppers. TFL, Cheers Greg Front row have been reshaped given comments that the blades are too fat and not pointy enough!6 points
-
Glazing painted:6 points
-
How to use about 50 quids worth of Tamiya tape! what a chore, I’ll give it a quick spray them I’m off for lunch and a second viewing of ‘The Batman’ as I couldn’t decide if I I liked it or not the first time around SD6 points
-
With my last models I hadn't much luck with the decals. So this time I've tried a different method. I cut out any transparent part of the decals to avoid the silvering I was expecting with these old decals. For the crosses of the upper wings and at the fuselage I cut a stripe of masking tape with the same width as the transparent center of the crosses. Then I put the tape on the wings and fuselage at the places where the transparent parts would have been. I cut out the white angles and transferred them onto the model, using the tape crosses for orientation. Later I cut out the Hs, hoping they wouldn't break. They did, but I could put them together on the model. You know that from swastikas that come in two parts. MicroSet and MicroSet did a great job. The result should have been good, but I made a mistake with the lettering on the right side of the fuselage. I had placed the crosses at the identical place on both sides, but on the right side it is too near at the cannon, leaving not enough place for the Hs. I hadn't considered the cover of the cannon I put on later. It is longer than the round base. So the black H is partially concealed. Too late for a correction. . . The rest was adding the remaining parts. The undercarriage looks a bit strange, but the angles of legs and wheels are correct. As I am not an artist in weathering I did a bit of Revell pigments here and there and so she is finished now. .6 points
-
Yeah, I've got many of those myself. This is me aged ~23 thinking I was a rockstar: Fast forward to today and this is me aged 41. Older, wiser (ok, maybe not), slightly more metal stuck through my ears, and definitely more knackered. The hair's still just as long, I just don't braid it any more: James6 points
-
Nearly there, Bit slow this weekend as I was on the pints Saturday night, Just can do nights out like I used too....only 7 pints too. Current State of the RB's Decals next and then seal them in , Matt coat and stick em under the wing. Though going, They look like 3d Prints cast in Resin, you can see the print lines in the resin, Very Delicate, Broke one of the front fins off too, Surprised I did not do more damage!6 points
-
Good morning everyone … Camouflage is done on this. Only the green for the dielectric, cone, and wheels is next. I tried to use the worms but wasn't satisfied with how they were laying out. So in the end this is all freehand. I will need to redo the Wheel bays but nothing major. Once thats done I will paint in the camera windows. Please feel free to ask questions, post comments or add thoughts. Dennis6 points
-
Well, I've done about 13% of the rigging on this string-bag and I'm already cross-eyed... IMG_5315 by Evan Bailly, on Flickr 🤪6 points
-
I look forward to seeing you build this. I have built a couple over the years and am hoping to start another one later on this year. BTW, in 2007 I wrote to Paul Davis, Refit Manager of Green Marine, who build the lifeboats for the RNLI. He also advised Airfix on the paints used. I had written to him to ask about the correct colour for the hull above and below the waterline. H15 Midnight Blue is fine for above the hull but he suggests a Cherry Red for below. This is for a boat with newly-painted anti-fouling but once it has been in the water for a while, then it turns pinkish. He did send me a couple of pictures showing both colours on the hull of a Mersey Class lifeboat (RNLB Royal Thames), although a different class to the Airfix kit, the colours still apply: Pictures copyright Green Marine and courtesy of Paul Davis Another thing I asked about were the toe rails. These are the uprights that go around hull and onto which the guardrail stanchions are bolted onto. I wanted to confirm with him that they were a light grey and not white and he has confirmed that they are indeed light grey and as you can see in the second photo. He also said that Humbrol H18 Gloss Orange was a perfect match for the superstructure. Dave6 points
-
Good evening. Some more on the trailer. The oils have dried and been sealed with more gloss coat and a Tamiya black panel line has been applied to the planks. After some procrastination I've decided to just add the license plate decal and not the large optional number on the right rear mudguard as I can only find one image showing this feature which incidentally is what the kit box art is based on. Instead I opted to mask and add the white width markings on the rear mudguards to add some interest. The license plate decal was a pig to fit and needed notching. With hindsight I should have removed the three raised details as I can't find a reference image with them on. I couldn't bring myself to do this though after the paint was added. It ended up being academic after damaging the paint on the right mudguard whilst removing the mask for the white markings. Moving on, the bits and bobs for the winch were next. This consists of some after market resin parts and a doctored towing eye from the spares box. The hook is from the trailer kit and the single link is from a chain I've found that is near enough for the other details that will be added. The problem with the towing eye was the open side where the cable is attached. This has been fixed with drilled out stretched sprue. It will make gluing the metal cable to this part a lot more straight forward. Below are all the parts for the end of the towing cable and the bracket for fixing down the spare wheel. Finally it all added to the trailer. I turned blue holding my breath when cutting the tow cable to length as messing it up could have been a disaster after gluing the winch housing in place. The spare tyre has been weathered but nothing else. Everything is glued in place apart from the chain tensioners as I don't fancy crimping on the chains in situ. The cable eye and rollers etc need picking out with a gun metal paint. It's all looking very shiny but not for much longer. Another dry fit. The wheels have been weathered and that is it for now. Thanks for looking6 points
-
I masked the stripes and applied the Sky Type-S to almost the entire fuselage. I think this paint job will really give the aircraft a shark-like appearance. I have Calculus' submarine n my mind, even though it will look complexly different. Hergé drew this, by the way. Not me. I found it on the web. Here's the Wyvern... The Tyre S looks very nice. Sprayed on smooth and silky. Dark Sea Grey tomorrow... --John6 points
-
My Buccaneer build is finally done. What started as an out the box build got a bit more involved as it went along. A few aftermarket sets got added, nothing much, but it took the build slightly away from my usual stock as a rock builds. I really like the look of the real thing and can see me getting seriously tempted by the new Airfix 1.48 kit when it turns up. Build thread here...6 points
-
Good idea. Can I send you my elderly mother in law 🧙♀️5 points
-
Here's a few more good pictures of this strange Sherman M4A3 HVSS 105mm rusty wreck, the green colour that can be seen on the turret pistol port is from when this Sherman was given an all over coat of green graffiti with white spots, which it has to be said looked very strange, there are patches of this green scattered around all over this rusty wreck. The picture below is a good example of the green that was applied as it can be seen on the hull top plate near the engine deck, this picture is also a good example of the junk that can be seen in the engine bay, I think there's some bits of old rusted sponsons that have broken off and been thrown in there. Picture below, the back of the turret looks to be in very good condition in comparison to the rest of the tank, it seems to have very little in the way of rough corrosion, this is about the only part of this Sherman tank wreck that has survived the elements quite well. (My thoughts exactly ) And that's a piece of the tracks I think sticking out the sand on the right hand side, It's probably sat on about half a length of track buried in the sand, but I'm not doing tracks, so I'm just gonna forget that I saw that, what track? Nope, I've not seen any track,.. none at all... Matt5 points


.thumb.jpg.d3635a7ef6507d35f372dd09671fe96f.jpg)


This leaderboard is set to London/GMT+01:00