
Leaderboard


Popular Content
Showing content with the highest reputation on 18/02/22 in all areas
-
Finally time to post my RFI of my Blackbird build completed and in its Barn. I toyed with Sled Shed and Habu Hut but settled on Blackbird Barn! it’s the old Italeri kit that I picked up before the Revell one came out. Not as detailed but I added lights and wanted the diorama more than the stand alone jet. Thanks to many, including @Alan P, @Serkan Sen, @billn53 and many others who have supported along the way. The shed and start cart, step and other bits are scratch built She is finished as 64-17974 in the late black and red scheme of the mid 80s at Det 4. Ichi Ban herself, as displayed at the Mildenhall Airfete in 84, when I was there watching. Decals are from the Caracal set. Even got a pilots autograph! So all done now - thanks for looking The build can be found at And the Shed build24 points
-
I really enjoyed this build, a nice kit!22 points
-
My latest finished build is the BPK Boeing 737-800. The build was started last year and dragged a bit due to some issues,which lead me to stop on this kit for a while and concentrate on other projects. I actually planned to have clear windows,but the clear parts for the cabin windows had a terrible fit,which I could not solve satisfactory. Another problem were the paint masks for the windows which not only had to be applied for each single window,it took a good 2 hours for both sides,the results after painting were rather disappointing. I also spent a considerable amount of time on the cockpit,but I thought there was something not quite right with the window sizes.When I was applying the silver window frames from the Authentic Airliner decal sheet,I realized that the frames of the decal did not match with the clear part at all.So in the end I oversprayed the windows and used the AA window decal instead. The overall fit is good,careful cleaning and preparation of the parts is a must. Some major issues are in the instructions. Sometimes its difficult or impossible to make out where some parts have to go or in the worst case,are completely wrong placed. Also some parts are not used,at least for the Qantas version,but they are not marked at all so you will have to find out yourself. Also if one follows the instructions concerning the landing gear,it will be impossible to glue it on its position later. I found out its best to build up the gear by installing the legs first and then add all other parts .DON'T follow the instructions !! I also glued the engine mounts to the wing and attach the engines after build and paint. Its much easier that way. The rest of the build is more or less straight forward,some PE parts are very delicate,so caution is a good advice. The fuselage was spray painted with Gunze white surface primer 1500,the red is Revell enamel 31 with a few drops white and the silver-grey stripe around the fuselage bottom is a mix of aluminium and neutral grey. Wings are painted with Gunze grey 315 and received a matte varnish after the decals and weathering was applied. The decals come from the kit and have a good quality and are also quite extensive and detailed. Again here there are some errors in the instructions,so photo research is needed too. Windows as mentioned from AA. Some antennas are not included in the kit,thes were taken from a Heller Boeing 707 sprue in my spares. The Satcom antenna is also not included.I was not able to find such in this scale on the aftermarket,so I will leave this until I found something that matches. Overall I am happy with the end result,despite its issues its a great kit but absolutely not for beginners. I also have the BPK 737-100 and -200 but I hope they will be a bit easier and with less errors in the instructions... Cheers Alex21 points
-
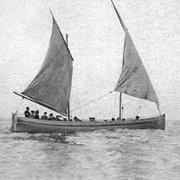
Hi all, Apologies if I've post some of these before but I re-scanned them and posted them on another forum. I therefore wanted to share them with you. I hope you like them. THey were all taken around the South and Mid West in 1980 and 1982. Martin15 points
-
A pair of recent completions. First, the Matchbox 1/72 Mystere IVA, done for the Matchbox Anniversary GB over at UAMF: A rather crude kit, lacking detail and subtlety, but once you've filled in all the trenches, it doesn't look too bad. Finished with the late, lamented Testors Metalizer Aluminium. Secondly, the ESCI 1/72 F-5B. This is a definite step up in quality despite being nearly the same vintage. Also finished with Testors Metalizer Aluminium.15 points
-
Hello, gentlemen! A thousand pardons! I've been working on this project for two months now and I've never managed to write anything about it. But my modesty isn't accidental - the project is really daring. Anyway, I haven't done anything like that in my life. So, at the risk of being a bad guy I decided to convert the well-known model HMS Warspite from Academy to HMS Malaya for 1940 in 2 colour alexandria camouflage: (as usual - thanks to @dickrd for the advice) I am planning to use the hull (after some modifications), armament, dinghies (they of course will also need modification) and some details of the lower level superstructure. Also of course photo etched rails, gangways, chains, winches and some other little things will be used. The rest I want to make myself. I must say that nothing is new under the moon and similar work was already done by Phil Reeder in 2014. Giving credit to this brave modeler, I want to end up with a model with more attention to detail. Even if that job takes five years! I'm not in a hurry! ( I will try very, very hard to take my time ). And if I end up being the man began to build and was not able to finish, let my notes help the more persistent follower. Or maybe (you never know?! ) inspire Trumpeter to release a Malaya model in 1/350 😈 What have I been doing for 2 months? I started making the hardest part - the main superstructure. Here's how it looks at the moment: It's far from finished but it's moderately optimistic. All sorts of little things, including a homemade aeroplane (Malaya had Swordfish and not Walrus at this time) and of course homemade sailors in jackets. These are the chains I plan to use: on the right prefabricated anchor chains, North Star, from a set of flat chains from Microdesign I plan to use the thinnest for the paravan. Here is the work plan for the hull: 1. First we need to saw off the boules - they will interfere with the mounting on the stand. We will leave more at bow and stern as I want a rough sea again. 2. Add casemates fore and aft. 3. A lady should have a waist. Warspite has one too! But is it worth messing around with it? Can it be seen only when looking at the model exactly from the stern? Unfortunately, no. It is clearly visible in almost all the Malaya and Barham photos because of the distinctive shape of the rubbish chute: Warspite has that detail in a different location, so the waist is less visible. 4. Next - portholes, exhaust spigots, sheet metal borders etc. 👨🔧👨🔧👨🔧👨🔧 🪚🪚🪚🪚🪚🪚🪚🪚🪚🪚 sawed off! To be continued14 points
-
I’m not a tank guy (mostly cars, aircraft and occasional ship) but here’s my third attempt at an AFV and my first attempt at a “mini” diorama. My goal was to recreate the scene shown on this Tamiya 1/35 M4A3E8 kit box art (based on the excellent Tasca kit) that’s been in my stash for +10 yrs: And here’s the result: I built this kit pretty much OOB except for the decals (Bison) and the resin stowage (Value Gear Details). I used Vallejo acrylics with oil washes and some enamel dry brushing. Vallejo dry pigments we’re applied to the tread and bogies. Figures were from the Tamiya kit and painted with Tamiya acrylics per the kit instructions. The base is an oval wood plaque I picked up at a crafts store and the diorama ground was created using a Woodland Scenics beginner kit. I’m a total amateur on tanks so please forgive me on any inaccuracies and errors. Most important, I had a lot of fun building both this tank and the base and am now hooked on yet another area of scale modeling. Cheers, John13 points
-
Hi Folks! It's been a while since my last post... parenthood takes a lot of my time nowadays... but -as I'm sure a lot of you do- I have become a "night owl" regarding this beatiful hobby. The legendary Mitsubishi Zero have been a pending model on my hangar, so I bought this classic Tamiya kit from the 90's and decided to give it a go. In the meanwhile, Eduard released their outstanding new tool, but I decided to keep on with the venerable Tamiya kit. So, I entered the twilight zone of the Japanese colours on these early models... you know what I mean. After reading and laughing a lot, and thinkin about the very special bunch of human beings we modellers are..., Nick Millman's research on his pdf (and a lot of the debate on its lovely page) gave me the last push to decided for AK REAL COLORS... RC 302 IJN J3 Hai-iro (grey, for the ailerons and fabric parts) and lighten RC 303 IJN J3 SP (amber grey, for the main fuselage). So, no more words, here is the finished model, representing the aircraft flew by ace Saburo Sakai in 1942, Bali. Happy modelling to all! Cris.13 points
-
Hi folks, this is one of my older projects which I was able to finish only recently. It covers the early appearance of Iraqis F.1's as it looked during the operation Giraffe, i.e. attacks on Iranian F-14's. Therefore she is armed in classic intercept configuration consisting of Matra 530F and Magic Mk.I missiles with single RP.35 drop tank. The 4014 is known from later date wearing 14 kill marks, but majority of them were not confirmed. The build was quite OK, but since this was one of the first Special Hobby "new generation" kits, it suffers from somehow poor fit at places and rather softly defined details. I used Eduard etched for the cockpit and Master pitot. She was airbrushed with Gunze acrylics using my own mixes as I did not quite like the instructions recommendations. Cheers Libor13 points
-
Hello all, this is the latest old kit I have completed. It is not the world's best finish by any chalk, but it represents a milestone for me personally. I was given one of these kits by my Mum and Dad for Christmas 1966. I was 9, and by then was able to make all sorts of Airfix kits, but I failed dismally with it, and Dad finished it off for me. I was well pleased with it (was that a phrase then?). In fact, I was so pleased with it that I bought another in 1984 or 85. Then I took a break from modelling, and re-joined the hobby back in 2008, whereupon I decided to give it another go. Well, I failed then too. Fast forward a few years, I found KingKit and what do you know, another ended up in my possession, and this time I succeeded. The markings in the kit were damaged, so I looked around for some inspiration. I recalled that eons ago I had seen these in RAF colours and remembered that I wanted to do one in camo, so I asked for help in the WWII Aviation chat section and was given some great advice, and this is now the result. I had a number of Modeldecal transfer sheets, and they came in handy, although there was a little bit of a compromise on the under-wing red/white/blue flashes. I did no additions to the kit except for scratch-building one of the lower engine exhausts from 0.8mm brass rod, the original having been missing from the kit, and adding some rigging between the outboard struts and between the tail fins. I used ColourCoats paints for the camouflage, brush-painted and was very impressed with the yellow - that only needed two coats straight over the grey styrene. Cabin windows were glazed with Humbrol Clearfix - much better than Krystal Klear. Fitting the wings was my downfall on the previous two builds, and it nearly was again this time. You have to add a pair of struts under each upper engine nacelle, glue them onto the lower wing, then add a jig which holds the wings in place while you then add the other struts. An extra pair of hands would have been useful. The top wing skewed to start with, but as I added the extra struts, it gradually started to straighten out. This arrangement meant I had to paint the wings first, and part paint the fuselage (well that part was probably optional!), and then there were two parts to the top of the fuselage go in to lock the wings in place, and then the rest of the painting can be done. Those two parts would interfere with the jig, so it needed to be done this way as far as I could tell. Anyway, it worked. The cockpit glazing was not the best of fits, nor were the exhausts. One I had to replace as I mentioned, but they were very fiddly to get in remotely the right place, and probably should have been done before I fitted the wings. I don't think I got them right in the end. This aircraft has an amazing stance, it looks ungainly but beautiful at the same time. I am so glad I eventually managed to complete one, I have the new Vintage issue in stock now, that will be silver, and hopefully I can make a better overall job of it, but not just yet. I am really looking forward to Heather Kay's build when she gets around to it, sometime in the future. Anyway, thanks for looking, Ray PS I am doing a new 1/48 Airfix Chipmunk now, it is fun building something that fits well (so far).12 points
-
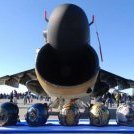
This is my 1/48 Kitty Hawk F-35B in beast mode. As always with Kitty Hawk Kits, fit issues were horrible. the bay doors however managed to fit ok when closing them up. Pretty Much OOB. I choose to find an aircraft that didn't have the ram panels a different color and I am happy with the result. Decals are Caracal. Ordinance from Hasegawa Thanks for looking F35B by Reginaldo Reyes, on Flickr F35B by Reginaldo Reyes, on Flickr F35B by Reginaldo Reyes, on Flickr12 points
-
Hi all. Here is my latest finished kit; Kinetic's EA-6B. Several aftermarket parts were used: Aires cockpit, Quickboost seats, Wolfpack wing fold set and Eduard exterior detail set. The decals I used are from CAM decals as I didn't like the ones in the kit. The kit is one of the earlier product from Kinetic and it shows. Although the fit is quite good, the surface details lack some refinement. This made me decide to add some rivets and missing panel lines. The sometimes faint panel lines were retraced with a scriber too. The canopies were tinted by dipping them in a mix of Tamiya clear yellow and smoke, thinned with MrHobby color thinner. The model was painted with MrHobby acrylic paints over Alclad black primer. Weathering was done with washes made from Abteilung 502 oilpaint and white spirit. Thanks for watching. René.11 points
-
Welcome to my first model built and completed this year. The Airfix Hurricane Mk1 in 1/48 scale and finished as this machine from No 1 Squadron RAF using decals from the previous generation Airfix kit. There is a full build log in the WIP forum but in summary paints used were Vallejo and Tamiya and the model was pretty much oob. The only additions being seat belts and rear view mirror. The other thing I wanted to try was to replicate the chipping and wear seen in the photo of the real thing, something I may have overdone a little but it was a first attempt at this sort of thing. Weathering was a combination of pre-shading, Flory wash and oils and overall the kit was a really nice build. So, here she is, feel free to comment and thanks for looking.10 points
-
Hello folks, Here is my 1/35 scale Tamiya Long Range Desert Group Chevrolet 30cwt Truck, built in 2014, but now with new better quality photos and smaller additions. I finished the model using Eduard PE 35251, tires from DToys 35-012, and lots of plastic and resin accessories (I have preserved my old Britmodeller WIP topic, but i don't know how to insert the link here). Like I said, I like the trucks, but in particular this model because their lines of 1930 and their curious camouflage schemes.9 points
-
Evening all, Well my Spitfire is finished. I am relatively happy with it and enjoyed the build experience. These older kits are a lot of fun to complete and adding wee bits of additional detail adds a certain amount of satisfaction i don't always get from more modern toolings. Theres a few bits added that are not Matchbox: Canopy (new Airfix Spitfire Vc ) and odds from the Eduard VIII kit - cannons, undercarriage, and seat armour. Anyway, thats my second build in the GB finished so its on with the Halifax. Gallery pics will hopefully follow at the weekend if the weather is calm enough to get some outside photos. Thanks for looking, cheers Greg9 points
-
Another from me. The Douglas Skyknight. Things looked a bit grim for the build at the first attempt at painting the International Orange. My effort was more an International Red. I managed to salvage things enough to get by and I'm calling it finished now. A basic build, with a few rough edges. Add extra colour and you hardly notice. I made a card base for the model. I wanted it to resemble a shop window display type of thing. The kit box provided the script and a bit of card, edged in black and with ink join lines and Tamiya tape got the job done. Build thread here:9 points
-
Gidday All, I've finished my model of the German cruiser DKM Seydlitz. This ship was a sister-ship of the heavy cruiser Prinz Eugen but was intended to be armed with twelve 15cm guns rather than 8-inch guns. But at about 20,000 tons full load she would have been rather large as a 'light' cruiser. Note it was main gun size, not ship size that differentiated between light and heavy cruisers. The design reverted to 8-inch guns before her commencement however. My model is a 'What If' and depicts the ship as she might have appeared had she been built as originally intended, a large light cruiser with 15cm guns. I used the Airfix Prinz Eugen as the base kit (donor kit) and built it mainly OOB except for alterations to her armament. I scratch built triple 15cm turrets to replace the kit's twin 8-inch, scratch built twin 10.5cm twin heavy flak AA mountings, quad 20mm Vierlings and single 20mm AA to replace the kit's mediocre mountings, scratch built the single 40mm Bofor guns added late war, scratch built the boats omitted by Airfix, scratch built the 160cm searchlights pilfered by me for another model and added radar to two of the main battery directors. The colour scheme is based on that of Hipper in March 1942 but the addition of 40mm Bofor guns suggest a much later date in the war. Here she is, DKM Seydlitz late in WW2. The final photo shows the full range of weapons the ship carried although they're not all clear in the photo - Main armament of 15cm guns in triple turrets, heavy flak 10.5cm AA guns in twin mounts, twin 37mm semi-auto AA guns (just above the 10.5cm mounting), single automatic 40mm Bofor guns, quad 20mm Vierling in the funnel sponsons, single 20mm on the top platform of the tower, torpedo tubes under the boat davits. As usual, close up photos show warts and all, such as my lousy brush paint job. Thanks for your interest. Stay safe, and regards to all, Jeff.8 points
-
I thought this thread was about the issuing of a 1/72 model kit by Airfix of a Gloster Aircraft Company Meteor Jet Fighter Mk 8. And not a dissection in the the design decisions of multiple model manufacturing companies round the world. If you want to discuss this (which has been discussed at length in other places) then okay, please do so, but take it else where, and discuss between yourselves away from this thread . Can we please get back to the point of this thread and the point that Airfix have decided (for their own reasons, whatever they maybe) to issue in 2022 a plastic injection moulded model of the F.8 Meteor in 1/72nd scale. I personally, because of eyesight, don't tend to do stuff in 1/72, but from what I have seen of this the detail looks quite reasonable for the scale, and looks reasonably comparable to the 1/48 sclae version that I have sitting on my shelf, and another one (FR.9) sitting in my very modest stash!7 points
-
All things come to an end, as so does this thread. The model is basically complete now, just the figure to add and that will be shown in the RFI thread shortly. Meanwhile, the final update. First the hand-painted ensign, hanging to dry after soaking in weak PVA to set the shape. The little hand-vice is prefect for gripping and adding weight to the bottom corner. This is a 2ft x 4ft ensign, the smallest I've painted, my new 7 inch magnifying lamp was very useful here Here it is on the short gaff (right term?) at the mast-head bit out of focus The aerials were made from heavy EZ line, with insulators at each end from fishing line shot weights. Important to feed the aerial down to the radio set. The handrails were run from satin silver "Soft Touch" very fine premium flex 7 stranded wire (0.010" dia.). Anchored using 0.8mm thin wall brass tube squashed and painted aluminium. A couple of buckets are seen on the deck along with a few rope coils (can't have too much rope). Nestling behind on of the midships cowl vents is the Vickers twin tub gun canvas cover, folded up. The sea ladder is left in the top Carley float and of course that Dan-buoy with its rigging is stowed on the port stern deck. Algae is growing on the waterline and a hint of diagonal planking is discernible on the hull sides The boat hooks are in the forecastle rack and some rope stands by the anchor, the Lewis guns are ready to fire, but someone's coiled the mooring ropes nicely fore and aft Overall, she needs a good wash down when time and the war permits Thanks for following alone once again, I hope it was helpful to any wishing to embark on wood and metal construction. Apart from a few links of chain, this one is all scratch built for a total cost around £250, plus the case of course It will be back is a RFI thread once I've sorted the case and mounting. I will be back shortly with a companion thread on a British Powerboat Company 70ft MGB (before torpedo tubes were added). Gives me a chance to made a twin Oelikon turret mounting Cheers Steve7 points
-
Hey Guys, Still working on the cab interior. I have only a few more items to be built and installed befor the cab is finished. I built up various small fittings for this space. This is the gauge panel for the dash.... and some wiring under.......the dashboard is simple paper printout of some dials, glued into place. I also built the steering column, E-brake, and such....... test fitting the outside panel. making sure that everything fits inside. No outside panel....... I still have a bit of work to do on this side, befor I start on "the other side". That's about for this week. Until next time. Thanks All.7 points
-
The box says Matchbox, so it's in. Bought at the Shuttleworth Model Show last Sunday, it's time it got built. No diorama base included but hard plastic track lengths instead. Side armour in one piece with moulded on support rails is a nice extra so is a pair of side armour rails without the plates for a different look. Work started yesterday and things are flying together. I've removed one side armour plate and added a short length from one of the support rails, just to give a slightly different look to the build. The plates have had a bit of a crushing here and there and the edges are thinned right down as well. Today saw the thing get primed with hi build auto primer. It photographs a very vivid yellow for some reason. It's a bit calmer in real life. And while I was making new bases for my other current AFV builds, I made one for this kit as well. I'm going for an Autumn look with it. The Stug will need a fair bit of paint modification to blend in here, at the moment it looks like it's escaped from Chernobyl, but paintwork begins tomorrow.6 points
-
This is the old Hobbycraft kit with a lot of surgery to rectify the many mistakes in shape and detail of this now old buddy. I did follow the great article of my now deceased friend Joël Ducasse, a master Modeller. The plane belongs to one of the best French Ace of the Battle of France, Camille Plubeau from the GC II/4, "Les petits Poucets" he is credited with 13 tallies. Certainly one of the best Armée de l'Air pilot. 43A6D012-05EF-468E-9D05-747EB3BD06F2_1_201_a by jean Barby, sur Flickr 432119A4-2C96-408D-8EB9-43DD2DBC459A_1_201_a by jean Barby, sur Flickr 83615DA1-8F06-4F7B-B8AA-723EF8D89E47_1_201_a by jean Barby, sur Flickr D26CF591-C3E0-42CB-90B0-193227DAAC1F_1_201_a by jean Barby, sur Flickr C8E693D8-5422-46C4-9651-B4F1F12D6A33_1_201_a by jean Barby, sur Flickr 7C684BA9-F403-4FC4-AADA-0394AC642288_1_201_a by jean Barby, sur Flickr DF0CAE4E-08C7-4A94-ABA7-A61E24229027_1_201_a by jean Barby, sur Flickr 5DDED52E-064E-4989-8E2F-4760041C6781_1_201_a by jean Barby, sur Flickr 4AE40519-2B93-4519-8441-DD666F114ACD_1_201_a by jean Barby, sur Flickr 54FF8FFE-388B-4810-8C84-4B26B84D7D62_1_201_a by jean Barby, sur Flickr6 points
-
My interpretation of Tamiya's epic 1/6th scale Harley, the ancient decals were quite a problem with some having to be airbrushed!6 points
-
F-16C Aggressor Tamiya 1:326 points
-
Hi all I have been doing this one the wonderful Airfix 48th kit. This was built OOB apart from tge addition of the Kitsworld 3D Seat belt and IP decals. They were glued in as could not get them to adhere as decals. The IPs were painted black around the instruments. The locating tabs were removed from ghe wings to stop the curve appearing. I had a bit of fun with the sliding part of the canopy but it was okay in the end. The model was brush painted using my ho to Humbrol enamels. Canopy guide slot painted in I have really enjoyed this kit congratulations to Airfix on another superb model. Thanks for the support and encouragement throughout the build and thanks to Andy Dyck for the photo backgrounds . Thanks for looking in Chris6 points
-
A few more: Bergstrom AFB, Oct 1980 Hulman Field, Terre Haute, May 1982 Capital Airport, Springfield, May 1982 Martin6 points
-
I promised to come back to you once I had dug around for more images of Malaya in my collection. I have found a couple more. The images you have worked from are taken from quite an angle onto the ship. I think the lines in the camouflage pattern lined up when viewed from broadside. Also I think the pattern changed even during its short lifetime: the diagonal line on Y turret portside visible in the 'Polish' photo does not appear in my image below and the lower line of the dark on the funnel seems to come lower.6 points
-
Hull painting is in progress. Port side is almost finished. This is what it looks like now. I used some old decals on this. Seems like some Soviet vehicle or plane markings. When I added this photo, I noticed that I did not paint the hose Unfortunately, the longer painting takes, the more damage I do... In the photo below you can see a broken off piece of the reflector holder. If you look closely, you will also notice the lack of a ladder on the frame above the side. I will fix it after painting, otherwise I will damage it again by manipulating the hull. I am also trying to create some base / stand for the model. This will solve the problem of breaking protruding elements. Besides, I need to attach the long rudders to the underside of the hull. I also decided to partially repaint the crane. The imitation of rust and scratching was too different from the rest of the ship. I used leftovers from some Tamiya's decal. Thanks for watching, Wieslaw.6 points
-
Coming towards the end of the build now regarding the body, I added the mud flaps at the front, I thinned them a little where the rubbers are and bent them a little as they looked a little too straight. I've also added the tools with their PE brackets... Here I've added the fuel tanks and fuel pipes and the two machine guns... A view of the machine guns, It's the first time I have seen Miniart provide PE for the shrouds that go around the gun barrel. They look a whole lot better than just the moulded type of gun. They do provide a moulded type of gun as an alternative if you prefer not to do the PE. The gun on the left I think is a Russian NSV machine gun, here I replaced the plastic gun barrel with aluminium tubing... Lastly I made up some mud flap retainers from copper wire, again it was easier to make up than to clean up the plastic ones. There are still more small bits and pieces to add on, but I've left them off for now because they are quite small and fragile and with handling the body a lot there would have been a good chance of breaking them off and losing them... One thing I need to do soon is to add the periscopes for the driver, I was initially going to leave them to the end but realised they really need to go on soon, before I start painting. So for the photo's I have just placed on the road wheels and now I will need to start making up the MasterClub tracks, which I will start looking at that next week. So I will be back when those are complete. All the best and thanks for looking in Ed6 points
-
Available on YouTube. Not heard of it before. It’s addictive viewing. Scary and skilful stuff. Graham5 points
-
Hello Happy Phantom Phanatics (and others!)! Here is my last Phantom from my USAF Phantom saga (for the time being🤔) : the Hasegawa RF-4C. Another Hasegawa classic, well known, built with the same amount of modifications to the base: Complete refurbished cockpit, resin wheel wells 🤬🤬🤬, belly louvres, airbrakes, ailerons, riveting, etc as already mentioned in my previous builds. routine... What was not routine was stuffing the camera bay accordingly to the version depending on the aircraft mission. To simulate the KY camera lenses, I used the tiny iPhone or mobile phone lenses, that gives a realistic effect, especially when you replace the too thick kit transparencies by thinner windows. For the markings and version I chose a Desert Storm warrior from the Alabama ANG, the "Boss Bird", thinking that the Carpena decal sheet will add more value than the Hasegawa one. I will come later on this subject 🤬; The choice was also made based on the good iconographie about that particular aircraft. Camouflage pattern is fairly simple, the Hill Grey, but "toned downed" to respect the scale effect. I weathered it quite a bit because of the harsh Middle East conditions. Decals: I started to use the Carpena sheet 7270 (desert storm part 2) but it turned to be disastrous: most of the decals started to break into small pieces when wet, some markings were not accurate (e.g. white shading of the Code Letters, shark mouth...), so finally I had to use a mix of self-made decals, paints and use some Hasegawa ones which are, unfortunately, too thick (well known default). No armament, the configuration is max range with an AN/ALQ 131 ECM pod (aftermarket), as seen on some pix. The result is that this beast is not on the top of my F-4 list, but i am too lazy to start another one. maybe one day...🤔 Here are the pix: The true flying camera: The fake one: ... and the little dio: I scratch built the ladder, the sound generator comes from the Hasegawa but, as the other pieces, is completely wrong so rebuilt: That's it for that saga, hope you enjoy the poor-quality photos, critics happily accepted, may be I will be tempted by the FM F-4 one day!5 points
-
The Convair Coronado CV 990 was manufactured by the Consolidated Vultee Aircraft Corporation and its maiden flight took place in 1961, It is still today one of the fastest subsonic aircraft that has been in commercial traffic. Its maximum speed was about 1000 km/h and, for example, a flight from Helsinki to the Canary Islands could take less than five hours instead of the current six hours. The CV 990 was an extended and faster version of the CV 880. A special feature of the Coronado were the large anti-shock bodies on the trailing edges of the wings. They reduced air resistance and increased the speed of the plane.. On top of the fuselage there’s a dorsal extension which housed two ADF antennas and one VHF antenna. The aircraft was powered by General Electric CJ-805 jet engines. These were non-afterburner jet engines designed for civilian use. They smoked heavily and were quite noisy so that the Coronado was recognized from afar by a loud roar and four black smoke trails. Nearly 20 airlines used the aircraft mainly on long-haul routes but in total only 37 Coronados were produced. One of the largest users along with Swissair and American Airlines, were Spantax (The Spanish Air Taxi Líneas Aéreas). The airline became known to tens of thousands of Finnish holiday makers in the 1970s. Spantax didn’t have a very good reputation due to accidents and sloppy service. A city legend has it that once a Spantax plane tried to land at the oil refinery near Helsinki in search of the runway landing lights. Nonetheless, I have warm memories of Spantax and the Convair Coronado. I built my model some ten years ago from a limited-run kit of the French F-RSIN, and I have to say that I’ve rarely seen a kit in such a bad shape. There were even holes in the fuselage and wing parts, and I nearly threw in the towel. However, after making a complaint, I got new parts from the manufacturer, and that’s how I got back to the grindstone. Sanding and puttying was the name of the game, and there really was a lot to fix, especially in the jet engines. I primed the model with Mr.Hobby’s Surfacer 1000 spray and then sanded the surface with 2000 grit sandpaper. I painted the model with Humbrol's white spray and Alclad white aluminum. The flaps were covered with Bare aluminum foil. Spantax decals are from by 26Decals. I also scratch built antennas, beacons and other details to the plane.5 points
-
Besides ANA,LATAM of Chile also added a Star Wars jet to their fleet. They chose the attractive Galaxy's Edge Storm Trooper scheme for one of their Boeing 777. When I found those decals from PAS on ebay,the decision was easy. The quality of the decals is very good,the only downside is that it comes without instructions. So a lot of research on the net and careful photo study is inevitable. Also some careful trimming in some places is necessary. I had a 3 Zvezda/Revell 777s in my stash and so the project was on. The Zvezda kit is superb with mostly good fit,so the build was troublefree. The fuselage was painted with Gunze white surface primer 1500,clear coated with Gunze premium gloss. The wings were done with Gunze grey 315 and the metallics are different Gunze and Testors paints. As the decals have window holes,I left the windows open on the kit and filled them with Krystal Klear. The silver frames come from the great Revell decal sheet as well as all stencils. This will be my final Star Wars logo jet,together with the R2D2 Dreamliner And the ,still in production, ANA 777-300 BB-8.Finishing this is a bit delayed as I had to wait for some decals for it. It will make a nice line up and a great addition to my collection of special liveries. Cheers Alex5 points
-
I think Wez said it best. All those that aren't talking about Airfix Meteor F.8s in 1:72 (shame it's the wrong scale ) should go away from this thread forthwith and let those that are interested in the actual subject of the thread take over. Why is it some people have a dislike for certain companies that they can't resist spouting at every opportunity? I remember a thread about a new Revell Lancaster that turned into an Airfix bashing thread within 3 posts once upon a time C'mon people, you can do better. Yes, I've got my red pen out again. BTW to the person that reported this thread 17 times who we'll call Dark Sir, we get it. You don't like the way this thread is going, but did you have to report it that much???5 points
-
Went to Hobbycraft yesterday with the wife and grandson, which is in the Webbs of Droitwich garden centre, the grandson loves looking at the pets for sale in the garden centre part, rabbits, gerbils, guinea pigs, hmsters and fish. My wife and I aren't at all sure about the ethics of selling pets there, but that's not for here (I don't think they should, tbh.) Went into their model section - I'm afraid SWMBO is not taken in by my expression of surprise that they have a small model selection, btw; I spied the Revell V2, which I picked up on impulse, and then I spotted a group of AFV Club kits, which I didn't think I'd ever seen there before. You know the rest - one CVR(T) FV 101 Scorpion - with metal gun barrel ( Ithink that was the deal maker) found its way into my arms with the V2. SWMBO excelled herself though when I rejoined her and grandson; I gave her the shopping bag, with the two kitss clearly visible and took gransdon's hand, and she said "I can see what you're tryig to hide" - I was utterly flabbergasted! I did point out to her that passing her the bag with kits in and clearly visible was not, in any sense of the words trying to hide them, but I think it was just simply her jnee jerk reaction to any kit buying. I'm wondering how to get the HKM 1.32 Lancaster nose art (the cockpit) kit into the house on my birthday, though.5 points
-
Hi all , Etch added ,Nacelles done, I'm not going ott on detailing Mostly assembled, the parts with the brass barrels will be done next, i didn't want to either knock them off or blast them with too much paint, In the mean time i built up the props and painted them,and painted the lg and kit wheels, i found out when trying to mask the canopy I'd got the wrong mask set , that, and the fact I've been out today to replenish my ww2 raf paints, after which i had a go at the undersides while i wait for the mask set to arrive , things went really well ,untill right at the end while applying some highlights a spill occurred on the fuselage stripes, phhhrhphh, but I'm happy with the days takings, it should be an easy fix, Also like a clumsy oaf i glued on the bomb mounts before paint, making it very difficult to mask, I'll tidy that up with the fuselage stripes, Cheers Glynn5 points
-
It's looking a lot like Village Photos is defunct, which is a disappointment since I have already been through this before when Photobucket did their thing. In the mean time I've hosted these on my own website to hotlink here. Same story as usual - been too busy / too tired / not enough time / no motivation since the last post. I have the topsides camouflage on now though.5 points
-
So a combination of stormy weather and me getting sidetracked researching my next build means that I haven't managed to apply any paint to the Whirlwind. However I do have the front part of the canopy in place and everything else masked up ready for the primer. Actually if I'm honest I underestimated how much prep work was left to do but now I'm 100% ready for paint when the next session comes along. Tbh it would have been much easier for me to close up the canopy but I said I would leave it open so I have. So that's where the build stands atm but at least now I'm ready for paint next time. Thanks for looking back soon 🙂👍5 points
-
Here's my Tamiya Corsair F4U-1A in 1/48, in the markings of John Thomas Blackburn's 'Big Hog', VF-17, November 1943. Basically OOB; I just added an etched ignition harness left over from a previous Hellcat build. Main colours are Colourcoats enamels. Build thread is here:5 points
-
Afternoon all......seems I haven't posted much on this one since May last year when the base camo' went on.......well I have jumped ahead somewhat to 90% near complete. Sorry about that, and not posting the intermediate stages to this point. Here's where it stands though.....the turret isn't yet finalised with it's weathering and dust layers, but the main chassis is nearly there other than its light dust layer which will be done with the turret to match. . There are two figures in the works and should show up at some point in the future...... That's it for now chap's.....next I hope will be in the RFI section complete along with the Panther G with Flak. Cheers all Simon.5 points
-
Thanks everyone for the comments to keep it in the active project schedule........appreciate it and decided to move on with it as I said with a new flak piece in place of the dropped one.. ..and yes Steve, 'butterfingers" it is ....that was a costly drop......£35 including the PE upgrade set.....sod it . Anyway,........... ........decided to keep moving onward with the weathering of the lower chassis and the wood plank insert ready for the 37mm Flak....(when I can pick one up). Here's some shots at this stage........it still needs the alcohol and matt varnish coat yet to fix all the pigments etc, and matt finish any shine where not needed. Finally last will be wet areas on the mud and oily patches here and there......and some tools and junk on the rear deck area. I don't want to put these on yet until the 37mm is done and in place........ Off to do some on my Kursk Panther.......cheers all. Simon.5 points
-
I've been down to the shed this morning, more to see if I still have one really as the wind here at the moment is a bit fierce. All's good though, so I did a bit on the Stug. Oil paints seemed like a good idea so I dug them out and got mixing. Yellow ochre and black was mixed to an olive shade and scrubbed over all the parts. That toned down the atomic yellow quite a bit. Then it was go with the flow time as the burnt sienna and mixed dark green were added in a random fashion in blocks and rectangles. A wide brush stippled the colours to a sort of soft edge. After an hour or so I very lightly dragged the dry wide brush vertically through the layers to give a fine streaking. Sat on its autumn leaves base, it's calmed down a fair way over the primer coat. It still needs dulling down and a few washes here and there. It's had the gun and side armour propped up for the picture. There is still quite a way to go here but the paint needs to be dry before proceeding so this build will go quiet for a while. A shame really as I'm well in the AFV groove here.5 points
-
Hi all, I had a bit of time after work today so I made a start, I wasn't able to do too much but I made a solid start of the interior bits. So far all the bits seemed to fit well, as mentioned previously, I could not find the instructions for the PE parts so I focused on the most obvious bits (i.e. the seat, headrest armour). Here's a comparison between the styrene seat and the PE seat. Personally I prefer the thinner, more in scale PE version so I'll be going with that. The instrument panel was also sanded smooth in preparation for the PE alternative. And here's all the bits ready for priming and then a bit of cockpit interior green. Hopefully I will be able to crack on with the painting soon and then get underway with the detailing. - Cam5 points
-
Here is my latest.The italeri/bilek Su-17UM.The kit is a bit crude but nothing too bad and nothing that an avarege modeller cant assemble.I added seatbelt and a gunsight and the rest is OOB.I painted the kit with gunze and tamiya acrylics. .5 points
-
Feeling like the Mojo is coming back, I have nearly finished the paint on the Sea Venom with some post shading on the EDSG, once happy I will gloss coat ready for one decals although I will get the canopy on first. I even got further on the stalled Sea Gladiator N5520, just got the EDSG to add and drill some rigging holes, decal and then start on the upper wing. Thanks for looking in Chris5 points
-
I won't bore you with photos of simple assembly this evening, well just the one then. This main gear is beautifully engineered, and so complex, that the only reason It doesn't retract is that Tamiya didn't put the control lever in the cockpit. I did, so I'm being extra careful until I paint the ground locks in! Simple assembly: main and nose gears assembles and installed, gear doors assembled and installed (most of the doors are multi-part assemblies, catapult hooks, aerials, arrester hook uplock, OAT sensor, coaming, windscreen, elect bay cooling intake, cabin air intake, all fitted, AAR probe assembled, arrester hook assembled, splitter plates sharpened, etc etc etc. It would have been a drag but for the excellent fit of all of these fiddly little bits. I'm painting the splitters and the fuselage behind them before assembly, and then touching up any gaps or glue marks after fitting them. I've accounted for all the parts that should be on the aircraft and set aside all those that shouldn't. With all of that done, I'm now ready to prime the aircraft and these few detached parts in the morning and then get on with the application of the simple two colour base coat, and decals. In the light of the fin fiasco, I've decided to use the decals left over from an Italeri Phantom that I made last year wherever possible, even if it means going a little inauthentic. Since this whole event I'm modelling never actually happened, I don't think I need worry about getting the serial number correct. (I just checked the rules and there's nothing there to prohibit a what-if.) This project is flying! Tomorrow. It's flying tomorrow. Today I'm taking the evening off to read a book.5 points
-
Curtiss SB2C-1 Helldiver US Navy Squadron VB-4 USS Hornet 1943. A fun enjoyable build.5 points
-
Westland WG-13 Lynx MK 88 A - German navy, waiting for maintenance. Build thread The main rotor is not fixed for transportation, so in some pictures it looks set askew. . .5 points
-
Speaking of which, it's time for the final installment of the little Hooky-Took. Added the final bits, Windshield wipers, Rescue hoist, Antennas, and marker lights. Followed by a leisurely afternoon applying All the stencils and regular decals. I went with UH-2C Sea Sprite 149753,UP04,HC-1, U.S.S. Coral Sea 1968 After that all dried I gave everything a good coat of gloss lacquer. So there you have it another build in the bag. I want to thank Dave( @Rabbit Leader) and Pat ( @JOCKNEY) for putting this clambake on. I don't know if I have another Matchbox in decent enough shape to build to keep it with in the rules of the GB. I have a AD-5N Skyraider that needs a better wing and extras but that's for the regular Build threads. That one I'm following a build progress that was published in Finescale Modeller some years back. I di have a '72 scale Snowberry, but again it's going to go through an extensive upgrade with more accurate P/E. The only other I have I think may be FJ-4 Fury, but no decals, and a partial instruction sheet that looks like it maybe a matchbox kit. Thats not to say I not opposed to picking up another MB kit before the GB is finished. If I do, rest assured you'll see me back here seeing how fast I can glue my fingers together. Thanks for following along on this journey and until next time Stay safe, stay healthy and model on!5 points


.thumb.jpg.ba34a9f6ddce411193946dbdcc7b5fe8.jpg)


.thumb.jpg.d3635a7ef6507d35f372dd09671fe96f.jpg)


This leaderboard is set to London/GMT+01:00