Leaderboard
Popular Content
Showing content with the highest reputation on 27/10/21 in all areas
-
Hello As I was struggling against my Mirage 4000 for the French Fancy GB, I was working on three Special Hobby Messerschmitt Bf 109 E. These kits were produced this year and here they are. First the Bf 109 E1 "Yellow 14" from 6.(J)/Trägergruppe 186 during Winter 1939/1940 Next is the Bf 109 E3 "White 13" from 1./JG51 during summer 1940. I chose to open everything around the engine as it is made possible in this kit. Further I opened the radio access hatch to see with a magnifier those equipments. and finally the Bf 109 E4 "Yellow 8" from III./JG52 in Rumania in May 1941. I can say that these kits are easy but long to assemble due to the number of tiny details and parts. The engines are inside the cowlings ! I could have opened the canopies which are in three parts but I am too lazy to get thinner the edges. It was a great pleasure to build them. All the schemes came from the boxes. Patrick25 points
-
Here is another tick on my P-40 Warhawk to do list. This is 1/32 Hasegawa P-40E Warhawk with the markings of “Kay Strawberry Blonde” flown by Sammy Pierce of 8th FS / 49th FG Doboudura, New Guinea in Spring 1943. The inspiration for this build is the profile in Kagero's Curtiss P-40 Warhawk book. Cockpit modified with Eduard PE instrument panel and seat belts. I have used Quickboost exhaust set and Grey Matter main wheels. Gunsight is from Master. Nose art “Kay Strawberry Blonde” made by Custom Hobby Decals and numbers of “Red 42” by my friend Ozkan Turker. Paints are Gunze Sangyo acrylics. Happy modelling18 points
-
This is an exquisite resin kit which I have not really done justice to, but here it is. Primed with Tamiya Neutral Grey. Painted with Mr. Color Gloss Black, Tamiya Red Brown and Rubber Black, Xtreme Metals Polished Aluminium. Finished with Mr. Color Super Clear III Gloss. I had a little trouble with the transfers which were extremely thing and didn't like much manipulation. Looks good in the cabinet though. Thanks for looking, Cheers, Alistair16 points
-
Hello all! It’s taken me long enough but I wanted to share my latest—this is my fourth model since picking the hobby back up last year. This is the Italeri AV-8B “Night Attack” Harrier. It’s a raised panel line kit so I decided to use it to try out rescribing—I have an old tooling Vulcan which I want to tackle next and I thought it would be prudent to try my hand at scribing as there will be whole lot of that required! I did my best to rescribe all the panel lines on the kit, which took me the best part of three months.. Good practice though and hopefully in future it won’t be as time consuming. It was intended to be a throwaway kit for scribing practice but it ended up not looking totally awful so I kept going and finished it. Many mistakes were made, as usual (most notable is the port forward nozzle which I painted in the opposite camouflage colours, doh!) but I’m sure you’ll be able to spot many more. It’s pretty much OOB but I did need to source some replacement resin nozzles as the kit I bought was missing these—the ones I found were strangely large but I think I managed to sand them down enough that the result isn’t dreadful. I also managed to lose the refuelling probe to the carpet monster and had to fashion a (much more basic) replacement from some sprue. I also tried some fancy photography on this one with a very basic setup but the photos are a bit too moody for my liking, I’ll likely have to try and source some brighter lights next time! Overall it’s been a great learning experience and I’m feeling a bit more confident for the next build. Any feedback (brutal or not) is welcome14 points
-
Time for a bit of an update I feel, though I must admit it is a little difficult to actually see the amount of work it has taken to get it to this stage, and this is only the port side !! My aim has been to get the lines and surfaces right before I add all of the additional detail, though framing all of the hull openings was something that I felt I had to do at this stage once I was reasonably confident that the areas around them were reasonably OK. Next stage will be a coat of Mr Surfacer, followed by anger, denial, half a bottle of brandy and finally acceptance, before a lot more work !! Anyway here are some latest status shots, I promise I will post the bare and untouched result soon after it has been squirted, (to provide some collective shoulders to cry on). The surrounds are 0.5 mm diameter evergreen rod, not a job I am not looking forward to doing on the starboard side. Cheers and thanks for looking !! David14 points
-
Good day, Here is my sixth completed kit for 2021. I chose this Hasegawa F-86D as I had a small window of time to complete a model. I chose a subject that was simple to construct and required few colors. Here are the highlights…………… 1. Paint A. AK Interactive Extreme Matt Aluminum ( airframe ), White Aluminum ( center section of wings), & Steel ( exhaust section ) B. Mission Models Dark Gull Gray ( cockpit ), Tire Black C.Model Master Chevy Red ( seat cushions ), flat black, and white D. Tamiya Titanium Silver X-32 ( gear wells ), Chrome Silver X-11 ( landing gear oleos ), and Flat Aluminum XF-16 ( landing gear ), Deep Green XF-26 ( anti-glare panel ), Clear Red & Clear Green ( wing ID lights ) 2. Vallejo washes : Black, light gray, light rust, and brown 3. Chalk pastels : Black & dark gray 4. Painted Tamiya tape for the seat belts and permanent marker for the belt loop holes. I enjoyed this longstanding kit from Hasegawa. It has very good surface detail and I added some minor extras in the cockpit to help dress it up. I used the kit supplied decals for the Japanese Self Defense Force. Up to four squadron options are provided. I recommend this kit for all skill levels. Thank you in advance!!!!!! Mike13 points
-
After diverting slightly off topic, I have de-nibbed the body with 2000/3000 and 6000 pads and painted the pinstripe, I am referencing a 'deluxe' I found on Google which I liked the colours of. Plentiful masking, but was it worth it? Hell yeah it was! In beautifully contrasting Humbrol 48, noice! Tomorrow evening will hopefully consist of some more body detail painting, I'm tempted to make some rudimentary door cards as the transparencies are rather clear 🤔 Cheers, Andy.13 points
-
Well it's been a while since I wrote a thread so with the Autumn term well underway here goes with Black Cat Models' second iteration of the LCI (Large). These vessels ran from 1 - 349 and a large number were requisitioned by the Royal Navy. It differed from later variants in having a lower angled bridge rather than the round "Castle" from the later variants that I depicted here I really enjoyed the last kit so "98" will be the second and there'll be a third along soon. I stumbled across the "Sprue Cutters Union" podcast recently which features amongst others, Chris Meddings, a superb modeller and ediotr of the E-magazine Ship modeller. It's well worth a listen though light on maritime subjects. Much discussion was recently had about the inspirational effect of original photos and the boost they can provide for modellers - I agree. We are lucky to have some superb images of LCI RN 98 courtesy pf the Imperial War Museum collection. She was delivered and commissioned by the RN in November 1942 - likely sailed across the Atlantic by a British crew from her place of building at Hingham Massachusetts. Here she is in UK waters at a site unknown and certainly unrecognised by me. She remains in "USA" colours that I take to be Ocean Grey hull and Haze Grey topsides. It's notable how grubby and worn she is. I find the photos very evocative and have wanted to build her since I first saw them. Here's a further photo of a sister vessel with a slightly different scheme though likely same colours "98" is unusual in having her main mast aft and a fore mast at the bridge. Here's a plan diagram indicating that some might have been fitted with Staysails though I've found no photographic evidence to support this References Nav Sourcehttp://www.navsource.org/archives/10/15/15idx.htm Landing Craft Infantry and support - Rottman & Bull - Osprey Publishing Weathering Brief I plan for this to to be as mucky and worn as the photos illustrate So here's the kit which is very similar to the previous release Decals will clearly need to be sourced from somewhere else! The Black cat instructions are pictorial and very user-friendly I'd previously formed a base whilst working on "375" The sea sculpt is acheived by simply pressing in the hasp of the padlock multiple times It's a pretty straightfrward job to free the hull from the casting cradle - so it's an off and nice to be blogging again More soon Thanks for looking Rob11 points
-
So my first finished build in the new cave and a thoroughly enjoyable one. Originally I had planned to build the Blu Lagos version but a mix up with the paint colour meant that i ended up with a normal version which I'm quite happy with. The shell was twisted when I opened the box and one of the A pillars was bent but a bit of fettling straightened out the issues and i don't think those problems show through to much in the finished build. Here's a few pic's of the finished build So that's it I'm up and running and it's time to start preparing for the next one. Thanks for looking back soon 🙂👍11 points
-
Noo ti's not I, although I did do the initial assessment for the metalwork and they were FULLY aware of how bad it was because I told them, it's worse than they show in the vids, they are leaving a lot of things that should be replaced but Harry can't spare the time or money on doing it properly, which is why I didn't do it in the end, all very lovely chaps though. Here is some of my work. The Stratos is (was) a genuine 74 rally car, it had had so many crashes and bad repairs I had to make pretty much everything bar the roof and front bulkhead from scratch, aluminium bonnet of a siata 300bc, Aston DB4 which I made the body for at the London concour last year, it was the first car as you entered Also myself and another coachbuilder from work have our own little unit we tinker in and have a youtube channel showing metalwork techniques on more down ro earth projects https://youtube.com/channel/UCbTWzmSSd1tk7C9-F8LTa3g Andy.10 points
-
Morning. Currently on my holidays down near Lizard point. I have been catching up on all your wonderful builds when I’m not walking along a cliff side or on a windy beach. 😀 It is rather beautiful down here. While looking at the photos I’d taken I noticed a few that I had while catching bits of bench time with the demon in between work last week. so here’s a holiday update. 😇 Let’s start with a shot of the tail control surfaces getting some surgery. As mentioned previously the doughnuts had to go but it looks like I can get away with some very careful chopping. Chopped on the left. Also managed to chop out the rear moulded section to slow space for the rear of where the pilots seat goes. Bullet proof guard? Well plasticard but Regardless this is marginally better than the lump that was there before. still lots to fix in the shape of holes and short shot elements. Due to this scale and the silver element I have decided to pop the control surfaces on before paint. I also reinstated some of the connection points. Prime time! I think these are actually all the bits. 😃 The better than before internals with some idea of foot plates. I built a little box for the seat to sit on. You won’t see this so to hell with accuracy. 🙃🤫 Pre shade time. The IP decal fits well on that new IP so that will be the detail. You don’t really see a lot through that tiny hole and most is covered by the new seat so I’m going for broad brush strokes. The seat also took some shade. 😎 I decided to go with blue grey lower and a spot of green grey upper. As mentioned I’m going broad brush strokes. The flory will really settle the dark spaces. I have done a gloss coat and a flory wash too. Alas no pics so you’ll have to wait till I get home. Still it was fun doing a little update. 😇 Hope you’re all having a lovely week. Happy modelling chums. Johnny.9 points
-
Continuing with the painting of my Panther, I applied a series of washes with artist oils (white and a touch of light yellow), then some panel accent (black and brown), then another darker but more diluted wash with water colors (dark brown), and this is where I am... Notice the open cargo bin at the back of the tank, without cover, and the absence of the right bin, according to references. The only visible markings that Befehlspanther 96 has, is the number 96, in white, at the back of the turret. I read somewhere that all the Befehlspanthern in the group had numbers in the 90s series. I didn´t have a decal, and I really don´t want to put a decal on all that intricate zimmerit detail, so I decided to paint the number. I chose a good picture as reference, printed it to the size needed, and cut the masking qccordingly (X-Acto and Tamiya masking tape). No retouches, straight from the oven, I am quite satisfied. Real number seems not to have been perfect, most probably hand painted with a brush. I think I will not suffer for the slight differences and let it stay as it is. + washes of course. Quite happy to see that Hauptmann Pfannkuche´s Befehlspanther can now be easily identified! Marco9 points
-
This is the Tamiya 48 scale T-34/76. Nice little kit. I had a couple of goals with this build. Those being: • Try multi-colour hairspray chipping • Figure out how to use Pigments • Put it on a muddy base Pretty happy that I achieved all 3 although I did end up covering all the pigments with mud when I did the base. Full right up on my blog but here are some images8 points
-
I had done the old Hasagawa Grant ages ago but the turret on the model is tragic in shape and size, so I tried my hand, poorly as it turned out, on making a new one. Years went by and I decided I wanted a bettter Grant in my collection, so I purchased the Mirage kit. While having a MUCH better turret, the hull was ill fitting and needed much fiddling and putty and when completed, didn't measure up to what I was looking for. So, enter the old Hasagawa kit. The hull is nicely done and fits much better. Drawbacks are the tools are molded in place and the three piece transmission cover is poorly represented, so I used the Mirage turret on the Hasagawa hull, reworked the transmission cover using the Mirage bolt flanges, used the Mirage PE brush guards on the headlights and added the tail lights from the Mirage kit (missing altogether from the Hasagawa one), added cast texture to the turret and transmission cover, cut out the engine intake and added the grill from some PE I had, drilled out the barrels of the 75 and 37mm guns, added the sand shield rails and handles to the side doors and the rear engine door access door, used the Mirage tracks and added the antenna. The markings represent a Grant of the Queens Bays at the Battle of Ghazala in 1942.8 points
-
This is the Classic Airframes Fairey Gannet in 1:48th Scale. I added some etched seat belts, but everything else is out of the box.. It is a typical Classic Airframes kit, some heavy plastic with nicely detailed resin parts. A definite tail sitter, needing lots of nose weight to get her to sit on her undercarriage properly! Painted with Tamiya acrylics. Thanks for looking Angelo.8 points
-
Hi All I bought an auction site sofa and roped in a mate to help shift it. The lady mentioned her husband was selling some model kits, and as my mate expressed an interest in Mosquitos (just liked the shape, no family connection or otherwise interest) I put this together for him. Built OOB except for Eduard etch (mostly hidden inside) and Tamiya paints. WIP here Comments and suggestions welcome Cheers Steve8 points
-
Stupid question, excellent answer! For those that don't know him, Major General Peter Cosgrove is an Australian. General Cosgrove was interviewed on the radio recently. Read his reply to the lady who interviewed him concerning guns and children. Regardless of how you feel about gun laws, you have to love this! This is one of the best comeback lines of all time. This is a portion of an ABC radio interview between a female broadcaster and General Cosgrove who was about to sponsor a Boy Scout Troop visiting his military Headquarters. FEMALE INTERVIEWER: So, General Cosgrove, what things are you going to teach these young boys when they visit your base? GENERAL COSGROVE: We're going to teach them climbing, canoeing, archery and shooting. FEMALE INTERVIEWER: Shooting! That's a bit irresponsible, isn't it? GENERAL COSGROVE: I don't see why, they'll be properly supervised on the rifle range. FEMALE INTERVIEWER: Don't you admit that this is a terribly dangerous activity to be teaching children? GENERAL COSGROVE: I don't see how. We will be teaching them proper rifle discipline before they even touch a firearm. FEMALE INTERVIEWER: But you're equipping them to become violent killers. GENERAL COSGROVE: Well, Ma'am, you're equipped to be a prostitute, but you're not one, are you? The broadcast went silent for 46 seconds and when it returned, the interview was over. I would pay money to have seen her face!8 points
-
Get your shades ready! Another build only finished yesterday after about a weeks work on and off and around 2 hours a day. Minicraft 1/144th DC-3 with Leading Edge decals. Revell acrylic bright orange paint and AK metal paints used. All airbrushed. The red strip is from the decal sheet which is not included on the 1/72nd version of the decals. I shortened the engine cowls by around 1.00 to 1.5 mm as the kit item is too long. I have built several of these kits and noticed the cowl length but this is the first one where I actually corrected it. Otherwise the kit isn't too bad and looks good enough in this scale. I now have 5 Daks ( one of which is the Roden kit in BIA colours that I showed here recently) in this scale and another has just been added to my bench and a start made but this next one is the Roden kit( rom the A-47 version) but not sure which scheme to do yet but it will be another civvy Dak. Also have a DC-2 from the CMR resin kit.What I will do over the next coupledays is take pics of all of them and post here in RFI. PS: I have also got a 1/72nd Airfix one on the bench too on the go. My decal choices for it are LEM RCAF C-47 , Thunderbird Decals for a civvy Canadian one as a Worldwide Airways Dak but I have done one in 1/144th using the original Whiskey Jack decals. Or I can do the CP Air one again but to 1/72 or a Silver City one using a set of very original decals from the first 1950s/60s Airfix kit. Hmmmm...........7 points
-
A friend of mine gave me an old Williams B-10. I converted a early B-10 into a model 139 with resin cast cowlings. I added resin cast bomb rack. Added gunners front seat, front and rear gun mounts and rear bulkhead. Eduard seatbelts and Mini-World .30 Cal guns. Falcon vacuum formed canopy. Aluminum tubes for exhaust. Much to my surprise, I got a third place award for this model at the local IPMS show! Build log; https://www.britmodeller.com/forums/index.php?/topic/235093604-martin-b-10wh-2/7 points
-
Thanks for following my build everybody! I took some pics on the outside table today. Unfortunately my photography skills aren’t up to much! Very enjoyable build though! Chris7 points
-
So following a tip off from a fellow member @keefr22 and with a 1/3 off the retail price it had to be done 🙂 Early Xmas present methinks 😉👍7 points
-
Bit late coming to the party, but now that I’ve finished the French Fancy and Highwing group builds I’d like to join the fun with this: I have a soft spot for twin boomers and this one will join my collection of SAAB’s unique looking fighters. What’s in the box: Two sprues of light grey plastic, one transparent sprue, a PE fret and some resin parts. The decals I will not be using, the blue of the national markings looks far too dark. Replacement decals from Moose Republic on order. A closer look at the typical short run parts, lots of big ejector pins, removal of which will be the first job. Time to fire up the Dremel clone to grind these away. It may take me a while to build this as there is a lot on at the moment. More to follow. AW6 points
-
Hi everyone, This is my latest build, depicted as an aircraft of GC II/5, with 5 confirmed victories and 2 probables upto June 1940. I attempted some brush painted chipping in line with a couple of period photos ( can be seen in my WiP ). Please go easy on me with this, I know it’s not the most realistic, I think hairspray is the next method I’ll try! I upgraded from the kit parts with aftermarket, namely a resin seat, resin engine and an Eduard Photoetch set, worth it for the minimal cost of these. The aircraft was painted with lifecolor acrylics, my first experience of these, would certainly recommend! What I would not recommend is the Berna Decals set I used on this, they were far too thick and would settle down. Various bits of staining were done with a Revell weathering set, I was particularly pleased with the mud stains, although they may be slightly overdone! Hope you all enjoy, any questions or comments please fire away! Ash6 points
-
Hello there folks, here are some pictures of my completed Egyptian T34/85 by Miniart. There are five versions to choose from in this kit and the one that I have chosen to build was the Egyptian Armed Forces. Six-Day War. Sinai. Summer 1967. I chose this particular version as I liked the odd spider wheel, all other versions had solid wheels and this is the only version which has the wonderful DShK gun on the turret. The only additions that I have added to the model were the tow ropes by Eureka XL and metal tracks by MasterClub. This particular model is the interior build, Miniart also do a non interior version. There are quite a lot of pictures to show as this model from Miniart is so well detailed, it's a shame not to show it off. Hope you like it. Here's a quick tour around the tank... A couple of photo's showing the DShK gun... When doing interior builds I do like to show off as much interior as possible when the tank has been built, so to start off I made the top of the turret detachable... This is the underside of the turret... Views showing the inside of the tank with the ammunition boxes on the base and various shells, seats etc The front/glacis plate is removable to show the inside of the front of the tank... Here are a few more views... I have used MasterClub metal tracks here which show great detail, paints for the bodywork were by Tamiya using the hairspray technique and then everything else blended using various oil paints for filters and pin washes... Now onto the rear of the tank. I decided again to show off as much a s possible so have made the engine cover detachable along with the rear plate which swings down to show the transmission... Top view of the engine assembly... This view shows the top of the tank body with all detachable parts removed.. Final view showing the front of the tank... That's it, it's a brilliant model to build, quite intense at times, mainly my own fault in trying to open everything up to show the insides.. Will definitely do more of these marvellous Miniart kits. For anyone who is interested, here is the link to the WIP. https://www.britmodeller.com/forums/index.php?/topic/235088277-t-34-85-egyptian-miniart-37071-interior-kit/#comments thanks for looking in, I hope you like it... all the best Ed6 points
-
Was very sad to hear about the passing of Mel Bromley recently so this is a small tribute to Mel who ran S&M Models and gave us 72nd modellers a lot of pleasure producing kits like this, the Canberra B2 and the Sycamore. RIP Mel. This was a lovely little kit to put together with the one criticism being the very spindly prop which had broken on the sprue. I replaced this with a reshaped prop from an Airfix Skyvan. Not all Provosts have the ribbing on the control surfaces portrayed on the kit which seems to be restricted to certain serial blocks - check your references!! I decided I wanted to portray a machine in the silver and day-glo scheme with the CFS and finding pics that definitively showed the location of the code letters and the demarkation of the day-glo areas was quite difficult. There seemed to be a number of variations of day-glo around the tail area in particular. In the end this is a little bit of an informed guess - In know that XF892 carried the pattern shown and was coded "P-B" when in the earlier silver and yellow scheme and I know that many CFS Provosts retained the same codes when they switched to day-glo. The model was given an all-over coat of white primer and the day-glo was a 50/50 mix of Humbrol acrylic Orange H18 and Fire Orange H209. The day-glo was then masked off and Citadel Chainmaill was used for the silver areas. Markings came from the spares box. Hope you like. Pat6 points
-
Steam engine Br 18 538 (S 3/6) from Deutsche Bundesbahn. Manufactred as one of the last 11 Br 18s, easy to recognise by 2'2' T 31,7 tender, for Deutsche Reichsbahn in 1931. In the 1950-ties it was upgraded by Deutsche Bundesbahn and remained in service until mid-60-ties. The kit: Revell (1/87).6 points
-
Well this was a mission to do......Made from 30 seperate parts ..not including the rivets, it started fine got the main body all soldered up only to realise that i had literally put it together inside out....obviously at the point of that realization it was too late too do anything about it.... luckily it didn't change the dimensions but did mean that all the riveting had to be done by hand. Think it turned out ok given the fact i nearly tore all my hair out when i realized what i had done.6 points
-
Erm, both down? Control surface - ailerons - on the wings that aren’t flaps are one up, one down. It’s how the pilot banks the plane, with the rudder to help turn. Tail horizontal surfaces - elevators - work in unison. Other than that, assuming it’s not just a photographic illusion, you’re bringing the venerable old Demon to heel nicely.6 points
-
most of the superstructure is complete , will finish the rest at the end . starting to look like a battleship now .6 points
-
6 points
-
Pilatus PC-6 Porter, Australian Army 161 Recce Flight, Nui Dat 1970-71. 1/72 Dora Wings, Dekls decals. Thanks for looking. AW6 points
-
Canadian author Carl Vincent has asked me to post these photos here: " I attach the only photos in my collection showing the Harrow in its Sparrow configuration. The final four images are official RCAF photos taken by an RCAF photographer somewhere, sometime in Europe. While they do not depict complete aircraft, the detail may possibly be useful or, at least, of interest. " Carl Chris, for Carl6 points
-
Hello everyone. I don't get on this part of the forum very often as my builds tend to be rather prolonged affairs, but here we are: this is my attempt at building an accurate Sea Vixen FAW.1 at 1/72 scale. A full account of the research materials and design process can be found on the WIP here: The build originally started out nearly two years ago with the original intention of modifying two existing kits (an approach which I pretty soon abandoned on grounds of quality/accuracy),deciding instead to design my own. Shown here is the result of 3d printing with some homebrew PE and vacforming for details. A few other details like pylon braces were hand-made from brass, whilst custom masks and decals were produced to handle the colour work. The designs for this aircraft were produced from a combination of photo-interpretation and the aircraft maintenance manuals - each indispensable in confirming the details of the other - using Fusion 360. I've no background in CAD, or 3d printing - or even making your own brass etch - so the whole undertaking turned out to be a major learning exercise on multiple fronts as different sets design problems arose and needed to be resolved. The aircraft here is actually the first of two FAW.1 designs that I've produced; I'll talk a little more at the end of his post about the next one. Aside from the encouragement of a regular bunch of knowledgeable and generous friends on here, there are specific individuals that I need (as always, I never consider anything I do on here solely 'mine' so much as the result of shared knowledge) to single out for thanks. @71chally - in my view the peerless historian of this de Havilland aircraft made sure that I had the bumps and colours of this aircraft correct. @Navy Bird provided support in the early days of the project and proved (should proof be needed) of how generous modellers are with information. @canberra kid as usual seems to have every British aircraft manual under the sun and filled in the blanks most decently with the pages missing from my own copy. @hendie was - with the routine resin masterpieces that he casually lobs into his builds - the single biggest influence on me turning to 3d printing and has by this stage cost me a bloody fortune in tools over the years.... The following photos then show my reproduction of XJ481, an early production Vixen that ended up being co-opted as a trials aircraft in the late 60s, at which time she received this bold diagonal scheme for work on trials of the Martel missile system. The paint scheme shown here is intended to represent the appearance of the aircraft circa 1970; a more detailed service history being available on the FAA Museum site here. Studio photos to start with then showing some of the details: My personal preference remains the use of daylight in terms of judging the effectiveness of my work in relation to the actual aircraft: Next up over on the WIP will be XN708, a later production version of the FAW.1 that was lost on night exercises in Lyme Bay in 1964. This one will be built as a full display version with wingfolds, moving radar and removable Avon engines: It's already printed - I just need to get cracking and build the thing! Thanks for looking in. Take care, Tony5 points
-
Hi all, this is my most recent build. The kit itself is fantastic, highly recommended. I added some mini-art ammo boxes and bits from the stowage box. The blue figure is panzer art, the guy with the shell Stalingrad and the crewman is one of the Tamiya figures from the kit with the spare head from Stalingrad. I painted the markings using masks cut on my silhouette machine, the only other aftermarket bit is a gun from RBM which needs a bit of fitting but is otherwise lovely. Enjoy:5 points
-
Those of you who've seen the WIP will know that there was not a whole lot of P for months at a time on this build. For some reason I never really got into gear with this build. Why that should be I don't know because the kit built pretty well, the scheme is simple enough (other than those bloody invasion stripes which I'll be giving a wide berth for a while, I can tell you) and generally it's come together pretty well. The kit was Eduard's Weekend version. I used Colourcoats enamels, Montex masks (for the roundels, fin flash and code letters) and Mig Ammo panel line washes and pigments. I had some late war Eduard RAF seatbelt etch hanging around so I used this to add some interest to the cockpit. Weathering is very basic; I've gone overboard on my last few builds and felt that restraint would be a better approach this time around - as well as there being a small element of CBA (see above!). The scheme I chose was Wing Commander Roland Beamont's JN751 as it was on D-Day in 1944 when he was leader of the first Tempest wing, which was given the number No 150 Wing. Although initially tasked with strike missions, Beamont shot down a Bf109 over the invasion beaches, scoring the type's first kill of the enemy fighter as he did so. In the months following the invasion Beamont became a specialist in the destruction of airborne V1, destroying 32 by the end of the V1's operations. Following the war Beamont went on to have a distinguished career as a test pilot, establishing many aviation firsts and records. He eventually retired as the head of Panavia following the debut flight of the Tornado in 1979. Any comments or criticisms welcome. Thanks, JRK5 points
-
Hello all. The Corsair needs no introduction. Nevertheless it took time for the big Chance-Vought fighter to prove he was a winner. VMF 213 was one of the first unit to receive the plane. Catapulted from New-Caledonia, the Corsairs first flew to Santo, New-Hebrides, to turtle bay where they were assigned to the pilots of VMF-213 who then flew to Guadalcanal. Fighting the Japanese late 42 early 43 was not a one side affair. Fights over New Georgia, Rendova, Choiseul and Bougainville were costly. In 43 the birdgage was replaced by the F4U-1A with a new canopy , but the birdcages remained on the front line until early 44on the Rabaul/Solomon front. The plane depicts here is the mount of 1st Lt George Defabio of the VMF-213 when hit by Japanese Flak over Munda. Defabio flew back to Guadalcanal with a large part of the right wing missing. Tamiya's kit is still a pleasure to do but a bit less when you use the Aires cockpit! The model is riveted and most of the work was done on the painting and weathering using oils and acrylic inks using pictures for a realistic aspect. Ultracast goodies were used, wheels, propeller, exhausts, they do a real good job compared to the plastic parts. As usual no decals but masks but for the dices which are decals. Any comment welcome, cheers. 73A5158D-8709-4E06-87C6-4B60ABB08DB7_1_201_a by jean Barby, sur Flickr 13894E0E-735C-4B1A-AD88-7F99091D9F85_1_201_a by jean Barby, sur Flickr BF65D818-CA17-4983-8483-FD8F81190C66_1_201_a by jean Barby, sur Flickr 8593A278-0376-4203-9CC5-3228B3FB7524_1_201_a by jean Barby, sur Flickr FD836419-8A22-4E94-9769-F137AE9374D6_1_201_a by jean Barby, sur Flickr 1C4334DC-234B-4488-8176-12690F6BE071_1_201_a by jean Barby, sur Flickr E9AF6DCF-AE97-48F7-9C5E-2AFC725FE8A5_1_201_a by jean Barby, sur Flickr DBFCD5A0-3DA4-431D-A01E-21BA58CFA8B1_1_201_a by jean Barby, sur Flickr5 points
-
We'll see; to be honest 1/48 does not appeal to me, but I would be curious to see what it's like to build a larger scale Hurricane after all these 1/72s! Welcome! I certainly have learned a lot from @Graham Boak and @Troy Smith and many other generous BMers and I am definitely developing a love of Hurricanes! I don't quite have the modeling skills or commitment to accuracy (or the patience!) you seem to, but I enjoy watching what you've been able to do with these Airfix kits. Not much in terms of exciting updates, but I am having fun (all that matters?) and we're getting close to having underside camo (I suppose Belgium's underside cannot be described as camo, but you know what I mean) done and some UC parts painted. From upper left clockwise, these are Soviet Union (AZ Mk IId)--I'm fairly happy with how the cannon gondolas are blending in; Kingdom of Yugoslavia (Airfix Mk I), which will be "wheels up"; Belgium (Airfix Mk I), also "wheels up"; and Ireland (Arma Mk I).5 points
-
There was a small incident during the tests. The commander of the ship was not satisfied with the result. He demanded to load a real combat load and re-launch the ship. I fulfilled his wish. The commander signed the documents on the positive result of the tests.5 points
-
Few hours planking, think its going OK with the 5mm x 0.5 mm lime strips I started in the middle, and worked my way towards both ends. No need to be precise as the overage gets trimmed off easily First lower side complete. There are s few cracks, the planks are not glued to each other only to the frames. At this scale the subtlety of the lower hull inner curves are not really coming out, but I doubt that will matter in the end Here is the bow section, it progresses quite quickly And here we are with it trimmed but still over size. The side planking will land against this over stretch and then I'll sand it back I fitted the two bow blocks on the port side but then realised that without the foredeck, the bow shape would be undefined, to I cut the foredeck out and glued it in place (should have done that first... That provided the line for sanding the bow blocks, here they are after filling (I said I had a tub of filler...). If you have it, may as well use it I also added some filler to the planks to make them more rigid and fill the cracks, this has had a rough sanding and is ready for the other side. So, not too hard, not too perfect, all about good enough. Actually considering whether I need the second layer of planking, will see once the first is complete and sanded Steve5 points
-
I'm calling lizzy done , I'm pleased with how it turned out, it isn't the easiest kit to build ,but if your persistant ,it ends up decent representation i reckon, Thanks to all who've commented and liked the build along the way , it did spur me on I'll try and do some better photos for the gallery when i get my second build done , cheers all5 points
-
My entry, the Hobbytime (Hasegawa) 1/48 kit with some Eduard goodies, scratch building, Procal decals and a Kinetic Litening pod. Build thread here: Chris5 points
-
Thanks for your comments Chris, Giorgio, Keith, Roger and Steve, always appreciated. Wot me? The trouble is if I see a bargain, and at these small local shows there are many to be had if you look deep and under tables, and if it is something I would like to make, then I get very tempted. So to satisfy the longstanding addiction to 1/72 I picked this one up: And then of course there is a new addition forming to 1/48, after the Meteor build, which incidentally, my friend Bob was very pleased with. Now that could be jinxing talk Steve, you stop that! Terry5 points
-
Did you hear the one about the dislexic agnostic insomniac that lies awake at night wondering if there really is a dog?5 points
-
I have completed the flak30 machine gun on the wintergarten. I have added a small magnet so the assembly is removable while I continue to work in the conning tower. The completed 8.8 gun was a little tricky to mask as I airbrushed the base colors on it then eventually touched it up with a paintbrush. Here is the picture I used as inspiration for my deck gun. In hind sight I could have used a darker grey for more contrast Out of the many pictures of the deck gun I found this one unique with two merchant vessels painted on the side of the 8.8cm deck gun. I am not a huge fan of how the horseshoe life flotation device looks on the side of the conning tower. I know they are only on display while their at port. I wanted to add the mounts to the conning tower. Instead of trying to make the hook and pots with paper and CA, I decided to modify the stock flotation device and make my parts out of it. I used a .030 drill to make the pot look like a cup. Below in the picture you can see the hardware I am trying to make and represent Left of the vents. (The hook & pots) Chop chop I added the hook and pots to both sides5 points
-
Perhaps we need to get this thread back on track and talk about actual kits?5 points
-
Hi, everybody! It's my next model from Ukrainian "Dora Wings".5 points
-
Glad you like it Beefy! And thanks for the likes 🙂 Some more Images 🙂 cheers Dirk5 points
-
There's been a little bit of progress on this device. The wood surround panel has been divided in two and the two parts trimmed for length such that the holes now correspond with their respective cockpit openings. Here we have them in place: http:// Thanks, blu-tak! And the coaming panel plopped on top: http:// Sorry about the murky pictures, but hopefully they convey more than my rambling prose..... The panels need to be trimmed for width, of course, and woodified. Thanks for looking in. Comments always welcome Cheers, Mark5 points
-
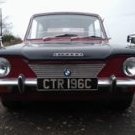
A strange one today: what I thought was a Vauxhall Maloo pickup, but this one had four doors. Red, 05 plate, looked Holden-based. Any ideas? If it's still there tomorrow I'll see if I can stop and get a photo. Edit: seems it's a Holden Crewman. I've never heard of a Vauxhall version, but I'm sure it was badged as one. Not really my cup of tea...5 points
-
Untitled by Harry Follas, on Flickr Untitled by Harry Follas, on Flickr5 points
This leaderboard is set to London/GMT+01:00







.thumb.jpg.b4a5069fd2c2dd5708ce1694345c5b11.jpg)




Wedge-TailedEaglePortraitRaptorDomains.thumb.jpg.41a306d3445a68f0f2df773e01776ea6.jpg)
