Leaderboard
Popular Content
Showing content with the highest reputation on 24/10/21 in all areas
-
My second 190 this year, and as the previous one this canvas is also Eduards new kit, the F-8 version. Using Exito decal sheet devoted to Luftwaffe ground attackers, I was only awaiting the kit arriving to market to build their first option - Major Theo Nordamm, Kommandeur of II.SG3 in the summering 1944, in the baltics. The other 2 options of the decal sheet are also on the workbench. Painted with Mr.Hobby, oils and weathering pencils. Managed to wipe the two UC warning red rods while handling the model during the photo session 😕 hope you enjoy, I sure did so28 points
-
Finally done.. my Jaguar in 1/48 scale. Built OOB, except for the Model Alliance decals and the Master pitot tube. I wanted to build a 6 sqn machine, since those were the last operational Jaguars I saw. Never saw this anniversary bird, but was inspired by a picture by Chris Lofting on Flickr. Painted with Vallejo and AK acrylics. Kind regards, Gerben25 points
-
Hi folk's, we have a victory! A glint of sunshine has caught the edges of the modelling desk,or rather I've managed to finish a kit in what has been a pitifull year model wise.Revell's Mkix in a post war Russian scheme worn in their last years of service,not too heavy on the weathering and managed not to ruin the white flash and rudder number which came as mask's in the decal set.Build log here. https://www.britmodeller.com/forums/index.php?/topic/235098109-revell-mkix-spitfire-in-soviet-colours/ Many thank's for taking the time to look.25 points
-
Greetings folks, Firstly thank you every one at the 707 wings thread and especially @TheyJammedKenny! your inputs were just great!!! and learned so many new things I guess that is the beauty of the forum, everyone is so kind and very helpful. I always wanted to build a civilian aircraft, so why not start with Maharaja of the skies the Air India, the 1963 Airfix kit was quite challenging I learned it has many errors but that I okay I can live with but building was really exhausting and hard, so many sanding and filling yet some area are still there, plus lots of try fittings. The painting of white was quite challenging I literally had no idea whether the paint is dried or cured so once or twice i touched on the wet paint and it was back to square one painting again. The wing section was quite challenging as there was no good reference but you guys helped me out a lot and really thankful for that, cheers to you all. The decals was smooth sail, however, I cut some individual panel on the decals so when applied look like some windows are opened. There are tons of mistake with this build for sure but I gave my best. Thank you all for watching, Cheers.23 points
-
I have been doing this as a distraction from my more involved builds. This is a model of an Aircraft that flew from Poland to Buenos Airies via Senegal and Brazil in 1933 by Stanislaw Skarzynski. The smallest aircraft at the time to complete a trans Atlantic crossing. The Aircraft was built in 1933 and had extra fuel tanks, two in the wings and one in the rear cabin in place of the rear seat. The rear side windows were also removed. The kit is lovely and with very few parts simple to construct. The kit was manufactured in 1985 and was built OOB apart from the exhausts which were from Albion Alloys brass tubing. Decals were from the kit and went on quite well with a few applications of softener. The model was brush painted with Humbrol enamels as usual. Thanks for looking in Chris20 points
-
Good morning everyone, This is 1/32 Special Hobby Hawker Tempest Mk.V with the markings of JN766/SA-N of 486 (RNZAF) Squadron RAF at Castle Camps Cambridgeshire in January 1944. Cockpit modified with CMK seat and Eduard instrument panel. I have used Barracudacast Nose and Propeller correction set Paints are Gunze Sangyo acrylics Happy modelling18 points
-
Hi, everybody! It's my next model from Ukrainian "Dora Wings".15 points
-
Hello everyone. I don't get on this part of the forum very often as my builds tend to be rather prolonged affairs, but here we are: this is my attempt at building an accurate Sea Vixen FAW.1 at 1/72 scale. A full account of the research materials and design process can be found on the WIP here: The build originally started out nearly two years ago with the original intention of modifying two existing kits (an approach which I pretty soon abandoned on grounds of quality/accuracy),deciding instead to design my own. Shown here is the result of 3d printing with some homebrew PE and vacforming for details. A few other details like pylon braces were hand-made from brass, whilst custom masks and decals were produced to handle the colour work. The designs for this aircraft were produced from a combination of photo-interpretation and the aircraft maintenance manuals - each indispensable in confirming the details of the other - using Fusion 360. I've no background in CAD, or 3d printing - or even making your own brass etch - so the whole undertaking turned out to be a major learning exercise on multiple fronts as different sets design problems arose and needed to be resolved. The aircraft here is actually the first of two FAW.1 designs that I've produced; I'll talk a little more at the end of his post about the next one. Aside from the encouragement of a regular bunch of knowledgeable and generous friends on here, there are specific individuals that I need (as always, I never consider anything I do on here solely 'mine' so much as the result of shared knowledge) to single out for thanks. @71chally - in my view the peerless historian of this de Havilland aircraft made sure that I had the bumps and colours of this aircraft correct. @Navy Bird provided support in the early days of the project and proved (should proof be needed) of how generous modellers are with information. @canberra kid as usual seems to have every British aircraft manual under the sun and filled in the blanks most decently with the pages missing from my own copy. @hendie was - with the routine resin masterpieces that he casually lobs into his builds - the single biggest influence on me turning to 3d printing and has by this stage cost me a bloody fortune in tools over the years.... The following photos then show my reproduction of XJ481, an early production Vixen that ended up being co-opted as a trials aircraft in the late 60s, at which time she received this bold diagonal scheme for work on trials of the Martel missile system. The paint scheme shown here is intended to represent the appearance of the aircraft circa 1970; a more detailed service history being available on the FAA Museum site here. Studio photos to start with then showing some of the details: My personal preference remains the use of daylight in terms of judging the effectiveness of my work in relation to the actual aircraft: Next up over on the WIP will be XN708, a later production version of the FAW.1 that was lost on night exercises in Lyme Bay in 1964. This one will be built as a full display version with wingfolds, moving radar and removable Avon engines: It's already printed - I just need to get cracking and build the thing! Thanks for looking in. Take care, Tony13 points
-
Hello to all.After a long time I have manage to finish this awesome f-14.The kit itself is the well known hasegawa kit and all of the issues that I red about are true.I added the aires resin cockpit and the exhausts.The cockpit is a pain in the you know what to install.My customer asked for a closed cockpit and that complicated matters even more.The jasmine decals I partialy used are bad and innacurate so I had to use the hasegawa OOB ones for it. Enjoy the photos.13 points
-
As such an interesting fact, I offer to view my older model. The basis was the destroyed Royalle model from Solid, which I significantly modified and equipped mostly with metal parts. I don't want to create a new theme in the unfinished models, maybe a few photos from the construction won't matter .... It was mainly about achieving the shape, testing the advantages or, conversely, the disadvantages of using duralumin and its joining, machining and painting .. It was then such a preparation for further development and gaining experience for buildings as such ... Cut and shortened chassis The original upper part of the Royalle Upgrade...12 points
-
Hi everyone. I've always had a soft spot for the Viscount, flew in them many times in the 70's- early 80's (Cambridge to Jersey). Loved the look of them and the distinct sound of the RR Darts. The kit went together reasonably well, just a shame its so expensive for what is, in 1/144 a very small kit. I wanted to do it in an in-flight pose so I borrowed a Corgi stand until I've machined up a more permanent display stand for it. I removed the props and replace them with clear plastic discs which were then air brushed yellow whilst they were mounted on mandrel, held in a battery drill. The decals are from 26 decals. Paints are a mixture of Alclads metalics, Mr colour and Halfords appliance white. Comments and criticism welcomed. Thanks for looking gazza l12 points
-
Hi folks, this time one of my recent quick builds using the Profipack edition. Built OOB, just for the display purpose I acquired LP Model ladder and wheel chocks. Painted with Gunze SM range. Cheers Libor12 points
-
Hi comrades! This beast finished. The build was complicated. Everything possible to exchange with aftermarket parts was exchanged. Some additions were scratchbuit. More details on the build can be found here: Thanks for looking12 points
-
Ok so. Basic coat of Dark Green on. Blu Tack and masking tape off and time to take stock: Not bad. I need to tidy up some of the areas where the grey and green meet; principally on the top of the nose and behind the canopy. Somehow I’ve left a bit of a gap with neither enough green nor enough grey in a couple of places Also the blu tack has left a residue in a few places that’ll have to be either wiped off (if possible) or over-sprayed On the plus side I reckon I’ve got just about the degree of softness between the camouflage colours I was after. And the masking tape came away cleanly all over, save for a little bit of paint that came away on the wing leading edge and looks just like purposely done chipping to show the alclad underneath More importantly I like the degree of colour modulation/variation, particularly in the Dark Green. Not too in your face but definitely there. The Ocean Grey on the port wing is maybe a bit solid - can’t make up my mind - and that may need a bit of post shading. Either way - a decent enough canvas to continue to work on I think.12 points
-
Evening all! The liberator has had a decent gloss coat and I've moved onto one of my favourite bits of the process - adding decals! There's not that many "big" markings, roundels, etc, but plenty of small detailed ones, I'll see how far I get tomorrow and hopefully post some more updates as they go on. Here's where she's at this evening: Suddenly starts to look the business with those flashes of colour doesn't it? Thanks for dropping by!12 points
-
Hi folks, A different build from me since it's not military this time. I had originally wanted to build Revell's Series III as a more beaten up, rusty vehicle being used by some broke surfer etc, but after I finished the body, I couldn't quite convince myself to mess it up again. I also had more plans to open up the interior and show off some details, but the Revell kit doesn't have separate doors, and the glass isn't actually very clear. Overall, it's an alright kit with decent enough detail, but the fit isn't great at all - there are so many locating holes and stubs that just don't line up and the moulding for some locating pins is just awful so a lot of work was required to get the kit to line up properly and allow the body to sit on the frame correctly - basically it's a typical Revell kit and I'm hoping their SR-71 is a lot better. Anyway...photos! The body colour is MRP Signal Red with Tamiya Clear Red over it to deepen the red, and provide a gloss coat. This was then glossed again with Tamiya X-22 and polished. The roof is MRP Gun Metal with X-22, and MRP Super Silver for the roof rack. The grille is Molotow liquid chrome (also used for the mirrors) which is the best chrome I've ever used! Various details were picked out with a mix of MRP, Tamiya and Vallejo. The majority of the decals are from the kit, but the Kangaroo and Coca Cola ones are from AK (Cartograf prints though) There is some orange peel on the body, but after several attempts at getting a good even polish, I wasn't going to try and redo this again. But hey, the real ones probably weren't built all that well anyway. The kit does provide a pretty decent engine (and a terrible gearbox & transfer case), but I improved it by wiring the distributor, adding a capacitor, fusebox and additional sensor, power and battery wiring. I also replaced the plastic front end built with one from Tamiya tape, but it's not visible at all so that was pointless. Overall this is pretty good detail, but the Revell moulding let's it down somewhat. Thanks for looking!11 points
-
Even if vintage airliners are my real cup of tea I occasionally like to model newer planes when I find a colourful and stylish livery. Well, this is what happened with Revell's 1/144 scale Airbus A320 in the smart scheme of the Swiss charter airline Edelweiss. The company was established in 1995 and it's currently a joint operation of Swiss International Airlines and Lufthansa. The emblem of the airline is the edelweiss or the alpine star. At present the company have a fleet of ten Airbus A320's plus eight larger Airbus types and three MD-80's. The quality of the Revell kit was quite two-fold. The decals were excellent but the molding of the parts surprisingly mediocre. There were a lot of flash and ejector marks but despite those problems the details and the accuracy of the kit were quite ok. Building the model was straightforward but quite time consuming. There were a lot of decals and aftermarket details (a set from Daco) to be attached. The cockpit window decals I ordered from Authentic Airlines. Moreover, the open holes of the cabin and cockpit windows had to be filled and sanded. I first primed the model with Mr. Surfacer 1000 and then spayed the white areas with Tamiya Fine Surface primer coated with Tamiya gloss varnish. The red areas of the fuselage and the rudder were sprayed with Tamiya TS-8 Italian red. For the colleagues who want to build this kit there's a piece of advice. The white alpine star decals are quite thin and transparent and the colour underneath shines easily through. So, before I painted the red areas I masked the spots where the decals were to be attached. As to the wings and stabs I painted them with Xtracolor X150 (Awacs/Canadian Voodoo grey). For the minor details I used Vallejo acrylics. In the end I coated the model and the decals with Humbrol clear gloss varnish.11 points
-
Hi folks, here's my representation of a Dominican Air Force F-51D as used towards the end of its' career in the 1970s! Airfix kit, Eduard etched brass seatbelt and Armycast cz decals. There are I'm sure a few inaccuracies (probably used the wrong canopy and I think I should've tinted it green) but it was an enjoyable build. Don't overlook the Airfix kit, though the detail isn't as fine as Eduard's it builds up just fine. 20211010_100754 by bryn robinson, on Flickr 20211010_100801 by bryn robinson, on Flickr 20211010_100823 by bryn robinson, on Flickr 20211010_100832 by bryn robinson, on Flickr 20211010_100838 by bryn robinson, on Flickr 20211010_100848 by bryn robinson, on Flickr 20211010_100919 by bryn robinson, on Flickr 20211010_100930 by bryn robinson, on Flickr 20211010_101033 by bryn robinson, on Flickr 20211010_102948 by bryn robinson, on Flickr10 points
-
Sounds (purely) reasonable.... From one with your background and knowledge Crisp, humbling praise. My thanks to you. 😁 Given that the front windscreen of the SV reminds me of nothing so much as a knight's helm Crisp, a defensive function would not be entirely inappropriate! Although it could well have been a by-product of having this this fitting in such a place, on the FAW.1 I've only ever seen this referred to in the technical literature in terms such as 'inter-layer demisting air' fixture, with its companion being that pipe-like demisting duct which pokes up behind the pilot's seat just in front of the rear canopy bulkhead. Aeroplane of April 4th, 1958 has a evocative pen-and-ink of said region: Flight of 5th Feb, 1960 has a more detailed inventory and visual breakdown of such features on the FAW.1 - along with an invaluable earlier article which they published in the 5th April, 1957 issue - discussing in detail the initial engineering development of the aircraft for service subsequent to WG240. Thankfully I downloaded both in full before the (heart-breaking in terms of aviation history) demise of the FlightGlobal online archive... Plenty of scope for innovation with this technique Crisp - looking forward to seeing you results. As this thread now swings away from XJ481 and begins to focus on XN708, without wishing to stir up controversy I'm going to call this: Pt.2 I tidied up the studio last evening and the benches haven't been this clear since early Spring: Judging by the clattering of the hoover whilst vacuuming the carpet I found all those missing bits of brass. It's a pity brass isn't magnetic as it would be a relaxing activity for the frustrated modeller to be able to go fishing for missing etch à la: I intend taking a few days off before launching into the next phase of the build but did spend a little time this morning over coffee sorting out where to begin. Along with the cockpit, some of the smaller fittings for this aircraft such as the radar were previously primed when I had the stuff out doing '481: Having spent a lot of time in recent months dealing with larger bits of the previous airframe I think I need to take a break from the bigger stuff and spend some therapeutic time painting and detailing smaller sub-assemblies like the undercarriage: I found it hard painting the white undersides over Alclad's black primer on '481, so this time around have invested in some of their grey version instead. After @hendie's recent complaints about the stuff though it seems pretty harsh that they've started trolling him on their labelling.... You watch. When I use it now I'll get my comeuppance as wings and fuselage peel like damp wallpaper in an 80s student bedsit..... Tony Addenda: James - our posts must have just overlapped in the ether - yours the more learned explanation as always.9 points
-
At last, my Cromwell build is about to commence so here it is in WIP. I have been wanting to build a Normandy Cromwell for some time, set in a small diorama possibly like so: Not only is the Cromwell one of my favourite tanks, but even more so with the look of that camouflage netting so typically seen in images from the period. The basis for the build will be the Tamiya kit. I did not drag out a series of sprue shots as I think the kit is well known. A Cromwell expert I ain't so feel free to offer any suggestions/corrections needed. I am aware of the rear deck mods as covered in a previous question I posted (goodness me, where has the year gone?). Thanks to John @Bullbasket and @Das Abteilung for their valued input. I am not worried about modding the kit so all input is welcome. That rear deck will be one of the first. I might have to secure some additional aftermarket or scratch build some items I do have some old Eduard PE from 1998 that may or may not be useful. And the Hobby Boss track links. Good or bad? I do not know yet. The subject is also not chosen so the options are open. I do have the Star decals as follows: Hope you can tag along. Ray8 points
-
8 points
-
Thanks my friend 🙏 I’m really enjoying this build. It’s coming along nicely and things are going pretty well so far. Unmasking the aft metalwork was pleasant. It looked fairly convincing adjacent to the painted fuselage areas. I painted a few bits and pieces since last round, the AM ladder, metallic then hairsprayed then yellow to be chipped… …and the relevant red areas using danny coreman’s excellent reference book as a guide. I started decaling this evening. I had a nightmare with my previous f-16 builds so this time I’ve gone with a really heavy gloss coat, and bought some tamiya nuclear strength extra strong decal softener. However that stuff can be pretty damaging accroding to the blurb on the packaging so i started off with the usual microset/sol route on the AM cartograph-printed furball decals and testing the water with a few stencil data parts first which went down a treat.. …so i carried on in that fashion, saving the extra strong decal stuff for another time. My paranoia from my last build spilt over into cutting these decals too. I cut as much of the film away as possible and punctured it where I could… These seemed to work really effectively with them sitting down beautifully. Although it means they are more difficult to apply as they become very fragile. One instance rendered ‘USS’ (from Enterprise) mangled… but luckily another naval vessel’s support came in to save the day. Thanks USS Independence. With a couple of applications of microsol the decals are really settling down nicely.. heres a few examples of the current better successes.. Granted I’ve mainly hit the big fun ones, so stencil data time is approaching too but hopefully thats fun too. Don’t you just love those big ugly old-school Hi Vis schemes? One annoying thing: Furball havent supplied a wingtip or tailtip decal. So they expect me to match the colour precisly from their decals and seperate that hard to mask painted area with a hairline black pinline to boot?! Wtf I mean seriously this yellow stuff circled in red is not supplied…8 points
-
Hello all, here is the latest from the shed., It’s the old Heller SAAB Lansen kit with extra cockpit detail, belly fuel tank and airbrakes from Maestro Models. The markings came from Moose Republic sheet 72002 from which I chose to do the J32 E from around 1994. I did a little rework on the kit parts before I started in the form of rubbing down the raised detail and then re scribing new panel lines. I also reshaped the gun ports (ish) and cut out the slots where the airbrakes go. Construction was straight forward after that other than bending and gluing the etch airbrakes and making a few blade aerials. It’s finished with Humbrol enamels and Xtracolor varnishes. I used Tamiya powders to try to give the effect of slightly faded paintwork as some of the pictures I have seen of these aircraft showed the paint finish ranging from very faded to pristine. It was great fun building a Lansen and revisiting much earlier modeling times via the Heller kit, which I did'nt think was too bad at all for an oldie. Anyway probably not the most accurate Lansen in the world but I’m happy with how it turned out, heres some pics. Hope you like it The etch detail fitted perfectly Very fiddley bending these, but well worth the effort I think. Thank goodness I have a bending tool. I was surprised how much bigger than the Draken it is. Thanks for looking Pete7 points
-
I spent months waiting for this GB to start, and now it's nearly over. Life can be cruel. A massive thank you to vppelt68 for running the show, it really has been a whole lot of modelling fun for me. Here's a big show off shot of how much fun it's been... I could have happily built more, there's so many Mustangs to choose from. Six will have to do I guess. Two weeks ago I would have been happy with one completed, I kind of got out of synch with the GB. A recovery was made with the aid of the time extension though, so it all ended well. During the GB I've got to grips with all kinds of different stuff, with varieing degrees of success. Building construction, with an attempt at the early Shelby office building by LAX, The devil that is photoetch and moulding clear plastic are both still defeating me, but I'm learning. New paint techniques have been tried and all kinds of photo ideas tried out. I've been kept busy, absorbed, informed and entertained from day one right up to this evening. Thank you everyone for making the GB something very special. Let's do something similar again at some point. Tony.7 points
-
My 1960's Hertz Car Rental Shelby GT350 pair are now ready for the Gallery. Hertz bought 1000 of these back in the day and rented them out to anyone who had a licence and enough money. 50 White cars were built and also rented out. Shelby must have been laughing all the way to the bank. Here's how the pair turned out... I'll be lying if I said it was all fun, a few problems turned up along the way that did try my patience somewhat. Now they are done, and I can sit back and enjoy having them, I'm more than happy to have built them. Tony. Build thread here...7 points
-
More decals on this afternoon: Lots of really finely detailed markings provided by Eduard here though they seem a touch thick too me - copious quantities of decal setting solution is starting to get them to settle and I guess the final coat of gloss to seal them in will also smooth things out. I've got all the fuselage ones added and will keep going on the wings (which are still only slotted in place) over the next week.7 points
-
So as planned I've clear coated the shell and I'm quite happy with the results. Now it bares no resemblance to the Blu Lagos version of this car but as explained earlier in the thread I'm not concerned about that I'm simply trying to create a nice looking Delta to put on the shelf 🙂. The clear coat went down well enough and I can certainly see the metallic pearl effect in the cave though I'm not certain it comes across that well in the pic's it is there. I've also experimented with using BMF on the front grille and although a little tricky to do i think it's turned out ok So that's it for today I'm happy with the progress I've made and this build should be finished soon. Thanks for looking 🙂👍7 points
-
Finaly I have had some time to put some paint on her. I used Gunze H80 for khaki green and Tamiya leaf silver for aluminium. Tamiya orange was sprayed on the insignia positions.7 points
-
The Air that I breath... Howdy, Moving away from the immediate cockpit area I got on with the intakes! The insides of the ports for the intakes are pretty rough so I need to..... ... TO DREMEL THEM!!! MUAHAHAHAHAHAHAH!! Of course I destroyed the dramatic effect by using the wrong tool....oh well. Any-hooooo, the dremeling was successful and the inner part of the intakes fit nicely into the port. Yeah, you are going to see lots in there with the intake on A decent fit but the edges are rough and needs sanding. I go at it with 90 grit sanding paper, just making circular motions with the piece on the sanding paper and you get an even job. Much better, and I went at it at the rear of the front fuselage too since I had the sanding paper there. I cleaned up this little inlet that goes into the hull... Heh, it literally snapped into place Here is the fan front, I think it must be the most impressive part to have been 3D printed, it´s gorgeous!! The fan front and all intake parts are primed in glossblack. The fan front was painted in Alclad Polished Aluminium...a bit shinier that the White aluminium I painted the trunks in. Look how nice the fan front looks....too bad it won´t be seen without an endoscope I gloss coated the trunks and then I shot pale burnt metal on top, changes the shine and gives a slight yellowish tint like the anticorrosive coating inside the trunks. Then it was time to start glueing things. The inner trunks in place. Had to trim a bit to make the fan front trunking fit the intakes. and the fanfront in place. Interesting how much smaller the fan front is proportionately compared with the Tarangus one. Not to bash Tarangus in any way but there are differences. Already the fan front is hard to see in there unless you shine a light. Before putting the forward intakes in place there is a little detail to fix on them. Through the notch in in the lower intake lip there is a small rod. I made it out of piano wire, drilled a small hole and put it through.... Cut the piece off with a piano wire cutter and filed down the ends. Then I glued in the forward intakes, the fit is alright but the forward intakes are slightly too small so there is a step between the airframe and the intakes.....it will be dealt with harshly! Time to put in the RAT housing. Another smart move by Jetmads, they made 3D printed guide blocks that will help align the fuselage halves when they are joined, brilliant! I had to dry fit....and this is a really nice fit, not Tamiya but better than quite a few injection molded models! I´m impressed. My brutal way of removing the step around the intake seams are simply to use my scraping tool and scrape the fuselage to fit! Yep it leaves marks but it´s really the only way and still remain sane. I can restore stuff later. And then a bunch of putty, it´ll have to cure until tomorrow when I finish up the sanding and restoring of details. The results of todays session And there ya go Cheers!7 points
-
A little update and things to watch out for if you have this kit. This following part I took a while trying to fit as it is very tight. It turns out that removing half the placement wedge clears up most of the problem. Still a bit tight but with a push,sits flush. The instructions are a bit vague on somethings and this part needed to go in before the front part was firmly glued into place. I will have to rig up something so the periscopes can go in now. The front is also a very tight fit and needs some fettling for it to sit flush. As it will get scraped away for zim and a new light holder added it's not too big a problem. If you are doing one of the un-zimmed versions keep this in mind.7 points
-
The Airfix 1/72 Fairey swordfish pretty much oob, a nice kit, builds up well but a bit tricky overall. https://www.britmodeller.com/forums/index.php?/topic/235088996-another-stringbag/7 points
-
I have been away traveling for several weeks (for the first time since COVID!). Really this whole "Hawker Hurricanes around the world" project was a way of "traveling" around the world while stuck in my basement, so it was nice to actually be away and doing the real thing again. I even happened to visit some "Phase 2" countries--Portugal, Belgium, and Slovenia and Croatia (both of which, of course, are formerly part of Yugoslavia, which is really having two phase 2 entries [pre-WW2 Kingdom and post-WW2 Republic]!), Still, I missed modeling, so it is also nice to be back home and finally get back to some Hurricanes this weekend! First up was Soviet Union (AZ Mk IId), which needed its cannons attached. These parts have zero in the way of locator guides, so I did my best freehand. I also wanted to drill out the barrels--this is a skill that is very much still a learning opportunity for me! I've had success on some other models (e.g., the Bristol Blenheim's Mercury "trumpet" air intakes), but so far with the Hurricanes every attempt at drilling out the exhausts has ended in frustailure (i.e., both frustration and failure). The 40 mm barrels certainly give you more to work with than the exhausts do, so we'll see if I managed an effect worth the effort once it's all painted (at this point a photograph isn't picking it up!). With cannons affixed, I continued on with underside camo (medium sea grey/Tamiya XF19) on Soviet Union and Ireland (Arma Mk I). Then it was on to the underside of Kingdom of Yugoslavia (Airfix Mk I) with a coat or two of light blue (Tamiya XF23). It's nice to be back at it! Oh, also I added two beautiful new Arma kits to my collection. These will make appearances in phase three (Axis versions) as Germany (Mk I) and Japan (Mk IIb). As this will (should) be the last of the kits I buy, I will take and post an updated group photo of all my boxes soon; perhaps I am the only one who enjoys seeing 20+ unique 1/72 Hawker Hurricane kit boxes in one photo, but I feel it is important to document for posterity!7 points
-
Bit happier with the roundels now There is a whiter section around the centre but I am blowed if I am going to start painting the white sections out! It will do me now. Thanks for looking in Chris7 points
-
After a very long absence, I'm back building again! The new house was a considerable refurbishment job, back to plaster and boards plus complete garden strip out so it took a little longer than I had hoped. New workshop is on the top floor so for the first time, I'm not in a shed, nice to be warm... I've been planning this thread during that time and I believe I've assembled enough information to do the subject justice, scratch-building the original 70ft Vosper MTB with a wooden hull and metal fittings as is my style, in 1:48th scale making a nice neat model 17.5 inches long. Along the way I will produce my own drawing set for this type to 1:48th scale, available to anyone who wants copies. 1:48th scale naval crew figures are available on Shapeways so it can be populated Now the challenge, volunteers needed... And before anyone mentions it, I know the old joke about the navy calling a volunteer, someone who misunderstood the question...." I've long considered creating my own "bare" kits using my techniques for others could construct. By "bare" I mean drawings and all the hard stuff will be supplied but basic materials (tube, strip wood etc) won't be This relatively simple project is the first such kit I intend to develop and I'd love it if one or two others could follow me building their own copies and providing feedback. This idea is that I'll do all the artwork, drawings, etc for etchings, laser cut and printed parts, anyone following with their own copy would only have to purchase the etched or laser cut copy. 3D drawing for the printed parts would be available for free, if you want me to print them, I'll take a small donation towards the cost of resin only. This is certainly not about me making any money, its about seeing if I can produce the information and components for others to build museum quality wood and metal models. Of course I will post the whole build here, but others following can also post their progress and reactions to the final form becomes a collaborative effort. If no one joins in, I'll still carry on, but I felt it would be more fun if a few of us went through the journey together and I get direct feedback on what I can do better. I realise that not everyone is into silver soldering so brass-etched assemblies will also be available as resin components. Budget wise, I'm hoping those collaborators can get this done for around £100 all in spread over the next 6 months or so. Any laser cut parts and etchings will benefit from my correcting my mistakes and re-doing the artwork (I make loads of mistakes) before other copies are made available. The hull construction will be wood. I intend to use 1/64th ply strips and double diagonal plank the hull. I've done this once before, its actually easier than tapered planking and the same as the full size practice for this vessel. No one need commit until I've shown this idea works I've assembled the following reference material I have three plans, the John Lambert one, a 1991 plan from Model Shipwright with lines and this drawing from IWM that I believe the other two are based on As this is a Vosper drawing, I'm using this as the master coupled with the lines from the model shipwright plan. From these I will produce my own 1:48th scale drawings. This drawing is applicable to MTB's 31 - 40 only. MTB57-66, 69-70 and 218-221 were also 70ft boats but the hatches and engine room vent look like they changed over time so I can't be sure the drawing is applicable to those. If we assume it is, then MTB61 could be constructed which was a conversion into a MGB mounting 3 Breda cannons which looks very cool. Depending on how purist you are, its probably close enough. One distinctive feature of this drawing is the wheelhouse shape and the curved wind break as you can see clearly on these pictures of MTB34 MTB74, the St Nazaire raid conversion, was a 72ft 6in boat, don't know where the lines were stretched for that sub-type. It's a shame because that is a very cool looking one-off Still Coastal Craft History vol 1 has colour renders of 32, 34 and 35. For my model, I'm leaning to MTB34 as shown in the image below So that is the plan. Any one who fancies joining me on this little journey (wood for wood, metal for metal), reply in the thread or PM me Cheers Steve6 points
-
mesdames et messieurs: the one and only, fantastique, unique sexy high-finned Mirage 2000 prototype 01: Mirage 2000-01 Prototype ESCI 1/48 + Eduard PE + Master pitot + Fonderie Miniature Magic missiles + Cocardes magazine for inspiration + BM GB support the first 2 Mirage 2000 prototypes originally had a differently shaped, higher fin. 01 got the series fin relatively quickly though! and is now in some French museum in the later white scheme ESCI very quickly released a Mirage 2000, but unfortunate, (or fortunately for me!) they tooled the original protoype fin and radom. (and also provide accurate and still great decals!! ) They relatively quickly noticed their error and updated their molds in respect to the fin. The radom is still the metal one with access panels that is only suitable for the prototpyes .... the wing leading edge angle is generally too big as well and is more representative of the Mirage III wing shape... the kit itself is great, incl. nice recessed panel lines. the Eduard PE adds exactly were necessary. maybe it is the best fitting Mirage 2000 kit out there! voila: work in progress in the still ongoing French Fancy GB 🇫🇷 (Gallery) how all started 3 month ago: the original in the air in ~1978 https://images.dassault-aviation.com/f_auto,q_auto,g_center,dpr_auto/wp-auto-upload/2/files/2017/05/M2000-01_1er-voli.jpg I am not sure if 01 ever carried any weapons or even pylons that is.... but they look cool and surely were a possibility for some airshow or display.... for those interested in details: 2 times ESCI Mirages 2000s, one peculiar, unfamiliar high fin, one series production fin (both without ECM on the wing rood trailing edge, but differently shaped! ) both of course have the slightly wrong shaped delta wing of the Mirage III series.... ESCI never corrected this... I hope you like it! merci! Werner6 points
-
F4U-1 “Bubbles” After grinding away on one particularly difficult short-run model I decided to pull an “easy” kit out of the stash. I selected Tamiya’s 1/72 scale F4U-1 “birdcage” Corsair. Of course, the subject I chose to model ended up being a challenge in itself. “Bubbles” was a particularly well photographed Corsair based at Guadalcanal in 1943. Sources disagree on whether she was assigned to the USMC’s VMF-124 or VMF-213 but I am inclined to believe the later. Regardless, her very well used appearance and distinctive weathering pattern (apparently she was a leaker) drew me to attempt to duplicate her as closely as I dared in a model less than 6 inches long. Built out of the box with addition of Eduard seatbelts and some scratchbuilt details such as the engine spark plug harness out of fine wire. Antenna wire is EZ-Line. Paints are mostly Vallejo Air Acrylics, with some AK and Tamiya colors here and there. Weathering was a combination of acrylic washes, AK chipping mediums, salt, and Tamiya weathering powders.6 points
-
T-37Bs, "Tweets", on the Wright-Patterson AFB transient ramp. 59-0332, 37th Flying Training Squadron, 14th Flying Training Wing out of Columbus AFB. May 1993. 64-13450, 89th Flying Training Squadron, 80th Flying Training Wing out of Sheppard AFB, September 1993. 66-7985, 37th Flying Training Squadron, 14th Flying Training Wing out of Columbus AFB, August 1993. 66-7990, 37th Flying Training Squadron, 14th Flying Training Wing out of Columbus AFB, September 1993. Thanks for looking, Sven6 points
-
6 points
-
6 points
-
So here’s a little update… I’m just sorting the issues with the damaged rub-down transfers. The IFR probe door in place to use a decal (yay) for the warning triangle. Top down view showing the cockpit off. Showing the continued weathering using pastels and oils. Weathering on the underside. Not sure if I should go further…photos of the underside of late cruise Navy Tooms are quite scarce, strangely. Undercarriage on, we’re starting to get towards the end of this adventure. On her wheels, could resist fitting the inner pylons😉 Outer wings installed, an to my relief it all lined up perfectly And the paper clip support can’t even be seen, result👍. I did plan it that way, honest. Really happy so far. Do think I need to tidy my work area tho, it’s minging. Thanks for stopping by, and all your encouragement. Cheers Si6 points
-
Cheers chaps, you comfort me. Thanks Johnny; your experience accords with what I thought was probably the case (and glad to hear the beading isn’t just me) Leaves a dilemma tho’. if you want to build up a few layers of colour/preshading as well as using the chipping fluid. Anyroad up. I’ve started cautiously seeing if the chipping fluid will still do it’s stuff in my case under a few layers of Tamiya acrylic and a layer of colourcoats enamel. And the answer is yes - albeit with a little effort as Johnny say - although not too bad. I need to check at some more reference piccies before going too much further - but I’m keen to get this done so I can get a protective gloss coat on the paint. I don’t like handling it too much without a clear coat. (p’raps this one is my paranoia Terry?)6 points
-
As has already been stated, the black primer went on as though it had been thrown from a bucket. The nozzle on the can has all the finesse of a fire hose. But fortunately, it dried OK. So it was time to move on to the base coat. I realised that I was very low on Mig's IDF Green, so I made up a mix of Tamiya's Khaki Drab, Olive Drab and some NATO Brown to an approximation of the mix. I airbrushed this all over and left it to dry. Next day, I emptied the last of my IDF Green into the a/brush cup and there was enough to give a solid coat all over as well as the turret and wheels. Now I'll leave this for a while before starting some detail painting. I'll be back when I have some more work done. John.6 points
-
On the real plane, the aileron control wires run from the side of the fuselage to a pulley near the leading edge of the upper wing, and back to the aileron control horn: There are also a pair of pulleys on the upper wing, with a wire that connects the two ailerons: I used a punch to build the tiny pulleys, and glued them to the upper wing: It was now time to glue the wing struts to the wing: I had attempted to color-match the brace between the struts to match the wing color. I'm a bit disappointed about the fit, as you can see in the photo below. In retrospect, it may have been better to glue the struts in place, fill in the gaps along the brace, and then paint the wings... (You can also see that I didn't do a perfect job of filling in the mold marks under the wing. This is definitely not going to be a show-winning build!)6 points
-
Hoping so… Let’s not jinx it though! Side order of freshly slaughtered Albatross to make sure? Cheeky… About the only set of curtains I’ve had in my adult life that hasn’t made me feel faint when I heard how much they cost! Milliput day today. These fittings aren’t on the civilian version: Somehow it all seemed a lot less messy in my head before I started: Time to let it all harden (and hope that the canopy stays on through all the sanding!)6 points
-
A couple of shitty pictures, sorry..! Still have not dealt with the too thin and much lighter paint on the canopy frame.. Ah well.. I was satisfied with some things on the bird.. But overall I rushed too much and cut too many corners (probably since I wanted to move on to other things and has not "produced" a finished model ina couple of years.. ::( - but I am more relaxed in my current builds..) IMG_0274 by IMG_0275 by IMG_0276 by IMG_0277 by Wanted to move on with the J 34 but I started three (!) other builds so will probably not be able to in time for the GB.. Ah well.. 😕6 points
-
small update . I tried to modify the kit fin cap back dated to a early B . But propsed to go south and doing so i destroyed a kit tail. SO i ordered new parts from Tamiya and find cap from hypersonic models . Parts showed up. The hypersonic B fin cap is really great and fit like a dream. Also gothe last of the parts for the main wing assembled. Next to start on the cockpit and exhaust burner can area 260CA916-3DCF-474B-98EB-96E87E958A99 by b007scott, on Flickr 24289CA9-1CF3-4932-B3AD-EC21C54A3312 by b007scott, on Flickr AAEC8F03-0CA2-4848-937F-B268402549CA by b007scott, on Flickr C99194F6-933D-4014-8D7C-31F68706F888 by b007scott, on Flickr Brian6 points
-
I do believe, according to the OED*, that the accepted British usage is indeed 'splotchification', although in Australia it is referred to as 'the splotchies', and in Canada as both 'splotcherating' and 'splotchification', depending on the time of day and the ambient humidity. Best Regards, Jason *Oxford English Dictionary6 points
-
I need to take some good photos first. It requires cleaning the desk which is not easy because I do several things at the same time. When I paint, I always make the biggest mess 🤣 Today I was able to finish the fire box. And the pilot's seat. I also painted the main mast but it is difficult to photograph it well.5 points
-
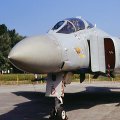
Just for reference, this should be fairly accurate for some UK phantoms. John5 points
This leaderboard is set to London/GMT+01:00








.thumb.jpg.d3635a7ef6507d35f372dd09671fe96f.jpg)








.thumb.jpg.76f12b87ce9ca9929c9aabdcf8f9d2dd.jpg)




.thumb.jpg.158e2e086d45b8f96b7d93b8bee8dc21.jpg)