
Leaderboard


Popular Content
Showing content with the highest reputation on 09/10/21 in all areas
-
Yak-3 | Hasegawa | 1/72 303IAP, Major General G. N. Zakharov, April 1944 Finished this on 10/4/2021. This was a bit of a stash-clearing exercise -- Small plane, big box, quick build. It was the 1991 boxing of this kit and the mold is older, so there was no detail in the wheel wells or cockpit, so I had to scratch build both. Even though I spent 2 nights on the scratchbuilding, it was still finished in a week. Despite being a stash-clearing build, I discovered I really like this aircraft as I researched it and its stable mates (the Yak 1/7/9 series). I also found that the Yak-3 is an unsung hero -- one of the best fighters of WWII. I also found that there aren't many finished Yaks on Britmodeller! This really got me into VVS aircraft and I'm thinking a lot about that Mig-3 I have in the stash... It seems that matching VVS colors to hobby paints are mysterious and contentious to some out there. I see Yaks finished in all shades of dark and light gray -- I just went with the instructions. I don't think the blue on the bottom is as accurate -- I used RLM 65, which was what the instructions called for, but I think the light blue they used was brighter, and perhaps a touch more green. Finishing: Gaps filled with CA, scratch built cockpit and wheel well details. Paint: Mr. Color 11 & 52 top, Hataka RLM 65 bottom Had to make a rear bulkhead since you could see through the canopy into the back. It didn't need to reach all the way to the top. Hope you like it! Questions, comments and constructive criticism always welcome.23 points
-
my last built, enjoy :21 points
-
Ki-44 | Hasegawa | 1/72 47th Sentai, Narimasu, 1945 Finished this on 10/4/2021. This may have been the oldest kit in my stash -- part of a set of kits my parents gifted to me for Christmas in college. The Tojo is a neat plane -- bigger than normal engine, small body and tiny wings. It's very unusual looking and has quickly become a favorite of mine. The hinamaru decals were very bright red, so I chose to paint the national markings along with those on the Frank build I was doing at the same time. The cockpit was a featureless tub, So I scratch built a new one, which was probably a waste of time because its so hard to see in the tiny opening in the top. Not a whole lot to say. Typical Hasegawa fit, which combined with the small part count, made it go together very quickly. Finishing: gaps filled with CA Paint: base coat of decanted Tamiya TS-30 Silver leaf, some panels painted with Alclad white aluminum and others with Mr. Color Super Metallic stainless steel > Testors Insignia Red for the hinamaru, Mr. Color 311 for the "Bandages" around the Hinamaru > Hataka RLM 02 for the yellow leading edges > Testors Ford Engine red for the tail. The original cockpit: My scratch built cockpit: Scratch built side wall detail: Hope you like it! Questions, comments and constructive criticism always welcome!20 points
-
Ki-84 | Hasegawa | 1/72 47th Sentai, 1st Chutai, Narimasu, 1945 Finished this on 9/14/2021. This was a kit that I built in college as a bare metal Frank, but since I didn't know how to do bare metal finishes, it was just a spray-bombed Testors silver. Recently I bought a new Frank and finished it in the same bare metal finish. I then disassembled this kit and stripped the paint off and rebuilt it as the other scheme in the instructions. I didn't have hinamaru decals, so I painted all the national markings and the walkway stripes on the wings. The color combination was not the one specified in the instructions, but one based on more recent research that I read about on the Aviation of Japan blog. Not much to say about this. I scratchbuilt some cockpit components, which was probably a waste since the opening in the fuselage is so small. It may not be a restoration on the scale that @Brigbeale does, but it was nice to breathe new life into this kit. Finishing: CA filled gaps Paint: Mr. Color Olive Drab (112) top, 10 parts Mr. color Gray Green (128) to 3 parts Mr. color Olive Drab (112) bottom. Testors Insignia Red Hinamaru, Mr. Color 311 for the "bandages" around the Hinamaru. WIP is here Since it was a restoration, here's what it looked like before I disassembled it and stripped the paint: . Hope you like it! Questions, comments and constructive criticism always welcome!19 points
-
HI Everyone, Finished this one about the same time as the VLR Mustang so thought I`d share some photo`s My latest go at Eduard`s 1/48 Airacobra kit Built from the latest Weekend Edition boxing Finished as `PAT-RIOT II` of the 46th FS, 15th FG, 7th AF Built from the kit contents but with a few small additions and tweaks Namely: brake pipes, splitter plate in the dorsal intake, some wiring for the radio in the rear cockpit and aerial wires Also drilled out all the gun barrels and exhaust pipes Decals were from the kit Hope you enjoy the pic`s, thanks for looking Cheers Russ17 points
-
Hello everyone, This is Eduard's 1/48 Polikarpov I-16 Type 10 that I finished in mid-September. The kit is inaccurate for a Spanish aircraft, so I've replaced the windscreen with a vac-formed example from Falcon and rebuilt the fuselage spine with plastic card and CA. The ailerons have been extended as well. Paint is mainly Mr Color applied freehand with an airbrush. The national markings are airbrushed and the only decals are the serials on the tail (which are the wrong font). The plan was to build this in 48 hours, but rather than two days, it took two weeks. I've written an article on this which I believe will appear in the November issue of SAM, so grab that if you want the full story Comments welcome, Cheers Jon17 points
-
Hi all This is 1/32 Dragon’s Messerschmitt Bf 110D with the markings of M8-SP from 6./ZG 76 Greece in 1941. Cockpit modified with Eduard instrument panel and seat belts. Exhausts are from Quickboost Paints: Gunze Sangyo acrylics Decals: EagleCals #32-119 Happy modelling16 points
-
Please Enjoy and have nice Weekend!14 points
-
At last I seem to have got the hang of inserting pictures I would like to present my humble little Novo, nee FROG, Hotspur glider! I started her a while ago and had much help and guidance from BMers, and especially aeronaut (thanks Alastair) to try to just improve the old thing a bit. To this end there is a fully home-made cockpit, tiny little transfers on the instrument panel, modified undercarriage and sundry odds and ends. Paint is Humbrol enamel, transfers were beyond my ability to repair so I printed the Pegasus insignia and BT671 identification, and roundels from spares. Hope you find it fun, I'm tremendously pleased with it.13 points
-
In this model, fabricated: -Pilot and operator cabs, -Propellers, -Nishties, struts, struts, wheels and landing gear flaps, -Imitation of wing mechanisation, -Rocket rails, -Light landing lights, -Keel BANO, -All kinds of antennas, -Exhaust nozzles. Of the modifications: -Cockpit lights, -BANO, -Burner, -miscellaneous air intakes, -Radar, -Cab, -Deflector hinges and linkages. Painting and lacquering with brushes. Paints: GSI Mr.Color and Mr.MetallColor urethane-acrylic, PC88 acrylic, Tamiya lacquer, futura, +plain pencil. Enjoy the view!12 points
-
A couple of days ago I finished my latest build, the Finnish army's StuG. Ausf. G III .These assault guns played a very important role in halting the red army's massive attack in the Karelian isthmus near Leningrad during June-July, 1944. The fate of Finland was at stake. If the Russians had been able to break through they would have marched directly to Helsinki and conquered the whole country. It would have been the end of Finland as a nation. But the advance of the red army was halted in fierce fights. One important element were the 59 German assault guns that were bought just in time to strengthen up the Finnish defence. These StuG III's destroyed in total 87 Russian tanks while own losses were 8 StuGs. My model is a kitbashing build of the Dragon 1/35 scale StuG III kit and the Tamiya Finnish StuG III special edition. I vandalized the Tamiya kit of its Finnish modifications, for instance the large tool box in the rear, the spare wheel racks on the sides of the StuG,, the modified shield for the machine gun and the DT assault rifle as well as the C-shaped hooks. The tracks are white metal ones of Master Club. The problem I noticed too late was the size of the tracks.They didn't exactly fit the teeth of the drive sprocket. I will have to fix that problem going forward. For the markings and the Finnish swastika (nothing to do with the nazi one, though) I bought the very good decal set of Echelon. Building the model was straightforward and maybe the hardest part was painting the complex green, brown and beige camouflage. I used Vallejo color's paints for the job. I finished the build by weathering the model with several AK's pigments. Many of the StuGs had a wife's or girl friend's name written above the visor of the driver. My model was named "Liisa" and it was one of the highest scoring assault guns with nine tanks destroyed.12 points
-
Hi folk's in what is turning out the least productive year since joining the ranks here in 2013 I may have reached double figures at last in finished kits for the year.Bought on a whim as modern grays really put me off reasonably happy with this easy kit.as usual no ordinance is supplied and as the Blue Angel scheme was not inspiring me a set of Italeri decals were used to represent a Finnish operated machine,thanks for looking in.12 points
-
Hi everyone. Finished this a few months ago and only just got round to photographing it. It's the fairly new Zvezda release which I was very pleased about when it was announced. Living in the shadows of Marshall Aerospace in Cambridge for the last 50 odd years, I've grown up with the sound of the Allison T56 so have become quite fond of the Herc, particularly the older K's. The kit went together without any issues and is naturally far superior to it's older competitors (much older from Airfix). I added an Eduard photo etch set in the cockpit, a set of resin wheels and the decals came from 26 decals. MRP and Alclad paints were used followed by a light oil wash and finished with an Alclad gloss cote with a matt cote on the walkways. I also added the aerials found on the early models which are not provided in the kit. Thanks for looking gazza l10 points
-
A belated RFI for a model finished a few days ago - I was waiting for the rain to stop! The build thread is here if you want to watch the painful process that was this one coming together... Anyway, here she is - any comments/criticism are welcomed👍 I will hopefully get some more photos added tomorrow, showing some close ups...10 points
-
Hello fellow modellers, here I would like to show you my model of the Valkyrie. It is a small commuter plane for 5 passengers, no, four plus pilot. It's maiden flight was in Januar 2015, the second prototype crashed or made a forced landing in 2017. Since then no further information is available. There are some pictures in the net, showing a black aircraft, maybe the first prototype, on several occasions with different registrations. Amodel is producing several unique and exotic aircraft. although the quality has improved significantly, there are still some flaws apparent in this kit, especially in the instructions. They want to ignore the rear windows and paint the whole area black, the undercarriage doors are toolarge and had to be shortened, the holes for the undercarriage legs are positioned underneath the lower wing part and so on. I wonder wheather they never make a test build with their test shots. I wanted to close the canopy, but it was too big, so I built it open. The windows are clear in the kit, so I had to airbrush them with Tamiya smoke, which took me three attempts. I wonder how all the F-16 builders manage to do it so effortless and successfully... The opening mechanism is way too high and has to be shortened. So are the seats, or the whole inside will not fit into the fuselage. But this is what modelling is all about, isn't it? And still I will continue building these kits, because I like the aircraft types away from Spitfires and 109s. (F-4s are an exception!) Thanks for looking, Norbert10 points
-
Hello fellow modellers, Finished finally my 'Blues' Scooter from the US Navy aerial demonstration team, the Blue Angels. I used the Hasegawa kit No. 07221. Paints: It was pretty difficult to find or mix the right Blues Blue color, therefore I mixed 50% Tamiya Blue X-4 and 50% Tamiya Royal Blue X-3. Gloss varnish layer from Humbrol Subtle panel line wash Midnight Blue from 502 Abteilung Aftermarket: A-4F Interior set from Eduard No. 49273 1/48 A-4E wheels early from Eduard No. 648213 1/48 Decals: A-4F Skyhawk Blue Angels 1974-86 Seasons from Yellowhammer Models No. YHD48-19 1/48 Masks: A-4E/F Eduard No. EX023 1/48 Enjoy the reveal pics! Cheers, Jos.9 points
-
Named after a genus of dragonflies, this prototype aircraft was built and tested by Miles Aircraft in 1942 as a private venture design for a carrier-based aircraft. The odd design was a response to the requirement for an unrestricted view of the carrier deck. Apparently handling was initially terrible until CoG problems were overcome. More on this design here, if anyone is interested: https://en.m.wikipedia.org/wiki/Miles_M.35_Libellula The kit is resin, with metal undercarriage legs and a vac-form canopy (two of which are provided, in case of cutting issues I assume!) Despite being resin, it was a fairly straightforward build, apart from getting the yellow to look reasonable. I did add nose weight too, but I’m not actually sure if that was needed or not. This one is a build for a client, so here are a few photos before I post it off to them.9 points
-
Welcome back to the campfire folks, pull up a log and perch yer bums on 'em. Don't get too close - you might see the defects. There's not been a whole lot of progress on the Scout this week - between my compressor playing up, work getting in the way and life getting even more in the way, modeling time has been a very scarce commodity. I'm also back off on my travels again all of next week for another molding project, and for the Annual Board meeting of the molding institute, so a busy week ahead. Bill, thanks for all the input and suggestions regarding the compressor. I managed to find an O-ring that sealed, but there's other issues going on. The compressor won't achieve more than approx.18 psi and a 10 second spray drops the pressure down to almost zero. I've spent enough time and money on it to date and I figure that getting 8 years of pleasure out of it is good enough to call it a day. I've bit the bullet and ordered another compressor from down the river. If I get bored in future I can revisit it and see if I can figure out what's going on. The rounds Luck, plastic cement, milliput, sproo-gloop, and a lot of French used so far Pete. Bill, if you ever do another Scout I would be honored to at least attempt a Nimbus in 1/72 for you though I don't know just how much detail would be able to be captured. thanks Tony - should be a nice anti-climax this time around then I think this one is more of an Hhhmmnnnnn hi Ian, yup, I had thunkit and aloes triedit, before almost flingingit. Neither option gave me a truly level roof. See damage report below great shots Paul, and yes, they have/will come in handy - many thanks thanks Markus Only one Scout in this lifetime Richie. It's taken me nearly sixty two years to get to this one. In another sixty two years it'll be, well... thanks Maginot. I do find that the seat harnesses really bring the seats to life and they are not particularly difficult to do. I also think that the material (cigarette packet lining paper) lends itself to this type of work, and can produce results more realistic than a lot of the aftermarket stuff. Now on to this weeks chores. Windows. Hate 'em. I don't know why, but canopies give me more issues than any other component. Every build, every time. Hate 'em. As previously intimated, I chose to go down the slippery slope of attaching the canopy to the rear of the fuselage first. Mind the gap folks! Oh yeah. Gotta love a nearly 1.5mm gap long that front edge. Luckily I had the foresight to glue in a strip of styrene (the white bit) before the glass went on as it is about the only place that canopy is going to touch. Some gentle persuasion was employed to bring the canopy as far forward as I could get it without (hopefully) overstressing any of the structure. The end result looks better here in the photo than it does in the flesh. At least I have a chance of making this work - in a slap-dash sort of way. There's still a decent trench to be infilled though. In regards to you comment about the level-ity of the canopy Ian, there's about a 0.5mm difference between the front and rear on one side and just under a millimeter on t'other side. It's not very noticeable and I think once the greeblies are scattered around, they should confuse the eyes enough to make it imperceptible. I used masking tape to protect the windscreen and troweled the milliput into the chasm, and smooshed it down as best as I could. This is first pass with the micromesh. while the milliput was being thrashed around I threw some on the tail pylon as it needs quite some modification. This is first pass with ye old Fyle and before I checked the drawings closely enough to realize I had taken too much off the back end. Cue second application of the yellow stuff. Since I can't really paint anything at the moment I can at least enjoy the 3D'ing. I had a bash at the blower-sucker motor. I should have shown the kit part as comparison - it's sort of laughable. This was created purely by guesstimating from photos and estimating ratios between the blower and the Nimbus. Yup. It was too big to fit on the deck. It didn't die in vain though. It was useful to use as a reference for reducing feature sizes on the second version. I probably spent about 2 hours on the initial design, then maybe 15 minutes on the edits. Left side = original. Right side = this blower has been resized to fit the screen and edited for content. But does it fit? Just and only just. The more I looked at the Nimbii the unhappier I was with my coloring in. I think I've gone too far with the weathering and I doubt if they would ever have looked that grubby in service. I think Giorgio should volunteer to paint all my engines and exhausts for me but he's so selfish Therefore... and you probably know where this is going Since I was printing stuff anyway, I made a few greeble edits and printed another couple of engines. There's slightly more detail on a few parts (all of which is damn near invisible at this scale) but the major addition is the engine supports at the front which I only spotted recently on some photos. Hereby endeth this weeks jamboree. No badges for coloring in, but I might be a good way to earning my 3D printing badge by now. New compressor is on order and should arrive late Sunday so I probably will not get a chance to try it out before I skive off on another jolly up North. Dib Dib, be prepared chaps, and keep those masks handy9 points
-
Hello? Mmmm.... I know I've been here before, but it's been a while. I almost didn't recognise the place. I was looking around for a while wondering where all the wheels, sprockets, tracks and turrets had gone and then realised where I was. Anyway, while I'm here, I ought to build something with wings on. I realised a while back that I hadn't built any aircraft at all this year! It's been a busy year generally, plus I've hosted two Group Builds, which took up a fair bit of time too. So, to rectify this lack of aircraft kits from me, I was wondering what I should build. So I started looking through the stash. Down at the bottom, under LOTS of tank kits, I noticed a 1/72 Airfix Mk.I Hurricane box. On opening it, I realised it had been partially started. In fact, I'd started and not completed it in the Hawker Hurricane Single Type Group Build back in 2016. I had planned on making two Hurricanes but only finished one. The original build thread for both Hurricanes can be found here: The kit I'm going to try and finish is this one: For this kit I'd also got hold of the Eduard PE set for it - which had two frets: ......plus I obtained this wheel correction set from CMK: The original plan, which I am going to stick with, is to have this one displayed wheels-down, on the airfield. I will probably make a small base for it too. The other Hurricane, that I actually finished looked like this: This was photographed against a sky photo backdrop and I have Photoshopped the clear plastic stand out. More details about this build can be found via the link above or more photos of the finished Hurricane can be found here: Some views of both kit's sprues and other bits can be found here: On the one I'm going to work on here, I had just about completed the cockpit painting, but not assembled the parts together for the frame, seat, instrument panel and fuselage halves. Here are some photos of said work: I must admit I cannot remember what overall plans I had for building this kit so I'm looking forward to getting back into it. I may try and get something done on this later today or tomorrow. Comments and suggestions welcome. Kind regards, Stix8 points
-
Hi, everybody! It's my next model. I used many resin sets from "Vektor" and one "Eduard"s set of etched details.8 points
-
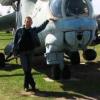
Dewey #1 Silent Running Modelled in 3D Studio Max & Printed with Elegoo Mars 2Pro Hi guys and welcome to my build of Dewey#1 one of the drones from the film Silent Running. If you don't know the movie there is a brief write up about it HERE. It has been one of my favourite films since I was a kid back in the 70s and 80s. I have been hankering after a kit of "The Drones" for years and have been holding off buying the wonderful looking kits from Destiny models as they are just out of my budget. especially if I want all three. With that said The family unfortunately came down with the dreaded Covid and over the last 8 or 9 days I have been isolated from them and it really bought this film back into my mind. Although I'm not quite as isolated as Bruce Dern was. but I have been feeling a bit like this. So with itchy fingers and an urge to jump into 3D Printing thanks to Alan @hendie & Tony @TheBaron I found myself the proud owner of . MICK ( Mars ) An Elegoo Mars 2 pro and FREDDIE (Mercury) Elegoo mercury plus Quite apt I'm naming my digital friends. 😀 I'm totally new to 3D printing and really have no idea what I'm doing aside from help over thee past week or so from the wonderful folk on Brit Modeller and of course You tube. I have a good Knowledge of 3D Studio Max but rarely get the opportunity to model High Poly robots these days so this is a real departure and treat. I have another build on the go that I'm also adding 3D elements to. The Vintage Airfix Hawker Demon. WIP can be found HERE. Follow along if you fancy it. Well There is no scale in the build notes as I don't really have one. The drones in the movie were about waist height. alas my printer is not so big so Currently the middle section is printing off at around eight or nine CM. we shall see I guess. Here are some cool movie pictures as I have no box to show. I love this one. And this is the little guy himself. I believe this is the destiny models version. Cools isn't he. Hopefully I can get something like. You'll note there is a little light on the top right of his head. I'll need to do some "plunge" moulding for this so I'll ask the help of Bill @perdu to lead my way in the dark. Other than that I'm planning to make a full kit with possible additions of wires etc. Unfortunately I took a Lateral flow test this morning and I have succumbed to the virus. I don't feel to terrible but I'll be stuck in the house for the next ten days. What a to do. 😈 Please join with me and see if I can pull this off. All the best and happy modelling. Johnny.7 points
-
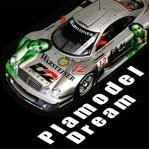
Among Japanese vehicles, R34 is one of my favorite car as much as the old NSX. This car is very cool and powerful, just like its nickname 'Godzilla'. This blue Calsonic GT-R participated in JGTC in 2003 It was popular for its refreshing and charismatic color. The assembly of this Tamiya kit was perfect, so I only cared about painting. The interior is also well reproduced in every visible part. It is described that the part made of carbon in the actual vehicle is painted with a semi-gross black, so I applied carbon decal. I removed the bonnet pin molded on the body and used the photo-etched parts of hobbydesign. I hope you like it. Full build video is here.7 points
-
Hello dear colleagues! My next model of a tank is M1 / 72. Short info: Crew - 4 people. Combat weight - 36.5 tons. Armor (fron) - 100 mm (turret) - 115-192 mm. Armament: in addition to the cannon, two 7.62mm SG-43 machine guns, (350 rounds in each) one 12.7mm anti-aircraft machine gun DShK. (200 patrons). Engine, diesel В-54 (520 hp) Road speed 50 km / h. Cruising range 350-400 km. The model is assembled out of the box, with the exception of some changes. - drilled holes in the barrels of the DShK anti-aircraft machine gun - all handrails of the turret are made with wire - added a handle on the inside of the hatch - added pipelines for external fuel system - added the barrel (from the needle) of the on-turret machine gun Painting - enamels AKAN, TAMIYA gloss varnish - FUTURE and matt TAMIYA MIG wash (dark), ZIPmaket truck wash, "pack" - MIG pigments, TAMIYA tinting of "powder". Decal ARMA. Presented a Soviet medium tank (w / n) from one unit of the Marine Corps of the USSR Navy Happy viewing!7 points
-
Well I started like this. to be fair the plans are for drone number #3 but the shape is pretty much the same for all 3 so it's a good start. I don't really have a lot of blueprints or sizes so I'm getting research from the movie and eyeballing a lot of the details. I wasn't happy with the way I modelled this so last night I did the whole thing again. I know it may look the same but it is different in structure. Currently we are here. My plan is to print off sections of the drone and assemble them later on. I'd like this to be about 15cm wide but we shall see. The build plate of the Elegoo isn't quite that big so making smaller chunks is a necessity. I could print him off in one lump but where is the fun in that? 😇 Here are some more shots so you can see some of the details. I'm planning on putting sockets under there so I can at least position the legs. there are details everywhere. Each drone is slightly different so I'm trying to get these as accurate as I can. Here are some of the wires. I was worried about smoothing groups from max but found that if you have enough polygons, Chitu box re factors everything anyway and ends up working. Well it did on my tiny Demon wheels so lets hope it works on something BIGGER. The 3D modelling was going fine but I'm reluctant to carry on without a valid test that this will actually print. As of Writing my reluctances are still valid as we are only an hour in to my first attept. I was planning on printing three test bits. The vent. and I have split the main section into two parts, Front and Back. Stupidly I took the picture of the back section facing its hollow side. 🤦♂️ Chitu Box does a "hollow out" operand but it looks a little hoaky to me so I decided to do it myself. Here's the first test in Chitu Box. I did all the supports by hand as I have seen a lot of tutorials saying the auto ones are a bit bobbins. I guess the proof is in the pudding. I'll let you know how it goes. Luckily I'm not feeling too bad. My taste has gone all funny and I feel a little woozy but that's probably the resin fumes. 😬 Take care chums. Hope you're all having a grand old weekend. Johnny.7 points
-
Time to put the seat to rest! I added the decals... lovely things that conformed perfectly and they are thin. And then I carved the lost ejection handle, yes I know it doesn´t look perfect but nor does it have to....no point detailing something that noone will see, I choose my battles. And the finished bang seat with it´s saftey handle in place as well .....now I just have to put it somewhere for saftey where I won´t destroy it until installment in the cockpit! There.. on to new goals! Cheers!7 points
-
Nice job on that Yak-3 kit! Good job tarting up the interior. Regarding Soviet colours being contentious, that is a bit of a canard. There is a general consensus on Soviet colours, and the Soviets did not use a large number of colours during the Great Patriotic War, unlike the Germans. They used black, dark grey, medium grey (which the Soviets referred to as 'Grey Blue', though it was really a grey colour with perhaps a bit of blue), tan (which they referred to as 'Light Brown'), a medium green with a bit of olive, blue for the undersides (RLM 65 is perhaps not an exact match, but not too far off), and a neutral grey for the interior. Those seven colours right there are it. Oh, and a temporary white (MK-7) for winter finishes. That's it for the camouflage colours (and the neutral grey is good for the interior). Hardly a minefield. Other colours were used, of course, such as on the engine, hydraulic and other lines and pipes, medium green for the wheels (not the tyres, of course), and silver was also used, more extensively than had been thought, both on markings (such as outlined stars) and on the interior. Although you will often see it on kit instructions, older decals, and colour profiles, yellow was seldom used on the exterior as it was the Axis recognition colour. I'm certain @Massimo Tessitori, @John Thompson, and @Troy Smith can add to the colour discussion. Welcome to VVS modelling; it's easier than you think! Best Regards, Jason7 points
-
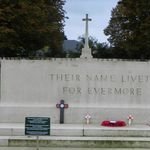
Hello all Another awesome day at Duxford for the last "Flying Day" of 2021. This was a full air show by any other name! I will start with the misty static shots and post the flying shots tomorrow. Thanks for looking. More to come....6 points
-
6 points
-
As I´ve mentioned in my jetmads threads I had to finish off three comission builds before I could get started on a big Viggen. Well, I am finished with the builds and I thought I´d present the three brothers in turn. Today it´s Olle 61, as of yet one of the two still flying Viggen. It is a demilitirised Sk37E from the now closed F15 wing in Soederhamn. In it´s day it was turned into a potent EW platform with an asortment of pods to go with it. Now it flies with the SwAFHF (Swedish Air Force Historic Flight) on air shows across Europe. For the build it was loaded with Master pitot tubes, Maestro PE and wheels, pilot repicas pilot figure and a CMK figure with seat, CMK reverse thrust paddels. The decals was put together from various sources and sheets. Ok here are the pics! And I´m a bit sorry they didn´t turn out that good after editing...I´ll do better on the next Viggen More in part 26 points
-
Bought and built,hope you like it. Tks for visiting!6 points
-
It was time today to re-visit a job I had done a week or so ago (maybe longer) - the masts. I felt the original was too tall, and I did not get the overlaps of the three verticals quite right. I was also concerned as to how to fit the spotting top on the foremast. As to that issue, I played with the original mast and a scrap of plastic this morning, and I found that if I used a certain size drill (the 4th smallest in my box of bits), and used a scalpel to increase the fore/aft hole, I could slide the plastic up to where the lower and mid uprights overlap, which is where the spotting top would be. That meant I could solder a new mast completely without having to put any resin parts on one of the brass rods during the solder process, and possibly melt them. I decided to try Longshanks' suggestion of taping the yards into place, then soldering them to the upright which would rest and be taped onto the yards. I drew a diagram as to what goes where: The extra little marks were indicating the extent of the uprights, and also where the overlap area would be. As you can tell, one yard is where there was an overlap, which could prove interesting when I join the two uprights together - would that join melt? Anyway, a while later after dealing with those and then setting up against another diagram for the complete mast, I had this: I used solder paint and flux, and it seemed to do quite a good job. Unfortunately, the upper upright was slightly out of true fore/aft, so I decided to redo it, but do two this time simultaneously. This time I reverted to my original way of setting the masts up. I taped them to a ceramic tile as tight as I could, and zapped them with the soldering iron. They came out fine this time, straight and true. Then I used blue tack to hold the yards in place and tape for the uprights: I set both up and got them soldered. One mast worked, the other did not, as two of the yards fell off when I got them away from the tack on one of the masts. So I kept the one I did first today and will use the best of these two, which means these: Then a quick dry fit into The Mighty G to see how she looks: I am happy! The masts do have quite a rake to them, they are at 80 degrees rather than vertical, that makes this ship look quite sleek. Hopefully I can get them sprayed with primer tomorrow. They will not be added yet, so I will start getting the funnels (all four) on soon and start getting some rigging to the funnels on too. That is it for now, thanks for looking, Ray6 points
-
Ok, so because I didnt want to do this after I had all my lovely surface detail done I didnt take many photos of the first (left) side being done. But with a buffed shiny surface the issue just glared at me even more. I tried telling myself that with a flat finish no one will ever notice....but it was an issue for me mentally. This is where I started, by fixing the upper curve of the intake section through to the intake opening. This is just the beginning as I went further back from here. But I have taken more of the other side in progress. Once the top profile was 'tweaked' I then had to build up the front section with CA as seen here. This was part of the way through the building up process The left side finished as best I can, notice how much thicker the forward section now is. Also of note is the lower intake lip being modified I think the 'hump' looks better now too More rounded and far more accurate across the top too Lower lip looking better now too.... All the time this was going on I continued to finish off surface details on the right hand side And a bit of an overall shot, to make me feel like I am making progress...... So there we go, I am making progress but it is slow, thanks for tuning in and I hope this was of interest to some Cheers Anthony6 points
-
Hi gents, As I have reached the painting process on my 1/32 P51, I thought that now would be a good time to open another box. This time I chose Italeri's Hurricane Mk.1 from Malta as I find this scheme very appealing to my eye (that and this time I wanted to go with something that requires minimal masking) I will be building it OOB since it has some PE goodies included and will probably be doing it with an open engine so some additional wiring might be called for. I'll see. So, nothing much for now, just this small intro. Thank you for taking an interest. Best, Nikola5 points
-
This is the old tool Airfix Vulcan. Glad they put it out to pass as the moulds were getting really bad. Thanks to @bentwaters81tfw for a set of intakes from an original tooling, the ones in this were really bad. Decals from before Airfix started using Cartograf and were not great. Still its finished and of the Shelf O' Doom. Even in 1/72 it fills my large photo tent!5 points
-
C-130 A97-008 of 36 Squadron Royal Australian Air Force out of RAAF Base Richmond. She was supporting the F-111C deployment to Red Flag 81-1 at Nellis AFB, November 1980. Thanks for looking, Sven5 points
-
Trying my best to reach the finish!5 points
-
One of my favourite films too. I found some free Hewey etc paper prints on line years ago and made them up. They were quite nice. Darned if I can remember what happened to them though. I'll be sitting in pod 3 watching your progress on this one. DO NOT eject pod 3! Thank you.5 points
-
Turns out the reason for the huge increase in insurance for the one car is we are now classed (by this one insurance company) as risky drivers... This is despite the fact that neither incident is actually our fault. The first in Feb, we had our catalytic converter stolen off the car, whilst parked on our driveway! They classed us at fault as the police did not have anyone in custody that evening! The second is because some unknown person hit the rear of our car and drove off. Thus leaving us with the repair bill. Neither of which are legitimately our fault. We have now found much better insurance at under £750 for both of our cars, fully comp! The other company have been told where to stick their quote!😁5 points
-
Hi all, Very recent finish for the F-16 STGB here on the forum. The build thread is here but to recap: Kit: 1/72 Revell F-16C kit 04844 Build: OOB Extras: Conformal fuel tanks from Hasegawa F-16 Paints: Tamiya Acrylics, Flory Models Wash, Klear, W&N satin varnish Decals: F-16 Zeus II by Procal I broke the very delicate tailplane aerials so need to replace those. And some of the decal touch-ups aren't a match. The canopy should be tinted but I forgot. But apart from all of that, really enjoyed it and love how it turned out. Revell_1_72_F-16C_Zeus II (2) by Dermot Moriarty, on Flickr Revell_1_72_F-16C_Zeus II (3) by Dermot Moriarty, on Flickr Revell_1_72_F-16C_Zeus II (4) by Dermot Moriarty, on Flickr Revell_1_72_F-16C_Zeus II (8) by Dermot Moriarty, on Flickr Revell_1_72_F-16C_Zeus II (1) by Dermot Moriarty, on Flickr Revell_1_72_F-16C_Zeus II (12) by Dermot Moriarty, on Flickr Thanks for looking and happy modelling. Cheers, Dermot5 points
-
Blimey. I turn away for a week’s walking in the North Highlands and Johnny is 3D printing….. 30 minutes! Well colour me envious That’s one hell of a useful day job you’ve got there Johnny; I’ve yet to find any collateral usefulness for the law…or much primary use for it come to think of it Already a hugely enjoyable/impressive thread and there’s so much more to come…. .5 points
-
Sadly, to date, I have had to refrain from visiting the USA in order to avoid a mass panic. Just look what happened when H. G. Wells' War of the Worlds was broadcast on the radio. Heaven only knows what would happen if a real Martian turned up at JFK Airport! Actually it would more likely be New York Docks as when I do eventually get round to visiting, I intend to have Sarah-Jane loaded on to the Queen Mary II and do the crossing in the proper way. I am still expecting the same mass panic though. Martian 👽5 points
-
Morning everyone … I masked and sprayed the walkways tonight. Still need to get the ones towards the rear upper spine. But nothing that some careful masking cant get tomorrow. Please feel free to ask questions, post comments or add thoughts. Dennis5 points
-
FWIW, here's a photo of the P-40B I built, painted with MRP Neutral Gray. I personally don't think the color is too dark. Also FWIW, the OD is a 50-50 mix of MRP OD 41 and Mr. Color OD C-12. The mix came out very close to the 41 chip in Archer's Monogram Guide.5 points
-
Just a quick glance in the box and the state of play.... In the bottom left corner is the main engine block assembly done. I had a look over the big fairing pieces and they cleaned up quite nicely. The air intakes got cleared and filed for a thinner metal look. These kits come from a stash where several kits have been started with initial assembly or paint, but I'm pretty sure this red paint is factory applied. The petrol tank is painted too. While working on the grey parts I discovered I had a missing part. The oil sump is a 2 piece item that fits under the the crankcase and one half was awol. So I've spent a bit of time scratching a mirror image on the half that I have. These parts have lugs that act as engine mounts to the frame and I replicated them with a length of Ali tube right through and protruding each side. The petrol tank turned out not to be supplied with a bottom. It's probably not seen to any extent but I thought it would benefit from something to cover the void. I resorted to my Muller Corner yoghurt pot styrene using the side wall plastic which is the thinnest. The sides are just wide enough to cover the bottom of the tank but not quite long enough to do it in one. A cross bar is fitted and the front section is to be added here. The two lugs protruding at the back take the fuel taps and pipes. So far so good..... 😎5 points
-
Hello Dears, What's better to distract a CC from boringly stenciling a Phantom ??? Stencilling a Tempest.... I'm dreaming of stencils.... Here are some news from 2 days ago... Painting anti glare panel and walkways... Next time you stupid CC do the walkways BEFORE spraying the HSS Then the prop !! And I turned myself as Jar Jar bink preparing the Ka boom.... as we are Hawkerizing, see what I found on the web.... Lord, save me from myself, I ordered another Airfix Hurricane..... Stay safe Gents !! And happy modelling week end to you all !! CC5 points
-
I've just enjoyed a lovely evening's moddelling. The dog was asleep after a long walk and nothing disturbed me, not even my stomach, and that's unusual. I generally eat my main meal at five but it's now eight o'clock and I didn't even notice. I'm currently writing, uploading photos and cooking simultaneously, and suddenly really needing to upload that cottage pie - thank goodness for frozen leftovers! Creative damage is the theme for today. That is the fan housing which I believe I posted above? It looks a little different now it's been downrange of a three inch shell's explosion. Made from thin metal, it surely would have been shredded and well as flattened by the internal explosion, particularly since both ends are open to the atmosphere outside. Unfortunately, I dared not flatten it because I still have to be able to fit it in there and space id going to be a lot tighter than I'd imagined. The Mk V looks the size of a removal van but it turns out to be as full as a loaded removal van too. There was hardly room to dodge a bullet in there. Anyway, shredded will do. I've revealed the actual fan housing through the hole so I'll be painting that very gingerly in the next few days. These are the three fuel tanks which were carried at the back of the tank, outside the armour, although with their own armour plate protection, in the style of the later T-34. It wouldn't be that much of a problem for the crew if the fuel burned as the fire would mostly be on the ground. I need to burn it for the discoloured paint, soot and other special painting opportunities, none of which I've done before. I decided that the tanks were damaged by the shock of the incoming shells, leaked and then burned and softly exploded, knocking off their armoured lids and revealing themselves. I shredded the tops for interest though I've absolutely no references to go on here. I may have to set fire to my car and take some photos... [Ah, the food is in front of me now. And my first drink since noon.] Back to that fan housing. There's no radiator core included in the kit and this will be visible once I've 'blown the bloody side off' so something had to be done. 'Take One' was to engrave the vertical tubes on a thick piece of plasticard. Meh! I didn't like that. We are going old school. I stretched some sprues and cut the best bits for use. It took a long time to get parallel and similar diameter pieces. I remember learning this technique from an Airfix Magazine in the sixties and getting in awful trouble for the burning plastic in my bedroom. Those floating black sooty smuts really annoyed my parents! And the toxic gasses I suppose! I glued them to that piece of card, the sprues not my parents, using the engraved lines to keep things straight. Trimmed to size, it's looking good, but there's a twist. I only glued the tops and bottoms of the 'tubes'... So the radiator could be burst asunder. It won't be quite this visible but you get the idea. Then I applied myself to the engine housing. The shutters are hanging from a single hinge and the front, where the shell came from, has been thinned and shredded. Written down like this, I don't seem to have actually achieved that much for my four hours of work. Maybe the BBC iPlayer slowed me down as I've also been enjoying bingeing on Luther, a light hearted cops and robbers program, which I recommend heartily. First thing next session will be a bit of painting and then assembly of the fuel tanks, back wall and floor. I'm hoping that I'll then be able to start installing the insides. It may be that the engine etc will have to be fitted to the floor before the floor is fitted to the side, which will be a major pain in the neck, so keep your fingers crossed for me. Must dash, it's time to eat!5 points
-
I really am at the wire on this one now. Fire extinguishers are the final item to complete. I've just done the canvas handles on the leather padding on the inside of the hatches on both Panzers. A lot of research went into these and a lad thats a bit of a subject matter expert on them (he's about to publish a book) pinged me to tell me the straps were canvas and not leather. It's all about the detail is it not? Hopefully I will get some Klear on this at the weekend and I can begin to weather it. A bit more to do on the Centaur to nail it, but again, if I get some time at the weekend, the Centaur really is at the wire to get it over the line and complete. Piccy below. Canvas needs grubbying up from the wear and tear from the tankies.5 points
-
It's a big complex kit so lets take the lid off and see what it's like The first cut is always the hardest, takes a lot of conviction to make it, and I'm sure it will make for an interesting build.4 points
-
Thanks to @Mike using a cheap printing company, this years Britmodeller Christmas Pantomime will have to feature a barbeque on the stage. That is unless someone out there wants 5000 posters headed Beauty and the Baste4 points

.thumb.jpg.d17ff607fc7e89ed057e63fcb6f2a888.jpg)


.thumb.jpg.d3635a7ef6507d35f372dd09671fe96f.jpg)


a.thumb.jpg.58d92d116b0315dc55d352fd191d65e4.jpg)
.thumb.jpg.c995f6673aea28e7e0666d95ea97dcf9.jpg)


.thumb.jpg.ba34a9f6ddce411193946dbdcc7b5fe8.jpg)


This leaderboard is set to London/GMT+01:00