
Leaderboard


Popular Content
Showing content with the highest reputation on 13/09/21 in all areas
-
Hello folks. Only my second model post, so being brave and going for it. The kit is new, and mostly goes together well, with little need for sanding or filler. There are some nice touches in the kit, such as direction arrows put on parts that could be accidentally put in upside down or back to front, and a pair of wheelbay masks. The instructions are of good standard, as are the transfers. My only real fiddle was putting the assembled undercarriage in its bay once I had finished spraying, it took a bit of help from a cocktail stick to get the forward legs to pop into the locating holes. The model is built completely out of the box, and finished in one of the two schemes offered. It represents a September 1944 Mosquito of 571 Squadron. I finished it as per the Airfix instructions, which included spinners that are in PRU blue (I handmixed this paint so sorry if it's not spot on.) The radiator covers were not painted in the overall camo scheme, but in dark grey, and don't have the usual red crossed 'don't walk' legend on them (this is handy as it gives me a couple of spare transfers to stockpile if I mess up on another build.) The port wing also has an inspection/maintenance hatch finished in underside light grey - again, I like this inclusion of non-standard features. The downsides: only one crew figure, and appallingly moulded at that. no provision of a 4,000 HC bomb or mounts for the same. (You do get four x 500lb MC bombs though to be fair). I think I could use mounts from the current B.II or B.III Lancaster plus a cookie from the RAF ground vehicles set if I wanted to model this, but as you can see I went for doors shut on this build. The cockpit canopy is ok, but the front frames seem much thicker than the Tamiya product, and look a bit bulky. It might be my painting making it like that though. The biggy - this model is apparently built from a scan of the TT.35 Mosquito at Cosford, and the bomb bay doors and rear fairing replicate the target tug version. The bulged bomb bay doors that should have been fitted are noticeably different. Whoops a daisy Airfix. Now the funny bit - as I was looking forward to this kit so much, every time Airfix e-mailed me about it, I preordered the kit, then forgot I had preordered. Therefore when the postie brought a gigantic box I was puzzled until I saw there were three kits in it. The missus thought it was funny, and it gives me two more kits to make. I won't be making them straight away; I will make one in the second scheme provided in the box (black undersides, green/grey upper surfaces), but I'm going to wait a bit to see if Airfix or someone else comes up with the proper bomb bay doors and rear fairing. I might make the third one as a TT.35 in fact as there is a second cockpit canopy provided that has the dome over the navigator's position. Summary - a good kit, but if you want it totally authentic as a B.XVI you're going to be doing some rebuilding and possibly sourcing of custom parts. Bad show from Airfix there. I've been as brutal as I can with the photographs, so you can see where I've buggered things up, also I seem to have acquired quite a few white specks of dust in the matt varnish finish which is annoying but they are barely visible to my old eyes. The last image is with the Tamiya model on the right; the Airfix kit sits lower, and you can see it's down the the undercarriage legs seeming longer on the Tamiya... again this could well be my lack of skill with building.35 points
-
Morning All, May I present the Airfix Shackleton MR.2 built as phase 2 WR964 of 204 sqn at RAF Ballykelly in the mid 1960s. Work in progress is here if anyone's interested: Would like to thank everyone that followed along and offered advice and support along the way. It felt like a long old slog but looking back it was actually around 8 months, and I had a break somewhere in the middle to make a Buffalo, so actually not all that bad. This is the biggest kit I have made since restarting the hobby a few years ago, and I did struggle at times. Mainly with the painting. If ever a kit needed an airbrush, this was it. Had a right time with getting 'stuff' in my gloss varnish, hence spoiling the finish a bit. That said, I'm pretty happy with the result, I've even managed to shoe horn it onto a shelf so don't have to store it with the wings off somewhere. I've learnt a bunch of new stuff along the way too, which has been fun. Some highlights being the use of chocolate ball foil wrappers for masking canopies, pledge floor polish as a gloss coat, Krystal Klear for windows and realisation that sanding sticks can be used in a non-destructive manner - e.g. for removing washes. The foil on the canopies was a lot harder to remove than I anticipated - might go back to tape next time, but cover the whole canopy and then cut round the frames with a fresh knife. The kit is not naturally a phase 2 machine - DSG scheme they offer is for a Phase 3 in 1972. Hence, you can leave off some of the details that are specific to that phase. I think there are also more fundamental differences, such as window placements, but I elected early on not to get involved in such things - all the better for my sanity. So this is a phase 2 in spirit more than in excruciating detail 🙂 I used Humbrol 164 DGS (tried the Tamiya equivalent but it was too light) and Vallejo white for the top - multiple thinned coats. Weathering was with Flory wash and some AK weathering pencils to do some rusty bits here and there. I've not gone all in with the weathering, deciding to err on the side of caution as I usually do, I think she looks suitably grubby but hopefully haven't overdone it. Decals are a mixture of the kit ones, yellow wing walkway marks from a Revell kit (Airfix only supply red ones for an overseas based machine) someone kindly supplied and the Xtradecal markings for the serial and squadron. The Revell decals were not that great - you can tell they're fairly old, but they did a job. Final satin coat was Tamiya rattle can which went on really nicely. It did interact with one of the underwing serials, and I think took off part of one of the nose codes. Need to be cautious with it, I think, and spray from a distance. Anyway, on with some pictures. Thanks for looking! Al.31 points
-
I needed a break from grey RAF fighters! The ETPS schemes are always a nice change. Here's the old Italeri 1/72 kit with a slightly hybrid livery - I don't think XX145 was ever in this (newer?) version of the scheme, but if she's ever restored and repainted, who knows! Mostly built OOB but with a little aftermarket etch from Eduard, and resin seats and wheels (can't remember where from though, as I started the build ages ago). Decals were from the Air Decal "Raspberry Ripple" sheet which I found on eBay, over Hataka Red Line acrylic airbrushed paints. I'm not sure if the various shortcomings in fit and finish are from the kit or my lack of skill, although it was certainly much more of a struggle than the last kit (the fantastic Airfix GR9). Don't peer too closely! Thanks for looking (from a distance). And with a previous T.2 (Hasegawa kit)...24 points
-
Hi all, Hot off the bench, the superb Special Hobby Tempest V as boxed by Revell. A beautifully detailed, sharply cast beauty of a kit with virtually no vices. Loved building it. Even though the kit is fine as it is (slight nose/spinner inaccuracies aside) I used some aftermarket items to improve it. The Barracuda nose and propeller did improve the overall look of the nose, radiator and spinner. Worth the investment if such things bother you! Also used CMK's Seated Pilot set, with a finely cast pilot, although the face expression is a bit odd 🤔 The wheels were also CMK, perhaps need a bit of a wash to bring them up 🤨 The serial number and codes came from generic sets by Xtradecal to represent a 486 Sqn V-1 hunter from June 1944. 486 together with 3 Sqn RAF claimed over 500 V-1s shot down in the summer of 1944. The V-1 kill markings were home-printed on decal paper. I used Klear mixed with water as a setting agent for the decals, which worked perfectly. Thanks @stevehnz@bigbadbadge for this toppest of tips 👍 This is one of the nicest kits I've had the pleasure of building in ages. So much so, I bought two more, which is unusual for me (I don't keep multiples of kits in the stash, donations excepted!) And here's the build thread if you're interested, the cockpit construction is worth a look: Anyway, thanks for looking in on this, hope you had a pleasant weekend. Alan24 points
-
Hello, today I'm sharing a little build of a classic kit: the graceful Airfix Seasprite, which I completed slightly over a year ago. I built it as a gift for a friend I had in college, who had served as a US Navy landing signalman. It is built out-of-the-box, even making use of the supplied pilot and crew figures. The surface detail and rivets are largely out of scale, but I think it's a charming reminder of the way kits used to be tooled: without the use of CAD software and so on. It was a rather straightforward build with little problems, and the clear parts still look good after rattling around in the box for the better part of 4 decades! The decals were difficult however, thick and with a noticeable "adhesive" on the backsides - I probably should have masked the tail rotor stripes instead of using the decals there. Just don't squint too hard at it. 😅 Also, as with all of my builds, it's entirely brush painted. Thanks for looking!22 points
-
Mr. Keihänen (= in English the Finnish surname roughly means "Spearman" 😄 was a very eccentric holiday and business mogul and the real pioneer of the package tour business in Finland. He was the founder and owner of the Spear Tours travel agency and the Spear Air airlines that in the late 60's and early 70's launched the first inexpensive holidays for hundreds of thousands of Finnish holiday makers in Southern Spain and in the Canary islands. Mr. Keihänen had a long hair and was very often seen in his favourite livery i.e. a chinchilla fur coat and swimming trunks🤣. Spearair operated two DC-8-32's that had been bought from Eastern Airlines. There were plans to expand the fleet of the airline but in 1974 the companies went bankrupt because of the heavily increased prices of aviation fuel caused by the oil crisis. I built the Spearair DC-8-32 from a Welsh Models 1/144 scale vacuform kit with 26Decals set. My model depicts the plane christened "Härmän Mimmi" i.e. "the Chick from Härmä", Assembling the vacuform kit was quite straightforward (to be honest I'm not a great fan of vacuform). The wings, stabs and engines were made of resin and the landing gear of white metal. The biggest trouble I had was with the decals. Because of the complicated Spear Air livery I had to fix the decals a lot in the nooks and crevices of the model. Since the decals were laser printed the overlapping of red areas caused immediately a darker seam, The black decal areas didn't have that problem. I bought another decal set for patching up purposes. Luckily enough, I also found a paint that was exactly of the right red shade i.e. Revell's enamel SM330. The cockpit and cabin windows were another story. The cheatline decals had cabin windows with lids but the planes didn't actually have lids but curtains instead. Well, I decided to cover the wrong looking windows with blank cabin window decals from my spares box. As to the name of the plane in the nose I tried to write the minuscule script as accurately as I could with a 0,1 mm black marker pen. I also added a lot of details to the model, and as to the engines I modelled them with the reverses being closed. I painted the fuselage of the model with Tamiya white fine surface primer which I then sealed with Tamiya gloss varnish spray, The metal areas I painted with Alclad polished aluminium. Satisfied looking Mr. Keihänen in his favourite outfit i.e. a chinchilla fur coat and swimming trunks. In the background you can see his two DC-8's. Memorabilia from a Spear Air flight😄21 points
-
Greetings all, Finished today. Brush painted, Humbrol paints, attached to stand via magnets. Thoroughly enjoyed building this .... Flown by Wing Commander J.B. Mitchell. No 92 Squadron. Germany August 1972.18 points
-
Hello all, After almost 6 months of work, we finally finished our SBD-3 Dauntlesses. This was a group build with my dad, who built the aircraft flown by Lieutenant Commander Wade McClusky, I built the aircraft flown by Richard Halsey Best “B1”. We used the 1/72 Hasegawa kits that were re-boxed by Hobby 2000. We replaced the dive brakes with Eduard photo-etched and added detail to the cockpit using the Eduard set too. My kit is pretty much out of the box; to see if it would add any value my dad did some other modifications to his kit: he replaced the kit canopy with a RobTaurus vac-form canopy, scratch-built oil coolers and machine guns, model master gun barrels, photo-etched bomb racks, Brassin bombs, scratch-built bombing view window, reskit modified resin wheels (smoothed out) and scratch-built window air flow deflectors. Both kits were painted with AK real colors acrylics (the underside colour was corrected). The decals are a mix of the ones from the Hobby 2000 reboxing, Aeromaster decals and some other spares. We had a lot of fun building the dauntlesses (but it was quite complex), so we hope you enjoy looking at them. Comments welcome! Underside of McCluscky's aircraft. Underside of Best's aircraft. Last picture.16 points
-
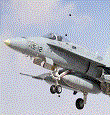
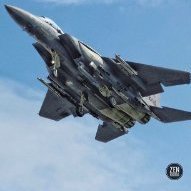
This model of F-16B 92-0458 of the US Navy Fighter Weapons School was built from the Kinetic F-16A/B NSAWC Adversary boxing. Having started it possibly a year ago it had got to the assembled but unpainted stage quite quickly but the current F-16 GB provided the impetus to get it finished Aftermarket goodies include a Quinta Studios cockpit set, Eduard etched seatbelts, Aires resin exhaust and Model Master turned brass pitot and AOA sensors. Thanks to @Peter W for sending me a copy of the Fightertown decal instructions - being in colour and larger than the Kinetic diagrams they helped muchly when making a set of paint masks. The three main colours (Grey and both Blues) are from the Mr. Paint range - after an initial coat each colour was oversprayed with random lighter and darker patches using Uschi van der Rosten Trinity Splatter stencils. A final photo paired with 92-0409 built from the Eduard Ltd Ed "Top Falcons" reboxing a Hasegawa kit which was finished during KUTA XII Mike16 points
-
Hello all! This is my latest Italian project which, in turn, conclude my trip through the different camos of that lovely bird. On this one something special was requested as it depicts a plane from the 70° Squadriglia The angry wasp, when Mussolini was dismissed, and before the armistice was signed. All signs of the fascist government had to be removed, on wings and fuselage and also on the Savoy coat of arms on the tail. The Silhouette tool comes handy in such a case, and was helpful too to do the white bordered 2 and 70. This camo was used by Breda in 43 when the fighting was more over the mainland than North Africa, so the green blotches were more packed and dense! Best regards. fullsizeoutput_2161 by jean Barby, sur Flickr fullsizeoutput_2162 by jean Barby, sur Flickr fullsizeoutput_2163 by jean Barby, sur Flickr fullsizeoutput_2165 by jean Barby, sur Flickr fullsizeoutput_2166 by jean Barby, sur Flickr fullsizeoutput_2167 by jean Barby, sur Flickr fullsizeoutput_2168 by jean Barby, sur Flickr16 points
-
a little relaxation with a what if version :14 points
-
After a long struggle, at last this beuty is finished! I built it OOB, and did not even try to make the nose movable. That meant pretty much work, but I guess that building the nose as Airfix suggested, would have caused even more problems. Fit is horrible, details crude, the decals seems to be made for another 1/72 Concorde and shapes are wrong in many places. But still: It is sooo cool to have a 1/72 Concorde on my shelf! It was worth all the struggle! I painted it with Tamiya white primer followed by many layers of Mr Paint white. I used Johnson's Pledge as varnish, which gave a good not too glossy finish. Panel lines were shallow and wide, especiallay on the wings, so it was totally impossible to do a normal wash there. After a couple of hours, I decided to fill them with a pencil instead. With a surprisingly good result! I have mixed feelings about rubber tyres, but on this model I think they look good. This is a big bird, almost 90 cm long! WIP thread here. Thanks for watching!14 points
-
Hi all I present to you my rendition of the Airfix 1:48 Chipmunk T.10 I chose to do the camouflaged markings of WP964 serving with the Army Air Corps at AAC Middle Wallop in June 1968 I used kits-world 3-D printed decals for the instrument panels and seatbelts (KW3D1481020) not overly impressed with these would of preferred photo-etch but hay-ho Tamyia XF-52 and XF-81 acrylic paints used for the camo also added the break lines from nylon thread i throughly enjoyed this build thanks for looking and happy modelling12 points
-
I’m pleased to roll out and present to you my latest build, which was intended as a quick space filler between others. In the end she took a bit more effort than I had expected as I discovered the additional features of these machines. The model depicted former Dutch RNEIAF F-51K Mustang “F-305” (ex 44-12754, H-305) as operated by No.3 squadron of the Air Force of the Republic of Indonesia (A.U.R.I.) around early 1958 https://en.wikipedia.org/wiki/Indonesian_Air_Force. I chose this machine as she stood out when I purchased the Dutch Decals sheet nearly two years ago. However, upon matching the only image I am aware of her (below) in this colour scheme against the instructions it was clear there were differences – errors. I consulted Max Schep. It was agreed that the scheme, instead of being a single green, was in fact a two-green camouflage pattern. THere is no red nose apart from the sinner. In fairness Dutch Decals allude to this possibility. I then noticed that this aircraft carried the No. Squadron “3” on the fuselage side, believed to have been in yellow. This is not in the Dutch Decals sheet. Note also that the serial and axe are oversize! Credit; Dutch Decals Sheet Later, while building the model, I saw that there were other differences. Firstly, the decal sheet shows the sharksmouth as having a red interior whereas the photograph clearly shows a very dark colour. You can match the red of the national insignia and it becomes clear. I opted for black as it matches other known black features like the eyes. The greens used for the upper surfaces are unknown too and so I have made a judgement call on what I think they were. Contrary to the decal sheet instructions I painted the undersides as natural metal rather than grey, citing the natural metal surrounds to the serial numbers. With help from other BMers, I chose black as my colour for the cockpit, citing the Dutch Air Force Museum machine as an example. I used an Aires cockpit set that was languishing in a box under my desk 😉. I also had a F-51K prop ready but didn't need it. She needed new rocket rails and so I fashioned these from Plastruct rod using a photo of a machine in the Jakarta museum as a reference (below). Credit: @Troffa Apart from the above it was reasonably straightforward. I used some aftermarket to spice her up a bit and tried to enhance detail by, for example, drilling out the exhausts. You can see that I dropped the flaps too. The only issue, and it has occurred with all of my seven Tamiya Mustangs, is that the windscreen takes some careful fitting. The wing panel lines were filled with PPP. Other things to change on the Tamiya kit are: 1) deleting the strengthening patches above and below the wings, and 2) modify the main gear doors as they dont sit right when following the kit parts locating positions. The cockpit set was nice (no rivet counters please). It’s a shame that most of it gets buried! The aircraft is depicted as she was during the troubles in Indonesia in late 1950s, fighting insurgents. This story is best captured here: https://www.dc3dakotahunter.com/blog/pby-catalina-26-invaders-p-51-mustangs-cia-rebel-air-force-attacking-indonesia-1958/. F-305 was damaged on 07th May 1958 during an attack by CIA-supported PERMESTA forces on Laha Airbase. What did I do/use? 1. Kit – Tamiya F-51D Mustang (54) in 1/72 2. Decals – Dutch Decals Sheet (72070). The “3” was drawn by @Giorgio N and printed by Arctic Decals. Likewise the replacement sharksmouth was printed from my revised drawing by Arctic Decals too. I used Xtradecal white and black striping for the flap angle indication. 3. Aftermarket – Aires cockpit set (7074 ), flaps from an Airfix kit (Thanks @rossm) 4. Paints - Colourcoats Green Olive Drab (ACUS19), USAAF Olive Drab 41 (ACUS15), Insignia Red (ACUS26) Matt Black and Tyre Black, Humbrol 27002 Polished Natural Aluminium and others. She has a final Satincote finish. 5. Weathering – Prismacolor Silver pencil, Tamiya Weathering Powders and Flory Dirt and Sand I hope you like her. Martin PS: Yes, I know it has a Hamilton Standard prop. It is correct, despite being a F-51K.11 points
-
My piece of nostalgia is complete. The Tigershark, painted in the red and white scheme, was my favourite model as a kid. None of my childhood models survived with me until adulthood unfortunately, but this was one I wanted back on a shelf so I bought a replacement. It's all OOB. I've left the pilot out to show the cockpit detail, and I followed the box paint codes apart from a couple of areas where I used artistic license on the ordnance (the original aircraft and instructions had Sidewinders with white noses and the box showed black stripes on the fuel tank but the build instructions make it all white) and the pylons are supposed to be body colour - so, white under the wings and I suppose red for the centreline pylon, but I thought they'd add a bit more colour detail if they were done in aluminium. Build thread with backstory here. Hope you enjoy. And on the shelf with its 1/48 stablemates.11 points
-
Built for the almost finished F16 GB. Not a competition winning build for sure, but a great paint job done with masking only, and my first ever completed GB! Thanksto @trickyrich for hosting an awesome group build!10 points
-
Well we are back in lockdown with the Delta strain doing its thing here for the last month of so. Fortunately only 15-20 cases a day in our little part of the woods. But it is enough for the authorities to keep us housebound. Our club decided to run a Lockdown Blitz build over a week which as turned into a month long blitz, so this is the result of my attempt which was just finished today. So not so blitzy in the end. It is two original tool 1/72 Airfix Mossies in the markings 1SQN RAAF (A52-526) and 464SQN RAAF (MM403). I used Aussie Decals for the 1SQN Mossie and DK & PD decals for the 464SQN aircraft.9 points
-
Greetings to all who stopped by! I present to your attention, a prototype model (project 904) of the serial screen-plane "Orlyonok", which was tested in Kaspiysk in 1974. Assemblability of the set is excellent, there were few details, about 30. Now the details on the model, a lot more (didn't count it). Considering the scale, the detailing is poor. Some units and elements (because of their discrepancy with reality, and given in the approximate performance), had to make from scratch. For the connoisseurs of this car, I should add that all the BANOs on skegs and stabilizers are my selves). Painting and lacquering with brushes. Paints: GSI urethane acrylics, Tamiya acrylics and PC88. Tamiya lacquers. +simple pencils, +oil paints. Stand from MSP. Enjoy watching!8 points
-
My latest finished project - "little bit" upgraded Hawker Tempest Mk.V 1/72 Academy kit. I made design and 3D print of the new cockpit, wheelbay, gunbay and engine. (all of them will be available on www.u3d.cz) The crazy is that during my work on the project another producer notify a new kit of this plane ... "c est la vie" ( now I know that the KP is not much better ... who knows how wil fit the Airfix )8 points
-
Hi mates, I started this build nearly four years ago, but it was one of those builds that kept being stuck back up on the shelf of doom. The Tigercat was a beautiful, elegant twin engined design from Grumman's Iron Works that was just too late for WWII, but saw combat in Korea at the hands of the US Marines. Most missions were recon, close air support and ground attack, but the Tigercat managed to knock a couple of biplanes out of the sky. I always wanted a Tigercat in my 1:72 collection, but I got tired of waiting for someone to produce a modern tooling. Therefore, I pulled out the old Monogram kit from the mid 60s and decided to tart it up a bit. Since the Monogram kit has raised panel lines, this meant a complete re-scribing. And, since it lacked detail in the cockpit, wheel wells, and engine departments, it meant I would be visiting the aftermarket section of my favourite hobby dealer. I settled on the Aires "Super Detail" set (read about it and weep over at the WIP), the Starfighter wheel well set, some Quickboost props, Aires tyres and wheels, and some Brengun wheel chocks that help keep her on her nose wheel. I ran into a lot of issues with the Aires detail set, but I finally decided enough was enough - let's just finish the thing! So here it is - all the fun details of the WIP can be found here, and if you read between the lines you'll see why I kept losing my mojo trying to finish it. But perseverance pays off...eventually. Project: Grumman F7F-3 Tigercat Kit: Monogram F7F-3 Tigercat (kit numbers 6062 and 6813) Scale: 1:72 (but a surprisingly large model nonetheless) Decals: Representing HEDRON One at Marine Corps Air Station El Toro in 1950. Stencils from the kit, national insignia, squadron modex and other markings from the Island of Misfit Stickers Photoetch: From the Aires detail set, and an occasional bit from the Drawer of Fiddly Stuff Resin: Aires Detail Set 7018, Aires tyres/wheels 7208, Quickboost Propellers 72381, Starfighter wheel wells 7212, Brengun wheel chocks 72093 Vacuform: Squadron Tigercat canopy 9118 Paint: Model Master 1717 FS15042 Dark Sea Blue, 1169 Flat Yellow; Gunze H58 Interior Green, H90 Clear Red, H93 Clear Blue, H92 Clear Orange, H94 Clear Green, H12 Flat Black, H11 Flat White, H47 Red Brown; Alclad 101 Aluminum, 111 Magnesium, 115 Stainless Steel, 314 Klear Kote Flat; Floquil 110015 Flat Finish Improvements/Corrections Detailed nacelles with resin engines and photoetch parts such as the ignition harness and plug wires. Port exhausts from Aires set did not fit, so new ones were scratchbuilt. Over 26 grams of weight in the nose, but it was just barely enough - sometimes she sits nice, sometimes not. Wheel chocks prevent any propensity for tail-sitting. Cut open the kit canopy, and used only the windscreen. The sliding canopy and fixed rear portion came from the Squadron vacuform. Detailed cockpit with Aires resin and photoetched instrument panel and seat harnesses. Resin propellers and hubs Starfighter resin wheel wells with oil and glycol tanks Resin wheels/tyres - all landing gear received photoetched scissors links Used scrap pieces of clear plastic to make new navigation lights and lenses Oil cooler vents opened up on top of wings 5" High Velocity rockets from Hasegawa F9F Panther kits Added communication antennae with 0.005" diameter Nitinol wire Build thread: Link - anyone wishing to use the Aires Super Detail Set please have a look at the WIP. It may help you when you get to the tricky parts. So on with the pictures! And some family shots: I think that last shot shows you just how big the Tigercat was. That's an appropriate picture, too, since the F7F was originally supposed to be called the Tomcat. At the time, the US Navy brass rejected the name because it promoted "female promiscuity." I guess that wasn't a problem later on after "The Summer of Love!" Cheers, Bill7 points
-
And I think I've found it! Hi there. After posting my builds on reddit for a few years, I decided to poke around for a new community and found this great forum. I feel that forums dedicated to the hobby are more conducive to proper comment/critique, as well as learning new techniques. I was drawn in by some of the more niche models that were posted here, like @Flankerman's glorious Be-10N. I definitely enjoy lesser-known and esoteric subjects just as much as a proper Tiger tank or P-51D. Hopefully I see you all around and I'll be commenting as well as posting my own models very soon! With best regards, Pyradus.7 points
-
Hi Vikings. On Friday I had a horn of "mead" when I got home from work. 466 by Bosse Persson, on Flickr The I sat down at the worktable to continue working on my Lansen. I cut the plug I'd used to fill the hole in the main landing gear bay to size and fashioned it so that it blends in with the suroundings. 457 by Bosse Persson, on Flickr And I cleaned up some more parts from ejection pins. 458 by Bosse Persson, on Flickr I then started to cut out the holes for the four airbrakes. 459 by Bosse Persson, on Flickr 460 by Bosse Persson, on Flickr 461 by Bosse Persson, on Flickr Teadious and hard work, very thick plastic in this kit. And it was getting late, so more "mead" and some wine in the kitchen seemed like a better idea. 462 by Bosse Persson, on Flickr I'd planned to do some overtime work on Saturday, but life got in the way, and when I finally had some time over I returned to the worktable and glued some PE parts to the wheel covers. 463 by Bosse Persson, on Flickr And yesterday Sunday, I started to clean up the ordnance. The 3D printed 15cm rockets. 464 by Bosse Persson, on Flickr 465 by Bosse Persson, on Flickr I only managed to clean up 3 pairs before my neck and eyes had had it. And speaking of the ordnance. The Lansen could carry 24 rockets, but with that load it could only just get airborne. So I've changed my mind to instead doing a maximum operational load of 16 rockets and a droptank. The ones that'll be surplus I hope one day to use on Pilot Replicas SK60C when it comes. To be continued..... /Bosse7 points
-
Thanks all. ❤️ Instead of replying individually I’ll carry on with the update which gives me more bench time. Needless to say Thankyou all the the kind words. 🙌😍 Masking mojo. 🧐 Flaps got done. The wheels got circled. And tail. The silly big prop. UC Doors. By the way as I’ve been moving the main frame around a lot she was getting scuffed on the intake so a bit of tape and all protected. 🙌😇 Colour was then sprayed. Prop looks nice. The tread turned out well. Tail wheel. Inner canopy section. Darker Mattel panel. And the main flaps got their metal bit added. Actuators. And the main spinner. after drying for a few hours all that got a nice top coat. That had to be left over night to cure. Next day I got something sexy in the post. 🤣 that tiny blue bottle I got with the Iwata finally ran out so I had to get this. 🥸 Masks off and top coat dry I could carry on with weathering. ⛈ The wheels looked good. Prop had turned out well too. So out with the flory! eager to move this build along I’d forgotten that I still had some decals to add. 🤦♂️ So I had no choice but to make clean bits in the flory, add the decal then I’ll fix up when cured. here’s one just by the wheel well. Two flap ones. Red stripe and a “no step” Fuel tanks. And luckily I hadn’t floried the prop so…. So there we are. Flory is now drying so I can get in there and knock it right back before going in and adding over the new decals. I’m not sure how many of these builds have been completed but I’m worried Jim might think I’ve forgotten about him so I’m stepping up a gear so I can get this one out of the door and to it’s rightful owner. Thanks for popping in. Hopefully I’ll get another update sooner rather than later. Hope you’re having a splendid weekend. Take care and as always. Happy modelling. Johnny.7 points
-
Built pretty much from the box, swapped the top .30 turret for a Sherman split hatch cuppola and left-off the tool boxes from rear. Paints are all Tamiya acrylics mixed by eye to 'try' and make the SCC13 Jungle Green. I've no idea what colour the earth is in Mandalay Burma, so mixed up some Mig Farm Soil & Vietnam Earth pigments and hoped for the best... Decals are by Star (35-C-1120) for a vehicle of the 3rd Carabiniers, 245th Indian Tank Brigade in Spring '45. Please feel free to make any comments or suggestions. All the best from New Zealand. Ian.6 points
-
thought I’d share this with you all as I’ve not been very active up this neck of the woods for a while. Built back in February , it’s part of a larger project with a Trumpeter Artillery Tractor and a Plus model’s bridge. It’s all OOB with nothing added.6 points
-
The re-issued Airfix kit A most enjoyable build.6 points
-
They are referring to the small stripes at the front of the mainplane RCV access panels. In the kit I believe that they are orange though I have not checked mine yet, : - Also on quite a few GR.3's :- Above images courtesy Phil Boyden (top) and Harrier SIG. HTH Dennis6 points
-
Dear fellow Britmodellers, here's my 1/72 Kovozávody Prostějov Lavochkin La-5 from 4th GIAP, flown by Y.Dimitri in summer 1943. I painted with Gunze/Mr.Hobby acrylics, decals are from the box. All photographs by Wolfgang Rabel. This is the updated version released by KP in 2020, which differs from the original 2015 boxing by finer surface details. The pitot tube was replaced by a piece of steel wire. I also replaced the tail fin antenna with stretched sprue. The sharkmouth was problematic to apply as it did not want to conform to the engine cowling. I had to use copious amounts of setting solution, pressing the decal onto the surface repeatedly with cotton buds. I was still left with some slight wrinkling. Thank you for your interest, best greetings from Vienna! Roman6 points
-
Each door is 4 parts plus one decal for the speakers.6 points
-
Hello all 🥳 The work on the model is 80% finished, so now I can take care of the terrain design of the vignette. I had already primed the surface in black, now I will apply the second coat with Vallejo products, wood glue and sand. After a short fitting test, I filled the black contact points of the grant with paste and covered them with fresh foil after about 10 minutes. The model was then pressed into the still soft paste and this time set aside to dry for 2 hours. After carefully removing the foil, you have a good impression of the model without messing anything up. Now everything can dry thoroughly, and then you can continue with stones, bushes and accessories. Have fun! MD first desert layer test fit covering with fresh foil press in lightly corrections with a brush after removing the foil, the background adapted nearly well to the tracks gaps will be filled with paste later north africa references a possible layout 🤔 See you!6 points
-
Hi guys! Big news from my home yard! The masts are painted and in place. Most of the rigging has been stretched. More and more self-made sailors in jackets are taking up their posts. A little-noticed, but psychologically very important milestone has been overcome - the leers on the lower level of the superstructure. The fact is that the shape of this level is the main difference between the Berwick and the Cornwall, and therefore it was impossible to do without leers from the kit. I had to apply inquisitorial methods to them And here's the homebaked Micro Master! Two of the four 8" turrets have been refinished. Of course, the Micro Master has smaller rivets and tidier parts, but the pleasure of doing it all yourself is incomparable! IMHO I still miss the splash in the bow. Added more but it's not over yet) Thanks to everyone who reads me6 points
-
Hi All, Looking at the lat date I posted something, it's been a wee while.... In my defence, we have had a Level 4 lock down here in NZed, and with my job, been some what busy and that's eaten into model bench time. I also decided in my "Infinite Wisdom" to do the White/Sea Blue scheme as in the Trio Formation above, to go with my RNZAF 5 Sqn Sunderland. So I had to scour the net to find 1/72 USN Letters to make up the VP 40 "QE" lettering/numbers. I managed to find a set (Techmod) through Hannants, and they are currently winging their way here Anyways enough of the weeping wailing and gnashing of teeth Lets see where I'm at As in my previous post, I don't plan to do a full interior, I did find a great site which had great interior photos, but it's now gone (did save photos to my computer) Anyways I found these two sites which have some great internal/external photos and great operational info. Sub Hunting in SEA - Marlin VP 40 Cruise Book 1965 So build photos The interior is quite sparse, except the Cockpit, but looking at photos from the first link above, you can see past the cockpit into the rear flight deck Marlin Rear flight deck Fuselage The cockpit is quite basic The large oblong thing does exist, but is missing a throttle Quadrant at the rear as in this photo link Cockpit Throttle Quadrant So I built one out of tubing and sheet styrene The Pilots controls are taken from an old Airfix Sunderland kit and modified Added some saw cuts to mount the throttles and levers As you can see in the above photo also, there is a a rear section attached to the rear cockpit bulkhead I built a rear section of the flight deck, starting by using my trusted gauge Transferred that to some cardboard to make a template ( well a few actually), and when test fitted and happy with actual size and fit, cut out from sheet styrene and added the decking and here we are Test fitted into fuselage Added some strip styrene for support With cockpit sitting in place (looking through to rear flight deck) I'm also looking at removing the moulded plastic and opening up the rear observation dome So, with that, I would like to post a slight warning about the tools we modellers use and keep on our model benches without to much thought.............. It's very early Spring here in the Antipodes, so the Sun gets warmer and my model room has a lot of glass (which generally isn't an issue). So ladies and Gentlemen, esteemed colleagues I present an Offender of the highest magnitude (Magnification rather) Now when I began prepping my photos for this post I couldn't help but think of the words by the Late Great Freddy Mercury "Lazer beams that blow your mind" So where am I going with this??? The said offender on the weekend, was sitting at the rear of my Marlin model box innocently waiting it's next use............................. add some sunlight, me being busy, and you have this.......... "Lazer Beams" Yes - "Blew my mind" YES Not irreparable, but a pain none the less - the photos below show are a start on repairs - you can see I have removed the plastic in preparation to add in the observers floor/compartment Well Thanks for looking in, hope you find some mirth in my innocent Sun powered lazer beam (I did later, as did my family ) More soon Regards Alan6 points
-
Thanks Steve, the early MkXV Seafires are nice looking being pretty much the final Mark with the original fuselage design. That's the next stage Martin, but it probably won't be for a little while as I have a bit of a busy time coming up. Thanks Pat, it's quite useful that the paint demarcation is along the joint so helps disguise it somewhat. The masking tape is off and theres a little little bit of seepage at the port wing root on the leading edge but otherwise not bad. The painting instructions show the cockpit door in ESDG hence the not quiet straight line on one side. Transfers on next, which will make it definitely French.6 points
-
Thanks Steve, it's a nice kit, typical Hasegawa, well thought out and a lot of very fine detail. We now have the canopy painted, a few coats of Liquitex matt varnish on and the canopy unmasked. Aerial on and painted. So finished and ready for the gallery.6 points
-
It's a top tip. I would have done the usual dry brushing which I doubt would have given the same effect.👍 Anyway here's a few photos. A few bits need a bit of touching up with paint and pin washes but overall happy with what is going on. The two different blues work much better now they are all together. Got worried that I may have to repaint again. On the home straight now with only one, hard part left really, the chrome windscreen surround. (A few smaller ones too but the shouldn't be a problem, touch wood.) Cheers all. Thanks for looking.👍6 points
-
Thanks to everyone who was interested in what I am doing here! Sight Visierkopf 38 with Zielfernrohr from scratch is done, and cables are attached. Visierkopf 38 cable is thicker because it had a lot of wires through which the signal from the aiming computer was transmitted to control the mirror inside the sight. A thin cable connected to the simple optical sight Zielfernrohr was required to illuminate the sight reticle in the dark (this sight was used for ground targets). A thicker cable I made from 0,3 mm copper wire (core) and 0,25mm soldering wire (outer). Thin cable is 0,25 mm soldering wire. Vytautas6 points
-
Arrived mid this week, I have not had a chance to take and post some photos until now. The content of the box is rich and the level of the detail amazing, have a look at the engine or the interior parts. Instructions are very detailed and in my opinion foolproof. Decals look unusable to me. Not that I care about cutting them out of the sheet, but the pale blue-grey of the roundels is discouraging. The dreaded raster is indeed there, mostly on the biggest parts. I will make some tests and let us see later, how it looks under a few layers of colour. Nevertheless, I am looking forward to the build, which I plan to start right after the Vincent I am building now. It is going to be exciting new experience, I guess.6 points
-
My second Tomcat is the Italeri 1990 boxing of their 1988 moulding and is for a low-vis F-14A Plus, later re-named the F-14B and is a far simpler kit than the Fujimi one - not that many stencils but I do have a Microscale/Superscale decal sheet of low-vis stencils for the F-14 if needed. I will probably have a lot of spares if anybody wants them! Again, more when I start. Pete5 points
-
Huh, can call this one finally finished. Build log can be seen here: https://www.britmodeller.com/forums/index.php?/topic/235083227-panzer-iv-ausfe/ Cheers! Kristjan5 points
-
Straight from the (1974) box, no interior just a two-session build and a little longer on the paint & weathering. One of those Mojo-restoring builds that was a pleasure to finish. Nothing else to say except please feel free to make any comments or suggestions. Have the rest of a great weekend, all the best from New Zealand. Ian.5 points
-
It was tucked away behind a Range Rover in the car park as I drove past so didn't really get much of a shot on the dashcam, but totays 'highlight' was a T-reg Nissan Primera. Nothing exceptional in that, but someone had decided to give it a full urban camo wrap... And you all thought the chrome Evoque was bad.5 points
-
Wrapped up the FGR2 yesterday. A good build with some user error. I find the Revell/Hasegawa main landing gear attach points to be a weakness in the kit and if I build another I will figure out a better way of installing the main legs. I removed the flaps and slats to display in the down position however it was not until complete that I realised the F-4 appears to only have a full flap setting and not the half flap setting that I have done. I used Eduard cockpit, intake covers and wheels. Cheers folks. Go Ricciardo!!!5 points
-
Better late than never, this build is finally under way! Quick run through the box of goodies: You've all seen this before, getting a bit long in the tooth now. It's not 21st century Tamiya quality, more like a modern Revell kit in fact. Ouch! I actually paid £75 at Telford about 5 years ago. Lots of plastic in the box! Cockpit moulding is pretty good, but no better than Revell's F-4E/F in 1/32. Exterior detail is pretty good for its time, especially in the wheelwells. What were they thinking with this malarkey At least the shape is good. Nicely done pylons and MER/TER launchers. Also a correct ECM pod for the late 60s/early 70s configuration which I will make use of! This sprue contains the wrong Sidewinders and the notoriously undersized jetpipe/nozzles which I'm not going to correct. These are the slotted E model stabilisers which are produced with a one-piece mount - great for correct anhedral, beggar to paint! The wings are massive in 1/32, this will need its own shelf A whole bunch of interior detail which won't be used - I'll probably use the cannon barrel so I can leave the access door hinged open. Nice to see the different fin cap options provided. Lovely moulded details for the intake vents 👍 The equally notorious and badly-fitting intakes, why most builders go for aftermarket seamless intakes or FOD covers. I haven't decided yet. More very nice details on the intake ramps. Clear parts are lovely, no seams! Seats are also well-moulded and look accurate. Another bright idea to have the metallic parts as a separate piece - unfortunately there's that business with the stabiliser which means you have to mask this for painting anyway This IS a good idea - metal cores for the landing gear, including the thin hub part for the main gears. This is the weak link of any Phantom build, usually means the main gears 'toe in' without additional support. Hope it works! Nice set of decals, but probably as unmanageable as all Tamiya's decals from that era... ...so I got these instead! The panel numbers are an ancient Hobbydecal dry transfer set from Korea. I used 1/48 as the 1/32 scale ones looked too obvious. Eduard Big Ed set - loads more PE than I'll ever use, but nice to have! Last but not least - the famous one-piece fuselage complete with the infamous BDR patches. I'll be leaving them on to simulate a battle-scarred Kurnass from week 2 of the October War. Great congratulations if you managed to make it this far - progress pics from tomorrow! Cheers, Alan5 points
-
Thanks Jeff and Sam, Is SMW definitely on this year? Ok, here’s the big update 😃 I’ve put together everything I’ve done so far and everything seems to fit. Please excuse the curly decks and gaps- nothing stuck down yet, just a big pile of Jenga - I’m going see how many sections I can pull out from below before she topples 🤪 (not really). I think I’m at the painting point next! Guy5 points
-
Waiting for your new update!Here is a 1/12 Niki Lauda figure made for this car!5 points
-
I got through this tedium.... Sprayed it with Mr. Surfacer 1500 black, Mr. Color Olive Drab and Mr. Color dull coat. It turned out pretty good. Then it was down to the 1000 little details. I painted Mr. color Dark Earth on the exhaust: Then I added some shading around the control surface hinges. What I do is put masking along the hinge, then take a short bristled brush and use it to apply Tamiya black weathering pastel along the hinge from in a front to back motion, but only applying it to the 2 or 3 mm on the trailing edge of the hinge. I discovered a neat trick while doing this. I found that I put it on too dark on one aileron. The weathering pastel will wash off with water, but it can make a real mess. I had an inspiration and took some fresh Tamiya tape and pressed it along the dark area and when I removed it, it pulled up some of the pastel, making it lighter. I experimented with this a bit and found I could just about totally remove the pastel by applying and reapplying the tape and burnishing it. Nice trick! It allowed me to back off the darkness on the aileron I'd been a little too aggressive with. I sealed the pastel with dull coat and then used a water color wash on the landing gears and in the gear bays. I sealed those in with Testors metallizer sealer. I also painted the tail wheel bay. So after all of that, here's what I had: There were a bunch of other little details that I painted, but nothing I thought to take pictures of. They would probably be boring anyway! I realized today that I still need to mask and paint the leading edge landing light. 😕 That will be my biggest task tomorrow. The rest will be final assembly and paint chipping.5 points
-
Evening all, not too much to report this week. Masked off the top of the fuselage (recycling as much tape as possible!) and layered up the preshade: This has become my "standard" approach - black base with rubber black, a medium grey mottle and then extra bits of white, all sprayed on very thin, but not so thin that you get spider webs. This time I also added a little bit of brown, focusing more on the undersides and panel lines. I've not sprayed a white plane before and I'm winging it a bit so really looking forward to seeing how it comes out. I'll now start adding thin coats of white and try and stop when it's "just right" - I'll post when it's done, tomorrow evening hopefully.5 points
-
This was was of those weekend where you spend ages on something, and don't feel like you've moved on very far. Yes, this was the weekend where I had to polish the body shell, first of all with Novus 2 to try to get rid of the worst of the orange peel (not totally successful, but the worst has gone), and then Novus 1 for the final shine. For the first time ever, and by some miracle, I haven't burned though the paint anywhere, even more surprising given how many edges the are on this thing. I must have put the paint on too thickly! There will be some wax added once it's built, but this won't be far off the end result. The other job was the one I've been dreading, my first go at bare metal foiling. I only did the surrounds to the 3/4 windows, but did learn a few things: 1) Foiling isn't as bad as I thought it would be 2) Foiling takes a lot longer than I thought it would 3) Don't grab the foiled piece with your fingernails - I've left a couple of indents in one of them. They don't stand out in the pic below, but the windows are there, sitting near the '2' and '23' on the instructions. And this is how the body looks now: That's the only picture from me this week. The only other thing I got done was to finish the wheels, but for those just imagine four like in the post above.5 points
-
Okay, here we go! Dullcoat applied, spinner on, canopy mask off. I still need to unmask the wings and do some chipping around the cowl abaft the spinner, clean the dust off the canopy, and maybe, if I'm feeling frisky (and daring, and inventive), add the whip aerial. But otherwise she's more or less done. The kit RP-3s are kind of dire and have no decals for the very prominent stenciling on those weapons, so I opted to leave them off. I did note that photos of RP-3 rails tended to show two parallel thin black cylinders running the length of each rails' underside, which are not in evidence in the kit either. I can't win. I'm reasonably happy with this, though.5 points


.thumb.jpg.d3635a7ef6507d35f372dd09671fe96f.jpg)


This leaderboard is set to London/GMT+01:00