
Leaderboard


Popular Content
Showing content with the highest reputation on 28/08/21 in all areas
-
Academy 1:72 SB2C-4 Helldiver. The kit is excellent out of box with detailed bomb bay and cockpit. Nanond35 points
-
The Boeing B-17 Flying Fortress is a four-engined heavy bomber developed for the US Army Air Force. It took part in numerous roles, by far the most famous of which is the Allied strategic bombing campaigns in World War II over Europe. It excelled in this role and went on to be one of the most iconic US bombers of all time and one of the most produced, with 12,731 examples being made. This example is "Hell's Angel", a B-17G-45-BO that operated with the 535th Bomb Squadron. It was particularly infamous for a tragic incident during a bombing run over Cologne, during which 110 lb bombs dropping from a B-17 flying overhead struck the nose of "Hell's Angel", destroying the nose and killing the bombardier. This example is of Revell's 1/72 B-17G kit (Promodeller boxing). Decals came from the Academy boxing, and this was painted with Mr. Hobby Super Metallics. The Revell kit in itself is, in my opinion, a pretty great kit. People smarter than me have already done the measurements and rivet counting regarding the inaccuracies of this particular kit, and it is generally regarded as being slightly behind the Airfix offering in terms of accuracy and proportionality. With that being said, I had a surprisingly good time building it. The parts fit together just fine, the interior is detailed and the whole kit can be expected to go together easily. Things to watch for in terms of assembly would include extremely thick sprue gating that makes it difficult to trim fragile parts, difficult assembly with parts such as the landing gear and cowlings, and instructions that are hard to follow. The kit also has extremely thick clear parts - particularly pronounced in the clear nose - and panel lines that are too deep for the scale. Overall, it's definitely a great kit and if you can get past some of the errors, it builds up really well. Definitely one of my better build experiences. Thanks for reading!31 points
-
The Loire 130 was the main type of seaplane boarded on the French Battleships and Cruisers. She gave a good account of herself despite her obsolescence. The SH model requires a lot of work to correct the many mistakes done, and I used very good articles in the defunct Replic Magazine as in Wing Master to do so. It was along and painful process but I did enjoy the result, only to see the model destroyed in my shelves fall-down! So this is a model of the past and I do not intend to do a second one! Tanks for watching. 86FC63A5-4E6F-4043-891E-C8F8B911C6BA by jean Barby, sur Flickr 41865955-E9CE-4871-BEDC-E06A3FDE5960 by jean Barby, sur Flickr 385737C0-D6B4-4159-A033-30F15283E3DF by jean Barby, sur Flickr 08883106-BFA6-4DE3-B3E2-797551F071F2 by jean Barby, sur Flickr E08D1B5F-65E0-411A-A39B-DF3F20A198E7_1_201_a by jean Barby, sur Flickr 635D143A-91A1-4D25-96D6-635FAD21D550_1_201_a by jean Barby, sur Flickr DA5C7605-02E7-461F-A838-852200C0C0DF_1_201_a by jean Barby, sur Flickr CB0572D7-BD4E-467D-B2E4-805A58581F8E_1_201_a by jean Barby, sur Flickr 08EA645C-C9C4-431A-B5F2-9E17D71DD32D_1_201_a by jean Barby, sur Flickr29 points
-
This is my Kriegsmarine revitalized project: Opel maultier: Italeri kit item 221, resin wheels, Master Box 1/35 separate tracks code 3505 and Eduard 35587 photoetch. Neger: Verlinden 1/35 human torpedo Neger, code 816, with cabin interior scratch build parts. Trailer: scratch build A little of history - Neger in action: The K-Flottille 361 was ordered to move to the Normandy coast on June 13, 1944. This unit was equipped with 60 "Neger" one-man torpedoes. On the night between July 5 and 6, the Neger sailors went into action. The target was the Trout line that protected the allied floating harbours. The actoin was very succesful as several allied ships went down. Walter Gerhold hit and sank the british frigate HMS Trollope and for this action did Gerhold recieve the Knight's Cross. The two british mine clearing(?) (Minensuchboote) ships HMS Magic and HMS Cato were also sunk that night. The seventeen year old Neger sailor Matrose Horst Berger was involved in the sinking of one of those and for this recieved the German Cross in Gold. At the age of just seventeen, I suppose Berger has had to be one of the absolutely youngest recipients of this award. Source (and a good read) for this information is "Das Kommando der Kleinkampfverbände der Kriegsmarine" by Helmut Blocksdorf (2003). (text credits to Krollspell) - in https://forum.axishistory.com/viewtopic.php?t=9567123 points
-
#20/2021 Eduard Weekend Edition oob, EZ line for antenna, brake lines with plastic rods and lead wire, painted with AK Real Colors RLM 74/75/76, fuselage band is painted too, no decal for that in the kit. Build thread here https://www.britmodeller.com/forums/index.php?/topic/235095922-airwar-over-austria148-messerschmitt-bf109g-10-erla-kgj27/ In June 1944 Luftwaffe Headquarters made a decision to have all the aviation industry focus on the fighter aircraft production. Consequently all bomber units personnel needed new assignement and the Command decided to train them as fighters. One of the Geschwaders affected by this decision was KG27. It was renamed KG(J)27 and re-equipped from He111 to Bf109 and Fw190. The training was conducted in Bavaria and Austria. After the training was completed, the unit took part in the defense of the Reich against the Allied bombing raids originating from Italy. This aircraft still carried the number 52 on the rudder. This was the marking of the unit tasked with the delivery of the fighters to the combat units. DSC_0001 by grimreaper110, auf Flickr DSC_0002 by grimreaper110, auf Flickr DSC_0003 by grimreaper110, auf Flickr DSC_0004 by grimreaper110, auf Flickr DSC_0005 by grimreaper110, auf Flickr DSC_0006 by grimreaper110, auf Flickr DSC_0007 by grimreaper110, auf Flickr DSC_0008 by grimreaper110, auf Flickr DSC_0009 by grimreaper110, auf Flickr DSC_0010 by grimreaper110, auf Flickr DSC_0011 by grimreaper110, auf Flickr DSC_0012 by grimreaper110, auf Flickr DSC_0013 by grimreaper110, auf Flickr DSC_0014 by grimreaper110, auf Flickr DSC_0015 by grimreaper110, auf Flickr DSC_0016 by grimreaper110, auf Flickr DSC_0017 by grimreaper110, auf Flickr DSC_0018 by grimreaper110, auf Flickr DSC_0019 by grimreaper110, auf Flickr DSC_0021 by grimreaper110, auf Flickr DSC_0001 by grimreaper110, auf Flickr DSC_0002 by grimreaper110, auf Flickr DSC_0004 by grimreaper110, auf Flickr DSC_0005 by grimreaper110, auf Flickr DSC_0001 by grimreaper110, auf Flickr DSC_0002 by grimreaper110, auf Flickr17 points
-
Finished a week ago. The most potent and most elegant version of the Hawker biplane fighter in service with 6. LP (Fighter Regiment) of VV (Army Air Force) of KJ (Kingdom of Yugoslavia) at Belgrade airport, sometime in 1938. The kit is typical A-Model shortrun, one of the better offerings by this manufacturer, if you ask me. Quite thoroughly researched, depicting not only the obvious differences, but also the more subtle variations from the standard Fury, directly from the box. The built was straightforward, the only real problems being the narrow front fuselage and the tricky alignment of the upper wing, as described in the WIP thread. Completed with Yahu instrument panel, Eduard steel seat harness and Mini World guns. Resin wheels from my spare parts box, but frankly, they looked nice in the box, nevertheless the painting revealed so many blemishes that most probably the original wheels from the kit would have been better. Decals by Kora. I have not found photos of this particular airplane and because I am no real expert on VVKJ, I decided to trust Kora used reliable references while preparing their decals. Although, I have my little doubts. Because they interpreted the “Lift here" stencil as "Hore tunaj", whereas it should be written as "Diži ovde” (or equivalent in Cyrillic). "Hore tunaj" means nothing in Serbo-Croatian, as my Croatian brother in law confirmed me last weekend over a bottle of wine. However, I decided to use the stencil on the model anyway as a lesson for future generations.😉 Brush painted with combination of Humbrol, Model Master, Revell and Tamiya (the blue rudder stripe) enamels. As usual, no rigging.16 points
-
Work has moved to the shed, and just to prove 1/ I did recently invest is dozens of Colourcoats enamels… And 2/ I do occasionally finish a kit However, I’m back in to watch the first hour or so of the Test Match and F1 qualifying At least it’ll gives time for the Milliput to harden SD16 points
-
Hi All, this is my latest offering the Black Widow. Another aircraft I've been wanting to build for some time and the first time I've built a kit by HobbyBoss. Got to say I was quietly impressed, the kit is well engineered with little or very little flash, so well engineered that I found even a coat of paint can affect the fit as I found when I tried to fit the engine into the nacelles and got into a bit of a mess. Built out of the box apart from some Tamiya tape seat belts and I fashioned together some different antennae as I didn't like the photo etch supplied with kit, painted with Tamiya acrylics but I think the colour on the upper surfaces may be a bit dark. Anyway here she is and as usual all comments and criticisms are welcome. Thanks for looking15 points
-
#19/2021 Hasegawa limited edition kit, stars and bars decals taken from the sparesbox because the kit ones were typical Hasegawa cream coloured and not white. The "Creamer´s Dream" decals are slightly undersized compared to the original aircraft. Seatbelts were already molded onto the seat. EZ Line for the antenna wire. Painted with MRP White Aluminium and Tamiya Flat Red. As you may know the P-51 wing panel lines were filled for better speed. So my dad also filled the panel lines, partially the filler got slightly loose again but gives it a worn look. Build thread here https://www.britmodeller.com/forums/index.php?/topic/235095923-airwar-over-austria148-north-american-p-51d-mustang-301stfs332ndfg-red-tails-15th-af/ Model shows the aircraft of Lt. (later field promoted to Captain) Charles L. White serving with the 301st FS in Italy 1944/45. His decorations included the Distinguished Flying Cross, the Air Medal with seven oak clusters for meritorious achievement and seven Bronze Stars. After returning to the States following WWII, Charles worked for 42 years in the St. Louis Public School System. He died on 25 February 2007. The Eduard Info June 2021 gave my dad the idea of a dual build. There´s an interesting article about theTuskegee Airmen who escorted B-17 and B-24 from Italy over the Alps to southern Germany, Austria, Hungary and Romania. One of the them was 2nd Lt Walter P. Manning. On April 1st 1945 he flew alongside Charles White and other Tuskegees escorting bombers to St.Pölten/Lower-Austria, where they encountered 109s and 190s of KG(J)27. Manning was shot down, parachuted and later imprisoned by Luftwaffe soldiers at Linz-Hörsching Airbase. On April 3rd an angry mob, led by local Nazi officials forced the soldiers to hand out Manning to them. Afterwards he was beaten up and lynched by hanging him on a lamp post and his remains were buried at the airbase. Right after the war he was exhumed by US troops and reburied at the Lorraine American Cemetery and Memorial in France. Manning’s family received the standard World War II Compensation of $500.00 in the aftermath of his death. In April 2018, a memorial was erected at the same airbase he was imprisoned and killed. Eduard Info https://www.eduard.com/out/media/InfoEduard/archive/2021/info-eduard-2021-06-en-v1.pdf 2nd Lt. Walter Peyton Manning https://www.blackpast.org/african-american-history/walter-peyton-manning-1920-1945/ commemorative ceremony https://blog.theveteranssite.greatergood.com/walter-manning/ DSC_0001 by grimreaper110, auf Flickr DSC_0002 by grimreaper110, auf Flickr DSC_0003 by grimreaper110, auf Flickr DSC_0004 by grimreaper110, auf Flickr DSC_0005 by grimreaper110, auf Flickr DSC_0006 by grimreaper110, auf Flickr DSC_0007 by grimreaper110, auf Flickr DSC_0009 by grimreaper110, auf Flickr DSC_0010 by grimreaper110, auf Flickr DSC_0011 by grimreaper110, auf Flickr DSC_0012 by grimreaper110, auf Flickr DSC_0013 by grimreaper110, auf Flickr DSC_0001 by grimreaper110, auf Flickr DSC_0015 by grimreaper110, auf Flickr DSC_0016 by grimreaper110, auf Flickr DSC_0017 by grimreaper110, auf Flickr DSC_0018 by grimreaper110, auf Flickr DSC_0019 by grimreaper110, auf Flickr DSC_0020 by grimreaper110, auf Flickr DSC_0021 by grimreaper110, auf Flickr DSC_0022 by grimreaper110, auf Flickr DSC_0023 by grimreaper110, auf Flickr DSC_0025 by grimreaper110, auf Flickr DSC_0026 by grimreaper110, auf Flickr DSC_0004 by grimreaper110, auf Flickr DSC_0005 by grimreaper110, auf Flickr DSC_0001 by grimreaper110, auf Flickr DSC_0002 by grimreaper110, auf Flickr14 points
-
Hello, this is my latest finished model (build for the Grumman F6F Hellcat STGB) Grumman F6F-5N Hellcat BuNo 78669 maj. Bruce Porter, CO of VMF(N)-542 Yontan airfield, Okinawa, May 1945 Eduard 1/72nd OOB except for Eduard Brassin resin wheels14 points
-
Hi mates, As I continue to slog my way through the "Putty Queen" that is the Matchbox/Revell PB4Y-2 Privateer, and its resulting decrease in mojo-osity, I thought I would generate some excitement by building my favourite subject in my favourite scheme. Of course it's a Phantom and of course its Raspberry Ripple. Yee-ha! For those unfamiliar with this venerable Fujimi kit, it's the fancy "Royal Collection" boxing, la-dee-da. This designation means that it has some extra parts and goodies which we'll see soon, accompanied by a disproportionate price increase. Unfortunately, the main parts are moulded in white styrene, which as we all know does not photograph well and should therefore be banished from the face of the planet. But here goes anyway, starting with some obligatory shots of the contents. First, the box: And the main sprues: You can occasionally see a tinge of yellow on the white parts - this appears to be some kind of mould release agent. I can honestly say I don't see this very often. If you recall, the glazing putty I use is red, which will make for a wonderful contrast with the white styrene. Suffice to say that the model will be primed in a light gray before I spray any white. Wingy things: And the last white sprue: That's it for the basic kit, other than the clear bits below. There is not a lot to it, but prior to the arrival of the new Airfix tooling this was the way to go for 1:72 British Phantoms. The Royal Collection box provides an additional plastic sprue for the modified nose cone used on XT597. And guess what? It's moulded in grey. Both closed and open canopies are provided. And to justify its "Royal" price, Fujimi also include vinyl tyres, white metal landing gear struts and nose gear door, and a nice photoetch fret. Things I should mention right up front: 1) I hate vinyl tyres. 2) I hate white metal struts. I ain't gonna use 'em. Nope. 3) But I like photoetch. A lot. Me being me, I couldn't help but acquire some aftermarket stuff. Although it's designed for the new Airfix kit, the CMK resin cockpit looks so nice that I will bludgeon it if necessary to make it fit. Hey, if I can make an Aires resin cockpit fit into the kit it's designed for, I should be able to make this work out. It can't be any worse... Speaking of Aires, their exhausts for the Spey engines are a considerable improvement over the nozzles that come with the kit. Hopefully they will fit. Not that I've ever had that problem before... But wait - there's more! Resin aftermarket tyres and wheels from RES-KIT and FOD covers from Quickboost. Yeah, I know, FOD covers are a really wimpy way of fixing the lack of intake trunking in the kit, but I think they will look nice. This is actually the first time I'll be using FOD covers on any model. Now, those lovely markings. Of course, they are part of the kit but they have a bit of that Hasegawa-like thickness and cream-coloured whites: So I picked up the Xtradecal sheet. And if I can't get what I want from those two, I also have the Modeldecal sheet no. 72 which also contains the A&AEE 25th Anniversary scheme. Between the three sets of decals I should be able to find what I need. So those are the raw materials. This won't be a speed-build as I'll work on this alongside the Privateer. Every now and then you just have to build a Phantom, you know? Cheers, Bill PS. Oh, another thing. This being the "Royal" boxing, none of the sprues (except the canopies) were bagged. Everything just loose in the box. Odd. As far as I know, the kit was new when I bought it. I can see a few scuffs but I don't think any significant damage was done. Very un-Fujimi like.13 points
-
Gloster Gladiators were used by 3 Squadron RAAF in the advance against the Italian army between November 1940 and February 1941. There are a few pictures around - one commonly photographed Gladiator was N5752 but there are pictures of a few including L9044, my build here. I have built a few of the Airfix Gladiators and it is a nice easy kit for a biplane. The only additions to the kit was the tropical air filter and the repositioned radio aerial. The decals are from the DK Decals 3 Sqn sheet - 72071 - and the shadow shaded paint scheme is a combination of Coloucoats and Modelmaster enamels. I did the AZ Gloster Gauntlet at the same time and the difference in buildability between the two kits is remarkable.13 points
-
Painted with UMP Grey Primer ColourCoats Dark Green, Dark Sea Grey, FAA/RAF Yellow, Postwar Roundel Blue Alclad High Speed Silver, Airframe Aluminium Tamiya Nato Black, Rubber Black. Citadel Nuln Oil Windsor & Newton Satin Varnish on the top half, Alclad Aquagloss on the underside. Decals from Xtradecal X72149 RAF No 1 Squadron 100 Years WIP Here Thanks very much for looking. Cheers, Alistair12 points
-
A light coat of primer on top surface SD12 points
-
I mentioned the garden being absolutely full of butterflies over the last week. They're still there: Like flying fractals of colour, the closer you look the more endless the patterns seem to be: In other news: I am reacquaint with paint. A quick word with the hecklers first though: Kind of you as ever Chris: work is liable to become uber-busy for the next few weeks so I wanted to get all remaining parts sorted in preparation for painting by this weekend. That way I can at least keep the ball rolling and do the odd bit whenever time and energies permit. Having lived a life of utmost virtue and purity Bill it would be impossible for me to know of such things. 🙊 I know you meant aircraft Terry, being of a similarly pious nature to myself. Your equipment is more sensitive than I thought Giorgio! 😁 It is. I posted the wrong photograph. Nice post Bill. 🤘etc. Back in June I finally got round to purchasing an amp/preamp combination so that I could play the vinyl collection for the first time in about 30 years, including 'DC-7' from this feller: 'She said, "You made it back safe, but do you know? I gotta kiss you son, You almost been to heaven." I said why you said, mama? She said, "You were ridin' that high-flying DC-7."' Whoever he is, owls shun him. I think we can all appreciate the levels of self-denial shown here Alan. Enough of my waffling, you'll want some of this: Almost back to a matt version of that tragic 1952 livery, XJ481 and sundry accessories has now been primed this morning: I used Alclad Black for this - knowing that their primers have been causing a lot of people grief of late. I can only say this stuff has never let me down over the course of several builds, though I waft it on gradually in three coats, starting with a fine mist to key it onto bare surfaces before building up the subsequent layers incrementally and leaving the each layer to dry for about 2-3mins before applying the next. On the first build I ever used it on (I think the Barracuda but I may be wrong) I simply sprayed one thick layer and it lifted horribly with tape - using three fine coats though, this problem has never recurred. Who knows though if layer depth is a solution to woes, or that I've just been lucky with the batches I've bought over time? Non-printed features like the cable ducting: - and airbrake fins really start to integrate nicely into the overall design once some colour is on: As expected, the small triangular antenna on the engine bay and on top of the hose break up the surface nicely: unexpectedly though, I haven't got round to breaking them off yet.... All that effort put into cleaning the joins between parts seems to have paid of at this stage as (barring some clumsy remedial work I did to a scratch on the inside of one of the tail fins) I can't see any outstanding irregularities that need finessing: Naturally enough, these merciless angles show the need to go back over the primer with some 2500 W&D. Some of it will also get a polish with the Dremel as I like the black of the primer so much that I've no need to consider adding another black pigment on top. If it look too dark, I may knock it back visually with some (very watered down) dark grey, but we'll see if that's necessary after further viewing. The stores also look much smarter now with some colour chucked onto them as well: The 150 gall. tanks: All trace of the original drain holes on these that were necessary to let excess resin out after printing are invisible - another benefit using the same resin for quick repairs of this nature: I've seen some shots of these tanks showing what looks like a quantity gauge/dial on their forward port sides - does anyone know if all of this tank type had this feature, as I can't see it in several photos? The Martel test unit also came out nice and sharp under primer: To visually mimic the flash of the camera lens under the protective glass I currently added a foil disk: Not sure that it looks all that convincing as a camera lens tbh so I might have a go at drilling the lens cavity out with a conical diamond birr and add a drop of the Fabrika Decoru drops which did such good service for lenses on the PAS. The actual convex transparency covering the front of the Martel I reckons will be best expressed as a simple plunge mould. I only need it to be a one-off for this aircraft in this instance so can sacrifice one of the other Martel prints and put some Milliput over the front to form the required glass shape over. I believe the overall finish of this aircraft was a satin one, so amongst other things up in Dublin recently I bought some W&N Galeria satin varnish to use for this task in Evans' (a treasure house of colour and artist tools). Also purchased were a few kinds of metallic and non-metallic artist's pigments that I've not seen people use in modelling before, so whilst spraying primer earlier I did up a few mules to run tests on. If the results are in any way interesting I'll show them here - if they're not, then we'll never speak of them again.... 😁 She'll sit like this tonight and tomorrow I'll tidy that rear inner fin. A quick respray and then some light sanding & Dremel work to smooth the primer. Recent sun over the week has also led to a sudden glut of ripening so I've begun doing sun-dried tomatoes in the oven - it seems to be working out ok and that lot are safely in the larder now in jars of oil and garlic: I know. Bourgeois as feck but what ya going to do? Yours in shame &etc. Tony11 points
-
So on Thursday, I told Mrs P I didn't want to have any more children. I've never felt more like a monster. She cried and cried and cried, didn't eat dinner, and went straight to bed, after telling me this news was her worst nightmare. She's been extremely withdrawn today, and I've been rather worried that I've found the magic words to make the only woman on earth who could love me magically stop loving me. So that's been fun. As part of my continuing and increasingly desperate campaign to neither turn on the TV nor have to hear the audiobook of the Star Wars YA novel "So You Want to Join the Resistance" even one more time this week, I've been offering to read to the boys from some of my "grown-up war books", since Winston seems to like it, and Grant seems to like it when Winston isn't bored enough to beat him like grouse at a stately home. The other day I read to them from Tank Action, a memoir of the fighting in Normandy by Captain David Render of the Sherwood Foresters Yeomanry, kindly loaned to me by a friend. Winston has been very into tanks lately, and he was entranced. He made a tank for himself out of pillows, and sat within it with a little Lego (well, Cobi) Sherman tank I'd gotten him a while ago, and listened to me read for two straight hours. After dinner, he asked if there was an audiobook so he could listen while in bed. Mrs P retrieved my phone from his unconscious grasp around 10PM, still blaring out tank facts at absolute maximum volume. Today he informed me excitedly that a Sherwood Foresters Sherman had destroyed a Panther ("which is even more dangerous than a Tiger"). He's a monster so often, but he's my monster. May all the Panthers life throws at him present their weak flank armour at ranges under five hundred yards. I bought a Flames of War starter set for the tank models, and tomorrow I'm going to try and build some Shermans with him as a little surprise. With any luck, at least one person in my house will remember me fondly after I die. I have done a little bit on the model as well, in case you were wondering. I'm a little demoralized by how much damage the cannon seem to have done to the wings, and how poorly my lights have gone in. Happily neither are visible in this photo, but believe me, it's there. I've primed the model, and opted to add the Sky band on the tail now, likewise for the wing invasion markings. I'm thinking I might do the fuselage markings after I paint the normal camo scheme, mainly because MN317/ZY-B left the area immediately around the squadron codes unpainted: FWIW, I think the sanded down fishplates don't look too bad:11 points
-
Good morning. Is it possible to have more fun than this on a Saturday morning? 2 hours doing this, and that’s the easy bit! SD10 points
-
Okay, I’ve invested 10 minutes with the Milliput here as I just think it looks better. The other fairing does look odd. Hopefully a few minutes well spent I’ll tidy it up later SD9 points
-
Morning, I’ve been a bit slow the last few days.. But I have done about 1000 PE steps😵 There’re all over the place! And another Range finder… Guy9 points
-
Getting there Thanks for the colour tip @jean Cheers Pat9 points
-
This represents an SBD-3 from VS-6 USS Enterprise June 4th 1942 crewed by ENS Frank O’Flaherty and AMM1 Bruno Gaido. Both Gaido and O’Flaherty were captured by the IJN after ditching their aircraft. After both men were interrogated, they had weights attached to them and thrown overboard to drown. This the Trumpeter Midway “Clear Edition”. As many have stated over the years, this is a pretty good kit! I wouldn’t mind building another one. The only AM used was Yahu IP, my wife made the squadron decal ID numbers for me. I used AK Paints exclusively on this build. This piece was awarded the “Whizzer White Memorial” Navy/Marine Attack Aircraft at the 2021 Las Vegas Nationals. Photos were taken with my iphone.8 points
-
I'd have to be a warrior, a slave I couldn't be, A soldier and a conqueror, fighting to be free. Figures are 54mm white metal. Banners and flags pad-printed onto resin sub-bases. Photo backdrops from the internet. Quoted lyrics from "Warrior" by Wishbone Ash.8 points
-
Hello This IJN amphibious tank (here without the pontoon's and the upper turret and upper deck apparatus ) had served in Saipan, in June 1944, with 5th Naval Ground Base Guard (II). I hope you like it!8 points
-
With a poor record of completing Blitzbuild entries, I thought that I would give myself a fighting chance of finishing something this time around, so I picked up this laser cut kit which should be easy to assemble and doesn't require paint. I give you the Musical Control Tower. I don't know what I will do with it when it's done but I should have some fun building it. by John L, on Flickr by John L, on Flickr by John L, on Flickr by John L, on Flickr See you over the weekend John7 points
-
Here is the third kit of my Twin Spitfire 3-kit project: Supermarine Twin Spitfire FB.III "M" of RAF No 135 Sqn based in India in November 1945. Once the Twin Spitfire had entered service in the fighter and reconnaissance roles, its use for attack was tested and the results were promising. With the need to replace the P-47s in SEAC with something with more speed and punch, the FB.III was quickly developed. Since the emphasis was in low-level performance, the wings were clipped and the central tailplane replaced by standard Spitfire tailplanes on the inside. By now the twin cockpit layout had become definite. Most of the sub-type's production was sent to India and they started entering service in early October 1945. Even with a full load of two drop tanks and four bombs, the FB.III was much faster and more agile than the P-47 it replaced and delivered a considerable punch in fast attack missions, acquitting itself quite well against the latest Japanese fighters in the theatre. In fact, the impact of the type was such that the Japanese sent some of their very latest fighter designs to the theatre and although a couple were indeed superior, there were too few of them and losses inflicted on the Twin Spitfire were fortunately much less than they could have been. For more general information of this project please see the first post (if you haven't already): It's a conversion using two Mark I Models 1:144 Spitfire XIV/XVIIIs and adding the central main wing only in this case and, unlike the other two, leaving the standard tailplanes. Otherwise the build was mostly OOB. This time I also decided to make it with clipped wings. The only Allied WW2 bombs I had available in this scale were in Platz P-47 kits so I pinched them from there as well as the outer pylons. The other pylons were scratchbuilt. I made the torpedo-type drop tanks similar to those actually use by Spitfires from the kits' sprues. As with the other two, the whip antennae and the underwing pitot were added from stretched sprue. The kit was fully painted and varnished with brush. I used the decals from the Mark I kits. Thanks for looking and, as usual, all comments are welcome Miguel7 points
-
Indeed it is, no real excuse for not finishing it. Just idle on my part SD7 points
-
Nose masked and attached. As much as I try, I cannot effectively mask the side windows, so…..I’m going to glue them in place, mask them off in their entirety and worry about them later! Life’s too short SD7 points
-
So, I've made a start More later. Cheers Pat7 points
-
Well, all the bits are on except for the wind deflectors, and it is ready for a finishing coat of varnish. Apart from the juggling involved in getting the wing on it has been a very easy kit to put together and the parts fit pretty well. Even the decs worked, though I suspect Pat may have put some more recent ones in the box before he swapped it with me. The colours are somewhat distorted in artificial light in the above pic. This should be in the Gallery before long, and in the meantime I can press on with my F-16 build for another GB, and likewise my Beaufort, though as I have the paints out I may also make a start on my Hs 123, though that might just end up in RLM 61/62/63 for a change. Cheers Pete7 points
-
Evening all, Here is my most recent completed build - the excellent 1/48 P-38G Lightning from Tamiya. This is a well known kit so I won't go into much detail about it, but suffice to say it is near perfect, and probably the best kit I've built. Tamiya have done an excellent job designing a kit which is easy to build, goes together well with no gaps, allows for strong location of landing gear/gear doors and has great detail. It's a shame that their decals are so thick. However, that is where Exito Decals come in with this: The set has been reviewed right here on Britmodeller already: Without repeating what Mike has already said, the Exito decals are well printed (by Cartograf! so expect good things) and offer some unique albeit racy marking options. I chose the 3rd option, Lt. Edgar L. Yarberrys P-38G of the 48th FS as used in Tunisia in June 1943. This allowed me to use the nose art in the decal set, and play around with some interesting weathering options given the desert conditions. Without further waffling, here's the build I think this is my best build so far (very few mistakes which is pretty good for me ) and I'm tempted to get another P-38 already, though I may wait for the almost inevitable P-38J or L from Tamiya. I used Gunze/Mr Color C304 for the OD, and MRP Neutral Grey for the...er, netural grey. Is C304 the right shade? I don't know - it seems a close match to the spray can Tamiya recommend in their instructions, and to some reference photos of restored P-38s I've seen, but is probably a little light for the OD used, but hey, maybe the Tunisian sun has bleached it? Aside from these, I used MRP signal red, MRP black, Tamiya flat yellow, Tamiya LP-11 silver, MRP interior green and Tamiya Nato black for the rest of the build. To give a sense of random fading/weathering, I pre-shaded the model prior to the base colours, and then used Abteilung 502 oils for further panel to panel variation. I used a few different sepia, umber, grey and sand shades to add some random fading similar to what is visible in period photos. Panel lining was done with Ammo blue-grey wash (over an X-22 gloss coat), but a lot of areas with heavy traffic were redone with Abt. 502 Starship filth thinned with VMS universal weathering carrier (standard). The exhaust staining is heavily thinned MRP tan and this is the only part I am not too happy with as it looks a little too light, but I can't change it now so it stays! The Exito decals went down well, yet again reaffirming my faith in anything printed by Cartograf! Speaking of, Exito don't provide all the stencils, and I didn't fancy using the Tamiya decals (I used one in the cockpit and it took some work to conform to a slight curve) so I used some stencil decals from Fundekals, also printed by Cartograf which were also excellent. Although the real P-38 (and Tamiyas decal placement guide) have a lot of stencils marked out on the underside, I didn't apply all of them because I'm lazy and not all would be visible. The Tamiya kit requires the gun barrels to be added early in the build, but I would almost certainly snap them off, so I used a Quickboost set which allows the barrels to be added later. The Quickboost set is well detailed, fits well (unlike a lot of resin replacements) and means no snapped barrels, so given it's low price it's a win for me! Also visible here are the Eduard resin wheels which I used because the Tamiya main wheels are supplied in 2 halves and I would ruin the tread cleaning them up. As a plus, the Eduard ones are bulged nicely. The weathering was done with oils over an X-22 gloss coat, and once that was sealed, watercolour pencils from AK and Faber-Castell. The "Babe" in question...Lt. Yarberry had nice taste This was the only decal where the carrier film didn't disappear that well and is still a little visible but not the end of the world. The trademark chipping on the wing roots was done with Tamiya LP-11 silver and AK heavy chipping fluid. The toughness of the Gunze C304 lacquer meant a lot of work was needed to chip it, but that just meant I had more control of where I was chipping. I sprayed, chipped and resprayed the wings a couple of times trying to get this right. The same method was used to chip the nose and engine covers especially at the panel lines where the crew would handle them during maintenance. The leading edge paint chips were done with Humbrol masking fluid applied with a sponge over the LP-11. Also visible here are the HGW belts - my first attempt at using them, and whilst they look excellent, I am not sure the effort is worth it in 1/48 - at least HGW provide enough spare buckles! The staining on the props/cowls was done with oils and pencils. The turbos were painted with a mix of Tamiya dark iron, silver and JGSDF brown, and weathered with thinned MRP lacquers and oils. Another look at the nose art The landing gear and bays were all done with LP-11, which is a great silver paint; it sprays extremely well and is very tough once try - must be why it's always out of stock in the UK. The tyres are Tamiya Nato black, and the weathering is again Abt. 502 oils, Ammo washes and pencils. I added radio wiring with Plusmodel 0.2mm lead wire to add some detail to the radio bay. Also visible is a bit of the Quinta studio 3D cockpit decals. Again these were something I used for the first time and they look excellent (although a little grainy), but in the case of the P-38 so little is visible once built that they aren't worth it - if the kit you're building is more visible then go for it though! Also visible are some of the Fundekals stencils. Something I struggle with is shiny oleo cylinders. Silver paints don't give the necessary shine, buffing a small area is difficult and although it was shiny, the Uschi chrome polishing powder seemed to lose it's lustre quickly. So I used a Molotow chrome marker refill, applied with a brush and this gives a very shiny, smooth finish. Given how hard it is to see the underside of the centre section, I didn't concentrate weathering here, focusing instead on the more visible areas. I applied some sand oils behind the gear as if it was thrown up by the wheels. The rest of the grey underside was weathered with oils again. The staining is again oils and pencils. The decals settled in very well over the surface detail That's it then - sorry for the rather large images, but I also upgraded my camera to the awesome Nikon D850 and whilst it's great the images are quite large! Anyway, thank you all for looking! Cheers,6 points
-
6 points
-
The AFV Club kit built OOB with the addition of the AFV Club individual tracks. The cam nets made from bandage material soaked in PVA glue. Miscellaneous stowage and figures from the spares box. Thanks for looking.6 points
-
Hi all - Here's my latest - Tamiya's P-51D in 1/48 - An enjoyable build although as ever, Tamiya's decals put up quite a fight. The kit is old but still top quality - it goes together very nicely - My one issue is the way the canopy is attached - with no framing where it meets the plastic. I added scratch built details to the wheel bays, used a Eduard PE cockpit interior with additional parts - also Eduard resin wheels. Painted in Alclad and Tamiya arylics - weathered with oils, enamel washes and pigments. WIP build is here: Thanks for watching Cheers John6 points
-
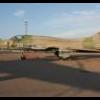
F-8E Crusader Trumpeter 1:32 The model is made, as always, straight from the box + self-made masks6 points
-
This was built for the F-16 STGB which is currently in progress. I have always wanted to build one of these but thought it would be a 1/48th version, however one of these popped up at a price I couldn’t refuse. If many years ago built the original Hasegawa 1/32nd version, which was a nice model, this one is really nice, not quite Tamiya level but enjoyable to build. People that know me know I can’t help myself with AM bits, 2 AM bits I highly recommend for this model, the ResKit Exhaust Can a vast improvement over the kit supplied one. Quinta Studio cockpit decals……what more can you say, for a cockpit this exposed a must. The only other bit I would recommend is the Zactomodels resin intake, this resin part completely replaces the intake and intake trunk. This resin part fits perfectly and gives you a lovely seamless intake, plus shape wise I think it looks a bit better than the kit one. All in all a very enjoyable build with a model I highly recommend to anyone interested in F-16’s or IAF aircraft. Attached is a link to the build, enjoy and thank you for looking. Model: Academy 1/32nd F-16I SUFA Paint: AK Interactive Real Color, and MRP, Tamiya Acrylics, Model Master Metalizer Lacquer Extras: Master Models – Static Discharges Quinta Studio – F-16I 3D Printed Decal Set ResKit – F-16 F100-PW Closed Exhaust Nozzle ResKit – F-16 Wheel set Wolfpack – F-16I Exterior set Zactomodels – AIM-120 AMRAAM missiles Zactomodels – F-16 NSI Small Mouth Intake6 points
-
This is my second completion for the GB and was built as it comes in the box with the exception of some enamel paint for the red colour. The kit was purchased for the princely sum of £4.99 at our local Lidl store. Hunting Percival Jet Provost T.4 Red Pelicans Display Team Central Flying School, RAF Little Rissington Gloucestershire, England,1966. Airfix 1/72 by John L, on Flickr by John L, on Flickr by John L, on Flickr by John L, on Flickr by John L, on Flickr6 points
-
Engine Phase 1 by Rodolfo Masti, on Flickr by Rodolfo Masti, on Flickr by Rodolfo Masti, on Flickr by Rodolfo Masti, on Flickr by Rodolfo Masti, on Flickr6 points
-
Uh, not quite done at the time I posted that! 3 hours and 17 minutes later though, I'm happy to call this one done. Total elapsed time was 15 hours and 17 minutes. I'll take some better photos and stick them in the gallery tomorrow. Goodnight everyone!6 points
-
Little H has painted the pilot, completed the cockpit and now the fuse halves are joined and drying.6 points
-
It shouldn't be much longer now! For once I'll have this done before midnight and have time to check out some of the other builds. Hmm, maybe. Only one window on each side is going to be transparent, so don't hold your breath! The Mr. Hobby "Shine Red" is a really good colour, very bright. Here she is exactly 12 hours in. They've been pretty relaxed hours as far as blitzbuilds go.6 points
-
3 hours in and the interior is all painted Some of it looks a bit rough there, but it got a lot better once put together Now to start making it airplane-shaped!6 points
-
Some progress Etch on the torpedo looks smart. Probably the wrong colour seat harnesses, but the interior is likely to be like a dungeon once the canopy goes on ! Blitzbuild this weekend so unlikely to make much more progress on this one. Cheers Pat Cheers Pat6 points
-
I have had this in my stash for quite a few years so I thought I might as well build it - it is the 1976 boxing from Airfix who apparently released the original in 1970. This is a plane I was well aware of, but had not really researched much until recently, and there seems as ever to be some confusion depending on which book you read! I had previously thought that there were 2 versions, the A-1 with a 2 bladed prop and no headrest fairing behind the pilot, and a B-1 with a bigger engine, 3 bladed prop and a headrest but it seems that may not be the case. According to Green and at least one other of my books, Henschel looked into improving the A-1 and the V5 prototype was intended to be the "B" version with a more powerful engine driving a 3 bladed prop and mounted in a longer more aerodynamic cowling, and the V6 was the prototype for the "C" version which was a "B" with a couple of extra machine guns for stafing, an enclosed cockpit with a sliding canopy, and the large armoured headrest behind, but he says neither of these ever entered production although the headrest was retro- fitted to many of the A-1 versions. Other sources however do say that there was a B-1 version produced so take your pick, but see my background story later. This poses a problem in that Airfix offer an A-1 during the Spanish Civil War with a headrest, and although I have seen pics of ones in Spanish service with the headrest that seems to have been after that particular war ended - they operated some into the 1950's. The other choice is one in Russia in 1942 which is safe enough. I was thinking of one in the early 3 colour splinter but in German markings, but the only pics I have seen so far of that scheme on a humped plane is when being used for training. I could remove the hump I guess, or maybe just go for a humped one in 70/71 paint, perhaps in France in 1940 or Poland a little earlier, serving with II.(Shcl)/LG.2 which carried the original version of the "Mickey Mouse" insignia which Galland adopted after adding a cigar! If anybody has any info on "humped" 123's in the early colour scheme in squadron service I would be interested to see any pics they have. Cheers Pete5 points
-
Here is my finished Boeing 757-236 in 1/144 scale from Zvezda’s new B757 kit in the classic ‘Negus’ livery of British Airways registration G-BIKC “Edinburgh Castle”. This kit, quite literally, goes together seamlessly with very little sanding and filling required. It’s great that is has both engine options as well as having either the newer blended winglets or the classic wing tips. I’ve never built the Minicraft or EE kits but I absolutely can’t recommend this kit enough! The beautiful decals are from Ray at @26Decalsand the B757 detail sheet is from @nazca-decals. The registration I went for, G-BIKC, was fitted with the older style RB211 engines. But I love Edinburgh so I opted to go for an engine upgrade with my build and use the newer RB211 engines. Paints used were Halfords appliance white for the upper fuselage, Humbrol 15 Midnight Blue for the lower fuselage and Halfords Racking Grey for the wings, nacelles and stabilisers. Metals are a mix of Revells aqua range. The decals are excellent, though I did mess up the port side tail decal as they were designed for the Minicraft B757, but Ray kindly provided me with a replacement screen printed one. I am already looking forward to building my next B757 which will be either Thomas Cook or Continental. As always, all comments and feedback is greatly appreciated. Thank you for looking! Regards, Alistair5 points
-
Tamiya 1:72 Fw190A-3. Nanond5 points
-
Hi folks. This is an old built of mine, my very first try with the Montex masks, resulting in no decals at all. I do remember that I have used the Cutting edge set for that plane! Thanks for watching! Plane is from the 182 sq. White nose markings and wings stripes. 03302174-AE5F-458A-8B07-AC6C3E04DAF4 by jean Barby, sur Flickr 906AC603-999E-4737-B9E0-C18315CB075F by jean Barby, sur Flickr 0760153F-FD68-4824-B28E-6C035B3A7526 by jean Barby, sur Flickr E6D3629B-8134-4BAA-B6FB-9BE22D451FD6 by jean Barby, sur Flickr 55EE239D-C7BD-459C-9C2D-0872959A5F60 by jean Barby, sur Flickr 2CF1EFB1-6EBB-43B2-90FB-93AC0DF8C0C7 by jean Barby, sur Flickr FBEF8CA4-C4D7-49C8-A75B-2E771502810B by jean Barby, sur Flickr AE20A844-0BFE-42D0-AA3D-40ADA80C7BDB by jean Barby, sur Flickr5 points
-
Good work Guy. The thing with all those steps and the like is that you can sink so much time in to them and at the end there is precious little to show for it. At the end, however, they are the subtle details that transform a plastic kit into a model ship. You'd notice them more on someone else's OOB model that lacked them. They're the sort of thing made conspicuous by their absence once you know they existed.5 points
-
What a lovely evening to be outside spray painting! There's also the sound of steam-locomotive whistles in the air, with the nearby heritage depot seemingly give an exemption to the lockdown for some sort of steam-up. It's a great place to live, here! Now to let that cure for a bit before the red paint. Oh, and don't worry, I did the engine cowling too, it's just not in the photo.5 points
-
Another week down and an unexpected day up in Dublin yesterday with the sun shining along the Liffey: Good to see the melancholy spirit of James Dean Bradfield enduring in grafitti: One of my favourite junk shops up near Mary's Abbey has a revolving cast in the window - this week it featured two 'oul dolls doing the walk of shame home after a night out in their finery: (Christ knows who the guitarist is meant to be...) Cheers G. Fuse wire is getting harder to source these days round here but I did find a big roll of something quite close to its diameter and softness in Søstrene Grene so laid in a stock. In Scotland: 'Och Ra!' (said upon seeing the Sun God appear in the sky.) Hope it wasn't followed by 'O my guts' Terry..... Triffids ain't nothing Lauren If you've ever had to fight a Horseradish infestation in your flower bed. For sheer Scarethebejayzusoutofyou though the Lovecraftian Guarana plant beats all! Awww. Did you make that ensemble? There's a joke about Samantha in there, as told by Barry Cryer perhaps.... That phrase works to the tune of 'Black Betty' and now won't leave my head. Or yours now..... Hate to have been her builder.... Tucked away 'neath the inner pylon of each wing of XJ481 are a non-standard Sea Vixen feature, namely a pair of 'v' shaped bracing struts, as you can see to port in this lovely shot of the area by James ( @71chally). With the struts themselves being slightly flattened in cross section, I simply soldered the required shape from 0.3mm tubing and then crimped some 0.5mm tube around the two halves of the vee using flat-jawed pliers, like so: The mounting spigot sticking from th apex was then trimmed to length and these were test-fitted: Quite fiddly to finesse these fitting as the parts get sliding off the pylon, so It took about three attempts to get both sets of angles sorted so that they matched reality. In the end though I was convinced that the resulting structure would bear scrutiny from all directions at this scale: Because of anticipated problems in getting even coverage around those parts at the painting stage, those frames will be painted separately so had have a coat of metal primer and been added to the brass pile. You can probably notice in the above shot that the penny dropped recently regarding damaging the aircraft so I keep it tucked on top of a small pillow on the bench for safety whilst working on it now , like a tiny and demanding king..... From this point onwards we're really into the final stages of adding PE to this version of the aircraft: A quick smoothing with 1200/2500 W&D and then a test fit the wing fences first: These fit the wing profile so accurately in fact that they almost clip into place on their own: I won't be taking any chances though and will again paint both fences separately with a view to adding them to the airframe after it's completed. The airbrake fins/ventrals have however been fitted permanently at this stage as, after due deliberation, I reckon that the extra handling caution required at this stage is less of a problem than would be caused by having to fit and make good around them on an already painted airframe later on: Using resin as adhesive I find enormously helpful with such jobs in allowing you the latitude to finesse the mounting angle of parts like this, and only then deciding at what point you want the adhesive to go off: I reckon then that unless anything else I might have forgotten springs to mind over the course of the day, it might be time to chuck some primer on all of that at the weekend and see how she's shaping up. Also about to move from the to-do to the have-to-do-now list is the design of some decals. Roundels and larger letters will all be masked & painted as standard for me these days, but for tiny markings (as well as that fiendish red matrix for the engine bay panels) on this aircraft, decals are the only option at this scale. As Pete has previously confirmed though regarding the red triangles for instance - and as the manual mentions for maintenance labels - these themselves were transfers rather than painted elements of the airframe. I'd some clear decal film ordered for said job some time ago but it's considerably overdue and apparently in Schrodinger's postbox of will it/won't it now arrive.... Thanks for lookin in as always - have a good start to your respective weekends and hopefully there should be some pigment to show you next time! Tony Pylons! I have to drill the pylons for the stores. I knew I'd forgotten something....5 points
-
Getting the wing on was indeed a bit tricky but all the various locating pins did go in their respective holes eventually. With the long rather stalky undercarriage it reminds me of a somewhat beefed up and more muscular version of the Fiesler Storch, and that is actually not too strange as both were intended to have good short field performance for the Army cooperation role. The Storch had a much more effective wing design with full length flaps and leading edge slats, but was a fair bit smaller and slower. The long undercarriage lifted the nose up high to help with short take-offs and also had good shock absorbing capability for high rates of sink for short and perhaps hard landings. The A-1 version of the Hs 126 had pretty good STOL performance, but with its higher power the B-1 was even better apparently. Quite a bit of touching up to do and then on with the last of the decs and a few small bits - nearly there! Pete5 points


This leaderboard is set to London/GMT+01:00