
Leaderboard


Popular Content
Showing content with the highest reputation on 26/08/21 in all areas
-
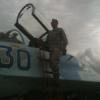
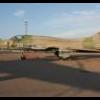
This represents an SBD-3 from VS-6 USS Enterprise June 4th 1942 crewed by ENS Frank O’Flaherty and AMM1 Bruno Gaido. Both Gaido and O’Flaherty were captured by the IJN after ditching their aircraft. After both men were interrogated, they had weights attached to them and thrown overboard to drown. This the Trumpeter Midway “Clear Edition”. As many have stated over the years, this is a pretty good kit! I wouldn’t mind building another one. The only AM used was Yahu IP, my wife made the squadron decal ID numbers for me. I used AK Paints exclusively on this build. This piece was awarded the “Whizzer White Memorial” Navy/Marine Attack Aircraft at the 2021 Las Vegas Nationals. Photos were taken with my iphone.50 points
-
Airfix Short Stirling Mk1 This has been with me since the days of paper rounds, endless summer holidays and eating as much as you want and never putting any weight on, oh to be 13 again ! I think it was the almost HMS Victory quantity of parts in the box that has put me off all these years, so the "Less than a tenner GB" was the ideal opportunity to finally get it built. Work in progress here Thank you to everyone for the encouragement and support, it was greatly appreciated, I hope you like it Cheers Pat33 points
-
This was built for the F-16 STGB which is currently in progress. I have always wanted to build one of these but thought it would be a 1/48th version, however one of these popped up at a price I couldn’t refuse. If many years ago built the original Hasegawa 1/32nd version, which was a nice model, this one is really nice, not quite Tamiya level but enjoyable to build. People that know me know I can’t help myself with AM bits, 2 AM bits I highly recommend for this model, the ResKit Exhaust Can a vast improvement over the kit supplied one. Quinta Studio cockpit decals……what more can you say, for a cockpit this exposed a must. The only other bit I would recommend is the Zactomodels resin intake, this resin part completely replaces the intake and intake trunk. This resin part fits perfectly and gives you a lovely seamless intake, plus shape wise I think it looks a bit better than the kit one. All in all a very enjoyable build with a model I highly recommend to anyone interested in F-16’s or IAF aircraft. Attached is a link to the build, enjoy and thank you for looking. Model: Academy 1/32nd F-16I SUFA Paint: AK Interactive Real Color, and MRP, Tamiya Acrylics, Model Master Metalizer Lacquer Extras: Master Models – Static Discharges Quinta Studio – F-16I 3D Printed Decal Set ResKit – F-16 F100-PW Closed Exhaust Nozzle ResKit – F-16 Wheel set Wolfpack – F-16I Exterior set Zactomodels – AIM-120 AMRAAM missiles Zactomodels – F-16 NSI Small Mouth Intake25 points
-
This is the old Dragon kit based off of the now-vintage Gunze Sanyo “high-tech” kits from the late 1980. All in all, with a little work and upgrades, they build up ok. This one is modeled after Fritz Amling’s “Leopard” Ausf. E from Stg. Abt. 202.19 points
-
Hi all, Well finally another completed aviation build, having moved to 1/72 armour for a short time. This time round, one of my longest builds to date, about 6 weeks to complete this Italeri tooled Revell 1/72 Junkers Ju52 after struggling to find the enthusiasm to finish it - bought as the Ju52/3 m Civil variant, but contains all the sprues required to make a the military version within reason. Kit went together nicely for it's 1970's vintage and although my rendition is not historically accurate, I'm pleased to have completed this aircraft type. I'd initially finished it with yellow wing tips and outboard engines, but after issues with spraying the yellow, and subsequently problems with the decals, I decided to alter the scheme to improve the final appearance. Finished with Revell Aqua acrylics and decals were aftermarket courtesy of Printscale. Despite these being thin, I just couldn't get them to adhere to the surface. Even after 24hrs they were movable across the corrugated surface detail. After changing the scheme and reapplying a different set, the same issue and silvering occurred. Doh! Nevermind. This aircraft should've had a dorsal turret, and no turret above the cockpit glazing, but parts weren't included for this option so I made a compromise. Overall a bit of a disappointing build for me, not to my usual standard but as with every build, a learning curve non the less.18 points
-
Hi, everyone! It's my next model. If the photos suddenly disappear, just click this link to my cloud storage.18 points
-
Hi all! Here is my completed F-104G. Painted with MRP paint and kit decals used. Thanks for looking! Rich17 points
-
Bf 109 E-3, 5./JG51 Hptm. Horst Tietzen.17 points
-
Build OOB. Enjoyed this kit from Academy.15 points
-
Evening all, Here is my most recent completed build - the excellent 1/48 P-38G Lightning from Tamiya. This is a well known kit so I won't go into much detail about it, but suffice to say it is near perfect, and probably the best kit I've built. Tamiya have done an excellent job designing a kit which is easy to build, goes together well with no gaps, allows for strong location of landing gear/gear doors and has great detail. It's a shame that their decals are so thick. However, that is where Exito Decals come in with this: The set has been reviewed right here on Britmodeller already: Without repeating what Mike has already said, the Exito decals are well printed (by Cartograf! so expect good things) and offer some unique albeit racy marking options. I chose the 3rd option, Lt. Edgar L. Yarberrys P-38G of the 48th FS as used in Tunisia in June 1943. This allowed me to use the nose art in the decal set, and play around with some interesting weathering options given the desert conditions. Without further waffling, here's the build I think this is my best build so far (very few mistakes which is pretty good for me ) and I'm tempted to get another P-38 already, though I may wait for the almost inevitable P-38J or L from Tamiya. I used Gunze/Mr Color C304 for the OD, and MRP Neutral Grey for the...er, netural grey. Is C304 the right shade? I don't know - it seems a close match to the spray can Tamiya recommend in their instructions, and to some reference photos of restored P-38s I've seen, but is probably a little light for the OD used, but hey, maybe the Tunisian sun has bleached it? Aside from these, I used MRP signal red, MRP black, Tamiya flat yellow, Tamiya LP-11 silver, MRP interior green and Tamiya Nato black for the rest of the build. To give a sense of random fading/weathering, I pre-shaded the model prior to the base colours, and then used Abteilung 502 oils for further panel to panel variation. I used a few different sepia, umber, grey and sand shades to add some random fading similar to what is visible in period photos. Panel lining was done with Ammo blue-grey wash (over an X-22 gloss coat), but a lot of areas with heavy traffic were redone with Abt. 502 Starship filth thinned with VMS universal weathering carrier (standard). The exhaust staining is heavily thinned MRP tan and this is the only part I am not too happy with as it looks a little too light, but I can't change it now so it stays! The Exito decals went down well, yet again reaffirming my faith in anything printed by Cartograf! Speaking of, Exito don't provide all the stencils, and I didn't fancy using the Tamiya decals (I used one in the cockpit and it took some work to conform to a slight curve) so I used some stencil decals from Fundekals, also printed by Cartograf which were also excellent. Although the real P-38 (and Tamiyas decal placement guide) have a lot of stencils marked out on the underside, I didn't apply all of them because I'm lazy and not all would be visible. The Tamiya kit requires the gun barrels to be added early in the build, but I would almost certainly snap them off, so I used a Quickboost set which allows the barrels to be added later. The Quickboost set is well detailed, fits well (unlike a lot of resin replacements) and means no snapped barrels, so given it's low price it's a win for me! Also visible here are the Eduard resin wheels which I used because the Tamiya main wheels are supplied in 2 halves and I would ruin the tread cleaning them up. As a plus, the Eduard ones are bulged nicely. The weathering was done with oils over an X-22 gloss coat, and once that was sealed, watercolour pencils from AK and Faber-Castell. The "Babe" in question...Lt. Yarberry had nice taste This was the only decal where the carrier film didn't disappear that well and is still a little visible but not the end of the world. The trademark chipping on the wing roots was done with Tamiya LP-11 silver and AK heavy chipping fluid. The toughness of the Gunze C304 lacquer meant a lot of work was needed to chip it, but that just meant I had more control of where I was chipping. I sprayed, chipped and resprayed the wings a couple of times trying to get this right. The same method was used to chip the nose and engine covers especially at the panel lines where the crew would handle them during maintenance. The leading edge paint chips were done with Humbrol masking fluid applied with a sponge over the LP-11. Also visible here are the HGW belts - my first attempt at using them, and whilst they look excellent, I am not sure the effort is worth it in 1/48 - at least HGW provide enough spare buckles! The staining on the props/cowls was done with oils and pencils. The turbos were painted with a mix of Tamiya dark iron, silver and JGSDF brown, and weathered with thinned MRP lacquers and oils. Another look at the nose art The landing gear and bays were all done with LP-11, which is a great silver paint; it sprays extremely well and is very tough once try - must be why it's always out of stock in the UK. The tyres are Tamiya Nato black, and the weathering is again Abt. 502 oils, Ammo washes and pencils. I added radio wiring with Plusmodel 0.2mm lead wire to add some detail to the radio bay. Also visible is a bit of the Quinta studio 3D cockpit decals. Again these were something I used for the first time and they look excellent (although a little grainy), but in the case of the P-38 so little is visible once built that they aren't worth it - if the kit you're building is more visible then go for it though! Also visible are some of the Fundekals stencils. Something I struggle with is shiny oleo cylinders. Silver paints don't give the necessary shine, buffing a small area is difficult and although it was shiny, the Uschi chrome polishing powder seemed to lose it's lustre quickly. So I used a Molotow chrome marker refill, applied with a brush and this gives a very shiny, smooth finish. Given how hard it is to see the underside of the centre section, I didn't concentrate weathering here, focusing instead on the more visible areas. I applied some sand oils behind the gear as if it was thrown up by the wheels. The rest of the grey underside was weathered with oils again. The staining is again oils and pencils. The decals settled in very well over the surface detail That's it then - sorry for the rather large images, but I also upgraded my camera to the awesome Nikon D850 and whilst it's great the images are quite large! Anyway, thank you all for looking! Cheers,13 points
-
Mossie on its legs! SD13 points
-
Finished! I enjoyed every moment of this build. Will get my hands on Tamiya's Phantom soon. If you want to see the different stages of painting, you can find it here: All but one of the pix are close ups, since the model i huge even in 1/48. I made one huge mistake, let's see if anyone spots it. And it's ready for pickup, Axel! Stay safe, take your shots and keep glueing plastic! /Torbjörn12 points
-
Thought I'd make a start on it. going to be a pure OOB build of ML963 of No. 571 Sqn from the kit. So a really quick post, I'll just get to the bones of it. Cockpit and bombay roof section complete, goes together really easy, MRP interior green airbrushed, then Humbrol 30 for the seats (kit suggests HU163 but I don't have that one) MRP 5 for the black bits. Tamiya tape harness. Fuel tanks are Humbrol 70 This pic from the Mosquito Wikipedia page show some labels too so have added them in Now all closed up and setting CT11 points
-
After few month brake I decidet to glue something "fast and easy". I've choosed AVIS model of Lee-Richards Annular Monoplane. On Friday I found few low res photos on the Internet and started work. Today I can (maybe not "proudly" but "sattisfied") present my new model11 points
-
Continuous: If need, you can asked explanations (remember: I dont speak very well! 😬). Rear engine fairing. Front engine fairing In position. I closed the side fairing, and I cut the cockpit windows Side windows ready. I applied putty in the fuselage, and I sand (is correct for use sandpaper?). For putty I use... how I explain... mass for wall. In Brazil we call texture for wall, used before the paint. In this picture, is necessary more sandpaper. Landing gear. Tires. 1 and 5: rear landing gear, with single tires. The landing gear suport is a bent wire glued (super glue) in a central tire hole. 2, 3, 4: front landing gear, with double tires. There are a wire conecting both tires, and other wire glued (super glue) on the tires. Site of the rear landing gear. Details from nose: landing gear in this position; details in the front fairing, with a little wood stick for rotor axis; the nose is cut to facilitate the build of windows. The floor and the rear wall for cockpit is ready. In top fo fuselage, I glue one fairing that go from the fornt rotor to rear rotor. The rear axis rotor is ready.11 points
-
Even more so when such aftermarket parts have to be used to build what the manufacturer states the kit to represent ! If I'm buying a kit of a Mosquito Mk.XVI, I have to find inside the box all the parts needed for this aircraft, not something different. I can understand having to buy resin parts to add better details, I may even begrudgingly accept having to buy resin parts to improve on the shape of the original parts, but I can't accept having to buy extra parts only to get the basic features of the variant the kit is supposed to represent. I wonder what the reactions would have been had this kit come from Trumpeter....9 points
-
Morning all. Well, I enjoyed ‘The Courier’, worth a watch There have been a few comments about the undercarriage being fiddly, and on the face of it, it appears so. But in reality it’s very straightforward and using the jig makes the exercise fairly easy. So, I set about timing myself! Stop watch set for part clean up… Ready, steady…….go That took……… Restart stop watch and get building….. Done….total elapsed time from start of clean up to completed build… So, on first impressions, tricky. In reality, doable. Engine cowlings fit well and a dry fit to the wing suggests no issues. Plan to fit open bomb bay doors and comments about fit of closed doors seem fair enough, although I’ve not tried very hard to fit this properly. Time for a cuppa SD9 points
-
F-16I SUFA IAF Tayeset 119 “The Bat Squadron” Model: Academy 1/32nd F-16I SUFA Paint: AK Interactive Real Color, and MRP, Tamiya Acrylics, Model Master Metalizer Lacquer Extras: Master Models – Static Discharges Quinta Studio – F-16I 3D Printed Decal Set ResKit – F-16 F100-PW Closed Exhaust Nozzle ResKit – F-16 Wheel set Wolfpack – F-16I Exterior set Zactomodels – AIM-120 AMRAAM missiles Zactomodels – F-16 NSI Small Mouth Intake9 points
-
I finished a F-16C Block 52 of the South Carolina Air National Guard. It is made from the Tamiya Block 25/32 ANG boxing, with spare parts from a Thunderbirds kit to make a Block 52. The decals are from Speed Hunter Graphics (Guardian Vipers) Further Aftermarket items: Eduard Brassin ejection seat Eduard Brassin Sniper ATP Aires exhaust Royal Resin weighted wheels Shull24 HTS pod Master Models pitot tube & AOA sensors Top Studio carbon fiber decals for the exhaust petals For the HG V paint, I used the Mr. Paint set, which consists of the base color and a sparkling matt varnish. Cheers, Markus8 points
-
Tamiya 1:72 Fw190A-3. Nanond8 points
-
We had our first club meet for 18 months last weekend. I put this bad boy in. It's destined for the museum when we can find a case big enough.8 points
-
Just for giggles, I put some air in those flat True Details tyres. Whadda ya t'ink? They still look a little underinflated. I would expect that the main gear tyres on an aeroplane the size of the Privateer need to be at a very high pressure and wouldn't show much sidewall bulging. Except in a failure, of course. I would like to use these resin tyres due to the tread pattern, so I'll add more air to them with 400 grit paper. The bomb aimer's picture window was glued to the front nose section, along with the shelf that the ERCO ball turret sets on. I masked off the windows and started yet another filling and sanding operation to cover up the seams. I've also been doing some work on the turrets - the bases have all been sprayed with Interior Green and the seat cushions painted flat black. The empty ammo chutes that are cast into the turret bases have some nice detail, even though small. The spent cartridges were painted with Mr. Metal Color Brass. I'm also going through my collection of unwanted photoetch frets looking for some leftover seat belts and harnesses that can be used for the turret seats. I have quite a few, and they don't all match, but that is probably not a problem. The Quickboost props are ready to be glued together using that funky UMM Propmaster thing. I think it was @72modeler who recommended using the Catalina props (right after I bought the ones for the B-24) - my timing is exquisite sometimes! No problem, I have an Academy B-24J in the stash and I can use those props there. So it may seem that this project is idling, but there is quite a lot of fiddly work going on behind the scenes. The fuselage is dangerously close to getting some paint, and things might start falling together after that. Maybe. Perhaps. Unless life intervenes. You know. King Crimson concert tomorrow night - probably the last time I will see them as Fripp has said he is unlikely to tour the US again. Wait, that's another reason to emigrate to the UK! Cheers, Bill8 points
-
I have been working off and on painting the parts for the cockpit and rear cabin, but not anything worth posting. Today I completed the painting and assembled the interior, should be able to close up tomorrow if all goes well. The interior construction is very fiddly and fragile, hopefully I can get the fuselage together without breaking anything. (photo taken before I tidied up those door windows) Thanks for looking. AW7 points
-
I always peruse the bookshelves any time I'm at someone's house. And judge the hell out of them. I suppose I ought to update you all on my progress, as I've been slogging along with this. Gunsight is mounted, canopy is closed up, fishplates are sanded down (and why the confused react, @stevehnz?), some paint is laid down to check the status of seams and so forth. I added the little PE covers over the 20mm cannon fairings -- these needed a bit of annealing, but actually went on fairly well: I'm a little unhappy with the canopy -- it's not as bad as the one in their car-door kits (which is my favourite version of the Typhoon), but it doesn't line up well, and one gets the sense that the people at Brengun are the sort of perverts who like to leave the sliding hoods open on their models. As a decent, respectable person, I do not. I've ordered one of their vacform canopy sets, which has a closed option, for future experimentation, since I have a ton of these kits. More later I hope.7 points
-
Mirage IIICJ (72062) 1:72 ModelSvit Sacré bleu! If you have not heard of the Mirage III where have you been? The Mirage III is one of the most recognisable aircraft to emerge from the Dassault Aviation stable in post war France. The Mirage III grew out of French government studies for a light weight all weather interceptor able to reach 18,000 meter in altitude in Six minutes and able to reach mach 1.3 in level flight. The tail less delta combined the wing with an area ruled fuselage to achieve its speed. The Mirage IIIC would remain in French service from 1961 until 1988. The largest export customer for the Mirage III was Israel. This version being the Mirage IIICJ. Israel found these aircraft more than a match for anything her neighbours we able to field with the aircraft being a success in combat with Syrian, Jordanian and Egyptian aircraft. Israel then sold some of these aircraft to Argentina. Kit This is the eagerly awaited new kit from Modelsvit. The kit resembles a high quality shorter run kit with fine surface details. While the parts resemble some more main stream manufactures in appearance they will no doubt need more care in the assembly. In the box we get 7 sprues of grey plastic, a clear sprue, a PE fret, masks(not shown) , and a decal sheet.. Construction starts in the conventional way with the cockpit. The seat is built up from 7 parts with PE belts and handles. The tub is made up from the base, rear bulkhead, two sidewalls and the area behind the cockpit. The instrument panel with its PE faces goes in, and PE is supplied for the side consoles. The cockpit then goes into the fuselage. The coaming then goes on in front of the instrument panel. Next up the engine exhaust is made up. This is a three part tube with the engine end and burner ring at the front and the inner nozzle at the rear. Once the engine and cockpit are in the fuselage can be closed up. Construction then moves onto the wing, first up the wheel wells need to be fully boxed in. Holes need to be opened up for the underwing stores. The main fuselage can then be joined to the lower wing with the upper wings following as well as the vertical fin. At the rear of the main wing the separate flaps and flap tracks are fitted. Here there are parts for dropped or straight flaps. The intakes are then fitted to the main fuselage, and at the rear underside the ventral strake is fitted. Moving on to the landing gear, the legs are made up and the main wheels can be fitted to their gear legs, and these can be fitted, along with the noise wheel at the front. For under wing/fuselage stores a single Matra R530, 2 Shafrir-2, 2 AIM-9D sidewinders, 2 RP-62 1300L tanks, and 2 RP-18R 500L tanks are supplied. These and the appropriate pylons can be fitted. Finishing touches are fitting the gear doors, canopy (both a one part closed, and multi part open options are provided), lastly some aerials (where appropriate). Decals There are 5 schemes provided in the kit; the decals are well printed by Decograf with no obvious flaws. From the box you can build; Mirage IIICJ No. 103, 253 Sqn, Eitham Air Base, Israel 1981 (2 tone grey scheme) Mirage IIICJ No. 758, 101 Sqn, Harzor Air Base, Israel, 1974 (Brown, Green, Tan scheme) Mirage IIICJ No. 107, 117 Sqnm Ramat David Air Base, Israel, 1973 (Brown, Green, Tan scheme with large yellow recognition markings) Mirage IIICJ No. 159, Argentinian Air Force, seen at the IAF Museum 2004 (Green, Blue Scheme) Mirage IIICJ No. C-704 Argentinian Air Force, Base Aerea de Rio Gallegous, 1986 (Dark Earth, Sand scheme) Conclusion It is good to see a decent model of the Mirage IICJ available in 1.72, this should build up to make an eye catching model if care is taken with the build. Highly recommended. Review sample courtesy of6 points
-
F-8E Crusader Trumpeter 1:32 The model is made, as always, straight from the box + self-made masks6 points
-
I can't sleep, and I lay, and I think The night is hot and black as ink Oh God, I need a drink of cool, cool rain6 points
-
Post-primer, I will be filling some gaps and I will try to do something about that seam running the length of the aircraft. After that I will stop for a week or so (sigh...) and wait for the post from France. I will start something else in the GB, however! --John6 points
-
Hi Beefy, Roger has asked me to post the images for you. cheers, Mike6 points
-
Maybe you are right, but I fear the acceptance level will remain low due to the wording. I feel a lack of respect for fellow BMers. Furthermore I feel a lack of facts and an abundance of self praise. This is my personal feeling, and I am trying to state it with a proper amount of respect and politeness.6 points
-
A bit more got done yesterday, not a lot but progress of a sort. Trying to get the dip out of the top of the rear window louvres saw me crack three of the things. Repairs have been made and the glue should be dry enough this morning for a bit of remedial rubbing down to take place. The engine got more ancillaries added which busied the thing up quite a bit. The radiator and support were added to the body and I then started to worry about how to assemble everything. The chassis fits easily enough to the body when slipping the rear end in first, then opening up the body at the front wings to let the front part of the chassis fit. The problem then is the engine and radiator fit. The engine fan sticks forward quite a bit and sits as it should, inside the radiator shroud. That then prevents the body itself from being able to be fitted Funny Car fashion. The engine bay needs to have the body slipped into place at that end first. Fitting the rear becomes a bit more difficult then as the rear body needs to be opened up a fair bit to make it fit that way around. It might have been possible to fit the engine in place after fitting the body but it looks a bit tight. The fan gets right in the way. I've left the fan unglued at the moment to allow a bit of fore and aft movement at the fitting stage. The engine is glued in now as there's a bit of added detailing I want to do that will be a lot easier with it fixed in place. The rear panel has been left off for now as well. Hot Rod magazine had this handy view of the 429 motor in a '69 body on one of its covers. Very useful for details. The 302 motor looks tiny in comparison. The front light surrounds have been painted with very dark grey and give the thing a quite sinister look. The engine bay is starting to look suitably busy now as well. The holes for the hood supports need filling in and I still need to finish the cowl repairs. I fitted the dash decals as well. The dials look brilliant, they settle in the holes really well and are readable if the fancy takes you. The wooden glove box door and instrument surround decals went on as well. The glove box one went fine, the instrument one failed a bit. The very thin bit of woodgrain at either end of the decal wont fit the dash panel, it's a bit short. It dried out of shape at one end, spoiling the effect somewhat. I was quite annoyed with that but need not have been as the panel is just about invisible once fitted. You really have to try to see the thing! I'm now annoyed at the effort put in for no result. You can't win.6 points
-
The fuselage is coming together (and hiding all that internal nastiness). The way it’s moulded is really quite lovely. The side panels only take on their elegant tapering curves once glued around the top and bottom panels, and then, as if by magic, the canopy and nose panel fit perfectly. It’s rather impressive.6 points
-
I've started painting the hull. I'm working from the anti-fouling paint upwards towards the top of the hull, so the first colour I've laid down is a fleshy tone upon which I'll work up the anti-fouling.6 points
-
The fuselage and engine fitted well, but the horizontal tail was another matter. Because it is mounted half way up the fin there is not a lot of room for the normal type of tab and slot attachment so Airfix decided to offset the tabs so they could be made longer. Unfortunately that resulted in a long slot which provided very little contact surface for the glue and to complicate matters it did not grip the tabs well either so it was very wobbly. However once the struts went on underneath it has firmed up somewhat - far from ideal. As I apparently have to add the various dive angle stripe decs before the wing goes on because the struts will get in the way, I have added the undercarriage and will now prime and paint everything. Pete6 points
-
Patrick has generously offered me some correct decals and so I will soldier on with this build and let it rest when it comes to that time, and await the post. The wings are on and there are large gaps to be filled--at all the roots, not just the one I photographed. And the underside is wider. But that is ok! The previous comment about pinning/ epoxy from @roginoz will come into play. Once the CA 'pins' are set, I'll seep in some Tamiya Thin Cement. When that is done, PPP will ill the gaps. That should make for a secure wing root! I think it's looking very much the part so far... There is a slight anhedral to the wings. Not as much as a Mig-19, but it's there. Nice panel detail btw... Gap city... --John6 points
-
A bit further....6 points
-
Hello, people. I will post one of my mounting, in my thecnique. I build my models with paper, cardboard, various plastic parts (junk, waste, I dont know the word), metalic wires, balsa wood, schoolar glue, cyanoacrylate (super glue, or Lord know the name!!! 🤔 - the language is complicated). The model was build a few years ago, and now I cant found the arquives. The model is a CH-47 in 1/100 scale, used by US Army in the Vietnam War. Starting the fuselage. I cut the pieces in cardboard and I put them toghether using a thinner piece of cardboard and schoolar glue. I continuous the mounting glueing more pieces. You see how I forme the fuselage in the curved parts I'm go cut and adapt pieces of cardboard to fit the empty spaces5 points
-
Heller's ages old kit of the Douglas DC-8-30 was probably by far the worst kit I ever built. It even rivals some of Eastern Express' outings... To speak about fitting parts would be a waste of time...at least the box art of the kit looked very nice. Taken from the instruction sheet and the way it would be assambled,it had more of a toyish purpose with its retractable landing gear. A nice idea of the inventors...if that kind of mechanism would have worked and the finished product would look like a DC-8... As the landing gear was impossible to fit in and and also looked not as it should have,I decided to omit it and make an inflight desktop model,which is also fine as it adds to the DC-8s elegance. A ridiculous lot of putty and endless sanding sesions later that pile of plastic turned into a presentable model. The decals provided in the box were the delivery scheme of former french airline UTA (Union de Transport Aeriens),one of the largest private owned and operated airlines. But they were not useable anymore,so I had to order a new set and also with more details and windows,the kits cockpit windows were a complete joke. Due to some heavy delays and the wrong delivery by the decal manufacturer finishing this kit took about 5 months more than planned. In the end I am quite pleased with this rare Heller kit but also more than happy to have it off my bench... The kit is nowadays (luckily I am tempted to say) hard to find and changes hands at very high prices...had I known beforehand of the "Quality" of it,I would have saved me the big bucks...But here she is and another of these Douglas classics found its way into my DC-8 collection... Thanks for looking Alex5 points
-
I have been on and off this build for around a year and half. Every time I felt I was close to done I would screw up something and came close to making it a paint mule a few times if not trashing it. The discontinued Airfix kit has some nice detail in parts and is puzzlingly lacking in others. I scavenged my spares box to try and overcome some deficiencies and before I screw it up again by overcorrecting, I think this is good enough and will call it done. Apart from bits and bobs from the spares box, since I was building an Indian Navy bird, I used Magic Matra missiles from an old Heller Mirage 2000 and used my pin vise hand drill to make holes in the tailpipes of the missiles. Colors, wash and clear coat are Tamiya. The decal instructions said that this airplane, IN618, was heavily weathered by 2005 and the extra dark sea gray had worn down to a dark sea gray. Decals are a mix of the ones that came with the kit and Model Alliance Indian Navy SHAR decals though the roundels are from the Italeri SHAR boxing. This build could have been better but for my overcorrections and impatience. Regardless, I hope y'all like it. I do hope the new tool SHAR from Airfix out in the winter is much better. I have high expectations. LLAP 🖖🏼5 points
-
Hinton-In-The-Hedges accommodated 104 Sqn FV-*/KQ-*/OY* and 108 Sqn SL-*/XD-*/XJ-* flying the Bristol Blenheim I. These squadrons merged to form No 13 Operational Training Unit from 27 November 1940 until 23 August 1942. Initially training Blenheim crews for daylight operations, its role was later extended to include night intruder training.5 points
-
Meanwhile, the engine assembly is finished: I have knocked quite a few bits off, which will need repairing. Also, I broke with the instructions (again! I'm really losing track of this, which is very bad!) to fully assemble the ducting before fitting it to the rest of the airframe. Can't really gauge the size of this - it makes a complete handful if I hold it. Although the whole thing fits together beautifully, it's a pretty intimidating part of the build! Everything forward of the exhausts is MRP, Mr Metal Color and Alclad paint; the exhausts backwards are all Colourcoats enamel. I'm telling ya, I spared no expense! This might be the best thing I've ever built. Certainly this is one of the best kits I've ever seen. Honestly, get one. You won't regret it! Alan5 points
-
More done today. I started by adding the Wolfpack resin nose. As you can see below, it has more defined details than the kit part: However it wasn't a perfect fit and needed some filler to blend in, nothing major. The only issue I've had thus far is cleaning up the seam on the forward fuselage. Revell also have a rendered the forward 'slime' light as a raised lump. Thankfully the excellent BAM set has a vinyl replacement which is much more accurate. You can see the seam free curvature of the forward fuselage and the 'slime' light in the below image. Courtesy of Prime Portal. Whilst the seam was smooth, I still wasn't happy so I've ran some sprue gloop along it which should hopefully sort it out. Once dry, I added the wings: I left that aside and assembled the tail fin: The sensor circled below is to be removed according to the BAM instructions and replaced with the small dome, shown on the right: However the images I have of the Rafale B as part of Op Chammal show the original sensors in place so that'll save me some surgery! Nice little kit this, i'm enjoying it. I did build the M version a few years ago and did remember it being a nice kit. On a side note, I gave in and @coneheadff has ordered me some replacement MICA IR missiles from the 48ers to replace the rubbish kit ones. More soon. Dave5 points
-
Eduard Bf-109 G6/AS + some parts from another Eduard G6 Painted with AK real colours.5 points
-
I believe a large part of this whole discussion could be prevented by carrying a reference colour chart along when making pictures of relics to ensure (somewhat) colour balance can be assessed properly. Or, for that matter, including the spectroscopy/metric and analysis data on which those conclusions are based. That would significantly cut down on 'signal noise' - i.e. opinions. I do note however that there is a certain undertone of 'I'm still right and you're all wrong' in this: If i'm honest, that's not a neutral attitude to present to readers.5 points
-
Time to add some pictures ! The build has progressed very slowly, mainly for one reason: I got convinced to spend some weekends away from home. This left me with less time than desireable to work on the model but I can't complain, a weekend off is always a good thing... Generally work start with the cockpit but in this case I decided to tackle one issue first: the Trumpeter Vigilante kits are well known to feature "flimsy" fuselages. The shape of this aircraft clearly leads to parts that need some internal support but the manufacturer did very little in this respect, so I decided to add plastic tabs to help keeping the fuselage halves properly aligned: A test-fit with the various tabs in place showed that these do the job pretty well and I'm now confident that I should get a decent fit. Mind, the parts in general seem to be engineers well enough to fit properly but the fuselage really benefits from some help. While I was painting the interior of the fuselage and adding the tabs, I also decided to add the main wheel wells. These were previously painted in white, although they will need more white to be sprayed further into the build. The wheel wells are nice enough, sure they could benefit from some extra detail but I've decided to build this model as OOB as possible so I'll keep them as they are. With the airbrush out it was time to paint the cockpit, or at least its main components. Lifecolor's FS 36213, lightened a bit, went on pretty nicely, then I started adding some more colour to the seats and consolles. Last for today, the instrument panels... these are offered in a very unusual way: a clear printed film with the instrument dials and a couple of panels printed in clear plastic with holes where the instruments are. Think of them like a more 3-dimensional version of Eduard's or similar PE panels. Now I struggle a bit with the idea... the clear plastic panels are pretty thick with the result that the dial are buried very deep in the panels. This make them very hard to see. The idea could have worked better had the panels been thinner... like it works well with PE sets. And then, why mould the panels in Of coursplastic ? A grey part would have worked the same considering that these parts have to be painted anyway... The addition of the clear film also means that different glues will be required... anyway, here's where I am at the moment, The panels have yet to be completed (and the rear one also needs some touching up where I made a mess with the black paint on a couple instruments Last but not least.. I don't know why all these latest pictures seem to be out of focus ! I'm using the same camera with the same settings and yet something is not right... I'll have to sort this before posting the next round of pictures5 points
-
After looking at the Tempest staring at me in disapproval from the shelf of doom for weeks (the Defiant had given up staring, but more of that later) I decided to bite the bullet and actually do some work on it. I used Humbrol 104 for the blue and 153 for the base of the red, adding a bit of 60 to tone it down a bit and the merest hint of blue (96) to help with this. I then learned how to dance the roundel-spraying mask merry go round and got stuck in. The airscrew, spinner and remaining undercarriage parts were also sprayed. I also realised that if I'd been clever I would have sprayed the leading edges yellow and the sky fuselage band on before I did the camo, but I'll have to find a way of doing that post-camo now, so that's the next task, along with spraying the codes. Still, it finally feels like I'm getting somewhere now, so that's good. The end is in sight. Cheers, JRK5 points
-
Hello Here are some progress on this not so easy build. First the areas where the joint was difficult On the wing... the upper leading edge... under the wing leading edge... under the whole wing... and under the trailng edge. In blue this is where where the elevons should hinge on : And I cut there : As there is no engine inside I had to cut some cardboard, glue at the end of the intakes and paint it black ( Hi Charlie Watts ) The ejection seat with PE from the box The instrument panel Inside the cockpit To be continued... Patrick5 points
-
Partially because Trumpeter have announced various other ship kits over the years that have so far failed to appear and some would like to see those appear before they push these Cancelled Projects to the front of the queue. They now do 3 German Aircraft Carriers from WW2 none of which were ever completed, yet have only done 1 Royal Navy Aircraft Carrier of the 12 carriers that took an active part in WW2.5 points
-
Just received a copy Remembering an Unsung Giant-The Douglas C-133 Cargomaster. History, development and most importantly. Scaled line drawings in depth.Research for a"potential" future project. At 420 pages+ fold outs. A little light reading on those cold winter nights.5 points
-
Thanks very much! Slowly goes it Thanks buddy and thanks again for the pics you took of the FG.1 for me! Glad to have you along I'm going to call this a win for the first coat of Mr Surfacer 1200 Leave it a day to harden and I can polish and rescribe/rivet Cheers Anthony5 points


.thumb.jpeg.fcf185ed9c8c199cd9714bb7d9816b09.jpeg)


Wedge-TailedEaglePortraitRaptorDomains.thumb.jpg.41a306d3445a68f0f2df773e01776ea6.jpg)


(510x640)-Copy(95x120).thumb.jpg.33073138e01aa81779639a845926753e.jpg)


This leaderboard is set to London/GMT+01:00