
Leaderboard


Popular Content
Showing content with the highest reputation on 10/08/21 in all areas
-
The Great Lakes XSG-1 needs no introduction is about as obscure as you can get and exactly the sort of thing that fascinates me. A single prototype scout seaplane from the early-1930s (designed to spot the fall of shot for the big battleships and cruisers), it is surely one of the ugliest flying machines ever designed - and a total, dismal failure. Its history actually reads like an elaborate practical joke - or the long-lost plot to a Laurel and Hardy film. It is partly its looks - as if the designers tried really, really very hard indeed to think of all the possible ways to introduce drag on an airframe. To me it looks One measure Grumman Duck, One measure Republic Seabee, both shaken and stirred, then mangled a tad - and finally served tepid, with a fresh slice of Heath Robinson. But it's definitely one of those instances where you actually can judge a book by its cover - performance was feeble: it was underpowered, heavy on the controls, aerodynamically unstable and, to cap it all, slower than its contractual guaranteed speed. But spare a thought for the gunner too - if this had ever been attacked by an enemy fighter he would have had to reach outside the aircraft to lift the machine gun from its stowage point in order to fit it to the cumbersome rack mounting in his compartment. IF he managed all this without dropping the gun into the slipstream or being whipped overboard himself, he had virtually no field of fire so could do precious little to actually defend against the enemy! At least his bailout (by the looks of things he'd just have to let go and gravity would do the rest) was easier than the pilot, who would have had to negotiate a thicket of cabane struts before leaping into the slipstream while attempting to clear the colossal tailplane mitt bracing wires. Then there's its first water handling tests where, among other things, the spray was so appalling that it nearly blinded the pilot, the observer/gunner compartment started filling up with water and nearly drowned him (but with no intercom or link to the upper cockpit, the poor man couldn't alert the pilot to his plight - though I imagine he banged wanly on the cabin walls - he did survive) and finally the engine drowned. All in all, the whole testing experience seems to have been about as relaxing as trying to give a Bengal tiger a vasectomy with a pair of nail clippers. And all this from the company that produced just the year prior one of the prettiest and sweet-handling US biplanes ever designed (in my meagre opinion)... If the XSG-1 was a prank, it was a ruddy marvellous one if you ask me. Sadly, I can find no evidence that it was. The kit comes with the Anigrand Sikorsky XPBS-1 (which I finished last year). It's fantastic to have a kit of something as bizarre and unusual, especially in 1:144 - one of the many reasons I love this scale. The build itself provided no major challenges - there's a build thread here if you're interested. I replaced most of the kit struts with plasticard which had a better scale fitness (I also removed one of the inner struts which should not have been there and added a handful more that Anigrand omitted). I added some other bits like the .30 cal gun and thinned down a few other bits to give them a better scale look. Paints were Hataka. I replaced the insignia with some thinner ones from the spares box (the Anigrand ones are very thick). Rigging was with Uschi VanderRosten thread. There are definitely compromises in here in the name of structural integrity. Given infinite time and patience I would have replaced the W strut on the forward fuselage with something daintier - I feared doing so would jeopardise whatever it was that was holding the upper wing on. Same deal with the floats - the rear struts I left alone as they provided the strength, the forward struts are prettier stretched sprue but merely decorative. I would also have filled the exaggerated rib lines scored into the wings. Inevitably all these things are much more evident in photos than in the flesh. But anyway. I am basically really happy with this. Anigrand also do a 1:72 kit of this aircraft if you find yourself with a sudden passion to build one yourself. Not a great deal more to say. A fun build and a good challenge. And with a somewhat more successful water bird that first flew just a couple of years after this - incidentally the same year that Great Lakes Aircraft Company went bust. Thanks very much for looking. Angus25 points
-
Hi This is the Accurate Miniatures 1/48 TBF/M (not sure which) Avenger, it's been sitting on the shelf covered in dust for a few years so I decided to clean her off. Great little kit with loads of detail and I could really do with starting a new one at some stage. Thanks for looking18 points
-
Hi all This is Eduard's D-9 'late' profipack edition, finished in the markings of '500647/Brown 4' of 7/JG 26, one of a small number (three or more were speculated, but only two have actually been documented) of D-9s which for some reason were fitted with the tail section intended for the Ta152. Temporary production shortages of the 'correct' tail seems the most likely reason. This one was found abandoned at Hustedt during the allied advance. The Eduard kit does go together, but not without a fight and it certainly isn't without its faults. Comments welcome16 points
-
Dassault Mirage IIIE, Heller/Mister Craft 1/72. Decals Syhart 50 Year Universary EC3/3 Ardennes.15 points
-
Grumman X-29 by Hasegawa, enhanced with RES-IM photoetched fret and some scratch built detail in the wheel bays. I first saw this aircraft in "F-29 Retaliator" game on 286 PC in the early nineties and was immediately captivated by its unique design. Imagine my disappointment when it turned out that the real thing was only an experimental plane and never carried any armaments15 points
-
No body should go thro such agony "A Maquette" a beast. But needed as it was for Jersey Airport 1950/60 the airliner most seen.. I could of done quite a bit more but really should have gone in the bin. I stretched my patience to the limit. Just one of the limits. http:// And so it is finished. http:// http://13 points
-
Hi all, I thought you might like to see my 1:32 scale build of a Junkers D.I from 1918. This model depicts a Junkers D.I that was involved in a flying accident, possibly during testing, on the 3rd of October 1918. It was most likely repaired and possibly given the Ser No: 5188/18, before being operated by either MFJG in Belgium or with Kampfgeschwader ’Sachsenburg’, operating in the Baltic during 1919. Design: The lineage of this aircraft traces back to Professor Hugo Junkers, when in 1912 he patented a design for a thick, cantilever constructed initially of corrugated steel. The first Junkers J.I and J.2 monoplanes were built but proved too heavy for operational use. Subsequently, the Junkers J.3 was redesigned during 1916 using an aluminium alloy (Duraluminium). However, it was shelved when production was switched to the Junkers J.1 biplane, which entered service in 1917. Due to the positive response for the J.I, work recommenced on an armoured single seat monoplane, starting with the Junkers J.5 through to the J.9, which eventually became the operational Junkers D.1. The maiden flight took place in May 1918 and further changes to the design saw 4 aircraft of the final version dispatched to the front in October 1918. The design of this aircraft was revolutionary for its time, a monoplane of metal construction and with only cross brace rigging on the undercarriage. The airframe was essentially of tubular construction with corrugated Duraluminium covering. Various engines were fitted during the prototype stages, but it seems the Daimler-Mercedes D.IIIa (180hp) or D.IIIaü (200hp) engines were fitted to operational aircraft. Armament consisted of twin 7.92 mm LMG 08/15 ‘Spandau’ machine guns. Operational background: The Junkers D.I was designated as a ‘battle plane’, meaning its perceived operational role was to be that of ground attack, rather than as a fighter. Only 40 aircraft were built between June 1918 and February 1919 and it seems of these, only 5 were delivered to the front. It's not certain than any of these aircraft took part in actual combat, although there were reports from the British late in the war that there were ’encounters with German monoplanes that were covered with corrugated sheet’. These 5 aircraft were eventually abandoned on the German landing field of Hombeek in Belgium. However, the aircraft did see active service after the war, in action against the Bolshevik forces in the Baltic countries, serving with the ‘Kampfgeschwader Sachsenburg’ volunteer regiment, commanded by Gothard Sachsenburg, a former pilot of the German naval ’Marine Jasta’. The regiment consisted of 3 squadrons, being FA413 (reconnaissance), FA416 (fighter) and FA417 (ground attack). Both FA416 and FA417 operated the Junkers D.I as well as the Junkers CL.I (two seat version) aircraft. A few aircraft were lost in combat, including a Junkers D.I being flown by Josef Jacobs. When hostilities ceased, those aircraft remaining were found by Soviet forces, abandoned on an airfield near Riga. The model is 1:32nd scale and made by ‘Wingnut Wings’ (Kit No: 32065). The list of changes/additions to the model are: Engine: Detailed with Nickel-Silver and Brass rod or tube to replace Coolant pipes, ignition lead support tubes, sump vent pipe, induction manifold pre-heat pipes, forward air pump pipes. Ignition leads at the Magneto’s and spark plugs are lead wire. Spark plugs and fuel primers are from ‘Taurus Models’. Rigging: Rigging is 0.08 mm or 0.12 mm diameter mono-filament with ‘GasPatch’ 1:48th scale turnbuckles and 0.5 mm or 0.4 mm diameter blackened Brass tube. Aftermarket: ‘GasPatch’ Spandau machine guns used to replace kit parts. Pilot figure is Wings Cockpit Figures’ LSK leaning pilot (LSK 14), Mechanic figure is ‘Copper State Models’ German ground crew (F32-012). Propeller was the Axial wood laminated version from ‘ProperPlane’. As usual I've created a downloadable build log in Adobe PDF format, for those who might want to refer to it for reference or build details. It contains full step by step descriptions of the model build, its modifications/changes and is also supported with illustrations and photographs. If viewed in Adobe Reader, each build log has book marked chapters/headings for easier navigation through the log. My model website has the gallery page, so to view any model, go to the gallery and select it. If it has a PDF build log, it will be available to download using the 'PDF' icon on that model photo page. For any photograph, just click the photo to enlarge or reduce the viewing size. http://igavh2.xara.hosting Mike12 points
-
Finally took two steps forward and none back! Made front wing stays out of 1mm brass (absolute nightmare to attach, their not perfect straight, but I haven't the heart to try and correct them). However. I'm actually quite pleased with them. The front wings sit slightly lower than they should, but again their staying as they are. Also made a belt (Using leather from an old wallet and some brass rod) to secure the spare wheel. Thanks again for looking - Andy12 points
-
This the old Matchbox kit, reissued by Revell. I'm using it as a basis for a model of an unusual Walrus---one of two that were carried by the S.S. Balaena factory ship during the whaling season of 1946-7. They could be catapult-launched, or lowered into the sea for a conventional water take-off. They were used to gather information about approaching weather, about the ice conditions, and to spot whales. (No-one had ever used an aircraft for whale-spotting at that time, and there was significant doubt among the whalers that it was even possible to see a submerged whale from the air.) John Grierson, who was in charge of the aircraft, left details of the adventure in his book Air Whaler (1949), a lecture to the Royal Geographical Society entitled Whaling From The Air, and an article in Flight magazine entitle Air-Whaling. So the aircraft are fairly well documented. In fact, a total of four Walruses were originally purchased and equipped for the Antarctic, registrations G-AHFL, G-AHFM, G-AHFN and G-AHFO. Grierson won the 1946 Folkestone Aero Trophy race in G-AHFN, but it then never left England. G-AHFM, christened "Moby Dick", got as far as South Africa and was then left behind---the hangar on Balaena could only accommodate two aircraft, and a third would need to be "parked" on the catapult, making aircraft handling and maintenance excessively complicated. But G-AHFL "Boojum" and G-AHFO "Snark" made it to the Southern Ocean and logged 96 hours flying there. I've modelled "Boojum": For a while Boojum flew without its undercarriage, and I considered modelling it in that mode, but ended up just not liking the look of it: The hook under the nose was characteristic of these aircraft, used for what was called a "mat recovery". Still under way, the Balaena would tow a net over the side, and the aircraft would motor up on to the net and cut power, snagging the net. Here's the model: The propeller discs I designed and printed myself---a tricky one, given that the four-bladed prop is actually two two-bladed props, so I needed to make two parallel transparent discs to get the correct effect. The base is magnetic--a scratch-built cradle that fits behind the underside step, and an old Airfix base. The major mods are the grab-rail around the nose, which I built from 0.5mm brass rod, and the "free" tailwheel, pieced together from bits of styrene and brass (the kit includes only the conventional tailwheel, with its rudder shroud and the oleo compressed). Minor stuff includes the rigging (monofilament), the nose hook (brass), the towing eyes (styrene), rear hatch rails (styrene), the various ropes and shackles (stretched sprue), the aerial supports (brass) and aerial wires (monofilament). I opened the observer's windows (the kit has them closed and represented by black rectangular decals), drilled out the front of the nacelle, added the spray fairing on the starboard side (the kit models this only on the port), removed the supenumerary thermometer housing the kit has placed on the starboard side, closed the rear hatch, added some styrene to its front end to model its real shape, and opened its small windows. There was also a bit of reshuffling of the interior, which doesn't show up in the photographs. The kit came together pretty well, despite an error in the Revell instructions which has one of the nacelle strut parts the wrong way around. I used a JBOT decal sheet as a basis for the markings, but ended up using only a couple of decals off the original JBOT sheet, and added most of the markings from a revised sheet I printed myself. More about those two problems in the WIP: I'm annoyed with my weathering, which is pretty slight generally, but I took a notion to a bit of salt spray around the nose, and I now find it more ugly and distracting than realistic. <Sigh.>11 points
-
Just completed Amodels 1/72 Sea Devon, a very nice easy build, although I think the nose is too pointy, so tried to round it as much as possible, added some missing vents to the engine which are missing on the kit plus some other minor little bumps here and there, I also made the rear horizontal tail asymmetrical which this version had, I painted the props with red bands although looking at photos of Sea Devon's they should be black. Probably not my best build, and still prefer the Rareplanes version if I'm honest, anyway these are the photos, taken with my iPhone for quickness, so might put better photos up at a later date11 points
-
I remember being volubly sniffy about GPS in the early days of it being commercially available; something along the lines of I can read a map at 450kts and I can read a road map, what’s the point of GPS? Fast forward to today and I use the OS app on my iPhone to tell me where I am when I’m out on the hills and the magnetic compass is a never used back-up, my apple watch tells me when I’ve run 5km and I get grumpy if my car GPS doesn’t automatically re-route me around traffic hold ups I guess I’m converted……10 points
-
Hey guys. Progress on the mustang has drawn to a bit of a stand still I’m afraid. As it seems Milo my youngest, now a sparkly new teenager is growing taller by the second. Cruel to keep him in his back bedroom when I had the top room all to myself. Alas all things must pass and the big switcharoo was undertaken this weekend. It was with heavy heart I gave up the grotto. Not all bad though as I have always liked the back bedroom as it looks over the wisteria. Say hello to the new grotto. This is mid transition. The stash came out of it’s Natural habitat. The kit to life ratio is strong with this pile. 😩😩😩. Lovely though eh. ❤️❤️❤️ How on earth will I fit it all in??? The bench has found a new home! A long way to go but getting there for sure. 😇 The French doors got fixed. Cleaned out the rot. Luckily it was rotten only in one beam that came out, let’s say quite easily. Said beam got replaced and a new rain bar added. Primed and puttied but she works!! Look at that line of drips. 🌧😅 Well at least there is some 1:1 scale modelling going on. 😊 The cabinets get moved in next. Time to give the kits a bit of a dust. I have a music festival this weekend so it’s looking slow on the Mustang front but at least I’m edging towards having a place to build her. watch this space. Jonster. 🥸9 points
-
y I had originally started this as a WIP thread, but after my first few posts I stumbled across Haneto's brilliant WIP thread, which is quite frankly the be-all-and-end-all of this particular model, making any of my attempts to be helpful completely worthless! 😂 But more usefully it gave me just about everything I needed to make the most out of this kit, as well as setting the standard ridiculously high... I didn't quite emulate Haneto's awe-inspiring work. Not even near in some cases. But now its complete I can appreciate it more. This is my third ever aircraft (my paint skills come from painting GW minis) and this has been my biggest project to date. Painted with acrylics (including the metal parts) from Vallejo, Citadel & Scale 75. I used the 'Russian aircraft' air paint set from Vallejo for the main base colours, although I used different colours from the set instead of the recommended 'flanker' paints, as I found them too dull and similar to one another. Weathering was done mostly via acrylic washes (the Vallejo washes are very good for manipulation with a wet brush/cloth for a good hour afterwards, despite being acrylic water based), although some enamel washes were used on the smaller parts. The exhaust and tail fins colour patina was partly done with the use of Tamiya weathering powders. Watercolour pencils were also used on various parts on the body. The 'lines' painted on the engine exhausts were done using inks (with the occasional help of a ruler!) A Molotow chrome marker was used on the brightest metal parts. I ended up using the Begemot decals with the set provided, as I had a few concerns over the GWH decals being a bit thick. Overall, this wasn't the case, and if you are considering the Begemot decals, be aware they are not a complete replacement, and you'll still need both. There is also a few errors in the Begemot decal guide, where the GWH one is by and large spot-on. The Begemot decals are generally much nicer and more detailed however. As far as the kit goes, it is great and generally fits together very well, but a few issues to watch out for; firstly consider scribing over the panel lines, as some of them are very faint and can easily be lost durng the priming and painting stages. Part of the reason why this kit looks so weathered is due to having to repeat washes where the wash just wouldn't stick in the panel lines. I also had to re-draw all the lines on the metalic parts of the rear fins, which was a hassle and why those parts may look a bit odd. Secondly, be aware that there are some very tiny parts on the main body that can easily be broken when handling it. There is a missing antenna thing from each side of the wing where they've got caught somewhere and subsequently disappeared, most likely inside the vacumn cleaner. Haneto did suggest in his thread to replace them with brass rod, but that's a bit out of my comfort zone. Next, you will need to shave off a good couple of minimetres of the main body around the insertion of the engine nozzles as that is not a good fit if left untouched. Finally, be very very careful with the landing gear assembly. I made a very annoying balls-up, but thankfully it's barely noticeable due to everything else going on with the craft. Once again this has come out more weathered than I originally intended, as I was going for a cleaner build. It's something for me to work on. My next couple of planned projects are to do a couple of scale 1/24 cars, which I am definatley not planning to weather! After that it should be an F-15e, also by GWH. Well done if you made it this far and thanks for looking. Huge shout out to Haneto for all the help and inspiration his WIP thread provided me (if you have no idea of what I'm talking about, go and look for it NOW - also to see what a SU-35 should really look like!) 😂 Any questions feel free to ask!8 points
-
Another trip to Albany A few weeks back I took some leave from work and headed off on holiday with the wife and kids for a week or so. At the moment here in Australia it's a pretty big deal to cross state borders, so we decided to stay within Western Australia and headed South-East to Esperance. The most exciting thing that has ever happened in Esperance is that bits of Skylab crashed somewhere near it back in 1979. Nothing much has happened since, however the local council has decided to put some great old photographs up on the windbreaks around the town and this one in particular caught my eye. This is a rather inspiring shot of 'Rob Roy' which is Western Australia's third steam ship and the first to achieve any reputation as a success. If memory serves she arrived here in the middle of the 1870s and kept going for over a decade. Here's a close up of the bridge which gives a great view of the wheel and a couple of the lifeboats. If I'm not mistaken we can also see a rolled deck edge on the forecastle along with a bunch of other enticing stuff. This however was just a foretaste. After a few days in Esperance - yes a few days is long enough - it was time to head to Albany and catch up with Ross Shardlow, Albany's leading maritime historian and artist. I proudly showed Ross my newfound evidence and the revised base drawings of the hull and funnel that I was proposing to use for the build... Ross was very polite but said that he thought he could see one or two things that perhaps could be improved.... 'I think I might have a look at the stern' he said. And so it began, a really great day and half's full of drawing and discussing and re-drawing and researching and re-drawing and discussing and researching and re-drawing. Some red wine was consumed and so too were some more of those cheese scones we enjoyed so much last time. Here's just a fraction of the stuff that we unearthed from Ross's library. A local Fremantle newspaper article regarding the Engine restoration... Another newspaper article explaining exactly where the scotch boiler that's on display in the Xantho gallery actually came from. This is the one that I originally thought was lifted from the wreck but no; that one remains on the sea-floor. Photos of ships of broadly similar appearance - likely analogs to Xantho- although this one is still a paddler and was built a warship, as was this one... Photos from old model-building magazines, how's this for inspiration? And schematic drawings - lots and lots of schematic drawings. This one is from Page 52 of 'Steam Coasters' by CV Waine'. it's of the SS St Seriol and seems to be from around the same period as Xantho. Importantly it shows how at least on this occasion, the mizzen mast was stepped onto the rear bulkhead just behind the engine room. it also shows just how little space was sometimes left between the front of the boiler and the main waterproof bulkhead. No doubt a bad practice from the point of view of inspecting the boiler, but the recorded dimensions of Xantho's engine room and the layout of the remains on the seafloor strongly suggest that she too must have been a very tight fit. Drawings like this from 'The Denny List'. This one suggested that I had too much sheer in my interpretation. Eventually we came up with something that looked like this. I declared myself happy and ready to start bashing together the hull once I got back to Perth. An enigmatic, concerned shadow passed over Ross's face... 'Hmmmmm... OK... ' he said, Off I went, back to Perth, back to the 'real world' of work and mortgages and so forth while Ross retired to his study... Stay tuned steamship fans, Bandsaw Steve8 points
-
But only on the condition that there is a responsible adult present. Martian 👽8 points
-
I would like to show you my finished project. It's Tamiya Porsche 934 Turbo RSR. I decided to turn it to a 930 ish. I tried to achieve something "Singer style" Porsche here. So some major work has been done mostly in interior part. But also I smoothed those wheel arches, and made couple other minor modification on body work. Seats are 3d printed from Shapeways by Ron Olsen. My phone do not pick body color exactly right. Color is from Ral chart ral 6033 mint turquoise, and top of that Zero Diamond finnish. Interior paint is also from Zero Ferrari Cuoio. In overall I'm pretty happy with the result. Paint job could be better, it is glossy, but surface is not very smooth. I'm not polishing kind of guy, but due this project maybe I have to Start to be that kind of guy. WIP here: https://www.britmodeller.com/forums/index.php?/topic/235077198-tamiya-porsche-934-rsr-112/ So here are pictures. Feel free to give some feedback. Pekka7 points
-
First flown in March 1956 and then grounded for modifications until April 1957 the Ye-5 was the last step in the evolution of the Mig 21, the Ye-6 being the actual Mig 21 prototype. The model was typical of A& A kits. Lots of fiddly bits that don't quite fit. The worst bits involved the cockpit area. The ejection seat was too tall or the canopy was too thick. Anyway the bottom had to be ground away until the canopy could be closed. The inner armoured front screen was a devil to fit and getting the canopy to fit the fuselage involved Milliput, bad language and being sent to the shelf of doom for much of the summer and I am still not happy with it but one has only so much patience. The kit nose probe was replaced by brass tube. The finish is Alckad Aluminium.7 points
-
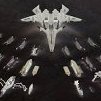
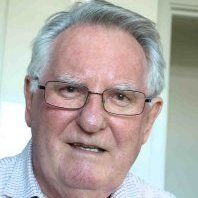
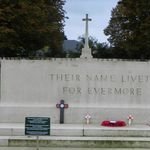
As I couldn't sleep this morning I thought I'd stick this up. It needs a few finishing touches but is ostensibly done. This beautiful kit was brought to my attention by @2996 Victor and is a limited edition sold by Spitfire AA810 more here. https://www.spitfireaa810.co.uk/ I am in no way involved or affiliated with this charity I just thought it was a worthwhile one. Primed with UMP Grey, Painted with ColourCoats Interior Grey Green, PRU Blue, Extreme Metals Aluminium and Tamiya Rubber Black. Finished with Windsor and Newton Satin Varnish. It was an OOB build apart from some Kitsworld seatbelts. As you can see not only was Sandy one of the incredible PRU Pilots but was also one of the Fifty murdered by the Gestapo after the Great Escape. To me this makes this an important kit to remember these brave people. A fun kit to build with no major issues. To Mark. Thanks so much for pointing me in the direction of this one and I have just ordered the book as well. Thanks for looking, Cheers, Alistair7 points
-
Brenguns lovely pou-du-ciel its tiny!! my dad got me this for my birthday, he likes to get me a 'challanging' kit. pictures are not the best, did i mention its tiny thanks for looking7 points
-
Hi everyone, this is indeed my very first car build, and although a simple kit, I was seriously intimidated, believe it or not. Just finished this build as part of the French Fancy GB, and the build thread, for the ones interested is: Here are a couple of photos and I feel a bit self conscious as you guys and girls build car kits for a living, or so it seems looking at the smashing quality of your builds. So feel free to give me some feedback and pointers, as this small 2 CV may not be the last car I build. Thanks for taking the time to look at this post. JR7 points
-
I really enjoyed this build, which is OOB with the exception of some Eduard photo-etch seat belts. Exterior colors are SMS Premium Light Stone and Dark Earth over Mr. Color Black. National insignia are from the kit (very good); individual plane markings are from an Xtradecal sheet. The model depicts K7107 VT-B, a Mk. I from RAF 30 Squadron based at Ismailia, Egypt in April 1940. I'm indebted to Britmodeller tonyot who informed me that the plane was most likely painted in Light- rather than Mid Stone. Cheers, Pip7 points
-
Good grief, what have I done to deserve this...other than everything.. Are you trying to make a monkee outta me....don’t answer that. Order of seniority old fruit...if I want to grab the steering wheel, I will...if it ends in tears, so be it but we must have discipline at all costs. As it happens Darling was all to happy to let me play with it...until the cyclic mashed his collective...7 points
-
Picked up from an article on the BBC about weird and wonderful British place names ( https://www.bbc.co.uk/programmes/articles/2wQdX4yYp6G0X6PVQjpYP40/the-best-and-most-eccentric-towns-across-the-uk-according-to-mark-steel?xtor=CS8-1000-[Promo_Box]-[News_Promo]-[News_Promo]-[BBC_DEFAULT~N~~P_MarkSteelsinTown] ) For a while everyone in Northampton knew the sign outside the hospital that said “Family planning advice – use rear entrance.”7 points
-
Here's my Zvezda 1/144 Tu-154M with Classic Airlines decals for Guyana Airways. Build thread is here. thanks for looking Julian7 points
-
Finally able to get around to thinking about starting this iconic beauty. Haven't even opened the parts bag yet, but looks pretty decent.6 points
-
Hello colleagues! I bring to your attention my next work, the Mi-24A (in common parlance "glass" or more often "veranda"). The source, pretty much without problems in the assembly, everything fits together perfectly, a lot of conversion parts, there were no special difficulties. Of the modifications: windshield wipers, seat belts, running boards, antennas, imitation hose in the chassis recesses and a small modification of the NV, RV and guided "Falang". Helicopter belonged to (373rd AFB, Kabul, June 1979) (P/N 315) Paint and varnish by brush. Paints: GSI Mr.Color urethane acrylic, Tamiya varnish, +plain pencil. Decals: Star, +Hippo. Enjoy the ride!6 points
-
Thanks Sam, I spent the day beavering away on the stack. I think she’s finished bar the searchlights and guns. I can’t decide what to do with the searchlight covers - on or off? Did they simply swing down as they are or did they fold up in some way? Lots of PE on this section! But enjoyed (most of) it. I always try and get the most done that I can do pre painting. Definitely a model in itself. Guy6 points
-
Update: touched down about 5hours after we were supposed to. No GPS in car as requested. In fact, no GPS available, and had to use my crappy old phone. The car kept trying to overwrite my cellphone and install imcompatible software which kept blacking out my screen. Eventually arrived at the hotel just in time for all the sirens to go off for an imminent tornado warning and had to tale shelter in the hotel ballroom. Nope, sorry - sat in the bar and got slightly blootered instead. Tomorrow's another day (but not expecting it to.get any better)6 points
-
The engine nacelles are coming together, they have to be built around the extremely fiddly landing gears (the two-part mudguards were a delight). Bit of cosmetic work to do before painting them up.6 points
-
A significant job has been done tonight which has been a bit of a stumbling block as I knew it was going to be a pain, as it's seriously fiddly! I've added all the fuel lines to the external fuel tanks. I used some brass tubing this time which was a bit thicker than the wire I used on the Kladivo and I think it looks better for it. More soon Ben6 points
-
Howdy Everyone, Thought I`d post a few photo`s of my latest effort Tamiya`s 1/48 FB VI kit, masquerading as a Canadian built FB 26 Built straight from the box contents ( though I realise there were probably a few differences ) apart from the decals........... ...which came from Iliad Design `Canadian Built Mosquitos` sheet Apparently China purchased 190 of these to fight in the civil war but this one was kept in Canada for training purposes..... ...... and carried the CNAC markings instead of the usual RoCAF ones Hope you enjoy the pic`s, thanks for looking Cheers Russ5 points
-
A very pretty G reg ('89 I think) BMW 3 series estate in dark metallic grey. Purty lilttle thing! It was parked in uptown Lincoln and looked factory fresh.5 points
-
I think someone needs a speed awareness course. I had to do one after being clocked at a tad over 31kts! Terry5 points
-
Finished up my 1/48 Tornado. It's such a unique aircraft and really exciting to build. The kit itself however, was not very good at all. On this build I depicted "Triffid Airways" from No.15 Sqd. of the RAF during Desert Storm in 1991. The kit was built mostly OOB except for some IDS seat photoetch from Eduard. These Tornados in desert pink tended to chip and fade during their service. As well, the Tornado is iconic for it's heavy soot staining on it's massive tail. Check out more detailed photos on my site!5 points
-
I have painted the deck. The bridge and its roof. And finally the bow section. Just some ladders and railings to fit and I'll be moving onto the stern superstructure.5 points
-
Ship date for the F-4C has been announced by FM as 23 August. F-4J USN is shipping now from Japanese hobby shops like HLJ. Latest F-4D and F-4J Marines box art here and here. Gene K5 points
-
I never thought that I would be the type of person who gets up early in the morning so they can exercise. And I was right.5 points
-
The great thing about having some days off and the British weather was that I could make some progress on the LeO. I should remember to take more photos. The wings went on pretty well and once filled and sanded, they looked good. I'm using the Hataka French paint set which I thin a little with some Vallejo thinner and then airbrush on. The blue for the underside had a couple of coats and then was masked off once it was dry. I then sprayed the top surface with the grey colour, again from the Hataka French set + thinner. The photo makes it look more beige than it actually is. While painting this, there was some ominous creaking from one of the forward windows. I really hope I haven't pushed it into the fuselage. The moment of truth will be later in the week when I take off all the masking 😕 This dried overnight and then last night I painted the greeny colour. The Hataka set has a really bright green which doesn't look right to my eyes. It doesn't match the Heller Musee instructions or the SMER instructions. The colour is much more drab. I had a look through my paints and found an Olive drab colour that matches the Musee instructions really well so I've used that. Chocolate is next and then the masks come off......5 points
-
Ok I guess I’d better update this build before I finish it!! I have been slow to update as I’ve been doing small bits at night, no more long building days/weeks for me!! Right lots done, the intake was a wee bit of a pain fit wise, the inside trunk and the outer fuselage didn’t want to play together so I ended up with a noticeable lip when I fitted the intake lip! The rest of the inside joins weren’t too bad. I also fitted the 2 bits of the intake trunk together before fitting it to the fuselage… not the way the instructions wanted you to do. This was to help with the join between the two sections. The main wheel well needed some persuasion to fit/sit nicely…. nothing a bit of good old fashion bondage wouldn’t fix! There are no decals for the cockpit panels, so painting was the go here, came out ok too. The bang seat is very plain and there are no seatbelts o I plan to use the pilot (say hi to Hiro ) and have the canopy closed….. a first for me for quite sometime! It actually looks quite nice with Hiro and the canopy closed…. and quite different to a F-16! I’m playing it safe too, Just one wee weight and set back a bit…..test fits showed there is no worries about her being a tail-sitter. Right closing up the fuselage was fun!!! It took a bit of work, especially at the tail where the two rubber gromets for the elevators go, it just didn’t want to close up without some serious bondage happening!! Can’t post photos of that as this is a family website!!! Once that was done the wings and rudder were fitted. A wee bit of filler was required here and there, but I’m pretty happy with all the joins, so nicely done Hasegawa and “Betty the Bondage Mistress”. Looks nice and busy with all those pylons fitted. …and with her “little”? brother….. it’s a little bit hard to see, but she is slightly longer, it’s in the wings and elevator that the size difference is most noticeable. Just some tiding up to do and finishing off and closing up the cockpit and she’s ready for painting, that should occur on Sunday with luck. It’s a nice model, just a few wee bits to make you work but still fun to build.5 points
-
What? Around or in a vaguely proximate manner to any of us? Have you missed your assimilatory pills this week dear alien? How on earth, or fourteen other similar planets, could a responsible adult possibly be present whilst we (any of us) do what we do?5 points
-
Go directly to the undertaker's. Go directly; do not pass Go; do not collect $200.5 points
-
Hi folk's,tracks added and after a dark wash a dusting with light earth the whole thing now needs a matt coat.5 points
-
I didn't realise it had been so long since I last updated this thread! I have been slowly nibbling away at her and she is very much Helldiver shaped now. The fuselage halves went together without any issues at all and hardly any clean up required, the bomb bay doors were a different matter though as they come designed to be displayed in the open position complete with some of the framework for the inside of the bomb bay as part of them. The instructions on where to cut them to build them closed are not as clear as they could be with an element of best guess needed, the stbd side of mine fitted pretty well but the port one had a nasty gap where it joins to the fuselage which I filled with some plastic strip and filler, of course being the idiot that I am I haven't taken any pictures of any of this at all. The wings and tailplanes were a good fit but some filler was required and I decided that having a better fit at the top and filler applied to the undersides was the way to go, so that is what I did, fortunately it only needed a smear of PPP to close the gap. I also sorted the pilot's sliding canopy by sanding away the extra framework associated with earlier marks of the Helldiver, I used various grades of micromesh after the initial sanding and after a dip in some Klear it looked pretty good, it has now been masked along with all of the other clear parts and given a coat of interior green followed by a coat of chrome. The chrome was applied at the same time as I applied it as an over all coat for the rest of the model so that after I have applied the gloss blue I can weather it back in areas of wear and tear just like the real thing. Also just like the real thing I shall be applying some zinc chromate yellow to the areas of high wear so that when I weather it back there will be a mix of yellow primer and metal showing through. As it stands at the minute she just has the metallic layer applied so I have taken a couple of pictures that show her in this state, starting with the upper surfaces and the engine cowl; And one of the under sides; Hopefully you can make out the extended area of the bomb bay at it's front which is one of the features of the -5. I hope to get the yellow primer on tomorrow after giving the metal a slight polish to even it out, I may even apply some Klear to help protect it. I promise to keep the updates more frequent too, along with the pictures. Thanks for looking in and a usual all comments and criticisms are gratefully received. Craig.5 points
-
There are far worse things than sitting quietly waiting for a journey. I used to find sitting resting my eyes allowed time to lapse gently with hardly any stress. I did sit in one on Majorca airport whilst Mediterranean skies decided whether to erupt even more spectacularly en route to Ibiza one year. After three very hot hours our Spanish hosts decided to let us off the airliner if we had our wallets (unspoken but obviously why they allowed us forty five minutes in the Airside hospitality) Then after the forty five minutes hustled us back into the 737 and flung us off to Ibiza where we spent the whole evening downing copious quaffities of San Miguel watching purple lightning flashes light up the entire southern sky. I would take sitting awaiting your slot over that trip anytime.5 points
-
Decals & sprues pics Source: https://www.facebook.com/groups/MilitaryModelingSRG/posts/2931264040422800/ V.P.5 points
-
Cor. I had to do a Search to find this thread; and even then it was on page 2 of the search results. I dunno; you turn your back, get ahead with work so you can go on holiday, go on holiday, catch up with work after you've been on holiday, do bits and bobs on the model that aren't worth posting about - and then a whole month has gone by. Anyways. I think I've now done enough bits and bobs that it may be worth troubling you with a post. Of course it might be a waste of your time but caveat emptor as the saying goes I was surprised (this being a Tamiya kit - albeit an old one) to find that the oil cooler fairing didn't fit very well into the wing, but rather stood somewhat proud with a visible step all the way around: I leapt on this as a task within my skill set and a few minutes sanding-down and a better fit resulted: The carburettor intake was also a rather ham fisted effort that looked curiously like not much at all when stuck together: But liberal sloshings (technical term) of TET melted the two bits together and careful carving with a scraper produced a smoother looking result. Flitting about for something to do I had another look back at Giorgio's @giemme build. Giorgio thermoformed a new rear cockpit transparency and fitted a separate reinforcing strut behind the headrest. Looking at the kit part and the unconvincing moulded-in reinforcing strut I realised I'd have to do the same. But I couldn't face it just then so went on to something else instead..... Undercarriage legs. The kit ones seem nicely enough moulded albeit that there were inconvenient mould lines to scrape off (aren't there always) and some drilling out to do. I primed them with gloss black and used Alclad chrome on the fescalised section of each leg: And aluminium for the rest; plus a black oil pin wash. As to the tyres, I micromeshed back the (to my eyes) over-prominent 'Dunlop' logos and airbrushed them Tamiya Nato Black (which I lightened further) and drybrushed 'em. The hubs were painted in Alclad aluminium and also given a black oil pinwash. So I've now got a kit of parts: That do the job: Whilst sloshing (still a technical term) the Alclad aluminium about I thought I'd have a practise with the this chipping fluid stuff used so spectacularly by Crisp @Ex-FAAWAFU on his P38 before he went on holiday to Devon and then did in his tendo calcaneal. Take one Rotol spinner; prime it black and add Alclad aluminium. Spray on the chipping solution (the stuff I have is from Mig Ammo - I can't remember whether this was the stiff Crisp used). Which I didn't find easy as it tended to bead. Add some pre-shading so as to get full money's worth from paint techniques generally better handled by the likes of Johnny @The Spadgent Paint the blades - which Tamiya helpfully moulded all together on the sprue (don't be fooled they have to be separated from that centre bit of sprue before fitting). Spray the spinner with Mig Ammo 'Sky', wet the spinner and proceed to chip followed by a gloss coat, oils and matt coat. I think the result is aesthetically pleasing. But I went a bit too 'paint worn off the nose of Jaguar-drop tanks' on the tip of the spinner as you don't really see any paint abraded spinner tips on contemporary photos. You'd have thought that paint technology would have been better in the 80's than the 40's wouldn't you? I may have to squirt (technical term) a bit of sky on the spinner tip later on. I should say that (thankfully) the contemporary photo's I've seen of 4th FG spitfires don't show any of the large 'Rotol' decals/marking on the prop blade roots that you (often?) see; which is just as well seeing as I haven't got any such decals. And so back to the rear transparency. I knocked up the headrest support/longeron out of a bit of 0.5mm square and 0.25 x 0.75mm plastic strip: And that fitted nicely. It'll have to be painted aluminium (note to self do not stick the transparency on without painting it aluminium!!!): And then I couldn't put off making the transparency any longer. I started by filing off the moulded-in headrest support from inside the kit transparency and then using pouring resin to make a buck from the inside of the transparency. Of course by this time Alan @hendie had reminded everyone what a pain thermoforming with PETg over a resin buck was. So I left the dental vac machine on the shelf in the garage and reverted to the traditional method espoused by Bill @perdu (see I do listen Bill). Strips of 0.5mm PETg warned over a candle and pulled over the resin buck, Rather remarkably - beautiful clear results 3 times out of 3. Of course it's a small and simple shape and the PETg only needed a minimum of heating to form around the buck. But hey; I'll worry about larger and more complex shapes again next time I need one.... Trimmed with scissors and the sides sanded flat: And it looks like a success. Some of the internals are actually visible! Even a radio shelf!! And the head rest support/longeron. Thankfully the support and transparency are only dry fitted here (note to self again: do not forget to paint the support aluminium before gluing on the transparency!!!). And there she rests for the time being. No major step forward but slowly accumulating bits and bobs.....5 points
-
On 3 February 1953, NAA began design of a two-seat F-86F as a high-speed T-33 trainer replacement. Initial work under North American Aviation (NAA) model number NA-204 began on 8 April, the company proposing that modification of an F-86F-30 aircraft could meet the needs of this project by splicing-in a 63-inch forward fuselage extension to accommodate a second tandem cockpit with dual flight controls. The resultant change in centre of gravity would require the wing to be moved forward eight inches, with longer wing-root trailing edge fairings blending into the fuselage just forward of the engine break line. Instead of a sliding canopy, the trainer would use a long one-piece clamshell item, with just one bracing frame at its midpoint. Cockpit instrumentation was similar to that of the F-86F but NAA added a company-developed intercommunications system as well as an omni-directional range receiver, instrument landing system and direction finder. The instrument consoles in both cockpits were described as, “…lower and wider than in the F-86F”. In most other ways, the conversion would use standard F-86F-30 components but one key difference was the use of a narrow-chord, slatted wing in order to take advantage of this item’s better stall characteristics. The trainer was planned from the outset to have twin 0.50-calibre machine guns for the gunnery training role, but the first machine did not have them installed and instead was ballasted to maintain the correct centre of gravity. For pilot access and egress, the TF-86 retained the combined ammunition door/cockpit step feature of the F-86F but added a second, similar item further aft near the wing-root to gain entry to the aft cockpit. The forward step would also provide access to the single ammunition box per side, placed at the aft end of the bay and feeding what would have been the lowermost machine gun on a standard F-86F. On the first prototype trainer the ammunition boxes were not installed and this bay was instead reserved for electrical inverter components. In practice the integral steps were rarely used, and a pair of F-86D boarding ladders were usually on hand instead. On both sides of the forward fuselage, duplicated spring-loaded hand-holds and kick steps were also installed, but again were infrequently used. NAA’s design and modification proposal was forwarded to Air Materiel Command on 9 July 1953 and two months later the USAF authorized conversion of an F-86F-30 to the tandem two-seat configuration. The prototype aircraft, s/n 52-5016, was assigned under Air Training Command Project 4F-56, a 1954-Fiscal Year tasking, even though the conversion was completed in December 1953. The trainer received the Air Force designation “TF-86F”, though NAA only ever marked the aircraft “TF-86”. The aircraft was initially marked "Trans-Sonic Trainer" but soon re-marked without the hyphen and second 's'. The TF-86F made its maiden flight on 14 December 1953 with Ray Morris at the controls, and the aircraft generally performed on a par with the F-86F, having similar top speed, climb rate and ceiling. Early in its flight test campaign, the TF-86F displayed a lack stability in yaw and so the area of the vertical fin fillet was increased and a novel fence-type device was installed on the fin itself. Meanwhile the Air Force had decided to evaluate the TF-86F in three different roles; as an instrument and transition trainer for F-86D interceptor pilots; as a fighter-bomber trainer; and as a T-33 replacement. This is the revised fin and fence on the #1 TF-86F: Formal evaluation was scheduled to begin on 1 April 1954 but the programme suffered a severe setback on 17 March when Joe Lynch took the aircraft out to Nellis AFB in order to demonstrate it at the start of a nationwide tour of USAF bases. On just the aircraft’s ninth flight, and while pulling into a slow roll on takeoff from Nellis, Lynch lost control of the trainer and the aircraft crashed and exploded, killing its pilot. It was later determined that the fuel tanks had been fully-filled by Nellis personnel rather than partially-filled as Lynch had requested. The extra weight had caught him out on take-off. Nevertheless, on 23 March 1954, less than a week after Joe Lynch’s crash, the Air Force authorized conversion of a second F-86F to the trainer configuration, this time under the NAA model number NA-216. To effect this conversion, the final F-86F-35 model (s/n 53-1228) was pulled from the production line and received a similar rework to the first trainer, though lessons learnt in the brief test career of the first aircraft were put to good effect in the second machine. This time, to counter the aerodynamic effects of the lengthened forward fuselage, an extension to the vertical tail fillet was made and a new ventral fin was fitted beneath the rear fuselage. Armament was also installed in this aircraft, comprising the originally-planned pair of .50-calibre machine guns and the narrow-chord, slatted wing was again part of the initial configuration. Delivered on 24 June 1954, the second TF-86F made its maiden flight on 5 August and following initial NAA test flights was fitted with an F-40 wing, making its public debut at an airshow in September. The aircraft was then sent on the USAF tour which had been planned for the #1 machine, and then returned to NAA for further testing. On 31 January 1955 the aircraft was assigned to the 3595th Combat Crew Training Wing at Nellis AFB, but just a week later the Air Force announced that no production orders for the trainer would be forthcoming; two-seat F-100s would instead fill the main requirement. On 10 March 1955, the TF-86F was further transferred to Edwards AFB for use as a chase and photo ship and following a successful career there it was flown to McClellan AFB for depot work on 20 November 1958. It was reclassified for storage on 21 July 1959, declared excess one month later and scrapped in March 1961. The No.2 TF-86, with a longer career than the first machine, had a number of configurations and colour schemes over the years, as follows: 1. At the time of its roll-out in June 1954, the aircraft was natural metal overall, with standard USAF markings of the time, including the “U.S.AIR FORCE” script on its vertical tail. There were no special markings at this time. 2. By the time of its first flight in August 1954, the No.2 TF-86 had gained a large instrumentation boom on the left-hand wingtip. Again, there were no other colourings or special markings on the aircraft. 3. Soon after its first flight, 53-1228 gained the script “North American TF-86 Transonic Trainer” on both sides of the nose. Colour of the text was red with a black outline. 4. By the beginning of September 1954, the aircraft had been fitted with a extended span, extended-chord “F-40” wing and the instrumentation boom on the LH wingtip was removed. Curiously, the cranked pitot probe on the RH wingtip was transferred to the F-40 wing. Large drop tanks were also installed at this time. It appeared at an airshow at Dayton, Ohio in this guise and was also demonstrated at a number of USAF bases. 5. By the beginning of December 1954, the “North American TF-86 Transonic Trainer” script was removed. NAA conducted a number of tests on the aircraft at this time. 6. On 31 Jan 1955 the No.2 TF-86 was transferred to 3595th CCTW at Nellis AFB and gained a Crew Training Air Force badge on either side of the tail fin, with ‘NELLIS’ script above the outer circumference. 7. On 2 March 1955 the trainer was taken over by the 6515th Test Group at Edwards AFB and the Nellis insignia was removed. 8. Soon after moving to Edwards AFB, the ‘U.S.AIR FORCE’ script was removed from the vertical tail and placed in larger letters on the fuselage sides. 9. Still at Edwards, the aircraft later gained a small pale blue chevron-type flash on the vertical fin, over which the Air Force Flight Test Center badge was applied. On the mid-fuselage, the ARDC badge was painted. 10. A minor variation to the latest colour scheme, by 1958 the TF-86 had received a white intake ring with a black band around its midpoint. The gunsight radar fairing also gained two concentric black rings around its periphery. 11. Penultimate version of the Edwards AFB colour scheme retained the ARDC and AFFTC badges but replaced the small, pale blue fin flash with a larger, dark blue version. Concurrently, the intake lip was painted red, this colour sweeping aft and blow the fuselage in a curving arc towards the front edge of the nose gear main door. The red area was bordered in a thick white line. 12. Final TF-86 colour scheme was the same as version 11, but now the aircraft’s “last three” (228) was applied in large black figures just above the machine gun blast panel. This is the version shown here: I aim to model the #2 TF-86F in configuration No.3; a short-span wing, Transonic Trainer script, drop tanks and instrumented boom on the LH wingtip. Starting point will be the Airfix 1/48 Sabre 4, or more accurately two of them. So the kit parts will need to be cut in order to achieve the longer, twin-cockpit fuselage and the wing will also need to be moved forward: And less of a challenge, the wing fence will need to be removed, the wing narrowed in chord and the slats scribed or maybe scratch-built: the wing fence is hollow and has a gap wchich will need to be filled too. Update soon I hope...4 points
-
Well, they didn't buff out and masking was required. Fortunately I hadn't reset the circle cutter after I cut the new backplates so I just cut two circles in Tamiya masking tape and used the outside pieces to mask off the outer edges of the brake drums. After respraying they were drilled and had brass pins added. Today I reattached the crossmember and added the new brake drum assemblies. Some aluminium rod provided the basic materiel for steering mechanism parts, which were bent, squished, and filed to shape before getting a coat of white paint. Those were also attached this afternoon meaning I have actually made some progress today! Here's where we sit as of tonight. (Tyres are still been "tweaked" and should be ready soon.) More importantly, the stub axles are now aligned correctly with the crossmember! The rest of the steering assembly will wait until close to the end of the build as I will only break it all off if I fit it now. Next job is to finish the tyres and mount them on the rims, then it will be the turn of the radiator and bonnet side panels. Thanks for looking in, stay safe! Ian4 points
-
Quick Update, I’ve just finished the funnel top. Started with drilling out the mini stacks. I think brass ones are supplied in the advanced kit, but they look fine after drilling. Just out of interest, I’ve got this great tool that makes the little attachment point nubs disappear, it’s basically an electric toothbrush with a sanding circle. It works really well. Highly recommended (I don’t have any ties to the company obviously!). And on to the stack, very fiddly! I was expecting a big Lego-like click together arrangement in this scale, but the brass is so fine it’s crazy (Pontos) and a lot of parts that bend just by looking at them. Praying I don’t drop this, it’s only held together with my ‘Thin Blend’ white glue. Thanks, Guy CEO Mr. Hobby G Tools 😆4 points
-
Thanks craig , Cheers all, I've given it a first coat of shiny silver and I'll mask off some panels for a bit of contrast next Hole in the bottom for a stand4 points


.thumb.jpg.d17ff607fc7e89ed057e63fcb6f2a888.jpg)


.thumb.jpg.d63052df9f30de247fb49bf44f442289.jpg)


.thumb.jpg.cfc129272ffec824439b15e6013d5952.jpg)


This leaderboard is set to London/GMT+01:00