Leaderboard
Popular Content
Showing content with the highest reputation on 14/03/21 in all areas
-
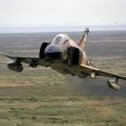
this time a Chinese Interceptor! not too many out there in modeled form, although Trumpeter did a great job on bringing them along! (I am desperately missing a Spey engined JH-7 Flying Leopard though! ) J-8B Finback 敵 機 PLAAF Famous for unsafely making an EP-3 Spyplane emergency-land at Hainan Island... Trumpeter 1/48 Metal landing gears from Up-Wind models no more aftermaket available.... simple as that! the kit fits great, detail is good! instructions could be a bit better in some areas, the landing gear assembly and some doors are a slight puzzle, as are the pylons and missile/ rocket / tank combinations. not helped by the fact that some of it was done for the J-10 kit and that all parts for the D/F are aslo included. WIP in the very recommendable group build section and the about to finish Interceptors GB: quite a beast! like 2 MiG-21s or one upscaled.... I think it also uses 2 MiG-21/ J-7 type engines... will put her next to some more well known planes for getting an idea.... thanks for your interest and thanks for the great BM GB community! Werner PS: I already wonder what you say about my Chinese (at least I hope that!) characters above31 points
-
Hi Guys, My latest work F-15DJ 82-8093 made from Hasegawa kit and spent more time masking than building. Cheers26 points
-
Hi, everybody! This is another example of a weapon from the "Wunderwaffe" series.23 points
-
Hello Here is at least my first kit of the year with this 1/72 Modelsvit Dassault Mirage III B. I chose to build her as a/c No 203 #2-FG, a natural metal two seat trainer from ECT02/002 in 1974. This kit is easy to build with very nice and fine parts. The only trouble went when I tried to insert the well detailed injected cockpit inside the fuselage. Actually I had to sand on the sides of the cockpit and even the position of the closed canopy is not perfect. So it would be better to make her with this canopy open. The paint came from Duralumin and Steel Alclad range. Every part came from the box. I think I will build some more in camouflage paint later. Comments are welcome. Patrick22 points
-
Hi Folks, This is the old Monogram kit I have just finished as a RNZAF Harvard MkIII, NZ1065. I have used Colourcoats paints with Ventura decals. This is actually my second attempt as first time around I was really not happy how transparent the white elements of the decals were. This time around I masked and sprayed the national insignias and just used the red portion with the ferns. I have made a small attempt at re-scribing, with another couple of Harvards on the go I'll be doing a bit more of it. Of interest the cockpit is a dark gull grey which they seem to have been painted with at some point.22 points
-
Hello fellow modellers, Here you are my Spitfile Vb trop, reproducing one of those given to Italian Co-belligerant air force in 1943-44. The kit is the excellent Airfix Spitifre mkV b recently re-issued. I just used the parts for the tropical version that are still on sprues instead of the standard ones. I've also used Tauro Model decal sheet that includes options to make Spifires, Macchi 205 and Airacobras all in italian colours. To paint the model this time I used Lifecolors Acrylics instead of my usual Tamiya and I have to say that they are not bad at all. Finishing has been done as usual with Tamiya spray followed by oil wash and pastel weathering. Enjoy pictures and please feel free to comment. Cheers. Andy21 points
-
Hallo This Seafire is from Airfix kit with some etched parts. The roundels are sprayed. So, have a look. Happy modelling20 points
-
Afternoon all! Here is my latest build, the very nice Airfix Defiant in nightfighter mode. I can heartily recommend this kit as it went together with no fuss and looks the business to boot. It is all brush painted with Revell Acrylics. I used a Yahu IP, Resin seat with harnesses, and paint masks for the canopy/turret. The aircraft is from 264 Squadron based at Biggin Hill 1940/41. TFL, Cheers Greg19 points
-
Hello. This is my rendition of one of the CR 42 used by the Regia Aeronautica during the short lull on the channel during the Battle of Britain. I helped myself with pictures of the beautifully restored CR42 of Duxford to get the proper colors right (I hope). Following the serial number, the plane could have different colors. The one who used (for years, and I did) the yellow numbers now know they were blue, so I consider using the decals from Italeri as the Silhouette does not like the white or yellow or light blue when it comes to scan those! Plane is from the 85° Squadriglia 18)Gruppo, based at Ursel Belgium . Thanks for looking, cheers. DDFC5DE9-6CD2-4C20-B380-BA88C70A8FAE_1_201_a by jean Barby, sur Flickr DCD77D15-17C8-4D30-A008-940FABCD7501_1_201_a by jean Barby, sur Flickr C20050B8-DE7E-4074-B7EF-40C1A0284259_1_201_a by jean Barby, sur Flickr 1782DAE0-D814-4036-8F86-2DF791BA3FA8_1_201_a by jean Barby, sur Flickr 235C6088-18CF-4EF2-B4B5-FB2C3EAD96BD_1_201_a by jean Barby, sur Flickr 1840B178-908F-49B2-BFEB-52EA820C2BF7_1_201_a by jean Barby, sur Flickr FCD964A9-5AF6-4F43-915B-3B6D29B98522_1_201_a by jean Barby, sur Flickr19 points
-
thanks Bigdave, struggling on is what I do. thanks Giorgio. I know th white background is not ideal, but it's the best thing I've got for working on delicate parts (fnaar). I've dug out an alternate thingy later on in this post thanks CC, the fight was not over I think that's what Johnny is using over on his Hind thread judging by the latest photos thy do test ones patience don't they? Ah! so it wasn't something I had done then? That's good to know was that during or just after you'd finished it Bill? It has turned out a bit better than I had expected given the latest fightback thanks Johnny. I'm more partial to Gentleman's Relish mesel Anchovies is the secret ingredient in my famous burgers y'know Wapiti Wapato To my surprise the clear nylon line worked out better than expected - see later photos, if you can make it to the end Too kind Ced. Maybe you're still suffering those side effects? Well, the Audax took a battering today. Battred into submission but it didn't go down without a fight, and in the process I have confirmed my absolute hatred of cyano glue. Damn stuff never works when you want it to does it? I spent the best part of an hour of my life fighting with this thing trying to get two lengths of nylon rigging to attach to the PE brackets on the rudder. Eventually I gave up and opted for two lengths of stainless wire instead as it was th only way this was ever going to get done. Thankfully they're pretty much hidden under the tail plane so it's not very noticeable when it's not playing dead. Then the tail skid went on. and lasted for about an hour before I broke it off again. While she was lying on her back I remembered to fit the one thing that (supposedly) makes this a different aircraft than a Hart... the hook. then I came across this blighter. Oh great. This gets tuck on top of another piece of PE hiding under the top wing. I'll leave that until later methinks. It's getting close. I can feel it in my bones. All the rigging is done so all that's left now (I think) is sticking on all the leftover bits such as these exhaust brackets. I had completely forgotten about them. I really should have labelled them all those months ago. I think this is the right order. Oh, I stuck more bits on top of the wing while you weren't looking Then it was just a case of coaxing the exhaust through all three brackets without knocking any of them back out again. That only took me several attempts. It was the same process/story with the starboard exhaust though I did have one scary moment when I finally slotted it into place and realized it was too short then realized that I had mistakenly used one of my earlier test pieces. Getting it back out was more difficult than putting it in but the right exhaust went in without too much of a fight. Meanwhile, back at the tail end... Oops! Dammit. With the exhaust in place the airframe takes on a whole different look, and starts to look like she means business now. Once the starboard exhaust was fitted, there was no alternative but to fit that long skinny thing for the pilot to aim through. This time thankfully the cyano sort of worked for me. Windscreen got fitted too. A quick check to make sure that the exhausts are equally set out from the fuselage. I'm counting this as good. Almost at the finishing line now - the aerial rigging was applied using EZ line this time. I'd had enough of nylon line and figured the aerial cables would most likely have been black anyhow. I managed to thread two ends of EZ line through a 0.5mm tube which formed a loop which allowed me to use a single line to each of the wing mounts while a third line was looped in when I pulled the original loop tight. (I'm not sure if that makes sense, but it's what I did, apparently) Lastly (if I'm not mistaken), the scarff ring and machine gun was added I was wrong! I still had to add the propellor. Giorgio, just for you I managed to find a piece of warped ply that I could use instead of that white cushy stuff. I'm very pleased with how the rigging has turned out. The clear line suggests at being steel without being too much in your face. I remembered right at the very end, that I still had to paint the brass tube on the aerial rigging, and also add a tail light. Had enough yet? Almost there now. These next three shots are my favorites. I think they capture the look of the Audax well. All done. At last. I'll just round this off by stating that this AMG kit is a dream to work with. The quality of the molding and detail was superb as was the engineering and fit of parts. It's a real shame they don't do more aircraft in my area of interest as I'd snap them up without thinking twice. My current display cabinets are full and I have nowhere to put the F2b and the Audax so I've been searching for additional storage and just missed out on a great display cabinet by about 30 minutes today. First world problems eh? What's next on the agenda then? Well, over the last year in between stalled builds and wotnot I began work on another build so I'll be starting a thread for that shortly. I've already completed a reasonable amount of work on it so it shouldn't drag out the way my threads normally do. until the next time.18 points
-
Hi Further to @bigbadbadge 's lovely Pawnee here is one straight from the KP box. As Chris has said, the kit is missing a few things including additional bracing on the wing struts. Pinback17 points
-
So armour build number 9 is complete and I'm very happy with the way this one has turned out. The kit dates back to 1974 so doesn't have the quality that is available nowadays however I have a soft spot for these classic kits and intend to build a few more in the future. I did have an issue with the tracks and sprockets supplied with the kit but a kind donation of spare parts from @M3talpig allowed me to finish off the build thanks Steve much appreciated 👍. Here's some pic's of the finished build The last pic shows the M3 Lee alongside the Sherman i built a while ago. It's an interesting comparison i think 🤔 So now it's time to move onto the Pzr III GB I think it's about time I started work on this project 🙂. Thanks to everyone who followed the build I appreciate your interest and comments back soon 🙂👍17 points
-
A 1/48 scratchbuilt 1917 quadruplane Supermarine PB31 aka the Nighthawk. Designed to patrol for long hours and attack Zeppelins as they came in to bomb England, two prototypes were commissioned, one was definitely built and flown. The design wasn’t approved for service but it has a lot of advanced features for its day. Doesn’t get much odder than this except for the Oertz W6 I’m intending to build for the anything but injection GB17 points
-
Had this mostly built gathering dust on the shelf for a couple of years. If it wasn't for the fact that this was mostly built up, it was too advanced in build to enter into the Interceptors GB but since as I'd just done the MiG, I thought it was only right that I should complete its western counterpart Finally got it done & at last got to grips with Alclad as opposed to the Vallejo Metal Colour on the MiG. Added another pic of them both side by side for size comparison & comparison between the metal finishes. So this is the Sword kit which is a short run kit & should be treated as such. The seam lines on the underside were a pain to ensure that they didn't show up after priming. There was a lot of filling & priming involved but the underside join still faintly shows through. Sword provides a resin insert for the two Avon exhausts which are quite nice only once in, they're not a perfect fit. Either a fine shim inbetween the fuselage halves is needed, or a little bit of filler around the resin is needed. Talking about the resin exhaust, would have been good if they had produced a resin nose ring. The kit halves around the nose were short shot, so it would have taken some sprue filler to correct that, so I added the Quickboost resin nose ring for the Trumpeter kit which fitted exactly & improved on the overall length of the model. I also find that Sword kits in 1/72 have very shallow fine panel lines, so I usually give them a going over to slightly deepen them. Decals are a mix of the kit decals & used some stencil data from the Airfix F.6, only those that applied, similar to what went on the F.3. Thankfully the Sword tail fin markings actually fit the tail fin which was a bonus as a lot of the time with large dcals, they're not always exact in dimensions. Everything else is just out of the box. First success using Alclad over their gloss black base. Used some Vallejo Metal Colour for picking out some individual panels. Used Ammo Mig red for the spine, custom mix Klear gloss & Ammo PLW. English Electric Lightning F.3 XR719 D Wattisham Summer 1965 And a couple for size comparison. Thanks for looking! Martin16 points
-
I assembled the Meng 1:35 Kit ... ZSU-23-4V1 "Shilka" Shangai Cooperation Organization "Peace Mission 2014" I hope you enjoy my work 🙂 The WIP can be found here: by Rodolfo Masti, su Flickr by Rodolfo Masti, su Flickr by Rodolfo Masti, su Flickr by Rodolfo Masti, su Flickr by Rodolfo Masti, su Flickr16 points
-
Hello all; Here’s my recently completed Lancaster, the RAAF’s 460 Squadron G-George. The WIP thread is from the current GB and is here; I must say I enjoyed it a lot more than I thought I would and a lot of my preconceived ideas and prejudices about older tooling kits were knocked down. Here’s a few pics of how he turned out, there’s more about the build as well as George itself on my site. Cheers.15 points
-
1/72 Revell F-101B Voodoo, TDY to 13th Bomb Sqn, Ubon RTAFB, 1970 - Vietnam War My main interest is the Vietnam War and the many aircarft that operated there. Coupled to this I also like to throw in a curve ball every now and again. This Voodoo is one of them! This is the Revell F-101B, airbrushed using Tamiya paints, spare decals and a Flory wash to highlight all the lovely surface detail. A bit of 'History'. In order to further reduce the flow of supplies from the North via the Ho Chi Minh Trail, USAF planners converted a F-101B to be used in the night attack role against ground targets. Using 4 x modified AIM-4H missiles in the air to ground role this unique Voodoo became the very first Tank Plinker. Working alongside the B-57G out of Ubon RTAFB, the Voodoo was moderately successful but ultimately did not impress enough to warrant more airframes being converted. Cheers all, Phil15 points
-
Having built the Airfix 0-2A Skymaster when I was a kid, I just had to get the ICM's 1/48 kit when it came out. The kit is well detailed and goes together well. I used Eduard's etched seat belts which really look good. I heard that the main gear is a weak spot so I bought the excellent Aerocraft Models brass undercarriage set. If anyone has this kit be aware that the decals let it down - they are so thin that they fold up at the slightest touch. I ruined three of them but luckily found a couple I could adapt. I couldn't do anything about the other one . I took time detailing the radio rack as can be seen below: However, even with all the windows on this aircraft you can't see much of the detail inside! Cheers Mick15 points
-
Model represent the Po-2 used as coherent aircraft, belonged to the 1-st "Normandia" Fighter Regiment (from November8, 1944 regiment named "Normandia-Nieman") from 303-th Fighter Avision Division, 1-st Aerial Army ofthe VVS RKKA, Monastyrshina airfiled, september 1944. Plastic from ICM with no fit issues, with Eduard PE set for interior and exterior as additional. It's my first biplan in 1/48 scale and i'm thinking photoetched turnbuckles is a quite usefull additions at least in this scale IMHO. Engine from North Star Models, it's another story. Realy it's a model inside the model. M-11 in 1/48 scale have a fine quality and despite the amount of a small parts (48 parts to be exact) i had not any troubles during the build. It's the best M-11 engine in 1/48 scale to my mind. Decals from Begemot. On the final photo, the original spark plug from M-11 engine near the model. Thanks for looking.15 points
-
Hi Folks Finally finished in time, a bit rushed in places. Just glad to finish the GB on time. Lightning F6, 11 Sqn, RAF Binbrook 1986 Kit: Aeroclub Lightning F6 Decals: A mix of Aeroclub/Airfix Extras: Airfix Missiles, Flightpath probe A bit of work to build but Great kit, better proportions than the Airfix kit. Darren14 points
-
Saab J-35Ö Draken 351401/09, Fliegerregiment 2, 1 Staffel Österreichische Luftstreitkräfte Zeltweg, Austria, 2003 Kit: Hasegawa 1/72 "Austrian AF Farewell Special" Decals: Taken from Mistercraft kit D-89 "Alpean Draken" Build Thread: https://www.britmodeller.com/forums/index.php?/topic/235082965-saab-j35a-draken/14 points
-
Saab J-35A Draken 36, F 16 Wing Uppsala, Sweden, 1960 Kit: Hasegawa 1/72 "Austrian AF Farewell Special" Conversion Kits: Aires 77202, Maestro Models 7202 & 7222 Decals: Flying Colors general sheet, Numbers from Tarangus Lansen Build Thread: https://www.britmodeller.com/forums/index.php?/topic/235082965-saab-j35a-draken/14 points
-
F-106 DELTA DART 101 Fighter Interceptor Squadron Mass. ANG. 1985 Hasegawa 1/72nd14 points
-
Kit: 1/48 Revell Eurofighter Typhoon Subject: Eurofighter Typhoon FGR4 - ZJ917 - '917' - IX (B) Sqn, RAF Lossimouth, 2021 - QRA fit Details: Modelled as per reference pics from interweb, books etc Misc: Mr Paint paints, Mr Color paints, Vallejo paints, Oils, PJ Pilot, various decal sheets Build Thread:14 points
-
finally finished! did a quick start and then a long pause, mostly due to other GB commttments thanks mods for the extension! so you get here a Chinese Interceptor! not too many out there in modelled form, although Trumpeter did a great job on bringing them along! (I am desperately missing a Spey engined JH-7 though! ) J-8B Finback PLAAF Trumpeter 1/48 Metal landing gears from Up-Wind models from Taiwan! (better than SAC, imho, but also not really necessary. maybe it adds some stability to the generally flimsy gear!) no more aftermaket available.... as simple as that! the kit fits great, detail is good! instructions could be a bit better in some areas, the landing gear assembly and some doors are a slight puzzle, as are the pylons and missile/ rocket / tank combinations. not helped by the fact that some of it was done for the J-10 kit and that all parts for the D/F are aslo included. whatever, I'd do a second, grey one with modern weapons one day! WIP: thanks for your interest and thanks for the great BM GB community! Werner14 points
-
Douglas F4D-1 Skyray Bu No 130747, Naval Ordnance Test Station, China Lake Carrying a NOTS-EV-1 Pilot rocket as part of Project Pilot 22 August 1958 Kit: Tamiya TA60741 Decals: Starfighter Decals SFD-72156 Resin parts: Starfighter Decals SFDR-7221 Build thread: https://www.britmodeller.com/forums/index.php?/topic/235082906-project-pilot/13 points
-
Fairey Fulmar MkIi BF782 of 806 NAS from HMS Formidable during Operation Ironclad, the invasion of Madagascar in August 1942. The Fulmar shot down more enemy aircraft than any other FAA aircraft during WW2 and was a very successful interceptor in the Med campaigns and convoys. Airfix (Smer) 1:72 kit, finished OOB except for seat belts, brush painted with Xtracrylix Extra Dark Sea Grey/Dark Slate Grey over Sky finished with Liquitex matt varnish. Transfers from the DP Casper Ironclad sheet.13 points
-
Convair TF-102A-45-CO Delta Dagger 56-2367, 57 FIS Keflavik AFB, Iceland, 1969 Kit: Meng MMDS-005 Conversion Kit: Xtraparts XP003 Decals: Xtradecals X72165 Build Thread: https://www.britmodeller.com/forums/index.php?/topic/235082968-convair-tf-102-delta-dagger/13 points
-
CURTISS P-40B WARHAWK 15th Pursuit Group, Wheeler Field, Hawaii. Dec. 7th 1941 Airfix 1/48th13 points
-
Here’s my attempt of building Das Werk’s 1:32 Ju Ef-126 "Elli"/Ef-127 "Walli", I opted to build the double Argus engined Ef-126. This is Das Werk’s first foray into aircraft, all mistakes are down to me, I can highly recommend the kit it’s a very reasonably priced, large scale, unusual subject that offers 3 types, EF-126 single Argus pulse-jet, EF-126 double Argus pulse-jet or EF-127 Walther 509C1 rocket powered versions. Also included in the kit are two different types of display “stands”, either a factory cradle or take-off/taxi trolly, either of which could be used in a diorama? I also purchased a couple of aftermarket items, Uschi van de Rosten woodgrain decals, specifically made for this kit, and a set of “generic” Luftwaffe HGW ‘fabric’ seat harness. Paints used were AK Extreme metals, Mr Hobby, MRP and Tamiya. …you can see the build log here… until next time as always, any suggestions, criticisms or comments will be gratefully received. rgds John(shortCummins)12 points
-
Sea king with lights and moving rotors. Tail and bottom leds flash. Other lights include the front ones and a right and left navigation light. Usb charge with an internal lipo battery. Finish isn't great as I find these helicopters difficult with making windows. Lights don't show up well as too bright outside. Will do one when darker. After thought. Very difficult to easily access on off switch when rotors running.12 points
-
Beautiful 3D printed kit from @One Man Model Toshihiko Shimizu The main challenge is to get rid of surface texture, especially on corrugated areas10 points
-
My first completed model of the year. I build really slowly so this is quite the milestone for me. Some small issues that I'd go back and fix if I could, but at this point I'm just keen to move on to the next kit 🙂10 points
-
Background: Much to my surprise I realised that despite having completed some 97 car model kits at this point, I'd never done a rally car. I'd certainly bought quite a few, but that's only almost the same thing. So what better place to start with rally cars than a Subaru Impreza, this kit having sat in my stash for some 8 years. I'd bought this particular Impreza as I do like the "bug eye" version, and the kit has driver/co-driver figures. There's a choice of car 10 - Mäkinen, or car 11, Solberg. Mäkinen in an Impreza? Weird. Also the Solberg/Mills pair have more interesting helmet designs, so car 11 it became. Pros: Everything you'd expect from a Tamiya kit. Great proportions, great fit, loads of details, clean moulding and a joy to put together. Not to mention window masks, a few sticky plated parts for the mirrors and driver/co-driver parts. The gold wheels are a good finish and require no painting beyond the centres/wheel nuts. The body fits on and off the chassis with ease. Cons: The decals for the kevlar seat backs are bright yellow, the real thing is more like dark gold. The giant side decals are fiddly to line up and the swrt.com decals on the sills really don't want to stick. The front lip has only a tiny contact area to glue with. Also and typical for this kind of kit - no engine. Verdict: A great kit and I loved building it. Very recommended. Build notes: Built over the space of 5 weeks, Jan-Mar 2021. Painted in Tamiya TS-50, the only additions to the boxed kit are the PE bonnet pins, drivers seatbelts and some heat shielding and wiring on the interior. The mud is made from Pinnacle weathering powders mixed with Testors dullcote and applied with a toothbrush.10 points
-
Dear Colleagues Before I finish the Flyhawk Hermes (1937) by placing her on her own base, I decided to put her 'in harbour' to do a few photographs. I have assembled odds and ends for the harbour over several years to make an interesting backdrop. I think many of you will agree that Flyhawk make the nicest 1/700 ships if you want a pleasant build with sharp details. What is admirable is Hermes was the first ship in the world designed as an aircraft carrier from the keel up. You can't help thinking that the designers got the overall design right and the lines look in many ways remarkably modern. Hope you like it? Andrew10 points
-
This is my first kit completed in 2021, and took a bit longer than I intended it to (often the way). 028 by Dan Hardy, on Flickr Had it since 2004 when it was bought in a D-Day 60th anniversary set along with an M3A1 half track (built) and a Churchill tank (unbuilt). Really not a lot to it! 029 by Dan Hardy, on Flickr My intention was to do it straight out of the box, but I couldn't leave it, and decided to busy it up with a set of stowage from Redog, and a couple of jerrycans from the spares box, which are originally from a Roco Minitanks kit. Many thanks to @Natter for sending me a part to replace one that hadn't formed properly and was therefore unusable. So here it is, in all its tiny glory; 437 by Dan Hardy, on Flickr 439 by Dan Hardy, on Flickr 440 by Dan Hardy, on Flickr 444 by Dan Hardy, on Flickr 449 by Dan Hardy, on Flickr 445 by Dan Hardy, on Flickr 446 by Dan Hardy, on Flickr10 points
-
Here are some pictures of my Tamiya Spitfire Mk XVI in 32nd scale. I've made the big mistake of using the Aires cockpit in this build, which just complicated things unnecessarily, as the improvement in detail is marginal. As a result, the model was put aside and sat in the "shelf of the doom" for about a year, until I've decided to continue building it. The kit's engine lacks many details, so since I was planning to keep the nose side panels removable, I've basically scratchbuilt all the cables and tubes that were missing forward from the firewall. A lot of time was spent researching the engine area, as there many versions of the Merlin, and each one look a bit different. I gave up detailing the top of the engine, as the cowling would not close if I did that. The bottom also does not have many things to had. So I've just glued the top and bottom panels closed. All markings, except for the squadron shield on the nose, were painted using masks made in Corel Draw and cut in a Silhouette Portrait. Model and markings were painted using Gunze Enamels and Tamiya acrylics (roundels). Cheers, Ivan10 points
-
First off a bit of roof strengthening. Not pretty, but definitely required. I've also added some plastic card backings in places where the sanding will definitely start thinning the plastic: And the grille backing piece has been removed and the nose is now looking a LOT better! And this is how the DB5 body looks after its facelift; lots of 400-grade wet-or-dry later: Then marked out for the first cuts: Too late to go back now! Then the boot section too: And quickly taped back together to see how it looks: Then the floor too. I noticed that there's what looks like an insert in this piece (arrowed), and it is exactly the right dimension too. Strange. Still, makes that part easier: And the deed done. Next up - glue, tape, swearing and a 24-hour rest10 points
-
Thanks Chris, I'll go one further and say I can't imagine a better kit of the Gladiator being produced in the foreseeable future, plus it's been a nice vice-free build so far (appropriate digits crossed, of course, there's still opportunities to mess the whole thing up ) A quick catch-up; I masked the black section of the underside markings off: Also disassembled the engines (the main parts had been held together with Blu-tak for the base coat of black) and gave the cylinders a coat of Vallejo Metal Color Exhaust colour, the gearbox and pushrods got a coat of Klear to give them a fairly glossy appearance. The ancillary engine parts were added and were mostly Metal Colour Duralumin - the little strut parts look quite horrifyingly delicate on the sprue but as long as you fit them in the right places they are actually pretty sturdy: One area where I did deviate from the instructions were the air 'trumpets' and their brackets that fit in the lower half of the engine... ICM would have you build these as complete units then fit them, which I did and it worked fine, but for the second set I assembled and fitted the tube and brackets and then added the 'cone' part later. This just meant I didn't have to get the angles for the bracket and the top of the cone correct before attaching the trumpet and hoping it all looked right when it fitted. That said it was only easier on my nerves, the first one that was assembled then fitted worked perfectly well as it was. There was more preparing stuff for painting; the propellers were masked as needed and the tyres masked using the tape elements from the Eduard mask set. I don't usually bother with these but I'm glad I did in this case, they worked well. I also assembled the upper wing - on the Belgian Gladiator I left this in two halves until I had attached the rigging wires, but what I gained in convenience from that I lost in having to clean up the mating seam later and the gain wasn't really worth it. The central boss and rear faces of the Belgian Gladiator's Watts Propeller were masked and the forward surface painted in an unbleached linen colour (in this case I used Colourcoats Chamois from the Armée de l'Air range): I also painted the yellow tips of the Sea Gladiator's Fairey Reed Propeller. The white portions of the underside quick-recognition scheme were also painted as can be seen from the underside of the tailplane above, I didn't get a picture of the main model with the white paint on, I'd masked it by the time I thought to take another picture ... and here it is masked, with all the parts gathered together that will need a coat of Sky Grey: ... which was applied with no issues: ... and the propellers are, pretty much, finished: The three-blade Fairey prop for the Sea Gladiator was pretty straightforward Night with 4" yellow warning tips (about 3.2mm in 1/32 scale. good luck measuring that .2mm, I just made mine 'slightly over' 3mm ); the Belgian Gladiator was a more complex paint job altogether. The colours were more-or-less as per the current Airfix release of their Gladiator kit which includes markings for the Belgian Air Force's G-30 and shows the prop colour as 'Pale Stone' with a 'Medium Green' leading edge. This may be inspired by the prop fitted on the preserved Gladiator at Shuttleworth which is in these colours, but in any case the pictures of the Gladiators of the Aéronautique Militaire Belge do show a pale forward-facing colour with a darker leading edge and in the absence of any better information I decided to go with Airfix's example. The 'silver' propeller boss still has to be fitted, but that's about it. So, that's where I'm up to. Hopefully today I can get the Dark Sea Grey and Light Slate Grey applied to the upper surfaces of the lower wings, and then get started on the rigging for the Sea Gladiator Cheers, Stew10 points
-
Construction continues - Steps 13 to 22 Moving right along now and this will be my last post for the day. We continue this Beaufort build with the Control Column (not glued in as yet), bomb aimers swivel seat (which is too large to be placed at right angles) and the convenient crew Elsan bog box / dunny. Airfix also provide the option to mount the lateral fuselage Vickers gun within an open side hatch, or an appropriate sized part to fix this panel closed. I’ve chosen the open position so glued in the gun mount as shown in Step 16. Also at this construction step is the requirement to remove the raised ridge which sits on the forward edge of the turret aperture. This appears to be another clue that future versions of Beaufort are in the pipeline as the two rear fuselage turret plugs provided within this kit do not fit whilst this ridge is still in place. Filing it down with a sanding stick in the vertical axis did the job quite nicely and it didn’t take me more than 10 minutes to get this right. It’s probably a step that younger modellers would want to avoid, however it’s no real hassle for geeks like us who frequent this forum! Next up is the small side fuselage window installation, bomb aimers port side table, internal tail wheel structure and rear fuselage cabin bulkhead. Without paint, it all fits perfectly and I’d encourage you all to build up as many internal parts as possible prior to applying paint. So far, I’ve enjoyed this kit immensely and with a little care here and there I cannot see how anyone could have trouble successfully getting to this stage. Cheers and good night... Dave10 points
-
This was one of my Christmas presents and it’s a treasure trove of odd WWI designs including scale plans. I wanted it for details of the Sablatnig planes but there are several others that I intend to build starting with the Oertz. Having just finished one Quad, I thought why not do another. So this is my intended victim the Oertz W6 aka the flying schooner. I know the GB doesn’t start till the 20th but I thought I’d crack ahead as I have a lot to do and I’ll make sure I don’t break the 25% rule. First off make the hull. Plans copied 20 times and former transferred to plastic and cut out. The next step is to Mitch them and assemble them.9 points
-
T-34, nice kit from Zvezda, was build out of the box, except tracks from MasterClub and some other additions. Thanks for looking.9 points
-
My latest work. Canopy broke, anyway,i left it the way it is. Any suggestions or criticisms are welcome, Thanks for watching.9 points
-
Model represent the Po-2 used as coherent aircraft, belonged to the 1-st "Normandia" Fighter Regiment (from November8, 1944 regiment named "Normandia-Nieman") from 303-th Fighter Avision Division, 1-st Aerial Army ofthe VVS RKKA, Monastyrshina airfiled, september 1944. Plastic from ICM with no fit issues, with Eduard PE set for interior and exterior as additional. It's my first biplan in 1/48 scale and i'm thinking photoetched turnbuckles is a quite usefull additions at least in this scale IMHO. Engine from North Star Models, it's another story. Realy it's a model inside the model. M-11 in 1/48 scale have a fine quality and despite the amount of a small parts (48 parts to be exact) i had not any troubles during the build. It's the best M-11 engine in 1/48 scale to my mind. Decals from Begemot. On the final photo, the original spark plug from M-11 engine near the model. Thanks for looking.9 points
-
This was my attempt at ICM's "beer delivery" Spitfire mkIX. The kit wasn't great - made of grey chocolate, for example, and you could either build it with the engine in and none of the cowling on, or the engine out and the cowling closed. The engine wasn't very detailed and didn't fit together very well. I hammered and bodged it into the state you can see it in below but the fit isn't very good and there's a suggestion of banana-itis where I've kept half of the cowling attached. The barrel attachment pylons were just pathetic, too. It was my first go at carving up a kit, as well as using an airbrush, so the results weren't great. However, it represents another step on the way towards being halfway-decent at the job, I guess. I also did a wee bit of scratch-building inside the engine bay, so that was another first. It's a bit rough in places, to say the least. There's a WIP here, if you fancy it: I painted it with Colourcoats enamels and used Ammo weathering washes etc. In this photo you can mainly see the disastrous job I did of the yellow leading edge sections. Here's another weakness of the kit - the thickness of things like the bulkhead, wing skins and fuselage sides lets it down. I like the Ammo fuel stains wash: I suppose, if I'm honest, I could have done a more involved job on the weathering - the wheels and gun-fouling being obvious candidates, but I got to the stage where I just wanted it done and out of the way. I'll look forward to having another go at a Spit, though - maybe one of the Eduard mk1's that I have in the stash. I have to say that I'm a bit ambivalent about this one, but you can't win them all.9 points
-
The Mongol invasion fleet has been spotted approaching the Home Islands and even the nation's housewives have been whistled up to bolster the defenses. Naah, I made that one up. While female Samurai did exist, they were few and far between. What we're seeing here is a ritual dance ceremony... ...calling on The Ancestors and the Gods to send another "Devine Wind", and save Sacred Nippon for the second time since the "Kamikaze" sunk the Kublai Khan's previous invasion attempt in 1274. Meanwhile, the Samurai class hone their considerable sword skills; and tactical plans to defeat the looming armed forces from China and Korea are thrashed out by the Shogun and his subordinate Daimyo's. The ladies efforts evidently paid off, because history tells us the "Devine Wind" did indeed hit the invading fleet a second time resulting in massive loss of lives and shipping. The Mongol Empire and its Client States never attempted to conquer Japan again. All figures are 54mm from Pegaso, Masterclass, El Greco, etcetera.9 points
-
Thenks to the extension I was able to finish a project for a GB since... Nordic 1 I believe. It was slightlyrushed in theend, but there is no subsitute for last minute panic, asfar as work motivation is concernedi guess. On the bright side I managed to finish one of the Tonkas fromtheTornado STGB aswell, so that is a bonus. You are herefor thepictures tough so enjoy: Kit: F-101B by Revell (1:72) Aftermarket: Resin seats and Model Master pitot Build thread: Pictures:9 points
-
A big push this afternoon and I'm all done! Well, maybe 99 and 44/100 percent. The two ANG birds (F-51D and F-86A) only have a couple of minor things to add. The Matchbox Sabre is going to have to wait until I'm back from my trip. It was always the odd-man out anyway . . . . Here are a few pics for you to enjoy! I'll post better photos in an RFI later. And for my last photo, my results from this triple-header build project:9 points
-
I started this build in August last year but my enthusiasm started to wane due to difficulties with the build. But I felt I ought to complete this build as I don't like to give up. Why this kit? This was chosen because I wanted to see what a new Airfix car kit was like and to try something outside of my comfort zone, i.e. a racing car with lots of decals. Why the loss of enthusiasm? Unfortunately this was the flip-side of choosing a subject outside my normal sphere of interest; I'm not that into racing cars and definitely not relatively recent cars like this. Is it any good? On the whole, yes. It's reasonably well moulded, not too much flash and nicely detailed. What's wrong with it? The biggest issue is the front bumper and the way the body attaches to the chassis. It doesn't help that the instructions call for the bumper to be glued to the chassis before the body goes on. It would probably work better to glue the bumper to the body first, that way you could do most of the decals and clear coat the body before it goes on to the chassis. How were the decals? A nightmare, the one for the front grille is particularly tricky. It's taken a lot of setting solution to try and get it to conform to the shape of the body. Getting the two parts of the stripe to join up and lie flat nearly broke me. The rear stripe isn't great either. What do you like? This is probably my favourite view. Anything else? I've not even mentioned the fun I had with the wheels, which are moulded integrally with the tyres and are a pain to mask. Despite all the moaning above, it is still a model I'm pleased to put on display. from a distance it doesn't look too bad and it is now part of my modelling journey. If you've not seen it, the build thread is here:8 points
-
I think the hull is done..........i think.............. finished the drivers and radio operators hatches last night ......so its on too the turret8 points
This leaderboard is set to London/GMT+01:00














.thumb.jpg.cfc129272ffec824439b15e6013d5952.jpg)


