
Leaderboard


Popular Content
Showing content with the highest reputation on 12/03/21 in all areas
-
Hi, hope you are all well. I'm here this time with the 1/72 Vampire. This was painted with Tamiya TS12 bare metal and picked out some of the panels in citadels runethang steel but the 2 colours are very similar and don't really show much of a contrast between them in the pics. The decals are from xtradecal. Well there it is, and thanks for taking a look. Dave.30 points
-
Hello all; Here’s my recently completed Lancaster, the RAAF’s 460 Squadron G-George. The WIP thread is from the current GB and is here; I must say I enjoyed it a lot more than I thought I would and a lot of my preconceived ideas and prejudices about older tooling kits were knocked down. Here’s a few pics of how he turned out, there’s more about the build as well as George itself on my site. Cheers.29 points
-
Greetings all from sunny Brisbane, Australia! Now for some mysterious reason, Airfix’s long awaited new tool Beaufort kit has found its way to Australia before being released anywhere else in the world. From what I understand, this rare feat has only happened once before when Frog released their Lockheed Ventura kit way back in 1977. So to celebrate our collective joy, I’ve decided to clear the workbench and start the very first Britmodeller Airfix Beaufort WIP. This is also the first time I’ve started a thread in this section, however some of you active Group Build modellers may recognise me from the various GB’s I’ve participated in with (at times) a fairly dismal start to finish completion ratio! The images below have been previously posted in the Beaufort ‘Rumourmunger’ thread, however I’ll post them once again to kick off this build. It’s also fairly late on a Friday night, so will wait until the weekend before I make an actual start and take more photos in better light. First impressions are very favourable and the plastic is smooth and smartly detailed. There are two choices of rear fuselage turret, however neither of the fuselage plugs fit unless a large ridge is cut away from the forward edge first (see attached photographs). I’ll describe more about the kit as I progress through the build and fully intend to build it straight OOB and following Airfix’’s clear instructions as best as possible. I’m yet to determine what scheme to choose, but as I always like my models to be slightly different, may deviate a little from the two nice choices supplied. Please feel free to ask questions and add your comments (both good and bad). I do not declare to be a Beaufort guru, so will hopefully learn a lot more about the subject as this thread develops. We’ve all been waiting years for a new tooled Beaufort kit and finally its here. This looks to be a cracking kit, so do yourselves a favour and treat yourself to one (or possibly two) when they eventually get to your Local Hobby Shop. Cheers and wish me luck.. Dave27 points
-
Hi This one was finished earlier this year, and is my first biplane. The kit was not bad, with good fit. Finished more or less out of the box in kit supplied belgian livery. Painted with mission models acrylic paint and no weathering exept for a water colour wash. The rigging is made up from mig medium fine rigging, and is a little to fine. Rigging this one was a challenge, but I'm quite please with the results. Regards, Isak25 points
-
Hey all. Took quite a while as I don't normally do 1/32, this was a half started kit my friend abandoned 25 years ago. I picked it up and decided to give it a go. Rescribed panel lines which is a first for me. Decided on a 'ghost grey' scheme. It's probably incorrect for the tail number, but it's my build and I liked the gret/blue colour scheme's I've seen. I've just realised I haven't painted the arresting hook black and white. So excuse that. But I will sort that out later. Thanks for looking 🐧21 points
-
Another one to my "Falklands collection", this time 1:72 Mirage IIIEA, I-014, 1st Squadron, 8th Air Group Argentine Air Force, Rio Gallegos, May 1982. New Modelsvit kit, built "out of the box" except metal Pitot tube (Master) and squadron emblems decals on the fin (Condor Decals). Painted with Gunze Mr.Color C series. The Modelsvit kit itself is just great - extremely well detailed as for 1:72 scale, crispy molded, well fitted (although a bit complicated - definitely not for beginners). I think it was the best short-run kit I've ever assembled. "Work in progress" topic was on Polish forum: https://www.pwm.org.pl/viewtopic.php?f=884&t=90757 And now some pictures: Thanks for watching!17 points
-
This is my second build of this year and also of an A & A Models kit! As with the Me109T, this is a short run kit, in this case of the Messerschmitt Me209V-4 (1/48). This aircraft was an adaptation of the Me209V-1 airspeed record breaker, an idea of Messerschmitts' to find an eventual successor to the Me109. This aircraft of course failed in that respect but is well worth a place in any Luftwaffe collection. The kit is very cleanly moulded and comes with a small fret of photo etch, canopy masks both inside and out plus wheel masks. A small decal sheet for two markings options and a glossy, well presented instruction manual. I built this kit O.O.B adding a few wires inside the cockpit, which is very well detailed. The instrument panel was an injection moulded with detail in relief, with a decal overlay which with a coat of Micro Set which gave a well detailed panel. I must add here I was a little unsure of the decals being matt finished with no apparent clear overlay but my fear subsided when I used them, full marks to A&A. A little filler was needed but it was a nice easy build ( I look forward to A&A's forthcoming Me209V-1). The machine modelled was, of course black 14, with the wonderful snake decoration (couldn't resist}. A&A call out for the machine to be RLM02 which is probably correct but just to be different I decided to finish it in RLM63 the difference between these colours is actually minimal, at least in AK's Real Colours paint range. The only photo I have found of this aircraft shows what maybe a mottle effect on the surface finish. Whether this is just the poor quality of the photograph or the true finish, appears not to be known. My answer was to apply some mottling using the base colour to give a similar impression to the photo, I leave you to judge as to its effectiveness. This aircraft was test flown at Messerschmitt's factory airfield at Augsburg in 1939:- It appears my mottling is too subtle to show up very well on my photos but it is there - honest 🤔 Cheers Andy17 points
-
I'd built a Hasegawa F/A-18F sometime ago and was all set to do the same company's F/A-18E to go with it using markings from Furball's CVW-8 decal sheet, but, I when I saw the Meng one was coming out I thought it would be interesting to have a comparison of the two. Now, I'm no F-18 expert but I must admit it looks OK to me and putting the 2 sets of parts together on the bench there wasn't a lot to choose from them. In fact, some of the panel lines etc are virtually identical so they're either both right or both wrong... It was certainly an easier build than the Hasegawa kit and parts fit together very nicely. The cockpit is a little basic but as I'd always intended to have it closed (like my 'F') anyway it didn't really matter. I did however put a Wolfpack seat in it. Panel lines maybe a little 'softer' than the Hasegawa one but not overly so. The nicest parts for me were the wheel wells. They really are quite nice. Very busy. There are plenty of options regarding weapons but I decided to use some of Eduard's JDAM's just to be a little different. As I aid markings are from Furball's CVW-8 decals and are very well researched. Looking at the parts breakdown it certainly looks like we'll be getting an F/G. and I'd certainly be happy to do a G using the same decal sheet. Anyway, thank you for looking and from an F-18 novice it seems to look the part to me. F181 F187 F182 F183 F184 F185 F18617 points
-
Hi everyone This is my 1/48 SU-30SM by Kitty Hawk. This was a very nice kit to build with great detail. The fit was good, only having large gaps on the air intakes and air brake. I had read reviews about the other su-27 and su-30 kits missing axles for the wheels but mine came with them so I'm guessing they have fixed it. The instructions did have a few mistakes, the paint guide didn't show the camouflage on the underside and showed the registration number from one of the other aircraft. The decals were decent but some of them took a few applications of micro sol to make them conform. Some of the yellow decals were very thin and clear so when applied to the model, they went a lot darker and hard to see, this was the same with some of the red ones. There were also some yellow decals that looked more of an orangey colour, I don't think they are meant to be that colour on the real aircraft but I could be wrong. The weathering made the orangey decals less obvious and orange which was good. For weathering, I decided to try something different to what I normally do. I applied a black oil wash on a gloss varnish, then coated it in matte varnish. I used small dots of white oil paint on the panels which I blended with a wet brush to try to make faded areas. I am happy with how this turned out. It was then coated in a matte varnish again. Thank for looking15 points
-
Hi all, hope everyone's keeping safe, looking after themselves, friends and loved ones. This is a model I finished for Airfix Model World a few months ago that featured in the March edition of the magazine. It is, of course, Airfix's all new Vulcan B.Mk2. Early in the project I was asked by Airfix to provide research for the kit, in particular detail photography, aircraft history and to select colour schemes. Working with Chris Joy, the designer was both fun and informative. I have a fairly substantial library here on the V-Force as well as access to different archives, courtesy of many friends, several of whom worked on and flew the aircraft. The most useful source, quite naturally, was the real thing, in this case XM594, the airframe scanned by Airfix using LIDAR technology. The aircraft resides at my local museum at Newark, so was easy to access, prior to any restrictions being put in place. The museum staff were extremely helpful, even providing me with a 'giraffe' maintenance ladder to gain access to the topside of the aircraft to photograph normally inaccessible areas such as the cockpit windscreen and canopy, spine and upper wing surfaces. This proved extremely useful to say the least and my sincere thanks go out to all the staff there. As for the kit, well overall it was a pleasure to build, however there were a few annoyances along the way. Most noticeable was the fact that the forward fuselage/nose is split in an awkward area where no natural panel line occurs and it took some careful filling and sanding to ensure that the seam was invisible and that the streamlines shape of the nose was maintained. Incidentally, three nose configurations are provided, one smooth, one with just the TFR thimble and one with TFR and IFR probe thus allowing any combination of styles can be built. The intakes took some fettling too as they're provided in three parts, again all seams had to be completely eliminated before being masked and painted. The ECM tailcone is provided in two flavours, the earlier smooth style for the Red Steer Mk 1 Rear Warning Radar and later bulged dome for the Red Steer Mk 2. The options continue with two styles of fin cap, one smooth, the other featuring the rectangular AR 18228 passive Radar Receiver fairing and both styles of jet pipe, 200 series long cans and 301 shorter. These are accurately shaped and tow out correctly however they are provided in three parts making alignment a bit tricky (although a jig is provided). Once assembled and painted they are quite convincing although a single-piece moulding would be preferable. Incidentally, only Olympus 301 engine facings are provided, the 200 series looked quite different. Having said that a pair of intake blanks are also provided which can be used as an alternative. As moulded, the lower wings come equipped with full Skybolt attachment points including the rear point, two fairings for the forward hard point and the domed coolant blister. Only 18 aircraft were fitted with the full suite so it's best you check references when deciding which model to build as there were a few different configurations over time. Easily the best reference for this is to be found in the superb book by Craig Bulman 'The Vulcan B.Mk2 from a Different Angle'. Other options include a choice of three differently configured ECM counterpoise plates, fitted between the jet pipes and two styles of X-Band emitter fairings, a single head and a twin head. I provided all information, dimensions and photos but a few things still seem to have been missed as there are a couple of odd omissions, for example the short separators (basically short tubes fitted with long level indictors) located at the top rear of the main gear legs, (although they may have been removed for restoration on XM594 at the time, as a rear door and attachment ties were also missing) and the central windscreen wiper is missing, again this has been removed on the Newark aircraft. For some reason the entrance-hatch retraction struts are also absent and these were replaced using steel pins cut to length. Also Chris didn't realize that the lower red strut fitted to the main gear's bracing struts are only fitted to airframes in long-term storage, (hence painted red) and not fitted to operational aircraft, as such they need to be removed from the parts. The weapons bay and undercarriage bays are well done, featuring plenty of detail although I'm sure the aftermarket chaps will have a field day in these areas. One small gripe, the 1000 pounders are moulded to the carriers, making painting a bit of a pain. Careful masking is the order of the day. Anyway, I don't want this to turn into any longer a review, congratulations if you got this far without glazing over, if you're interested, please read my article in AMW for more details. For those interested I'll probably write a post about building the kit, in detail, after it's officially released. Being a pre-production kit, no decals or box was supplied and so my friend Chris Clifford, the former editor of AMW and now of Flypast, helped in providing some decals as well as a copy of his latest Combat Machines No 6, book on the Vulcan, well worth getting. Another good mate, Jan Forsgren kindly donated a set of the excellent Fundekals and Freightdog sheets too and these proved invaluable with this build. The aircraft chosen here was XM597 as she appeared at the 1974 Greenham Common Air Tattoo. I chose here due to the unusual combination of squared off fin cap, white tail cone and circular dielectric panel on the upper fuselage and early 'D' style markings. The ground equipment comes courtesy of Aircraft In Miniature. Cheers all and happy modelling Melchie The well appointed weapons bay with three carriers supporting 21 1000lb bombs. A Blue Steel stand off bomb is also included along with the correct fairing. Bit of 60's nostalgia... Vignette consisting of Noy's Miniature V-Bomber base and AIM RAF Ground Equipment. As no decals were supplied with the kit, the cockpit detail was built up using parts from Eduard's Victor B.Mk2 set and appropriate parts I had in the spares bin. The seats were beefed up using Tamiya Two-Part Epoxy as the kit parts were a tad undernourished. Seatbelts, harnesses, ejection-seat firing handles etc also came courtesy of Eduard. The cone fitted to the front of the cockpit is to allow you to fit any nose weight, (in this case Liquid Gravity). AIM RAF ground Equipment14 points
-
This is my latest creation, as it typical for me an OOB build. Paints are a combination of Model Master, Gunze and Tamiya. This is Revell's 1/48 kit number 3925 of the Panavia Tornado F.3 ADV, No. 111 Squadron, Royal Air Force, Leuchars, Scotand July 2002. I have to thank some fellow Britmodellers for the heads up regarding the fit. The fit is great provided you pay attention to the fuselage and snug it up as the assembly goes along. Also, given it is swing wing you need to plan ahead and in my case the wings were painted before they were attached as it would be near impossible to do this after the fact. Overall I think this is a great kit for the money provided you can get the fuselage parts to all match up. Some silvering of the decals but I think that is partly my fault. I don't have another kit with trust reversers as an option so I thought I would deploy them just because. But it is fidley to get them to work and I would not do it again. The last picture I have paired it with a really great kit (at least to me it is a great kit but partly because I love the plane), which is the Airfix 09179 BAC/EE Lightning F.3 111 XR711 which was flown by the CO in 1965 out of RAF Wattisham. Although the pictures don't really show it the two planes are almost the same size.14 points
-
Another nice little filler in kit the first pic explains witch aircraft I have modeled. He only difficult part was doing the three colored spinner12 points
-
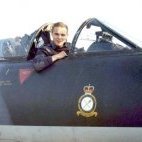
I have my Father-in-Law's photo as a desktop picture - my usual method of seeing too much detail. This morning I noticed the bare shaft (oooer Missus): …connecting to the tail rotor. Can you see it? It's the only thing I've been seeing for a while. Wished I'd seen it before I glued the fuselage together. Nothing for it but to… Stew taught me to 'stroke patiently with a sharp blade' for this sort of thing. As you know, I STILL don't have my bottled patience, hence the micro-saw and chisel. It's off now. Looking forward to the fun of scratching a little gearbox. Not. Clamps are off. Giorgio's dry-marker test showed up the issues as usual: Mr Dissolved Putty, thinned with TET, applied: Luckily I noticed, just in time, that the gap on the rear of the main fuselage may be intentional to represent doors, so I've left that. If it's NOT supposed to be there please keep it quiet, there's a good chap. More sanding later, then I'll mask the windows.12 points
-
Hello my Friends. This is my latest. 279 Shipborne Fighter Aviation Reg. 2 Sqn. Tigers Red 80. July 2005 - Severomorsk NAB. Apart from a few niggly instructions and poor fitting canopy I really enjoyed building and painting this. All the best. Ralph.11 points
-
Good day to you all, Happy Thursday! Welcome along to my latest completion. This is my Trumpeter 1:48 Seahawk FGA 6 converted to an FB3 and dressed as a member of the Red Devils. The Red devils were an aerobatic team of 5 aircraft from 738 Naval Air Squadron running for a couple of years in the early 1950s. Their claim to fame was being the first team to (intentionally!) use smoke as part of their display. I have depicted the aircraft folded as the aircraft started their display folded, taxied to the dispersal and then did some synchronized wing spreading just before taking off. Also, it shows off the large underwing Royal navy. The model is OOB with only an aftermarket seat installed which is a huge improvement on the kit version. It was a spare I had kicking around, it looks a bit different so may well be the wrong type for this aircraft but it does look better! I also remodeled the nose, gun ports, wing fold, intakes and tail bullet. The decals are aftermarket from Model Alliance Naval display teams set, a nice set but I felt the white was a little too transparent. The paint finish is Model Master Acryl signal red which almost gives the red a 1950s shade to it! To convert from a FGA 6 to an FB3 was more or less just an antenna change around. There was no other major modification involved. See link below for the WIP Build link Anyway, enjoy the phots! And here it is with their Classic Airframes counterpart Thanks for looking in! Bob10 points
-
Hello all, let me present a recent builds of Arma Hobby´s Hurricanes. The first one is a Hurricane in Portugal colours and it was really a pleasant OOB build. The second one is a most successful Hurricane of 310 Czechoslovak squadron during the BoB with 6 kills claimed by several pilots. The kit is also a part of small group build with my friends dedicated to Bob adversary. I hope you like it. If you are interested in a bit more details and photos, I would appreciate your visit there on my blog http://72insight.com/en/hawker-hurricane-mk-i-and-mk-iic-1-72-arma-hobby/ Here on the blog you can also find another BoB Hurricane build by my friend Vladimir Kafka. addition of example picture due to the some troubles10 points
-
Hi all, Here's the completed model of the Roland D.VIa, Ser No: 3615/18 during 1918 (Pilot and Jasta not known). Wingnut Wings kit Decals from Aviattic and ProperPlane Propeller by ProperPlane Rigging - GasPatch turnbuckles, mono-folamant and micro-tube. Figures from Model Cellar Paints used Tamiya, Alclad and Mr. Colour. As usual my PDF format build log can be downloaded from my site (link in signature). Build thread can be found here: https://www.britmodeller.com/forums/index.php?/topic/235088230-132nd-scale-roland-dvia/ Thanks for following this build and for you encouraging comments, Mike10 points
-
Thanks Giorgio Gone now, thanks to your dry-wipe tip. Oh, and lots of sanding. Thanks abat The clamps are 'Berna clamps' and I love them. The carbon-fibre rod and soft jaws mean that you can press the jaws together to give just the right amount of hold, or squeeze tighter to clamp. They don't do 'high pressure' but then I don't usually need that. Recommended! Seams filled and sanded: Now I need some masking mojo.10 points
-
Nakajima Ki-44-II Ko Shoki 47th Sentai Narimasu February 1944 The 47th Hiko Sentai was established at Narimasu in October 1943 by expanding the 47th Dokuritsu Hiko Chutai (Independent Flying Squadron) which had been the first unit of the Imperial Japanese Army Air Force to be equipped with the Nakajima Ki-44 or Army Type 2 Fighter (Allied reporting name 'Tojo'). As one of the earliest Home Defence units in the Tokyo area the 47th played a major role in opposing B-29 attacks for which, like many other sentai, it was ordered to form a Shinten Seikutai air ramming section in November 1944. After a long tenure with the Shoki they re-equipped with Ki-84 ('Frank') in the following year The model represents a Ki-44-IIa (Ko) from the 3rd Chutai with the narrow fuselage band indicative of a shotai (flight) leader. The Ko was armed with two 7.7 mm machine guns in the front deck to supplement the wing-mounted 12.7 mm Ho-103. Later versions had heavier armament. The Shoki was the first operational 'heavy' fighter of the IJAAF which offered speed, armament and protection versus manoeuvrability. Of 1974 vintage - long before the Hasegawa kit appeared - Otaki's design is nevertheless a fair representation of this chubby little fighter. My build goes back to 1982. I updated it some years ago with aftermarket items that had become available in the meantime (engine, cockpit, exhausts, control surfaces). Other parts were improved through scratch-building, e.g. the air inlet, oil cooler and outlet flaps, the tail wheel and doors, the open cockpit hatch and more. Decals are home-made. A couple of notes on colours - Sentai emblems in white, red and yellow colour for the 1st, 2nd and 3rd Chutai with blue for the HQ flight were typical for the IJAAF. This convention has been questioned for the 47th Sentai by several authors/ illustrators who opined that an unusual order of blue-red-yellow or red-blue-yellow with white for HQ was employed by the 47th, and that the line-up in this photograph shows the 1st (or 2nd) Chutai sporting cobalt blue insignia. No evidence other than tonal interpretation of a series of monochrome pictures was provided. Taking all circumstances into account it would be safer (and more likely) to assume a conventional colour sequence*. In this case the photo, like my model, would show 3rd Chutai aircraft with yellow markings. For the cockpit interior I chose aotake, the well-known blue-green translucent varnish used by Japanese aircraft manufacturers, although a yellowish olive green would have been more appropriate for a Shoki of this period with aotake being a remote possibility. Interior areas other than the cockpit were finished in aotake, however. The two theories about the markings of aircraft #19 - The Shoki is the first of a series of Japanese army fighters that I plan to present in the course of 2021. Maybe you like my Kawasaki family album posted here ハッピーモデル構築 - Michael REFERENCES NAKAJIMA KI-44 SHOKI I/II, AIRCAM AVIATION SERIES NO.25, RICHARD M. BUESCHEL, CANTERBURY, 1971 ARMY TYPE 2 FIGHTER “SHOKI“, FAMOUS AIRPLANES OF THE WORLD NO.16, TOKYO, 1989 JAPANESE ARMY AIR FORCE FIGHTER UNITS AND THEIR ACES 1931-1945, IKUHIKO HATA ET AL., LONDON, 2002 NAKAJIMA KI-44 SHOKI, MODEL ART PROFILE 5, TOKYO, 2009 NAKAJIMA KI-44 SHOKI, REVI CAT NO.II-4005, MARTIN FERKL, OSTRAVA, 2009 KI-44 'TOJO' ACES OF WORLD WAR 2, AIRCRAFT OF THE ACES 100, NICHOLAS MILLMAN, BOTLEY, 2011 JAPANESE FIGHTERS IN DEFENSE OF THE HOMELAND 1941-1944 - VOL.1, LESZEK A. WIELICZKO, LUBLIN, 2014 IMPERIAL JAPANESE ARMY AIR SERVICE ILLUSTRATED (FIGHTERS EDITION), YUKINOBU NISHIKAWA, TOKYO, 2015 IMPERIAL JAPANESE ARMY & NAVY AIRPLANES ILLUSTRATED - BOOK 2, TOKYO, 2015 PICTORIAL HISTORY OF JAPANESE ARMY 47th SENTAI, FAOW SPECIAL EDITION VOL.8, TOKYO, 2020 * E-MAIL CORRESPONDENCE WITH NICK MILLMAN, AVIATION OF JAPAN, 1 MARCH 20219 points
-
Got it because online shop hasn't updated stock availability and I had to swap my original purchase. I think it's my favourite german plane, tbh, one of the 3 planes in front of I always spent most of my time in Cosford . Goal is to glue everything clean and neat and paint it with more vibrant colors than usual (and with more contrast). Might not be 100% historically accurate because of that. First thing I've done after opening the box: was glueing together few interior pieces and painting everything else in sprues: I've notice that there isn't any decal for control panels. First time in my life I've decided to paint everything inside with a brush. (only aftermarkets I'm going to use are Montex masks and Aires exhaust - mostly because I had to add something to have minimal order at Hannants ). I'm in the middle atm, and I'm quite happy how it looks tbh. Few things have to be corrected, have to add some mud on the floor and some cables at the back of control panel as well (back is going to be clearly visible).9 points
-
This was my attempt at ICM's "beer delivery" Spitfire mkIX. The kit wasn't great - made of grey chocolate, for example, and you could either build it with the engine in and none of the cowling on, or the engine out and the cowling closed. The engine wasn't very detailed and didn't fit together very well. I hammered and bodged it into the state you can see it in below but the fit isn't very good and there's a suggestion of banana-itis where I've kept half of the cowling attached. The barrel attachment pylons were just pathetic, too. It was my first go at carving up a kit, as well as using an airbrush, so the results weren't great. However, it represents another step on the way towards being halfway-decent at the job, I guess. I also did a wee bit of scratch-building inside the engine bay, so that was another first. It's a bit rough in places, to say the least. There's a WIP here, if you fancy it: I painted it with Colourcoats enamels and used Ammo weathering washes etc. In this photo you can mainly see the disastrous job I did of the yellow leading edge sections. Here's another weakness of the kit - the thickness of things like the bulkhead, wing skins and fuselage sides lets it down. I like the Ammo fuel stains wash: I suppose, if I'm honest, I could have done a more involved job on the weathering - the wheels and gun-fouling being obvious candidates, but I got to the stage where I just wanted it done and out of the way. I'll look forward to having another go at a Spit, though - maybe one of the Eduard mk1's that I have in the stash. I have to say that I'm a bit ambivalent about this one, but you can't win them all.9 points
-
Hi all I don't do much in the way of Modern Jets however the gorgeous lines of the Tiffie Tempted me back when it was released and for £15 it is a bargain considering the amount of plastic you get. I started this a few years ago and the loft conversion meant it got packed away. I dug it out recently and just added the finishing touches. Built OOB apar from the second set of Asraams from a kind BMer whom, i am embarrassed to say cannot recall, sorry and a big thank you and launchers courtesy of @peterairfix and the 3 Sqadron decals (after I had an incident with the originals) courtesy of @Stephen. Thanks to all of you who came to my rescue. The airintakes were smoothed out as per the article in the Tamiya model Magazine of the time. Hope you enjoy and hanks for looking. Chris9 points
-
This is my latest contribution to Airfix Model World. Eduard 's superb special edition P47 'Jugs Over Germany'. Paints are MRP....9 points
-
A Grizzly Turret Time for some basic work on the turret, the Tasca part is very nice, as expected, but for a Grizzly it needs a couple of basic changes, first it needs to lose the pistol port, and secondly it needs to gain some cast in applique armour, in the form of a cheek, and as far as I know all Grizzly turrets were set up this way, regardless of whether the upper hull has cast in applique armour, welded on applique armour plates, or nothing at all, and it has to be said that my knowledge of Sherman's is far too limited to understand why this is the case, the turret set up seems to bear no relation to the hull set up. The picture above left is a good example of the cast in armour cheek and what it needs to look like I think, the Tasca kit comes with a very nice welded on applique armour plate which can be used as a starting point to recreate the cast in applique armour cheek, and the picture right simply shows the empty space we need to gain by removing a pistol port... Pictures above, left and right, with this particular Tasca turret, the plastic behind the pistol port is very thin, so it's probably best to fill in the area first with plastic card to strengthen things up a little, thin layers of card seem to work well here, and then simply fill in the pistol port hole with more plastic card, then remove the pistol port from the outside, job done. The cheek armour is little more complicated and can be done in several different ways to be honest, you can simply glue on the kit supplied welded cheek and then work from there with fillers and such to gain the required shape, you can start from scratch with thin layers of card and fillers (as done here, pictures above) or simply buy/use a turret that already has the cast in applique armour cheek, I was expecting this job to be fairly easy, but had a nightmare trying to get everything to blend in, and still wasn't all that happy with the result. And if you start from scratch (as done here) then it's important to note that the gap between the bottom of the cast in cheek armour and the bottom of the turret will not look right while you are just working on the turret alone, that's because the turret sits down behind a splash guard formed in the shape of the cast hull, in other words, once you fit the turret to the hull it will match fairly well with ref pictures. Still working on tracks... Matt9 points
-
Well after a year of sitting in the stash, I finally built my Airfix Buccaneer. It is a really nice kit, just with a few spots which you need to watch to get them to fit right. I know there's a lot of details that take should be removed for an S2C in 1971, but this isn't a Vulcan so I just left them on to simplify the build. This is the build thread: Anyway, despite a few setbacks and an unintentional flight, here's the result: The wings have been left detachable, less chance of breaking the joints if it takes another unintentional flight.8 points
-
3 complete Pom-Poms (OK, two of them still have rear railings to add, but you get the point). 1 more to build, now. Also today I received a parcel from New Zealand... yes, more ridiculously beautiful Micro Master work. In due course this model will have a seaboat (cutter “lifeboat”) on both sides hoisted outboard on its davits, which will make it very prominent, so I want those boats to be as good as possible... ...but while I was buying a pair of Micro Master cutters, a couple of Fast Motor Boats crept up on me from behind and jumped into my basket. They’re going to be pretty visible, too (that’s my excuse...). Probably lucky that he hasn’t done an Admiral’s Barge or Seaplane Tender. Yet. Anyway, how could I resist this? And compared with what I had before from Shapeways (itself a HUGE improvement on Merit’s awful boats): Another advantage of this is that the chocks are designed to fit. Even the Tetra chocks have a problem; since Merit’s boats are all basically the same (& wrong) the Tetra designers have done their best to allow you to upgrade them. It’s a gallant effort, but they still use Merit’s hulls, so the chocks are designed for them. And thus need a lot of work to make them fit replacement boats that are the correct size & shape. These chocks fit the hull like a glove: Happy More soon Crisp8 points
-
Paint, paint and more paint. Don't think I've ever used quite as much on a single model. But now done. Getting there has taken weeks, mostly working in the evening as real life tended to get in the way earlier. I had to work out the basic camouflage pattern. Easy on a Spitfire? Just follow the profiles? Maybe, but they varied quite a lot and I'm trying to recreate a particular plane; 609 Sqn's R6691 PR-J in August 1940. And there's only one photo of it AFAIK. The other photo of 609 Sqn's PR-J, you'll find on the web, is another earlier plane (different aerial mast for a start). I reckoned R6691 was probably going to be pretty similar to R6692, so back to the IWM film. But R6692 is painted in the 'A' pattern, and R6691 in 'B', so mirror the pics in Paint Shop Pro. Most of the profiles of this plane are wrong, including the ones that come with the Montex decals, but they help a bit. The Airfix instructions colour call-outs were best and the BM Spitfire Mk.1 walkaround was very useful. The camouflage lines had to be transferred onto home printed 1/24 plans, enlargements from 1/48 plans in the Valiant Wings book. My normal masking techniques, paper and blue tac sausages, wasn't going to work at this scale, nor on a plane that has hard demarcations between the paint colours. I didn't want to use Tamiya masking tape as that would almost certainly have resulted in ridges between the colours, something I hate and very much wanted to avoid. So I tried Frisket masking film. It has a matt surface that you can draw on, or use a fine marker, and it's very low tac - much less than Tamiya tape. Experiments proved that it worked, but would it stick to the model which is largely covered in rivets? I transferred the camouflage lines from my 1/24 paper plans to the Frisket Film, it's translucent enough to see through so I could copy the panel lines, and the camouflage, and then cut out the individual masks. I painted the Dark Earth first. In hindsight I should have painted the whole of the topside DE (as I would at 1/72). It would have been much easier/quicker and I managed to miss some areas and had to apply more DE paint later. The film stuck to the surface - just! But the age old problem with sticking a flat film to a 3D curvey surface did cause a few problems. I did get a few patches of feathering between the colours, but having the corresponding mask that covered the green, it was easy to use this and touch up the DE. And on with the green; The only way to paint something this big is to do it in sections. I'm using Colourcoats for the first time, and I love the colours. But the Dark Earth definitely went on better than the Dark Green. The DE was smooth and gave a good satin finish, the DG was much dustier and came out fairly matt. Variations in the ratio of thinner to paint, the pressure or the distance of the airbrush to the model made no difference. I don't think that it will cause issues downstream as the whole model is going to get a coat of gloss, which is where I'm headed next. But not for a couple of days to allow the CC paint to harden off. Thanks for looking! Back soon.8 points
-
Closing in on 3 completed pom-poms - actually all 3 still have bits to do, but you get the idea: More soon Crisp8 points
-
From the internet:- A beautiful mortal, Medusa incurred the wrath of Athena, either due to her boastfulness or because of an ill-fated love affair with Poseidon. Transformed into a vicious monster with snakes for hair called The Gorgon, she was killed by Perseus, who afterward used her still potent head as a weapon, before gifting it to Athena. This is a 75mm kit figure from a Russian manufacturer who's name escapes me right now, (might be Ukrainian, can't remember). I had initially intended to do her human half in flesh tones, but after re-watching the grand old movie from 1981, "Clash of the Titans" I changed my mind and went for something a bit more exotic. FINISHED MODEL7 points
-
This is the 48th scale version of KP's previous 1/72nd kit released late last year. (I still think the SH kit is better) Did I see somewhere they were also doing a 48th scale one? Although a significant improvement on their 1/72nd scale one because of larger parts they are still very soft with regard to detail and the fit is a little 'iffy' in places particularly under the forward fuselage and rear of the wings. Theres a distinct 'chunky' look to finished model too. Detail is also a little soft especially the cockpit parts and the undercarrige. A lot of weight is required in the nose for obvious reasons but there is just enough room. I left off the instrument panel and coming till the last minute just in case I need to fit more. The canopy is reasonably clear although quite thick. Also it'll need jiggling a bit to fit too. The kit is also missing the correct rocket pods for IAC aircraft but CMK and Reskit produce some. After fitting the Reskit ones I had serious thoughts about them looking too big? What do you think? Its easy to remove them... Some of the IAC appropriate aerials are also missing but easily remeded. I decided to use Max decals for the markings as the colours were somewhat deeper and a little more accurate. Anyway, thanks for looking. 20210312_074020 20210312_073849 20210312_073911 20210312_0739487 points
-
Thanks Adrian, after your epic performance with that Frog Beaufort / Airfix Beaufighter conversion, you deserve a free kit and the honour of building this kit too. You’ve paved the way and thankfully Airfix have listened. Nice to have you onboard. I would have to say yes, although I’m not one of those panel line nit-pickers. I’ve been happy with Airfix’s panel lines for quite a number of years now and the trick is to avoid using very dark / black washes. That’s exactly right Steve... lets’s see how this one turns out. Not sure what we Aussies have done to deserve having dessert served first, however we’ll take it anyway. Also nice to see @JOCKNEY is still reducing his stash by sending his kits all over the world, however to be fair he does finish a lot more than me. Nice to hear from you and I hope to do this kit justice. Why thank you... I haven’t been called Sir.... ever! I hope you enjoy the ride, which won’t be too rushed I can assure you. Chris.. no need to apologise... Canadians are as loose as most Australian’s so you’re in good company here. Considering your age and frail condition I’m glad you’ve pulled up a pew nice and close. Glad you can be part of this WIP. Good to hear these kits have arrived in the UK, so there will be many more modellers hacking away with me at the same time. I’ve never started a WIP in this section, so God only knows how it will go. Thanks for all of your comments and I’ll make a start after I get the routine family chores out of the way. Missus now tells me she wants to see her parents and visit a Home Renovations show, so that wasn’t on the initial weekend plans! Cheers.. Dave7 points
-
Got out of bed, came down stairs, made myself a cup of Rosy, noticed that the wind had dropped, it had stopped raining, and the sun was out. What could spoil it? Then I opened up BM and saw this reply in the Cromwell page. Why is it that some people just can't except that we are all different and see that this wonderful hobby of ours comes in all shapes and sizes? It's not a one size fits all. Some are happy to build a kit OOTB whilst others expect a little more from the contents of said box. I could have replied directly to the insult of "expending an awful lot of hot air", but that would just have played into the agent provocateur's hands and got the thread shut down. And besides which, there has been enough thread drift already. So all I'll do is direct the gentleman to an empty room where I'm sure that he will find some like minded souls to have a row with. So, getting back to what this thread is about, thanks @AntPhillips for posting the photos of the sprues. John.7 points
-
Beautiful job Your Generalness...and inspirational as always. I have a couple of these on order but... I have no idea when they'll arrive I have no idea how I'll smuggle 'em past Mrs T when they do arrive I have no idea where I'll put hide 'em once they're here I have no idea when I'll build 'em I have no idea where I'll put em when I do build 'em But I've been hankering after these ever since I built the old tool one so these are minor details.7 points
-
Inspired by @johnlambert and his Airfix Aston Martin DB5 resurrection, I decided to have a go too, but in a different direction. So this squashed thing arrived today, minus a couple of parts, very flat and with some pieces already glued together. But at £6 it was OK for me: Yes it's a DB5, and I want a DB4 GT, but I shall get to the main differences and then explain how I aim to try and bash it into shape. So for starters here are few photos of DB4 GTs I've seen over the years; more than I thought in fact. All are identified by their chassis numbers: 0110/GT: 0123/R: 0124/R: 0133/L: 0136/R - with bumpers! 0136/R again, a few years earlier and pre-restoration (it was originally pale blue as above): And one of the 'recreation' cars done by Aston Martin in recent years: More in a mo6 points
-
Thanks Robert , meant to take these and post them earlier this week. Bit constrained for distance to photograph them full height from floor to ceiling but pulled the sofa and some other odds and ends out of the way to get as much in as I could. Top image is left to centre and bottom image is centre to right with each having a bit of an overlap in the middle. Most shelves have their contents doubled up with another row behind and less than half the height of the unbuilt kits between the top shelf to the ceiling can be seen although they are only about a quarter of my total , the rest are up in the loft. Only magazines on the shelving are part-work collections like 'World Aircraft Information Files' , 'Warplane' and they like ; Foreign Language Titles ; complete short-run titles such as 'Air Power' and 'Air World' ; my 'vanity' collection. UK titles for the c urrent year get kept in a storage box and then moved out to the shed to be sorted by title into storage boxes and join the others which for some go back around fifty years. Material removed for research into current projects gets is kept in collapsible crates under the computer table until returned to storage.6 points
-
This is my initial build of 2021 and also my first build of an A & A kit, these appear to be short run kits by Modelsvit ( although I stand to be corrected!!!). I believe this is the first kit of a Messerschmitt Me109T (not an adaption of an E version) the kit actually represents the later T-2 version with the two fuselage covers which show the machine was fitted with GM-1. Not all the schemes supplied with the kit are correct for this particular variant, the two oval fuselage panels would need to be filled and a single round panel re-scribed to back date the kit to the T-1 version. I stuck with a T-2 version, as with all short run kits some extra work is required in cleaning up the parts but other than that the kit goes together well. the only exception I found was using the closed canopy, the fit leaving something to be desired. The model was built O.O.B. I chose to represent a T-2 from Jasta Heligoland 1942/43. Kit was finished in the usual RLM74/75/76 scheme using AK Real Colours, decals were used from the kit and went on really well, except the green/white 3 from my spares:- A comparison of an E and T's wingspans, the E-7 is an Eduard kit. Cheers Andy6 points
-
G for George, Avro Lancaster B.I / III Airfix 1/72 Old Tooling So here’s my entry to the GB. This turned out quite well I think and certainly it knocked down some of my prejudice on older tooled kits. Here’s the WIP thread; ...and the pics; Cheers! Mark6 points
-
Thanks Chris! Love your Pawnee by the way! Came out awesome Thank you sir, thats a real compliment coming from you too. I appreciate the encouragement chaps! Last few weeks have been slow to say the least. I have been so busy working on the house inside and outside, dug 9 trees out and my hands and arms ached so much I couldn't hold a scalpel blade still without shaking all over the place. But this week I got back to the bench for a little while and did the left intake upper vents, was a bit shaky at first but I got there in the end. I just have to shoot some Mr Surfacer on and do some fine tuning, but I think I did a better job second time around. Time to turn my attention to the lower ones now. Slowly I am getting there Thanks for your patience and long wait for this update Cheers Anthony6 points
-
Thanks very much gents - Duncan, the paint isn't quite as matt as it might appear and it does have a very smooth finish, but I am not a brave man nor a particularly reckless one and I did lay the transfers down on a layer of wet Klear And despite my suspicions I appear to have avoided the 'Comete' decal silvering, though it did require copious applications of both Micro-Sol and Ultimate Decal Setting Solutions: I didn't take the day off modelling, and fitted the ailerons and completed the last of the rigging (apart from the R/T antennae). I had sufferered a couple of evenings confusion over the connecting wires for the ailerons so I mention the following for anyone who suffers the same... the wires attach just outboard of the wing struts, presumably to avoid flutter from the turbulence caused by the struts. To get the correct distances between the two wires (which should mirror the angle of the strut both in relation to it and to each other) measure back from the rear strut and use a divider if you have one to make sure the distance remains consistent over all four wings. The BM Gladiator walkaround has some great pictures for helping locate the locations the wires connect at. Now I can concentrate on getting the Sea Gladiator up to the same stage, which will involve a lot of spraypainting, but inbetween that I can work on the engines, wheels and propellers; I did a bit of two-birds-with-one-stonery with that yesterday: Cheers, Stew6 points
-
I think @AntPhillips deserves a round of applause for posting up pics for everyone6 points
-
I can assure you that the very next Brewster Buffalo that I build will be the KNIL version. Or maybe the Finnish... The paint is indeed curing, as the smell is very much reduced today. I suspect another day and it will be OK to mask. I bought the ejection seats and upgraded intakes from Iroquois (MasterCasters) and have their "detailing set" on backorder. I've been waiting for that even though I have no idea what's included. Probably just the ejection seats and upgraded intakes... Roger that, no more Model Master. As @Andwil noted, it's the Special Hobby kit. At first I thought the cowling was too large in diameter, but when I dry fit the cockpit I realised that the internals fit fine, and the cowling would be OK, as long as there was that gap. It was pretty easy to fix with some sheet styrene spacers: ***** Here, you can help me watch paint dry: Cheers, Bill6 points
-
Here is the first (and the last so far) helicopter in my collection - Wessex HAS.3 in 1/72. Italeri kit made straight out of the box. The only change is tail rotor direction (wrong in kit) and, of course, add of antenna wires. Generally it was fast and simple work, just to try if build of helicopters models makes me happy.... I have discovered that it`s fun, so I hope that it`s not my last heli. This is well known Wessex HAS.3 in boring blue-gray, which was embarked on HMS Antrim during Falklands War. Note that not all decals from the Italeri`s set have been applied - the painting of this Wessex in 1982 was little different from today`s at Fleet Air Arm Museum (lack of emblems etc.). Maybe one day I`ll add some A-S weapons to this Wessex, but I don`t have any so far. For now my Wessex HAS.3, perhaps the most ugly helicopter in the world , looks like this:5 points
-
Hi folks, this is the Special Hobby kit built with CMK sets (Engine set, Landing flaps) that required some surgery, along with Rescue Models Intake and Cockpit aft that improved rather simplified kit's parts. Markings were airbrushed using custom made masks by Omask.cz, based on Massimo Tessitori Soviet Airplane site. The "White 23" belonged to 78.IAP of VVS SF (North Fleet). I also used great Airone Hobby Fabric effect masks. The kit was painted with Gunze Aqueous, Aeromaster and AK Real Colors. Cheers, Libor5 points
-
Hi Folks Please bear with me as there a number of firsts for me here, the main one being Ive never done a "Work in Progress" before😱. I will mention the others in a mo. I hope not to bore you to death🤐 I chose this kit for a few reasons, there is another forum that are going to do a Matchbox build (Im not going to do it though). But it reminded me of the first kit I ever built some 50 years ago. Bought as an xmas present and armed with just a tube of Airfix glue (see image below, may bring back a few memories to some of you😂). Searched the internet and found one still in its original cellophane. The kit was first manufactured in 1972 through to the 90's with I understand only having box & decal changes but never any new moulds. Mine is from 1982 so should be much the same as when I got my first one in 1974. The other firsts for me will be😱 1. Polished metal cowling (have something in mind though) 2. A realistic wooden painted propeller (If on the reveal the prop is black you know I failed😭). 3. The rigging hmmmmm still trying to work that one out So here are just a few pics but will add more as I progress The dreaded glue Thanks for looking and will be back soon, Any suggestions, comments would be welcome Many thanks Si5 points
-
Ready for inspection is my latest build. This is my first time posting a RFI on here so I welcome any comments and suggestions for improvement. But please note figure painting is not my forte. This is Tamiya’s excellent 1/35 Cromwell with added eduard photo etch where it was relevant. The build was seamless and the fit was excellent. Built as a Cromwell from the 5th RTR of the 7th armoured brigade on their way to Villers-Bocage on the evening of 12/06/1944.5 points
-
Good afternoon, My first completion of 2021 is here! Talk about being a slow builder.. First of all a special mention to @Ray_W who sorted me out with replacement roundels after I buggered the originals up + all those who popped in to my WIP to help. Cheers gents! WIP here I started this late last year and thought it would be a fun idea to display with the flaps down. Duly I bought the Eduard PE flaps set and thought ‘how hard can this be eh?’. At least a month of misery ensued trying to fit the blasted things. I may use them again as they definitely add to the look of the finished article but they definitely added to my stress levels. The fit of the Eduard plastic is great, except the ailerons, which while fitting well, have somewhat flimsy attachment points. The coloured PE was lovely, the canopy masks were good although the rear canopy had to be trimmed, which was a bit of an annoyance. I had a minor disaster when painting as the upper cowling seam appeared out of nowhere and my paint decided to craze. So I had to do an entire upper surface respray. Paints used were Vallejo and Modelmaster acrylics, a pledge gloss coat and Vallejo matt varnish to seal it all in. Decals actually worked better than I expected. They bedded down well and the carrier film is invisible under the varnish. I dabbled with removing the carrier film but to no avail. No panel line wash as I didn’t think it needed one. Exhaust stains done with Mig Rubber paint and some drybrushing. All other weathering done with Revell weathering powder. Aerial was done with Uschi thread which I really enjoyed using. Without further ado, here is the finished article: Happy to hear your thoughts! Ash5 points
-
The flat coat is on, and the canopy masks removed. Just a bit of weathering with pastels, and installing the rear gun and antenna to go. It's coming together! Hope you like so far, thanks for looking. Colin5 points
-
Vac formed canopies done:5 points
-
I decided to do something about the paintjob after it being roundly criticised [I hope to get on Oprah as it nearly affected my mental health 🙄, what do you mean you can't tell!😂] Anyway the cab has been attacked with wet and dry, one wing is now a pattern replacement part and one side door will end up as a scrapyard salvage part in a totally different colour, maybe with a slight rust issue and then finally coated with matt varnish as though ready for a far more accomplished paintshop. The chassis, in contrast, has had the wheels all blinged up.5 points
-
You were quite awake my dear Shturmorak, quite awake. There were no less than 15 tin triangles that received full wraparound, (if you include XH558 which received it's somewhat hybrid scheme shortly before becoming the display aircraft in September 1985). Quite drab but effective. At least 617 had that nice big squadron motiff on the fin to brighten things up a bit. Ah, that would be XM607, poor thing had that awful Dark Brown/tan camo sploshed all over it's undersides. Apparently it worked rather well as she nipped in and out of the equally dark brown and tan Nevada scenery, well under the radar catching the locals quite orf guard. A cunning plan indeed...5 points


.thumb.JPG.2ce06c4ff2300a5faba93aaeacbdab25.JPG)
-01_compress20.thumb.jpg.876237f478e7de3cb420ca2f41976d87.jpg)


.thumb.jpg.cfc129272ffec824439b15e6013d5952.jpg)


This leaderboard is set to London/GMT+01:00