Leaderboard
Popular Content
Showing content with the highest reputation on 19/01/21 in all areas
-
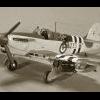
My first completion of 2021 is the venerable Italerei 1/72 Henschel Hs-126 which I decided to build as a homage to all those Saturday afternoon pocket money builds of my childhood. Built over several Saturday afternoons. Grandstand is no longer broadcast on the TV so listening to the football on the radio had to do instead and I used a cutting mat instead of Newspaper! I made no attempt to correct or update the kit other than to add a small block of resin to replicate the tropical air filter and some masking tape seatbelts. Painted using Colourcoats Enamels and the kit decals were used. No Hakenkrus were supplied and I did consider leaving them off but as all my other Luftwaffe builds are fully marked I decided to raid the spares box. Unintentionally I did manage to add an out of register pair to compliment the slightly out of register kit decals . The only thing missing from my typical 1970's build is the gluey thumb print, I hope you like it. Duncan B39 points
-
Hiya Folks, Well here I am with some more Airfix Spitfire Mk.Vc`s,...... this time from Australia, depicting an early arrival still in its desert finish from 54 Sqn RAF before they flew up to Darwin for operations,.... and a 452 Sqn RAAF aircraft from early 1944 based at Strauss, Northern Territory. For these models I reprofiled the DH spinners, cut out the side entrance door and sourced new wheels from the spares box, especially as the 452 Sqn aircraft had wheel hub covers. Thi model also sports an Eduard canopy hood while the 54 Sqn one has a vacuformed hood and both have had rear view mirrors bodged and added. Decals came mostly from DK Decals,..... Both were brush painted; 1- 54 Sqn, RAF,..... BR544/A as seen flying in the Sydney area in January 1943 prior to moving to Northern Australia for operations, still wearing its desert delivery colours. This aircraft was used by Flt. Lt. R.K.C. Norwood to shoot down a Zero while Plt. Off. W.H. Appleton also scored a kill in it and both men also claimed 2 probables and 3 damaged in it too. Here is the real aircraft, seen in the middle of the three; And a line up of Spits in Australia, prior to heading north; The model was painted using Polly Scale Middle Stone and Pactra Dark Earth with the last of my Aeromaster Azure Blue on the undersides. 2-452 Sqn, RAAF, A58-236, QY-G Which was based at Sattler Strip near Darwin. Australia April 1944,..... flown by Plt. Off. `Junior' Beaton,...... with the desert finish `converted' by adding RAAF Foliage Green to the Middle Stone painted areas. Here is the real thing, care of Peter Malone who posted it on Hyperscale years ago; And possibly the QY-G which A58-236 replaced following an accident in 1944; Being a later delivery, A58-236, QY-G may have had the narrow cannon bulges, but as the kit only provides the bulged type,...I can live with it if these are wrong, they were removable items after all . As it had previously served with 54 Sqn RAF who were known to reduce the size of their roundels and fin flashes while based up around Darwin,... (and there are traces of the original larger RAF roundel being painted out under the wings too) it may have retined these,.... however in the the available reference photo the fin flash is full sized and does not match the smaller 54 Sqn style,....so it appears to me that 452 Sqn must have re painted the RAAF roundels full size to match the other squadron aircraft,..... and this is how I chose to portray it. The model was painted using a base coat of Humbrol 29 Earth Brown, Polly Scale RAAF Foliage Green and Aeromaster Azure Blue. I`ve now started another pair,......another Aussie machine from 79 Sqn and possibly a USAAF one if I can cobble the decals together! Here is the Aussie option that I am thinking of; Cheers Tony37 points
-
Hi everyone, this is my Airfix 1/48 Hurricane MkI. It was flown by a FAA pilot, Richard ‘Jimmy’ Gardner of 242 Sqn. Based at RAF Duxford in August, he served alongside Dickie Cork and Douglas Bader. The kit was rivetted and I sanded down all of the proud fasteners around the cowling and nose. I then used a jewellery tool to better create the dzus fastener. it was masked and sprayed all over with the serial from the spares and the Nelsonian flags underneath the cockpit (England Expects that Every Man...) came from Xtradecals set. Sadly they used the wrong codes (T) and did not provide a serial so one of the Britmodeller members on here, Tony Walton supplied the information. Having grown up in Pompey and loving the FAA and Nelson, this was a kit I’d wanted to do for a while. All sprayed with Colorcoats which now seems to me my go to RAF/FAA paint. I think some Ultracast exhausts were also used. Thanks for looking. Nick32 points
-
Hi Folks, apologies for the posts today, I’m playing catch up. This is the Merit 1/48 kit. It has its foibles but it goes together okay if slightly basic in detail. It represents an a/c flown by Flt Lt L.G. Schwab in Paramythia, Greece, 1941. After a holiday in this area I knew I had to model some of the aircraft that operated out of this beautiful valley. I have a Blenheim and a Swordfish to add to this. Sprayed with Colourcoats and Maketar custom mask. If anyone knows the serial, please let me know and I will gladly add it. If it was sprayed out then happy days! https://flic.kr/p/2ktENUJ32 points
-
Trying to just have fun with these Airfix kits. This is their PR XIX done up with Xtradecal X48-118 for RM643/Z. The only non-OOB part is the exhaust stacks. Clear glue still drying on the camera ports. Marbled on a PRU Blue color from SMS....great paint. Xtradecals....great as well. Kudo's to Airfix for allowing in-flight builds....they give you the parts to build gear up which I really appreciate (wish all kits did this). The issue I have is the pilot figures. I painted the kit pilot up and it really looked great. To get him to fit in the cockpit...I ended up cutting away about 2/3rd's of him to get him to fit (legs gone...backside...gone, lower back...gone). Very frustrating...but it's a Spitfire cockpit...can't see anything anyway. LESSON LEARNED: I will never build another in-flight kit and attach the canopy BEFORE I paint and finish. This is the second or third build I have had fogging on the inside of the clear parts after I thought all the glue had set and off-gassed. This could also be paint and overcoat fumes sneaking in during the painting process. Regardless...I will improved my builds by adding the canopies as one of the last steps of the build. Lesson learned. So off to the work desk she goes....to keep my two Mosquitos company. Cheers Collin31 points
-
Original FROG Canberra PR.7 kit bought and made in 1960. Consigned to 'spares' box by late 1970s, but slowly worked on for next 10 years and fully restored and improved by 1995. The 'flat' mainwheels were cut off and Matchbox B-25 Mitchell wheels added, all raised rivets and panel lines removed, and hinge lines scored in. A 'collar' was added to the rear of the canopy. The original FROG engine cowlings are too bulbous, but have been retained. They are closer to the one-off Sapphire engined experimental version. The colour scheme was chosen to be close to and a tribute to the original FROG markings. WH778, 31 Sqdn, Laarbruch Germany, c 1956 (11) by Philip Pain, on Flickr WH778, 31 Sqdn Laarbruch Germany, c 1956 (10) by Philip Pain, on Flickr WH778, 31 Sqdn Laarbruch Germany, c 1956 (6) by Philip Pain, on Flickr WH778, 31 Sqdn Laarbruch Germany, c 1956 (4) by Philip Pain, on Flickr WH778, 31 Sqdn Laarbruch Germany, c 1956 (2) by Philip Pain, on Flickr Thanks for looking.30 points
-
Here is my recently completed Kitty Hawk 1/48 FJ-2 Fury. The markings are from Caracal's second FJ-2 sheet. Paints are MRP International Orange 232, Gunze Mr Color Insignia White 316 and Insignia Red 327. From Hypersonic Models I used their ejection seat and cockpit details and nose gear. I used CAT4 resin wheels.28 points
-
After spending a considerable amount of time under the workbench this old kit has finally seen the light of day. I had been put off making it for two reasons. The rigging and the non availability of NIVO in acrylic. I finally bit the bullet and using 'Prym' elasticated thread and mixing the paint to as near as I could to NIVO finally finished it. The Heyford was the RAF's main bomber during the 1930s and retired from front line service in 1939 although some were kept into the early 1940s for use as glider tugs and bomber crew training.27 points
-
#3/2021 And my dad has finished his first 109 in 2021. Hasegawa kit, bomb rack and 50kg bombs from Zvezda, Eduard seatbelts, EZ Line for antenna wires, plastic rods and lead wire for the brake lines. RLM74/75/76 painted with AK Real Color. Shortened the legs to get a more realistic look. Build thread here https://www.britmodeller.com/forums/index.php?/topic/235084867-stranded-jabomesserschmitt-bf109f-4b-10jg53/ On March 27th 1942, Unteroffizier Felix Sauer, serving with 10.(Jabo)/JG53, had to make an emergency landing on the beach of Sicily due to an engine failure. The pane wasn´t damaged much during the landing but most probably because of the saltwater damage it was declared a 90% loss. DSC_0001 by grimreaper110, auf Flickr DSC_0002 by grimreaper110, auf Flickr DSC_0003 by grimreaper110, auf Flickr DSC_0004 by grimreaper110, auf Flickr DSC_0005 by grimreaper110, auf Flickr DSC_0006 by grimreaper110, auf Flickr DSC_0007 by grimreaper110, auf Flickr DSC_0008 by grimreaper110, auf Flickr DSC_0009 by grimreaper110, auf Flickr DSC_0010 by grimreaper110, auf Flickr DSC_0011 by grimreaper110, auf Flickr DSC_0012 by grimreaper110, auf Flickr DSC_0013 by grimreaper110, auf Flickr DSC_0014 by grimreaper110, auf Flickr DSC_0015 by grimreaper110, auf Flickr DSC_0016 by grimreaper110, auf Flickr DSC_0017 by grimreaper110, auf Flickr DSC_0018 by grimreaper110, auf Flickr DSC_0019 by grimreaper110, auf Flickr DSC_0001 by grimreaper110, auf Flickr DSC_0002 by grimreaper110, auf Flickr20 points
-
Hi all. Several years ago I started building Eduard's 1/48 P-38 kit but never finished it. Recentely I decided to pick up this kit again. A cockpit set by Pavla and an engine from Quickboost were used for this build. Some cutting has to be done to accomodate the engine. I also made a support to make sure the engine wouldn't move after the fuselage was closed. The model was painted with Mr Hobby paints over Alclad black primer. The walkways and red and white stripes were masked and painted on. The kit decals were used and weathering was done with Abteilung 502 oilpaints and pastel powders. Thank you for watching. René19 points
-
Hi folks Another couple of models finished over the weekend. First up is the Italeri F-5F in 1/72 scale. The Italeri kit is an old mould with raised panel lines but goes together quite well and seems to have a nice accurate shape. Decals were straight from the box for a VFC-111 machine in 3 greys. Paints were Mr Hobby Aqueous. Has to be one of the most attractive colour schemes...... Apologies for the quality of the photos, struggling to get enough light in the workroom at the moment. Next up is the Hobbyboss F-5E also in 1/72 scale. A more basic kit with some shape issues here and there, but it does have the benefit of engraved panel lines albeit a touch on the heavy side perhaps. But at around £7 it's a real bargain. Paints were a mix of Mr Hobby and Vallejo, and decals from the kit plus the spares box. I'm afraid the 'bort' number is as far as I know not accurate as I completely messed up the original decals so i had to use the closest I had available. Anyway it was a fun build...... I've got more of the same in the pipeline so watch this space.... Thanks for looking, comments much appreciated 👍18 points
-
Found this kit at the back of the stash. Never done a dual combo before and I must say that I'm impressed. One of Eduard's earlier offerings. You can see the leaps they have made in the quality of moulding (I'm also doing a Tempest at the moment). Now regarding paint colours......... I know there has been "some" discussion regarding this.... BUT.... this is my take working with what I have in stock during a lockdown. Markings are for Col. Anton D. Yakimenko commander of 151GIAP (red nose) and Maj.Sergei S. Shthirow 267 IAP Please feel free to comment etc. Thanks for looking Dick18 points
-
This is my first complete build of 2021. I'm currently on a phase of the older Airfix airliners, and this one dates from 1961 with a 2015 re-release. It's a very simple kit with few parts, but it builds into a striking aircraft with an equally striking colour scheme. The paint scheme was tricky in parts to get right, especially the red upper wings with the wing fence interfering with the masking, and the tight curves between the inner engines and fuselage sides. The Olympic Airways livery is much simpler, but not as visually appealing in my opinion. I had no problems during the build with the fit of any parts, although the clear cockpit windows are a millimeter or so too short on either side, but the clear glue and window frame decals hide this. There was also a sizeable gap on the belly where the underside of the wing box meets the fuselage, but I think I managed to hide it with the filler.17 points
-
This is roughly complete, I'm still working on the details and placement. Been re-arranging the placement of the vehicles more and more to find the perfect spot. Working on painting figures, which are not the best in details or features. Trying to find other figures, that will look much better than the ones I'm working on presently. Slowly but surely things are hopefully falling into position. Got to add the hydraulic spillage and more weathering here and there before calling it quits. The scale I'm working on is 1/35. The theme is simple and is part of usual transport method, in certain countries. Not sure if it is done every exactly, but have seen several types of methods being used to put a front loader into a shipping container. This is just one of the methods used. Hope you all like the images. Apology for the bad photos. Will take better ones when done. ---------------------- ---------------------------- -------------------------------------------17 points
-
"There is no other help for us, no stronger wall to ward off disaster, no city with its ramparts to hide inside, no other army to turn the flow of battle. Here on the plains of Troy are we, our backs to the sea facing the mail-clad Trojans, far from our native land. So in the strength of our own hands is our salvation, and there can be no surrender in this fight." -- Homer, The Iliad, XV (trans. A S Kline) "Only fully experienced pilots must come here. It is no place for beginners." --Hugh Pughe Lloyd, AOC Malta, to Arthur Tedder, 25 April 1942 "I thought my last minute had come and decided to sell my life dearly. I flew straight at the nearest machine with the intention of ramming it. I did not fire a shot, but the Macchi pilot, suddenly realising that his number might be up too, took violent evasive action, stalled, and crashed into the sea." -- Ioannis Agorastos "John" Plagis, on 11 May 1942 Born to Greek parents in Hartley in what was then Southern Rhodesia in 1919, Johnny Plagis was still a Greek citizen at the start of the Second World War, though he had lived in Rhodesia all his life, and it was under the birth nationality of his parents that he served in the RAF. Plagis went to Malta on 6 March 1942 off HMS Eagle with the first sixteen Spitfires sent to that beleaguered island. On 20 March 1942, Plagis's close friend and fellow Rhodesian, Pilot Officer "Douggie" Leggo, was shot down and killed by either the experte Hermann Neuhoff (who would himself be shot down by Canadian Hurricane pilot F/Sgt Garth Horricks DFM of 185 Squadron and taken captive on 10 May 1942), or Ernst Klager (taken prisoner on 3 July 1942 at El Alamein after being shot down on a frie jagd by a SAAF Kittyhawk Ia flown by Lt Sydney "Moose" Reinders). It appears that a 109 then either fired into Leggo as he dangled in his parachute, or deliberately or by accident (the attack took place at only 50 yards range) collapsed his parachute as it flew past him. Regardless of what had transpired, the results for the Luftwaffe were very nearly as catastrophic as the killing of Patroclus had been for the Trojans. In his diary that night, Plagis wrote "Swear to shoot down ten for Doug -- I will, too, if it takes me a lifetime." In fact, it took him only until 7 June, a little less than three months. Among those he shot down was the 13-claim ace Fw Hans Schade on 1 April, one of four aircraft he brought down that day. Plagis went on to be a Wing Commander in northwest Europe and flew Meteors with the RAF postwar, before returning to Rhodesia, where he involved himself in several deeply regrettable ventures, including a business partnership with Scientologist huckster L Ron Hubbard which ended when the latter was expelled from Rhodesia, and more seriously, Ian Smith's Rhodesian Front. In 1974, apparently unable to adjust to civilian life, Plagis died by suicide. He was married and had four children, but in the tumult of Rhodesia's subsequent collapse and reformation as Zimbabwe, they seem to have not surfaced anywhere to provide a more comprehensive biography of his life. In what is now Harare, a street is still named John Plagis Avenue after him. So not a very happy story behind the model we'll be building today, which is why my leading quote for this build, is perhaps apropos: Telamonian Ajax defended the Greek ships from the assault of Hector and the Trojans almost single-handedly, but was bested by Odysseus in a contest of skill with the armour of Great Achilles as a prize. Ovid writes in Metamorphoses that Ajax, "who so often when alone, stood firm against great Hector and the sword, and flames and Jove, stood not against a single passion, wrath. The unconquerable was conquered by his grief. He drew his sword, and said...'I must use this against myself...lest any man but Ajax vanquish Ajax.'" As for the kit, it's of course the new Airfix Spitfire Vc, which I'm pretty excited about. I'm planning on using the DK Decals Aces of Malta sheet, which has markings for GL-J/BR321, which Plagis apparently flew after transferring to 249 Squadron in June of 1942. Naturally I can't find any photos of it in Cauchi's Malta Spitfire Vs, so if you have or know of one, I'd appreciate it!15 points
-
Hi Folks, Normally I’m a FAA kind of guy but I do like the odd Soviet a/c. This is one I made last year. This is the Zvezda boxing of the AM kit. I used some Eduard belts and a mixture of the kit and Eduards kit decals. Sprayed with Mig Ammos Soviet set. Let me know what you think about the colours on this colourful bird. Cheers15 points
-
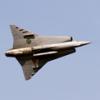
261 - Saab J 21A, 1/72 My number six, and Saab's first fighter. Whether this was a good construction or not is debated, but you cannot deny that it is a odd and cool aircraft, The sharkmouth was painted on this very aircraft only, and just for a short while. Swedish Air Force leader, General Nordenskiöld went "mad as hell" when he saw it, and it was immediately overpainted. A pity, since it looks really good with it! Additions: - Re-scribed panel lines - Ejection seat detailed - A few more details added: In the cockpit, on the landing gears, and landing lights+guns - Scratch-built ladder - Decals from Special Hobby's J 21 and from my spares box WIP thread:15 points
-
Thanks Adrian Thanks Bill - definitely on the bottom then (fnaar!) Not to worry John, I've slowed down a bit (see below) Thanks Giorgio It is a nice kit Ben, few problems so far Yep, that's it… autopilot engaged! Little progress as I address this mojo killer: You can see I've done the wings and, maybe, have the stripes in the same place on both… although the bit sticking up near the ailerons may give me away. I've put some 4mm tape on top of the fuselage to guide the stripes but it beat me - I'll come back to it when I have some patience.14 points
-
Tuesday lunchtime and I've decided to take a few hours off: we're in the middle of yet another flood warning as A. Ocean assembles itself in kit form on top of the landscape. Hard to concentrate on anything meaningful with the eaves getting all elemental so thought I'd inflict some of me blather on the assembled -armed with a mug of the fizziest instant coffee I've ever come across (you pour water on it and it goes off like sodium..) Bill first then: Funny how what's good in a modelling forum can be legally problematic in a convent.... Agreed Simon - and some primer has been duly snorted Vixen-wards. Thanks Ian! In the process of further tidying the region in question here but not going to remove too much more surface relief than what's seen here I think: Missile lock sticker on the lens Ced? 😁 My pleasure G - something I should have done earlier to give people and idea of the practicalities of assembly printed resin parts tbh. It's a minor obsession of mine the way that kit surfaces can be so egregiously smooth and regular in ways that physical surfaces aren't always themselves. The visual equivalent of a holding your face in fixed grin for the camera..... 😀 For God's sake - what have you been putting it on CC? Diesel, 1.6. Usually the motors get a good blast going into and out of work as it's about 40km from home. CV-19 and working from home though have put the lid on that for a bit so it'll have to get the odd 'soot-burner' of a blast down some of the backroads locally instead. Is there a particular brand you'd recommend CC? I'd almost forgotten the pleasures of a messy bench scattered with tools... This made for a pleasant session last evening tidying up the control surfaces and stores, followed by fixing some brass pins in the latter for mounting onto their pylons: Actually and metaphorically I also took the 'plunge' and did a test vacform from the resin buck: At 0.3mm thickness, this PET sheet is a bit thinner than the actual 0.5mm stuff I'm proposing to use for the real thing as although it gives great clarity, I'm concerned that the interface with the fuselage won't give a big enough bonding area to glue it in place securely enough. Pleased to say though that in addition to a nice smooth teardrop profile, the frame and fairing details also reproduced well: Tacked into place temporarily: The more eagle-eyed will notice here that some time back I broke the central dividing frame for the canopy off of the fuselage ( as part of which it was printed): as it's a fragile element so easily snapped off during handling, I'm reconsidering the advisability of print it as part of the nose section and reproducing it as a separate part to be added later instead. It was kept separate in the Fusion designs anyway for just such an eventuality. The buck itself? As Alan confidently predicted, it survived without any damage at all so good to go next time: After a squirt of Halford's grey all over the airframe for quality checks, the unprimed control surfaces and stores were added to check for any assembly problems. Due to the expected resin shrinkage, some slight filing was needed to fit the rudders and ailerons into their recesses, but pleasingly only a very small amount: Heartening to be able to report that the airframe is in pretty good visual shape - some residual sharpening up of filler excess at the wing roots in one or two places still needs doing generally the amount of cleanup involved has (aside from the top of the engine bays and boom sides that I mentioned previously) been largely as a result of my 0ver-generosity with resin filler rather, than any flaws in printing technique. As a test mule anyway, that's really the point of this version, to feel my way around it now as a set of interacting physical objects. and develop a sense of how to address it as such. A closer look at the control surfaces in place: Martel testbed and 150 gall.: Actually holding the aircraft in your paws after a year of staring at it in virtual form is an experience as bewildering as it is satisfying. One thing I've learned from holding it as well is that it's likely to be a tailsitter, so will need weight added to the nose section, and secondly, as XJ481 is going to be posed in flight, I need to think of an unobtrusive way of mounting it in Whoosh mode; some final shots to finish in this vein then: After tidying away any excess filler from the aforementioned wing roots, I'll leave it at that for the '481 mule and turn attention to outputting the more complicated XN708 version. Hope your weeks are going well so far. Tony14 points
-
The first one over the line for this year is the Hasegawa F-15A Eagle 'ASAT'. It might be an old kit compared to some modern tooling's but it's still a lovely kit to build. On September 13th 1985 an F-15A piloted by Maj. Wilbert Pearson took off from Edwards Air Force base and climbed to 35,000 feet before launching a missile which carried on upwards before hitting and destroying a satellite in orbit. I’ve tried to build ‘Celestial Eagle’ as it was on that day complete with a live ASAT missile instead of the usual inert one. This one comes with a lot of extras in the box including etch for the cockpit and exhausts, white metal wheels and undercarriage legs. I still managed to add a few bits though: Eduard - Interior etch set Aires - Ejection seats Hobbydecal - AOA Probes All the main colours came from Hataka and the rest were Vallejo Model Air, both sprayed beautifully as usual. Gloss coat provided by an ever dwindling supply of future, followed by 10-11 hours of Two Bobs decals. Why do we put ourselves through the torture of stencils? Lastly some dark dirt from Flory Models and a Matt coat by Xtracrylix Matt Varnish. I have to say that it really was an enjoyable build for the Interceptors group build and now just got to decide what to build next. On with some pictures: As always comments and critique welcome. Pete13 points
-
Happy New Year all... currently on sale is the February edition of Airfix Model World magazine with my Lockheed Vega on the front cover. Here's a couple of teasers... 😉 Cheers, Dean13 points
-
Hi all, Thought I'd show off my first build of 2021, an Airfix MiG-15 in 1/72nd scale. I've had this kit in my pile of shame for the best part of ten years, so finally getting round to it at long last. Always loved MiGs, and this one came out around when I started hobbying back in 2009. Have to say, reading up on the kit meant seeing the wide ranging problems with the kit; not to scale, panel lines too deep, poor fitting parts, the works. Not a bad kit if you aren't overly concerned about a few mm here and there, and I think it tidies up nicely. C&C is appreciated, not only is this my first scale build in 2021, it's my first since Christmas 2018, so a bit rusty trying to keep things realistic! Hopefully I've gotten the photo adding correct, if not someone say! - Geo13 points
-
In the first months of T-60 production, Soviet factories were disrupted severely by the German advance. Factory No.264 outside of Stalingrad, which would end up as the second highest producer of T-60 tanks, took a while getting up to speed and was assembling T-60s from components coming from other factories that had been packed up and sent deeper into the country as they were getting overrun. I converted a Miniart early Plant No.237 into a screened (uparmoured) early Factory 264 T-60. The unique armour plates (rounded at the bottom) of the particular vehicle I was modeling are not included in Miniart’s early 264 kit, so I added sheet brass armour plates to the turret and converted the hull to a welded one, as was produced at Factory 264. The Miniart T-60 kits are really well done, very detailed and a pleasure to build. This is my fourth build of the seven gun tanks, so perhaps I’m in need of some counseling...12 points
-
A HAWK plated U-2A. 1/48 scale. I brushed the chrome finish to calm it down a bit...12 points
-
Armour build number 5 complete and i thourghly enjoyed myself again with this one. I decided to use this build as a sort of weathering mule so this certainly isn't a factory fresh Tiger infact it's probably way OTT but it gave me a great opportunity to learn about the weathering products I've purchased recently for future builds. The kit itself well it's Tamiya so no issues there and it's detailed enough for what i intended it for. Here's the pic's of the finished build So another one finished time to start the next one thanks for looking back soon 🙂👍12 points
-
Hi all First finished build of the year but started last year- i'm not that quick! I went for ICM's Lagg-3 kit as my first ever Soviet aircraft- always had a soft spot for the Lagg-3 and enjoyed the build. It went together ok but a bit of work was needed to get the gun bulge inserts to fix into the engine cowling piece properly. I really enjoyed the painting and weathering. I knew I wanted to have a go at a winter scheme and went for number 64 of 3.Gv.IAP flown by Georgy Kostylev who named the plane his "Columbine Tale" (I confess I have no idea to what that refers to!) I used MRP for the green/black/blue and then went with Tamiya white for the winter coat so to bring in the hairspray chipping. I was pretty happy with that but felt that the edges were too harsh so after a matt coat i wet the surface and used a weathering pencil to dab on more white around the edges and a brush to blend. This made the made look more like it was washing off rather than chipping off. This particular aircraft is shown not to have a canopy hood so I put a few more details into the cockpit than i normally would. Hope you like it, back to tanks next but sticking with the Russian theme with the 1/48 Hobbyboss KV-1. Graeme12 points
-
The instructions say it's a MD 450B Ouragan EC 3/4 «Flandre» Patrouille de France, Bremgarten 1956. Modeldecal sheet 68 was used for a couple of stencils, and the correct orientation of the Diables rouges and Petits Poucets emblems. All in all a nice little kit of this forerunner of so many famous Dassault designs.12 points
-
So far, so good. This is the 1/35 Hitachi Vibratory Combined Roller ZC50C-5 from Hasegawa. Almost done with it. I still have to add the side amber lights to the unit.11 points
-
This was a build for the Interceptor GB and my first experience with an AMK model. I had been in awe with this model, especially with the reviews it had received. Building it……… ……..well it’s a nice model and probably one of the better ones to come from China, but there is a very good reason why Tamiya are so good. For a model that promised so much, and is quite expensive… the reality is it doesn’t quite live up to the hype, “slide moulding” is super trick, but if the detail from it isn’t as good as traditional moulding. There are/were lots of little things that really bugged me with this model, but in the end the decals were the biggest let down…. for the premium you pay for this model…..they were ! It sort of sums up the whole model, it promises so much (and the reviews build it up) but in the end it sort of lets you down. I blame all the hype by the reviewers, it’s an amazing model, and one of the best aircraft models from a Chinese company for some time, and quite expensive too, but in the end, you just know Tamiya (or Zoukei-Mura) could have done it soooooo much better and cheaper too. Would I build this model again……. let’s put it this way I have an AMG F-14D in the stash, but I just bought another Tamiya F-14D ( have built an F-14D and have F-14A in the stash already), and will probably buy a couple more as well! AS for the Quinta Studio 3D Decals......... they have to be the best product out there by a million miles....an absolutely stunning product you just have to buy!! Please enjoy, as usual there is a link to the build. Model: AMK 1/48th MiG-31B/BS Paint: Mr Paint and Tamiya Acrylics, Model Master Metalizer Lacquer Extras: Amigo Models – Nozzle set – still missing!!!!!!! AMK – Die-Cast Landing Gear set Eduard – PE Detail set Quinta Studio – Interior 3D d Master – Pitot Tube set ResKit – MiG-31 Resin Wheel set11 points
-
This is the only car i have built, and was made in my first period of modelling about 15 years ago. Recently found the pictures tucked away on an old hard drive. One thing sticks out in my mind about the build and that was that i really enjoyed doing the CF decaling.11 points
-
So the final update for the Tiger I've gone as far as I think is necessary and I'm happy with the results. Here's a couple of pics I will post more in the rfi section later on11 points
-
Not outstanding build,but the camo perhaps made for it... Thanks for visiting! Marcus10 points
-
Calling it done on this year long project. Kit is Tamiya's magnificent (dare I say the best scale aircraft model ever released) Mossie, with a boatload of scratch built details (I think I put over 200 extra items into the weapons bay alone), Barracuda cockpit decals and other bits, AIMS 100 gal slipper tanks and Avieology decals for No. 333 (Norwegian) Squadron. Thanks to everyone on this site who patiently answered my hundreds of questions and provided additional information. A special thanks to Crimea River for all of his help. Here's the real thing, it matches up very well with the one photo available of KK-Q.10 points
-
Hi My first finished kit for the 2021 year I started this kit in 2019 but didn't have the motivation to finish it Some others pics at this link Hawker Tempest MkV10 points
-
Hi all, My first build from this year completed, the very nice 1/48th Tempest V by Eduard Superb fit and surface detail, only let down by terrible decals, which were thick, wouldn't conform and some even failed to adhere completely, I had to source most of them from my spare sheets. My only addition to the kit was a set of Eduard resin wheel. Painted with MRP lacquer paints, and sealed with MRP clear matt cote... which is impressively matt. Weathered with oil washes, pastels and a silver pencil for the chipped areas Thanks for looking, gazza l10 points
-
So I got a little started tonight. The kit seems pretty clearly inspired by the Eduard Spitfires in terms of engineering, especially in the cockpit. The plastic seems weirdly soft and...crumbly? I used my micro-chisel to poke out the hole in the seat armour for a seatbelt, and a chunk of plastic just flaked off, as if it were puff pastry. Detail seems very soft on the heels of the Arma kit, but of course it's a great improvement on their Spitfire I, so I reckon I ought not to complain too much.10 points
-
It is a rough old kit, I painted it Humbrol 87 a blue ish grey following a post from a modeller in Spain! Some nice interior detail.. The Buchon was a kit I built in 1985 (?) using parts from an Airfix 109E and a Frog or Heller 109F and various scratch parts... The kit lacks wing fences and cannons... The single part canopy is massively thick!! But I decided to separate tha canopy in to the open position. The wheels are wrong the replacements were donated by a friend from a late model AZ 109.. I also made the wing lights.. Look ma no cannon or wing fences, how???9 points
-
This is Heller #241 the 1/72 Arado Ar-196A, a kit I had to get into the GB as it was the first ever Heller kit that I built as a 13 year old. That was also the last time I built this particular kit and it was great fun, and a little nostalgic, to be able to revisit it again. Still a great kit out of the box, I think this Arado typifies Heller at their peak in the late 1970s. Well detailed and easy to assemble, although warped float struts in my kit did cause me some headaches and a breakage which can be seen in the photos I think (yet to be repaired!). I used the Kora "Finnish Lease" decal sheet for this build. Nice thin decals that worked well enough, if a little too matt in finish that shows up in places. WIP here.... Anyway, here is the finished build. Hopefully a bit better than my first effort back in the early 80s, but a thoroughly enjoyable build nonetheless. Thanks for looking! Steve9 points
-
Happy New Year to all my modeler friends! Now the nearly two-month-long project has come to an end. Although is was planned to finish last December, I couldn't due to some issues. I have always wanted the F-4 Phantom in my collection and now that I have finally got one! It's the J version of F-4 from US Navy and the markings are Vf-102 Diamondbacks which you do not see often like the Jolly Rogers or the 3-tone Air Force Versions. The kit is from Academy in 1/48 scale. The quality of the fit and details are acceptable but I wanted a super detailed Phantom in my collection So I decided to add lots of upgrade accessories. These are- Cockpit PE, RBF Tags and Resin wheels from Eduard. F-4J Resin Nozzle from Reskit. Ejection seats and Electronic bay from Aires. Air intake covers from Quickboost. Carrier deck section base from one of the Chinese brands called Phoenix. Plus the missile head covers and pitot tube covers are scratch built. The build is enjoyable with only minor fit issues. Decals are of very high quality and so pleasing to apply as they are printed by Cartograf.7 points
-
I was very sad to hear of the passing of Chuck Yeager on 7th December 2020. Of course Chuck was the first man to break the sound barrier in level flight (although many others had come close in dives), but he was also a consultant on Electronic Arts 1991 'Chuck Yeager's Air Combat' on which I (mis)spent many happy hours. There's a great video of the flight here and Chuck's Wiki entry is here. In his memory I've built Tamiya's X-1. RIP Chuck, you had the right stuff. My first 'see through' model… WiP thread here:7 points
-
I first became aware of the Northrop BT-1 after watching the 1941 Warner Bros / Errol Flynn movie ‘Dive Bomber’ in the 1980s (and made a fuzzy VHS recording of it which I played back many times). The film was the last in a series of 1930s Hollywood movies with a naval aviation theme (mostly with a screenplay written by ex-naval aviator Cmdr. Frank ‘Spig’ Wead) and the only one in glorious Technicolor. As ever in aviation movies, the true stars were the aircraft. The BT-1s don’t have a big role in the film, but form a backdrop to some of the final sequences. It was the only type in the film with which I was then unfamiliar and I was struck by the prominent ‘podded’ semi-retractable landing gear a bit like its contemporary the Seversky P-35. Naturally, I was inspired to build a model at some point...... The first in a long line of carrier aircraft to be designed by the legendary Ed Heinemann, the BT-1 was nevertheless a flawed design, but lead directly to the very successful SBD Dauntless, with which it shared the same outer wing panels. The BT-1 had poor low speed stability; not exactly a desirable characteristic in a carrier aircraft and although delivered in 1938, it was 1940-41 before the 54 built were committed to carrier use with squadrons VB-5 & 6 aboard Yorktown and Enterprise, after some of the flaws had been fixed. The prototype had ‘solid’ dive flaps, which caused extreme tail buffeting during the pullout from a dive, which was cured by adding holes to the flaps in various sizes and patterns until an optimum solution was found. Test pilot Vance Breese performed over 100 9g pullouts during this activity and the resulting perforated flap design was a great success. The low speed stability problem was eventually improved by adding slots in the outer wings, carried over to the SBD. The rear, hinged portion of the gunner’s canopy caused turbulence which affected gun aiming, so these were removed some time after delivery and the SBD had a different rear enclosure, which slid forward rather than projecting into the airstream. Carrier service of the BT-1 was short and they were relegated to training in Miami when the first SBDs became available around mid-1941. I recently completed my BT-1 project, based on the 1/72 Esoteric Models vacform kit, which I had 90% completed around 1997. I had difficulties with the paintwork, which relegated it to the ‘Shelf of Doom’ for over 20 years and it was my longest-uncompleted model. The arrival of the Ginter ‘Naval Fighters Series’ volume on the BT-1 rekindled my interest in the type with its remarkable collection of photos and inspired me to rework a few areas. Like most of my vac projects, it’s really ‘Scratchbuilding-Lite’ as only the basic fuselage and wing components get used (heavily modified) and everything else is scratchbuilt. In this case, that includes the P & W R-1535 Twin Wasp Jr engine and Hamilton-Standard 10’ controllable pitch prop, all control surfaces, flaps including flap motor, torque tubes and actuating links, landing gear and fairings, canopies, wheels and all the other external details, including the gun camera and practice bomb dispensers. I challenged myself to see if I could reproduce absolutely everything in the cockpits, which took months, including the 40-piece Douglas gunner’s mount....not sure if I’ll go that far again, but it looks the part. So here is my model of Bu.No. 0614, the 4th section leader's aircraft of VB-5 'Winged Satans', aboard the U.S.S. Yorktown (CV-5), 1940......7 points
-
There has been some E Type discussion but in the 1/43 area there's no shortage of choices of new and older kits. Here are two cars that raced in the U.S. The white one with green is quite well known - Group 44 racing team,driver is,was Bob Tullius,I saw this car in real life at the National Motor Museum the other year which was a nice surprise. It's a Provence Moulage resin kit. The white one is famous for being the last E Type to win any race in 1980. Won races in the SCCA series,despite a few dirty tricks by the other teams! Must have been one the fastest E types ever. Oh,the team was called Gran Turismo and they are both screwed to a grey primered display case,I think by Trumpeter,just the right size for two 1/43rds. The kit was made by the Jaguar Model Club,which was disbanded a while ago. Equal I would say to a Marsh Models kit,a resin body and everything else is metal. These need making in 1/24 perhaps? Chris.7 points
-
The Blackburn Aeroplane Company. Who, imaginatively, called it the Blackburn Blackburn.7 points
-
I think the Wyvern is beautiful. Now this is an ugly plane But I still love it.7 points
-
Good afternoon mates, first of all I'd like to thank you for the nice comments and the pictures. They're all very useful! As you’ll have seen from my last update, the cockpit is done and glued into place. The stick and the ejection seat will be left for a later stage, to avoid breaking them ,so now I can proceed with the operator’s pit. As for the cockpit, I’ll build it from scratch and it’ll be a slow process , but I’ll have to be inspired!!! Luckily thefuselage section is circular, so the bulkhead separating the cockpit and the operator’s pit’s been cut from a 0,5 mm styrene sheet, using this tool I hadn’t used for ages!. Once cut and sanded,I painted it black on the backside, the one facing the cockpit. I don’t want to spray it once fitted with the risk of damaging the cockpit’s finish. Once dry, I glued it into place, quite an easy task! I started by glueing it to the side of the fuselage interior and then I glued it to the cockpit’s floor. Now it’s nice and solid! Initially I had glued the cockpit to the left side (…was it port or starboard…???can’tremember…)and the front wheel-bay tothe right one, but this made it impossible to join the fuselage halves, so I removed the wheelbay , which I’ll glue later under the cockpit, and I sanded off the locating slide for the fuselage top insert. This allows me to join the fuselage hales by rotating them into place. …like this…”clack”…sort of Lego bricks locking noise!! The bulkhead dimension was sanded a bit to get a good fit between the fuselage halves. Once happy with the bulkhead , I concentrated on the floor. First IU cut a rectangular piece of styrene and then I shaped it to fit to the bottom of the pit. Before concentrating on the side consolles and all the detail, which won’t be that straight forward, I decided to spend some time to fit the ejection seat. From what I’ve found on the net, the operator seat was a MB MK3 … something as shown here below. I’ve checked among my resin seats and found these two: on the left an Mk4b by CMK and on the right an MK4W by Small World Accessories. Of the two, the MK4b is the closest one, at least for its external black frame. The other one’s chute container , head-rest and back frame look more convincing. So I may either use the first one, modifying the chute container and head-rest or the second one, building its external black frame from scratch. After removing the seats from their moulding struts, they looked really happy to move sideways although the small room avaliable, so I decided to add a locating pin at their bacoand a locating hole in the center of the bulkhead. The locating pin made the seat happy enough to stop running around!!! I added the locating pin to the other seat too I’ll probably use the one at the bottom, which look is closer to the real thing. Next will be the detail around this busy area. But before I’ll have to study all the pictures in my possession. No rush! That’s it for now. Thanks for watching! Ciao Massimo7 points
-
This is Heller kit #156, the 1/72 Dewoitine D.500/501. This is yet another kit I built as a teenager, and was probably the second or third Heller kit I bought. I think I was taken by the subject which was something I wasn't familiar with at the time. A nice little kit, adequately detailed and fits together nicely and didn't cause any problems during construction. WIP here... No matter how hard I tried, I couldn't get any half decent photos of this one, and all it did was highlight my ham fisted mess ups. The Aftermarket decals were very thin, not easy to work with and very translucent and this can be seen where the cockerel decal is placed over the fuselage tricolour stripe. That's going to bug me like crazy so I might have to try and rectify that. I tried drilling holes for the exhausts with the idea of adding some very fine metal tubing for the exhaust stubs. Well, I got them all wonky and subsequently forgot to add the tubing. Typical me! Am I happy with this build? No, not really, but it has encouraged me to have a crack at another one. On a positive note, the Games Workshop Methril Silver that I used for the paint job was excellent and gave a great finish. So, in summary, a great little gem of a kit from Heller suitably messed up by me! [/url Thanks for looking; Steve7 points
-
I had another web chat with an HMRC advisor yesterday, my sixth in total! This time the advisor really made an effort, she seemed to understand the difficulty of the situation and tried to get the right information, taking a long time between lines written, apologising for taking so long... But, she ultimately failed. She had to escalate the problem to a higher level of customer support and I was booked in for a phone appointment in February (they will call me, hopefully). She said there are so many strands of information and updates and the issue of selling from abroad to the UK touches both the VAT and the import/customs department with separate sets of rules and guidelines and they don't really come together. So yes, it's all going swimmingly. We're past mid-January and even at HMRC themselves they don't really seem to know how regulations that you are supposed to follow NOW are actually implemented in reality. It's not that I'm not trying - I now have a UK VAT number but I won't start charging VAT from UK customers and sending parcels before I know for certain what will happen after the parcels have left Japan. J7 points
-
Well, here she is, just the pennant numbers to put on when the masks arrive. Made a 'posher' base for her to sit on, much better than the supplied plastic one and better than the old one I cobbled together from scrap stuff that I have been using for building her. Lighting in the shed ain't so great, will try a few more in proper daylight tomorrow. Still undecided on whether to make some of the rigging black as per Nialls info a little earlier, anyone got an opinion on that? Anyways, here she is after a few months of work. She was definitely a challenge, but I am immensely proud of my first ever ship build. I've grown rather fond of her and will be a bit of a wrench to hand her over to my window-cleaner...........maybe I'll have to go get myself another maritime build!!! Have had half an eye on a sub but I think it is huge at 1.3mt!!! (Revell 05168 US Navy Gato Class Submarine (Platinum Edition) 1:72 Plastic Kit). Between taking the above and below photos I scratched a couple oars for the lifeboats, 'cos the missus commented on how would they row!! Peek-a-boo!7 points
-
I’ve continued on with the turret and left the hull for now. I’m not convinced the cheek armour was on the particular Firefly on the Star decals sheet, but it looks good... Now I’ve got some etch to add as well as a little bit of scratch building for the brackets on the turret bin. Then it’ll be back to the hull. Sean7 points
-
Another group build completed and I have enjoyed this one a lot. I have built the Hasegawa Hi-Grade Series F-15A Eagle with ASAT Missile. I didn't add much beyond an Aires resin seat, Eduard etch and some metal AOA probes. Decals came from Two Bobs and the rest from the box. Pete7 points
This leaderboard is set to London/GMT+01:00

