Leaderboard
Popular Content
Showing content with the highest reputation on 05/12/20 in Posts
-
Latest build from me depicting the loss of Panavia Tornado GR.1 ZD791 on the very first day of the Gulf War, January 17th 1991. Crewed by John Peters and John Nichol, their Tornado was hit by both a surface to air missile as well as taking hits from 23mm flak. Both survived the ejection and were taken prisoner and were released at the end of hostilities. This is a 1/32 scale Revell kit, the aircrew being aftermarket items. Not a perfect build and certainly some artistic licence was used, hopefully this depicts a well known incident from the first day of the Gulf War. Last picture is a link to Flickr showing a video of the flickering lights representing flames. Not sure it really works, but it was the first time, so very much a learning curve.30 points
-
28 points
-
VPAF MiG-21PFL 'Fishbed-D', '4127', pilot Dong Van Song, 921st FR, Noi Bai, 1966 Dong Van Song flew this plane often on the first part of 1966 - and two kills were confirmed by Noi Bai pilots with this airframe. On july 14th 1966 '4127' was shot down by F-4C (flown by Capt W J Swendner and 1Lt D A Buttell) using an Aim-9B missile. Pilot Ta Van Thanh was killed as the plane disintegrated over Hanoi, while he was chasing F-105s. - - - - - - Kit: Eduard MiG-21PF ProfiPack Edition (#70143) Scale: 1/72 Aftermarket: Master pitot tube, Print Scale decals. Paints: Vallejo acrylics Weathering: Flory Models Wash, Mig weathering products Simply brilliant kit by Eduard. Build thread:25 points
-
The Academy F-4B builds into a really nice kit. Kits painted with my Tamiya mix colors and decals are from the IPMS Yankee Station Mig kill sheet. The carrier deck with launch briddle is from Zoukei-Maura Brian21 points
-
I started this ancient Airfix Do17F in 1/72 well over a year ago, and got to the decals stage around January this year. Unfortunately the decals were no good and I shelved the model, the replacement decals I would need to buy would cost more then the model itself. Because I am probably slightly insane I decided recently to just but the decals and ended up using ones from four different decal sheets to complete the model. So with an evening of applying decals and an afternoon of weathering, here it is. It’s also my first attempt to airbrush exhaust stains. Criticism welcome21 points
-
I can remember going to the International Air Tattoo and seeing this in the static line up and promising myself that I was going to build it soon. Well soon has been stretched a little bit but I finally got it done. The kit had quite a few extras added to it but all worthwhile in my opinion. Eduard Cockpit Etch Set Eduard BOZ Pod Eduard Sky Shadow Pod Eduard CPU-123 Paveway II Quickboost Undercarriage Covers Reskit Wheels CMK Martin Baker Mk.10 Ejection Seats Master Pitot & AOA Probes Painting was achieved with Xtracrylix and Vallejo paints followed by a gloss coat of Klear. Decals came from Kits-World and Xtradecals. Dirty stuff was provided by Flory (Pro-modeller) Dark Dirt and all matted down afterwards with Xtracrylix Matt Varnish. All in all a thoroughly pleasing build and hope you all enjoy looking as much as I enjoyed building it. Enough waffle, on with the pictures: Thanks for looking Pete19 points
-
I just took these photos of my first proper little diorama project ever WIP and background here: Airfix kit, Tamiya and resin figures, base made of floor insulation foam, plaster, static grass, and Mig Ammo Acrylic Water. Thanks for looking - comments are always welcome! Elger19 points
-
Hello folk's,I've been having a cull of older builds but one I couldn't part with this little one from a few years ago definitely one of my favourite builds and aircraft in fact I've just bought a Revell 1/28 kit for a second attempt at the Red Baron's mount,anyway here she is thanks for looking!19 points
-
Quite a job for a mediocre modeller such as myself Broplan ATR 72 with much scratch building and cobbling; and wit the 42 (built from this same kit, just sawed off) Comments welcome but keep in mind, I strive for mediocrity19 points
-
Having had a break from Helicopters for a while, I'm back with this one: Very kindly donated by @AdrianMF it's another old Airfix, but thankfully not shiny plastic! Thanks Adrian, very kind of you, I'll try to do it justice. The first problem is the end opening box, soon sorted: Some shots of the parts trees, as usual. Rivets. Count 'em! Not as prominent as the P1127 so they may just get a gentle rub down. I think these bits are the runners from the fuselage, but I'm taking no chances - they will be saved! I'm doing this one as XG454 from the trials unit - silver and white, nice. Nine steps in the instructions so should be straightforward. Famous last words! To be honest I've delayed this a bit until you've all forgotten Bill's amazing build. Rats, I've reminded you now. I'll aim to get close, but no promises!18 points
-
Finished the diorama at last. The MGB was on here months ago but never got around to finishing the scene until now Fujimi garage accessories.17 points
-
The very good Eduard's 109 in the markings of the second greatest Ace of the WWII. Best regards. DSC_0001 by jean Barby, sur Flickr DSC_0002 by jean Barby, sur Flickr DSC_0003 by jean Barby, sur Flickr DSC_0004 by jean Barby, sur Flickr DSC_0006 by jean Barby, sur Flickr DSC_0005 by jean Barby, sur Flickr DSC_0007 by jean Barby, sur Flickr DSC_0004 by jean Barby, sur Flickr17 points
-
Hi everyone I started this one for the Journey's End GB back in the summer and never managed to get it finished until recently. It's a pretty nice kit. It's typical Eduard in that why use one piece when you can break it down into 3 pieces but I'm happy with the end result. This was the Bunny Fighter Fighter Club boxing of this kit with an extra decal option for an A/C RLM 81 and 82 wrap around camo with replacement nose panels and bare metal under wing surfaces and a few extra bits of resin. The machine, yellow 7 152xxx, was discovered by US forces at Prague-Kbely in May 1945. It was part of 11./JG300 I used a generic Luftwaffe masking set for the national markings and masked the yellow 7 by hand with Tamiya tape. Paints were a mix of Hataka orange line, Mr Hobby and Tamiya. Weathering was created with pre shading, Flory Models dark dirt wash and oils. Hope you like it. 9364AC43-D25A-4394-8867-EFE910EB007B by James Halls, on Flickr 68117D3B-E46E-4540-AC51-1F98540E5BD7 by James Halls, on Flickr A8BC1AEC-D83B-4837-AC22-B227E8D11BBD by James Halls, on Flickr 2C24D751-2445-48F2-8DD0-AB0AAD0F1649 by James Halls, on Flickr I used Tamiya LP11 for the underwing bare metal. 7804A01C-F064-4360-A463-F774472B3A97 by James Halls, on Flickr And a couple with it's FW190A stable mate. Also built for the Journeys End GB and also an Eduard kit. I think tbh the nicest Eduard kit I've built for a while with the exception maybe of their line of Spitfire Mk VIII and IX's EF6B5B16-3150-444B-9601-C1664425D070 by James Halls, on Flickr A7850E47-6B64-41F6-867C-60736A642FB7 by James Halls, on Flickr Thanks for looking. Questions and comments welcome. James15 points
-
Maybe as a nod to the spirit of 'Reduce, Reuse, Recycle', I recently dug out an old 1/48 Monogram P-51D Mustang that I built (badly) over 40 years ago. I stripped off the thick layer of Humbrol 11 and used some spare parts from the new 1/48 Airfix Mustang kit to replace items that had gone missing. It wasn't the quickest of tasks - I think I could have built 3 Tamiya Mustangs in the time it took me to complete the refurb! Anyway, after all the stripping, replacing, repainting and general refurbing, here's the end result, Scat VII, flown by Gen, Robin Olds in 1945: The positive thing about the raised panel lines of the Monogram kit is that it makes it easy to recreate the puttied and painted aluminium finish of the laminar wings. I re-scribed the panel lines on the fuselage. With a bit of winter sun today, and with some help from Photoshop, I was able to take a photo against the sky. This was my starting point: Ugh. The paint for the invasion stripes must be 1mm thick! I had to resort to a bit of surgery to use the Airfix transparent parts. Final picture in B&W: Thanks for looking. RichardC14 points
-
Hi all Well this is my first WIP on BM, I don't frequent many modelling sites these days and spend most of my time on LSP (Largescale Planes) due to the fact I usually only build 1/32 (oh and superdetailing a 24th Mossie). Anyway, Britmodeller has always been a site I loved from the minute I joined, there are so many helpful and knowledgeable people here and so happy to help. I have been given great info on the Brit Phantom which I used to know very little about, except for the fact I always loved this version of Phantom. I FINALLY managed to get a copy of the Wild Hare conversion from my buddy Mike and decided it was time. Here is a link to my detailed approach to the conversion so far, and to be fair, I am not really using much of the resin conversion. If I were to do this again I would use very little. Although full respect to Frank Mitchell and Klaus for producing what they did as it made us mere mortals feel it was possible to make the best looking version of Phantom ever made! RAF FG.1 XV571 WILD HARE Phantom Conversion - Works in Progress - Large Scale Planes I will show some photos her of progress to where I am at now. And then I will update the thread at the same time as LSP....sound like a plan? Please step in and correct me where you see I need it, I am relying on others that know more to steer me in the right direction and correct and direct me. I have spent many many hours studying info on the net and talking to different ones, and my hope is that the build will be a resource on all the differences needed pulled together for specific modelling purposes. Also feel free to ask questions and I will do my best to answer. There way more differences in the Brit Phantom than I ever could have possibly have realized! I am no expert but am happy to help. Here we go Some random photo's of progress to date The scheme chosen is this although right at the end of her time wearing this, recently I have been sent a phot of this bird looking a bit patchy and scruffy which is great because these Phantoms got dirty. The trick is subtle Tamiya nose grafted on... Riveting and revised panel lines Heat shield area very different Cut off back end after correcting panel lines and riveting Slotted Horizontal Stab... These were completely reworked As were all the surface details here Getting there realized fin surface details were all wrong and needed revising Just added the left ILS blade antenna and about to put the right side on. Then it is intakes....this is truly a minefield of shapes and sizes! I will need your help here! Anyway, that's a bit of a photoessay of what I am up to. Thanks to all of you on BM who have helped me so much, I truly appreciate it! I hope this is of interest Cheers Anthony13 points
-
Here is my Platz 1:144 North American P-51D-20-NA Mustang which I built back in 2007. It represents 44-72218/WZ-I "Big Beautiful Doll", flown by Lt. Col. John D. Landers (78th FG CO), 48th FS, 78th FG, 8th Air Force, USAAF, from November 1944 to May 1945. The kit was built OOB and fully painted and varnished with brush. As I have mentioned before, these Platz kits are a real delight with great finesse for this scale. Eduard has released these same moulds under their label. Highly recommended. Thanks for looking and, as always, all comments are welcome Miguel13 points
-
Hi All Eduard's 1/48 Weekend Edition 84123, built OOB, AK Interactive and Tamiya paints. A lovely thing to put together, bags of detail even in this boxing. Will be building another. WIP here Comments and suggestions welcome Cheers Steve13 points
-
Painted to represent the PR2 prototype PX216, during trials at Boscombe Down in November 1945.12 points
-
This is my latest offering, Revell 1:48 AC47D D Gunship which was re boxed recently. With a spot of scratch building and Eduard photo etch set: I really enjoyed this build.12 points
-
This was a bit of a challenge and it hasn't turned out great but frankly better than expected. Interesting aeroplane though. It used more filler than glue in places and required a lot of weight to keep it in its wheels. Sprayed in Vallejo acrylics and using a Caracal decal sheet, here it is. z20201205_164755 by Derek N.Ferguson, on Flickr z20201205_164806 by Derek N.Ferguson, on Flickr z20201205_164814 by Derek N.Ferguson, on Flickr z20201205_164826 by Derek N.Ferguson, on Flickr10 points
-
1/32 ITALERI TORNADO Well I had to do it, just to see what it was like compared to the old faithful Revell kit. at first glance it's nice, but there are flaws, well there are with most kits, but when it's all new tooling, and such avast array of online images, you would think it's impossible to get wrong. so this is the cockpit OTB, with a few ANZY decals and switches, but the ejector seats are from the kit, I also opted to use Tamiya tape for the seat belts, as the PE supplied is thick, and not very pliable. any enjoy landing gear is next. So new pics of the build so far Burner cans inserted, you need to be careful here as they are difficult to insert, so I cheated, and cut the middle section away, which allowed be to insert the forward blades, then the burners. the 2 x screws which are for securing the wing roots are as much use as a chocolate fire guard, they need to bite into the plastic, too much tension and they will not work, and even though one of mine was round on the end, I decided not to use them, so I went to the Tamiya spares box used these with a locking nut work, there is some weight to the wings so you need to take care. wing pylon detail is lost, so I re drilled them wi10 points
-
With tanks and infantry, the Grenadier Guards managed to fight through Hunner Park to the south end of the road bridge. Machine guns firing, heavy weapons in action, shaking the streets with their explosions, covering everything in clouds of dust from the pulverized masonry. The bridge was shaking with the explosions. Skidding, shaking, firing the Guards' tanks, they reached the other side. The attack to seize the Nijmegen road bridge (Waalbrug) was carried out by the senior battalion of the Armored Guards Division. AoS sign white 51 over red square is owned by the 2nd Btn Guards Grenadiers. The division's second senior battalion, 1st Armoured Btn Coldstream Guards, AoS sign white 52 over red square, was not on the bridge at the time, but was employed further east of the corridor to aid the American 82nd Airborne. The scene of this Diorama is about the 2sd Welsh Guards on their way towards the Arnhem road, 21/09/1944. To make this diorama, I used a 12X12in base. There are 14 figures in total. The vegetation is Woodland Scenics. The street floor was sculpted to look like the brick floor. Also including the building's architecture, I hope I have managed to make the scene look as close as possible to what it was at the time, of a Dutch city. A military police officer from the Guards Armored Divisional Provost Company guides traffic near the bridge. The figure of the MP is Hornet, as are the 2 figures of tankers. The Cromwell tank in full markings: The Guards formation badge and the AoS sign of a white 45 on a green and blue square, identifying the armoured recce regiment of an armoured division. Also show is the bridge classification marking. The old and good kit of Tamiya Dingo, The figure of the officer and the sniper are Hornet, with resin heads. The Dingo figures are Miniart. The plaque on the wall: “Verboden Toegang” (Forbiden Access). With the marks of the 2nd Armored Battalion Irish Guards. Dingos were used as vehicles in liaison tasks. It was the Shermans of the Irish Guards who led the advance of the Waal across the road to Arnhem. The AoS sign of a White 53 on red square of the Irish Guards, The seated figure has headphones for the radio operator. The accessories that complete the model are made of resin. Jerrycans are from Tamiya. Miniart British Tank Riders (35118). Cromwell has a very large empty space, so the choice to place the figures there was obvious. It was not common for the British to use tanks to transport troops, just as the Russians did with their infantry, but for the scene, I believe he agreed, just to symbolize the need for the hurry to send infantry to the other side of the Waal. The C Squadron sign in the White is cleary visible on the stowage Box on the side of the vehicle. A beautiful final view of the diorama, showing the Cromwell Tank of 2nd Welsh Guards crossing the street at Nijmegen. An C Squadron Sign (circle) enclosing a number 1 is barely visible on the left rear hull of the model. The classic British Red Phone Box, making its presence here. I believe it is not common to be seen in the Netherlands, but I found it interesting to add it to the diorama. There is an illustration of the box cover of the Master Box 3533 kit, which served as inspiration. Highlight for the German / Dutch bilingual sign warning of danger of mines. The figures are Tamiya. The last is Hornet. The bike is Master Box. I respect those who in the past have fought for this bridge. In terms of model making, it was a lot of fun to make this Diorama. The hard work in doing it was a pleasure. Thanks for watching! Fábio.10 points
-
Hi all, Here's my completed Spitfire Mk Vb. Only took me around 9 months to finish! It's an OOTB build, but I used AM decals as I didn't like either option offered by Airfix. Fiddly kit to build, and I'm glad it's finally finished to be honest! Thanks for looking Matt10 points
-
E-3D Sentry (AWACS) VIII Squadron RAF Anniversary scheme Airfix 1/72, Combat decals. This is a special build requested by a friend who flew the E-3D as a co-pilot. One of his colleagues recently passed away from cancer in his early 50's, leaving a wife and children behind. This model is for them, a tribute to a husband and father who flew the E-3D as Captain. ZH106 was apparently his favourite, and he shared the nickname 'Grumpy' with it. Enough words, this will be going to his family: Thanks for looking, John8 points
-
The day I thought would never come final has..... No not a deal on fishing, but...... Two assembled track runs complete with DBs Not only that but.... Already had initial paint work..... They can be completed after all! Cheers Darryl8 points
-
8 points
-
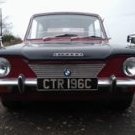
Finally fully back on-line thanks to a new router, so a chance to reply and an update. A lot of the types mentioned above have special memories for me. My father used to drive huge distances for his work in the early 70's, so got through company cars on a regular basis. After a couple of tank-like Austin Cambridge's, things got more modern with a Triumph 1300 (which seemed to be a regular visitor to the local garage). Then came a white Morris Marina 1.8 Super 4 door BKD858K-I remember the speedo reading 110mph on many occasions! Then his work required more load space, so an Austin Maxi 1750 HL in 'Harvest Gold' TCB249K replaced it. Sadly lacking in top speed and the need for an even longer load area, saw the arrival of a Marina 1.8 estate, KNG113L in orangey red (very 70's!). At that time, my mother had a maroon coloured Hillman Imp, which was registered GAY53D (probably worth a few quid these days). Anyway, back to the Princess, and the interior is coming together and the wedge shaped body is about ready for paint. Dave8 points
-
After that I tackled a 1/48 Sepecat Jaguar by Revell. An aircraft I wanted to join the RAF to fly as a boy. My first foray in to aftermarket resin as part of the ejector seat was missing out of the box. The fit of some of the parts was pretty rubbish but overall I'm happy with the final result And last one for now, a 1/72 airfix Sea King. This one went together really nicely, would like to do another in Royal Navy colours. Currently working on a 1/24 Airfix Spitfire Mk Vb. Not nice!! But that's for another post 🙂 Thanks Ed8 points
-
So, the weathering process continues. This picture shows a good example of how grubby the underside got on these birds. Between muddy fields, engine / cannon soot and the oil leaks that Merlins were known for, the bottom of these aircraft got dirty! Note also the patches of what looks to be red dope on the port horizontal stab. After airbrushing the basic exhaust staining, I did a bit of oil wash and then tried out Flory Washes for the first time. Very nice stuff, I'm a big fan. Essentially nothing more than fine pigment, water and a surfactant. You slop it on heavy, let it dry and wipe it off with a damp paper towel until you have the effect you want. You can go lightly and end up with some moderate staining or wipe off most and you’ll get a nice panel line wash. I used Dark Dirt and Grime tones. Just a warning, for matt paint, they tend to adhere pretty strongly and may not come completely off no matter how much water you apply after they set up. Need to use caution here. Anyway, this is still a work in progress. I add some weathering effects, then tone them down until I feel that I got it just right. Mud spatters coming off the tail wheel were Testor's dark tan with a dab of brown added. I figured the drop tanks would have just been stacked in the dirt so I added some mud stains to their undersides. Also added a few patches of red dope to represent battle damage repairs (see previous posts for more info on this). That's it for now, thanks for looking!7 points
-
Perhaps you're right! Thank you Sir Does this look 'toned down' to you? Just kidding - that's the wash on but, when it's dry, a lot of it will be wiped off again. Hopefully.7 points
-
Ok, here's what I've come up with (and it's staying like that!). I mixed some Vallejo Dark Sand with Light Brown and added their RAL 7028. I think it isn't quite 'yellow' enough? But once I get the Green/Brown over-spray and White-wash on and then a bit more weathering it should look OK. What do you think? The photo's were done earlier on with sunlight coming into the man-cave by the way so may give a more accurate appearance. Davey.7 points
-
Thanks Bill, great pictures DO please stay around Bill and add your usual helpful comments, otherwise you will be missed! Sanding has commenced… Thanks Steve Hopefully my 'standard' will encourage you to do yours. I'm not planning any major fiddling… but you know what happens to plans. I had some sanding mojo so one side has been Micromeshed: May need another go over…7 points
-
..there have been a few of the 'new' Airfix Skyhawks on BM recently, unsurprisingly given that its such a nice little kit. Shame the nose shape only looks 'right' from certain angles. I should really have modified the antenna behind the cockpit too; here's mine.. 3a Escuadrilla Skyhawk embarked aboard the Argentine carrier 25 de Mayo (ex-WWII Royal Navy carrier HMS Venerable) during April/May 1982.6 points
-
Hello I have just finished this couple of Special Hobby Armstrong Whitworth Meteor NF. First here is the NF Mk.11 in French colours when assigned to CITT 346 (Centre d'Instruction Tout Temps - All Weather Instruction Center) at Tours AFB in the 1960s. At the time this squadron was the advanced training unit for all weather fighting and was equipped with Meteor Mk.7 & Mk.11 in addition to some SNCASO Vaitour II. Camouflage is Medium Sea Grey and Dark Green, with a little light blue-grey on the radome and to mask a previous unit code. Secondly is a Meteor NF Mk.12 from No.64 Squadron at RAF Duxford in 1957. This one is camouflaged in Dark Sea Grey and Dark Green over Medium Sea Grey. Building these kits was quite easy with the fuselage. The wings were more difficult to assemble particularly around the engine nacelles. The paints came from Tamiya and Gunze acrylics range. Patrick6 points
-
1/48 Hobbyboss McDonnell F3H-2M Demon VF-14 Tophatters. OOB apart from Pavla resin seat. Demon 1 by stuart burn, on Flickr Demon 2 by stuart burn, on Flickr Demon 3 by stuart burn, on Flickr Demon 4 by stuart burn, on Flickr Demon 5 by stuart burn, on Flickr Demon 6 by stuart burn, on Flickr Demon 7 by stuart burn, on Flickr6 points
-
Little more progress, spent a pleasant few hours chipping away at the Panther.. Combination of lightened Vallejo dunklegelb and a little dark red primer. After that broke out the Ak pencils and added more scrapes and bare-metal effects. The idea being rather than concentrating on one area do a little in one position move round do a bit more and so on, until the whole thing is done evenly...thats the plan anyway! The pics.... Even started adding some oil stains.. That's all folks... For now! Cheers Darryl6 points
-
Well the ILS/VOR blade antenna's are now fitted...It is official, I need to look at the intakes now🧐 I made new base plates for the antennas as the conversion ones were a little uneven and the edges were damaged in places. so the white at the base is 10thou plasti-card. A much nicer fit too. The shape of the antennas was refined to match the originals a tiny bit better and scribed some details on. Did I mention the intakes terrify me????? Thanks for your interest guys Cheers Anthony6 points
-
Looking forward to this. Especially as I’m not having to do it! As background info, I snuck in a visit to a model shop in suburban Chicago a few years ago after a trade show, and it had nothing but car kits, apart from five of these. On principle, I always buy something when I go to a model shop, and so I walked out muttering “what the Hell am I going to do with this?”. Sorted. Regards, Adrian6 points
-
I will be looking in here from time to time, just something amazing about the Cedvedere so it would be rude of me not to. No interference whatsoever Ced but if you need anything in my vast archive call on it do. Wise decision to stick with the kit as is, look rivets. Er where? Not on this picture so rub em down would/might suit. Have fun Ced, this one endears herself to the model maker.6 points
-
Finally I feel like I’m getting somewhere with this one.6 points
-
The short answer is yes, heading back in the airflow. However, quite often modellers overdo the smoke staining, but that is their weathering choice. Just check the photo evidence for what you're modelling if you wish to portray it accurately. There are so many variables at play based on the type of aircraft and airframe age, gun useage, ammunition type, traffic areas, whether it has been wiped down purposely like for example with the addition of muzzle leading edge gun patches or accidently rubbed off on armourers' clothing. Also need to consider where most staining occurs (e.g case/link ejection ports). For example I note with Battle of Britain Spitfires you will see very subtle staining on the top of the wing if at all. More visible (still subtle) on the underside lighter colour, and usually most pronounced staining from ejection ports (although my thoughts on this is that this is a mixture of gun oil and smoke). Here's a Spitfire photo. In this case, some underside smoke staining in the direction of airflow. No hard and fast rules. Some aircraft exhibit more pronounced staining and some will probably post photos to suit. And yet other photos can be produced of the same aircraft with very little staining. And again, yes all moving back in the airstream. Ray6 points
-
Hi all! My new model. WIP: http://www.greenmats.club/topic/320-convair-b-58-hustler-148-monogram/5 points
-
Loads of inference from me Ced Normally I'd be up the bar with Bill, but it'll have to be a couple of take-outs and social distanced viewing via Zoom or some virtual media thingy that keeps freezing...5 points
-
@trickyrich and I have consulted. I seems that there are a number of builds which might need a teensy bit of help getting over the finish line. Therefore as an early Chrstmas prezzie this GB is extended until 27 December. Wisely, the extra time you must use.5 points
-
Welcome Giorgio, Ian, hendie, Terry and Simon - great to see you here I know exactly how you feel Adrian - what am I going to do with it!! Hopefully a good job Great story, I love 'em. Indeed, thanks Bill Rivets are now flattened: I've avoided sanding the panel lines this time, I think, and left a few rivets around some 'features' for interest. Now then, these bits: Bill left them out and glued in tiny vanes I think I might scribe these out a bit instead…5 points
-
Hi, Recently joined the forum and thought I would post a few photos of the builds I have done over the last 2 to 3 years since restarting in the hobby. First off, my 1/48 Tamiya Mosquito, my first attempt at a model in many years and the first time using an airbrush and acrylic paints. Then there is my 1/48 Revell Mk IX Spitfire An improvement on the Mosquito as I honed my techniques a bit5 points
-
I tend to agree with you, Alan Thanks for the praise Cheers Keith, thank you As for the sunset pic, only a week later we had this 🥶 Raining now, but still snowing hard up on the mountains - and of course skiing is forbidden due to the COVID situation.... Thanks Ced, windscreen sorted, see below Thank you Johnny You're familiar with Italeri yourself, so... Oramask is really great stuff, especially to be used with a cutter like the Silhouette range, but also good for hand cut masks Thanks Simon, see below for some progress I don't know Rob, in fact all I'm doing is managing some modelling during the week, at night Grazie Massimo, much appreciated OK, mailbox sorted, now for some progress; I promised a recap about the wing fit issues, and here we go: leading edge Starboard wingtip shows quite a big difference in top and bottom wing profile ... Some sprue gloop needed here The worst part, though, is the trailing edge: not only it's too thick, but it also has this gap To be fair, you can only see the gap at this angle, still it's quite annoying. For a split second, I thought of cutting out the flaps and ailerons to fix it; then I decided to remain sane (sort of...) and try and fill it with PPP. First I tackled the leading edge, though; my good friend @Gene K suggested to get a new kind of electrical sander, which I did That's an electrical nail sander/polisher, battery operated, and it comes with three convenient heads, that allows you to do from sand to polish. Ideal to work on long flat seams, so I immediately put it to good use on the wings leading edge. After a few minutes, all I had left to fix were these spots The coarser sanding head on that toll is actually perfect to remove plastic excess, like on the wingtip, without overheating the plastic itself I actually used it for the windscreen too, starting from this situation and ending here: I sorted the remaining spots on the leading edge too That's it for now, more work during the WE - all comments welcome. Ciao5 points
-
Thanks Dan, They were actually quite nice tracks to work on. Having said that I haven't actually fitted them yet.🤞 So the fun of the painting the Berlin scheme has begun. I attached the bazooka plates with some double sided tape and masked off the wheels. I have gone with the Ammo Mig Berlin scheme paint set as I had read a few positive reviews of them. I thinned it with Mr Levelling Thinner and it went on quite nicely. I started with the masking for the Blue/Grey and half way through felt that the white was just a little too grey so I went over it again with some Tamiya LP-2 lacquer to brighten it up a bit. Next up was the Blue/Grey, again it went on nicely but this time after comparing the hue to images in the book and on line, I felt that it could do with being a little bluer, so I added a few drops of blue in and and misted it over the model. As you can probably tell the masking for this scheme is a time consuming and fiddly affair. The Tankograd book is really a must if you are going to tackle this scheme. As has been noted elsewhere the kit's painting guide isn't very accurate. I believe there is a masking set available for this kit but I don't think it would have been very easy to use. There are soo many nooks and crannies and awkward areas that I think the only way to do it is to use decent masking tape. I found the Infini cutting mat invaluable in cutting the tape into the sizes I needed. It has been one of my most useful purchases, especially as I also build WW1 aircraft and it makes cutting masks for rib tapes a doddle. This one has seen better days though so time for a new one. For the sake of my sanity I decided to complete the painting of the base colours on the hull first. The brown is the last to go on and again I'm not sure that it's quite right. In most of the images it appears to be a little darker than Mig's but I have decide to leave as is for now is it will probable darken with the washes and weathering. I will leave the exciting bit for tomorrow and hope there isn't too much tidying up to do.🤞 Wayne5 points
-
Ok, so the last post covered what I’d done to the GWH seats and whilst I have now moved along, it’s either been just putting a few bits together or spending a while sitting looking at how to improve or modify a few bits, and as this is different to the Hobbyboss kit, each time, some thought is needed. I suppose the best positive step at this stage with the Academy kit is that the “A” shaped frame behind the RIO’s seat is included, and very well structurally attached to the rear of the RIO seat tub, so that all that’s needed is a little detailing with some bent wire (0.4 and 0.8mm) to represent the air duct and conduits. The cockpit central coaming was, IMHO a little disappointing in that it lacks quite a bit of detail that wouldn’t be too difficult to cover in the mould , or include as a separate part. The most obvious bit is the frame handle on top of the coaming that the RIO would hold onto when the aircraft is manoeuvring and a lookout is called for. I decided to slice off the central rear piece where the handle representation was and then beef-up the sideframes with two pieces of microstrip. The handle (and buttons either side of the handle) were made from small pieces of stretch sprue. It’s sall quite difficult to see at the moment, but I’m hoping that a little primer will unify the colour/finish and show it off a little better. On the right side, I added another small piece of stretch sprue and some bent 33swg wire to represent the small wiring harness that connects to the buttons. I wonder what the buttons are? Someone will know. With a sharp blade I cut a vertical seam in the plastic representing the forward fabric cover, and added seams to two edges too.. along with some fastener (dints) with a pin in a pin vice. It’ll do. To the forward coaming I just removed the plastic moulded bit representing the camera and added a shaped bit of microstrip to (slightly) better represent it. Cockpit coamings and frame; GWH seats by Jonathan Hughes, on Flickr And a test fit of it all in the tub Academy cockpit pieces; GWH seats by Jonathan Hughes, on Flickr I then moved down underneath the cockpit to the nose gear bay and added a few spare resin bits and some PE from the Eduard Big Ed set... and some thin plastic strips to represent wiring harnesses on the other side of the bay (not visible here). On the Hobbyboss kit, I added much more detail in here, but afterwards realised that you don’t really look at it... so this will do for this one. Nose gear bay details by Jonathan Hughes, on Flickr Nose leg... well, it’s got some bits missing hasn’t it. It looks as though Academy planned for a separate piece for the retraction jack and for the two control rods that sit either side of the oleo and connect to the scissor link... and (I guess) to the catapult strop... pulling this downwards as the nose gear is compressed for takeoff – I guess these might be the catapult strop links, but I am guessing. Anyway, it matters little as they’re all missing. Looking at the leg, there’s a “pin” piece for the retraction jack to connect to, just no jack. Other kits have done this similarly with separate pieces provided (GWH, Hasegawa and FM)... so these needed creating. As Tony Oliver has mentioned previously (and as he set out to remind me this week and then saw that I’d done it already 😉 I used the spare hobbyboss leg from the last kit – the compressed leg , and relieved it first of its retraction jack. Cleaned up, I drilled a hole across the end (where the pivot would be) and a similar hole in the leg and joined with a piece of 0.4mm wire. At the moment the wire is “long” so I can hold the bits for painting; I’ll trim it later. But it works. Improving the nose leg. Hobbyboss retraction jack added by Jonathan Hughes, on Flickr You’ll see in this picture the two pieces of wire added to the upper link of the oleo scissor and to the pivot of the catapult strop. This is where those other links are needed. I contemplated making these from scratch... but how? I considered robbing another kit (Hasegawa, FM or GWH) in case I wanted to make one of those gear up... but there had to be a better way. I don’t know if it was a better way; it tried my patience and care, but I went back to the hobbyboss spare noseleg and mutilated it a little more; what was there to lose? Hobbyboss noseleg scavenging bits by Jonathan Hughes, on Flickr So yes, on this one it’s moulded as a solid piece and thus a bit crude, but the edges look about right (ignoring the bulging rear end that I sliced off afterwards). I cleaned this up to leave me with this: Cleaned up control rod piece by Jonathan Hughes, on Flickr All i then needed to do was cut just under 1mm in from each side to give me two <1mm thick control links. Yea... a great idea. What could go wrong? Well apart from messing it all up and slicking my fingers... So, I popped a brand new Swan Morten No.11 blade in the handle, and carefully (whilst not breathing) lined up the blade and pushed down... then went to the forward end (angled upwards) and did the same... three careful cuts later and I had a control link. Then I did the other one. Then I cut the bulbous ends off and shaped the ends to the right length, and drilled a small (0.3mm) hole in each end of each... then just trial fitted them onto those small bits of wire. Outer slices of control rod piece cut, drilled and fitted to leg by Jonathan Hughes, on Flickr and Nose leg details Inc hold back spring by Jonathan Hughes, on Flickr Yup, that worked. Quite pleased. A good evening’s work. Visible here also is the small microstrip slithers on the upper oleo scissor link and the wire piece representing the hold back tensioning spring (?) and yes, I opened out the end of the moulded tensioning connector piece. Note that I’ve drilled out and straightened the lightening hole in the lower scissor link too. There is an Eduard PE piece for this... but that’d be flat; the scissor link isn’t flat. My mate Brian was showing me some resin pieces he’d received of these in 1/48... yup, inspiring stuff. I try to show such stuff in 72nd, but I’d need new eyes for that level of detail. Right... then I did a test fit of the tub and nose gear bay in the two fwd fuselage halves and yes, they go together quite well. This reminded me of the other idea I’d had for this one. I think I’ve decided to depict the aircraft as it would have been serving on Ranger rather than after return to the states... so armed with 4 sidewinders and 4 sparrows... short range interceptor fit I think it’s called, and the fuel tanks shown in use at the time are devoid of markings (which solves the problem of not having those special wolf’s head and stripe in decal form) but, in operation, air to air refuelling would be the order of the day, and on the basis that the knuckle joint of the USAF tankers hose/drogue units tended to clobber the probes and probe covers, the probe door cover would often be removed (before it got broken). Thus the probe is visibly stowed and bay open to the elements (well, the main bit anyway). So, the panel lines on the kit are good and using this as a guide (and cutting well inside them) I removed the necessary material (drilled and cut with a sharp blade) using a bit of dymo tape stuck along the panel line to stop getting too close. Cleaned up (carefully) this eventually looked sharp enough. One problem with this kit (if it’s a problem) is that the upper edge of this bay would be the kit glazing piece ... so it’s an open sided hole. And that will need boxing in... Drilled out panel for refueling probe bay by Jonathan Hughes, on Flickr Boxing this in wasn’t too tricky using a couple of widths of plasticard to form the “box”, the thinnest being used for the top “roof” of the bay... all added in with tamiya thin and a drop of my old sprue goo in places to reinforce. It needed a little fettling behind to alloy the cockpit tub to still fit, but that was sorted easy enough. You can’t see the front of the probe when it’s stowed – it’s behind the forward door buried in the nose... os I just needed a bit of bent plastic rod to represent the probe. I measured this dimensionally against the GWH kit part and dropped it in to see if it looked ok – compared to period photos. I did consider using the GWH kit part (as it’s finer) but this has the clips that go around the probe to secure the door to the probe and photos show the clips removed and a smooth probe, so I’d have to remove them – seemed pointless, when the plastic rod seemed to do the job. I might add a few more bits of detail in there – but need to give that a few minutes thought first and question whether it’ll need it. Bent rod added into boxed bay by Jonathan Hughes, on Flickr On the other side of the nose, I drilled out the shell chutes and boxed those in (as I did with the HB kit previously) and then added a cannon muzzle (again as I did with the HB kit) Refuel probe bay boxed; shell chute holes boxed; canon muzzle added by Jonathan Hughes, on Flickr I assembled the cockpit tub bits (loose fit) and popped it all together to see how it fits, yes, well enough. Note the glazing piece just plopped on to check fit – had I got it right? I think it’s ok for now. Cockpit tub in nose trial assy by Jonathan Hughes, on Flickr And finally a test fit of the cockpit tub on its own. I’m not going to use the Eduard PE in the cockpit – the raised detail is too nice to just file off. So I’ll paint this all up, add the decals and then a little more colour... and yes, some PE handles as you’d expect. But so far... whilst progress hasn’t been quick, I’m pleased with the way that this all sits. Cockpit panels ready for priming by Jonathan Hughes, on Flickr So.. that’s it for now. Thanks to Tony O for the support (as always) and to my mate Brian who keeps my ideas balanced and will (I hope) tell me when I’m going wrong. Anyway – it’s Friday night and beer o’clock... it's been a long week. Cheers all. Jonathan5 points
This leaderboard is set to London/GMT+01:00

