Leaderboard
Popular Content
Showing content with the highest reputation on 04/12/20 in all areas
-
E-3D Sentry (AWACS) VIII Squadron RAF Anniversary scheme Airfix 1/72, Combat decals. This is a special build requested by a friend who flew the E-3D as a co-pilot. One of his colleagues recently passed away from cancer in his early 50's, leaving a wife and children behind. This model is for them, a tribute to a husband and father who flew the E-3D as Captain. ZH106 was apparently his favourite, and he shared the nickname 'Grumpy' with it. Enough words, this will be going to his family: Thanks for looking, John38 points
-
ICM's Heinkel 111s in 1/48th scale are superb models! This is the H6 "North Africa" version (Though this aeroplane was based in Italy!). An out of the box build, just added seat belts. Painted with Xtracolor enamels & Tamiya acrylics. Absolutely no issues with build, or fit with not a drop of filler needed. Thanks for looking Angelo27 points
-
Hi all. Just a few shots of my last build. Was started not long after I finished my Tamiya F-14D, as a comparison build. Wish I had built them the other way around. Despite the AMK kit having more OOB options than a Tomcat fan could ever want from a kit, I find the kit falls short when compared to Tamiya's offering. The shape issues on the AMK kit have been well discussed already, but although I realise it's unfair to compare the fit of this kit to the Tamiya kit, I find the biggest shortcoming is the over-engineered approach AMK have taken. By giving literally every pose option you could think of, the fit of the kit suffers, and as a result, this kit fought me every step of the way. The Tamiya F-14D is maybe my favourite kit on the market right now, and I plan to build many more of them. If I were to add another AMK kit to my stash, I would be tempted to use it solely as a donor kit to add the wings to a Tamiya build. The dropped wings in the AMK kit are the real stars of the show. Still, it's a big, well detailed Tomcat with a million options from the box. I built mine OOB, with the exception of the decals which came from the Tamiya kit. Speaking of which, a debt of gratitude is owed to @exdraken who really saved this build by parting with the decals from his kit after a rather embarrassing accident with mine. Finished with Vallejo model air paints and weathered with Windsor & Newton oils/varnishes. C&C welcome as always. Hope you enjoy! Cheers Daryl23 points
-
What can i say I love the Tamiya P-51B kits. I have built 13+ and have more in the stash. Love the Ealry Bud Anderson scheme which you rarly see built up. Paint waith Tamiy paints and weathered with oil washes. Decals are Egale Strike or Aeromaster Brian23 points
-
Hi all, Just a couple of teaser pics of my Canadian racing Spitfire, the cover feature article for this month's Airfix Model World magazine: Cheers, Dean22 points
-
Always thought thre Spitfire looked great in the USAAF Med scheme. This is the classice Tamiya kit still not bad for its day. Painted with AK real colors and decals frommEagle Strike. Weathered with oil wash Brian20 points
-
As those previously posted here have said: a very good short-run kit but with a lot of delicate sequences during the assembly. Some details like the pitot tube and external ring are on your charge, some small parts are really fragile to remove from the sprues. The deco is made with home made masks but one "Flying duck" insignia is missing from the decal sheet. The camo is painted free handed and the Dutch Profile book on the subject was of constant help. Once again thanks to our Ukrainian friends for tackling such a non profit subject! EC251E67-FDBB-4B6F-81E9-63DEFC69EE7A_1_201_a by jean Barby, sur Flickr 7B007779-DCFA-493A-BBC3-40965B237DBE_1_201_a by jean Barby, sur Flickr FF042B87-E026-4DEA-BFED-7B3FC8DD56F4_1_201_a by jean Barby, sur Flickr 239928A0-F913-4BB4-B2B0-B21ABF32F004_1_201_a by jean Barby, sur Flickr 8383BE55-57FD-4A42-9290-5309AD5C62CE_1_201_a by jean Barby, sur Flickr BFD9B5AE-7369-4F2E-91DD-F04B48AFA794_1_201_a by jean Barby, sur Flickr 1B9A917B-6A36-4F73-9301-6F11A6221B2A_1_201_a by jean Barby, sur Flickr 3EB83416-EA78-4277-9929-CF9254FCAA56_1_201_a by jean Barby, sur Flickr18 points
-
This is the fantastic Tamiya kit. Really is shake and bake. If you have modelling block then I can fully recommend a Tamiya AFV in 1/48. They are a real joy to build. As I have said before I'm not really a figure painter, but from the other side of the room they look just about acceptable. The one in the middle behind the turret is just like Tommy Cooper...... You can hear the conversation..... "How did you win the war?"..... " Just like that!!" Thanks for looking Please feel free to comment etc. Cheers Dick17 points
-
Academy 1/48 scale Kit F-4C, build as an "D" (the C box has all the plastic parts of the D version), Warbird and kit decals. OWL 08 "Night Owl" unit. Vietnam. Vallejo Model Air paints. Some aditional decals from stash (formation lights) and plastic parts (pod, lgbs from Hasegawa). Thanks for looking 128798850_1903508979807175_1523088514208548027_o by Rodrigo Loyola, en Flickr 127871250_1903509036473836_3602716095358155570_o by Rodrigo Loyola, en Flickr 127719087_1903509169807156_545038258400060146_o by Rodrigo Loyola, en Flickr 127651220_1903508669807206_1960830353309086743_o by Rodrigo Loyola, en Flickr 127554085_1903508939807179_1022296655106371764_o by Rodrigo Loyola, en Flickr 127884761_1903508963140510_3104116450302373902_o by Rodrigo Loyola, en Flickr Thank you15 points
-
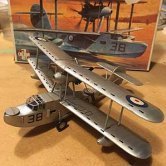
At last, here is my Matchbox 1/72 A.W. Siskin IIIA. Decals courtesy of @72modeler Wheels were sourced from an SH A17 Nomad as I would never be able to paint the kit wheels and felt these looked far better either way. Now to sort the wheels on an Airfix Demon... That's all for now, Thanks all, Tweener15 points
-
I miss you all very much, and I dearly need to get back to the bench. Last night I had 50 ml of some rather nice port Mrs P picked up, and dreamed I was at Heathrow with Cookie and Bill, getting ready to go to Telford again. Here's hoping that's prophetic.11 points
-
Right, time to tackle this little beasty! I have been waiting for someone else to post up a build thread, so I could learn from them, as I'm sure there are gremlins hiding in this limited run kit. This one started well, but has stalled - So picking up the batton. First step, lets open the box and see what's inside - Supermarine S5 1/48 from MikroMir by Mike, on Flickr Four sprues of quite detailed plastic. Supermarine S5 by Mike, on Flickr Supermarine S5 by Mike, on Flickr Supermarine S5 by Mike, on Flickr Supermarine S5 by Mike, on Flickr PE and decals Supermarine S5 by Mike, on Flickr Supermarine S5 by Mike, on Flickr Supermarine S5 by Mike, on Flickr These are not the smallest bits of plastic in the kit either! Supermarine S5 by Mike, on Flickr Instructions - Supermarine S5 by Mike, on Flickr What do Micro-Mir think the pilot sits on? I struggled to find reference for the S5 cockpit, although there is stuff out there on the S6 and varients. There is room for improvement here, although I'll make my mind up how far to go after I've dry fitted the fuselage halves together. It's a pretty small opening to get into so not sure how much will be seen. Supermarine S5 by Mike, on Flickr Other issues I need to address are that they supply a lovely little Napier Lion power plant, but I am fairly certain this can only be built into the kit with the cowlings off. I think in real life the cowling may even have been part of the rocker cover on the cylinder heads.. And beaching dollies would be amazing, but we'll see how confident I am in my scratch building abilities on that front. N220, S.5, Hanger F, RAF Calshot, 1927 by Mike, on Flickr10 points
-
Painted with Hataka paints, red line, Eduard Prepainted PE for cockpit, reisn exhaust and Airdoc decals. 128644080_1903256059832467_8616492687927221832_o by Rodrigo Loyola, en Flickr 128769927_1903255993165807_643789982570129978_o by Rodrigo Loyola, en Flickr10 points
-
A few notes on the build, it didn't seem appropriate to put them in the main post. There are a few errors that need correcting, the most obvious of which is that the inboard engines will touch the ground unless you do something about them. All the engine pylons are way too deep, so I cut the engine pods off, reduced the depth of the pylons, and the re-attached the pods. The wingtips are curved back, as the kit was originally a civil 707. On the Sentry the leading edge is straight all the way along. Some plasticard wedges and filler solved this problem. The aerials on the wingtip are much too small, so I made some with plasticard and brass wire. Also Airfix show them too far outboard, so I relocated them about 1 cm further inboard. Finally, I added the crew so that the new owners of the model can see them through the cockpit windows! John10 points
-
Hey all, Here's my latest on my Soviet armour spree. This is Tamiya's T-55A, which has for once more options in the box than a Dragon kit... The kit can be produced in either Czech, Polish, or Soviet markings with the neccessary parts to represent the relevant country's own production variations to a relatively accurate level. Now whilst this has nothing over the latest Miniart offerings, it is still an awesome kit! My example follows a generic Czech scheme painted using Mr. Hobby 012 Olive Drab (1). Though meant to represent USAAF Olive drab I feel it gives a reasonably accurate representation of Russian Green. The kit was built out of the box and weathered using pigments, graphite, and oil paints in various capacities. I'll admit now that the hatches are a bit bare at the mo, but I'm currently looking to fill them with some crew members to fill those gaps. Thanks for looking! Sam9 points
-
This is my latest offering, Revell 1:48 AC47D D Gunship which was re boxed recently. With a spot of scratch building and Eduard photo etch set: I really enjoyed this build.9 points
-
Hi all, This is my latest completion, finally off the bench and gotten some photos taken to share here This is the newish mould Airfix kit, picked up for a bargain £8 a few years back after a stop in at a Toymaster shop I saw on a drive through Blackpool. Loved the box art and always wanted to have a go at a Jg.27 E-7 with desert blotchy camouflage. There's nothing I can add about the kit that hasn't already been said here but it was a nice easy stress free build. I decided to correct a few of the weaker parts of the kit, replaced the gun barrels with some master ones I had in the stash, wheels with ultracast resin and the prop blades with Quickboost ones designed for the Eduard kit. The last item was a bit of a pain as i had to Dremel out the inside of the spinner a lot to get the hubs far enough through to allow it to sit against the back plate, retrospectively i would have gone for the complete Ultracast prop and spinner! Did a little bit of scratch work to shorten the legs by a couple of mm on the oleos, hollowed the exhaust tips, added a spring to the canopy opening section, cut out the radiator flaps and replaced with some metal from a can of cider ( thatchers cloudy apple I believe ) and finally added a set of belts I had in the stash and smash moulded a couple of the conical (isolators?) at each end of the aerial wire. Paint was mostly Tamiya though I had some humbrol 118 US tan which the instructions call out for the RLM79. I was too tight and impatient to order a Tamiya or Gunze equivalent so went with it but had forgotten what a pain Humbrol acrylics are to spray, they are so gritty and have to be thinned so much not to clog the airbrush immediately. Decals weren't the best and couldn't manage to get them to settle down well despite lots of microsol/set and still ended up with a little silvering, funny as I didn't remember them being so bad when I built the Galland E-4 boxing of this kit a few years back? Anyway, on with the pics, all C&CC appreciated as always, Thanks, Stu9 points
-
No time machine, sadly, I was referring to my brief time as an RAF Ossifer Cadet GD/P in 1973. Failed on the camping, of course… Thanks Geoff Good idea for the lights - I did think of that for the last application (last of three) but, as you say, I would have been better off putting a bigger blob on and letting it hang (snurf titter). Anyway, before Bill tries to encourage me to try to print tiny, tiny numbers I cut out the roundels and stuck 'em all on: After a good soak, only one of the old transfers cracked a bit. Can you see it? In the end I cut the roundels out, carefully, with decal scissors. I made sure to avoid the blue and trimmed off any little bits of white. I think I got away with it. Pitot and front doors need pasting and I need another look around before some varnish. Satin or matt?9 points
-
The 'Comete' decals are tricky. Those little thin tail pieces are all separate. --John9 points
-
Thanks Giorgio Your tip for the Vernier guage worked too thanks - opened the box this morning and… Ta dah! Still off. Mum! He called me a rude name! Centre red dot not in the centre? Rats, he noticed. Better print some more then (see below) DecoArt Liquid Glass link is here. Have a Google for a local(ish) supplier to you 'cos the people I bought it from, Beebaab Crafting Supplies, got cleared out last time BM mentioned it Thanks Adrian Aha, you found a bottle - good stuff. I have the UV resin too but I think this is clearer, and it dries; I find my BluFixx always ends up a bit greasy. 'Want to fly' lists are a moving feast eh Keith? I had Lightning on mine (although at 6' 2" I don't think I would have fitted) until we were told that, when the Russkies came, we had three weapons; missiles, cannon and "fly your aircraft into the nearest bomber". Yikes. The theory was that we wouldn't get all of them so the airfield wouldn't be there to go home to. Sobering times. Oooh, pies Why no hats Pete? Did one get blown off? (Fnaar!) Thanks John - three hundred and two? Hold on… Ah, Wiki says "Other than Hartmann, Barkhorn is the only fighter ace to ever exceed 300 claimed victories." Got it! Great story, thanks Thanks Johnny, very kind of you matey Just for Ian: Into Inkscape, nick the image from Wikipedia's Roundel page, resize to 9.5mm, duplicate, align, print: Printed on white laser decal paper of course, so I'm going to have fun cutting them out. Don't I have a tool for that? Did you notice an outrigger in the background? Before I went to bed last night I stuck things on (there had been wine): Look Bill - the outriggers don't touch the bench: Phew. Close up of the nav light: Not perfect but close enough for me. I do need, at some point, to go over the paste again where it's too thin. Without spoiling the overall variation. Still hoping a varnish and wash tones it down9 points
-
I think we’d all drink to that; last year’s shared days at Boscombe Down with you guys, with @CedB and @The Baron at Yeovilton, and with @Terry1954 at Bovingdon feel an all-too-distant memory now. I very much look forward to future repeats - not to mention a Telford 2021 re-rendezvous with half the population of this board. My other passion in relaxation terms, besides modelling, is singing - I am lucky enough in normal times to sing fairly regularly (20-30 times a year) with Salisbury Cathedral Choir. Last Wednesday I did so again, for a BBC broadcast (repeated on Radio 3 at 3pm this coming Sunday, if anyone is interested) - the first time I have sung with anyone else since late-January. It was an absolute joy to do; I haven’t stopped smiling since. Just like modelling, you have to really concentrate to do it well, so you can easily go for several hours and suddenly realise that you haven’t thought about anything else - not work, not stressy things, not the ridiculous fight you had with that Git in IT - for half a day. And that’s very, very healthy.9 points
-
Hello ! It’s been a litle while since I posted anything here , so there is my latest plastic achievement with an “exercice de style “ from an historical photo. I wanted to mount the new Tamiya’s Marder 1 and reproduce this well-known pic was a kind challenge. It required to open the front driver’s post and scratching the interior and somme spécial stuffs as the 5cm mortar ammunition box while thinning a lot of pieces Hope you’ll like it and that the work done was worth it full build here : https://warpaints.net/viewtopic.php?f=60&t=15112&sid=7666074b72b5a1459cb4fc404e17f030 See you Fabrice8 points
-
Afternoon all,first up in my Heller GB build's is the Ouragan from a set of three covering also the Magister and Alpha jet,a nice simple oob build not helped by poor decals but plodded on to the finish.I used Tamiya's Chrome silver from a jar brush coated with Humbrol gloss coat.Thank's for looking in and please check out the GB for a superb spread of kits and genres,better still build something too!8 points
-
Ah, fellow sufferers eh? Do you still shiver if anyone mentions FIRECARTS? Thanks Dave. Rats I was so worried about the old transfers I followed the instructions blindly: Schoolboy error Ah, got it, thanks Pete. (Thoughts of mentioning sucking suppressed ) Shiny eh? Oi loiks shiny fings… Great tip Giorgio, IF I'd thought about it before applying the paste Hopefully the ones I've ended up with are OK though. She's ready for the varnish in the morning:8 points
-
It's taken us a while during this bizarre year but our new products for DuPont 71-013 US Equivalent Dark Green and DuPont 71-035 US Equivalent Dark Earth will be available by next weekend. These will compliment the 71-021 Sky Type S Grey which I think we were the first to make a specific paint match for, and together these will capture the different appearance that some US built types built in RAF Temperate Land Scheme exhibited as compared to the British paints. Infact there will be a few more new paints added to the range about the same time: BS381C-110 Roundel Blue for post war RAF aircraft (hi-viz) BS381C-172 Pale Roundel Blue for post war RAF aircraft (lo-viz) BS381C-454 Pale Roundel Pink for post war RAF aircraft (lo-viz) In addition, we're adding WWI German Mauve which completes the trio required for types such as the Albatross D.V in it's typical scheme of wood coloured fuselage with olive and mauve upper surfaces on the wings with pale blue underneath. Lastly our new Primrose Yellow for inter-war Royal Navy East Indies Station cruisers, sloops etc is coming.7 points
-
Hello all, this is my little attempt at another 109. I've been trying to expand my techniques with this one and a few of the experiments have worked pretty well.....i think?! For the first i have really gone down the post-shading route and add to that more oil paint weathering, i had always been disappointed with my oil weathering but i found the flaw in my technique....its wasnt done on a matt finish, so problem solved me thinks. Painted with Gunze Mr Colours paints and MRP matt varnish to finish, so let me know what you think on the weathering, did i get it to work better?7 points
-
Just finished this one for Med. GB, build out of box, a very basic kit, but fit was exelent taken its age into consideration. Cheers Jes7 points
-
Hi all. Kinetic's AV-8A was released shortly after their Gr.1/3 kit, which is basically the same kit except for a few different parts to be used. The kit was built almost straight from the box. Some rivets were added, as were some details to the cockpit and seat. I used Mr Hobby paints over black primer from Alclad. Washes were made from Abteilung 502 oilpaints. Thank you for watching. René.7 points
-
This plan is proving tough to achieve. I meant to use 1/64th ply to cover the torpedo tubes but it really wouldn't bend that tight easily so I went straight for 0.2mm aluminium. This has the advantage of being able to mark rivets with a back wheel, but many disadvantages, including it marks so easily and bending it exactly right without marking it is more or less impossible. At least this is the worst it will look, once painted and all the details added, these slight blemishes either go away or add realism as thin sheet metal is rarely perfect on warships (excuses excuses...) The exact shape of the launch hollow is really hard to determine, the back plate is flat as this picture of Kevin Wheatcroft's e-boat under restoration clearly shows. It also shows the rivet lines down the face Here is the first side sort of done, significant fettling still to come.. In the end I doubled the rear bulkhead to leave a land for the side armour covering the torpedo launch apparatus which sweeps round into the navigation light enclosure. All together too hard to achieve in one piece, as I guess real practice would have been That gaping hole gets filled with the torpedo tube end which I plan on making shortly. Much more sanding and coats of primer coming, moving to white and red towards the end. The grey is useful as it shows the blemishes clearly By the end of the day, I'd got both sides in the same early state. This bit is turning ridiculously difficult to achieve the quality I want, still we persevere, perhaps there is something to be said for kits.... Steve7 points
-
Or in the coal-hole with the hatch shut! 😁 Similar orientation here Bill: Overcast permitting (Midwinter's day is invariably a shivering affair of grey vapours here) if I stick my head out the bathroom skylight just after the sun's down then that patch of sky should be visible in the twilight: I'm bringing the long lens home from work just in case to try and get some photos a few days either side of the event. Saddening news from Arecibo eh? The footage of the collapse is heartbreaking: that dish along with the VLA in Mew Mexico were always part of my teenage mental landscape growing up (much influenced by regular doses of 'Omni' magazine also...) So sorry to hear Benedikt. I will try her recipe this winter for sure! Thank you. I've had expert help here Massimo that's played no small part in ensuring as much accuracy as possible from the available visual references. I live in hope however that one day the International Museum of Original Aircraft Drawings and Maintenance Manuals (IMOADMM) is opened in an easily accessible European location with good coffee and those soft white gloves they make you wear when leafing through historical documents.... 😁 Blinking busy all week again so nary a neuron left to fire on anything Vixonian. I did rally at some point however (genuinely forget which day) to have a tinker on the metalwork bench in producing a workflow to get one of these to scale in brass: At ever-so-slightly over ⌀10mm it's the scale size required for the AI.18 dish but involved some juggling between the doming set and hole punches to arrive at a usable combination to produce a dish of the right diameter and curvature: These combinations have all been marked with tape so that the tape can rub off and I have to do it all over again later on.... Hope at some point over the weekend to get busy marking these up with a pencil - one copy to note all the bits I've forgotten to do so far (including m/f locating lugs where needed to help line things up), plus a second version breaking each aircraft down into discrete parts for printing: There's another fortnight or so before things here start to wind down a bit for Christmas at work, but my aim is if at all possible at some point before January is out to have a full-up test print of each aircraft, in order to assess what works and where I might need to adjust my thinking in terms of assembling the parts as you would any model kit. Thoughts about PE (along with vacforming and designing masks for painting) will take care of themselves for a bit whilst I focus on getting the resin side of the house in order. Also with an eye on paint in the future; having long been enchanted by @giemme's results in using tempera, I've just ordered a basic set of colours myself to try out on the Vixens instead of the usual oil paints that I would use for tinting and toning. Be fun to see the difference. In other news, have finished all three seasons of Narcos in the last fortnight and now on Narcos: Mexico - travel shows are such a great way to relax of an evening. Tony7 points
-
Hiya Folks, I enjoyed my two postings to the Army Garrison in North Yorkshire at Catterick and at the time RAF Catterick was still an active RAF airfield, Depot of the RAF Regiment and was almost like a time capsule, looking much as it would have done back in 1940,...... unfortunately that has now changed since the Army got their mitts onto it, as anybody travelling along the adjacent A1 will know! I wanted to build the new Airfix 1/48th Blenheim Mk.If as a Catterick based aircraft from 1940, with the addition of fin flashes and the yellow outline to the fuselage roundel but still with the black and white undersides sported until just before the Battle of Britain and with only a few reference photos go go with, I opted for L8685, FK-N of 219 Sqn. The model was brush painted apart from the white on the underside which was rattle can and although I represented the painted out and modified roundels on the upper wing, the colours seem to have blended better than expected after a coat of varnish,..... ah well! I`ve also noted that the pitot on the side of the nose fell off while carrying the model to be photographed,..... and once I`ve found it (hopefully!) it will be stuck back on! Here is a radar equipped Blenheim Mk.If of B Flight, 219 Sqn based at RAF Catterick in 1940; The Model,.... L8685, FK-N, doe not appear to have been fitted with radar during the summer of 1940; I was impressed by this new Airfix kit and will certainly be building another,...... I`d like to built a couple of bombers,.... one based in Greece (the next boxing will feature one of these!) and also an Indian based pre war aircraft,.... space allowing! Cheers Tony7 points
-
Good evening gentlemen A little bit of progress tonight: The mirror has been glued on the dah, and is really impressive with its metal transfer, very shiny and reflective. The side handles has been glued and painted. The transverse retentive rail on the luggage area has been put in place. The hardest job remains to do: The lateral protective rail has to be scratched, shaped, and fixed in place with five fixtures (1 center rear, 2 lateral, and 2 at each forward end) According to the dimensions @ejboyd5 has given, the center rear fixture should be 0.625 mm long and the lateral fixtures should be 0.25 mm long. Obviously, with my limited skill level, it's impossible to do, so, a compromise needs to be made, and hopefully, I could manage to fabricate 1 mm long fixtures... But It's another story [/url [url=https://flic.kr/p/2kd6fPz] Stay tunes if you like and thanks for watching7 points
-
Flew in & out of Jersey Airport. not built a FLY before. Just hoping it is better than A Miles AeroVan by MIKE MIR http://6 points
-
I had originally planned to be part of this STGB right from the start, but, a combination of less modelling time generally and, as a result, my MTO GB Pz.III build taking longer than expected, has resulted in me starting with only about a month to go!!.......and part of that month includes Christmas, with all it's distractions! I had originally planned on building something in 1/35. I have some rather nice Dragon kits - some with Zimmerit. Then, as time went by, I thought I would do something in 1/48 - the Tamiya range in 1/48 usually produces some fine looking models. But a week or so ago I decided to drop to 1/72. I have a nice Dragon 1/72 Panther G kit, with Zimmerit, but I purchased a large set of PE to go with it - so far too much to be done in a month. So here I am with a Zvezda snap kit. I have made a Tiger I from the Zvezda snap kit range and it resulted in a rather nice model. I'm hoping this one will be okay too. There are a couple of known issues with the kit which I think I have a plan for sorting out - and I may see if I have some mesh of some kind for the grills on the rear deck 🤞 I think I'm going to make it as Panther 445, a tank that was with the Pz.Abt. 51 during 'Operation Citadel' near Kursk in August of 1943. Kursk was the largest tank battle of WW2, Kursk was also the first time that the Panther tank was used in combat. So this is the kit I am going to use: A photo of 445 after it was knocked out This Panther received mine damage and was abandoned. You can see the damaged road wheel rim beside the crewmen. I may try and get this started this weekend alongside doing more work on my Pz.III. I'm not doing the knocked out version but a version of it before this and I may try and make a small base as well. Comments and suggestions welcome. Kind regards, Stix6 points
-
VPAF MiG-21PFL 'Fishbed-D', '4127', pilot Dong Van Song, 921st FR, Noi Bai, 1966 Dong Van Song flew this plane often on the first part of 1966 - and two kills were confirmed by Noi Bai pilots with this airframe. On july 14th 1966 '4127' was shot down by F-4C (flown by Capt W J Swendner and 1Lt D A Buttell) using an Aim-9B missile. Pilot Ta Van Thanh was killed as the plane disintegrated over Hanoi, while he was chasing F-105s. - - - - - - Kit: Eduard MiG-21PF ProfiPack Edition (#70143) Scale: 1/72 Aftermarket: Master pitot tube, Print Scale decals. Paints: Vallejo acrylics Weathering: Flory Models Wash, Mig weathering products Simply brilliant kit by Eduard. Build thread:6 points
-
Putting this up for interest/comment. Found on the Web. Photographer not known but all Credit. :- Dennis6 points
-
Hiya Folks, Another one finished,..... the old Matchbox Lysander is still a nice kit although the interior is a little basic, so I added a few extras from the spares box here including an instrument panel, a decent pilots seat and control column, a fuel tank behind the pilot and behind that a small circular seat for the gunner plus a bit of side wall detail,.... and you probably cannot see any of it despite the large greenhouse canopy!! The front of the wheel spats was also drilled out and glazed using crystal clear to represent the landing lights and the windows on the rear fuselage were also cut out and glazed in the same way. The model was brush painted and finished as a pre war aircraft of 4 Sqn using Xtradecal sheet 72148,... but the instructions are not very good and represent the right side of the aircraft incorrectly,....with the code letters arranged the wrong way around,..... while the B Type roundels seem over large too when compared to a photo of the real aircraft found in an old issue of Aviation News. I also added underwing roundels and serials as non were provided on the sheet; EDIT; I built one in the Matchbox GB a few years ago too if anybody i interested or wants to see some of the extras that I added; Cheers Tony6 points
-
So Just getting my hand back in with some traditional weathering, chipping this time painted on type. Just around the drivers hatch to see how it works out. Really zoomed in Cheers6 points
-
So today I've completely re painted the turret from the primer up, and I'm really glad i did as ,at least to my eye, the results are far better and exactly what i was looking for originally. Still more work required ie washes etc but for now I'm happy and glad I didn't retire this one to the shelf of no return. Here's a few pic's of today's progress the first pic shows the turret re painted before the whitewash was applied A lot more subtle i think and shows way more of the olive drab tank colour which is what I wanted to achieve. So comments welcome and that's me done for today, thanks for looking back soon 🙂👍6 points
-
Cheers Ced, I found a bigger version of the Stratford Rd photo and hit Google Maps for confirmation And it is confirmed the old picture is taken near Farm Rd, near where that old modelling Mecca used to be Voila One row of shops lost their chimbleys but still recognisable as the same row of shops over a hundred years later, evidence if we Brummies needed it that, if we can keep the City Council and Mr Hilter away our landscape doesn't need to be torn apart every five to ten years... (A sore point to moi, obvs) I have been slaving away over hot typing paper on these plans/drawings Getting there. But I don't want to do this one so now I have to redraw the plans to suit the more Brummie, as Tomo noted there are more pics of three windows buses, omnibuses6 points
-
The vac form was cut according to the outlines. Here it's just resting on the roof, but it should be suspended slightly below the roof. It's not possible to test fit well at this point. Somehow the thin and floppy piece must be painted. I'm trying to fix it to a piece of cardboard with two supports, using blue tac and tape, to be able to work with it. First the rear panels are sprayed, and some black at strategic areas on the back. When this is dry the panels will be masked to spray the headliner itself. The inner wind screen frame and the box covering the wiper mechanism are glued in place. The rear window and the rear shelf are also glued in place. Now waiting for the headliner to be finished...6 points
-
Also guys we have our dates; Saturday 17 April 2021 - Sunday 8 August 20216 points
-
OK first we try a fine coat of Modelaire dayglo from Vallejo. Taking it slowly so another coat can wait for a while, looks good so far.6 points
-
6 points
-
Thanks folks! I made up some company names and registrations (the reg's. are spurious because I lost a sheet of transfers.) Did I mention I used old sheets of dry transfer letters to get the names and reg's? Yup...that was tricky. I also borrowed a couple of escape hatch decals from a Amodel 1900 and the Canadian flags behind the office windows form a Matchbox DHC-6. The pimpin out is almost completed and detail work can probably begin soon (antennas, gear doors etc) My references showed spoilers with a cross hatch on the upper wings. That looked like something I'd have to do; the model as it sits right now, decals gloss coated and sealed Thanks for looking6 points
-
In another version of the joke, He became an interior decorator. He did the hall and stairs through the letter box. Meantime, I've been on a course, learning how to tie up Horses. I can't say that it went without a hitch....6 points
-
6 points
-
Yikes! Powered pain eh? Right, that's it, the door and strut are on. Oh, and the canopy: The BluTak will be removed when I'm SURE the glue is dry. If you hear a scream later… Transfers tomorrow.6 points
-
Evening all, Having come off a steady diet of Tomcats and Corsairs for almost 10 years, i needed a "Palate Cleanser" that i could more-or-less slam together with minimal modifications, and get right to paint schemes, which is the part i love the most. Enter the Airfix Buccaneer S. Mk 2. Model building enthusiasts of the "Brick" haven't been really ignored, but they have been limited to the mold making standards of their era. With the exception of the lovely CMK Resin kits, most 72nd scale Buccaneers have more or less been shells that are Bucc-shaped on the outside, but sorely lacking in terms of substance in most other places. Not to mention kit makers have had issues getting the shape of the Buccaneer "Beak" quite right. Not so with this kit. I read many build reviews, and without exception have heaped praise on this kit. It ticks some key boxes like being Carrier-Based, and "Cold War" vintage, plus at least over here the Bucc is still viewed as something as an exotic; you don't see on contest tables very often. Citing the throwaway cliche "Construction began with the Cockpit", you can see what i did here so far. The cockpit sidewalls and tub were painted with Mr Color C335 Medium Sea Gray, and given a wash of water, Future, and Tamiya flat black. When dry this as well as the cockpit tub got a coat of Model Master flat clear lacquer. After i prepped the painted cockpit tub with some Mr Color Super Clear III, i applied the kit decals. I was expecting these to be a real mess, since the working surfaces were so small, but i was pleasantly surprised by how well they laid down and it was fairly easy to coax them into place. I suppose i could have held out for a resin cockpit set, but the added fuss of removal from the casting block, test fitting, etc. kind of defeats the purpose of making this a "Fast" build. One exception are the ejection seats. I'm keeping my options open there. I glued the cockpit tub into the left fuselage half, and them taped the right half on, serving as a "jig" to hold the cockpit tub and nose wheel well steady while the cement set up. When that was done, i un-taped the halves and mixed up some nose weight from a combination of 15-minute epoxy and copper shotgun pellets. Guidance from Airfix says 15 grams. i kind of guesstimated at that. Wanted to be able to still close up the nose halves after all, plus i really hate working with epoxies. When i glued the nose halves together, i deliberately did not glue the rear end where the halves wrap around the aft cockpit bulkhead- what i call the "Forward Fuselage Splice Point"- in order to be able to "squeeze" or "spread" the aft fuselage as needed to ensure a level, flush fit at the junction. I'll let this section outgas and harden while i go on my next tour and hopefully it will be ready for mate when i get home. Up Next: The fuselage centre section. Stay tuned.5 points
-
Thank you, guys. It's time to show the next round. Nothing fancy this time - only the bulkheads in engine bay, fighting compartment floor and few smaller boxes and bits here and there. And the turret motor in the middle af all this of course. Kristjan5 points
This leaderboard is set to London/GMT+01:00






.thumb.jpg.3d6eff3e2f6cc042679bca864bcb2b1a.jpg)

