Leaderboard
Popular Content
Showing content with the highest reputation on 13/11/20 in Posts
-
I have finally finished my Lancaster. But before I present the photos I would like to make a couple of comments in regards to the Airfix Kit. I don’t think is news to anyone to say this kit is quite mediocre. Throughout the building, I’ve constantly find myself fighting to it rather than enjoining the process. From the get-go, there was something weird about it. As soon as I opened the box an awful stench came out of it! it really stinks. Not sure if all Airfix kits are like this or only my box, but it was so bad that I have to put it far from my workbench. Second, called me spoiled, but I’m used to nice quality instructions from Eduard or Tamiya, this one instead, is very poor, with many wrong call outs and mistake and with no logic at all. Another frustrating thing was the soft plastic. In particular, when glueing small parts they just melt!…And what about the warped pieces and bad fit? …Seriously!. It really bothers me that this kit cost $78 dollars here in Australia. To put it in context, you can buy a fantastic Eduard Profipack (with PE and mask) in 1/48th scale for $48 to $52 Australian dollars. This is simply not right!. Airfix has been around almost longer than any other company and they still can’t produce something decent! ( I know for some their Hellcat in 1/24 is “amazing”, but I don’t do that big scales, so I don’t know) What annoys me the most is the fact that this is the Avro Lancaster! One of the most iconic, if not THE most iconic bomber (sorry B17’s fanboys 😜 (I like it too)) of WWII and there are no good alternatives. I’ve heard worst things about the Hasegawa and Revell 1/72nd kits and the Tamiya 1/48th is almost 40 years old!. The only hope was the Wingnut Wings 1/32, but that would never happen now, and for many of us it is way too big anyways… (the HK Models 1/32nd is good, but not close at all to the sample model presented by WW) …Ok, enough of my rant. Sorry about that 🙄. Now to the photos. I've tried to improved the simple surface detail by adding some missing panel lines and rivets. Thanks to elger, Simon Dyer and warhawk for providing me with the drawings! I’ve replaced the plastic wheels with the resin set from Eduard and I’ve used AK real colour lacquer RAF Dark Green and RAF Dark Earth as well as some AMMO washes, filters and oils to give a little of colour variation and weathering. I hope you guys like it and any comments are welcome. Mickey the Moocher QR-M EE176 of A Flight, No. 61 Squadron. Stationed at Skellingthorpe One of less than a dozen to have survived over one hundred bombing missions in active WW2. And one more with some size context 😉 cheers Jorge52 points
-
De Havilland Sea Venom 1/32 by Revell / Matchbox Hello an Welcome to the "long time coming" RFI for my build of the De Havilland Sea Venom 1/32 by Revell or Matchbox which ever takes your fancy. This particular one is the Revell boxing kindly sold to me for next to nothing by the very generous @rob Lyttle . I do hope that I have done her justice dear sir. The WIP can be found HERE. She was a blinder of a kit with lots of things to add to get her the way I wanted but the foundations were good which was all I needed. Shes a lot bigger than I though for a 1/32, the cockpit had not much detail to speak of so pretty much all of it is scratch built. I used: Tamiya glue, acrylics and sprays. Flory washes. Lots of plastic card and wire. and plenty of help from the wonderful BM hive mind. ( Thanks guys you know who you are ) Special thanks to Chris Sandham-Bailey for the massive amount of reference shots. So without further ado I'll get on with the pics in no particular order taken this morning ( Friday 13th ) in a lovely Autumnal back garden in the Mid West of England. Get a cuppa, there are loads. And that Ladies and Gentlemen is that. I hope she is pleasing to you, she was a pleasure to build and I'm happy with most of what went on. Thanks once again for all the help and Companionship along the way. That's the best bit. ( The Journey ) Take care and as always dear chums. Happy Modelling. Johnny. 🦈34 points
-
Howdy Everyone, Just finished my latest effort, My attempt at Great Wall Hobbies 1/48 Black Widow, built from the `Last Shootdown` boxing This was intended to by my Halloween post but it over ran a bit Mostly from the box but with a few items replaced due to breakages ( why do they mould tiny aerials to the main parts? )..... and parts like the engine harness which I decided weren`t worth wrestling with esp` as you can barely see them. So: engine harness, `T` shaped aerials, pitot, fuselage side antenna all replaced with wire and plastic card Mainly filler free build except for the windscreen which had a huge step. Main U/C doors req`d modification to an early `B` configuration, which wasn`t too hard. No weapons or drop tanks so these came from the spares box Hope you enjoy, thanks for looking Cheers Russ30 points
-
Finished not without a few errors by Airfix & equally by me. But all finished. Laurie http://28 points
-
24 points
-
Creeeeeeeeee. Bang! Door Two is locked forever!!!!. 👨🔬 Bell AH-1 / AB-47 ( M.A.S.H ) 1:72 Italeri RFI What better date than Friday 13th in 2020 to release the RFIs for "Dr Spadgent's house of Horrors". This is door Two of a multi build thread that can be found here. And the WIP can be found Here. Everything will be explained within these threads. This is close to my heart. I watched Mash as a kid and it's haunting theme makes me stop in my tracks every time I hear it. The kit was a joy to assemble and the scratch parts were just as pleasurable to construct. I added some extra bits and bobs that weren't there OOB. Thank you for all your help along the way ( if you indeed did follow along ) and I sincerely hope you like the shots taken this very morning in a very cold but sunny Autumnal garden in the Mid West of England. Enjoy dear Friends. And that's that. I hope you like the pics and thanks again for all the help along the way. If you had fun you could follow along in my next build thread. HERE. Take care and as always dear Chums. Happy Modelling. Johnny.22 points
-
With a bit of effort I've pushed this one through the finishing gate. Need to make a simple base so I can add the figures properly. Went to the trouble of paining them, so may as well. This the Airfix kit with the CMK Wellington figures and Techmod decals. I replaced the gun barrels with some metal Master versions (rather nice). The bomb bay was filled with some extra 500lbers from the Whitley kit and some resin SBC from Belcher Bits. The decals were lovely and thin, but oh so brittle. Spent ages carefully putting them back together and patching up the gaps with (almost) matching paint. On to the pics. Tim19 points
-
Creeeeeeeeee. Bang! Door One is locked forever!!!!. 🧛♂️ Horton Go 229 1:72 Revell RFI What better date than Friday 13th in 2020 to release the RFIs for "Dr Spadgent's house of Horrors". This is door one of a multi build thread that can be found here. And the WIP can be found Here. Everything will be explained within these threads. This was a Great kit of a really cool ( in my opinion ) Aeroplane. Thank you for all your help along the way ( if you indeed did follow along ) and I sincerely hope you like the shots taken this very morning in a very cold but sunny Autumnal garden in the Mid West of England. Enjoy dear Friends. And that's that. I hope you like the pics and thanks again for all the help along the way. If you had fun you could follow along in my next build thread. HERE. Take care and as always dear Chums. Happy Modelling. Johnny.18 points
-
Hiya Folks, As many will know I have a very soft spot for the old Herk and the recent release of the new Zsveda C-130 Hercules kit was music to my ears,..... I never understood why Revell never went for the C-130 to add to its C-160, Atlantique, C-17, Grizzly/Atlas but I am so happy that Zsveda bit the bullet instead because this Ukrainian company have produced what at first sight appears to be a beautiful kit of the old girl with an obvious intention of producing other versions in the future judging by the left over parts, including a stretched fuselage variant. Having recently built an stretched RAF Herk C.3P from the Italeri kit I thought it would be interesting to build the new Zsveda kit on the back of it and so here we go! Well the first thing I noticed was the wing walk lines for the RAF version,..... Zsvesda provide yellow walk lines,....... but in fact the RAF used yellow walk lines with red hatching alongside on their grey and green camouflaged aircraft. The kit includes an option to build the RAF`s XV215 when it wore the `Fat Slags' artwork on the nose from the Gulf War and as I was intending to build that very aircraft soon using an Italeri kit,......I may just be going falong with the kit option for a refreshing change! Now Xtradecal did have a few sheets available for use on the the Italeri kit that contained the wing walks and roundels for an RAF Hercules, one was for XV292 in its 25th Anniversary markings and another including two sets of wing walks and roundels from the same set,..... but unfortunately neither are currently available now,...... I have messaged Hannants to inform them about the above,..... so we shall see whether they re issue it into their Xtradecal range. I have heard that 26 Decals MAY be releasing a sheet of wing walks to accompany their excellent early RAF Hercules decal sheet depicting the original desert scheme,...... so we shall see. In my case a fellow Britmodeller came to my rescue and sent me a set of wing walks from Xtradecal,.... so thanks very much Mark,.... I owe you one mate! I had also bought a set of Brengun wing flaps for the Italeri kit as I was intending to add them to my Italeri Hercules C.1P, XV215,.... so I may try to use them on this kit instead,........ we`ll see; So on with the build,.... the parts are just superb,....... nice recessed panel lines and the shape of the parts are much more Hercules like when compared to the old Italeri C-130 kit with its raised panel lines. When dry fitting the cargo floor into the fuselage I noticed that the raised edge detail encroached on the side para doors,..... and as this area was actually flat, for obvious reasons,.... I cut this detail away and filed it flat. Still with the cargo floor,....... most Herks have non slip pads on the bare metal floor and these can vary between operators,...... I know the RAF floor looks very different to a USAF floor pattern for instance,........ so I found some photos and tried my best to replicate it, by first masking it with tape and then painting the pads in black. Speaking about decal sheets earlier,....... this would be another good idea for the kit,..... to release a decal sheet for the floor pads,...... as they are very hard to get right by painting them. The cockpit detail is excellent and a revelation to anybody used to building the old Italeri kit,...... all I added was a second bunk position left over from an old Italeri kit. Here is the part constucted cockpit and the cargo floor having masking tape applied prior to painting the non slip pads,....... of course I have rather simplified mine as the `pattern' was quite intricate in some areas, especially around the para doors and on the end of the cargo tailgate; Here is my cockpit and cargo floor so far,...... ready to fit into the fuselage. I painted the cockpit interior using Aeromaster USN Light Gull Grey (thanks Jon!) as I thought that this ws a good match for the padding and interior metalwork,...... with Sky (light green!) used for the ceiling of the cockpit area and Dark Earth for the lino flooring; So that is me so far! Cheers Tony16 points
-
Hi comrades! Here my take on Classic Airframes kit. The kit was great, I liked it more than Tamiya (built simultaneously - see "family photos" and built/RFI thread somewhere here. The only thing I regret-is the leading edge lights - they are to close to/part of wheel wells, not to my recent skills to insert the clear plastic here 😰. Otherwise-I'm happy with the result. The build is here: Thanks for looking!16 points
-
Kit : Airfix Hurricane MK.I Scale : 1/72 This is an old build I started last Christmas. It’s an Airfix starter kit. I just wanted to build something simple because the other kits had just finished were complicated and time consuming. I finished this model in Tamiya paints. It’s built out of the box. The kit goes together really well so it was a pleasure to build. Thanks for looking. Ken14 points
-
Hello Again, this is the second of my recent builds, once again built straight out of the box and painted with Tamiya acrylics. I'm not sure I've got the colour right I think it may be a little dark, also I'm not sure the two probes on the nose are positioned correctly and you will notice that the decals have silvered so overall I'm not totally satisfied with this build, please be kind. Thanks for looking, all comments and criticisms are welcome.14 points
-
Good evening everyone. Its been a little while since I finished a model or at least posted one onto here. But here it is. I've had this kit for over three years now sat waiting for me to build it but its always been left for another model as generally i'd never been a huge fan of olive drab models. I loved the box art, which was my main reason for buying it initially and after watching the Mini Series Catch 22 I knew I wanted to build it before the end of the year. My other reason was that I thought it would give me a good chance to use the chipping medium I had just bought. I feel like the model build went pretty well, being an Italeri kit I really thought i'd be fighting with a lot of parts to get a decent fit, but I made sure to do a lot of pre fitting and carefully filling the parts where the fit was still pretty bad to save myself more work than I needed to and to get a nicer overall finish. I think for the past models I have built, this has been my issue; not pre fitting and secondly not filling gaps in a clever way as usually i'd just slap a load of filler on and sand it back. As this was a bit of a learning curve, I spent a while doing these parts to make sure it would pay off. The only parts I neglected to pre fit were the clear parts, specifically the canopy, nose section and landing lights on the wings which didn't fit so well. Another reason I enjoyed building the kit so much was that I think I have found a good balance for kits such as this one where they are fairly cheap and easy to get hold of (I guess its different when they are either expensive kits or rare as I would take more time to get the little things to the best finish I could) and therefore wasn't too fussed if there was a little bit wrong here or there. I think, personally for me, I spend too much time overthinking things with the kits and trying to make them as accurate as possible within my skill set. This is why the landing lights might jut out a bit and the tally decal had to be cut making it inaccurate. I managed to snap the delecate nose wheel gear so purchased some SAC gears, which were nice but I wasnt sure they were worth the £17 I paid for them. I also bought a set of quickboost gun barrels as the kit ones were really lacking, I think this made a good addition to the model. Lastly. there seemed to be a bit of a debate on the colour of the front of the engine cowling, some said it should be drab, some said yellow, as well as white and red. I chose red as I thought it fitted the best to the model and I love seeing a bit of colour on an otherwise dull paint scheme. So overall im happy with the end result, it was a really enjoyable and relaxing build. Hopefully it'll get me in the mood to build my Eduard Spit with all the trimmings. Hope you all enjoy. Also let me know what you think about the red engine cowl! Thanks, Ryan14 points
-
Hello all, Here is my recently completed 1/48 Hobbyboss A-6A Intruder, in the markings of VA-75 'Sunday Punchers' from the USS Independence on station in the Tonkin Gulf in 1965. A nice enough kit that needed some corrections, the build thread can be seen here Extras used included Hypersonic resin GRU-5 ejection seats, Eduard cockpit etch, New Ware masks and Furball decals. Paints are a mixture of MRP and Tamiya. Weathering done with Flory Models panel wash and a selection of Abteilung oils. I've always liked the ruggedness of the A-6 and I'm happy with how my first kit has turned out. The modifications required for those interested: Thanks for looking and take care Dave14 points
-
Creeeeeeeeee. Bang! Door Four is locked forever!!!! 💀 Bristol Blenheim Mk.1f Airfix 1:72 What better date than Friday 13th in 2020 to release the RFIs for "Dr Spadgent's house of Horrors". This is door one of a multi build thread that can be found here. And the WIP can be found Here. Everything will be explained within these threads. This kit was kind of 50/50 some of it flew together some of it not so much . I had troubles with parts and she nearly went in the bin. ( a first for me ) I'm glad that didn't happen as she turned out rather well in the end. Thank you for all your help along the way ( if you indeed did follow along ) and I sincerely hope you like the shots taken this very morning in a very cold but sunny Autumnal garden in the Mid West of England. Enjoy dear Friends. And that's that. I hope you like the pics and thanks again for all the help along the way. If you had fun you could follow along in my next build thread. HERE. Take care and as always dear Chums. Happy Modelling. Johnny. PS. Would you Adam and Eve it. Four months later I get an E-Mail from Lynne at Airfix. My replacement clear parts are in the post. 🤣 ( let that be the twist in the tale ) JJ12 points
-
Creeeeeeeeee. Bang! Door Three is locked forever!!!! 😈 Polikarpov I-16 Zvezda 1:144 What better date than Friday 13th in 2020 to release the RFIs for "Dr Spadgent's house of Horrors". This is door three of a multi build thread that can be found here. And the WIP can be found Here. Everything will be explained within these threads. This is the smallest kit I have ever built and what a joy! Thank you for all your help along the way ( if you indeed did follow along ) and I sincerely hope you like the shots taken this very morning in a very cold but sunny Autumnal garden in the Mid West of England. Enjoy dear Friends. And that's that. I hope you like the pics and thanks again for all the help along the way. If you had fun you could follow along in my next build thread. HERE. Take care and as always dear Chums. Happy Modelling. Johnny.12 points
-
Wow, thanks alt That was enough for me to mask the Scooter demarcation and apply some brown: But I stopped when I realised the mojo hadn't been enough for me to mask the underside of the tailplanes 🙄 Oops. Two Zoom calls today (both recreational) so no more done. Hopefully tomorrow12 points
-
Hi to all! Here is my latest finished job and this is first time posting my job on this forum. So, model is Airfix A-4B Skyhawk, 1/72 scale and in Argentina colors. It's wonderful Airfix kit and it's pleasure to working on it... Take a look.... Thanks!11 points
-
Thanks Giorgio and Ben Camo done now: I need to mask up for the black bits. More masking mojo required for this: Why oh why oh why oh why does the top colour wrap around to the underside! And I have to mask around the pylons. Horrid.11 points
-
Been a while since I built a model after the marathon sesh i had back in Lockdown #1! Unfortunately during the current Mockdown I've been busy as ever at work and not noticed any change from my usual routine Just finished this though - seemed like a really nice and simple kit. I built it as Airfix intended straight from the box - I rarely build 1/72 so this might offend! Was a nice build and might get me to start looking seriously at 1/72 - they certainly look neat and take up way less space! All the best, Alan11 points
-
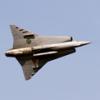
Hi, Here is a selection of images from my latest completion. This model is based on the 'The first Jet Guardians of Neutrality' boxing of Special Hobby's 1/72 De Havilland Vampire. The airframe depicted is a Mk.1, specifically J-1003 of the Swiss Air Force as included in the kit. This release adds to the previous boxings of this kit with the inclusion of new tail booms and a new tailplane specific to the Mk.1. Also the later variant tailplane and the intakes have been re-tooled to correct errors. In the case of the tailplane its chord has been reduced and in the case of the intake openings they have been reshaped. I am not sure exactly when these modifications were made. Despite Special Hobby fixing these errors there is still a big error which remained untouched, the overly large wing chord. The issue seems to be with the root rather than the tip so I removed a slither of plastic about 1.5mm at the root from the leading edge of the wings leaving the tip as it was. This changed the wing leading edge angle to better match references. This also required the intakes to be moved rearward the same distance to avoid a step and the fuselage parts needed adjusting to match the new intake positions. The trailing edge of the wing remained uncorrected even though I estimated it was about 2mm to far rearward along all its length, the tail booms and control surfaces made it more complicated to fix. Apart from the modifications to the wings the kit was built largely out of the box, except from some scratch built details in the cockpit including a seat harness and other details based on references. Along with a couple of aerials under the port wing noticeable in photos of J-1003. I also drilled out the clear wing tip lights from the inside to create the bulbs. I packed the nose and area behind the cockpit bulkhead with steel balls to try and prevent the model from sitting on its tails, although I ultimately failed in this regard. Once the airframe was assembled it was primed in Ammo One Shot Black primer then overcoated with gloss black in preparation for the High Speed Silver finish. This was replicated using Vallejo Metal Colour White Aluminium. The red wing bars and fins with their white crosses where masked for and then painted, as I thought the red may bleed through the included decals. The model was then gloss coated using AK Interactive Gauzy Shine Enhancer to help protect the paintwork. After applying the numerous decals another coat of Shine Enhancer was airbrushed on. Weathering was achieved with the use of Ammo's panel line washes, Ammo's Starship Filth Oilbrusher and Tamiya's X-19 Smoke. The model was finished with a coat of Vallejo Satin varnish to tone down the shiny metal effect. The undercarriage parts that were previously painted, fitted without any issue along with their doors. The masking was removed from the canopies and the sliding portion was secured with Vallejo Liquid Mask. If you add some to the canopy mating surface and leave it to dry it remains tacky enough to hold the canopy in place once positioned. It can then be repositioned a few times before the stickiness is lost, allowing the canopy to be posed open or closed. Hope you enjoy! Mark.10 points
-
Hello to all of you guys and girls on this forum.I hope you are all doing good and are safe and healthy.I present you my latest finished model.The 1:72 A.Z.Models Zlin - 242 L.I built this little thing as a retiring present for one of the aviation goround crew - mechanic in our air force aviation academy squadron.The kit itself is pretty hard to work on.I t requires a lot of effort to assemble correctly.I cut the canopy in two to make it in the opened position.I made the wing lights out of transparent sprue and the seat belt out of tamiya tape.I painted the model with tamiya and gunze paints.The decals are from the ancient blue rider set for macedonian and slovenian af. Enjoy the photos10 points
-
thanks dov. I think I just need a bit more practice I hope the Eduard version of the kit is better quality than the Revell boxing of the Eduard kit - the Revell kit is very poor hey! I can stuff things up just as well as the next guy. Better even... Thanks G - I'm trying to raise my game to your level just the one the drivers feet rest on Pete thanks Ian. - it's providing challenges on several fronts at the moment the alliteration just provides that extra panache Crisp thanks Roger thanks Terry Apologies for not really having a lot of time to post recently. The build is still progressing though. After looking at the previous photos I decided I wanted to change the color of the fuel tank. What better way to represent dull aluminum than with ehrrr... dull aluminum. Except that the BMF turns out rather shiny when it's buffed down. Still better than the horrible color I had it previously though (reminder to self - tone that seat down!) A few additional wires and a valve were added based on reference photos with all that done it was getting time to close up the fuselage, but there was one more item to add - the tail skid. The kit part was scarily flimsy, as well as having a mold mismatch (as everything else in this kit) and I just knew it was never going to last the handling and jostling this kit was going to go through so I soldered a few bits of brass together which cold pass for a tail skid at a casual glance - once cleaned up and trimmed that is. You can see the flimsy kit part lying on the mat, as well as a failed first attempt in brass. Hey we all learn from our mistakes don't we? Then I decided that I didn't like the kit breather tube(?) - I assume this is some way of getting cool air to the pilot? Again, brass was brought into play. a small length was soldered perpendicular to the main tube, then painted up in dull aluminum it took a bit of phenargling but I managed to get the T shaped tube in there without breaking the fuselage apart. I found that the instrument panel could be inserted later which was handy - that also meant that it could be positioned correctly in respect to both fuselage halves. I always hate it when you have to glue an instrument panel on one fuselage side first and hope that it lines up later when you finally come to assemble things - I never get it right! For the cockpit floor, I used dull aluminum BMF again, and added a couple of lengths of wire for control cables. The control column was replaced with brass tube as the kit part was mince. The pilots seat need a belt, so some Tamiya tape and a little piece of wire... trimmed to shape and glued in position at this point, the fuel tank was simply resting in position. I wanted to wait until I had the coaming in place so I could align the filler tube with the appropriate hole in the coaming (my OCD kicks in when circular objects are supposed to be concentric, and they're not) another couple of control wires were added Then the floor/wings were glued in position The kit instrument panel comes with cartridge ejector chutes molded in, but they were nowhere near aligning with the mating holes in the fuselage sides so orf they came - to be replaced with brass square tube (epoxy glue applied later) There is also an ejector chute on the coaming. I'm assuming they are cartridge ejector chutes... but 3 chutes for 2 guns? The only square tube I had was a bit on the large side but some careful filing soon took care of that - you can see here just how much the tube was thinned down - trying to keep that "sheet metal" look when it came time to put everything together I found that the rudder bar was longer than the available space so some very careful filing (it was already glued in place) was required to make it fit. There were a couple of fit issues with the engine firewall/fuselage interface so I came up with this high tech jig to hold things in place Finally the engine was fitted though I'm still going to have issues with the engine cowling later. Port side view Another thing to be addressed later is the air tube sticking out of the fuselage sides. On the few 28 Sqn Camel photos I have located, there appears to be some sort of fitting on the end of that tube and I cannot find a decent enough photo to get any real detail. I assume it is a curved pipe pointing forward to direct the air into the cabin? I keep mentioning mold mismatch with this kit. Here's one of the struts - that mold mismatch is in the region of 0.5mm or greater. Honestly, this is simply unacceptable in this day and age and you thought that was bad? Take a look at the ailerons. That is just ridiculous and it just keeps getting better and better - this is the aileron dry fitted before any cleanup! a nice millimeter or so gap all around. If you close up the gap, the trailing edges do not align. what utter crap. Anyways... moving on, with the fuselage closed up it was time to prime. (after the tail plummage was stuck on) the seams turned out acceptable (but the concentricity of that rearmost filler pipe is annoying the hell out of me - must see if I can tweak it without damaging anything Current state of play is researching which particular a/c this is going to be as there were so many variations in the paint schemes, and drilling gazzillions of tiny holes all over the place.10 points
-
10 points
-
Thanks johnny and Bill, kind of you both Brown bits done: Still wet. Green bits next - don't forget the refuelling probe…10 points
-
Renault FT 75 BS FLYHAWK 1/72 Last year I bought the Flyhawk double-pack kit of the Renault FT 75 BS, which some of you may remember from the WIP I did at the time. The second FT that came in the box has been sitting around waiting to be finished since the first was done. As I've got a gap in my schedule at the moment, I thought I'd try and get some old part-finished builds completed before the end of the year, and this one came off the shelf first. There wasn't actually all that much to do, as I'd got the hull together while I was building the first one. A couple of days to finish the assembly, and a few more for paint and weathering, and I could cross this one of the to-do list. No real problems with the build, apart from the decals which silvered quite badly for some reason. The ones on the first build had gone down flawlessly, so maybe these ones had deteriorated slightly in the intervening time. There's not a huge amount of difference between this and the previous build, apart from the camo scheme, but they look good together in the cabinet. Thanks for looking Andy9 points
-
This is an old Starter 1/43 kit, which depicted the 1990 Le Mans 'art car'. Unfortunately years in the garage of doom had rendered it a shadow of its former self. So it has been converted to '90 spec (side-exit radiators) and given a fresh coat of paint and some auction-site decals. This is the starting point: cleaned up but tatty.9 points
-
Hi mates, I have assembled this beautiful kit to make this model: I hope you enjoy my work 🙂 BTW, the WIP can be found here:9 points
-
Ciao, here a diorama in scale 1/35 with a veichle of a Sonderkommando Dora ready to re start th exploration in a desert. The veichle is Tamiya in scale 1/35. see you Paolo8 points
-
This build came from one of those flashes of inspiration that results in a sudden urge to start a kit from scratch and see it through to the end in quick order, rather than languishing for a few years as per usual. Browsing through Airframe Extra No.7 'The Suez Crisis', I came upon a photo of a lineup of Meteor FR9s of No 208 Sqn at Hal Far, resplendent in Suez stripes! I had no idea this version wore these markings, only ever seeing them on NF13s before. I'd had this book a few years but never twigged, there's even a small version of the photo on the front cover, hiding in plain sight! Very handily, the photo shows the nearest aircraft's serial clearly (WB121), and I knew immediately that I had to build this aircraft. I was already part way through an Airfix Meteor F8, but straight away started a newly received FR9 to build in parallel. I won't go into detail on the kit itself, other than to say it is generally a joy to build with a small number of fit issues, but nothing major. I built it pretty much straight from the box, and finished it with Xtracolor and Humbrol paints and a mix of kit and aftermarket decals (for the serials and 'W' codes). I hope you like the result as much as I do! Thanks for looking. Mike8 points
-
As these are digital renders, the panel lines do look sharper and deeper than they will on the real thing. Bryan and I have been designing kits for a long time and there's a bit of a "sixth sense" to knowing how to model panel lines in CAD vs what you want them to look like in plastic. We've gone with a depth and width to match Sweet and Platz kits in 1/144, as we think they're an excellent balance of fidelity and character that will lend themselves to painting. If they look too heavy in test shots, we'll shave them down, we know that panel lines are of huge importance to get right and we won't put out something we're not happy with relative to the top kits on offer at the moment .8 points
-
Now during my own association with the RAF Hercules during the 1980`s and 90`s the camouflage was transitioning from a Dark Sea Grey and Dark Green scheme with Light Aircraft Grey undersides to a wrap around scheme of Dark Sea Grey and Dark Green and having replicated the latter on my Italeri C.3P model I want to build this one in the former and many were looking quite tired and faded which is the look that I am going for; The aircraft that I have decided to most likely replicate is XV215 and to illustrate how the paintwork had faded,..... here it is in the early 80`s in fresh finish; https://www.airliners.net/photo/UK-Air-Force/Lockheed-C-130K-Hercules-C1-L-382/536433/L <Copied photo from Airliners.net removed due to copyright issue - please only LINK to their content> And by the mid 1980`s,.... with the addition of its refuelling probe during the 1982 Falklands War,..... here is how XV215 looked; And during the Gulf War period of 1990-91 with the addition of its `Fat Slags' artwork taken from Viz magazine which was essential reading in HM Armed Forces at this time,..... I even got my nickname from within its pages,..... and I`m not telling you what it was!! I think it also had black rubber coating added to its belly for protection during rough field landings,.. I need to double check this; And here are a few more pics as reference to illustrate how much the scheme could weather with age on XV215`s sister aircraft; This excellent pic was taken from a thread here on BM,..... higlighting the type of tail used on these RAF Herks which is not actually provided in the kit which states to use the early style short part,...... so something to fettle with later! Also for interest,..... here is the interior of an RAF Herk; And the RAF C.1P(K) tanker,.... used in the Falklands; And another interior,..... but I don`t think this one is RAF and looks more like a later C-130J ,.... however it is still it is an excellent view of the pipework, seats and padding which is included with the Zsvesa kit; Here is a link to a stripped out RAF cockpit,..... oh how I wish that I could afford this and have somewhere to put it! Why did the RAF Museum acquire a USAF C-130 cockpit for the museum at a time that real RAF Hercules with so much service and history behind them are being withdrawn from service and scrapped,......crazy! https://shootaviation.com/sets-and-mockups/cockpit-mockups/c130-hercules-cockpit/ Cheers Tony8 points
-
Here is my Yak-1 on skis, another post for a snowy day. This is Accurate Miniatures kit #3423 which was released in 1998. I first painted the normal camo scheme and then oversprayed lighter coats of white so you can see in places shadows of the fist scheme. This flew over the Leningrad front during the winter 1942/43.8 points
-
Hi Folks, its been a little while since I've posted anything on here so while I have a little time here are a couple of my latest builds for your perusal. Nothing remarkable, built straight out of the box and painted with Tamiya acrylics. Thanks for looking as usual all comments and criticisms are welcome.7 points
-
Amazon recently opened their Swedish website and I found these really cheap with free shipping so I accidentally pressed the buy button. I am curious to find out how the doors work on the BMW.7 points
-
Well this has been sitting still for too long, so I had a max effort couple of days and it's finished! Proper RFI to follow.7 points
-
I've added some more parts to it. I'm currently masking the windows on the windscreen, and after that I will fill and sand the seams. Still on target for paint this weekend.7 points
-
This is my first serious attempt at displaying a boat 'in motion' on the sea. It was a huge learning curve for me and I will admit I was relieved to see the back of it. However, after a few days I want to try something else and improve on this effort. Any comments, criticisms and advice will be gratefully received.6 points
-
6 points
-
My latest completed model, the Hobbyboss 1/72 easy-kit of the Fw.190A-8. It's not a great kit, not particularly accurate and missing a few details (like the aileron trim tabs). Still I like these kits and I have a few I bought for very little that I use to practice new techniques. This is one such model, as I used it to try a different way of reproducing the mottling on the fuselage... and I'm not happy with it, so I will have to try other techniques (meaning starting another HB kit...). I also tried to cut my own mask for the spiral on the spinner and again I'm not too happy with the results. The kit is mostly OOB, apart from a few additions in the cockpit (instrument panel from plasticard, control column in plastic rod and seatbelts made with foil) and a couple of exterior bits (pitot tube in brass and lower fuselage antenna in metal wire). Decals are from the kit with the exception of the lower crosses that come from the Academy 190D. I am not sure if this aircraft had the 20mm guns in the outer bays, Eduard offers the same subject in 1/48 scale and they think so, others say she had the 30 mm with shorter barrel... I had to decide and decided to go with Eduard as this allowed me to simply use the kit parts. I did not add any weathering, not even a panel wash. And I omitted the wire antenna.. I rarely do this on HB kits anyway. Not really my best model, at some point I also had problems with the clear gloss coat damaging the underlying paint and it shows in the wings, In any case it's finished and will take its place on the shelves. Next 190 will be made from a much better kit.6 points
-
Hi, Dewoitne 338 was a luxury long range French passenger airplane from late thirties. 31 of them were build. You can read more on this type here: https://www.passionair1940.fr/Armee de l'Air/Appareils/Transport/Dewoitine-D338/EN-Dewoitine-D338.htm and here https://en.wikipedia.org/wiki/Dewoitine_D.338. Few of them were captured by Britts in summer 1941 in Syria & Lebanon campaign and them they were transferred to Free French forces. Together with other civil airplanes they went into LAM (Lignes Aériennes Militaires ) - the FFAF transport service which was flying between Bayreuth and Brazzaville in Congo with base in Bangui (today Central African Republic). Each machine posses individual name. Mine has name "Belfort" (FL-AQB) and was renamed from "Ville de Beyrouth" (F-AQBD). The kit is by Broplan, vacu with small parts done as injection. The building thread within Mediterranean Theater of Operation GB is here: Here she is: (on above photos the khaki hue is reproduced closest to what I see by bare eye, below it goes too much to fresh green for some reasons...) The left engine just started! : An some shots in African sun: So it is already fourth militarized civil French type in my collection, other are Potez 29, Potez 651 and Bloch MB 220: Dewoitine is the largest of them ! This is mine No 19th in this year comments welcome Regards Jerzy-Wojtek6 points
-
Paddy and Mick were two honest hard working Irish labourers (no! thats not the joke!) They were unemployed so they decided to go west to that big Irish colony across the big sea to see if they could find work When they arrived they ended up in the mid-West. They saw a road construction company and enquired for jobs 'We're taking electricity to lots of rural places. We need the poles erected for the power lines. Can you two do that?' 'Of course we can!' replies Mick Actually they couldn't but no good Irishman ever admits he can't do a job. The manager drove them out into the country and up a very rural road. He showed them a pile of wood electricity poles. He told them 'Get as many of those as you can erected within the week. You'll live here in that cabin over there. At the end of the week I'll be back to pay you and see how you've done' At the end of the week the manager returns. He pays them then asks 'How many poles did you get done? '50' says Paddy '50! Only 50!' says the manager. 'That other team down the road did 200' 'aye' says Mick, 'but did you see how much they left sticking out of the ground?!'6 points
-
I'm pleased with the first attempt with the clearfix. The window on the left is the kit clear window. The window on the right is the Clearfix. A great deal of boring masking was done yesterdfay. I did it when the fuselage halves were separate as I worried about poking the windows in. Just as well as I did poke one in. A bit of fettling with the seats in the cockpit area was needed as the 2 halves of the fuselage didn't fit together with the seats were they were. Once this was done, the 2 halves did align with only a small banana shape noticable at the front and rear of the fuselage. Hopefully the tape will hold it together while it glues. The landing light needed lots of fettling to get it to fit. Next stop, more masking of the canopy and turrets 😕6 points
-
Well, this was tedious: I worked off and on for 3 days to get this masking done. What made it more tedious than usual was the fact that each panel in the canopy had a 45 degree bevel (is that the right word?), which really slowed things down. Still, I was able to paint the canopy tonight -- Interior green, then black, then OD, then dull coat. While I was at it I dull coated the drop tanks and the filler caps on top of the wings. Those filler caps came out A-OK! What, me worry? Put a drop of Micro Crystal clear on the lights on the underside of the wings so it would look like lenses. Turned out nice, I think! I glued the drop tanks on, and then got to the canopy. yeah... the canopy... which didn't want to fit for love, money or applesauce. Luckily I have a second kit that I'm not afraid to fool around with and discovered that the dashboard and the seat needed trimming. Once that was done it fit reasonably well, but not perfect. Probably only noticeable by me... So here's where things stand for now. I may actually be done, but I'm really tired right now and will follow up with my to-do list to make sure I got it all before really declaring victory on this one. Here's more than a few years of improvement side-by-side!6 points
-
Next step was to shape up the (Hasegawa) cockpit with Maestro Models photoetch. The instrument panel had to be modified, since the Danish Drakens had no radar. It is not spot on, but good enough for me in this small scale: Combining the Hasegawa parts to the Heller model was easier than I thought! (The white ones are from the Revell release.) Heller did a great job getting the shapes correct. The exhaust cone was a little challenging, but I solved it through not glueing the two parts together first, but glueing them one after one to the fuselage. And my insert solution for the air intakes was successful. After a sanding session the result was far better than I expected: Couldn't resist to gather all my Heller Saabs in this group build in one picture, before painting them:6 points
-
The fuselage halves are glued together, and the prop is readied:6 points
-
And the winner is........................... @Black Knight6 points
-
Tough crowd these armour guys Andy, not like the more gentile sort of person one finds building car models... 🤣 K5 points
-
5 points
-
Everyone seems in such a hurry to cry 'racism' these days.... Yesterday a customer asked "In what aisle do I find Irish sausages?" The assistant asks "Are you Irish, sir?" The guy, clearly offended, says "Yes I am, but let me ask you, if I'd asked for Italian sausages, would you ask I was Italian? Or if I'd asked for Bratwurst would you ask me if I was German? If I asked for a kosher hot dog would you ask if I was Jewish? Or if I asked for a Chorizo, would you ask if I was Spanish? Or if I asked for Keilbasa sausage, would you ask if I was Polish?" The assistant replied "No, I probably wouldn't." The chap replies "Well then, just because I ask for Irish sausages, why do you ask me if I am Irish?" The assistant responds "Because you're in Halfords!"5 points
This leaderboard is set to London/GMT+01:00


.thumb.jpg.d17ff607fc7e89ed057e63fcb6f2a888.jpg)








.thumb.jpg.cfc129272ffec824439b15e6013d5952.jpg)








.thumb.jpg.76f12b87ce9ca9929c9aabdcf8f9d2dd.jpg)
