Leaderboard
Popular Content
Showing content with the highest reputation on 21/10/20 in all areas
-
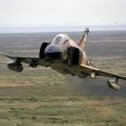
The Hasegawa kit is fantastic, fitted together very well with no filler required, just a bit of sanding. I used the Eduard etched cockpit detail, otherwise it's oob. Paints were all Tamiya spray cans; AS-13, AS-14 and AS-27. Thanks to @Mark V for the Spang F-4 info! I still need to add the ECM pod in the left Sparrow recess. All comments and suggestions welcome ...27 points
-
Evening All, To say I'm glad to move this one of the workbench is a bit of understatement! It had been sat on the shelf of doom for almost a decade and then I had a spurt of enthusiasm, or is that stupidity to get it finished. Definitely not one of best efforts, I'll put that down to repeatedly losing interest in it. Either way I'm pleased its finally finished 🙂 For those interested, the WIP is here Thanks for looking!22 points
-
Hi Everyone, Hope you don`t mind me sharing some pic`s of my latest attempt at a `fat faced spad` Built from Revell`s reissue of Matchbox`s 1/48 A-1E kit Every time I build one of these I try to bring it up to something a bit nearer the real thing but always see afterwards all the bits I missed...... ....so hopefully this ones a little bit nearer than the last. Improvements this time include: Tamiya main undercarriage, arrestor hook, main wheels and air force type tailwheel engine and cowl. Monogram propeller, all from some recently `culled` kits. Tried to correct the windscreen by sanding off the incorrect pillars, polishing and adding thin strips of black decal to represent the bonded joints. Embellished the seats, added: gunsight, coaming, brake pipes, steps, vent in the fin leading edge, wing fences, wiper, various aerials...... and boxed in the main undercarriage bays. Decals from Caracal Models CD48046 USAF/VNAF A-1E Skyraider. Oh and went for a simpler weapons load than usual with the centre Navy style drop tank just to be different. Hope you enjoy, thanks for looking Russ19 points
-
Just finished Piaggio PC.7 resin kit from SBS in 1/72 scale. Very nice kit. It is my built 37th for this COVID year, normally I haven't time to make so many kits. Thanks work from home I made unusually many models - most OOB.18 points
-
Thought it was about time I posted a few images of what's happening with my Hampden, can't let Neil carry all the weight, (and there's a fair bit of it). Progress has been slow, due to other projects taking precedence, modelling and 'real life', including the removal and replacement of a new kitchen here at Melchett Towers, all at the rabid insistence of the Memsahib, (under threat of death and/or cessation of my 'Wensleydale with cranberries' ration, affirmative action was needed). Not far off finishing the interior now, just a bit more work on the nose area including window framing, bomb panel wiring, an ABS bomb sight, nav's tools and map for the nav/bomb aimer's table. There's also a few odds and ends like fitting the seat, radio boxes, control wheel, control-surface cables, pipes and glazing to the door, then it's onto the bomb bay. The basic structure is there now, but it needs all the electricals, racks and bomb door actuators to be fitted. Thanks for looking, hope you approve. Melchie. Scratch built seat and radio set, still to be fitted. Parachute and survival pack made from Magic Sculpt modelling putty, great stuff, easy to use. Everything together.16 points
-
Evening folk's,built for the MTO GB is Pegasus Hobbies easy kit.finished as Ina "Macon belle" flown by Lee Archer one of the famous Tuskegee airman,well worth reading his wiki entry.As always many thank's for looking in.https://en.wikipedia.org/wiki/Lee_Archer_(pilot)15 points
-
Good evening, It's the first time i start a topic with you. I'm not fluent with english language, but it is easier as i only have to write ! Main purpose is to share about plastic kit building, but also to practice again your language because, retired, knowledge is fading fastly... so i have a dictionary on my knees ! 😄 Why a Whitley ? Because a good friend is building a Manchester and i had to go with him on something in relation with his subject : too lazy to start my Planet Model Manchester kit after some hard previous work, i saw this recent box, and i also wanted to build a new Airfix big plane kit. Also because i did not build any flying british thing since... 1994 ! Meanwhile, i had at least made this : and this... So i expect to be forgiven... 😄 I have seen two other Airfix Whitleys built here and i got by the way very useful informations from you about landing gear legs. The kit seems ar first very clean and easy to assembly and as a fact after two days it seems nearly finished : nearly... 😜 First small correction with rudder's shape : Corrected one on the left side. As it seemed i would not have a lot of work with this kit, i started to detail the turrets which are already very fine from the box. Here the rear one (FN4A ?) : The scheme is coming from "British Aircraft Armement" from R. Wallace Clarke, an excellent book you surely all know. I had to sand very heavily for the first time when gluing engine's nacelles to the wing : maybe i did not proceed correctly as everything was going nearly perfectly until now. Then i started to look too often to the landing lights : Airfix chosed a solution which gives satisfaction when you look the aircraft from ahead, but which is really puzzling when looked from above... So i decided to make some extra work there also... Front turret (FN16 ?) : Here you can see how things look like with rudders and drifts. I was prone to think it wa nearly perfect, but careful attention to pictures revealed a real mistake here from Airfix : The left part has been corrected : I was also puzzled with wing's position light, but when you don't want to see... So i first made that : The light must be at the end of the straight part of the leading edge, and straight above the upper angle of the aileron : but if you get the first place, you miss the second, and vice-versa... It took me some time to understand there was something wrong with the aileron's size, as overall wing shape is perfect. Correcting this problem needed a big work, as i thought this kit would be finished in a few weeks only : but in the end i couldn't deal with the parts as they were and i started the correction, both extrados and intrados. Aileron's length is 8 cm instead of 7,6 : the number of ribs is correct, but you have to get rid of the last one. Of course, it means you also have to correct the part of the wing which is covered with linen, and move the command fairings. In the end, it looks correct after several days of sanding, gluing evergreen, spraying surfacer 500, sanding... It is a big amount of work, but if accuracy is one of your goals you cannot avoid it. I must add that the plastic is easy to work and that i like it (some people say it's too soft, another point of view...) Well, the plane is not finished yet and i hope to end it in two or three weeks. Some extra work as you can read and see, but this kit is a really good one : i only hope i will have less work to perform with the Wellington and the Fortress Mk.III ! Regards.14 points
-
The PZL23 was a 1930s Polish built light bomber which saw service into WW2 and in fact was the first aircraft to attack a target within German territory during the Polish invasion. Suffice to say, it's elderly design was no match for the Luftwaffe and it suffered heavy losses early in the conflict. The Romanian airforce also used them against Russia. It was a nice little kit to build and Heller provided both Polish and Romanian decals. What started out to be a simple paint job using Revell Aqua was almost ruined by a bad reaction to Humbrol matt varnish. I had to sand it back and repaint while trying to preserve the Romanian decals. Anyone else had a problem with Humbrol varnish?12 points
-
This was my second try. I did not think I would enjoy the smaller 1/600 scale but I found I was wrong. I don't really see anyone building these old kits but I like working on them. Thanks for looking.11 points
-
11 points
-
Thanks Roger, alt-92, Noel and Bill for the 'closed' confirmation and especially to alt for the great pictures. I'm certainly getting some more Harrier love Thanks to Keith for the SHAR translation and, like Bill, I won't ignore you! Bill you are an exceptionally kind and generous man and I'm sure I can do something with the transfers - or make some more! I'll look forward to building that - and watching you do yours of course. I'd better get mine done quickly before you set the bar too high for me! Thanks to Shalako, alt, Mark and Heather for the tip on giving the transfers a tanning. I'll see what they're like and decide what to do later… Thanks Mark - I still remember stroking that 3 though! Pleased to hear your daughter turned out fine - reassuring. Right, close the intakes and… oh wait: Nasty flash. Once sanded they went on really well: Next question. When I dry fitted the canopy the bit behind the seat shows: …and there's a gap. Should the gap be there? How's this from alt's pic: Yes then. But what colour? While you're pondering that I'll prepare the Scooter for its u/c doors, closed of course. Adopt the position!11 points
-
I'm not sure why but the AEW version of the Gannet has always been one of my favourite aicraft and I was very pleased when Sword came up with the first injection moulded version of the AEW3 in 1/72. gann4 This version of the kit came with a resin radar operators bay which was a very nice addition although makes avoiding tail sitting very tricky - mine is stuffed full of ball bearings and there is even tungsten putty in the spinner and it only just remains on its wheels. gann2 by pat cauthery, on Flickr The fit of the kit is relativey good for a limited run kit - I found it difficult to get the fuselage all closed up at once and so glued aeverything but the radome together, and then dealt with that separately. The Sword instructions were also rather vague in parts - fitting the fairings around the exhausts had me scratching my head for a while, but by reference to a few pics on the internet was able to work out what that area was supposed to look like. Had some trouble with the finlets as well - they had a canted backwards stance which I did not think correct and I had to resort to some firm sanding to get them more in line with the real thing. gann8 by pat cauthery, on Flickr Paint was Xtracrylix XDSG over Gunze Aqueous Sky, with the trim being Humbrol Roundel Blue and white decal stripes applied to the finlets. The rest of the decals for this machine from D Flight 849 NAS operating from HMS Eagle came from the very nice set by Alley Cat models. gann1 by pat cauthery, on Flickr Hope you like Pat gann9 by pat cauthery, on Flickr gann7 by pat cauthery, on Flickr gann5 by pat cauthery, on Flickr10 points
-
Hi all, Done a while ago this is my IL-20 Coot. An Amonster, the wings and fuselage come in fibreglass with the rest in plastic. The parts all need cleaning up before assembly with drilling, cutting and sanding required on the fibreglass parts. Thereafter fit, fill and sand are the order of the day. The model is from the box other than the Little Lenses used for landing lights and Kristal Klear cabin windows. The U/C is drilled and reinforced with brass rod as there is a considerable amount of lead in the front end. More recently I had another go at the paint finish. These aircraft had very faded paintwork which I have tried to replicate using Tamiya powders with a blue hue to fade the grey base. Oil stains were done using the same product. Promodeller wash was used for Panel lining. The aerial is new and the propellor bosses now sport black tips. At a later stage I may convert it into the M variant which has many more interesting lumps and bumbs. We shall see. Hope you like it Pete Thanks for looking Pete Ongoing in the shed Il -14 Albanian Air Force 1, MiG-23UM Hungarian AF, Ermalayev 2, Su-15UM10 points
-
Hi folks, I'm late to the party but thought I'd give this kit a go. I built the railcar earlier this year as something different. Not having built rolling stock before, I guess it turned out ok. I set the Jagdpanther aside but saw this GB mentioned so I thought I'd break it out. The require contents pic: I'm planning to do an OOB build so the moulded on zimmerit helps in that regard. Carl10 points
-
10 points
-
Thanks folks! Here's a couple pics of the railcar. It went together well with the only issue that it's moulded from ABS plastic so the cement didn't always hold. A few parts had to be re-glued to get them to stay put. Carl10 points
-
Here's another pic of the other hull parts with the moulded on zimmerit. So assembly starts with the lower hull. That went together without any issues. I then added the suspension arms and used their jig to make sure they're level. While that was setting, I started on the tracks. They're link and length with individual track teeth. Thankfully the teeth are grouped together on runs that match the layout of the track links while still on the sprues. One sprue done, another to go. That's it for now as it's time to out the kids to bed. Carl10 points
-
Hi All! 1/144 resin kit. Tu-104B -enlarged late model of first soviet jetliner for 100 passengers. This aircraft 42-438 from 204-th Novosibirsk United Air Squadron. Plane crashed in March 1961 near Sverdlovsk. Enjoy watching!9 points
-
Decision taken off you Ced, you get the silver oldest style Aifix kit-in-a-bag It's all there but the decals may benefit from ultravioletting or scan and reprint They are immensely old. I get this one, I just re-found my next mojo basher It is gorgeous The transfers need some application of "oohya!" so it will be fun A slight short-shot on the rudder but entirely sortable, looking forward to this next.9 points
-
What a nice modelling experience Hasegawa kits are, the N1K2 is the last of my trio of Japanese subjects in 1/32 scale and as well as being enjoyable to build I have learned a lot about Japanese WW2 aircraft and learned (or re learned) some modelling techniques. Paints used were mainly Sovereign Colourcoats, the undersides was Xtracolor High Speed Silver and Humbrol was used for the small details. All markings were painted using Montex masks apart from the stencils data plate and kill markings (I'm not that clever !) Seat belts are the amazing but fiddley RB Productions IJN ones. And so here we are, for some reason the aerial wire looks more prominent in the photos than it really is, and yes I messed up the "no step" area on the wing, there are probably more mistakes as well. Build thread is here And on with the photos which are not the best as I took them with my phone. And the flip side And put to bed with the other two builds. Cheers Dennis8 points
-
This is the Galaxie 1/25 kit, a challenging but fun one to build. I airbrushed the exterior with Scalefinishes Como Blue and Dove Grey (original chevrolet colors for this period) and Tamiya TS-13 clear gloss over coat. I deviated from the instructions by pre-mounting the front fenders to the body before assembly/ paint and installing the interior directly within the body instead of pre-mounting to the chassis. I had a bear of a time installing both front and rear bumpers which seemed to encounter the short end of the tolerance stack-up on this model - thank goodness for 5 minute epoxy! The “stovebolt” 235 CI straight six engine was my favorite part of this build and made me nostalgic for my second car (a ‘55 Bel Air 4 door with the same engine, bought for $265 USS and driven for 3 years). I love these streamline “futuristic” post-war GM designs and wish Galaxie or Moebius might produce others (‘47 Caddie Series 62 fastback please????). Cheers, John8 points
-
Far from chain, but could be used for steel cable. Two lengths copper wire twisted. 0.26 diameter. I may be able to go finer than this. Keep on keeping on! Bob8 points
-
I've done some painting. I should probably give this glossy paint some time to dry now.8 points
-
I enjoyed building the Airfix RMS Queen Elizabeth so I decided to continue with another Airfix 1/600 scale ship. The deck color was something that I was hesitant about but I was reasonably happy with how it looked when assembled. I see most France models with either a very bright, or a dark green deck. This was a grey with a green tint. As with my other 1/600 ship I had much difficulty painting the windows. I don't have the talent to paint with a brush, especially in this scale. This was my third complete ship. The only other project I have is the one I am currently working on, a 1/350 RMS Lusitania. The 1/350 scale is a little easier for me to work on as my old eyes at times aren't up to the task of 1/600!!7 points
-
Hello all I finished this one yesterday, Eduard's FW-190 A4 shown as one flown by Siegfried 'Wumm' Schnell in Jan 1943. I was pleased with how this one went together and with the amount of surface detail, quite a big difference after my last two builds (Airfix Hurricane and Tamiya Spitfire Mk1s). I added more detail into the engine but this is covered up by the 'fan' behind the propeller- I know its there... This is largely painted using MRP paints which spray very well, I'm a definite convert, and certainly made the mottling easier. I also got a lot of silvering on the top crosses so took them off and painted them on instead- they do look better painted but not too keen on wanting to repeat that masking process! I've kept the weathering light as all the pictures of Wumm's plane show it to be very clean. A flory wash and some oils were the main of it but I did try splattering some un thinned matt varnish over certain areas to try and help simulate fading. I think this has worked well in some areas but now I've seen the close up pictures is maybe a bit heavy in some areas! Overall I think I'm making progress and each model is better than the last so looking forward to next in line which is the Tiffe Italeri/Hasegawa re-boxing. Thanks for looking. To prove that a little work went into the engine7 points
-
7 points
-
I can also confirm this. Don’t get caught out, like I did, by hoping UV rays make it through the double-glazing - especially if the glass is that clever stuff that stops UV getting through.7 points
-
Hiya Folks, Been a long old build this one as I started it when the Airfix Walrus kit was first released,.....and as I wanted to replicate a pre war silver aircraft I used decals left over from the old Classic Airframes,.... only for Airfix to then go and re release the kit with exactly the same markings!! I also bought the Neomega resin, white metal and brass etched catapult section kit to mount the model on and as some of the Walrus operating on the China Station like 714 Flights aircraft aboard HMS Cumberland had the amphibian undercarriage removed I decided to do this too, with the model folded and mounted upon the catapult. After painting the model and putting the decals on quite quickly,..... I then had a mental block towards rigging and so the fuselage and separate wing sections sat in the box along with the unbuilt catapult for over 2 years,.....looking like this,.... ; But recently I had an epiphany and finally got it rigged, assembled and the catapult assembled and mounted onto an MDF base. Cheers Tony7 points
-
Hi dear colleagues! I would like toshow you my first serious armour in scale (i am an aviator). Ecscellent Zvezda kit with a nice detaling and stunning fitting! Painted with AKAH , weathered with oil paints fnd dry pigments.6 points
-
Hi dear colleagues! Letme repreent you another my buil. This time is old and poor KP kit. Sratch build: overall rivettlines, cocpit, wheel bays, hatches out of self agdesive foil, antennas scopes and dischargers. The pilot and armament is from Zvezda's Yak-130 and KH's Su-35.6 points
-
Hello, colleagues! Excellent kit from Zvezda vith decals rivetts ans PE axterior set/6 points
-
Hello all, [Note: this will be a work in progress for a while, and I may end up adding to this initial post over time, rather than make you (future reader) sift through a thread looking for bits of information. If necessary I'll make a new post just to alert you that an update has occurred. [Edit: slight change of organization already...] I will also admit it when I don't know about something, and I welcome input from others to help fill the gaps.] I've been refreshing my memory about the Accurate Miniatures SBDs, and along with that the differences from one Dauntless variant to the next. Scalemate's product timeline is a good reference for the kits that came from this basic tooling, so rather than repeat it all, feel free to refer back to it. I will, of course, cover some of the same ground. Ultimately, boxings were released to make any SBD from -1 to -6 (never as such, but the -6 looks the same as a -5) and- more or less- the A-24s that correspond. However, as many of you will remember, at some point Acc Min messed up when mixing and matching to offer different variants, with the result that some kits did not have the right combination of parts, let alone the right ones for the intended variant. Many of us have probably had one or more kits in the stash for quite a while now, so I will show you what to look for if you want to quickly check whether or not you've got a "complete" kit. To get this party started, here are the fuselage sprues from the -1 (left) and -5 (right). Most of the trouble came from this basic sprue... Basically, "early" (single rear gun) was Sprue A, while "late" (dual rear gun) was Sprue B. Overview of this sprue (details will follow): On the lower left are the two cowl halves, and on the upper left are the "inner" cowling halves- the ones between the "real" cowl and the firewall Top center is the top of the cowl; bottom center is the gun cover (and base of the windscreen) Top right is (Sprue A) single rear-gun details, AND spinner and ADF loop. Sprue B: twin-gun details, plus radar unit (replacing ADF loop) Bottom right is the pilot's rear bulkhead, with armor protection- note the different shape The fuselage pieces themselves differ in having the little sliding doors represented on the "late"/Sprue B parts. Note that this detail is only on the outside; the inner surface remains smooth, for you super-detailers to address. The problem of mis-matched parts arose when Accurate Miniatures wanted to release a "late" SBD-3 (sometimes referred to, inaccurately, as an SBD-3A), with twin rear guns. I believe that this was the "Battle of Midway" SBD-3, in a "white background" box. They changed out the cowlings- "outer" or front, and "inner" (1 in list above, or top/bottom left) on Sprue B, but neglected to change the cowl top and gun cover (2, top/bottom center), which were for the SBD-5. The spinner, found (if not always) on -1 through -3, also disappeared. Here's an example of the "oopsie" Sprue B: Once the mistake was discovered, the sprue was (at least sometimes) corrected, but some kits also reveal an interim solution: In post 2 I will look at the differences between SBD versions, and possibly Acc Min's parts to reflect these changes. And now to post before the computer goes <PFFT> (again)! bob6 points
-
Couple of quick shots on the bench of the latest build. This is the Airfix 1/48 kit done as one of Flight Refuelling’s D3 Drones XN652 circa 1980-84. I used Pavla’s resin cockpit, Aires undercarriage, Wolfpack wing fold and Eduard seatbelts. Pitots are from Master, the engine covers and UDP were scratched. Decals are from the kit and Model Alliance both of which weren’t great - ‘bloody awful’ is a better description though this may be down to their age or way they were stored. Big thank you to Dave Swindell for coming up trumps with a photo of the Universal Drone Pack that replaced the Observers ejection seat. Pity you can’t see much of the detailing when the things together but I know it’s there and it’s probably my favourite part of modelling. The kit did put up a fight especially around the forward fuselage and flaps and I hate spraying yellow. Love the Sea Vixen and the kit though If I’m honest I’m quite glad it’s all over. The undersides and air brake do look quite nice if I say so myself but to be honest I darn’t move the thing now to photograph them - should have done it before attaching the wings. The next project was going to be a second but I’m not sure I can face it right now. Think I’ll wait and see how the therapy sessions go first. With the cancellation of the project XN652 ended her days at the Catterick Fire School as instructional airframe 8817M. Hope it’s of interest.6 points
-
6 points
-
Airfix Spitfire mkI, Xtradecals 92sqn, painted with Humbrol Sky, Xtracrylix Dark Earth, Vallejo Dark Green and finished with Winsor and Newton Matt6 points
-
Meant it be a dogfight double but looks like it’s foe won’t be making it in time so here’s an Airfix Defiant as per the dogfight double release, painted with Humbrol Sky, Xtracrylix Dark Earth and Vallejo Dark Green and finished with Winsor and Newton Matt6 points
-
Thanks Alistair I know, I know… but my iPhone does loads for me other than calls and Flickr; diary, notes, SatNav (with CarPlay so safe), CCTV control etc etc… And a couple of games - I'm addicted to Worms3 and play Solitaire too. Sad man… They are expensive though so I guess it counts, for me, as 'a treat'. I get those once a year. Probably. Quite right CC! At the moment he just eats, sleeps and, er, goes to the loo. If I can get him modelling he'll be just like me!! Thanks Craig It's a nice kit and a nice subject - go for it! Good idea Alistair, but I bet the ladies would veto it! I know what you mean about the phones Mark - more gigs, mips and other TLAs* but nothing to blow your skirt up. The camera is just silly now TBH - professional video in a phone? Maybe a bit too far… (* Three letter abbreviations) I'm envious of your 3GS though - the last of the 'clamshell' models and soooo nice to feel - or is that just me? Thanks for the empathy too - it's been a long time since I've worried, probably unnecessarily, about a helpless little body but it's not a good feeling They're going home today so fingers crossed we're over the worrying. Thanks alt - I can see why people have problems - it's a weird fit to be sure Ah, well, going for the 'Max' is me giving up John… maybe a trip to the optician would be cheaper but we shall see (or not!) Indeed CC. I changed optician to the one my wife goes to and he's great, but the shop does designer frames… They do employ nice young ladies to tempt you to spending £100s on 'style' but I've grown out of that to be honest. I should go back for a check though, like you. And then off to a cheaper shop! The nozzles have been filled with thinned Humbrol and scraped: I was a bit disappointed until I realised the filler was darker grey - they are smooth, honest! Inserted and glued like this: I hope that's right. BIG gaps eh? While looking for bits I noticed this: Now that most of the big parts are off 'Sprue C' is really wobbly and the only thing holding the centre in is the probe. Removed and put somewhere safe. Next step: I really don't like these choices where there's no guidance on WHY there's a choice. I have no idea. This: … or this: …for a SHAR that's chasing a Scooter? Answers please on a postcard to…6 points
-
@trickyrich, making friends and mostly enemies everywhere he goes. Lets face it, he doesn’t make models6 points
-
Lots of progress over the last weekend. I sprayed the whole model with Future and did all the decals. They went on with no bother at all. I used the Mig panel liner - Sand to enhance the panel lines. Here is a photo of one side done, the other side untouched. The top is done Once all the panel lines were done and cleaned, I weathered it a little with some silver paint and Dark Earth pencils from Ammo Mig. I stuck the last few bits on including the prop and guns. The outer guns are from plastic rod. Lastly, these extra bits and pieces were painted and I'm calling it done6 points
-
Brief midweek update... Aren't I the lucky one, mid week modelling not long but something! Drilled out the exhausts, dragon do give an indentation (one on left) but not very deep so quick ream out, simples! Few fixtures and fittings added to the hull whilst waiting for the new barrel. Not very exciting but at least proof of life if now't else! Thanks for looking Darryl6 points
-
Lee’s tip for the day.... Do not waste your money on Tamiya Extra Thin cement. Buy the airbrush cleaner, instead. It’s much more, for much less, and is the Exact Same Product.6 points
-
This my second RFI since joining Britmodeller back in April. The Esci Dodge WC52 is a nicely detailed kit, especially for its age, but requires some serious modification to get it to sit at the right height. The modifications I needed to do were far more drastic than I was expecting, and it ended up taking longer than I thought it would, but quite pleased with the result. Also added some windscreen "glass". The old decals were useless, but I wanted to do mine in US Eighth Air Force markings, so got a spare set of USAAF Bomber Resupply set decals from Airfix, and chose to finish it in 100th Bomb Group markings. Here's the WIP; And here's the finished item; 20201021_163054 by Dan Hardy, on Flickr 20201021_163113 by Dan Hardy, on Flickr 20201021_163133 by Dan Hardy, on Flickr 20201021_163146 by Dan Hardy, on Flickr 20201021_163206 by Dan Hardy, on Flickr 20201021_163222 by Dan Hardy, on Flickr 20201021_163319 by Dan Hardy, on Flickr5 points
-
Cracking on with the engine . My research came up with a variety of different colours for the exhausts . The instructions suggested flat metallic grey , but I went with Tamiya gunmetal , overpainted with Humbrol Matt clear . The exhausts are a big feature on the Metro , so I think it’s a shame they are going to be hidden when the body is on . I had thought about cutting the rear hatch off , and doing away with the mounting bar but I don’t feel brave enough to attempt it . Heres some shots of the work so far . Tiny decals applied to cam covers , exhausts masked to paint mounting straps . A proper engine ! The engine , with exhausts , needs squeezing through the square space at the back of the floor pan . This proved difficult. A corner was obstructing the engine , so I cut the corner away and managed to get the engine dry fitted into position . The exhausts push into the white bar that doesn’t exist on the real car . The body also fits into place on this bar . A tight fit ! View from underneath . I painted the gear linkage and some pipe work at the front. Cant see much of that engine detail with the body on ...... Thanks for looking Gary .5 points
-
Looking good, Buffers! I always thought the FRS.1 was by far the best-looking Harrier, being the pointiest.5 points
-
5 points
-
It was for Mustard and its derivatives. While not the deadliest of chemical agents, mustard was widely used at the end of WW1 for one main reason - it got over everything, and was persistent, and could cause casualties and injuries long after other agents would have dissipated. Contamination of equipment was, and is, a major concern. Vehicles that have been splashed with mustard can be a hazard that is not immediately obvious, until exposures happen. The color change of the gas patch was supposed to provide a quick alert that something might be amiss if a plane had happened to exposed while on a low level mission.5 points
-
This is a bit more convincing and a better reflection of the colour: The (dusty!) bits of dark green armour are just resting there to see what they look like, I need to scuff them a bit. I'm quite pleased at how the separately-tinted pieces create a slightly patchwork appearance. Will5 points
-
Stencils, All of them, and underneath, and I fitted the prop - removeable.5 points
-
Perhaps it's better to accept that it is Fatally Flawed(tm) and Completely Unbuildable(r) ?5 points
This leaderboard is set to London/GMT+01:00


.thumb.jpg.d17ff607fc7e89ed057e63fcb6f2a888.jpg)














(510x640)-Copy(95x120).thumb.jpg.33073138e01aa81779639a845926753e.jpg)