
Leaderboard


Popular Content
Showing content with the highest reputation on 09/10/20 in all areas
-
Last years Christmas present finished! 1/48 Eduard Hawker Tempest of No. 3 Sqn RAF flown by Sqn Ldr Charles H. Macfie, late 1947, Germany. Thanks for looking28 points
-
This time a plane with propellers. The model, as usual, is made straight from the box. B-24 Hobby Boss in 1:32 scale, very weak model. And the idea of making plastic landing gear legs is an absolute mistake. It doesn't make sense to write any more because I have nothing good to write about this kit19 points
-
Evening, Another in a series of small general aviation 1:72 models that I have been designing and 3d printing to keep 2020 interesting...and what better to model in 2020 than the Pipistrel Virus? (Actually it's pronounced Veerus). This is a dinky plane with a lovely bird like fuselage that reminds me of an Etrich Taube. I think it deserves a model, it's quite a thing if you are unfamiliar - 140kt cruise at a claimed 48 nautical miles per gallon. 1000 or so have been manufactured so far, including 194 to India where it is the air force basic trainer. And happily, one flew over my house last week (once you've modelled one you can definitely spot them). This is the parts breakdown: Thanks for stopping by! Harry19 points
-
Eduard's fantastic (but fiddly in places) 1/48 P-51D Mustang kit probably doesn't need any introductions by now and neither does the subject of part one of my recently completed double build. Built out of the Profipack box and painted with AK Xtreme Metals and Mr Hobby paints. Part 2 to follow shortly Duncan B16 points
-
Part 2 of my Eduard P-51D double build was Ridge Runner which featured on the box art. I used the Brassin resin drop tanks and propeller for this one because I made a mess of the kit parts during assembly (the kit drop tanks aren't so nicely detailed either). Painted with AK Interactive Xtreme Metals and Mr Hobby and dirtied up with pigments and oil washes for a bit of fun and to contrast with BBD. And both together The double build was an enjoyable project, the kit isn't a 'shake and bake' but is very satisfying to build. Duncan B15 points
-
Built OOB.I added homemade seatbelts and painted the whole thing using mr.hobby and tamiya paints.If you are interested in you can watch the whole process on youtube at the following ling.13 points
-
Here's my third Japanese WWII aircraft. I have returned to plastic modelling after too many years and I have decided to make as many Japanese planes as possible. I've narrowed my list down to those were over 1000 were made, there's a lot Here's the third, an old AIrfix kit from 1984 with plastic bits in it from the 1965 mould... There's a thread in the WIP section, this took a bit of love to fashion. I got depressed during the build but finally made it out the other end. Learnt a lot. Notice how I flattened the tyres in completely the wrong place As always, I welcome any and all comments. Thanks for watching! That's all folks.13 points
-
Dewoitine D.520 (L092), Smer re-box, with Berna decals and PE which turned up with my second-hand one. WIP is here: [edit - slightly better photos] Thanks for a fascinating GB subject - I’m looking forward it! Thanks for looking, Adrian13 points
-
Hello everyone, I hope you all are keeping safe. I've just completed the 1/32 Tamiya F16CJ and thought I'd share a few pictures of it, i swapped the static dischargers for the superb Master set (AM-32-084) as the kit parts looked a bit too chunky, MasterCasters Soft FOD inserts, other than that...its out of the kit box. I'll try and get a few outdoor pictures added soon as the weather allows 🙂 All comments welcome....stay safe folks!11 points
-
Hello Everyone, 8th October is celebrated as Indian Air Force Day. 2020 was the 88th Air Force Day for the IAF. I present the Mirage 2000 to commemorate this day. The Mirage 2000 was upgraded by the Indian Air Force and was re designated as Mirage 2000I. The kit is from Kinetic in 1/48 scale and is built Out Of the Box. The build is simple but Kinetic hasn't mentioned much in the instructions about which parts to use for the different variants which can be modeled from one kit. So you will need to refer your references for the particular version you will be building. The model is painted using locally available acrylic paints and the camo was hand air-brushed without the use of any masks. it was just simpler for me this way IMHO. I chose to give it a load of 4 MICA missiles and I am in process of scratch building the SPICE 2000 smart bomb which was used to strike terrorist camps deep inside the enemy's territory in BALAKOT. Overall the kit is a nice and simple build with beautiful detail OOB and I would recommend everyone to get this kit. I found this to be the best in 1/48 scale. Do enjoy the pics and the WIP video. Best Captain Adi's ModelArt11 points
-
Hello to all. Futher to the WIP on this restoration of the old Airfix F-16, here is the finished model. Landing gear and wheel bay doors were missing so I 3D printed replacements. The decals are reprints of a Hasegawa set. It was not easy fitting Hasegawa ones to an Airfix kit bit I think it turned out ok. I think I preferred 260+ decals on my Phantom! I put my Red Arrows Hawk and Gnat alongside to show my little collection of display aircraft.10 points
-
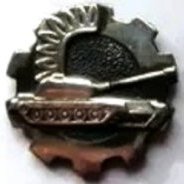
Hi All, Today I completed the hull with suspension. I made the cast texture in the same way as on the turret. Close up of a sprocket. The Patton tanks had three holes in sprocket for getting rid of the mud. Dragon found this an insignificant detail so I had to drill them. I couldn't resist to try on with the turret10 points
-
Finding myself with a generous supply of P-51 Mustang decal sets at hand, I picked up a brace of Hobbyboss's relatively-inexpensive 1/48 'Easy Assembly' P-51D kits, to check them out and to thin the stash a bit. I've built a half-dozen or so of their 1/72 versions -- perfectly workable for the most part, if one doesn't mind the 'molded hole'-style cockpits -- and was curious to see how their larger-scale offerings compared. Overall, I was quite chuffed: pluses include clean moldings and generally excellent fit, petite and mostly-accurate panel lines, and a sparkling-clear (albeit single-piece) canopy. What interior detail is supplied -- instrument panel, stick, seat/armor and radio rack (but no sidewall detail whatsoever) -- is quite nice for the 'economy' end of the scale, and can be painted up to a nice standard. External stores...at least for the Korean War boxing that I purchased...were limited to a pair of standard 75-gallon 'teardrop' droptanks, sans plumbing. A nice feature is the provision of nylon gussets for the prop and wheels, allowing them to be easily and cleanly added (or removed, if necessary) post-construction. There's one pretty obvious gaff in the kit: the shock scissors on the landing gear struts are molded on the wrong side of the struts, pointing toward the front. (And the struts themselves are 'keyed' with their forward angle built-in...so they can't simply be 'flipped' to correct the issue.) The lack of cockpit wall detail is presumably down to the 'Easy Assembly' ethos, but two other omissions are just odd. The prominent movable radiator exhaust chute...visible in virtually every photo of P-51D's, just forward of the tail-wheel...is simply absent, just a solid smooth curved surface. The other omission is more niggling, but I think it's the only kit -- of any scale or complexity -- to miss it: there's no hint of underwing ejection chutes for the six wing machine guns. [To put this in weird perspective, they did a splendid job of molding the much-tinier pattern of open perforations on the breather plates on the nose...something few manufacturers have ever attempted to do!] All these issues were fairly-easily sorted during or prior-to assembly. I had an old Eduard color 'Zoom' set on hand, which nicely-supplied most of the missing cockpit detail. I carefully sheared the 'scissors' from the struts and reversed them, adding soft-wire brake lines at the same time. (I'm ashamed to say I didn't actually notice the missing cartridge ejection chutes until it came time to decal the wings. Having no desire at that late stage to insult my carefully-applied natural metal finish...a few more scraps of black decal stock were quickly applied, to cosmetically fill in for those errant chutes. Among my various decals, I had a nice Mike Grant sheet which included markings for the F-6D photo-reconnaissance version of the Mustang, so I decided to do a mini 'conversion.' I scratch-built the three fuselage camera ports from scrap bits and tubing, added an intervalometer control to the cockpit floor, and scribed the type's distinctive camera-access hatch on the stbd. side of the aft fuselage. I used a mix of paints and decal shades for the natural metal -- mainly AK Xtreme Duraluminum -- and good old Tamiya 'Chrome' for the silver-lacquered wing surfaces. I supplemented the Mike Grant decals with home-printed ones for missing stencils and a few minor corrections. Markings are those of Capt. Clyde B. East of the US 9th Air Force's 15th Tactical Reconnaissance Squadron. East -- who'd been too young to qualify for the USAAF pilot program -- had hitchhiked north to enlist in the Royal Canadian Air Force, training on Tiger Moths and Harvards before earning his wings in 1942. He flew an adventurous tour of interdiction and harassment missions over France, Belgium and Holland with the RCAF's 414 Fighter Reconnaissance Squadron, before transferring to the US 9th AF in 1944. There he first flew Spitfires, then moved on to both the C and D models of the F-6 reconnaissance version of the P-51 Mustang. He ended the war having amassed nearly 400 combat hours, and was credited with 13 aerial victories. Hope you enjoy the photos!9 points
-
Another refugee from the shelf of doom. I actually started this kit in 1987! I never give up! It does require a bit of sand and fill and has raised panel lines, but the shape is spot on. I found one photo of an aircraft with the yellow/black pitot tube, so ran with it. There was quite a bit of variation on how the pitot tubes were painted anyway. The aircraft were also kept pristine, so no weathering. No masterpiece, but I love the look of it.9 points
-
I have to say this was a good kit, it went together very well. Despite the moulds being from 1991 (at least that was the date on the parts). I didn't put the crew onboard, as I do not like little people in my builds. I used some of the Eduards PE that I bought, but some was just too much of a fiddle. For my first boat of this scale it was fun, I highly recommend it. Jon9 points
-
A few more photos9 points
-
Hiya Folks,..... another Defiant,.... but this time a Battle of Britain aircraft which I have been planning to build for some time,..... as usual it is brush painted and I used the excellent kit decals,.... this has to be one of Airfix`s best kits ever to build,..... the design work and detail is superb. The model represents L7021, PS-H of 264 Sqn based at RAF Hornchurch on 25th August 1940 with its large A Type roundel converted to A1 Type with the addition of a narrow yellow ring. When studying photos of 264 Sqn Defiant`s I noticed that the demarcation between the black and Sky on the propeller spinner could be quite raggedto say the least,..... so I attempted to replicate this,..... but not too much! Here is the real thing, L7021, PS-H seen on the 25th August 1940 at RAF Hornchurch. The previous evening it had been flown by Pilot Officer `Bull' Whiteley when it downed a Ju88 but `Bull' was killed on the 28th and L7021 was to fall in battle on the same day too taking Pilot Officers PL Kenner & CE Johnson to their deaths,...... RIP; And here is the model; Cheers Tony8 points
-
Good to be able to help on your mighty model. You will need to experiment on some scrap first. The key I found is to find appropriate sized dome tools to form the depressions. I promised I'd show the Deluxe materials Scenic Rust in the raw As you can see it provides a nice texture but it's not a one-stop shop Avoid the numpties and stay safe Kev8 points
-
An hour or so in the shed this morning got a fair bit done. The whole plane got a bit of a shock with three full sheets of 180 grit used up sanding it all down. I've used less on full sized cars! I'll be trying to keep the rivet detail on the outer parts of the wheel spats, I think it's very deco looking. Once I had had enough of sanding I hit the airframe with a couple of coats of primer filler to see how things looked... Yay! Let's hear it for the Big Bananna I'm tempted to make it into the Fyffes Bananna entry for the Trans Bermuda Air Race of 1932... only no such thing existed! Ditto mottling it and hanging a torpedo underneath and calling it an early Italian Maritime Strike aircraft. It looks like the solvents in that primer were stronger than I thought. There's going to be a fair bit of sanding, filling and priming followed by more of the same going on here over the next week or so. It's getting colder and a bit damper now so the drying times for the filler and primer will be a bit longer. If I rush things there's a chance of cracking or shrinkage at a later date and nobody want's that. There's not much point posting more until things look a bit different so the thread will step back for a while. I'll be back... Tony.8 points
-
Hello All, This is the KittyHawk Super Etendard kit built completely OOB. Paints used are locally available acrylics. Masking was done using my Kiddoo's Play Dooh. Few inaccuracies if I am being nit picky, do check your references for the decals and what loadout you want to use. The decals are very nice except for the flap walk markings. They are to be used if you model the aircraft with flaps up. If you choose to put the flaps down then you will have to cut the decal and then use it. The instructions don't mention anything on this. The Exocet Missile Pylon provided is not tall enough so much so that the fins touch the wings and thus cant be used without proper modification to increase the clearance. The bow in doors on the intakes are shown to be installed from the outside. IMHO I would suggest to install these from inside - gives a better fit. Overall the kit is superb with excellent details and good weapon options. Except for the few things which I noticed as mentioned. Do Comment for me to improve upon anything. Please do Subscribe as I would be coming up with more such Builds. Enjoy The Pictures.. . .8 points
-
Hey there, here is my contribution to the group build. Got this Panther F a while back, only to have a spare set of rubber rimmed wheels for another 2 in 1 kit. Not this one made me curious because of the night vision pieces and the air defence armour. Also the artwork really got me. So I will do this in that style. For the brown I will try to achieve the look of the bare steel plates and paint the sand with a washable color. Got a commander figure for it and a full set of dio parts as well, but I guess trying to finish the build together with the figure should be enough for now. Even though you get the easy to use dragon styrene tracks, there is a full set of magic tracks. Individual links for a nicer model There are plenty of parts inside the box. Two upper hulls as you can build the prototype and the final model. Also the PE for the air defence armour is thick. Should give a nice in scale appearance.7 points
-
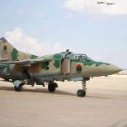
Hi completed some Airfix MiG-17F "fresco C" fighter models in 1/72 with schemes of the Angola, Uganda and Mongolia air forces.7 points
-
Hi all - This is the old Eduard La-7 in 1/48 - I struggled a fair bit with this one - I think it's been my longest build to date, not helped by my attempted modifications - adding extended landing flaps and few others additions. I had a few fitting problems which required many hours of filling and sanding, especially around the wing roots. I attempted to create a fabric wing effect with paint and weathering which I'm more or less happy with. I also needed to grind down the sides of the canopy to allow an open cockpit which I'd never attempted before - this came out quite nicely I think. I also tried a few new weathering techniques and feel like I'm getting better with oil paint weathering. Areas where I failed was a few ghost seams making appearances in a few places - also I mucked up on the decals with some visible silvering and carrier film. But all up, I'm pretty happy with the way it turned out. Thanks for looking John7 points
-
Cockpit- Take Two This 'ere pic show the central former that's supposed to run down the spine of the model, ok. The cut-out is the cockpit section and the Mk 1 cockpit was born and boxed in accordingly. Unfortunately, the raised section in the middle of the cockpit is in fact the seat, making my cockpit floor about 3.5mm too high. This was confirmed when I tried to place a scale seat/ pilot and found that the pilot's head was sticking outside ! Here is the Mk 2 cockpit, lowered by 3.5mm. Additional stringers and frames were added, and for added strength I added a firewall between the cockpit and engine. Thought it would be nice to give him a headrest too. Now I was happy, additional plastic was added around the perimeter to aid gluing. Made a seat, an i/p, rudder pedals, quadrants for the throttle and undercarriage up/down and control stick. Here's a view of the radiator exhaust with its odd arrangement. The shape is a little pants at the bottom but I'm hoping that I'll sort that when the halves are joined together. I now encountered the same problem as @Moa had when he put the halves together and offered up the spinner... more trouble to deal with . So, seeing that this is a virgin kit and not a started one as in Moa's case, either the spinner is too big or the fuselage is wrong, my money is on the fuselage, either way, it needs sorting. Stuart7 points
-
PART 05 - Skylights Another day, another detail! I have no photos of skylights, so I had to inspire with skylights of another ships and make It with same style like hatches and chest. As always, I will add some photos of "How It's made", so dont forget to open hidden content! I inspired my self at sails, especially with how skylight works. Important thing is, that Leader is work boat, not vacation boat, so I did those "glass covers" more massive. I am glad that I am still able to keep everything right in scale 1/72. Handles are made out of wire 0,5 mm (36 mm in 1/1), covers are made out of wire 0,3 mm (21 mm in 1/1). And this is the result!7 points
-
Hey. Thanks for all the kind words. More fighting with this kit. The Shims got cut back and a little bit of PPP added. And the business end. Not too bad. (Or so I thought)🤔 All sanded as best in could. Time for a spot of green for the internal canopy. 😱😱😱😱😱 Im sure somehow the green has made it worse. Excuse the blurred pic but I was in a bit of a foul mood. 🙈 I think that’s the last time I try and fill stuff with Krystal Klear. It’s like a horrible rubber that just isn’t meant to be used this way. (All my fault) and to top it all off we lose Eddie. 😭😭😭 One of my heroes, a true legend. With all the bad vibes I actually had to put this to one side as I was so down about how it had turned out I was headed towards the bin. Temper curbed I came back today. 🧐 I figured if I use mr Surfacer and then lightly sand in stages I might get something back. Not as bad as it was at least. After a few hours of thin layer upon thin layer of Mr S and some re-scribing I managed to get her to a point where I could do a prime test. By no means perfect but I’m confident I can get her looking ok. 🤨🧐 And the other side. Once again not too bad. I think this has decided my colour scheme. I figure camo will mask a lot of errors. 🤞🤞 More soon. Thanks for popping by. Take care and as always. Happy modelling. (what a week) 🤨🤪 Johnny7 points
-
The wing roots molded on the fuselage have to be sanded back: Fuselage must be protected: There: Ready to insert spars: May end up separating the rudder anyway.7 points
-
I had entered into a build hiatus while waiting for my chosen subject for the MTO GB to arrive. With the current COVID-19 implications, and the possible impact on supply, receiving it within time is a concern. So, a visit to the LHS was warranted to see if there was an appropriate subject on the shelf . One that I could get into immediately. Preferably, with everything in the box - no aftermarket required. The LHS do have an exceptional armour selection and a good range of MiniArt's Lee and Grant Offerings. A Grant - what a great subject! With wallet in one hand and the chosen subject in the other, without the detailed interior, it was time to part with some cash and get it home and on the bench. A bit of a change of pace from my aircraft builds and one that I always really enjoy. AFV's are a great circuit breaker. So here it is, brand new, not even out of the plastic bags. Once I had the kit back, I then took a quick look to see what other armour was under construction in the GB. I discovered that we will have a squadron of 1/35 Grants with the Takom from @SoftScience and another MiniArt from Enzo @Enzo Matrix . Understandable, it's a very cool subject. So we have a mini Grant GB within the GB - could be a 7th Armoured Division rat plague! I have not chosen the final scheme. I think we all like the 3-colour scheme with highlighted olive drab. I will pick something a little different. Will post that soon and hope to be into the construction this weekend. Looking forward to launching into the build with hopefully a fitting result. Ray6 points
-
Yrrnngghhhh. That's the level of my mojo at the moment. My last WiP of three Hurricanes took over TWO MONTHS - I'd normally have completed at least three builds in that time and three-at-a-time doesn't count, not in my mind anyway. I looked through the stash to find something that wouldn't make me too guilty if the mojo drought messed it up and might give me some 'mojo exercise'. Tricky. The only likely candidate was this: Bought in a panic when I read somewhere that it had been withdrawn. I tried to find out from Scalemates how old the kits are but got bored… they both look like new tools so should be challenging enough. I'll take some pictures of the part trees later.6 points
-
I would like to enter this classic Italian fighter, build one some years ago as Finish, kit need some work as it is a short run kit. Cheers Jes6 points
-
My first topic here: P-38 tamiya 1/48 Belts, Rivets HGW Decals - Exito6 points
-
I just went for a trip out, to include a look around KB Models in Havant, to see what he has on the Heller shelf. Turns out he got new stuff in this morning and I was spoilt for choice! Difficult decisions ensued, I can tell you, but in the end I opted for this one.... That is, I actually turned down the Talbot Lago Record..... 😕 Never mind, there's always a next time. You can always pencil me in for this. I may just start a place holder thread with a statement of intent. I peeked in........ Looks GOOD ‼️👍6 points
-
Thanks guys! Who said "joke"? Here it is: Just a fuel filter access hatch...Good idea isn't? You can see the bonnet fasteners above. Not easy in fact! The real life... ... and mine Thanks for watching and "Like"... Dan.6 points
-
I have this track set, but the limit of my knowledge here is that the tracks changed across Panther production. Can I use it on this Panther? I've been planning this one for a while, so I have a nice selection of goodies to throw at it, including: I figured if I'm going to have hatches open I'd better have an interior! These are for the Tamiya kit, but I am hoping to fiddle them into the Dragon kit. I must admit I am starting to feel a bit of 'Alice in Wonderland' syndrome coming on - I am being pulled down a rabbit hole. 😶6 points
-
Well, I came from a disadvantaged background:6 points
-
Hi All, Will here, I'm the other half of this operation and very happy to answer any questions you might have. This has really blown up and we're really happy! Bryan and I met at IPMS Telford last year and we got on well as we're both plastic kit designers and knew many of the same people. It was at Telford that I started thinking about a BoB collection in 144 as there were some great models on display in that scale but much that was clearly missing, and I started developing the idea over the winter and talking to hobbyists. When Bryan got in touch with me in Spring after Wingnut Closed its doors, I put the idea to him and he was very enthusiastic about it. The rest has happened from there! We have a Bf109E in development and will show you more on that very soon. As mentioned above we have other subjects on the list which are also sorely needed in 1/144. For our first kickstarter we will just be doing the spit and 109 as well as some add ons and accessories that we think you'll like. Once we have established a network of suppliers we can rely on and delivered that first kickstarter, we'll get cracking on the others as quickly as possible. We're planning to launch the Kickstarter in November, and we're really grateful for all the support we've been getting so far, it's so encouraging!6 points
-
'The Swoose II' B-17G-30-BO 772 BS / 463rd Bomb Group The name Swoose originated from a B-17D that was one of 19 out of 35 Fortresses in the Philippine Islands that survived ground attacks from Japanese forces on the 8th Dec '41 shortly after the attack on Pearl Harbour. It was given it's name by Captain Weldon Smith following repairs undertook in Australia in January 1942 where the tail of another aircraft was grafted on, the name being derived from 'Half swan, half goose' inspired by a song at the time called 'Alexander the Swoose' about such a bird! The aircraft was later flown by Captain Frank Kurtz choosing the aircraft as a personal transport for General George Brett. Later in 1944, Kurtz commanded the 463rd BG in Italy as part of the 15th AF and had a B-17G named after after his earlier aircraft, Christened by his wife 'Swoose II' shown in the photo above. It survived the war and was eventually salvaged in May '45 despite a few scrapes along the way. When I heard that HKM were releasing this in 48th scale, I had to get my hands on one. I had been planning to build the Monogram one, but kept stalling because of the work that would need to be involved to get it to a decent finish although the shape is very good. The HK kit goes together very well and the nose shape was corrected following the evident inaccuracies of the 1/32 kit. The only major issue in my opinion is engines being about 3mm too high, but I decided to leave as they are to prevent ruining surface detailing. It's been a pleasure to build and has plenty of detail straight from the box. As with most builds, I try something new. This was the first model I've painted with the MRP paints which are a delight to use although due to not being happy with the shades used, I ended up going over it with a mix of Tamiya paints - mainly khaki lightened with some white. Another step forwards was a rather heavy weathering approach, particularly on the under surfaces where photo's show a lot of mud splatter. I used a toothbrush at the suggestion from @Josip and following reference pics from @Rakovica. The build can be seen here Anyway, here's the finished result. I appreciate some don't like excessive weathering, but I've tried to replicate what I've seen on photo's of weathered B-17's. Cheers Neil5 points
-
I would like to enter this one, it will be rocket armed operation out of Yugoslavia 1945. Cheers Jes5 points
-
I would like to enter this Italian, it is an old and very basic kit, but still looks good considering its age. Started it and think it will go together quickly. Cheers Jes5 points
-
Hasegawa moulded, Revell boxed F4U-7 finished as AU-1 or F4u-6 with eduard colored belts and printscale decals. Such a pitty that I forgot to fill pin marks over HVAR rockets. I wont do the same mistake on mu F4U-5 hopefully. I liked how it turned out. I hope you enjoy it. Any commend is wellcomed.5 points
-
Hello, Here is my current build, the Italeri 1/48 Viking. Progress so far ' More to come.5 points
-
Next to drive onto the bench is this lovely piece of elegant Italian engineering, both in real life and model form. One sand grey coloured sprue. And the detail is lovely. This isn't one of Italeri's reboxing of an Esci original but a new tool from 2007. Instructions and transfers for 4 versions, 3 Italian and a Wermacht example. Off and going soon.5 points
-
A topical build that I decided to work on after watching the coverage of this ongoing conflict. Its an area I have had a particular interest in for a while and travelled to Stepanakert in 2018. For the base I used an old T72 kit from my stash. Its an SDV kit from the Czech Republic in 1/87 scale. Rather old model with lots of flash and quite vague instructions. Its a T72M so the export version of a T72A. I think most of the Nagorno-Karabakh tanks are T72B, but Armenia have the A in their arsenal, so its definitely plausible. I added the ERA to match the reference photo I had (shown above) by cutting up some handy 0.75mm sheet. I also drilled out the driver's hatch and made the replacement hatch from flash. Paint was all freehand with Humbrol 117 as the base and some Vallejo, Humbrol and Revell Aqua for the colours. Decals surprisingly not included for Nagorno-Karabakh and no aftermarket I could find in this scale! However I suspect the crests would be removed in combat anyway. I painted the flag design. Figures are from a Presier police set in 1/87th. The driver is just a floating head on some sprue with his arm glued to the tank. For the commander I wanted to use the nice Soviet style officer's hat in the set, so he is travelling in best uniform for some reason, perhaps a senior officer heading to the front. The flag base was an idea I had, watercolours on canvas. Thought it would make an interesting backdrop.5 points
-
5 points
-
Thanks Victor Bill Well, I was downstairs on the iPad and the site seemed to be back up so I came up to the man cave and… it's down again I can see the photos on my mobile devices. Weird. Maybe I should do a 'trailer'? Coming soon to a browser near you… Pictures of part trees. The hunt for little paint pots. Pilots to the fore. Seats - yes, they're glued! Don't miss next time's exciting episode…5 points
-
Useful stuff Ben and very surprising too, thanks mate Well I suppose this is ready for its first real paint job since the primer test. In response to Ben's advice it will be the grey which will set out the window and door seals, with the cockpit framing in the same grey Paint just around the outlined windows ready for the larger masking before I white the beastie all over I have added as much greeblification as the 1/72 scale size will carry without looking over-fussy I hope Lost of little bulgey fairings, why ItaRevell left them off is beyond me. Other stuff can wait 'til the painting is done. Now to fill the doorways and visit the paint shop Ciao5 points
-
Oh dear Mark, what will I do now I've accepted Craig's challenge? We shall see Welcome Terry Didn't you follow the Hurricanes? Probably wise… Anyway, Flickr appears to be back up. I guess 'the man who knows' got into work and fixed it. Again. Now I just need to remember why I took the photos this morning… Ah, easy, transfers: Uh oh, yellow bits. I could paint those of course but a ) yellow is a pig to paint and b ) there's a thin bendy bit. Transfers it is. Maybe over white. Now I realise that the Uploadr (sic) has jumbled the shots. Rats (and then some). SHAR part trees: OH GOOD GRIEF IT'S GONE DOWN AGAIN! Cue Victor Meldrew…5 points
-
Here's where we're at, engines on and starting to paint the airframe. As usual with SH kits there was no positive location for the engines, you have to simply line up the cowlings on the nascelles. I sanded down the bulges on the cowlings a bit as they're too prominent, but I don't think I've done it enough. I also cut-out the moulded in landing light on the port wing, bad job SH! I have a couple of options in the spares box. Undercoat on. After doing this I noticed something was wrong somewhere, took a while to figure it out but finally realised SH haven't done the small side windows behind the main cockpit glazing, another bad job SH! So drilled and cut them out, using the Airfix kit as a guide. The Sky undersides and Dark earth are on, now letting dry over-night before masking up for the Dark Green.5 points
-
Here is what my photos tell me was the timeline for the various schemes that Valiant wore from the completion of her rebuild in November 1939 until her disposal in 1948. I have numbered the photos as an aid to discussion if needed.5 points
-
I bought an early Dragon kit (pre magic or DS tracks) of a night fighting Panther G. Instructions were to paint it like this:5 points


This leaderboard is set to London/GMT+01:00