Leaderboard
Popular Content
Showing content with the highest reputation on 16/09/20 in all areas
-
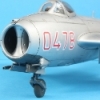
Shenyang J-5 (MiG-17 'Fresco-A'), '2310', pilot Pham Ngoc Lan, 921st 'Sao Do' FR, Noi Bai, 3. April 1965 'First Kill' This early Shenyang J-5 (license built MiG-17 'Fresco-A' by the chinese), number 2310, was flown by Pham Ngoc Lan on the 3rd of April 1965 when the first recorded VPAF kill was achieved. This happened over Thanh Hoa province and Pham Ngoc Lan claimed to shot down a F-8E of VF-211 flown by Lt Cdr Spence. But in fact, Crusader was only badly damaged in this incident and Spence made an emergency landing at Da Nang. - - - - - - Kit: Zvezda Soviet Fighter MiG-17 "Fresco" (#7318) Scale: 1/72 Aftermarket: Master pitot tubes & guns, Eduard brassin main wheels, Eduard PE Paints: Vallejo Model Color, Model Air & Metal Color, Tamiya Lacquer Weathering: Flory Models Wash, Mig streaking effects Decent all-around good kit from Zvezda (originally from Dragon). I did enjoy the build, no big issues. Built for Vietnam GB Build thread: Airfix MiG-17F in the background David and Goliath.24 points
-
Let me start by saying I love biplanes but I hate rigging so I tend to avoid them. The RNZAF and NZPAF did have a lot though and I feel I have to try, so buoyed by the mediocrity that was my Walrus I attempted the new Airfix Tiger Moth. It is an excellent kit, I used no filler whatsoever and every part literally clicked into place. 20200916_115858[1] I used the SBS etched rigging which is great but doesn't give you the control lines for elevators or rudder. It does give you a number of inspection panels which are post war fitting and as my machine was built in 1939 at Hatfield then shipped in a knocked down state to the new D.H. factory at Rongotai and reassembled in January 1940, these pieces weren't used. NZ740 was one of the first dozen machines assembled at Rongotai and was issued to the Flying Instructors School at either Hobsonville or Magere depending on which source you read. 20200916_115850[1] I have a photo of her believed to be taken in 1942, which surprisingly shows she was not carrying a fin flash and another photo on the RNZAF museum site, probably from the same sortie, shows she carried B type roundels on the top wings. 20200916_115903[1] 20200916_115908[1] The previous Tiger Moth I built was from the excellent Aeroclub kit, I dug it out of the carrying box for comparison, she is finished as NZ723 which was impressed into the RNZAF at the outbreak of WWII in 1939, She is still in civilian colours but the registration letters have been removed and RNZAF markings added. 20200916_115921[1] I still have another Aeroclub Tiger Moth, a Dh 60 and a Hawker Demon to convert to a Hind to do, I may not leave it another 14 years to have a go. Thanks for looking and sticking with me through this ramble.22 points
-
I built this diorama using the 1/5000 Bandai Imperial Star Destroyer and the 1/5000 Resin Jedha City by JPG Productions. Enjoy.21 points
-
Hello all, This is my latest finished model, AMP's HUK-1 Huskie in 1/48. It's the most fun I've had building a model in a long time. There's no aftermarket and I only made some small changes to better reflect this particular airframe. Paint is Mr Color 365 and the decals are from the kit (although I replaced the national insignia). It's a tiny model (excluding the rotors, about the size of a 1/72 WWII fighter) with lots and lots of parts. The close-ups show a much rougher finish than I would like, although in real life it looks pretty smooth. Comments welcome and a full build article is at https://jonbryon.com/amp-1-48-kaman-huk-1-huskie/ Jon20 points
-
All, Without doubt one of the best kits regarding assembly that I have experienced for a long time. Totally enjoyable (and straightforward) build as result uncomplicated assembly and great fit throughout. The instructions also featured one of the best, easy to follow rigging diagram that should be the standard for all biplane models. Pretty much built OOB with just some minor detailing here and there. This is my take on the kit for the marking option of No 72 (F) Squadron 1938. Highly recommended kit Regards Dave18 points
-
Bristol Beaufighter TF.X flown by Flying Officer Maurice Exton DFC, 144 Sq., Royal Air Force Banff, Aberdeenshire, Scotland, October 9th, 1944 The story of what happened that day could be found here - https://issuu.com/spinkandson/docs/12044/81 (I couldn't figure out how to copy-paste from there) Compared to Airfix's Blenheim this model was an absolute pleasure to work with. No fit issues at all. Used Tamiya acrylic. Weathering is done with Prismacolor pencil and pigments made out of polychromos pastels.16 points
-
Bought at IPMS Avon model show 2017, built 2020. 49 Sqdn RAF. Hampden P4403, "EA-M", flown by Flight Lieutenant Learoyd VC.16 points
-
Decided to call it done. Forgot to glue that sharp thingy on the nose before I took photos but anyways,...15 points
-
Hello again. Final posting tonight. My only representation of the Battle of Britain among any of my models is this one. I did have Spits and Hurris but a long time ago and will remedy that soonish. But in the mean time there is this one. Tamiya kit I built some years ago dusted down to enter my clubs 'virtual'monthly comp.14 points
-
I see your Amiot 143 and raise you by one Whitley. I’m sitting on my Blackburn Blackburn for when I really need to call your bluff.14 points
-
Hello everybody, here is my latest completed project, a Bugatti 100 Racer in 1/72 using the Projekts Models limited run kit. I knew nothing of this racer until I stumbled across this kit on 'that' auction site and just had to have it. The Bugatti racer was designed in the early 1930's with the view of racing it in the 1939 Deutsch de la Meurthe Cup Race but wasn't completed before the outbreak of WW2 and like the Caudron C.714R racer, was hidden away until after the war. As you will see, the Bugatti racer was a very futuristic design to achieve the highest possible speeds. Two 450hp Bugatti type 50B racing engines were mounted behind the cockpit, each driving a shaft either side of the pilot to drive two, two-bladed contra-rotating propellers. Cooling intakes were located on the leading edges of the tri-tail assembly. It wasn't until 1970 that the decaying aircraft was bought by an American, restored and on static display at the EAA Aviation Museum. Inspired by this image, having the racer aircraft, I needed to source the Bugatti 57SC Atlantic car and a few figures. Besides the obvious problems encountered when building limited run kits; no location points, fit issues, etc, extra work was needed with making the exhaust fairings which was rather tricky and making the undercarriage doors from thin brass. The headache of the whole build was the canopy as it was a mixture of metal frames and plexiglass reinforcing frames. Painted with Humbrol 48 enamel paint and...no decals. I found this at Shapeways but in the wrong scale but asking nicely, I acquired the model but at a cost. Enhancements to the kit were fitting windows using acetate, fitting a 5-port exhaust at the back and the 'chrome' trimming along the engine covers using thin wire. Internals were painted with a Vallejo leather colour paint that was 'swished' around and excess poured out. Humbrol 48 painted externally. Tyres and grills were painted Vallejo Panzer grey and grills were dry brushed with silver. Wheel hubs were painted silver and highlighted with a Molotow Chrome pen, as were the handles, hinges and fuel filler cap. And here they both are on a concrete strip with a pilot and and a 1930's gent figures. WIP here: I'd like to thank all those who encouraged me during the build but particular thanks need to go to Claudio @Moa for helping with images and supplying some suitable figures. Stuart12 points
-
Hiya Folks, An old one from the cabinet which I don`t think I have ever shared,.....a 1/48th Classic Airframes Bristol Blenheim Mk.IV of 82 Sqn,.... representing the men of Bomber Command who continued to support The Few of Fighter Command by keeping the pressure on the German`s. While the heavies concentrated on more strategic targets,.... the Blenheim Boy`s were kept busy throughout the Battle of Britain in daylight raids against Luftwaffe airfields in France and the Low Countries, Channel Ports where invasion barges were being prepared and other targets,...... often with heavy casualties. Diaries of Luftwaffe pilots have mentioned how tired they were due to being on standby against these Blenheim raids and how they were often attacking them time afte time. The aircraft that I chose to replicate was P6915, UX-A of 82 Sqn based at RAF Watton which was unfortunately shot down on the 7th June 1940 during the Battle of France, before the Battle of Britain started. The Classic Airframes kit is by no means state of the art,..... but it was the only way to build a Blenheim in injection moulded plastic for many years until the superb Airfix Mk.I kit turned up. The main problem with the kit for me was the over small main wheels,...... which are very evident on the model, plus only an early aircraft could be built as there were no bubble side windows provided. Please bear in mind that I built this model well over 15 years ago,..... so it is no spring chicken and there are things on it that I would do differently today,.... but as usual it was brush painted; Cheers Tony12 points
-
So work on the Lancia is complete and I must say I thoroughly enjoyed building this kit. Here's a pic of the finished car I will post more shortly in the rfi section Many thanks to everyone who followed the build and I appreciate all of your comments 🙂12 points
-
Airfix 75th Anniversary Battle of Britain set. All models built OOB. Vallejo ModelAir paint used throughout. Kit decals with Xtradecal Swastika's for the Luftwaffe aircraft.12 points
-
Not much progress, as this was my morning... Now, where was that little bushing that I saw long ago... The masks are on, and a coat of primer is airbrushed, revealing the usual spots that need tiding: I dropped the model twice from about one foot high. Will have to check when the primer dries that nothing was compromised. Imagine, for example, if the toilet was dislodged! Oh, the humanity!12 points
-
The decals are 30 years old, can;t seem to get rid of the silvering... And some of the canopy does not fit well.12 points
-
Hi. Just finished this alongside another build(to follow in next post). It was started some months ago but having found time and settled in my temporary build 'studio', I present this. Airfix 1/72nd Mustang as privateky owned in Canada 1970s 80s as CF-FUZ ( as depicted here) Later C-FFUZ with antenna changes. Draw Decals over Humbrol gloss black. Modified the cockpit area to take a second seat and having trawled the net came across a modelling article showing that this particular aircraft had red insides. Also added new aerials one to fuselage and another under each wing just behind the wheel bays. If I had the dosh and owned one it would be in this scheme or similar. The actual aircraft wnet to the US and then South Africa and finish ed as Queen of Hearts. It is now based in Germany.11 points
-
Airfix Hurricane Mk1. 1/48 scale This is one of the defending planes of 605 squadron in the 15th August northern raids. It was flown by P/O Kenneth Schadtler-Law. UP-O, P2717 I think you can guess why I chose this plane. Ken was South African. On this raid he short down one of the raiders into the sea. In doing so he was hit and had to land in a field which resulted in the plane turning over and he injured his head. Thanks to Rabbit Leader for the 'O' Decal. I have attempted to just give a little bit of Exhaust effect as I over did the first try and had to repaint the sides.11 points
-
Decided to glue in all the nuclear bombs alongside the huge weapons pod. Whats an aircraft without nuclear bombs anyway? Nothwithstanding this is a Trainer Bomber!11 points
-
The Aston martin DBR9 debuted in sports car racing in 2005 and achieved success at Sebring with a win in the LMGT1 category and a third place in that category at Le Mans that year. The model here is the Le Mans entry as depicted in the 1/24 scale Model Factory Hiro multimedia (resin,metal and photoetch) kit. As with all Model Factory Hiro kits the design and detail are well executed but trial fitting is imperative and a little fettling is required. The kit builds up into a great replica, particularly highlighted by the Aston Martin green metallic paintwork and extensive carbon fibre decalling finish. Hope you enjoy. Steve Hansford Melbourne,10 points
-
...And yet we design one of the most beautiful looking aircraft, but decided to give it a fugly makeover just for a laugh...10 points
-
My organizing skills are unimpeachable! Just look at my garage! (Image from an interesting book: https://www.npr.org/2013/11/13/244984351/christmas-lights-make-slippers-in-global-junkyard-economy10 points
-
Hi Guys.... Hope everyone is staying safe, and remaining healthy !! Ready for inspection, and Critique, please !! Is this Taniya 1/35 M10. Finished as a vehicle in Saint Lo, July, 1944, the kit is finished from the box, with some scratch building for the wading trunks.9 points
-
I can't resist sharing this on the 80th anniversary of the start of the Battle of Britain. Actually made by my son 10 years ago for his primary school's Easter egg craft competition, which he won (he's a great bearded brute nowadays...) I might have helped him a bit where sharp blades and solvents were involved 😁. The village where we live is directly below the Messerschmitt's tail.9 points
-
Hi. The second most recent model completed. This time its the AVI kit of the DH Puss Moth. Nice simple little kit but the worst part of it I found is the flat sided too narrow and slim engine cowls. Looks horridly skinny!!! I fixed this by cutting to outline shape a couple pieces of plastic card glued to to the existing engine and filing down upper , lower and forward edges of the card to achieve the characteristic curve of the original. Blended in with a smear of filler did the job. To highlight the opening sections of the covers I applied very thin black pin stripe decals and for the upper hinge line a silver stripe decal piece. All the canopy framing was also done in silver decal stripes. The kit decals looked thick on the sheet but when applied and 'decal solutioned' the carrier film just melted away. The only decal item I did not use was the tiny decal in red for the fin which was supposed to be the Tiger Club emblem which is totally wrong and should be yellow and black. I think somewhere I may have a pair from my decal spares. The struttery was a little fiddly but it all worked out OK. The wing reggie decals were applied before fixin the wings in place. A lot easier and less stressful than trying to wiggle them past the struts and getting damaged! By the way, the cabin doors need to be depicted too as nothing on the mouldings show these. I simply scored in the outline of the doors with a straight edge and sharp pointy blade taking the shape from photos and the box art Just looking back at this one, I could or should have done something about the oil tank on this left side nose. It is poor the way it has been depicted alongside the aforementioned flat engine panels. But, I may give it ago if I come across someay of doing it. Incidentally, the full size rael G-AHLO is now in Canada on display at the Canadian Air and Space Museum Rockliffe, Ottawa. It is finished in red fuselage silver wings and registered as CF-PEI. All I would like to see now are kits of the DH 87 Hornet Moth in two versions with pointy wings and squared off wings, and DH 85 Leopard Moth........9 points
-
Red Leader was tough. I abandoned the kit pilot. I started with a Monogram 1/48 jet pilot, I think....filed/carved/sanded off most of the detail. Then did a total Frankenstein; separate upper arms, forearms, one hand, and head, all from different pilot/ground crew figures, to get him posed as putting on his helmet for flight. I just really wanted to capture that moment. Detail added from masking tape (vest, straps) and styrene for other details. Took a lot longer than expected but ended up far surpassing the kit pilot, I think. Helmet made from a Monogram helmet, with the head/face removed with a roto-drill. Detail added with styrene, painted to match Red Leader.9 points
-
This is Provence Moulage's 1/43 Ferrari 250 GT furgone del pane 'Breadvan' #2819GT. I wanted to place the spare wheel in the back, so I've been waiting a week or so for some nice aftermarket Tron versions because PM only give you four wheels and tyres! I also changed the kit intake trumpets with Tameo versions, even though you can only see ten of them under the bonnet bulge. Incidentally if you are into classic Ferraris, I can't recommend this book highly enough: it's probably my favourite 'single car' book.8 points
-
This started as a barn-find spare, kindly donated by our own @Brandy to the cause of displaying Classic British Kits for the CBK SIG: Some months later, thanks to various life events, and she's now rather shinier, and ready to race: Next up, but not for a while, the Aston Martin DB3S, this time from an unbuilt kit... best, M.8 points
-
Hi there, so my latest finished build and probably the best Hasegawa kit I've built to date. Fitment, decals, clear parts etc were all excellent and easily on a par with any Tamiya kit I've built. I used Tamiya X2 White for the shell and applied the decals on top after waiting 3 days to make sure the paint was completely dry. There is no clear coat on this build as I think it looks fine without one which is very unusual for me. So here are the finished pic's The last pic below shows my Lancia rally collection, if I had to pick a favourite it would be........ all of them, superb looking cars imo. Thanks for looking and I'll be back soon with another build, though exactly what that will be I'm not sure 🙂8 points
-
Seamew! Good call. I'm suprised Shorts had the gall to put their name on the side of it. Then there's this.... Stipa Caproni. Now, I'm not quite sure if this is either an ugly aircraft, or the sort of thing you see sitting outside Tesco that you stick 50p in to keep a toddler amused for a couple of minutes. I'm seriously leaning towards the latter.8 points
-
8 points
-
Dear all, As requested by Jerzy (JWM), I herewith post some images of the Roden Heinkel He 111B I built a few years ago. Markings are mostly from the kit, although I swapped the white fuselage numbers for black ones, as they should have been. The trick I used to get the fuselage to close, was to add a shim (1.5 mm behind the cockpit, 0 mm at the tail), which allows the clear parts and the bomb rack to fit). I kept weathering rather light, just adding a pin wash to the control surfaces, the tank filler caps and the bomb bay. Certainly not my best result, but in the end I was just glad to have finished it. I do like the elegant look though of the 'classic' bomber nose, rather than the later 'all glass' nose from the P and H versions. Peter7 points
-
Afternoon all, Thought I'd share some images from a couple of trips up to Fairford in the last week to catch the B-52s on deployment. First, a frustrating afternoon on the 10/09 resulted in just a couple of images of YANKEE41 returning Boeing B-52H Stratofortress | 60-0005/MT | US Air Force | RAF Fairford | 10/09/20 by Shaun Schofield, on Flickr Boeing B-52H Stratofortress | 60-0005/MT | US Air Force | RAF Fairford | 10/09/20 by Shaun Schofield, on Flickr I had much more luck on the 14/09 with KAGO flight returning after a long mission, plus the bonus arrival of U-2S BLACK01 in mission fit. Boeing B-52H Stratofortress | 60-0005/MT | US Air Force | RAF Fairford | 14/09/20 by Shaun Schofield, on Flickr Boeing B-52H Stratofortress | 60-0007/MT | US Air Force | RAF Fairford | 14/09/20 by Shaun Schofield, on Flickr Boeing B-52H Stratofortress | 61-0034/MT | US Air Force | RAF Fairford | 14/09/20 by Shaun Schofield, on Flickr Boeing B-52H Stratofortress | 61-0034/MT | US Air Force | RAF Fairford | 14/09/20 by Shaun Schofield, on Flickr Boeing B-52H Stratofortress | 60-0005/MT | US Air Force | RAF Fairford | 14/09/20 by Shaun Schofield, on Flickr Lockheed U-2S | 68-10337 | US Air Force | RAF Fairford | 14/09/20 by Shaun Schofield, on Flickr There are a handful more on my Flickr for those interested. Hopefully I'll get another chance or two to get up there later this week before they go home. Thanks for looking, hope they were of interest, Shaun7 points
-
7 points
-
Chris, who can think about upholstery! Oh, the tedious chore of every day making the beds of this executive plane for this super-rich lazy 1/72 types!:7 points
-
For ugly you can't beat the Short Seamew:7 points
-
I feel that there will soon be paint, at the moment I am trying to get excited at greeblifying the Merlin-Norge. T'ain'tn't easy but has to be done, I suppose it might be easier if I knew what all these devices are for but I maintain a semblance by saying these are for "to go there and there" like the camera mounting frame from 0.03 brass tubing which sits round the streamlined side fairing A small brass etchy piece from my Re-Heat switches and knobs panel set fills the.plug in place. on the fairing At least there are some excellent pictures around to copy and paste from For instance I expect the brownygreen box under here will be sort of Dopplerish and I know the oddball shaped white curved boxes normally carry searchlights. The pair of hexagonal misshapes are radar devices according to my guru @SimPlai. He draws them and I try to make them in tiny scale well enough to pay tribute to his 'lovely' radome. Not as good as his but in tiny scale most peeps won't even notice (he said, fooling himself. Not) Not clearly visible here are the drawn on lines to which I will be tooling out the undersponson cutaways too (it all makes work for the working stiff to do) Some prominent roof vents have been added (cannibalised Sparrow missiles from several different Phantom models provide countless spare vents and spikes) and the cable cutters from the kit are being added too. OK ciao for now.7 points
-
Go on.........you can admit how many times you fell asleep! Hope it was useful. Hi Nigel. Thank you and I will try not to splatter you with too much paint! Hi Craig and thank you. The L version is a lovely kit to build - I think you will enjoy it. I made one a few years back in one of the MTO GBs. It goes together very well and looks the part when completed. So....this is what's in the box for this project: A few closer views: Small decal sheet: Sample of the instructions: And I have made a bit of a start. These are the parts I'm using first and the plastic bits and bobs have all been cleaned up - seam lines removed, etc.: Some assembly done: Then I started some painting!! Thinned, with water, Humbrol 93 - Desert Yellow - applied with a medium flat brush. This is after a couple of coats: It might be a while before another update as I need to do some more work on another project in the BoB GB. Comments and suggestions welcome. Kind regards, Stix7 points
-
Thank you very much Giorgio. Hope you are keeping well. Cheers Ozzy! Hi Charlie. that is very kind of you to say. Hi Nigel and thank you for your, as always, very kind comments. Hi Greg and thank you. Your Hurricane looks superb in the gallery. Well done. I suppose that's one of the benifits of painting the camo freehand with brushes - no masking involved! Hi Cookie. Hope you are keeping well and thank you for your kind comment. Well! Yes, I know I keep saying this but, time has been getting away from me again. I had intended to post some updates over the weekend but didn't get chance. Once again I have been finding the odd bit of time to work on this - plus start another build in the MTO GB! All of the time I spent on this over the past week or so was on the decals. Here you can see they have been applied and been given a couple of coats of Pledge - the newer version of Klear. As I usually do - where I could - I cut the decals as close to the printed design as I can - to try and minimise any silvering from the clear carrier film. They mostly went on okay - I only had to use some Humbrol Decalfix in a couple of places to get them to settle better onto the detail: For the fuselage codes I cut up the original Airfix decals and replaced the fuselage roundels with some I had in the spares box. Thanks to @Troy Smith's advice and @patmaquette getting there first - I was able to get the code letters in the right order on the starboard side. Next I need to add a bit more light weathering in places before getting some Matt Varnish applied. Comments and suggestions welcome. Kind regards, Stix7 points
-
What's you problem with the highly acceptable-looking Potex 630/631? Nothing eye-straining about the Breguet 690 series either, it's a French Beaufighter, but a year earlier.7 points
-
In best Queenie voice "Imagine the mess, poohee!". Martian 👽7 points
-
VPAF MiG's, Part 1: MiG-17 'Fresco-A' (Zvezda 1:72) Shenyang J-5 (MiG-17 'Fresco-A'), '2310', pilot Pham Ngoc Lan, 921st 'Sao Do' FR, Noi Bai, 3. April 1965 'First Kill' This early Shenyang J-5 (license built MiG-17 'Fresco-A' by the chinese), number 2310, was flown by Pham Ngoc Lan on the 3rd of April 1965 when the first recorded VPAF kill was achieved. This happened over Thanh Hoa province and Pham Ngoc Lan claimed to shot down a F-8E of VF-211 flown by Lt Cdr Spence. But in fact, Crusader was only badly damaged in this incident and Spence made an emergency landing at Da Nang. - - - - - - Kit: Zvezda Soviet Fighter MiG-17 "Fresco" (#7318) Scale: 1/72 Aftermarket: Master pitot tubes & guns, Eduard brassin main wheels, Eduard PE Paints: Vallejo Model Color, Model Air & Metal Color, Tamiya Lacquer Weathering: Flory Models Wash, Mig streaking effects Decent all-around good kit from Zvezda (originally from Dragon). I did enjoy the build, no big issues. Build thread:7 points
-
Hi guys had no computer for two months but still been building , Revell 15 cm Panzwrwerfer 42 out the box with added wires to launcher and my usual dio ,not a bad kit but tracks were a pig ( lots of flash).6 points
-
G'day All, Some more Trek. This is the Space Seed release from Polar Lights. Good, fun kits.6 points
-
Hello, some pics of my recently built Skyraider in experimental camo (CTA decal). Some aftermarket used and scratch build made (in the main wheel bays). Hope you like it.6 points
-
Nothing wrong with them. It’s what they did next that's upsetting... Behold! The mighty Potez 63-11 multi-role Jack of all trades, master of none?6 points
-
Beyond the rigs of the times, there is also the specifically French policy of Multiplace de Combat, which can perhaps be described as multi-crew multi-role aircraft. Away from those produced to this requirement, the French aircraft were no uglier than anyone else's. Dornier 11/23? Zubr? Overstrand? TB-3? Remember that the Virginia didn't leave service until 1937. But then one man's ugly is another's pugnacious. I did overhear two visitors to the Warton flightline describe the Lightning as ugly. Somewhat surprised they get away alive.6 points
-
Steering wheel story... And steering column. First, the dashboard : And of course the steering wheel! Another jig... And another milling session! Selector will be the next story... Dan.6 points
-
Rivets applied. This took a lot longer than I thought but the decals are very easy to use, quite strong yet flexible and don't take much soaking to leave the backing paper. They adhere well - I used some Mr Mark Softer with them and they dried quite quickly too. They have been applied to a glossy surface which I think has helped. I suspect they are a bit over scale, but hoping they look ok under a coat of primer and paint. The pattern is more indicative than an accurate representation.6 points
This leaderboard is set to London/GMT+01:00









.thumb.jpg.cfc129272ffec824439b15e6013d5952.jpg)


