
Leaderboard


Popular Content
Showing content with the highest reputation on 22/08/20 in all areas
-
May I present my latest build, Tamiya's new tool Spitfire Mk.1 displayed as N3290 as piloted by F/O John Gillies. This aircraft was shot down near Boulogne on the 23rd May 1940 with Gillies being captured alongside S/L Roger Bushell who was also shot down in the engagement. As plenty of others have mentioned the fit of the kit was very good, I only had a slight issue when attaching the front part of the canopy which had a slight overhang on the starboard side. I also struggled to attach the armoured windscreen cleanly which unfortunately has a smear mark where you can see the Kristel Clear. Apart from that an enjoyable build. All painted with Tamiya paints, I used Marty Sandford's dark earth mix 4:XF-52, 2:XF-3, 1:XF-51, 1:XF-2. and dark green straight out of the pot. I had done some pre-shading and mottling but this has largely been hidden, so after the flory wash I used oils to add shading and some slight weathering. I also got carried away with my masking and painted an extra walk line on the starboard wing so sorry to you Spit enthusiasts! I also wasn't sure if the underside of the stabilisers should have been aluminium or black and white- my brief research seemed a bit inconclusive so I went for the black and white. Really pleased with how its turned out, I especially like the style of the fuselage roundels with the small red circle which really makes the white part jump. Looks the part next to the 109 and Hurricane. Eduards Fw-109 A4 next. And a bit of fun:35 points
-
I finished my kitbash of Hasegawa's B-24D and Minicraft's B-24M to build B-24H 42-7650 which made a crash landing in the occupied Netherlands on November 13th, 1943. Build thread here: Apart from a few accuracy issues the Hasegawa kit is great. Minicraft is a bit more crude, but not so much worse to justify the price difference in my opinion so if you want to build a B-24D or J the older and cheaper Minicraft kit is a very good option. The Minicraft nose does fit the Hasegawa fuselage - but modifications are necessary. The Minicraft nose is slimmer than the Hasegawa fuselage at the bottom, so after attaching it I needed to sand down the Hasegawa fuselage sides a bit to make the nose flush. What I'm most happy about is that I now have a fairly rare and fairly accurate B-24H. Aftermarket used: Eduard PE sets, Eduard resin wheels, turbo super chargers, and bomb bay doors, brass barrels. Painted with Mig Ammo acrylics. Kept the weathering to a minimum because the aircraft was new when it was lost. Figures are old Airfix USAAF crew and the ambulance is from Academy. Comments and feedback is welcome as always. Thanks for looking!31 points
-
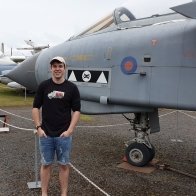
This is the Kitty Hawk 1/48 Jaguar GR1. The kit has a bit of a reputation for being a hand full. It has plenty of detail and in my opinion it is the best Jaguar in 1/48 scale. It doesn't come easy though! It is certainly buildable, however it does need a fair bit of work. To start with the instructions aren't great. I had whole sections missing, wrong part numbers and generally pretty difficult to follow. The fit can be poor in areas, there is a good bit of filler all over this one. A a lot of the panels needed work to get them to line up. Locating holes were the wrong size and had to be drilled out, parts were the wrong size and didn't fit and the weapons were quite simply just wrong. It didn't come with wing fences so I had to scratch build them. Even with all these things to tackle it actually wasn't too bad a build. I really wanted a Jag in the collection, maybe that's what carried me through. I wouldn't recommend attempting it if you are just new to the hobby, however if you want a bit of a challenge and a build which may take a bit longer than the usual Airfix or Tamiya then give it a bash. Thanks for looking and please leave any comments or questions that you may have!20 points
-
Latest one off the bench, #7 since February. Feels good to be so productive this year after 0 last year and only 2 per year for several years before that. II./JG53 January 1944 Vienna, Austria Aires cockpit Brassin exhaust BarracudaCast wheels Quickboost gun barrels Montex masks EagleCals decals Scratch details Reworked ETC rack Shortened gear legs17 points
-
This one began life in the Spitfire/Seafire GB. It is the Airfix Spitfire FR Mk XIV (kit 5135) converted to a 'C' wing highback Mk XIV to represent NH698, DL-F which as apparently used by Ken Collier when he became the first pilot to tip a V-1 out of the sky with his wing. I used some Eduard photo etch to enhance the cockpit (Mk XIV details FE980 and belts 49 006), Ultracast 'C' wing guns (48146), and Quickboost prop and spinner (48 253) and exhausts (48 229). I also stole a set of wheels and tyres from an Eduard Spitfire Mk IX, gun sight from an Airfix Spiitfire Mk Vb (5125) and rear view mirror from a Hasegawa Mk IX. The new spine was donated by the Airfix Mk Vb kit and fits quite well with a little fettling; the rear and sliding canopies also came from this kit. The belly signalling light was moved back and new lights installed near the wing tips, and a new IFF aerial fashioned from flattened fuse wire. Fuselage national markings are from the kit, lower wing national markings from Red Roo (4821), and upper wing markings, codes, serial and nose letter from the Airfix Spitfire Mk XII kit (5117). Stencils are from the Airfix Mk XIV kit, with spinner 'Lock/Unlock' stencils from the TallyHo Mk XIV sheet (48 022). The conversion aside, the Airfix kit has a few issues. I found poor fit with the fuel tank cover, windscreen, ailerons, tail planes, carb intake, upper wing fit to fuselage, tail wheel, gun fairings and belly aerial. The kit also incorporates some errors, including wrong belly light position, no under wing signalling lights, raised dzeus fasteners on cowling, incorrect gunsight, flush fitting fuel tank cover, random rivet rows on wings that disappear into nowhere and incomplete rivet rows on wing root fairings. The plane also needs a whip aerial on the spine. The propellor blades look a little wrong in shape to my eye but I admittedly did not compare then to plans. The tyres have a tread pattern on them that turns into a poor representation around the circumference, where the moulds meet and in my opinion are best replaced. The wingtip lights are poorly represented and need improving; I didn't do a great job there but I think they are a bit better, I hand painted the D-Day stripes and found any brush painting skills I may have once had were AWOL. I applied some restrained wear and tear and oil staining. Sitting at the back of the shelf the model looks okay and the average finishing job isn't too noticeable. The D-Day stripes certainly bring attention! To the pics. Apologies for the quality. Believe it or not that lower starboard wing light is green, but has been washed out a bit by the flash.17 points
-
Latest off the bench is the Italeri /Accurate Miniature's B-25 Mitchell in the markings of 320 Squadron. Decals by Dutch Decals The kit is showing it's age a little and is bit of a beast size wise. Now real problems .... quite a bit of filler ...fits where it touches in some places. I did put the specified amount of nose weight in.... but still it drags it's bum. Hey ho. Please feel free to comment etc. Thanks for looking Dick14 points
-
Also from 2005, if I recall correctly the year I went back to the hobby after a hiatus. Nothing remarkable about the model, just a cozy flash-back. This little, boxy beauty, exhibiting the traditional Airfix rivet treat was a relaxing project. Fit wasn't great, flash was abundant, pieces exhibited stubborn warps, but, for some reason, it was a delight to build.13 points
-
I have not put anything on RFI for a while now, despite finishing a few models, but I thought I might put this one as there do not seem to be many Voodoos around. The model is from the Revell 1/72nd scale kit that came out in 1991 and I think I bought the kit around that time. Canada bought the Voodoo after the cancellation of the CF105 Arrow project and the realisation that the Boeing Bomarc SAM had its limitations and lacked the flexibility of a manned interceptor. The Canadian Voodoos were designated CF101 and were, apparently, airframes surplus to US requirements and were replaced in the early !970’s with updated airframes and they served until the mid !980’s when they were replaced by the CF18 Hornet. The Revell kit was last released in 2013 and might be around somewhere, but I have not seen one for a while. Mine was moulded in a silver grey plastic with fairly neat panel lines and nicely moulded detail and I suspected leaned heavily on the 1/48th Monogram kit from the mid 1980’s . Decals were given for a USAF and a Canadian Voodoo, but mine were not in the best condition and had some iffy colours and were replaced with Belcher decals. The instructions were printed on what looked like toilet paper and were vague in places in showing where things were supposed to go. The kit went together fairly easily, although the how the cockpit fitted into the fuselage was not clear and could have been more positive and the main undercarriage wells needed sides added. The Detail in Scale book and the Aerofax Minigraph were helpful in sorting colours out. Canadian Voodoos were originally natural metal and then ‘silver’ painted and finally finished in a pale blue grey that I matched with a Vallejo colour. The Belcher decals were a bit of a disappointment as some tended to break apart and eventually they were coated in Microscale Decal Film, that seemed to solve the problem. Not my usual British subject, but the roundels are derived from British ones. Looking at the photos I have noticed that most of the panel lines are invisible. On the actual model this is not so and I suspect it is a combination of the pale colour and bright conditions the photos were taken under. Hope you like13 points
-
Hello again!! First off - good and knowledgable people....can anyone tell me what these 2 obects are? The first sits on the deck ventilators - the second on the superstructure deck... Super-fast deliveery From White Ensign Models once again - much needed oars and ladders etc - essential - thanks WEM And some general progress shots.. And thanks to whoever explained that - The trick to bending etch is to press into an India rubber with whatever curved implement you are using - I am eternally grateful! The turrets primed showed significnat spaces between the top etch and the pastic - a real drwback so it's back to the (invaluable) Mr Hibby Liquid putty. Likewise where I'd filled locating holes for rafts sat proud so back to re-sanding key areas Learning from Kent - 3mm masking tape And since the red antifouling will be hidden within the base - I thought I'd experiment with the hairspray technique having read in one of the other BM sections (?avation and apologies to whoever did thsi first - I omitted to write down name and location) that it was possible with enamel Colourcoats paints! The VERY happy answer is - IT IS. Using just 2 layers of "Worn effects" (other brands are available), 20 mins after application of the red, I scrubbed with a bristled brush or used an acupuncture needle to "scratch" the top layer of paint. The trick is to get water to the starch layer that will then lift (hopefully) giving a pleasing and natural chipped effect. I'll try the same on the hull sides with a base layer of 507C then worn effects then 507A over showing some chippig at water line and bow. Thanks for looking Stay Safe Y'all Rob13 points
-
Hello! It's my new model. The assembled is very simple and pleasant. Moreover, I to assembled MiG-21 mMF model before. As additions, I used Eduards rockets R-3, exhaust nozzle, ejection seat from Neomega, nose and air intake from Mini World, Masters pilot tu,e and wheels from Reskit. Painting Ganza and Hataka. Weathering- oildots, washes and pigments.11 points
-
Good afternoon guys So this is the kit finally finished and im pretty glad its done. I started it around the beginning of July as it was given to me for my birthday and slowly worked on it until realising I'll be away from home starting on Monday till the end of the week and wanted it done before then. The kit was fairly straighforward in most places and went together pretty easily which was pretty suprising to me; i've been used to building Italeri kits and reboxes of their kits and had a lot of fit issues. This isn't to say the kit doesn't have these kinds of issues but they seemed a little bit less severe than what im used to with their kits. Most notably with the construction was the narcelle fit which although taking a bit of time, was quite an easy fix by just sanding and cutting until it was a little more flush and filling after; and also the canopy fit ( I feel like the canopy fit may have been an issue I created due to sanding and then filling which I am not that happy with the end result). The other issue I had, and was the biggest pain in my opinion were the decals, the tail and wing tip decals were completely out of scale! Even putting them up against the kit before I placed them it was apparent, I tried to make the best of them which I feel went alright but for anyone who has seen photos of the real plane would be able to tell the decal art doesn't match up with it. The mis- scaled decals really proved an issue on the vibrant tail, with the raised sections and the decals that were meant to fit over it not playing ball any way I tried to place them. I opted to leave the decals over the raised section off and just have the Willow green showing through, which I think was for the best. As I mentioned, for the most part I worked on this kit quite slowly, and up until after decalling the kit I was really happy with the result. It was looking really clean, and glossy which was exactly what I wanted to go for. My next step was to coat the whole model in some Klear to lock it all in, it was pretty warm and windy on the evening I did it so I had the window open which is directly in front of where I paint my kits, when I had come back the next morning, the model had loads of little imperfections which im guessing is where the wind had blown dust onto the model whilst the Klear was still drying (kind of a reflection on the cleanliness of my bench, which is getting a complete clean up today before I start a new kit). I sanded it back the best I could but I felt it didn't look all that great after that so left the kit for about a week before coming back to it. I think this might have also been part of the problem for the next issue I had finishing this kit... I did the usual Ammo panel line was I use and decided to brush on a light layer of it, allow it to dry and wipe it off after which i've never had too many issues with. However, I think where I had sanded most of the Klear from the model, the wash stuck to the model in a lot of places and left it looking pretty unrealistically dirty. Right up until this morning I had been trying to correct this the best I could but it is by no means perfect. Overall this model has been a bit of a pain, and went from being a really fun and different build and turned into a slog to get it finished. (Oh and my attempt at a tinted windscreen has left it completely blacked out, this is a mistake I can live with and is something I can learn from though). I still like the end result, but this was a kit I really wanted to be perfect, and from a lot of error's I could have prevented it turned out not as great as I had hoped for. Anyway from the shelf it looks alright, when you look up close you can see the issues, it's all stuff I can learn from for my next build though so not the end of the world. Hope you can enjoy, despite the issues on the finished kit. I realised just as I posted the photos I have forgot to paint a tiny part but i'll sort that later. Thanks, Ryan11 points
-
For a change of pace from my usual sci-fi shenanigans, this popped into my mind a few weeks back as I had a Matchbox toy of the GT-40 that I remembered well. So I sought out a kit from Japan which arrived quickly and was cheap enough to avoid the Royal Mail ransom squad, so when I finished the most recent Battle of Britain diorama, this was what I turned to. I really enjoyed building a 'simpler' kit without lots of scratch building or conversions, so it was a refreshing change! WIP THread here: A photo I took on the workbench after finishing it, but I like it as much as the 'posed' photos above The box Kit contents11 points
-
Here's my take on 'Red 19', a Fw190A-8 of 5/JG300, flown by Uffz. Ernst Schroder, from sometime between August to November 1944. The plane had already been through the repair shop once before being issued to Schroder and also went through a major service around late October, which also included a partial repaint. The colours here are pre-repaint (yes, I've taken the easy way out ). Schroder belly-landed the plane during November, after coming off second best during a dogfight with P-51s. As far as I can tell, the aircraft was repaired again and was re-issued to JG301. Schroder survived the war, went back to Cologne, got married, had several children, trained as an architect and seems to have specialised in historic building preservation. He was also a keen aero modeller in his later years. Despite being a Tamiya kit, the build was not without its issues, but mostly went ok. The timeline for the various colours and slogans on Schroder's 190 is not completely clear, so I've gone for an early representation of the a/c, rather than the more 'complex' paintwork and insignias on the later version. Even on this version, the fuselage crosses seems to have had the white borders either rubbed down or over-painted in a darker shade, so I had a go at re-creating that, which didn't exactly go to plan, but it looks vaguely similar to pics taken at the time. Anyway, hope you like. Apologies in advance for the pictures - more wind/rain again today, which made an outside shoot impossible - so dull and pooly-lit indoor shots were the only option..10 points
-
Welcome back to what of late has been reduced to a mere weekly update on matters of general interest... As if the previous week hadn't been taxing enough, with the arrival of Storm Ellen to these shores on Wednesday a night of havoc ensued. About 1am I watched from the bedroom windows as the birches and poplars in the front garden were repeatedly pushed right over into living longbows by the blast. An ominous battering above our heads presently announced that the house hadn't been spared. Morning light surely enough revealed the roof to be damaged in several places and three trees down across the back garden. We didn't lose power though broadband was out for 36 hours. Luckily there's a local feller Brendan who's dead handy at fixing roofs so that got sorted yesterday evening, plus the trees have now been dragged aside and de-limbed in preparation for sawing up to help feed the stove over the winter. Garden's s a right state though, but we're luckier than many - the roof got pulled right off the local postal depot during the storm, and that was a modern building! One oddity between the series of storm fronts pushing over us yesterday was this phenomenon that I'd never witnessed in such extreme form before: Scudding wisps of low cloud forming and dissolving in front of your eyes within seconds as if timelapsed... Despite such travails I did in fact manag to solve a significant obstacle that I'd been struggling with for some time on the aircraft - I'll come back to this in a moment after the postbag... 🤣 A bon mot worthy of the great Ced himself Bill! Did you see the 'furry' one Pete? Ain't subcultures great? 😸 For you Edward: The dear little fellow all healed and released into his home environment once more. That cries out to be the final line of a poem Crisp. 'My Forum and Other Animals'...? (Brandishes rosette for the 'Secreted Mammal' class...) Sage advice as always Alan. Might have to wait a month or so til I find out how big a hit we're going to take regarding fees &etc. with out eldest starting college next month. I've selfishly selflessly tried to guide him towards a career in injection moulding but they will have such independent minds these days. 😁 Fear nought Bill - I decided a while back that due to the rather fetching New Romantic paint scheme of XJ481 during her Martel years, she'll be built entirely 'clean' (no doors/openings of any kind opened up) and posed in flight in order to avoid breaking up the lines of her paint scheme. By contrast, her sister ship will be letting it all hang out, as it were... 😄 I recall seeing an image of an actual Sopwith Camel disassembled and packed in a crate for transit during WW1 and it being little different in appearance from a kit in a box. I suppose just replying that 'the chaps on Britmodeller were all talking about them' would really have just made matters worse under the circumstances Terry... You are too kind, as always! (PS. Bought some photos of Furious in her 1918 guise from a seller on E-bay last but need to contact NMM to see what they have.) Ok. So when last we spoke I'd finished off the RAT/arrestor bays and sundry gubbins, with attention now needing to switch to the main volumes of the two aircraft. To be more precise, there are in essence a number of decisions that need to be taken now due to their impact upon both subsequent detailing and the printed outputs themselves, with respect to forming a 'shell' for the fuselage and nose sections. Such a shell has to perform both structurally (to provide self-supporting strength) and visually (where openings and edges are visible to the viewer. From experience I'm working to 0.8mm as the baseline wall thickness to help preserve structural rigidity, and where such thickness would pose a visual problem at the edge of panel openings, windows &etc, this can be strategically thinned/chamfered around the perimeter to approximate scale thickness. Having learned so much over the course of this build since it starting at Christmas, I now realize that I was in error to initially create such regions as the nose and fuselage as 'solid' objects - originally having done so due to inexperience and not knowing how to plan a build effectively to later grapple with the idea of producing volumes with thin walls. This had, quite frankly, become an increasing headache until realizing that at this point in the design cycle there was no escaping having to commit to a solution, however arduous. The one thing I didn't wish to do was to have to undo all the subsequent work since about March, but after several false starts in the background over the last month or so (there'd have been no point showing you a series of dead ends and saying 'look - a dead end! 😁) I realized there was a simple and effective way to deal with the problem. 'unstitch' the original solid until it is now a series of disconnected surfaces. hide all but the outside wall of the airframe. stitch these together to produce a single surface copy and shrink this down to form the inner wall, nesting it inside the first one. stitch the resulting 'lip' between the two surfaces back together again and: Voila: You have a wall. The thickness of this rear edge is 0.8mm. Seen from the side: You can see that it thickens towards the apex of the nose: on '481 this won't matter because the rear of the nose cone won't be open and we'll slicing the nose diagonally and replacing the tip with the trials gear. On '708, I can cut out the required profile and slope this back into the thicker section unobtrusively without compromising rigidity. '481s nose above wasn't too hard to do modify like this (once I'd successfully worked out a methodology) but that of '708 was a nightmare due to the fact that I'd already built the nose well and Microcell bay into the original solid loft! All my attempts to repeat the same process on this airframe foundered upon the complicated inner geometry of these interior details, until I I theorized 'why not just (temporarily) cut them out of the mix' - like so? Being careful to ensure that the region included both the nosewheel bay and that of the Microcell launcher in their entirety, I set this excised section to one side and began work repeating the method with a borrowed 'skin' from '481 - ending up with a broadly similar result: Similar that is, except for having to cut openings in the underside for the nosewheel well and Microcell bays- horribly complicated jobs with all of the compound curvatures involved: You can see above that it also made sense to separate the radome from the fuselage at this stage, due to this being open in the final display. From here it was just a case of adding back the initial region cut out from the original solid: I'm not unduly worried that at present this interferes with the floor of the cockpit - as can be seen more clearly from the rear: - and likewise at the front in respect of the AI 18 electronics: Both of these aspects can be turned to advantage in terms of providing good solid supports within this part of the aircraft and can easily have sections cut away from them as and when required in order to accommodate the subsequent interior fittings I'm not sorry to have gotten past this problem now - it's been preying on my mind for some time and no amount of focus on detailing was going to make it go away. I need to turn my attention to the rear fuslage next to see if the same methodology will work out there also. Thanks for looking in as always and be careful with your bits that go over the hedge last: Tony10 points
-
I hardly dare to post this when I see some of the exquisitely crafted models on this forum, but this might encourage those who lack patience, as I do, but want an good result with minimum effort. More photos and build notes on this page of my web site: Vietnam Super Sabre10 points
-
About 7 years ago I tried to make my own decals. Since the machined characteristic is the area with greater shine, I printed out the negative area in grey onto clear decal film. The location on the model was pre-painted with aluminum paint. The pattern I was going for was more loose, not very rigid like the St.Louis: regards, Jack10 points
-
This is my modification to a large scale die cast model of the Gulf Porsche 917, I did a WIP thread here Basically I started with a CMR (nee Minichamps) ready made model of the famous #20 car from 1970 Le Mans but wanted to add some extra detail. This is what I started with, And after stripping down, some scratch building and detailing I finished with this, It's not perfect, the weathering is a bit clumsy (no airbrush) but is inspired by both the movie images and pictures of the "real" car at Le Mans and is placing the car at late afternoon/early evening of the race after the first downpour and before the headlamp protectors come off. Anyway it's my homage to one of the most iconic race cars from, for me, the best era in endurance racing. Dave9 points
-
FW-190F-8 | Airfix | 1/72 SG 10, Luftwaffe, Ceske Budejovice, Czechoslovakia, May 1945 I finished this on 8/21/2020. It was really a manic-depressive build! I purchased the Airfix FW-190A-8 kit after a string of delightful experiences with Airfix kits (including the F-86, Typhoon and P-40C). The scheme they included didn't thrill me, and then I read later about the difficulties with this kit (which I won't go into here). Consequently, I lost interest and it was pushed to the back of the stash closet, likely never to be built. Recently, I was thinking it would be nice to have a A-8 in the display case and thought that maybe a late war A-8 with an RLM 81/82/76 scheme would be nice. A quick internet search led me to Aeromaster's "Defending the Reich Part 3" decals which had a scheme that I just loved: black 6 of SG 10 (Although Aeromaster said it was "Wr. Nr. and unit unknown") . Internet searching turned up no pictures, profiles or models of such an FW-190A-8 (more on that later), so I went my merry way. Everything went well until painting. Hataka (whose paints I've really loved so far) had renditions of RLM 81 and 82 that were lime green and purple resulting in an airplane that looked like something the Joker from Batman would fly! So, I asked for some help in this thread: The thread resulted in a lively discussion which taught me a lot and allowed me to fix the colors to something more believable. It was in this thread that some very helpful folks found pictures of my Black 6 -- the reason why I couldn't find information on it is because it was an F-8, not an A-8! Once I used those search terms I found quite a bit of information, including that Revell released a model of Black 6 not long ago. The other problem is that the paint scheme on the a/c in the picture was clearly not what Aeromaster had in their profile! I did some soul-searching because I hate doing things wrong when I have evidence in hand. I wanted to keep the paint job because it looked great. I decided to at least convert it to an F-8, so at least that part would be correct. I dug most of the parts I needed out of an Eduard FW-190A-5 in the stash and ordered AML models resin ETC50 bomb racks. At this point I started an WIP. @SafetyDad recognized I was struggling with the authenticity of my build and suggest that I do "Black 9", which there is no documentation of, but could've existed and would be representative of the kinds of paint schemes being applied at the unit level at the time (the pictures of the SG 10 aircraft showed they all had different paint schemes). So this was the approach I took. I really have to thank a number of folks that helped me out, both with the paint and the build: @SafetyDad, @Werdna, @dogsbody, @Wulfman, @Jamie @ Sovereign Hobbies, @Tail-Dragon, @klr and hopefully I didn't leave anyone off. Sorry for the long-winded RFI, but it was such a saga and I had to share... Paint: 1 part Hataka RLM 81 (Braunviolett) to 1 part Hataka RLM 79b (Medium brown) / 2 parts Hataka RLM 82 (light green) to 1 part Hataka RLM 79b (Medium Brown) uppers > Hataka RLM 76 Decals: Stencils from Airfix kit > other decals from Aeromaster's "Defending the Reich Part 3" Aftermarket: True Details wheels > AML Resin ETC 50 Bomb racks Other: Centerline bomb rack and bomb, armored headrest support, and loop antenna from Eduard FW-190A-5 kit. Although I found German bombs to go on these racks, the detail was so incredible, I decided to leave them empty. I broke off and lost 2 sway braces that I fabricated some replacements for. The exterior detail of the Airfix kit is quite nice with the exception of the wheels. The wheel detail is terribly soft and I highly recommend replacement wheels. I used the True Details wheels and they are beautiful! Plus, they are weighted! Thanks for looking! Questions, comments and constructive criticism always welcome!9 points
-
Neat little Heller kit of a genuinely exotic beastie. Aftermarket decals, because I wasn't convinced that the ageing Heller ones would be worth the paper they were printed on. Did I mention it's quite small..? best, M.9 points
-
Nicely said & something to stop & think about what is represented in them as we chase the next new kit. Steve.9 points
-
A 1/48th Monogram F-15A Eagle painted in the very early and short lived air superiority blue colour scheme. Humbrol enamel paints applied with an airbrush, decals by Caracal models. The kit dates back to 1979. I have always wanted to build an F-15 in this scheme and despite a few small mistakes I am very happy with the result. 20200819_141334 by Ghostbase, on Flickr The story behind this bird is interesting. She was F-15A serial 71-0284 and she was the fifth full scale development Eagle. She was used for armament development including the rotary cannon and when her test career ended she became an instructional airframe. She was photographed in these markings at an airshow (possibly Sheppard AFB, TX, date unknown) with "City of Iowa Park" nose art. Her FF code stands for 'First Fighter' for the then 1st Tactical Fighter Wing based at Langley. How she kept her blue colour scheme is unknown but it was very unusual and it certainly adds some interest to this model. 20200819_141449 by Ghostbase, on Flickr I used Humbrol 47 which is enamel gloss sea blue as that looked to me to be the nearest to air superiority blue in their range. I would say that it is just a tad darker and 'richer' than FS35450 however for some reason the camera on my phone has processed the photos to a lighter shade! I do have the Hataka acrylic Air Superiority Blue (HTK-A155) in my paint stash but I am really struggling with acrylics at the moment and just wanted an easy paint without my airbrush clogging up after 60 seconds. This coat went on well and just one application too. 20200819_141509 by Ghostbase, on Flickr I must also mention how impressed I was with the kit. It was first released in 1979 and it went together very well, I only needed a little filler where the nose section slots into the main fuselage. I did like the detail around the cockpit and also the radar as well as the open air brake and I think they really add to the model. Yes, it is raised panel lines and for this build I was comfortable with that. 20200819_141756 by Ghostbase, on Flickr This is the first time that I have used Caracal decals and I am very impressed, they were really easy to apply and they make an average model look good! These were from their F-15 "The Early Years" set and I am building a second F-15A using this set as well. 20200819_141808 by Ghostbase, on Flickr Apologies for the rather makeshift photo studio but these were taken at my alternate man cave! 😊 This build really has helped get my mojo back. Michael8 points
-
I like trucks so here goes.... You can't go without this workhorse can you... I don't know how I'm going to build it yet. Probably without the M60 on top. Maybe open bed. Anyway definitely not with a load of scared FNG's in the back being transported to their bases 🙂 ....8 points
-
Glad you approve ...... Calling the seascape finished now. Perhaps a few touches to the lifeboat, gel still drying Thanks for looking in Stay safe Kev8 points
-
Well, I seem to have passed muster and am definitely adopted as new hooman. [edit] As clearly demonstrated here by the appropriate 'Comfort Test' stamp of approval:8 points
-
As a stash overflow control measure, for many years I have been a British subject only builder, but, recently, after a long layoff from model building I saw this and it reminded me of my last foreign subject, that was a Matchbox 'Zero' back in 1989 while my wife was in labour with our daughter! kits have come a long way since the primitive Matchbox of yesteryear!8 points
-
Here is a colour image converted to B/W of two Baltimore's. Although it does not solve the problem of this thread it illustrates the difficulty of interpreting colour from black and white photos. Cheers, Etienne.8 points
-
Already you have seen my steering wheel. But not the Monogram one, and the steering column: Of course mine is quite different... How to? Two thin mahogany sheets glued on a thin brass piece, a lathe, a dividing head, a jeweler's saw, some files and some hours... No secret! Thanks for watching, Dan.8 points
-
I got all the odds 'n' ends done finally. Bits of touch-up painting, painting red on the trim tabs, dry brushing wheels and tires, painting exhaust stains, fabricating new sway braces, paint chipping.... and so on... and so on. I had to do a lot of trimming on the brace for the armored seat back. I assume that Airfix's canopy was thicker than Eduard's so that the inner width was too narrow for the piece to fit. Got it to work though! It's interesting that Airfix provided indents for the loop antenna... but didn't include the loop antenna! Luckily I had a spare from the Eduard kit. Anyhow, I got over the finish line! I'm really happy with it too. Here's a sneak peak I shot before dinner -- I'll try to get a proper RFI up tomorrow.8 points
-
Here are a few pics,....... These two are widely said to have been painted in desert colours before departing for the Middle East,..... mmm? Standard scheme in the UK; And once in the Middle East; One of the first dets to the theatre went to Malta; Jumping the gun a bit,.... but returning to `those' Malta photos,..... this is a close up; And a B&W pic of the above; Another comparison of a colour pic to b&w,.... admittedly a UK based aircraft; Two versions of the same photo of an early Coastal Command Beau in the UK; Back to the early arrivals in the Middle East,.... 252 & 272 Sqns at some times pooled their aircraft.This is the period I am most interested in and when the desert scheme MAY have been adopted? ; T3329,....Captured by the Vichy French Moving into late 1942-43,.....with C1 Type roundels,.... a well known colour photo; 235 Sqn detached to Malta; 252 Sqn aircraft at Idku 1942; Mk.VI seen in Sicily; 227 Sqn Mk.VI,.... desert scheme? I`m not convinced? And as it was mentioned,.... a few night fighters; 46 Sqn NF,...below; 255 Sqn Algeria; Night Fighter? Seen in Italy; So that is a fair selection of Middle East based Beau`s up to 1943, Cheers Tony8 points
-
My entry for this group build, the Martin B-57B Canberra operated by the 8th Bomb Squadron out of Bien Hoa AB and then Da Nang AB in 1964/65. It didn't take the Canberra long to become well-known on the tactical scene and they picked up the call sign 'Yellow Bird' based upon the squadron colours (the sister13th BS were 'Red Bird'). I am building the 1/72nd Italeri B-57B Canberra OOB and it will be finished in aluminium. I will be using the decals from the kit. I will also 'ghost' build a second B-57B which will be in the later SEA camouflage scheme coded as 'PQ'. I am looking for a straight forward build of these kits which I have had in the stash for many years now. Michael. Canberras2 by Ghostbase, on Flickr7 points
-
I think I like this one even more then the standard "Deuce". The kit was a lot harder to get in fact. I'll be starting my Deuce first as a warm-up for this one.7 points
-
I got this as a Birthday present, having seen a few builds in various sections on here mainly @diablo rsv. I've got a few ideas on how the finish build will look, it will be set in France as during the early stages of the buses conscription. I'm currently taking annual leave and got a bit done, the detail is fantastic, however, with the extremely delicate parts there sprue connections are a little over the top. https://www.bbc.co.uk/news/uk-england-365319847 points
-
Hi all, I can now finally close out my Eduard dual combo FW190 D11/13 project (link to previous post below:) So the second subject I wanted to do with the dual combo kit was the infamous Yellow 10. Its one thats been right up there on my build list since I first saw it when getting back into the hobby about 13 years ago and the reason I had to get the dual combo kit when I saw it I love the camo and although the subject has been much done it was one that I needed on my shelf, just hoped that I could get to grips with the fine airbrush work! Theres not much I can add about the build that wouldn't be repeating my previous post. I had hoped to work out any bugs on the first build, which kind of worked though I did end up with more of a wing root gap to sort on this one and also get over happy with glueing and clamping the wings with the plan to leave the ailerons loose to add later. Once the glue had set I realised that I managed to close the gap up they sit in between the wing halves and had to get the scalpel in there and open it up again...doh! The kit and profipack parts were great from the box, though again I used a set of ultracast exhausts and replaced the gun barrels and pitot tube with brass hollow tubing. Paints were mostly Gunze Aqueous for the RLM colours and Tamiya for others, finished with an oil wash and xtracrylics matt varnish. Anyway enough waffle and on with the pics, any C&CC appreciated as always, Thanks, Stu7 points
-
Evening all. This is a recent completion for the F4u Group build and I thought I’d post it in RFI for further perusal. This is an old raised panel line kit which is a nice simple, well fitting kit. Painted with Gunze aqueous acrylics for upper Olive drab and dark sea grey with lightened Tamiya Sky for the lower fuselage. Cheers Allan7 points
-
Another jet to join my NATO Tiger fleet. Czech Air Force Saab JAS-39C Gripen 9241 "WildCat" 211.Tactical Squadron NATO Tiger Meet 2017 1/72 Revell Saab JAS-39C Gripen Model-CZ Decals & masked stripes painted in gunship grey using Hataka acrylics. Only other aftermarket used were Master brass pitot's. I also added the blade aerials which are located on the tail fin which aren't present on the kit. Other people might be more aware to the provenance of the stores pylons in the kit as they aren't representative of the rails used by current operational Gripens, discovered that they were too short in length & wrong shape. There's probably aftermarket pylons available somewhere. Cheers & thanks for looking! Martin7 points
-
C-130H Hercules of the 463rd Tactical Airlift Wing out of Dyess AFB supporting Red Flag 81-1 exercise at Nellis AFB, November 1980. 74-1659 74-1666 74-1669 74-1675 74-1680 74-2069 74-2131 Thanks for looking, Sven7 points
-
A vicar was sitting in his seat on a small commuter-style aircraft when both engines failed. As the nose dipped downwards the pilot hurried out into the cabin. "Does anyone here believe in the power of prayer?" he asked the passengers. Instantly the vicar's hand shot up. "I do," he announced confidently. "That's excellent news, father," the pilot replied. "We're one parachute short."7 points
-
I have been busy plugging away at the T4 over the last day or so and have now added a second wiring loom to the bomb bay. From the pictures, you will see that the clamps on the bomb day doors are now off and everything is holding nicely in place. I have also fitted some inspection panels to the doors. The wiring looms are not that difficult to make but do repay one taking one's time over. I think they are worth the effort. Whether I am still saying that after I have done the B(I) 8/12 is another matter. I am still steeling myself for another mamouth grinding session (fnar, snurf) on the second set of doors. I am also in the process of detailing the nose wheel bay and have knocked up some piping runs from Albion Alloys' slide fit tubing. A heads up aout the kit part here. You will find that the bay fits better if you remove it's locating lugs from the two fuselage halves. I though it was something that I had done wrong until I realised that I had not actually done anything to that particular area of the model so that logically, just for once, it could not be my fault. Anyway, take care, there is some fettling needed in this area. Thanks for looking. Martian 👽7 points
-
Hi guys, I finally finished this build. It's HobbyBoss Panzer I Ausf. A, kit No. 80145, superb kit, with great details and quite well engineered. There were few frustrating bits, like super small photo-etched parts (and when I say super small, I mean SUPER small), quite a lot of cleanup of indy track links, but it's worth the fun. You can find more about this build in the WIP section here. I decided to build DAK version, Vehicle number 833 from the Regiment 5, the one of vehicles that arrived with the first batch of DAK units and that participated in the first actions until it was probably lost sometime around first fights around Tobruk or soon thereafter. There were quite a lot of research involved and this was the most fun part of this build, because information about Pz Is present in NA theater is quite obscure. The biggest dilemmas I had were which version of Pz I was this and how to paint it. I figured out with quite certainty that this was Serie 3 vehicle, but with many modifications. And regarding the paint, the safe bet would be to leave it painted in RAL 7021, but most of the initial vehicles from the Reg. 5 received a very light "mysterious" paint, early in the campaign, so I decided that it would be more fun to go in this direction. There is no definite answer which paint it was (the only fact that is quite certain is that it's not RAL 8000), but there's a big chance that it was Italian paint, so I decided to go with Giallo Sabbia Chiaro. This paint was used at the time and there is a good chance that stocks were present around Tripoli at the time when Reg. 5 arrived. Here's some pictures: And on the white background: And some details: And finally interior, before I sealed it. I must say that this kit provides really nice interior. Cheers and have a great weekend! Nenad6 points
-
Hi There, I bought this at Scale Scotland Murrayfield last year and have been scared stiff to cut the wings ever since. I finally stuck my courage to the sticking place and got on with it. This one is a little personal as the home base for 809 NAS was HMS Fulmar and as it's close to Dingwall this makes her one of mine. Primed with UMP Grey Painted with Colourcoats Extra Dark Sea Grey, Light Aircraft Grey and Light Admiralty Grey, AK Xtreme Metals Aluminium, Lifecolor Dark Admiralty Grey, Tamiya Rubber Black and Desert Yellow. Washed with Citadel Nuln Oil and Flory Dark Dirt. Finished with Windsor & Newton Satin Varnish. I really enjoyed this one but didn't plan it very well, when I build the next one it will be better. As always, Thanks for looking and all comments and criticism are welcome. Cheers, Alistair6 points
-
Tonight Matthew I will be building the Special Hobby 1/72 AH-1G Cobra helicopter designated “Pandora’s Box”. I had originally just ordered decals and paint masks from Hannants for the Revell rebox I already have, then realised it didn’t have all the parts I needed, so I just bought the the SH Over Vietnam kit as it wasn’t expensive.6 points
-
Hello everyone! Here is the second of my two latest kits finished last week, also a Mark I Model's 1:144 Dornier Do 17Z-2. This one represents F1+AL, Stab II./KG76, Luftwaffe, France, 1940. All the comments on the other build apply here except that this kit has a loop aerial above the cockpit instead of the blister the other kit had. I had to thin the part as much as I could. As with the other one, the kit was fully painted and varnished with brush. Thanks for looking Miguel6 points
-
As a reward for your confession, here are some pictures to show the progress to date. The floats are on! Also a small ladder for refuels can be seen. And I've fitted a pressure refuel point on the other side of the fuselage. Here under the wingtips we have some aerials/sensors. They were meant to be small scale ship guns. Under the nose is this little gizmo. Another sensor/camera? thingummy/wossname. And, due to transatlantic pressure, (ahem!) what could well be a MAD boom. Though it's intended purpose was as a torpedo! I've fitted a tank bit on the end here for the sensor. Some cleaning up of joints is needed, but overall we are nearly there. I think I've settled on a paint scheme and I've found some decals I want to use. So things are heading towards a close. Oh yes, It needs a name. I'm partial to Sea Dragon, Seedrachen in German, which is the usual language choice for kreiger names. Thanks for looking in and keep the comments coming, One day I'll get a build up to the size and sillyness standards of @Martian. Cheers, Pete6 points
-
Looking forward to this one, hopefully it will help kick start my mojo from its summer slowdown. So having perused the stash, I have decided to go with this.6 points
-
Well this little chap is not far off being finished. Rear suspension on, seat fitted and a few other bits. And the rest of the paint... And the first decals. Unfortunately I noticed that the decals seem too large all round and though most won't notice, I did. It means that the key elements are too close together and it can't easily be fixed. Still, they do go on well and will look OK for most onlookers. There is still a bit to do under the skin but hopefully the next post will be an RFI.6 points
-
Hi All, Some good progress today! Here's the observer's position in a completed state - the oil wash is still a little damp: This should be quite visible with the cockpit open, so plenty of attention to detail! Next I turned my attention to the instrument panel. This is presented as a transparent component, which I painted black. When I went to apply the main IP decal, I noticed that the instrument detail was transparent rather than white (rather confusingly the second panel and observer's instruments ARE white) I therefore picked out the instruments in white to provide a backdrop: I then applied the decal, ending up with this: Now although the lower panel looks fine, the main panel is rather... bobbins. Not to worry! Out with the old faithful: A little bit of firtling later, a flat coat and instruments picked out with gloss: That'll do pig... Time to bring the sub-assemblies together - here they are located in a fuselage half. I scratched the pilot's armour and a headrest: And here's the fuselage buttoned up: That's all going to be nicely visible even with the canopy in place - happy with that!! Next I decided to address the front windscreen. I taped a section of shiny plastic card into place over the gap in the windscreen. Once I'd shuttered the end of with another slice of card I poured in a healthy blob of Krystal Kleer: I'll leave that to dry overnight and hopefully that will be sufficiently clear! The main wings and tailplane went together easily - a little filler around joints but painless overall. I drilled some holes in the leading edge where the wing-mounted 0.303" guns are located. I also sanded down the fabric effect on the wing upper & lower surfaces, as they were far too pronounced. I am enjoying this build immensely! Finally I masked off the canopy using the kit-supplied masks. That's all for today - thanks for looking! Roger6 points
-
Both are do-able from the IIc, if you get the 40mm guns for the IId, and the IV had a universal wing, so did use bomb racks. They require some small changes to the wing panelling, and making the radiator armour. As @Graham Boak says, AZ did make a decent stab at these as well. But remember though that only 300 IId and about 600 Mk.IV were built, and markings options are not that plentiful, out of the 14,000 or so Hurricane built. Same with the Mk.II Sea Hurricanes, I can't remember exactly, a few hundred at most. The IIB is a really good idea. With new props, you can do the Canadian Mk.XII, and it is the variant most photographed in VVS use. Conversion to a IIa is easy, just fill the outer gun bays. So Arma have now covered the vast majority bulk of built Hurricanes. If they don't do the others, I'm sure they will be done with some AM. A while back 3-D Models did a some 40 mm guns for the dreadful Airfix IIc, IIRC they were injection moulded, so they may still exist. Finally, I really appreciate the way Arma Hobby interact with their customer base, that when the did the Mk.I they posted up CAD shots here, and they took on comments regarding issues visible, and investigated the issues raised, and corrected accordingly. Result are the best Hurricane in 72nd. And No doubt will be the best in 1/48th.6 points
-
Hello Dears, Thank you @The Spadgent, see here !! Well on the 20th of August 2000, I met Mrs CC for the first time !! We so had a good reason for some rest and recreation !! 20 years that she had a lot of reasons to turn mad on my behalf... I asked her to book an hotel room for us, She did so but there has been a problem... She then book another one... We first paid a visit to a great museum of the life in the Ardennes... And she found her future car... Well, we then told the barman to be prepared for the visit of a @Martian ambassador, they say that they are ready to go.... A 200l pint will calm down any martian... We'll see !! Back to the hotel room story... Yes Dears Yes !! it is not a shark.... An hotel room located in between the runway and hangars.... It was a dream for me !! Now, I wonder why we have an australian registered light plane here, in the middle of the Belgian Ardennes... Surely for the beer methink !! There was this one too... Target Hooops sorry Martian, Glider towing... Well Gents !! It was great !! Ah !! A bit of modelling ?? Look James @71chally, I started to cook your bat.... I just hope that it will not be an undercooked one.... The Martian cockpiterry has been an incentive, so I look at my own interior !! Sitting on here is surely a pain in the A... But, such a huge space under the seats... Why for ???? Ballast was my first thought !! Here we go... If you have friends that sell tyres... Get some of these.... I'll stack some on here, Airfix ask for 100 Grs... That mean 10 of .38 special... I use a plan B... But I still stick to plan A !! I will not put all the ballast in just one place... This morning, It was breakfast (Continental one alas) in looking at a Cub towing some gliders!!! Mmmmh tomorrow, My missus has some things to do for me... Have a great modelling week end... For my part, I'll try to !! Sincerely. CC6 points
-
A certain amount of tidying up to do but the main painting is just about finished. The cowlings are a push fit at the moment as I will need to mask and paint the flaps at the rear and the exhaust collector ring at the front. Over the years I have been told by kit instructions to paint the exhaust ring sometimes grey, sometimes brown, but mostly bronze. In fact, as mentioned by Graham and other modellers, both would have initially been unpainted metal, but the collector ring would rapidly have tarnished rather like the rear fuselage of NMF Super Sabres! I think I will use "burnt iron" with a spot of grey for the vents and mix antique bronze with that for the front ring. Possibly I will add a little rust to the mix at the end and use it on the actual short exhaust pipes - we will see. I have dipped the clear parts in Pledge so need to start painting the framing pretty soon - my least favourite job! It is not exactly the best looking plane I have ever built though it may look a little better once the nose glazing is on - the prototype had a very blunt nose, but the production one is at least a bit more "rounded". Should be able to start putting decals on before too long, but I will give it a coat of gloss varnish first. Cheers Pete6 points
-
6 points


.thumb.jpg.b4a5069fd2c2dd5708ce1694345c5b11.jpg)


(510x640)-Copy(95x120).thumb.jpg.33073138e01aa81779639a845926753e.jpg)


.thumb.jpg.cfc129272ffec824439b15e6013d5952.jpg)


_opt.thumb.jpg.be9c1e22e34c329b51268dfacc8614e0.jpg)
This leaderboard is set to London/GMT+01:00