
Leaderboard


Popular Content
Showing content with the highest reputation on 27/07/20 in all areas
-
Hi All, Here is my effort at Airfix' excellent Wellington GR MkVIII. Here is the WIP if anybody is interested: The kit was built OOB with only Eduard masks for the glazing (a must for this build!). The aircraft was modelled as HX379 of 172 Sqn, based at RAF Chivenor in 1942. Here's a shot of the actual aircraft: It's far from my best build but I'm not unhappy with the final outcome. I'd highly recommend the kit and to my eyes this is a lovely scheme for the Wimpy! Here's a final shot with her Bomber Command stablemate: Thanks for looking, Roger36 points
-
I will soon be retiring and moving to Wisconsin, where I went to University many years ago. I thus thought it appropriate to build an aircraft with some DairyLand heritage -- I chose the Lockheed Model 10 Electra of Wisconsin Central Airlines circa 1948: The worklog for this project can be found here: I began with the old, short run kit by Special Hobby, and made numerous changes & corrections. Some of the most significant are: Vacuformed a new canopy (the one in the kit had yellowed with age) Replaced the horizontal and vertical stabilizers with thinner, scratchbuilt items Added seats and details to the passenger compartment Enlarged the engine cowls and installed aftermarket Wasp Jr engines Re-built the main landing gear struts and scratch built tail wheel assembly Decals are custom made by Arctic Decals ( arcticdecals.com ). Mika did a great job on these and helped research the details. Enough yackity-yack, let's see some photos! Some close-up, detail shots: Nose lights and pitot tubes added: Aftermarket engines with added cylinder wiring and valve pushrod covers: Re-built the engine cowl, added exhausts, scratch-built correct landing gear struts, and added the leading edge landing light: Added passenger seating and detailed the interior, little of which is visible now: Mika's decals were very thin, and went on beautifully! Scratch-built rear surfaces to replace the over-thick kit items: Scratch-built tail wheel area: Wingtip and tail lights were made using UV-activated liquid gel, painted with transparent red and blue. As a side project, I converted a 1/72 WWII staff car into a 1948 Plymouth Special Deluxe sedan. Rebuilding the frontend and grille area was a real challenge to my scratch-building skills! Final beauty shots: I never expected this to become a three-plus month project. Shipping delays due to the Coronavirus pandemic left me with a lot of down time while waiting for parts and decals to arrive. But, at long last I can call this job done. My plans are to complete my Wisconsin Central Airlines collection with a DC-3 Dakota and Cessna Bobcat. But first, I have to pack up my workroom and stash for my move to America's Dairyland. That means, I won't be doing any modeling until after I've got my new workroom set up -- Probably November-ish. Wish me luck!29 points
-
Here's my Tasman (ex-Heller) 1/72 Dragon Rapide, just finished in the A Kit You Built As A Kid group build. I've used Arctic Decals' Railway Air Services decals and the SBS PE rigging set. The decals were excellent and the set included masks and self-adhesive chrome window frames - these went on nicely but the ones on the curved windscreen needed a bit of help from some canopy glue. The PE rigging set was a huge time saver and resulted in much better rigging than I could have achieved without it! Build thread is here. thanks for looking Julian27 points
-
I always wanted to build this Mig-21 F-13 as it was the very first Mig-21 we got, It first arrived in 1963 and the one am building arrived in 1964. The BC824, is a rare aircraft as only a few were bought and only one or two survived. I decided to build the aircraft using the Revell kit, but getting it was a huge problem due to covid lockdown and postal service not working. At first the vendor was not sending to the place I was residing, so I asked a friend to get the kit for me and send it to me when the thing improved a little bit. He was kindly enough to do it for me and I am very thankful to him. Honestly, it was one of the fastest builds I have done. It took me just a day and half to complete it. It was a smooth sail, the only problem was the weapon that came with it which I didn't use and borrowed a pair of K-13 from another kit. The biggest and only major problem I faced was the wing root took some dry fit to correct it, and the minor one was the canopy it was hard tracing it. For painting I use only one silver color, and rest was modulations by adding different paint to the silver mix. My printer broke down again so for the serial number, I used leftover decals, cut the individual number and alphabet and stick on it. I am so happy with the result and glad I could make it for the 15 August 2020, perhaps a little good news in these extraordinary times. Thanks for looking, Cheers. Outdoor.22 points
-
Hello Gentlemen, Haven't been completing anything in a while, here's the 1/48 HobbyBoss F3H-2 Demon, of VF-31 Squadron "Tomcatters". A very impressive kit, quite an easy build providing you correct the few version mixes by Hobby Boss. Corrected : F3H-2 has the short beaver tail type, while the kit provide the long one. Weapons stations1 and 8 are moved closer to the wingfold hinge line Kit is providing Sparrow and Sidewinder missiles, but only Sparrow rails. If using sidewinder, rail is to be changed Other : dash is to be trimmed so the front windshield can sit and the articulation plates for stabs were sanded from fuselage and redone in plasticard, so stabs could be posed angled. Paints are Gunze and Tamiya acryls. You need to make room on the shelves, this one is a big boy ;). Hope you'll like her. Best, Stéphane21 points
-
1/32 Tamiyia F4 Phantom VF-33 TARSIERS The main build was OTB, apart from the ordnance which is Eduard, the pilots are resin figures and the yellow shirt is from Reedoak. Many of you will know my preferred paint is MRP , just because it drys really quickly, and allows a lot more applications of weathering than other paints. The decals are from MILSPEC, which I have to say were very nice to work with. And on this occasion the base was built by my good friend Mario Catania, he’s very good , you should go over to his face book page and see what he’s doing. Established in September 1943, VF-33 were first equipped with the Grumman F6F "Hellcat". Their first operation was to the Soloman islands, the first time a US Navy squadron has used the F6F in combat. VF-33 was land based at this time, supporting the island hopping Pacific campaign. VF-33 disestablished in July 1946. VF-33 was re-established on the 11th of October 1948, this time flying the famous Chance-Vought F4U "Corsair". After seeing action during the Korean war (and being awarded the Navy Unit Citation for their success) several changes of equipment and location followed in quick succession. By 1962 the unit was flying F8U-2NE "Crusaders" from the world's first nuclear powered aircraft carrier, the USS Enterprise (CVN-65) and as part of this team took part in the blockade of Cuba. In 1964 the squadron started to become familiar with the aircraft which (in two different versions) would last them the next 17 years and became the backbone of Naval Fighter Aviation. The plane was, of course, the F-4 "Phantom II". Initially equipped with the F-4B, VF-33 set a new Atlantic Fleet record by winning the CNO Aviation Safety Award for four years in a row (1961-64). However VF-33's time with the F-4B was short and in 1967 they upgraded to the F-4J. The new F- 4 featured a different radar, higher thrust engines, slatted tailplanes, extra fuel cells and larger main wheels (to handle the increased weight). Almost as soon as the new F-4's were received VF-33 was once again deployed to combat, this time to South-East Asia onboard USS America (CV-66). During their time in theatre VF-33 dropped over 3,000,000 pounds of ordnance! This was in the space of 4000 combat hours flown over 5 months. On the 10th of July 1968 a VF-33 bird downed a MiG- 21C, the first air to air kill by an East Coast Fighter squadron over N.Vietnam. After returning from Vietnam VF-33 continued it's association with CVW-7 and USS Independence (CV-62), deploying most years. Several awards were won during this time, including the CNO safety award in 1969 and 1970. The 75-76 cruise saw the squadron win the Golden Tailhook Award,21 points
-
The new 1/72 Airfix Gladiator is a real sweetheart of a kit. No flash and any mold seams are slight and easily dealt with. Fit is as with all new Airfix kits, precise to the point that you need to be very careful during clean up not to remove too much anywhere before checking. I did mine OOTB with the exception of using the S.B.S. rigging wire set. (#72046). It gives you a complete set of rigging all pre-made to the correct lengths. You do, however, need to pre-drill holes to receive the wires, so advanced planning is necessary. As they are made in a silver metal, I painted mine a darker metallic color before cutting them from the fret. Almost all the wires fit spot on, but a few needed a slight bit of tweaking, probably due more to my assembly technique than any error on their part. The only thing missing is the antennae. It would have been nice to get that as well, but it's either easily made or can be omitted entirely from some versions on the a/c. I did mine in the camo of the Swedish volunteer unit that flew for the Finns during their war with Russia. (P.S. Notice how I forgot to remove one of the pieces of masking from the left rear of the canopy. What a twit. Problem has since been solved.)21 points
-
Hiya Folks, I was so pleased to hear that Valom were releasing the Vickers Valetta as a 1/72nd scale kit and as soon as it was released I bought `a few'! The kit is lovely and I can very highly recommend it, although the instructions can be a bit obscure in places and photos of the real aircraft are a real bonus. The decal sheet is quite limited too as the roundels are the wrong size and there are no wing walk stripes, which were prominent on the real aircraft....... hopefully a decal manufacturer who specialises in post war RAF decals might help fill a void,...I have dropped some hints and provided some info! Here is my WIP if anybody is interested; The Valetta which I have modelled is VW202/C of 84 Sqn which took off at daybreak from Nicosia, Cyprus along with 17 other Valetta`s from 30, 70, 84 and 114 Sqn plus 14 Hasting`s from 99 and 511 Sqn`s to take part in Operation Telescope, the Airborne Forces element of Op Musketeer, the Anglo French operation to regain control of the Suez Canal. These aircraft were to drop 668 men of the 3 Para Group consisting of 3rd Battalion The Parachute Regiment plus attached arms onto El Gamil airfield on the 5th November 1956 while French paratroopers along with British Royal Engineers and The Guards Independent Company `Pathfinders'also took off from Tymbou, Cyprus in their French Noratlas transports to jump nearby at Port Fuad, the plan being to hold both flanks of the invasion beaches for the troops coming ashore next day. Each Valetta carried 20 paratroopers and 7 of the Hasting`s carried 30 paratroopers while the remaining 7 carried a smaller number of troops plus the heavy drop consisting of Jeeps and trailers/anti tank weapons which were mounted under the fuselage on special beams. As the formation approached El Gamil a Canberra dropped a smoke bomb to mark the DZ and help assess the wind which was critical as the troops were jumping along the runway and there was water on either side. This forced the pilots to fly directly into the low rising sun but this had already been accounted for and tinted screens had been erected inside the windscreens to prevent the crews from being dazzled and the first troops jumped over El Gamil right on time at P-Hour which was set for 0515hrs. Small arms fire from the ground was encountered and a number of aircraft received hits, as did the men under their parachutes including the battalion doctor who was hit in the eye and wounded,.... but the entire drop was completed within 10 minutes and all of the aircraft returned to Cyprus safely while El Gamil airfield was swiftly secured within 30 minutes following heavy fighting. A follow up drop arrived later in the day consisting of 2 Valetta`s and 5 Hastings bringing in 3 Para`s D Company and more supplies including an ammunition resupply. The British Para`s fought along the narrow istmus where the airfield was located and down to the main beach defences in Port Said which were captured and held until the amphibious landing the next day, the 3 Para Group lost 4 men killed and 32 men wounded during the assault and subsequent fighting and the amphibious assault was a great success,..... including the very first use of helicopters in an amphibious assault. Although the military operation was a sucess,... the politics were not and the British and French were forced to withdraw under the threat of nuclear attack from Russia and financial ruin by the USA and the Anglo French built Suez Canal remained in Egyptian hands. My father in law was one of the men who stormed the beach and I am proud to know a few of the men of the 3 Para Group who jumped at Suez,.... the last time that British Airborne Forces have parachuted into action in large numbers. Here is the aircraft that I am depicting; And here is the model; And seeing as I ws asked,......here is a comparison between the Valetta and the Dakota too; All the best wishes, Tony19 points
-
Hi fellow modellers, I just finished my third build after coming back to the hobby after an absence of more than 10 years. It also counts as a Covid build since we were in quarantine for a long time… I had to pause the build when we got infected with Covid in april, Its what they call mild infection but we were pretty sick.. my wife is a nurse and she got it at work. Three weeks ago I got to go back to hospital because I got memory problems and its a good chance that it was Covid related… took me out again for some time… modelling is what kept me going in between sick periods. But now I am better and was able to finish the build. Sorry its another Tamiya P-38F.. but I hope you like it!19 points
-
Finished, just in time - Re.2000 from Special Hobby has just arrived, there will be another Italian in the collection. Re.2005 from Special Hobby will wait its turn. As for Re.2005 from Sword, I can recommend the model to every fan of Italian aviation. Nicely detailed (e.g. resin exhausts make a great impression), but without a deterrent exaggeration, fit is OK, and despite the fact that some details are vague (the barrel outlets in the top engine cover are probably the worst), I rate the model as a strong 4 on the five-point scale. I did not add much from myself, some tube in the cockpit, barrels made of brass tubes, antenna installation (Uschi line 0.02 mm, insulators from a cosmetic stick). The entire airframe was riveted on the basis of a template from the available plans. Painted with MRP and Lifecolor paints. Washes from MW, pigments from AK. Hope you like it :)19 points
-
This is the 1/48 Revell British Legends kit (reboxed Hasegawa). This is my first Revell/Hasegawa Phantom in 1/48 scale. Not my best work but not my worst. I did enjoy building it. Coming off building Tamiya F-16's and F-14's I knew I was in for a challenge so I did alot of dry fitting, sanding and filling etc. Overall, I believe it helped me in certain skills. I still can't believe that this mold is at least 30 years old or more and no other company has a molded FGR.2 in 1/48 scale since the RAF and Royal Navy had so many cool markings and options. I am now a Phantom fan and will be building many of these. This build was OOB and I added the usual sea blur from Coastal kits and cut it down to ft the base which I got at a local art supply store which I stained and colored. i waited almost one month for the decals from Hannants to show up in the mail and they are the Xtradecal RAF Phantom FG.1 and FGR.2 part 4 sheet. The stencils (which were never ending) came from the the kit itself. It had a few options and luckily the right stencils came with the kit. The clear riser is from "Wings or the Great War" which i found on amazon (only available in the US). I am happy with the outcome and learning more as I go. It's nice to get back into building after not doing so since I was a teen. I wanted to represent "Desperation" conducting a patrol over the waters of the Falklands Thanks for looking Fgr.2 by Reginaldo Reyes, on Flickr Fgr.2 by Reginaldo Reyes, on Flickr Fgr.2 by Reginaldo Reyes, on Flickr Fgr.2 by Reginaldo Reyes, on Flickr Fgr.2 by Reginaldo Reyes, on Flickr Fgr.2 by Reginaldo Reyes, on Flickr Fgr.2 by Reginaldo Reyes, on Flickr Fgr.2 by Reginaldo Reyes, on Flickr Fgr.2 by Reginaldo Reyes, on Flickr Fgr.2 by Reginaldo Reyes, on Flickr Fgr.2 by Reginaldo Reyes, on Flickr Fgr.2 by Reginaldo Reyes, on Flickr Fgr.2 by Reginaldo Reyes, on Flickr18 points
-
Hi all, I am finally able to get the second member of the Sarcife trio rolled out and RFI for your delectation 😊. It follows my earlier AD-4N, The link being the French pilot, Jacques Borne. Jacques had 663 hours on the Magister. The Groupment Aerient Presidentiel de Gabon (GAP) received four of these machines, while the Gabon Air Force is reported to have also received three (to be confirmed). While their role was formally to protect the head of state in practical terms it was ceremonial to a very great extent. These aircraft came from Austrian stock and, following Gabonese service, this machine – TR-KFJ/368 – went to the Congolese Air Force as 9Q-CPC. It was previously 4D-YQ in Austrian service. https://fougastribute.forumgratuit.org/t192-le-fouga-au-gabon-entre-1975-et-1990 The kit used here is the exceptionally fine Special Hobby offering. It is super-detailed, and I’d venture to suggest that it is the best in scale for this machine. There are a few fit issues but essentially it is a nicely engineered kit. My main area of angst was the upper nose gun section – which is slightly narrower than the lower section. To correct that I inserted a small shim after halving the section vertically (thanks for the encouragement @Wez). For anyone contemplating a similar build be aware that there are many minute parts! Also, the French liking for complex canopy mechanisms did not help, either. Having said that I managed to corral them and get them in the intended locations. Note also that the nose guns do not fit too well. I replaced them with Plastruct rod. For the markings I used the Max Decals set Fouga Magisters Part 1 (7205). The decals settle beautifully but I quickly discovered that they are not accurate in dimensions. The wing roundels are too small, the side pennants are too big, for example. In fairness it was a set that was designed before the SH kit came along. Anyhow, as it is the only option (to my knowledge) I soldiered on and got a nearly decent representation of the aircraft early in its Gabonese career. What did I use? 1. Kit – Special Hobby Fouga CM.170 Magister (72284) 1/72 2. Aftermarket – none 3. Decals – Max Decals (7205) See above, some kit stencilling and warning marks, 4. Paints – Humbrol Polished Aluminium (27002), Matt Black, Steel (27003), Gunmetal. Model Masters Fluorescent Orange-Red undercoated with white and yellow. Various other Humbrols. All enamel. Finished with Humbrol Satincote. 5. Other – broom bristle for the dorsal aerial. 6. Weathering etc – Flory Dark dirt to accentuate the numerous hatches etc, kept to a minimum plus a few wipes with Tamiya Weathering Powders here and there. I hope you like her. Now on with the third part of the trio 😊 Martin PS: now to get the Harvard III done16 points
-
Hi folks, this is the Dora Wings kit built with couple of mods for the upcoming Airframe Detail No.9. Not an easy one, but definitely looks the 'Lizzie" every inch. Painted with Gunze H and AK Real Colors, markings from the kit - V9287 from 161.sq (SD), Tempsford. Cheers Libor15 points
-
Hi all, my latest offering to the modelling gods! A bit of a struggle all round, not helped by the many trials and tribulations thrown up by Real Life during 2020... Anyway that aside, for the most part it was a fun build - the headaches were, as is my habit, almost entirely self-created. The WIP thread, for anyone interested, can be found here. Aircraft of this type were the mainstay of the RFC training units in Canada during WW1. The markings depict an aircraft of 'C' Flight, 88 Canadian Training Squadron, 44 Wing based at Armour Heights Field, Toronto, during 1917/18. One of several very interesting photos I found on-line was of this very aircraft, in flight over Central Ontario: (Image in the public domain) Hawk-eyed individuals will note, perhaps with the same level of incredulity as I did, the presence of the trainer on the wing adjacent to the trainee's cockpit whilst approximately one thousand feet above the ground - no doubt explaining to his pupil, in words of one syllable, the fundamentals of flight! So without further delay, here are a set of photos of the finished article: Thanks to everyone who looked in, commented etc on the build, your interest was much appreciated. Comments and criticisms, as ever, welcome14 points
-
Evening all, Here is my finished F-22 Raptor in 1/48 from Hasegawa. This was my first experience with Hasegawa and I am very impressed! That said, I did add a few details, mostly to the cockpit - all of this is in my WIP thread: Here is the finished build: Some detail photos of the cockpit: Thanks for looking!13 points
-
Having built an amount of axis tanks and aircraft over the past years I thought it time to try my hand at an allied aeroplane for fear of favouritism . This is the 1/48 Eduard Profi kit of a Mk.VIII Spitfire and my first attempt at one of their kits and I have to say they are top quality with crisp detailing and almost perfect fit of parts along with many decal options, not to mention the photo etch parts. Suffice to say this won’t be the last Eduard kit I’ll be building! Anyway, this is built out of the box using Ultimate Primer, Tamiya paints, Humbrol lacquers, oil paint wash and weathering powder. Low resolution photos are courtesy of an ancient iPhone so apologies for that and I really must invest in a proper camera. As ever, any constructive criticism very welcome.13 points
-
Hello mates, here my Mersu Mercedes by eduard built recently with changed (very nice) figures from CMK (they were german from Siebel accessories), now finnish with selfmade caps and finer details. Before research i didnt knew how dirty the finnish Gustavs were in the 1950ies! Only flying full throttle, no cleaning anymore! Fun only for the Finns! Cheers, Tom13 points
-
Hello, this is a Cessna T-37 converted from the Trumpeter A-37. It belongs to the 89th Flying Training Squadron, Sheppard AFB. Decals were self made...12 points
-
Thanks Keith Tilly is very cute and takes advantage of it frequently. No relation to Mols though… they're both 'working cockers' on their pedigree certificate but Mols is at least three times bigger: Thanks Johnny Well, you were warned! The problem with having three on the go is that, when you've masked one: …especially where the 'tape for curves' keeps lifting, even after stretching: …looking at the other TWO drains the mojo Backgammon this morning. I may force myself to do more later. Maybe.11 points
-
Hi guys, While working on my North Africa themed subjects (currently working on Hobby Boss DAK Panzer IA, WIP soon to come), I did a little detour with this subject. It was a quick-build, straight from the box. I am no expert for French tanks and I decided to keep research to minimum as well. So I am sure there are many inaccuracies. The only change I did compared to the official Tamiya instructions is color scheme. Even though there were all kind of camouflage combinations used on this subject, light green proposed by the instructions was not very convincing to me, as it didn't match any particular paint choice from the official directives. So I just selected colors (from the Hataka French WW2 set) that matched reference photos the best and one of the combinations that was mentioned in the directives. I also did one experiment on this. As I find Hataka lacquers quite durable when fully cured I decided to do the paint job without any primer and without any clear coats. No primer was not that good idea (I had some minor chipping when pulling masking tape), but I was quite happy with the decision to not use any clear coats, as I like the Hataka semi-gloss finish, especially for the vehicles that were not exposed too much to the harsh conditions. Anyway, It's painted with Hataka lacquers, weathering was done with a combination of Mig's Europe Earth, Dump Earth and Earth and mix of 2 - 3 pigments. The build itself was super easy (as expected from Tamiya kit). I didn't even had any problems with indy link tracks, there were minimum cleanup involved. The only thing worth mentioning is that I was not able to complete the track with 102 links as recommended and I had o use 104 links. Also, photo-etch straps for stowage and tools would be welcome. Looking forward to your feedback. Cheers.9 points
-
Weasels of the 128th Tac Fighter Squadron, 106th Tac Fighter Wing, Georgia Air National Guard out of Dobbins AFB at the Red Flag 81-1 exercise, Nellis AFB, November 1980. 62-4423 62-4444 63-8304 63-8313 63-8328 Thanks for looking, Sven9 points
-
Evening Ladies and Gents, I have a story to share. Behold this marvel of Soviet engineering, the MiG-15. I’ve been told that a couple of them have been built over the years. This one is mine, and, well, the build was... an experience (i.e. horribly cursed). So it all started when I tried to assemble the fuselage. The halves wouldn’t fit and I had to do много sanding. Then when cementing the wings, I realized that I had done the wrong variant. The seat kept falling out of the cockpit, and I forgot to glue the ballast, resulting in it all leaking out. I planned to use maskol to mask the blue camo lines, but when I opened the jar, it had hardened into a solid mass. When painting, the white didn’t come on right and I had to sand it and redo it. The bombs wouldn’t fit on the pylons, the right wing broke for no reason, and when I was finally putting the decals on, they inverted on themselves. Finally, the wash I used leaked out of its bottle. Nonetheless, I soldiered on through and eventually triumphed. Please pardon his appearance, the rear canopy is still drying. This came as part of the Royal Class Quattro pack, so there’ll be more to come (I’ve heard nothing but praise for these kits, so hopefully the next are not nearly as painful as this one). Cheers, Olivér9 points
-
Hello fellow modellers, In my introduction round as a newbie here on Britmodeller.com, I have already shown two photos of my latest built model, a RAF F-4 Phantom FGR Mk.2 from the former RAF airbase Wildenrath Germany, 92 squadron.. Below the entire series of this beautiful kit from Revell which is actually a rebox of the Hasegawa kit. I used some extra's to build this kit, from Eduard the resin seats, cockpit PE and the AIM-9D Sidewinders. The resin FOD covers are from AMS. For the decals I used a set from Xtradecal. I hope you'll enjoy the pics...! Cheers, Jos Saturday 21 November 2020: Today I won "Silver" in an online competition with my Revell/Hasegawa F-4 Phantom FGR Mk2 from the former RAF AFB Wildenrath in Germany. My model was rated in the category: Military Aircraft >72. Due to corona, the Dutch ESM could not take place physically, so they decided to do this show online. I am really pleasantly surprised by this fantastic result...!8 points
-
Hi All. I'm a bit late to this party! I was going through my stash last night and found this hiding at the back of a cupboard: I remember building this as a kid and it turned out into a semi-decent model - certainly by my standards back then! I then remembered this GB was running, and thought it really should be built again... My plan is to build OOB, but to a higher standard than when I last made it. No improvements to the basic kit - I know it is inaccurate but I want this to be a nostalgic build rather than an accurate one. Here's a shot of the sprues, which are dated 1973: Hopefully a quick build and a trip down memory lane at the same time!8 points
-
Done.---John8 points
-
Sea base, yes; personally I far prefer ship models in their element, which is also why I have built her waterline (the kit does provide the lower hull if you want it). Likely to a fairly simple one where the sea is relatively calm - I’m already committed to a ‘roughers’ one for Ark. Also a few figures, but not many - and definitely no 1/350 Crisp; you’ll have to assume that I am chained to the chart table at the back of the bridge, as I invariably was when at sea in Dido. After all, at the time I was a 19-year-old Midshipman whose ability to distinguish posterior from elbow was intermittent at best! Post-Dido, next ship likely to be Broadsword, which probably will have a Mini-Me on the flight deck.8 points
-
Next silly question 😎8 points
-
Jamie, So true, so true. Having spent time in the Service myself and, later in the Australian Defence Department, you do need to understand the stores system and nomenclature if you want to get the correct item. Names and descriptions are often given incorrectly in other documents, basically due to human error or just plain laziness in finding out the correct description. There were four types of Sky paint available during the war years, 1. A nitro-cellulose dope. (for fabric). 2. The original matt cellulose paint. 3. A matt pigmented synthetic resin. (The 'smooth' paints). 4. A matt pigmented lanolin solution. (For use on sections of seaplane that were underwater when at rest). Post war, the DTDs 751, 752, & 753, specifying improved dopes of low, medium, and high taughtness were introduced. Attached below is a brief section of an EXCEL document I have been compiling over the years as I gather information about the RAF, (and RAAF), finish specifications, their service store numbers and description, and manufacturers' codes and descriptions. I have added Sky Blue and Sky Grey to the Sky section, just for the hell of it. A point often not considered by modellers is the type of paint, (or dope), i.e. its chemical composition. This had an effect on the surface finish and also, to some extent, on the hue, not to mention variation within the specified standards by the manufacturers. Each finish had, amongst others, specified standards for hue and surface finish, but there was some lattitude allowed to manufactures. One also suspects that during wartime, extra lattitude was given, just to get the product. As to variations in finish when applied to aircraft in service, that's a whole new can of worms. We modellers have become too consumed in trying to get the 'exact', 'correct' shade of paint on our models, when in fact there is no such thing, as any inspection of a service aircraft, (not a restoration), will show.8 points
-
Update #2 - Construction continues I’ve been slowly working on this Hurricane kit and have just cemented the fuselage to the wing and cockpit assembly. I can’t quite work out what’s wrong with my kit, however I’ve had a tricky time just getting to this stage. For some reason the lower wing seemed warped and did not want to sit nicely within the lower fuselage opening, so I’ve had to apply CA to the front section and tightly clamp this in place until the glue set. Then I repeated this action to the rear of the main wing and now hope it all remains firmly in place. To be honest the initial fit was actually worse, so I cut away the forward section of the cockpit framing which helped it slot in a little better. I’d be interested to know if this is a typical trait of this kit, or (hopefully) just an issue with my copy. Anyway, now that this major step is over I’m hoping the rest will just fall into place like it should. Cheers.. Dave8 points
-
Yep - they said "Just stick it on my bill." Ok8 points
-
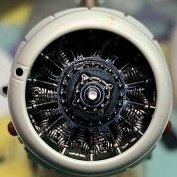
B-52s are festooned with various lumps and bumps covering a wide array of sensors and jammers etc., but these are not covered by Sanger so it's a case of making your own. So when it's a rainy afternoon, it's time to get out the BUFF and Milliput... Untitled by Thomas Probert, on Flickr First off, the rear fuselage has this (what I presume is) chaff dispenser that later model Hs don't have: Untitled by Thomas Probert, on Flickr This was swiftly removed with a razor saw to make way for a new fairing to be made: Untitled by Thomas Probert, on Flickr Speaking of making fairings, I've adopted a fairly fool-proof method of getting a snug fit to the fuselage. Step 1: place some masking tape on the area the fairing will sit, and then make an approximate shape of the required fairing in Milliput: Untitled by Thomas Probert, on Flickr Step 2: When fully cured, remove the tape (which by default removes the fairing,) sand to shape and then reattach to the fuselage for a perfect fit: Untitled by Thomas Probert, on Flickr There is a fairing in place of the chaff dispensers on the rear fuselage, as well as one on either side of the fuselage near the rear landing gear bays: Untitled by Thomas Probert, on Flickr As well as two atop the forward fuselage: Untitled by Thomas Probert, on Flickr As you can see from this image, I've also started adding the various strengthening plates at the upper wing-roots and atop the mid-section: Untitled by Thomas Probert, on Flickr Until next time, Tom8 points
-
DH 106 Comet C4 Amodel 1/144 I bought the Amodel Comet 4C intending it to be a simple build to add to my theme of 1960's - 70's RAF aircraft in 1/144 scale. How hard could it be? After all there are just 2 fuselage halves, a 3 piece wing, a fin, a single piece tailplane, and the undercarriage. And then I read this thread going on in the civil section. Suddenly it wasn't so simple. Many thanks to Tommo and Skippiebg who added much useful information. It turned out that the kit is undersized in both fuselage length and wingspan. Anyway, I persevered and stretched the fuselage, and increased the wing area, (the WIP is here), reshaped the nose, and have now finished. It makes a change to see a civil airliner in uniform. The C4 was the the same as the civil 4C and in fact this particular aircraft XR395 was sold to Dan Air and became G-BDIT. I remember seeing it parked up at Blackbushe airfaild in the late 70's, where it was planned to turn it into a cafe/restaurant, but sadly this never happened and it was scrapped at the airfield. Decals are from 26 Decals, and were a pleasure to use. and the finally 'with something else. I'll need to crack on with the VC10now ! This is briefly what was needed to correct the kit, lots of plasticard and milliput: Thanks for looking, John7 points
-
Hiya Folks, Whilst copying photos to Photobucket I thought you might like to see some of my cellar........showing where I keep the rest of my built up models! Everything is 1/72nd scale....see how many aircraft types you can spot! I`m just having a change around and the same shelves should be bulging with naval types soon! Cheers Tony O EDIT,.... As well as adding new pics above to replace the Photobucket ones,..... hee are some pics of my cabinet too,.....it has since filled to bursting point! Cheers again. Tony7 points
-
Hello modellers. Thunderbolt and Lightnings Another 1/48 diorama completing the trio (excluding the figures). This one is featuring a P47D of 78th FG, Bofors gun and another 'follow me Jeep'. Just because you can never have enough black and white checkers. The two other diorama feature P38s of 20th FG. The runways edges are supposed to link up to create a bigger scene.7 points
-
Playing with the printer again today, this lot took 30 minutes to print as a single group. The key thing I needed was the 2pdr mount seat, but as its sort of free to do the others , I threw in some lifebuoys and those small rice seed like objects are bottle screws to take 0.5 mm wire for the mast stays. Also in this set are some 2pdr ammo in a 42 round block (hard to see, out of focus a bit. Both 2 pdrs have a 42 round magazine feeding 3 14 round belts. I need to work out how to mount the magazine on the guns so thought I [rint the ammo to try. Once I'm happy, I'll add the magazine to this artwork so it slots on I've also been painting. The superstructure has two coats now, and the main deck just a single light under-coat. All interim of course and pre-weathering, still she's looking very smart The torpedo tubes are still in primer btw. You can see the additional handrails here, the deck line still needs a tidy-up. But the best bit is the name plate... I have no clue if they carried one, but they should have and if they did, this is certainly where they would have mounted it. I love relief etching.... You can also see that the windscreen is completed now amnd mounted. The whole superstructure is still removable btw, it slides into place, hence the perfect paint line.... That tank is for paraffin, aparently.. I've painted the filler cap matt red, but if anyone knows that colour a paraffin tank cap would be, please enlighten me. That deck looks very grey in the pictures, but it actually quite a blue grey in real life, my own mix for MS2 and the white is a creamy off white Steve7 points
-
I've painted up the interior, and got the ip on , I'm not too handy with the brush work , but I've still cut out the pilots door , now I'll have to paint the frame interior, and sort out any other bits I'm having inside, Cheers all The ip decal folded up on me and i lost it, so i filled in the instrument holes with white glue7 points
-
Decals arrived late last week (three weeks from Finland), so this weekend I was able to finish up my Electra project. Here are a couple of pics at the finish line: More photos in the RFI section, here: Thanks to everyone who followed my work and contributed suggestions and comments! Special thanks to Colin for the excellent drawings, Moa for research, and Mika at Arctic Decals ( www.arcticdecals.com ) for providing the custom markings I needed.7 points
-
Here's my Heller 1/72 Dragon Rapide:7 points
-
This was a fun one...WiP is here --Many thanks! John M.7 points
-
My poor worn out Nugget Buster South Pacific style.1/48 Tamiya F4U-1 Birdcage Eduard P/E set and a few minor modifications7 points
-
Sorry, they are phone snaps, which is awfully lazy of me. In my defense its unusual for me not to get distracted from the actual task in hand, like spending more time photographing a model instead of knuckling down and building it! I really enjoyed getting stuck into putting some colour on the Blenheim today. (Helped by having the house to myself for most of the day!) And the masking took a fair bit of concentration. Gordon, I am with you on this one. I don't think it is technically correct for this particular finish, but it does look good. You can see I used paper masks and tape. Where I used tape I tried to tease the edges away from the model slightly. You can still tell where I have used each technique, but I hope it's not too offensive. I can happily live with it I think. I'm just happy I haven't ripped off massive chunks of paint with the tape. There are several bits that need attention, which I'm itching to crack on with as soon as I've posted this. Please forgive any bad grammar in my haste! Painting the pre war Blenheim MkI by Mike, on Flickr Painting the pre war Blenheim MkI by Mike, on Flickr This proved a rather tricky area. Not helped by me forgetting to paint the top of the rudder on this side in the dark earth first. Also, I made mistake in not laying down the dark green heavy enough in a few places, and then having to try and refit the paper masks in exactly the same place again! Painting the pre war Blenheim MkI by Mike, on Flickr One of the places I had to revisit. It turned out far better than it should have! Painting the pre war Blenheim MkI by Mike, on Flickr The masking here is a little scruffy, and you can see I used tape, and it wasn't lifted proud of the model. As this is where I am going to chip the paint slightly I'll leave it for now. If the chipping goes west I'll address it when I repaint. Painting the pre war Blenheim MkI by Mike, on Flickr Painting the pre war Blenheim MkI by Mike, on Flickr A few spots of paint lifted underneath. Not bad for cheap Lidl masking tape. A little paint loss after removing the masking tape by Mike, on Flickr A little paint loss after removing the masking tape by Mike, on Flickr Overall I'm very happy with this, my first attempt at RAF camo since the 1980's ...7 points
-
The location for the main supporting beam for the wing structure is measured and drilled, then the tube is inserted through the fuselage at floor level. Locations of the vertical supporting members are drilled in the lower surface of the wing, where the spar is. The vertical mast positions closer to the tips were drilled through. A vertical member brass tube is inserted as a dry run, it's standing snugly by itself: I thought that I would use the Albion Connecto P.E. set for this build, but then decided not to in this particular case, as it would make life unnecessarily difficult. But it has its uses, needless to say:7 points
-
Probably a red herring to point out capitalisation, but as with most armed forces, if you actually want to obtain a can of paint you need to requisition it using its correct name and stores number in order to get the right colour in the right formulation in the right size of can. Everything worked by stores or catalogue numbers in the normal logistical supply chain, precisely because one often ended up with amusing stories for the grandchildren if requesting something without knowing the proper catalogue number - e.g. Lt Cdr Peter Scott requesting 2000 maps of Iceland when the Royal Navy set up base there and being sent just shy of 2000 maps of Ireland, and the remainder being of Madagascar - or, indeed, the short term chaos caused by whomever first wrote the signal instructing the use of Sky Type S but calling it Duck Egg Blue. A significant portion of my week during RAF Initial Officer Training was spent on learning how to write in an unambiguous and very explicit fashion for this reason. Anyway, there certainly was confusion reigning for a portion of 1940 in the RAF as well as the RN and probably the British Army as well, but hard lessons were learned in that if it's at all possible for someone to misinterpret then you can be certain someone will, and therefore to communicate instructions clearly and unmistakably. I don't have copies myself but I do know that copies of RAF stores numbers for paints do exist which denote the chemical type, the can size and of course the colour - and the official name was Sky from the outset, Sky Type S for the smooth finish stuff specifically. When the Ministry of Aircraft Production started ordering aeroplanes from American companies, the specifications sent were likewise called Sky. ANA610 is described as Sky, and even prior to the ANA promulgation even DuPont's equivalent was catalogued as 71-021 Sky Type S Gray with particular mention of the gray part which was anomalous and indeed 71-021 was probably a better fit to the colloquial "Duck Egg Blue" description than the stuff they were asked to match (Sky) was. One may muse at what precisely it was DuPont actually received as a sample to match since the rest of them were pretty good matches for the MAP specs. The timescale would fit fairly well for the calamity our Duck Egg Blue friends unwittingly caused. Having spent a bit of time reading 80 year old letters in Kew, this sort of thing was by no means unique, but something all parties wished to avoid nonetheless. One will find letters enquiring about rumoured stuff, replies fleshing out the official status, further letters requesting samples to match to and so on. The organised memos to operational units were generally better executed than this one insomuch as they were drafted, checked for clarity, approved then issued. One does tend to find a paper trail of the odd correction or clarification, which simultaneously suggests some notable variances out in the field but also that people were indeed checking and that life in the forces wasn't a massive free for all. If we have a clear understanding of the official standards and the typical weathering characteristics of each paint (some susceptible to chalking whilst others more to photo reaction of one or more pigments), along with the camouflage policy and its chronological evolution we can make informed decisions about deviations for artistic license, which I do indeed do on my own models. I just like a known good starting point and a conscious decision about what direction I'm adjusting it in.7 points
-
My recent and other current builds all seem to have been (or still are!) a bit finicky, and I'm hankering after something nice and straightforward. Hence I'm going to start my Tamiya Bf 109 E-3; I've got the Xtradecal Luftwaffe Battle of Britain sheet on its way, and I'll be building one of the yellow-nosed schemes from that sheet.6 points
-
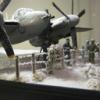
I think a suitable subtitle to this one would be, "Go on, Sir, You tell 'im!" This is a scratchbuild which has taxed the spares boxes, but it has been rather enjoyable. The idea is that after the battle is over, there needs to be a period of tidying up. So, a vehicle of some sort, a trailer for the recovered scrap/salvage, and, in this case, a means of finding said salvage. Hence, a drone to overfly the scene and spot the goodies. I was pressured by persons anonymous to put this lot into a small diorama. So without further adoodoo's here we go. First off, a birds eye view of the scene. A lot of the kreiger action takes place in Australia. So here we are in the desert, next to a water purification plant. Not quite a moisture farm on Tatooine, but not far off and somewhat derelict to boot. And here's why I said it's, "Go on, Sir, You tell 'im!" I bought the Fighting suit ready finished from the bay. I have some others, but they are in snow camouflage. Not really suitable in this case. This vehicle is totally scratchbuilt. Bits of various tanks, Humvee etc, and the crane was HO scale. The round tanks in the background were Hugo Boss Orange aftershave. The RH one was originally in my old Misfit build from Saudi. I'm not sure how this would tow both trailers, but it could probably happen. The drone was a small scale Transall. Both trailers are scratchbuilt too. The mudguards are Airfix Tiger tank turret parts . The settling tank? seen here was a ship display stand. The springs are brushes for electric motors. The cones in the middle were from torches and the centre thing is an upsidedown 1/24th Pillar drill. I also took pictures outside in case it made them sharper. The drone landing gear should be removed for transport. Someone will be on a fizzer! Will it hit the trailer? A better view of the motor brushes here. Perhaps if the tank was full of water, they'd help with heat dissipation? And an eye level view. From the other end. I wonder what the outcome will be? Thanks for looking and your comments are always welcome. As are offers of money or chocolate. Have a look in the Work in Progress section for build details. Cheers, Pete6 points
-
Ok well here’s the thing. 🧐 I’m feeling a bit left out. You’re all at it. Well not you Giorgio but the rest of ‘em flaunting their multiple builds around like it’s the done thing! Even @CedB, @perdu and @Martian are at it. I blame @corsaircorp he’s the real multiple model enabler, the king of the build matrix, the wondering traveler, skipping from kit to kit like a social butterfly in cosmopolitan London. For every one finished there’s a five strong multi build around the corner. Well I can’t take it any more.🤤 I needs some of that action. 🤪 But true to form I’m going a bit different. As I don’t have multiple kits of the same thing.* They will all be totally different 🤔😩🤔🤪 all in one thread. I’m planning OOB but I just ordered some Eduard internals. 🤣 I can’t multitask for toffee but it’s going to be fun doing four kits at once! 😍🥳 Here are the kits. so what do you think? Something you might want to watch go slightly awry ? let me know. I’m currently building the belts for the Venom and have the aerials To do so there’s a few days before it starts. I’d be interested to see if..... we’ll you lot would be interested to see. 👀✈️🚁🛩🛸 Thoughts? Johnny 4x4 * That’s a lie I have another venom. 🦈6 points
-
Gave everything a shot of primer today. A couple of seams need a bit of extra work, but generally quite pleased. Thanks for looking. AW6 points
-
It certainly would have but by the time I realized that I already had most of the roof done. Another, and probably more important reason was that from the cant rail level to top dead center on the roof is only about 18 mm. I still have to put the ceiling panels in and add lighting etc. so that it can be seen in the mirror. Taking 3 mm away from that 18 mm would make the ceiling curve appear very shallow. Oh yeah.... and did it again this post too! Thanks Les. I'll keep that in mind for future builds you be as daft as me then Steve? oh, I can measure way more times than that and still get it wrong! Thanks Ced Thanks G Thanks Steve. Trained woodpecker eh. Can they cook and do the housework? 50 attempts at the same shade of Grey. After some severe sanding the roof started to look a bit better. I probably spent an hour or two over two or three nights making sawdust. Eventually I tired of tasting the stuff and decided enough was enough. I still had just under 1 mm to remove from the roof, but then sanity took over and convinced me that 1 mm oversize equated to roughly 25 - 30 mm or so. Would anyone ever notice, particularly as the roof will never be fitted to the main body? I'm calling it making a concession to scale effect! Once I had reached that point it was a case of filling the gaps using epoxy... followed by more sanding. Then I hit the beast with some primer. Overall, not too bad though you can still see the seams that were filled with epoxy, and the 3D printed parts at each end. The worst offender was this nasty gap - which was then filled with ca. Then sanded. Did I mention sanding yet? Groundhog day started with fill, then sand, then prime, then wait for primer to dry. I needed the primer on there as it was the only way I could see the actual finish on the roof, especially the compound curves at each end. Then go back to square one and fill, sand, wash, rinse, and repeat... time and time again With all this sanding one thing I was cognizant of was keeping the roof straight and true so frequent checks were called for. Around iteration 5 or 6 I had a small hump, but just barely discernible. By the time I got to iteration eleventy seven, the roof was in pretty good shape. I was still seeing some rough patches here and there with this being about the worst. Overall, I was reasonably pleased with the progress. Then I had a complete and utter brain fart and decided to coat the rood with fiberglass resin. Why? I'm not sure. I think I was thinking of sealing the grain etc and filling up some small holes in the epoxy that I couldn't seem to get rid of - but why I just didn't use ordinary wood varnish as a sealer, I have no idea. Guess how much sanding that took to get smooth again? I guess one benefit is that the roof is now very strong - surprisingly strong. I have even managed to keep the long edges straight while doing all this sanding malarkey. After another few groundhog days my brain needed something else to fixate upon. I decided it was time to fit some greeblies. Greeblies are always good. For whatever reason, greeblies always come with a sense of satisfaction and achievement once they've been fitted - just the thing for a mojo lift. Now, in order to greeblify the roof I need to find the center-line. Ordinarily that could have been a difficult job what with those tapered ends and compound curves and all, but would you believe I had planned ahead for this? No? You're right. I didn't, but in a stroke of good fortune, the printed parts I used at the ends were symmetrical had a center section 8 mm wide. Using that as my datum it was easy to mark off the center at each end. Then string some thread between the ends and tape it in place. Perfecto! A little while later and I had all the locations of the roof greeblies marked out and pilot drilled - taking care (wot! me?) to identify what type of fitting was used at each location. of course I couldn't resist test fitting a few of the greebles These were the vents I had produced at Shapeways before I got my own printer, and as always, the surface is quite grainy as Shapeways cleaners never do a decent job, and by the time I receive the parts it is very difficult to remove that grainy finish. The rotating vent is one I printed, but I've learned a lot about printing since then and I think I will try and redo all the vents to see if I can get them any better. Iin between bouts of watching paint dry I fidgeted, footered , and fettled some other bits. Mounted on the ceiling are some nice brass domed vents. Easy enough to print but I opted to go back old school this time and turned these on the lathe. Each one will have a 0.3mm rod protruding from the center which will then have a small handle mounted on the end of the rod. I haven't figured that part out yet as I am still making this up as I go along. While I was at the lathe I also turned these small fitting for the overflow pipes along with a domed vent fitted over the kitchen area. By the way - did anyone notice I'd been sanding again? An overall view of the roof and if you use your imagination here you can almost visualize what it would look like had I gone with plan A, revision 1 and actually fitted the roof So where are we now? Well, all the greeblies have been put in the greeblie box for safe keeping. The roof has been given yet another coat of primer - this time to be followed by some wet sanding, and if the result is anywhere near acceptable I may even try to throw some white paint at it until next time comrades6 points
-
I added most of the decals to my little Wessex today, they settled down well but are out of register and the roundels don't appear to fit too well under the windows, and seem to sit a bit low to me. I am not sure if the windows should sit higher up than they do. I have discovered that there are detail sets available for Mark 1's Wessex kits, so I think that I will have another go at one of these at some point in the future, adding some of those details to the build, that will give me the chance to check the window positions making any adjustments, if required. by John L, on Flickr by John L, on Flickr I have make a slight adjustment to the blue across the nose to accommodate the number decal, so once I have sealed the decals in I will re-mask and touch up in that area.6 points
-
More unexciting windows in progress, don't call me Safe Style and I will avoid too many pictures of the process (nor Anglian neither OK?) Other stuff also got done This Is on a self explanatory page getting me eventually to here. And Trim and tidy up when the Green has set. Tomorrow. Ciao.6 points


.thumb.jpg.c995f6673aea28e7e0666d95ea97dcf9.jpg)


Wedge-TailedEaglePortraitRaptorDomains.thumb.jpg.41a306d3445a68f0f2df773e01776ea6.jpg)


This leaderboard is set to London/GMT+01:00