
Leaderboard


Popular Content
Showing content with the highest reputation on 27/05/20 in all areas
-
In May 1940 the BEF found itself with its back to the wall and the call went out for the ships to rescue them. Various Naval vessels and over 600 'Little Ships' set out to rescue them from the harbour and beaches, This is my tribute to those men and boats that didn't come back WIP https://www.britmodeller.com/forums/index.php?/topic/235064445-dunkirk-tribute-completed/ Thanks to everyone who has supported and encouraged me along the way Stay safe Kev Ps BBC 2 tonight 7pm little ships18 points
-
KITTY HAWK 1/48 IVP/M KIT This is my latest Aeronavale model the Etendard IVP – built from the Kittyhawk 1/48 kit which is nicely moulded but I thought the instructions could have been better in being more precise in placing the smaller parts like hydraulic rams, vents, ejection seat harness, etc – lots of tiny bits to add so you have to be careful they don’t flick out of your tweezers and disappear lost in the carpet forever! The rear fuselage is provided as a separate unit with jet engine which I thought a bit gimmicky & needs careful work on the join if you decide to fix the tail in place – would rather have seen some intake trunking instead – despite that with a bit of care it makes up into a nice model. Included in the kit is a neat little boarding ladder – the bracing between the top rung and the pad that sits against the fuselage is not provided so I added that with a piece of brass wore bent to shape. Kit decals were mainly used but the pale grey numbers and MARINE lettering came from Berna Decals sheet BD48-47. I shortened the main undercarriage legs by 1mm and cut off the nose wheel fork and added a wedge of plastic card before rejoining so the angle was increased – both of which gave the jet a higher nose up attitude. I scratch built the intake blanks from plastic card and brass wire. Fitted an ALKAN POD made by L’arsenal to the outer starboard pylon. 625 LTR fuel tanks were fitted to inner pylons – these were spares from my Kinetic Super Etendard build. Wheel chocks are in resin by L’arsenal & are very nice castings A forward radar warning antenna was added to the fin leading edge & was also a spare from the Kinetic kit Painted with Hobby Colour aqueous acrylic – H304 FS36118 H337 FS35237 Below photo with Kinetic Super Etendard SEM Below - My current Aeronavale line up - the iPhone camera seems to have distorted the photo on the right hand side of this photo Cheers CJP18 points
-
It’s been a while since I last posted anything new so here is one I recently completed while in ‘lock down’. It’s the Revell/Monogram 1:48 Bf110/G2 the plastic dating from 1994. I’ve had this kit hanging around for quite a while now but being 1:48 and having little display space left I have been putting it off. Well, I thought I’d build it and find a home for it later. I’m glad I did as it was a very enjoyable build. The fit is excellent, the level of detail to me at least is good, surface detail is nicely engraved but does vary a bit - disappearing in some places under a single coat of paint. (I know a lot is written about deep panel lines (Airfix come in for some criticism) but personally I prefer them a bit heavier. The new Airfix1:72 kits for instance have what is probably overscale panel lines but with a nice wash/shading do give a great looking result. Probably not accurate but I think the visual effect is better.) Anyway, upper surfaces and mottle effect is done with Gunze acrylics – excellent paint. The undersides I tried to use a new pot of Humbrol 247 (RLM76) – Couldn’t get it to spray at all - constantly blocking the nozzle. So I mixed my own with a cocktail of Tamiya blues and greys. Not ideal but OK. One strange feature of the finished kit is the amount of camber on the main wheels – it looks a bit too much to me but I’m sure its accurate. All in all a recommended kit. Enjoy the photos. Cheers, Bob17 points
-
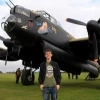
A project I started a good few years ago which featured in the WIP section here; I did eventually get around to finishing it after stripping it back and spraying it, but I never took any photos for an RFI and I figured it was about time, so here is my rendition of Avro Lancaster B.VII NX611 'Just Jane' The modifications to the base kit are as follows; - Eduard etched cockpit interior - Kitsworld decals - Modified tailwheel to A340 nose wheel type - Treaded mainwheels (Barracuda I think) - Modified Astrodome to Lincoln type - Canopy aerial bulge removed - Starboard side viewing bubble only - Payload bay door lifeboat cutouts - Starboard side fuselage heating vent - New, further forward mid-upper turret opening And with her younger Sister, a rendition of @richw_82's Shackleton WR963. Those of you who attended Telford SMW 2015 may have seen this on the Coastal command table. Admittedly it was rushed to get it there and it did survive the day, unfortunately falling to bits in a house move a few years later. I figured I'd fix it back up for this; Both airframes are finished to represent specific days in their history. NX611 is in her faded paint but with new Squadron letters from the Three Lancs event at East Kirkby which I attended and WR963 is modelled from the day she last did a fast taxy at Coventry and is a hybrid MR.2 / AEW.2 to suit with a cut down payload bay. Edit: Here is the RFI for the Shackleton. She originally had larger fuselage Roundels and the under-wing serials were wonky. The original decals were all Aeroclub and the replacements were Xtradecal; Cheers, WV90815 points
-
SEPECAT Jaguar T.2 31 Squadron RAF Germany, Bruggen, 1976 Italeri kit / Aeroclub seats / Aires resin wheels I built this Italeri kit straight after finishing the Hasegawa Jaguar T.2. It compares quite well and cockpit detail is better. The main shortcomings of the Italeri kit are the wheels (thankfully there are some good resin replacements out there), the seats (ditto) and the drop tanks which are about 7mm too long and mount too far back on their pylons. I didn’t find out about the tanks until final assembly when everything was painted but I seem to have got away with shortening them without needing to repaint. It just means there are now only 3 tressle markings instead of 4! Normally I would have repainted but I had a big dose of just-get-it-finished-itis. I’ve also just noticed that I forgot to replace the fuel dump pipe which disappeared sometime during assembly. Decals are from Modeldecal sheets and various other sources including the old ED Models Jaguar and Tornado codes sheet. I found that there is no aftermarket decal sheet available covering early Jaguar stencil data. Anoyingly, the Modeldecal instructions suggest using kit decals for these which with these old kits are usually unusable or incomplete. The 16 Sqn grey Jaguar is from the Hasegawa kit which I posted on this site earlier. I put Flt Lt Smith in the front seat so as not to have to drop the flaps & slats which seemed to be the default position for static Jaguars. He came from the Hasegawa Jaguar kit so he was already checked out on type. The centreline CBLS came from the CMR resin Buccaneer kit.14 points
-
1/72 Academy F-8 Crusader, 422d Fighter Weapons Squadron, USAF, Da Nang AB, South Vietnam, 1969 Well then, certainly not one for the purists.... I absolutely love the Academy Crusader - must be one of the best '72 kits ever made. I have built 4 of them now, 3 of them in their traditional grey and white. I do like throwing my own ideas into the mix now and again and have wanted to do a USAF Crusader for ages. So, here it is...! Depicted as an aircraft undergoing test and evaluation but on the front line of CAS missions in South Vietnam - why let the Marines have all the fun...!! 😉 Carrying a full load of Zuni's and Snakes. I have used etch for the seat handles and added a strike camera between the ventral fins. Decals from the spares box. I am really pleased with how this has turned out - I certainly haven't seen another one in this scheme before. Airbrushed freehand again with Tamiya acrylics. I hope that I don't upset too many of you....! Cheers all, Phil14 points
-
Evening all, Just finished off my latest build, Airfix's early ragwing Hurricane. I've hastily thrown this together as my original intention for build 13 hasn't gone to plan and has been shelved for the time being. Built completely OOB and finished as usual with Hataka Orange Line and Alclad, with W&N Galeria Matt to finish. Airfix 1/72 Hawker Hurricane I by Shaun Schofield, on Flickr Airfix 1/72 Hawker Hurricane I by Shaun Schofield, on Flickr Airfix 1/72 Hawker Hurricane I by Shaun Schofield, on Flickr Airfix 1/72 Hawker Hurricane I by Shaun Schofield, on Flickr Airfix 1/72 Hawker Hurricane I by Shaun Schofield, on Flickr Comments welcomed as always, Shaun13 points
-
Hello mates, here big new pics of my Blinder made with my newer camera 6500px. Full resolution in flickr download for details. Cant find old thread... New Edit: As for the questions of mates below i took a picture at Nuremberg, Trumpy is not convincing to me.... Cheers, Tom13 points
-
Finished quite quickly for me. This is the Airfix Mk I Spitfire fitted with the excellent 3D mod set with decals. No issues and a very pleasant build. Hope you like it. Keith13 points
-
Hi folks, sorry for the long pause between updates. No real progress right now, it's been a busy month. Our water heater sprang a leak, our basement had some light flooding, and so forth and so on. I also seem to have finally found a hobby more expensive and time-consuming than modelling: shooting. To compound the error, I've decided to reload my own brass and bought a turret press, so expect to hear I've blown my fingers off in the fullness of time. It was our Memorial Day on Monday, so I took the boys to the cemetery at Fort Sheridan to put a Union Jack on the grave of the sole British soldier who's buried there, Cyril Evans, who perished in this country after being liberated from a Japanese prison camp. This year, someone else had left a yellow rose on his grave. There weren't any on any of the other graves, so I can only assume Private Evans has picked up another friend far from home. I hope so. The boys wanted to come with me to place the flag, and I was very proud of them; they were quiet and respectful in the cemetery. Winston held my hand, and Grant held Winston's hand, and we made our way over and placed our flag. This year, due to COVID-19, there was almost nobody there, but I feel like it's at times like these that the traditions are most important to keep up. Mrs P and the boys may be off to Michigan next week, and if so, hopefully I'll have more time to work on the models.13 points
-
Good day, ladies and gentlemen! Let me present you my next model from Luft 46 series.12 points
-
Latest off the bench is this beauty from Airfix. It's not a perfect kit but absolutely worth putting a little bit of effort in to build a classic British jet, even if, ironically, I built it as an RAAF one. I never really had much love for the Meteor, in terms of ever wanting to build one but that all changed when I went to Australia in 2018 and was lucky enough to attend the Warbirds Down Under Airshow. There is a Meteor F.8 based there in these markings and it looks absolutely gorgeous, so wind forward to now and here she is in plastic. The current one isn't the original airframe and has differences that have to be ignored for an authentic build and hopefully I've managed to get something close to the original setup. Extras added were: Eduard Cockpit Etch Set Eduard Brassin Wheels Pavla Spent Case Chutes Master Pitot Tube. Everything else out of the box. Build wise there's lot of good detail in the kit, it just falls short on a short shot part (Horizontal tail is a bit short at the rear) and a fairly unnecessary gap on the wings. I though to start with that I'd got it wrong somewhere but I can't see any way to avoid this gap, as the bottom wing dictates the width of the fuselage at this point. Annoying but not insurmountable with basic modelling skills, which is good because that's all I have. All finished with Alclad High Speed Silver, Future and Xtracrylix Matt. The decals were superb and only my ham fistedness with a few, that curled up and caused endless cussing before getting them straight and in place, causing any headaches. But for good or bad here she is and, as always, comments welcomed. Onto the next which is equally as Airfix, British and early Jetty. More fun ahead I'm sure, now where did I put that filler. Pete12 points
-
What can you do. I have many models already completed but still waiting for this and that last touch that should come in the mail. But doesn't. So here is another project. It all started when I realized that I needed a pair of floats for a De Havilland D.H.89 Dragon Rapide. Since there are no aftermarket EDO floats for it, I acquired an old Noorduyn Norseman. The floats in the kit are not accurate, but can be improved upon. But the boxing came with floats, skis, and wheels, so no harm was done requisitioning those floats. And besides the design sort of grew on me. A quick search rendered a few attractive subjects, from which I chose one plane used by the US Forest Service. I think that is a good cause for any plane, to take care of nature, instead of obliterate it. Here is a link to a photo of the plane on Bill Larkins Flickr photostream: https://www.flickr.com/photos/34076827@N00/4425369018/ This is, as many of you know, and old mold, originally a Matchbox release, and then squeezed a bit more by Revell, which is my boxing. It is not a bad kit, but the flying surfaces suffer from Ribitis, that is, the inflammation of the ribs, in all flying surfaces. The parts were carried to the doctor, who happened to be Sanding Sponge Bob Doctor, that gave the patient a firm and repeated scrub under water, until the inflammation disappeared, leaving a more acceptable skin. So, without intention or premeditation, I found myself in the process of building a chubby Noorduyn Norseman. Other than show what I am doing, I won't abound on information since this kit has been with us since Victorian times. It is so old, that Revell actually blotted the original brand an date engraved on the molds. To the right and in the foreground, the original accordion wings, to the left and background, the sanding has already started: There is a difference: All surfaces undergo the same treatment: The floats that come with the kit (that I snatched and will be using somewhere else) are not accurate, and need re-working: All flying surfaces sanded down, all parts cleaned up and ready for assembly:11 points
-
Hi Guys, This is my first posting of a built model here, hope you like it. Its the brand new 1/72nd scale A9 Cruiser MkI from IBG, sold under their World at War brand. I have to say that for £9.99 here in the UK this is tremendous value for money. I'm no rivet counter (and there are lots of rivets on this kit) but it looks and feels like an A9 to me. The only deal-breaker for some will be the way the tracks are represented, and it really is a shame, considering what IBG are capable of. The wheels and tracks are moulded as a single unit as per some of the other kits they make. The problem here is two fold. Firstly the characteristic slots in the track surface are missing, and secondly there is no representation of the gap between the outer guide horns in the inside of the track. When IBG have done this on other kits I have of theirs it has been fine, as there was only a single centre horn, which is easy to represent with a two part mould. Outside guide horns would be very difficult to represent accurately without making the tracks a separate item. One could also open out the cooling slots over the engine bay. I dodged this with paint. I painted the kit in a Caunter pattern I found on the web using AK's Real Colours, thinned with Mr Color Self-Leveling Thinner I looked and looked for a prototype to model but couldn't find anything suitable so this is the finished thing with no unit markings. Probably overdid the weathering, but it looks more restrained in the plastic, so to speak, than in the photos. Next time, and there will be a next time, I really enjoyed building this, I will have a go at making the tracks look better. And add an aerial! I'm sure someone will come along and tell me why this is nothing like an A9, but It went together in a couple of evenings, fit was good to excellent and with the exception of the tracks was a hugely enjoyable experience, even masking the Caunter scheme. Highly recommended, with the caveats above. All the best John So on with the pics11 points
-
I present my recently completed 1/144 scale Roden C-47, in the markings of the aircraft used by 335 squadron RNAF to transport the King of Norway, during the early 1960's. The model was built as part of the Nordic GB, but missed the deadline due to some last minute issues with the decals, which were rectified very promptly by Vingtor.. The full WIP can be seen here Having built several DC-3's in this scale before (both minicraft), I think the Roden offering has the edge, in terms of looks and accuracy. Wheel wells were fully detailed internally using scrap card and rod, aerials and under fuselage radar bumps were scratch built. Paints used included Alclad Hi-shine plus Aluminium, Alclad White, MRP Luminous Orange, black and yellow. The dark blue trim on both engines and the fuselage cheatline were airbrushed using Revell Lufthansa Blue enamel. Decals are from Vingtor sheet 144-124. Although this sheet does give the cheatline, on my initial set, I experienced some cracking due to me having one of a small number of a bad batch. Vingtor were able to help me subsequently, but by that time I had already reverted to airbrushing the cheatline. I'm very pleased with the way the cheatline has come out however! And finally, here she is with her older stablemates: Thanks to all those who followed the GB, and special thanks to @trickyrich, @Col. and @Vingtor for their support and help! Comments and questions welcome Thanks for looking. Terry10 points
-
Hi All, Popping this one in here after completing her for the 'Built as a kid' GB. Cheers Nigel10 points
-
"Valiant and Brave" -SAR Sea King HAR3A (1:72 Airfix) Hi everyone, I hope you're all keeping safe and well. Well, my final exams are all done now, so back to the bench I go while I nervously await the results! This kit was given to me many months ago by a close friend at university, and I wanted to save it until I had the time to have a good crack at it. On with the build! Kit: Airfix 1:72 Sea King HAR.3/Mk.43 Paints: Vallejo, as always, along with (for the first time) a dash of Tamiya clear green to tint the upper canopy (I think it's worked well?) Decals: Mainly kit decals, along with some from the Xtradecal RAF Anniversary Update 2011/12 set *Disclaimer: The decals used represent a bit of a hodgepodge of various markings that the aircraft carried, and are not 100% accurate Scratchbuilt: The sensor pod under the port "stub" is entirely scratchbuilt, the aircraft instrument panel was scratchbuilt (not that's it's particularly visible), the riveting is all done by hand, and there's a full interior (it's just a shame I couldn't get the lighting/focus right to photograph it!). The filter "box" in front of the intakes is also heavily adapted from what came with the kit- I had some photoetch grill sections lying around, so I used those. I scratched some of the main rotor mechanisms and added the "whisker" aerials with thin wire. Well, there we are. I'm quite happy with the result, and I'm certainly tempted to have another shot at this wonderful kit from Airfix in the near future. Thanks for having a look! Best wishes, Sam10 points
-
I used an Obscureco detail set and Canuck decals for the 3 AW(F) OTU 'Bald Eagles' team from 1960 at RCAF Station cold Lake10 points
-
Ah, thanks heather! Redo: Something's in focus there. Shaky hands this morning. Any remnants of dark green are herewith to be referred to as 'pre-shading'.10 points
-
I could do with some new ones Keith I've ordered some of those 'adjustable spectacles' from the 'web and hoping it's not a fraudulent site - fingers crossed… Could be Thanks Ian Oi! Old age? Me? Thanks Rob I've painted the de-icing strips: Untitled by Ced Bufton, on Flickr Of course the rivets didn't help with the masking so I have some touching up to do. Can't face the framing today - a friend recommended 'Taboo' on the Tele and at first I thought it wasn't my sort of thing, but I persevered. Binge watched five episodes last night10 points
-
The detail on the fuselage is nice. Pity I don't know what was in the interior of the Forest Service plane, so I can't open the door and hatches as I often do, but I would love to: The engine is oversimplified and needs to be replaced. The instrument panel has detail, but looks smallish: The -now blotted by Revell- original branding: And now the flying surfaces are more like photos of the original plane: All this strenuous sanding exercise reminds me of the hard work on the despicable wings of the Handley Page 0/700 conversion I posted sometime ago. Only the most demanding training at the Shaolin Modeling Temple would allow a modeler to endure the rigors of such harsh endeavors. I can still hear the voice of Master Sandpaper (or was it Pat Morita?): sand wing, polish wing...sand wing, polish wing...10 points
-
Another memory jerker from me. This time it's Revells Bf109E in the picture box series, dating back to the mid sixties. The nostalgia angle comes from two directions with this build. First up, the kit getting built now was dug out of one of Tony James £1.00 bargain bin boxes in his Lavender Hill Comet Miniatures shop. Two unboxed kits at a pound each were part of a haul from a visit quite a few years ago. One in blue, one in grey. One set of UK Potters Bar instructions, one set of Venice Beach ones. Getting the kits home see's a couple of bits missing from each. There's enough to make one kit though. Seeing the Comet price sticker on the bags was memory jerker No. 1. I miss that shop a lot. The second and more relevant to the GB memory was first seeing the kit on the shelves of WH Smiths in the Earls Court Road when it was released. My usual Airfix kits came from Kenways, opposite Kenway Court, also in Earls Court. My pocket money at the time was 2/6d per week. An Airfix Series one kit was 2/- A Revell picture box kit, 2/3d. That extra 3d was a fortune to me at the time hence my mainly Airfix diet. The boxed Revell kits were for looking at only. I ended up with a few of the Revell range eventually and another model shop, Patricks in Fulham, was responsible for that. Their window displays would have me glued to them for ages on a Saturday. Whoever built their models had a liking for the Revell kits of the time. Oscars, Heins, Tempests, Corsairs, Hayate's, all built to very high standards. The bit that got me with the Revell kits was the little extras. For instance, the opening engine cowl on the Hayate and, now I'm finally getting to the point, an opening canopy on their Bf109E! I really did think that was the ultimate in detailing at the time. Never mind it opened up to reveal nothing whatsoever in the way of detail, not even an instrument panel, IT OPENED!! I built the 109, complete with opening canopy and was proud of it. I used Humbrol light blue for the sides and undersides, Airfix bottled yellow for the tail and spinner (starting a life long dislike of Airfix paint sat the same time). The fuselage mottle and the wing splinter cammo was done in Humbrol Shwartzgrun und Dunklegrun. I remember that very well indeed. The two greens were so close to each other it was hard to tell them apart. I used to add a bit of black to the Shwartzgrun to up the Shwartzness. As luck would have it a few years ago I bought a collection of built models and in it was a Revell 109 finished exactly as I did it. Quite amazing! The blue was the same, the greens certainly the same. It's one of my favourite models, mainly for the memories it evokes. Unfortunately it's not my original finally finding me again, it's better built than my effort back then. The weird thing is, the Revell instructions do not even mention using green! The colours called out are light blue for the sides and undersides and dark and light grey for the cammo. The unknown modeller and I both went against the instructions and used identical paints. Here's the built model itself... Fast forward to today and my latest entry for the GB. Normally I wouldn't think twice about the colour scheme I would be using. As per the first one, no doubt about it! The thing is, I already have a very well built one just like that. No point in another really. So this build will be getting the greys as Revell intended. It will look a bit odd to me, but it's going to tie together quite a few memories,including the future memory of this GB making it all happen. It's Karma man! Phew! That was a long winded intro for such a small kit! Tony. .9 points
-
Here it is all done, there is a WIP if you haven't seen it already. This was a Christmas present from the girls along with the update kit. This was supposed to be a summer project following my holiday of a lifetime after retirement, but hey ho. I started building on the 1st Feb and finally called it finished last week. LAV 1 by phil da greek, on Flickr LAV 14 by phil da greek, on Flickr LAV 37 by phil da greek, on Flickr So here we go, this doesn't represent one particular vehicle but rather is an amalgamation of several hundreds of LAV photos I've discovered on the internet, but the pose of the figure does come from one particuar photo of the Canadians in Afghanistan. I'm pretty happy with it overall, but the figure disappoints me as I found the CADPAT particularly challenging, the sharp digital pattern has turned into a series of dots and blobs. LAV 78 by phil da greek, on Flickr LAV 79 by phil da greek, on Flickr LAV 80 by phil da greek, on Flickr LAV 81 by phil da greek, on Flickr LAV 82 by phil da greek, on Flickr LAV 83 by phil da greek, on Flickr LAV 84 by phil da greek, on Flickr LAV 85 by phil da greek, on Flickr LAV 86 by phil da greek, on Flickr LAV 87 by phil da greek, on Flickr LAV 88 by phil da greek, on Flickr LAV 89 by phil da greek, on Flickr LAV 90 by phil da greek, on Flickr LAV 91 by phil da greek, on Flickr LAV 92 by phil da greek, on Flickr LAV 93 by phil da greek, on Flickr LAV 94 by phil da greek, on Flickr LAV 95 by phil da greek, on Flickr LAV 96 by phil da greek, on Flickr LAV 97 by phil da greek, on Flickr LAV 99 by phil da greek, on Flickr LAV 100 by phil da greek, on Flickr LAV 101 by phil da greek, on Flickr There we go, an enjoyable build of a good kit. Thanks for looking in!9 points
-
Hi all! A simple but difficult to do...short run from Xtrakit in the 1/72 scale...It was done in almost three weeks...hope you like it!... follow the pictures:9 points
-
Hi all, Having just completed my 1/48 Spitfire collection, I have begun work on my next collection(s), this is the second in my twin engine collection and the first in my DeHavilland collection! When I first discovered the DH Hornet, I thought it was "what-if" aircraft, such a fantastic looking aircraft, sleek and clean - Eric "Winkle" Brown said about the Hornet; "For aerobatics the Sea Hornet was absolute bliss. The excess of power was such that manoeuvres in the vertical plane can only be described as rocket-like. Even with one propeller feathered the Hornet could loop with the best single-engine fighter, and its aerodynamic cleanliness was such that I delighted in its demonstration by diving with both engines at full bore and feathering both propellers before pulling up into a loop!" I fell for the secondary scheme in the kit, with the striking red arrows on the wings and fuselage, subsequently I discovered the spinners were silver (not the striking red) and, interestingly, the fin flash was likely of the C type. The kit was very straight forward and fun to build, it took no longer than 4 days to build from start to finish. I'm aware there are a few inaccuracies, but I'm not worried, I think it looks fantastic, a truly striking aircraft. Thanks for looking, I've already started my 1/48 Tamiya Mosquito which is coming along well! Cheers, Ben9 points
-
Thanks John and Adrian Some framing done before my nerves abandoned me*: I've learned to make sure that 'a run' of frame is done with the same cut of tape. Trying to get another cut exactly the same width is pretty impossible. * Nothing medical, don't worry. It's just that I find this fiddly work hard to keep up nowadays.9 points
-
I was going to add this to the existing IAFM thread as part 3, but thought that it was worthy of a thread in its own right. I knew a lot of what to expect at Hatzerim, and as I said it did not disappoint, but while taking a winding path from the end of the display area I saw another enthusiast on the same trip walking towards me, a big grin plastered across his face. "There's loads of stuff down there," he said. "Phantoms, Skyhawks, loads of them." And he wasn't wrong. Before long I had the same daft look on my face, for within the Museum area was an enormous storage area, utilising a number of revetments, a compound and many more airframes just left out in the open. I had no idea of this, and it was certainly the icing on the cake. To say nothing of the marzipan fruits, birthday candles and hundreds and thousands. First, some of the aircraft left out in the open: 004 Douglas C-47A Skytrain by Martin Schofield, on Flickr 10 Dassault Mystére IVA by Martin Schofield, on Flickr 043 Nord N.2501D Noratlas by Martin Schofield, on Flickr '113' Dassault MD.450 Ouragan by Martin Schofield, on Flickr Then, the compound: '103' Boeing Re'em by Martin Schofield, on Flickr 010 Boeing 720-023B by Martin Schofield, on Flickr 035 Boeing Anak by Martin Schofield, on Flickr 042 Douglas C-47B Skytrain by Martin Schofield, on Flickr And lastly, there were the revetments. There were four or five of them, crammed with aircraft. We were able to walk around the top of the embankment and snap away at our leisure. 20080509217 by Martin Schofield, on Flickr 844 Douglas Ayit by Martin Schofield, on Flickr 385 McDonnell Douglas Ayit M by Martin Schofield, on Flickr 295 McDonnell Douglas Kurnass by Martin Schofield, on Flickr 261 McDonnell Douglas Kurnass by Martin Schofield, on Flickr 187 McDonnell Douglas Kurnass by Martin Schofield, on Flickr 217 Hughes Lahatoot by Martin Schofield, on Flickr 639 IAI Tzukit by Martin Schofield, on Flickr 20080509218 by Martin Schofield, on Flickr BuNo.999725 IAI F-21A Lion by Martin Schofield, on Flickr So that was a big tick off the bucket list for me, and what a tick it was. And we still had two more days to go!8 points
-
Last built this kit about 30 years ago. A year or so back, I had a crack at the KH recon version & that kit is a REAL dog so thought I'd give this a go to restore my faith. Not disappointed - it really is a very nice kit with beautifully detailed cockpits, u/c bays, flap & airbrakes. Raised panel lines of course but none the worse for that, just needs a bit of extra care during assembly in order reduce any sanding/filling to a minumum. The only issue I had was in trying to work out how the internal screen that separates the two cockpits along with the canopy jack are positioned & arranged. Some images from helpful BMers were provided in response to my pleas but I'm not entirely convinced I have them right. I lost the clear cover to the port-side lamp below the cockpits so knocked up a replacement from clear sheet. However I am ABSOLUTELY STEAMING THAT I LOST THE STARBOARD STABILISOR!! I had it painted & all ready to attach & it simply disappeared. I have applied to Revell for a replacement but it seems the kit is OOP & spares are no longer available 😭😭. Anyway, still pleased with how it turned out!8 points
-
Hi there, Here are some pics of the revell 1\72 Condor that i completed last year. Unfortunately which is always the case with me, just when all was nearly done i got a small spillage of something on the fuselage when i was fixing the aerial wire, then broke the antenna in a moment of panic. i really enjoyed putting this kit together, the fit of the parts was on the whole was very good . Built out of the box I reckon its one of the best value kits on the market today. Hope you like it .8 points
-
Got the wing bomb bay doors done this morning. A little fiddly and because of the wing profile, each door has a little curvature to it.8 points
-
I thought I could manage a bit of painting so brushed the depth charges with Hu91: Checking 'British Explosive Ordnance' for markings I scrolled too far and came across this: 250lb Bouyancy Bomb by Ced Bufton, on Flickr That's them innit? Not depth charges but '250lb Bouyancy Bombs'. Dark grey overall (rats) with a red nose band (3" from the nose that's 1.05mm scaled) and green band at the base of the ogive. What's an ogive? Band 9.5" (3.35mm scaled) from nose. According to Wikipedia 'An ogive is the roundly tapered end of a two-dimensional or three-dimensional object.' Helpful. Not.8 points
-
Gent's thanks for all the kind words with more work done on some of the deck fittings aiming director and what I think is the grenade launcher ? and the ships motor launches. Filled the deck holes with some scrap PE to make it look like a plate at the bottom of the ladders will paint and scratch it to make it look worn. Then had a nightmare with one of the ladders while folding the step plates it just fell apart my clumsy hands Will have to rebuild it and hope it looks OK Also looking at the life rafts they have a PE insert but not sure as weather to use not sure if the fit parts just look ok or with the PE what do you lot think ? PE dry fitted to the left ones and top one just primed. Stay Safe beefy8 points
-
This was very satisfying. I found the Roden kit to actually come together without any major pitfalls although it is important that some pieces are attached before others, etc...pay attention to the plans, and so forth... Painting is mostly free-hand, some minor masking, airbrushed tires. Paints are Vallejo, Vallejo Air and the green is Tamiya XF-81. For the headlamps I used Chrome inside and when dry, a dollop of Revell Contacta Clear (twice). I think they look nice. I scratchbuilt the shovels and picks because the moulded ones on the boxes looked terrible. Enjoy! The turret turns, btw...😉 --John7 points
-
Hi all, Today marked the end of lockdown for me, back to full-time employment in a bizarrely different workplace, it must be said. Safe to say modelling got me through the lockdown, particularly the groupbuilds right here on Britmodeller. I usually build four or five models a year (I think the most I've managed in a calendar year was 9) so to have built nine in just under two months says a lot about the time I've had available to build! So - in chronological order, here they are: 1/32 Revell Hunter FGA.9, 1/32 Revell P-51K Mustang (for the Mustang STGB) Monogram 1/72 F-82G Twin Mustang (for the Mustang STGB) 1/72 Airfix Vulcan B.2 1/32 Kinetic (Academy) F/A-18D Hornet (for the In The Navy GB) 1/32 Revell F/A-18E Super Hornet (for the In The Navy GB) 1/72 Airfix P-51B Mustang (for the Kit You Built As A Kid GB) 1/48 Airfix Seafire FR.47 (for the Spitfire/Seafire/Seafang STGB) 1/48 Hobby Boss P-38L Lightning (for the Blitzbuild 2020 GB, built in 24h 36min!) The usual build rate will now be resumed, but this year will probably be an impossible milestone to ever beat! Hope everyone stays safe as we step back into the danger zone... Cheers, Alan7 points
-
Hi, During lockdown, like most of us, I have made a few models, this gave me a change to hone my modelling skills and try my hand at modeling aircraft. Not my normal genre of model making, usual make restoration dioramas, figures & rust vehicles. I have put them all here, to save starting three individual threads. So here they are my three 1/32 Spitfires. Tamiya Revell - "Aces High" Revell MK. IXc clipped wing Stay safe Richard7 points
-
SteveHnz has requested a few photos of the York in my avatar. So at his request, here are a few photos. This is the CMR conversion with the Hasegawa wing, it was built several years back, so please don't be too critical.7 points
-
7 points
-
More #28 complexities. Yesterday the new cutter arrived, a Silhouette Cameo 4, and I found some time this afternoon to set it up. After same faffing it seemed ready to run, and I could import the dxf-file created in AutoCAD to the cutter software. I loaded a piece of ordinary copy paper to make a test. The cutting knife automatically adjusts to the material you specify in the software, there is a huge amount to choose from and you can add your own. I suspected there would be some trial and error here... The first attempt seemed to indicate some lesser setting needed, so I tried another, which was better but not good enough. Apparently this would have to be adjusted again according to my masking material, so I could just as well load that and run it for real. I planned to use these sheets from Tamiya; #87129. Of course that material is not represented in the software settings... Never mind, I loaded the masking sheet with the previous paper setting and started the process. It looked pretty good, but a bit hard to see exactly. I lifted out the two figures and the result looked very nice and sharp. So far so good. The two masking sections were lifted and applied to the mesh and the centre pieces placed. Some extra pieces where applied where needed. Thin black paint was airbrushed at low pressure straight ahead and in shallow angles. After the masking was carefully peeled off I had this. It was finished off with a very thin mist of brown dirt. I'm very happy with the result. It will need to be left alone drying for a while now, before I try to install it.7 points
-
Here's my contribution to the Group Build. Airfix 1/76 scale Matador and 5.5 inch gun. From the box plus glazing added from a scrap blister pack. Here's the model built in 2020 along with the gun from the original I built in the late 1970's when I was a kid. This was in parts in the spares bin but I found all the bits and ressembled. 2020 model with 1979 gun and Airfix Avro Anson built for the 40th Anniversary of the Battle of Britain in 1980 when I was 15. Great nostalgic Group build so thanks to Dansk for the original idea. I have loved seeing all the old kits being built to a much better standard than we ever managed as kids. Colin7 points
-
Hi all, Just finishing off this kit, It is from Mountfleet Models. Cracking looking boat, Was Finishing it for my Dads 75 tomorrow but won't cross the line now as I need to do the rat lines and some of the Jib rigging and was short of Blocks and shackles. Rc inside, Lights and Fog unit. Here are some progress shots over the past while. 607_0784 by Georgeconna32, on Flickr 607_0793 by Georgeconna32, on Flickr 609_0908a by Georgeconna32, on Flickr 610_1057 by Georgeconna32, on Flickr 610_1054 by Georgeconna32, on Flickr 610_1052 by Georgeconna32, on Flickr6 points
-
I am just about to launch into my conversion of the Airfix 1/48 Vb into an early Vc (RAAF Aircraft). It seems a fairly straightforward and reasonably easy conversion. Special thanks to @Troy Smith for the suggestion. I have read a number of excellent BM threads on the subject of Vb to Vc conversion including some great input from, but not limited to, @Graham Boak@Magpie22@Giorgio N@Troy Smith@gingerbob and, of course, the late great Edgar Brooks. I have also perused other links like the Spitfire Site and its often visited "Concise Guide to Spitfire wings" http://spitfiresite.com/2010/04/concise-guide-to-spitfire-wing-types.html. et.al. I have now put together my list of what is required including some questions that are not clear. What have I missed? Top Wing Half 1. Remove external wing strengtheners 2. Remove wheel well blisters and repair. 3. Fill domed wheel well (upper wing blister) and provide new ribbing to match C-Wing. 4. Remove cannon blisters and repair. 5. Remove inboard machine gun detail and relocate between ribs 13 and 14. 6. Fill all unnecessary panel lines. 7. Re-scribe new panel lines in accordance with C-Wing including new panel for early wide cannon blister and relocated inboard machine guns. Check and include any new access hatches. 8. Fit wide cannon blister (CHECK: my subject has the early wide blister) Bottom Wing Half 9. Remove underwing cannon blisters and repair. 10. Add cannon ejection ports and panel detail. CHECK: New trailing small blister in cannon access panel in C-Wing. Include if required. 11. Fill link and case ejection port for inboard machine gun in old B-Wing position and include in new C-Wing position. 12. CHECK: Do Airfix provide landing lights to be removed? 13. Re-scribe panels. Check and include any new access hatches. Complete Wing 14. Fill old inboard machine gun position and drill outboard new position. 15. Replace tapered cannons housings with taper and cylindrical type and fit. 16. Fit outboard second cannon position stubs. Other Stuff 17. Rake undercarriage legs forward by 2” EDIT: @Graham Boak commented - The undercarriage change is described in Spitfire the History (in the chapter on the Mk.III) as being a movement forward of 2 inches at the axle 18. Fit bulged undercarriage doors. 19. CHECK: Strengthened undercarriage, what does this mean? 20. CHECK: Does Airfix include the larger round oil cooler? 21. EDIT: @Graham Boak commented: The Mk.Vc also introduced the revised windscreen with the inset armour glass. This was seen on Mk.Vb late in production. It had a straight interface with the fuselage rather than curved. 22. EDIT: Check your references for correct Propeller and Spinner @Troy Smith has given a good explanation and links further down in this thread RAAF 79 Squadron BS219 23. Wide cannon blister. No evidence of any other blisters on upper wing. 24. No pilot head rest. 25. Exhaust gun heating tube removed. Hole in cowling remains. I am modelling how the aircraft looked in March/April 1943. 26. IFF included. Thanks in advance for any input. Soon I'll start a WIP of these changes. This can be found here: Ray6 points
-
6 points
-
Well looks like i'm done with this one. A nice kit to build that could still be a great model with lots mor eTLC than i gave it! Thanks to all who have watched, commented or liked, all the support and interest is much appreciated. Here are some photos to be going on with, i will take different ones for the gallery later, Cheers Greg6 points
-
I almost forgot to mention, I replaced a leaky faucet! Mrs P was hugely impressed, even more so when I subsequently repaired a cabinet door Winston had knocked off of its hinges. There's a local indoor shooting range near me that I go to. It's $30 for a hour of range time (plus an extra $10 if I bring a guest); the last time I was there, I brought the Webley IV and Enfield No2 MkI* and between the two of them fired off 254 rounds of 38-calibre ammunition in that time, pretty much all of my stock. I, uh, am not a crack shot. Suffice it to say that should, heaven forfend, I ever have cause to fire an eighty-year-old pistol in deadly earnest at a man-sized target ten yards away, and that target possibly has right side hypertrophy, they're in for a rough time. (The British Army, incidentally, didn't expect much from the Enfield No2 MkI* either, judging by the manual for it that I have. Users weren't even supposed to aim, just fire two shots quickly from the hip, presumably yelling "SERGEANNNNT" as loudly as they could at the same time in the hopes that somebody with a slightly larger weapon could do the heavy lifting.) I'm also a member of a small national shooting organization that more closely aligns with my limp-wristed namby-pamby politics than some of the larger ones. I have a baseball cap and everything.6 points
-
Thanks for all the information! The framing behind the seat was made with a couple cut pieces of styrene sheet and some cardstock. Turned out alright... Fuselage closed, wings on, some putty and filler sanded down... It turns out that someone placed the instrument panel too far down and forward to properly mount the gunsight, so that'll just be left off... Canopy masked and on. One of the landing lights was missing but a bit of clear sprue, cut and sanded into place was sufficient for a replacement (as seen vaguely on the port wing). Paint and gloss coat on. As recommended earlier in this thread, Tamiya XF-61 (Dark Green) was used for the green. As not recommended earlier on this thread, XF-52 (Flat Earth) was used for the brown, and XF-23 (Light Blue) was used for the underside. Now that the paint's all on, XF-23 seems a bit too dark... Decal process started. The aviprint.cz decals go on quite nicely and are responsive to Micro Sol. And it's finished. I'll put up an RFI thread when I remember where I put the light box... Overall, a decent enough build. There were no particularly insurmountable fit issues and it's reasonably well detailed. Some parts, as usual, were harder to place accurately (looking at you, landing gear doors...), but when finished it looks like a Boomerang, and that's the effect I was going for.6 points
-
One of the first thoughts that went through my head Jo. The down side is that angles and Tee sections are priced about the same so I'd need to buy twice as many - which would work out about the same as buying the Tees from the UK I considered styrene Ced, but trying to replicate those curves and getting the styrene to stay put would be a Herculean task, and I'm a wimp. Thanks again Ian. After much consideration, I think I am going to go with Eileens Emporium. I found that they do 500 mm lengths which makes things a little easier. It's going to be expensive but there's no point in scrimping at this stage of the build is there? That's assuming I can actually make 1 accurate carline, let alone 30 identical carlines. Thanks M! Things are continuing to move in a forwards direction. A lot of the stuff over the last few days has been of the cut, sand, stain, repeat persuasion. Infinitely boring. A break from the monotony arrived when it was time to fit a few more transfers. This lot is for the bar area Yet more heater boxes - this time in the dining area. I surprised myself by managing to make the heat box in one continuous section and still get it to fit Followed by more measuring, cutting, staining, etc as I needed the heater box for the bar area as well. I realized that I couldn't cut any of the cover strips to length without having the heater box in place. Brass got fitted to the dining area heater box - my very last section of that particular brass mesh - which is now OOP. I had to end up buying a selection of meshes to try and get something similar, or rather, not too obviously different. Also started making up the pelmets - and now I've got to try and keep track of what all the different pieces are for - not easy for an old sod like mesel. A small disaster struck when I was putting the gloss coat on top of the transfers - I got a run on one of the panels. Easy I thought - just sand it all back and re-gloss and stick another transfer on (luckily I was sensible enough to order extra). However, when I re-glossed the panel, there was and obvious defect which showed up if you caught the light - you can just see it here if you strain. I toyed with the idea of carrying on, but after a few milliseconds, it was Nope!, make another panel or I'd forever be staring at that defect. This evening I managed to get all the main panels glued in place. Still a lot of work to be done though - heater boxes, window cills, cover strips, then pelmets have still got to be fitted. One of those jobs I'd been putting off was the TRIANON BAR sign on the art work behind the bar. As far as I can tell, the real sign has Chromed letters mounted directly on the frame. I tried printing out a sign (top) and painted it up, but it was too large. I tried another (center) but trying to paint the letters was difficult - they are only 2 mm high. Then I came across a piece of photo etch (bottom) I'd made a couple of years ago and wondered if I could use that. I painted it using the same brown I used on the side frames. When the paint had dried, I put a piece of micromesh on top of a piece of granite, then very gently placed the painted Trianon Bar sign face down on the micromesh. Even more carefully I rubbed the photo etch back and forth on top of the micromesh in the hope that I could remove paint only from the letters and not the rest of the signage. I'd call that a success! Okay the letters are now brass and not chrome as I believe they should be, but this is by far the best Trianon Bar sign I've made so I'm sticking with this. Nothing ever goes according to plan does it? When I came to fit the sign, I noticed that a bunch of dust had somehow got behind the glass and was very visible down the left side of the artwork. As much as I didn't want to do this, I felt I had no choice but to try and open it up again to remove the dust. I removed the minimum possible number of pieces to let me in - once I had got this far, I could prise up the edge of the clear sheet and blow under it to remove the dust Then glue it all back together again! (I had to take the photo at this angle so the light would catch the text As you can probably see in the photo above, I also got the bar heater box made up and brass fitted. The mesh is slightly different but close enough to the original mesh I was using. Downsides again - the new mesh is so unbelievably thin that when the heater box is in place you can actually see through it and see the carpet on the floor. I'll need to add a dark strip of wood behind the mesh so that you can't see the carpet - a fairly easy job. now to figure out how I can purchase a whole load of brass tees without SWMBO asking awkward questions6 points
-
I wanted to get the masks off to see what state the canopy was in with static build up so got the mat varnish on the fuselage earlier and bit the bullet. As expected, they were caked in the stuff but with a keyboard aerosol cleaner to clear the inside and a brush with Kleer on the outside to restore the shine, it isn't looking too bad. The side windows and top escape hatches are worse but considering what it's been through since they went on, I'll have to live with it. The astrodome base frame needs painting before it's stuck on, it's just resting there at the moment. There's more weathering to do yet, not even touched the starboard wing yet, but as the wings are only pushed on, I can work on them without damaging the fuselage.6 points
-
Hello Folks, This old model was built around 20 years or so ago using a long defunct resin conversion set and was recently pulled out of the loft for a makeover,....here is the before shot; It was sanded back ready for a repaint into the earlier camouflage scheme and the window layout was altered to better match the real layout of the C.Mk.V version by filling some in and drilling out some new ones,.....the build thread can be seen here; http://www.britmodeller.com/forums/index.php?/topic/234965749-stirling-x-2-recycling-an-old-airfix-cmkv-conversion-the-new-italeri-amkiv/ And here is the model mid way; I`m still building the new Italeri Stirling A.Mk.IV on this `in progress' thread,.....and cheers to everybody who has supported me along the way,...here. Anyway here is the finished model; Hope you like it and cheers for the resin cowlings Lee!, Cheers Tony PS- As Photobucket are playing silly buggers I`ve added a few of the pics here from another provider,.......but if you click on the Photobucket icons these will take you to the original images.5 points
-
The latest in my 'lockdown'-series. Actually it's part 1 of 2, but you'll have to wait a bit to see the full concept. This is the Heller 1/24 Honda NSR 500cc racer, but I build it as a custombike. First up is the original: And this is my version: It's not a big model!: Cheers for now Hans J5 points
-
Oy! That was a trade secret! Cheers, Stew5 points


This leaderboard is set to London/GMT+01:00