
Leaderboard


Popular Content
Showing content with the highest reputation on 17/05/20 in all areas
-
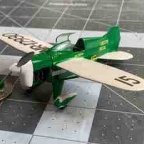
Dear fellow Britmodellers, this is my 1/72 Dragon Arado Ar-234 B in markings of 9./KG76, flown by Hptm,. Josef Riegler. I built with addition of Reheat photo etch, True Details wheels and Master pitot tube. Decals from Aeromaster "Arado Blitz Bombers Pt.1", painted with Gunze/Mr.Hobby acrylics. Photographs by Wolfgang Rabel. Thank you for your interest! Best greetings from Vienna Roman44 points
-
Evening All, I hope this finds you well. Here's one I started maybe 2 years ago and I thought I'd quickly finish it while I waited for my next project to be delivered. My next project arrived within a week.....finishing this took about a month. Hmm. The Kit - Airfix's 1/48 Sea Vixen FAW.2, built as XP954 of 893 NAS, HMS Victorious, 1966. I'm no expert on these so it's pretty much out of the box except that I added some brake lines and busied up the seats with some Tamiya tape; I may change them for resin ones in the future. I also didn't paint the coal hole lid as I've seen a couple of pictures with it clear - artistic licence. I left the wings down so as to show the shape of the aircraft, and the flaps and hook are down for maintenance. Main U/C doors, and airbrake are sagging a little. Finish - Painted in Tamiya acrylics and coated with Kleer (stocks are dwindling). After decalling I gave it a light overspray of the base grey (top) or white (bottom), and then gave the top surfaces another going over with a lighter grey, and also added bootmarks, oil stains and stuff. The bottom was streaked with oil stains also.......So subtle it hardly shows in the pictures. Why ? - Memories. There were a couple of these in the hanger at Halton.......massive beasts next to the Gnats and JPs we were working on. One day I was volun-told to get up on one of them with a broom to dust it down before an inspection. I'd initially thought I'd build one of those airframes but I liked these Sqn markings....and it was easier. Here we go......... Seat harnesses by Tamiya. Decals........so many decals !!!! The canopies aren't glued in position; I might need to swap the seats in the future. There's bootmarks there, honestly. I found Humbrol decalfix pretty good with helping prevent silvering. I forgot to make the drop tanks a bit dirtier. Ah well, roll equipment, just been fitted. You can just about make out the engine compressor face. I'm happy with it In the cabinet next to the Bucc. I hope you like it. Comments good bad or indifferent welcome. Cheers. Gaz38 points
-
Airfix 1/48 Seafire 47 OOB, original 1996. For a kit this old....it builds very very nicely. This for sure is a 3 footer. Painted the stripes. Kit moved along pretty well until I got to the decals. Had a set of the aftermarket PMA (PMAD017) and they were complete garbage. Every decal shattered hitting the water. So out came the 26 year old decals and man that was a tough road. Each and every decal needed ~10 minutes to just come off the paper, and any modern day decal setting solution had zero affect on them. Some silvered, some just simply wouldn't stick. Toward the end I just wanted to finish, which caused me to paint the nav lights backwards. Another COVID build for the work display. Cheers Collin24 points
-
4812/in/dateposted Serial numbers will be added after the lockdown opens. Great kit and lots of fun. My favorite aircraft.23 points
-
Latest aircraft off the bench today. I resisted buying Trumpeter's version of the Lightning for a long time as it always looked a bit 'out of shape', but now that the Sword F.1/F.3 offerings are becoming harder to come by there is no other game in town really if you want an early mark 'out of the box'. So I bit the bullet and thought I'd see what I can do to improve it. After seeing several builds on here and noticing what people were saying plus using one of my Sword kits as a template I modified two key areas. The Trumpeter versions have always appeared 'front heavy' somehow, but having compared the fuselage shape with the Sword kit it's actually not bad at all. So what else could it be? The main problem seems to be that the undercarriage is too long making the aircraft sit too high. So I cut 3-4mm off all the legs until it matched up with the 'sit' of the sword kit. Next I looked at why there was a 'front heavy' look. Again comparing the two kits it seems that the wings that are set too far forward...which also takes the main undercarriage with it, giving that 'bunched up front heavy' look. So.. with some minor surgery I moved the wings back about 3mm and 'voila'..... it actually looks like a proper lightning now! I didn't have the skill or parts to modify the other problem area.. the exhaust nozzles...but maybe next time. It's far from perfect and I'm sure there are lots of other details that are not correct but with a little bit of work I'm now able to produce some more early mark Lightnings for my collection. Paint was airbrushed Vallejo Metal Color (White Aluminium) , although I can't see it has any advantages over my go-to Model Air Aluminum really. I used some dark grey panel wash to try and highlight some of the panels but really wish I hadn't as it was hard work removing it and also took some of the silver paint with it! Xtradecals were to finish off for one of the most striking of early Lightning schemes...No. 111 squadron at Wattisham early 1960s. Thanks for looking, comments and tips appreciated. Cheers!22 points
-
Here is the Revell Boeing 727-100 in the classic orange and blue of Hapag-Lloyd circa 1984. The inspiration was this, one of my all time favourite airliner photos, although my model depicts an earlier version of the livery. The kit first appeared in 1964 and has been reissued on and off since, most recently in the colours of Germania whose 727s were actually leased from Hapag-Lloyd. Although it’s probably the most accurate injection-moulded 1/144 727, the Revell kit suffers from sunken windows, raised detail and rashes of rivets. However with a bit of t.l.c. it scrubs up quite nicely and my aim was to create a reasonable likeness rather than absolute accuracy. Anyone who wants the perfect 727 will need to look to Authentic Airliners. The outline shape is pretty good but to my eyes the windscreen is slightly too upright and the tip of the nose cone is too blunt. I replaced the cockpit with the spare clear section from a Zvezda 738 which was an amazingly good fit. Using the Zvezda model as a pattern I added a little Milliput to the tip of the nose then sanded until everything looked OK. I don’t claim 100% accuracy but I think it’s a bit better then the original. Revell have rather overdone the slope on the top of the number two intake which makes the opening too small. Thin plastic, superglue, Milliput and a few minutes of carving and sanding quickly put things right remembering that on the 727-100 the intake was slightly oval. Still with the fuselage, there should be a faint hint of “lobe crease” level with the bottom of the main door which I represented by light scribing with a P-cutter followed by a few strokes from a triangular needle file. I’m not sure I got this quite right and I will probably rethink it if I build another Revell 727. Otherwise it was a case of getting rid of the rivets, smoothing out the lunar landscape of sink marks on the wings and re-scribing the raised lines where appropriate. I replaced the kit wheels with a resin set from Brengun intended for the Airfix -200 but easily adapted for the Revell kit. Paint is Halfords Appliance White and Racking Grey with Revell Aqua 30 Orange on the fin. Natural metal is by Tamiya and Revell Decals are by Flightpath with Authentic Airliners windows, Scaleliners coroguard and some odds and ends from the spares box. Flightpath confused themselves with the door outlines and gave us 737-style outlines with white lower sections instead of the 727s’ characteristic dark blue ones. Luckily I was able to source some thin dark blue decal stripes and curves then do a sort of decal jigsaw puzzle, mildly annoying at the time but worth the effort. Replacement nose wheel doors, pitots, aerials and other sticky-out bits are from a Daco P/E set intended for the 737. The is the third “classic” airliner kit I’ve built recently (the others were the Airfix Caravelle and DC-9) and it certainly won’t be the last. I’m already eyeing up the Airfix Comets and Tridents in my stash. Thanks for looking and as always constructive criticism is welcome. Dave G21 points
-
This time, quite a difficult model for me. I don't like models of planes that are realy clean, they look like plastic toys to me. That is why my model making is heavily exploited aircraft models. This time I tried to make this model like oryginal, so that it was not too tired, but that it was also not a plastic toy. I hope I managed. F/A-18C VF-131 Academy 1:3221 points
-
Here's my Lincoln, just finished in the Lancaster STGB - build thread is here. This is the Airfix 1/72 Lancaster II converted to a Lincoln using the Blackbird Models resin conversion and converted to the Armstrong-Siddeley Python testbed RF403 using a combination of 3D-printed nacelles and bits from a couple of Trumpeter Wyverns. I say 'testbed' but I don't think it really was - this was the third (I think) Python Lincoln, built for use at Woomera in high-altitude trials of the Blue Danube bomb. It was a fun build - the Blackbird conversion is excellent - just marred by a small SNAFU when a big drop of paint somehow got inside the canopy - hence I've only photographed it from angles where it's barely visible! thanks for looking Julian19 points
-
Great Wall Hobby kit - very nice except for a couple of funny fit issues. Mission Models paint and Kits World nose art. Used an old Bandai jeep kit, a couple figures from that, another one from Eduard, and the guy standing on the wing is a very nice aero master figure who was so under scale that I had to move him to the background. The base is Eduard.18 points
-
Hi All,Just a few of my aircraft that have been on the shelf waiting to be finished off,I have not built any new aircraft for some time,mainly build AFV,(should I say that word in this subject),What motivated me to do this,was a shelf I had above my aircraft decided to fall down after 7 years being there,it damaged some aircraft and took out most of my helicopters,and landing gear on other planes,so I thought it was as good a time as any to put up some of my aircraft,Enjoy or dislike. Cheers Jim.18 points
-
Latest build for the cabinet is Airfix’s lovely 1/48 Sea Fury done as FB.50 616 of 860 Squadron Royal Netherlands Navy. Quite fancied a quickish build so only added Barracudas replacement engine cowl and Xtradecal sheet 48175. Even so the build dragged on a bit. Have to confess Second World War aircraft types are not really my interest at all but the Sea Fury has always fascinated. Thought lock down might see more time for modelling but the Mrs has had other ideas. She can’t understand why I don’t take as much care with the decorating as I do with the models! Hope it’s of interest. I enjoyed the build so much I’ve bought another two.17 points
-
#13/2020 And another one finished. Started with Dragon´s "E" kit but then stole the engine from one of their Ju88 kits and built an "A". Eduard seatbelts added, EZ Line for the antenna wires and brake lines, AIMS decals for the main markings, Gunze RLM70/71 for the replacement wing and old selfmixed RLM76 with Tamiya XF-23 Gunze H314 and H2 and a not known anymore light grey. Build thread here https://www.britmodeller.com/forums/index.php?/topic/235068862-baby-blitz148-junkers-ju188a-2-rächer-iikg6/page/2/ Model shows an aircraft of II./KG6 which took part in Operation Steinbock, also called Baby Blitz by the Brits, and flew nocturnal raids over England. Info here: https://en.wikipedia.org/wiki/Operation_Steinbock DSC_0001 by grimreaper110, auf Flickr DSC_0002 by grimreaper110, auf Flickr DSC_0003 by grimreaper110, auf Flickr DSC_0004 by grimreaper110, auf Flickr DSC_0005 by grimreaper110, auf Flickr DSC_0006 by grimreaper110, auf Flickr DSC_0007 by grimreaper110, auf Flickr DSC_0008 by grimreaper110, auf Flickr DSC_0009 by grimreaper110, auf Flickr DSC_0010 by grimreaper110, auf Flickr DSC_0011 by grimreaper110, auf Flickr DSC_0012 by grimreaper110, auf Flickr DSC_0013 by grimreaper110, auf Flickr DSC_0014 by grimreaper110, auf Flickr DSC_0015 by grimreaper110, auf Flickr DSC_0016 by grimreaper110, auf Flickr DSC_0021 by grimreaper110, auf Flickr DSC_0019 by grimreaper110, auf Flickr DSC_0020 by grimreaper110, auf Flickr DSC_0022 by grimreaper110, auf Flickr DSC_0023 by grimreaper110, auf Flickr DSC_0001 by grimreaper110, auf Flickr DSC_0003 by grimreaper110, auf Flickr DSC_0004 by grimreaper110, auf Flickr DSC_0005 by grimreaper110, auf Flickr17 points
-
Hello everyone - Hope you are all safe wherever you are. Here is my 1/48 IAI Dagger from the Kinetic Mirage IIIE/5 South America boxing. The kit is out of the box with the exception of some cockpit details from various sources, a new seat, mirrors on the canopy and a metal pitot from Master. The kit is pretty good - if a little fiddly here and there. The main problem I had was that the fit of the front canopy was poor. I simply filled and faired in the gaps and accepted that some detail would be lost - pictures show that little in the way of riveting/panel lines can be seen in this area anyway. The other problem was the poor instructions and slightly ambiguous placement of some parts such as the blade aerials on the tail - there are actually no slots for them to fit into and the placement suggested is wrong. (Also the aerials are too long!). I chose the large fuel tanks because I like them and because the supersonic tanks provided in the kit are of the French type and not the extended type used by the Israelis and Argentinians. I modified the markings a little and modelled C-415 shortly after the Falklands conflict with mission markings. C-415 suffered a damaged front canopy early in the conflict and was not available again until near the end or after the end of hostilities. I just didn't want to model the Yellow/Blue campaign markings that everyone else does! Colours were as suggested in the instructions from Mr Hobby Aqueous Hobby Colour. Detailing and weathering was mainly using oils. The surface detailing is extremely fine in places and it was difficult to use a normal wash procedure so in places, individual lines and rivets were picked out. thank you for looking Cheers Malcolm And a (poor) picture of the real thing:14 points
-
Airfix Boeing 707 1/144 26 Decals - Air Mauritius I've got three of the ancient Airfix 707's in the stash, but what to do with them? They are the Conway engined -436 version not used by very many airlines. Browsing the 26 Decals website I came across this laser decal sheet which really appealed to me. It covers two ex- British Airways 707's, G-APFD and G-ARWD. I chose G-ARWD, originally delivered to British Eagle and sister ship to the ill fated G-ARWE. The kit originates from 1963 and has a number of areas for improvement. In no particular order: The nose is way too narrow, I shimmed it by about 5mm to fatten it, and fitted a Daco clear cockpit section. I've been using these on Airfix Airliners, and done several 737s and a 727 with them. The 707 can now be added to that list. The talfin is too short, I raised it by about 10mm The engines are horrible. I widened the intakes (which made a huge improvement) and sanded them to a better shape. All raised panel lines sanded off an rescribed I made one or two other improvements, but this has been lurking on my work bench for about a year, as I worked on it slowly, It always seemed to need filling or sanding, so was never the favourite when I got a bit of bench time! Anyway, I got there in the end it is now finished. I'm not in any hurry to start the other two just yet. With something else, its' rival the DC-8, also using 26 Decals. Thanks for looking. John14 points
-
Hello all ! This is an old model that I chipped the green paint with rubber and needle. Have a nice WE !14 points
-
This guy only took a couple years to complete, but here it is: It's the 1/72 Eduard kit in TSS, painted with Vallejo - my first success with free hand camo with water based paint. I'm happy with how it turned out, but it may be another case of beginner's luck, as my next attempt went terrible and I don't want to talk about it. 😆 And here it is alongside some BPF stablemates. Thanks for looking.14 points
-
G'day Chums,for your delectation I present something I started back in 2014.The build thread is here .I dug it out the other day,found that the white had gone yellow so decided on a repaint.This is the result And here with my Airfix XII from 2015. Thanks for looking in Chums,stay safe.14 points
-
Afternoon folk's,another one for the Kit you built as a Kid GB,the old Phantom from Airfix,built as we did back then pilots sat in her and up on the stand,well well past it's sell by date now really not worth doing anything to the kit as there are so many excellent newer molds out there,but to a twelve year old back in the day especially with the original box art it was the biz,all brush painted as usual,thanks again for looking.14 points
-
MiG-15UTI 'Mukelo', Finnish Air Force Kit: MiG-15UTI Midget (#80262) Scale: 1/72 Aftermarket: Kuivalainen Photo Etch Paints: Vallejo Model Color, Model Air & Metal Color Weathering: Flory Models Wash Build thread: Nice little kit from Hobby Boss, very good value for money. Built in a week.14 points
-
Useful info, thanks Jo. I've reworked the lamps and printed off some today - we'll see how they look tomorrow The glass and bottles are hollow Ced. I like the idea of some wine in the glasses though - I must try and see what I can do Yeah I never could quite get why they call it a minivan. It's been a great car though - 7 seats so when friends or family came visiting we could all fit in the one vehicle. It's past its sell by date now so I just keep it as an emergency back up and for those times when we need space to move stuff I tried adding some clear blue and clear red to a couple of bottles but they didn't look convincing. I need to do something with at least a couple of them though so we'll try something else further down the line. I'm very reluctant to buy more paint just for one or two drops of a color that I'll likely never use again. thanks Harvey - they fail me often too don't worry Ian, the lid is firmly down. psst - don't tell anyone but I'm hoping to start fitting all that by next weekend if it all goes to plan Ah... optics, that what the term I was looking for. I've seen photos of Pegasus with and without optics and I'm sure the rail was there in both cases. a few napkins and that should be about it Tony. No AP's, clipboards or pens on this build I did in a moment of madness consider adding lighting at one time - but I'm already 6 years into this so NO ! Just a small update this time around. Things seem to be taking forever to accomplish these days. It seems the closer you get to the finish line the longer things take, or it could just be that now I am getting to all the finicky stuff. It's curtain fitting time! I tried shading them but it failed miserably so I settled with a satin clear coat, I'm not really a soft furnishings type of guy anyway. I wanted to make sure the curtains stayed in place once fitted so thought about using the tie backs as a securing feature. Looking though my stash I found some nice brass rivets which fitted nicely into the center of the pommel I had created in the tie-backs. At least they would once I had drilled a hole for them. Luckily I also have some stainless rivets when it comes to doing the curtains in the bar area since it's all chrome finished The pommels were drilled through and I offered the curtains up to the side frame and drilled through the woodwork for the rivet, adding a touch of superglue to the rivet as it was inserted. Curtains should be nice and secure now. As soon as the curtains were fitted I could add the pelmets which finished off the paneling nicely. Table brackets were glued in place - the brass paint was very glossy so I gave them a misting of semi matt and they look a lot better now I just need to get moving and finish off the tables now Over the last few months I've had that same side frame fixed but never actually looked at that side of the carriage. Now it was time to carefully turn it around and see what the curtains looked like from outside. I'll take that! With only lights and luggage racks to fit (until I remember something else I've no doubt forgotten about), it was time to fit the other side frame - and what a job that was! I won't tell you how long I spent trying to get the second side frame bolted into position - I'll just tell you that the watchmakers kit I ordered provided teeny weeny bolts of various lengths, but what they didn't tell you was that there was more than one thread size... but only one size of nut!!!! Of course I had picked the wrong threaded bolts. I can't believe it took me so long to figure that out. Idiot! But it's on now It's going to be tight working in there So, more progress achieved but still loads more to do. I did consider trying to do all the paneling before the side frame was fitted but that presents a different set of problems so I'm going to have a go with the side frame in place and see how it goes14 points
-
My second lockdown completion and another Wessex, this time a HAS3, it is the 1/72 Italeri kit with the Rotorcraft correction and External fuel tank and pylon from Air Graphics, markings came from the kit and various Modeldecal sheets some of the markings are a best guess as HMS Londons Wessex 3 seems to have been a bit camera shy and I could only find two very poor pictures of her including one that showed the name 'Cockney Rebel' but I'm happy with it _IMG9032_1 by Phillip Wilmshurst, on Flickr _IMG9029_1 by Phillip Wilmshurst, on Flickr _IMG9037_1 by Phillip Wilmshurst, on Flickr _IMG9036_1 by Phillip Wilmshurst, on Flickr _IMG9042_1 by Phillip Wilmshurst, on Flickr Anyway Enjoy Willy13 points
-
M4A3(76)W HVSS "Easy Eight" Tamiya | 1/35 scale Tamiya's fantastic offering of the M4A3(76)W HVSS, commonly referred to as the "Easy Eight." Aftermarket goodies: Friul tracks, RB Model metal barrels (main gun and machine guns), Panzer Art antenna mount (I forgot to drop the actual antenna in the mount), Value Gear stowage. Painted with a combination of AK Interactive Real Colors, Tamiya, and Vallejo paints; weathered using Ammo of Mig, AK, and Mig Productions enamels, 502 Abteilung oils, and a touch of Vallejo acrylic weathering effects. Comments and criticism welcomed as always!13 points
-
1/350 Trumpeter HMS Hood with; Eduard PE Flyhawk detail set which includes Pom Poms and brass main armament barrels, Various resin details form NorthStar including, 4" guns, quad Vickers, bridge equipment, searchlights, HACS, Pom Pom directors and crew. White Ensign resin main turrets Painted in ColourCoats enamels Sea painted in artists acrylics with clear gel medium top coat and cotton wool spray Rigging in Caenis 700 and Uschi line WIP here; Thanks to everyone who followed the WIP and gave advice and feedback 👍 Lot's of pics because of the size - mounted on the sea base she's 90cm long! Nice kit, and great as a base to add detail to. Hope you like the pics as much as I enjoyed building her. Few detail shots; Working parties to close the breakwater openings; Same on the quarterdeck to stow the ladders; Obligatory B+W shots; Thanks for looking, any feedback gratefully received. Cheers Nick12 points
-
Two Canadair Sabres, both based on the 1/72 Airfix Sabre F.4 Subject: 441 (F) Sqn. Canadair Sabre Mk.5; s/n. 23059, based at 1 Wing, Marville, France circa 1955 Assists: Heller F-86E (small nose wheel door, recess for nose landing lights, canopy -'sliding hood'. 100 gal. drop tanks, speed brake doors and hydraulic ram, wheels) Pavla: F-86E resin cockpit interior (C72099) Modifications: - the recesses for the nose wheel lights immediately in front of the nose wheel door, were cut away from the Heller nose wheel well and grafted in place on the Airfix kit. MV lens supplied the lights - the fins of the Airfix drop tanks were used on the Heller 100gal.drop tanks as the RCAF didn't use the style of tanks with the vertical fins on the 'winglets' - Heller 100gal. drop tanks were used as they were a more accurate shape according to period photos - Heller speed brake doors were used as 'arms' for the speed brake's 'open' option for the doors in the Airfix kit were quite anemic. They were however, correct for the 'closed' option - the hydraulic ram for the speed brake doors of the Heller kit seemed to be more detailed than the simplified Airfix offering - Pavla's resin cockpit replaced the kit cockpit - Heller's 'sliding hood' portion of the canopy had the correct footprint, whereas the Airfix offering is too tapered. The vac-form canopy in the above mentioned Pavla set is correct as it's based on the Heller canopy, but use the Airfix windscreen for the attachment key they've incorporated for their windscreen. - wing fences moved in to their correct location. They should be approx. 40mm from the wing root - drop tanks moved inward to their correct location. They should be a scale 6' from the wing root - ammo bay scrapped flat and 'ammo boxes' inserted , pus ammo bay door detailed by additional framing - side vents opened as was the small square 'vent(?) on spine in front of fin. Special notes: Orange wing stripes were for one of the frequent exercises that seemed to occur during the 50's. Also note that on the Sabre 5's the small triangular portion of the leading edge of the 6-3 wing that overlapped the ammo door, had to be physically removed to open the door and placed on the wing. The Mk.6 saw this feature become part of the ammo bay door, itself. Decals were a mix of Leading Edge's 1 Wing sheet and Aerographic generic post-war RCAF lettering and numbers - ensuring the early style of number was used as per period photos of '056.. Subject: 430 (F) Sqn. Canadair Sabre Mk.6; s/n. 23677, based at 2 Wing, Grostenquin, France - circa 1958-9 Assists: Heller F-86E (as above with 2 exceptions... (a) the drop tanks. This Sabre is modeled with Heller's optional larger Ferry tanks, only used on longer flights and (b) Heller's version of the jet pipe - which more correctly represented that seen on the Orenda engine, replaced the kit part Kit cockpit is replaced by an 'enhanced' cockpit consisting of a mix of Pavla and Heller parts A Fujimi F-86 provided the wing slats and the decking immediately behind the seat replacing the blank area of the Airfix kit Cut-down scoops from an Italeri F-5A provided the 'sugar scoops' on the fuselage, behind the trailing edge of the wing. Modifications: (as per the Mk.5 - with the following exceptions) - the wing fences removed and the 'slat bay' created by filing/sanding a slanting depression in the wing's leading edge within supplied panel lines - 'slats' glued in place and some Contrail airfoil cut to represent the 'slat actuators' as seen under the wing when the slats are deployed - as is usual on the ground - flaps repositioned - 'sugar scoops' added - kit cockpit 'enhanced' by one made up of a surplus Pavla F-86 seat & Heller cockpit parts Decals were a mix of Leading Edge's 2 Wing sheet and their generic post-war numbers (ensuring the correct style was used as per period photos of '677). Scott12 points
-
Latest off the lock down bench is the Airwaves conversion for the Tamiya Mk 5 Spitfire. Basically it's a new set of wings and a 4 blade prop. Nice and easy. Markings are for Lt/Cdr George Baldwin 807 NAS while on HMS Hunter September 1945. Bit different to the normal Seafires. Hope you like. Please feel free to comment etc. Thanks for looking Dick12 points
-
Here is the finished Campbell-Railton Blue Bird in the 1933 version, now rebuilt and fitted with the new Rolls Royce R engine. The model is built from the FPPM 1/24 scale resin kit, with some added and modified details, the WIP-thread is here. It's built to represent how it appeared on Daytona Beach on February 22nd 1933 when Sir Malcolm Campbell raised his own record to 438,48 km/h or 272,46 mph. Competitors of the same era; Henry Segrave's Golden Arrow and Malcolm Campbell's Blue Bird. Father and son; Malcolm and Donald Campbell. Edit: I thought this was too good to not be included:11 points
-
Hi All, here's my take on the fictional Easy 8 Sherman 'Fury' as depicted in the 2013 film of the same name (Italeri 1/35). Loved the film despite the 'interesting' ending and have never done an armour subject before, so that decided the subject. I loved doing this build and I will be building more armour subjects as well as my usual aircraft and Sci-Fi. Thinking Tiger 1 next There were several issues with the kit itself, for example the extra tracks were clearly an afterthought and simply do not fit the model without breaking the upper wheels (as you can see from their wonky appearance). The instructions are pretty poor and I found the plastic brittle - things would just fall apart mid-build!! I added some extras, such as rope to tie down the payload on the back, some extra tarpaulin to hide the out-of-scale buckles on some of the moulded bits and an air recognition cover... or whatever it is as I just liked the contrast it provided. I also created a bull-whip antenna as per the film. Some firsts for me were the mud (homemade) and larger scale painting and weathering - thoroughly enjoyed all of that! Anyway, hope you like and comments well received... go easy (8) on me11 points
-
Here's a very quick build from the last few days, as a test using Halford's Fiat Capri Blue, and Halford's Racking Grey. The build is very straightforward. The only modification is to remove the unnecessary flap track fairings on the underside of the wings. The A319, A320, and A321 kits use the same wings, but only the A321 has the extra flap track fairings. Their removal is given in step 3 of the instructions. The blue turned out really well, I was afraid at first that it would be too light. I'm also really impressed with the grey. But this build has given me the confidence to use the Fiat Capri Blue on the Revell British Airways A380, and to use Humbrol Midnight Blue for the Landor 747. I built this A319 as G-EUOG, which brought me home after six years living abroad. The decals are the "old" Chatham livery for British Airways, meaning that there is no crest on the fuselage, and no registration decals for the top of the vertical stabilizer, or above the flight deck windows. In addition, the current Chatham livery does not have shading on the tail cone, as depicted with the decals - the current version is solid red. I found the wrap-around decals for the tail cone difficult to apply, and there are some folds. However, with this A319 now hanging from the ceiling, no-one can tell! One thing that bothers me about this kit is that there are no decal options for the cabin windows, like there were for the A320. And there are no clear parts for the cabin windows. There are silver window frame decals, but this means that the windows are represented only by the very thin decal film. This is actually the third time I have built this kit - the first one was damaged beyond repair during my move, and the second one I had completed, just finished the decals and was fitting the antennas, when I turned it over and realized that I had some cement on my fingers, which had melted through the logo decals and smeared blue and red all over the fuselage. So in the bin immediately it went. Most of the time building this kit was spent on the many decals that it has.11 points
-
Mig-21bis MG-125, HävLLv 31, Ilmavoimat Rissala, Finland, 1980s Kit: Zvezda ZVE7259 1/72 Build thread: https://www.britmodeller.com/forums/index.php?/topic/235068508-nordic-heavy-metal-pt-4-mig-21/11 points
-
Lockheed F-104G R-345, Esk. 723 Flyvevåbnet Aarlborg. Denmark, 1980s Kit: Italeri 1296 F-104G 1/72 Decals: Xtradecal 72315 Build thread: https://www.britmodeller.com/forums/index.php?/topic/235067614-nordic-heavy-metal-pt-3-f-104/11 points
-
Hi folk's here's an all time favourite of mine Airfix's Phantom.10 points
-
Here's my second offering for this very fun and nostalgic GB. Thank you Enzo! Lot's of little scratch-built items on these vehicles...shovels, ammo boxes, jerry-can racks, steel tow cable (around the VW spare tire), 2 jacks, sand channels, etc...The paints are all Vallejo Model and Vallejo Air. Decals are OOB. The jerry cans are from a resin set I have. Sand is from down the street. I live less than 600km north of Libya anyway, so I imagine it is similar in colour. I adjusted the MG on the VW to be more relaxed...I also added a windscreen... --John10 points
-
Some Progress Hello Maritime Folk, Again I must start a post with an apology for letting this lie fallow for so long. As I have mentioned before I am now working from home and spending about 9 hours a day in my study on a computer so once I have some time to myself I tend to not want to come back in here and write up this journel. Today however is Sunday and I was not in my study or on a computer at all yesterday, so I can face a bit of time in here today bringing this thread up to date, and I have some progress to report. Once again I fear this might be another long post… To cut a long story short I have found some potentially useful references and have drawn up a second set of plans (the first were no good) that you can see at the bottom of this post. A while back @JohnWS posted this advice: ‘Don’t get caught up in sweating too many unknown details or the model may never be built.’ I have taken that advice to heart and have limited this set of drawings to the hull and gunwales only and have disregarded anything else. All the stuff that goes on top, masts, boats, superstructure, funnel will have to come later. I am very interested in any feedback you may have on the preliminary set of drawings that I have made. But first, reaseach including searching through libraries, bookshops, my own library and – of course – the internet. My first objective was to find any images at all of any merchant ship that met the following requirements: · Appropriate era · Screw propulsion · Clipper bow · Rear set funnel · Two masts Images of ships that meet all of those requirements are quite rare. One very famous ship – SS John Bowes - cropped up early in the search. John Bowes was the world’s first screw propeller collier and apparently created something of a revolution when it first saw service in 1852 by immediately delivering more coal from Newcastle to London in 5 days than two equivalent sailing vessels could in a month. According to W.A. Baker’s outstanding book From Paddle-steamer to Nuclear Ship (1965) ‘She proved such a success that her design was widely copied’. The image below is from that book and shows that John Bowes met four of the five requirements I had set, only differing in having three masts instead of two. I wonder if the fact that she was ‘widely copied’ and was presumably the very image of a modern merchant ship might- at least indirectly - have had some bearing on Mr Robert Stewart’s decision to reconfigure Xantho in the way he did. From the internet I have found these two images of a model of this important and influential vessel. Apparantly the model is in the South Shields museum - Tyneside. Searching further I found a terrific webpage on channel island shipping: www.channelislandsshipping.je/page42.html Which had images of no less than four vessels of immediate interest. · Metropolis, · Foyle, · Esk, · William Miskin. William Miskin was of particular interest as its funnel was set well to the rear, in a roughly equivalent postion to Xantho’s. Interestingly the Channel Island website’s history of SS William Miskin finished with the vessel being sold to New Zealand interests which led me to investigate this book… Where I found this photograph, which shows the SS William Miskin run aground at Hokitika, a small town on the West Coast of New Zealand. (Miskin is the screw steamer not the paddle steamer in this photo.) This I think is as close as I will ever find to a photograph of Xantho. This ship’s age and fundamental configuration is similar to that of Xantho (albiet William Miskin was built as a screw steamer an not re-configured from a paddle-steamer”). Interestingly – at least to me - further research indicated that the SS William Miskin was wrecked in 1868 near Timaru NZ. By strange co-incidence the site of her destruction is about five km South of my mother’s childhood home and about ten km North of dad’s. So – armed with the outcomes of my research including the very indistinct diagram of the hull lines of PSS Premiere (below)... and this image of what the remnants of Xantho's rudder and propeller would have looked like if ever put on public display... I set about having a go at drawing up a possible set of drawings for the hull. Here is the result at 1/100 scale. I’m reasonably happy with this attempt but there are a few things that I’m not sure about or that might raise some discussion. 1. I have given this ship a completely flat bottom as indicated by Premiere’s line plan. I’m fairly confident that this is correct and is likely to be an artifact of Xantho’s lineage as a paddle-steamer. One of the few advantages with paddle propulsion is that it allows a very shallow draft, an advantage that a flat bottom takes full advantage of. Dr McCarthy says that during the dive on the Xantho wreck the hull shape below the waterline was not clear as the wreck was buried to that level. 2. I have given the vessel a single unbroken gentle sheer curve from bow to stern. I think that this is consistent with the designs of the day. The photo of the SS William Miskin shows a raised poop at the rear but the painting from the Channel islands website shows a single line for the length of the ship. I therefore think that on the William Miskin the poop must have been added later during a refit. The indigenous drawings of Xantho show no sign of a raised poop. I have interpreted the gunwales to be of changing height from very low at the bow to full hegiht at midships and then lowering again toward the stern. Does this seem reasonable? 3. I think that the ‘deck line’ DL (this is the point a which the deck meets the gunwales) on this drawing is incorrect (or at least unconvincing) near the bow. At the point indicated it sort of ‘waists’ inward and I don’t think that this is correct? In this case I drew the cross-sections first and derived the deck line from the sections. I think I might need to do this the other way round. 4. On the cross sections (A, B, C ) the gunwales start by leaning outwards quite markedly then steepen though D until they are vertical at E. I believe that they would have been vertical at E because the hull sides would be vertical where the paddle-wheels would have been mounted (4a). The gunwales then progressively lean outwards again towards the stern though (4b). I am not sure about this. Should the gunwales remain vertical behind the midships point? Any comments are most welcome. Very best regards and thanks for all of the interest shown so far in this – somewhat unusual – project. Bandsaw Steve10 points
-
The Aviatik 30.40 was a prototype Austro-Hungarian interceptor from 1918 and this is my build of the Alliance Models 1/48th limited run kit. I have always thought this to be an attractive little aircraft especially with it's interesting two tone grey low-vis camouflage. There only being a few parts in the kit I was hoping for a straight forward build, but as is often the way with limited run kits there was a lot more work than there appeared to be at first glance. I added as much detail to the cockpit as I could based on photos from similar Aviatik aircraft from the period and as usual little of it can be seen now. Seat belts are from Eduard and a couple of generic dials were added to the instument panel. All the flying surfaces were sanded to remove the exaggerated rib detail and to thin the trailing edges. The distinctive washout on the ailerons was added by gently heating them and bending into shape. The engine was replaced by one I found in the spares box. With some additional wiring and plumbing although not 100% accurate it's passable, especially as it's mostly hidden behind the cowling. The struts supplied were rather thick and over sized so these were replaced with brass Strutz material, soldered where strength was required. The spoked wheels are Eduard items robbed from another kit and I drilled out the kit wheels to get the tyres. Not perfect but good enough. The propeller is made from wood veneers. After looking at the photos I realised it wasn't fixed which is why it looks a little crooked in some views. The paint was my own mix of Mr.Color paints. The hardest part of the build was trying to replicate the machined aluminium cowling and panels and I'm still not really happy with the way they turned out. As always critique and advice welcomed. Wayne.9 points
-
Just a few more mix of 28mm and 1/35 figures I painted from my stash. Cheers Jim.9 points
-
Eduard Mk VIII Spitfire, OOB. Painted with Mr Color Laquers and weathered with oils and pastels. Really nice kit,and just what i needed to get something finished. Peter Peter9 points
-
Original build log here: As my first foray into resin models and one of my first aircraft models I am super happy with the result! Looking to continue improving though. It was built straight out of the box except for cutting one of the engine cowling pieces out so the engine was more visible9 points
-
Hi, Here is my hasegawa's Skyraider Wing fold mechanism is a scratchbuilt work paints are gunze acrylics, and weathering is done with oil paint9 points
-
Hello All, I thought I'd present my attempt at Revell's 1/72 Dambuster: I received this as a birthday present from a pal which although gratefully received, I would have probably bought the Airfix one - would be interested to know if people have built both and whether the latest Airfix one is actually superior? It's an acceptable build although the wheel bays and undercarriage was in my opinion, poorly engineered and not very strong. I also had a significant step on the fuselage halves but corrected them. You can see the fit issues on the wheel bays and undercarriage plus the repairs I had to make after one them completely collapsed! I added some extra detail to the nose area and tried a 'marbling' technique to paint the camo on a black base, rather than my usual grey primer and pre-shading. I actually prefer this approach and am pleased with the effect despite the hand cramps from the extra time with the airbrush! Had some issues with the decals silvering which show up on the black prominently and on the wing stencils. Not sure why as I applied my usual technique... Anyway I hope you like. Cheers, JB.9 points
-
This is the Aeropoxy Resin 1/48 Gnat Mk I/Ajeet (Invincible). After building roughly 270 Gnats at HAL and its outstanding performance against Pakistani Sabres and F 104s the Gnat was upgraded by adding an extra indoard hardpoint on each wing to take extra payload including Soviet UB-16-57 Rocket pods, a new Martin Baker Mk 9 seat, new avionics and fuel in the wings. The aircraft was rechristened the 'Ajeet" (Invincible) and was built from 1977 to 84. I chose to do it as an Ajeet from 2 Sqn "Winged Arrows" from the early 90s just before retirement at Kalaikunda. The model had to be converted by using two extra inboard pylons and UB-16-57 Russian rocket pods and modifying the seat to a Martin-Baker Mk 9. I used a salt spray over silver and then painted the camouflage of Russian green and Olive by Vallejo followed by careful sanding to bring out the silver. The crest and numeral '2' on the rudder are hand-painted with a decal numeral in the crest. National markings are Bright Spark and serials by tally Ho. The model shape is a bit short on length and the undercarriage had to be modified to get the sit more or less right. took a ton of steel balls in the nose. Pics of the real aircraft by Peter Steinemann.9 points
-
Hobbyboss 1/72 Westland Lynx MK90 - Royal Danish Navy (Søværnet) My first group build ever and infact my first kit to finish in something like 35 years (I’m a slow builder 😁). A very nice kit that went together nicely. Decals are bit on the thick side I think, but for a novice it’s likely better that way around. Build thread here, A big thanks to Rich, Col, Enzo and everybody who contributed (we broke the voting “machine” ). Cheers Johnny b9 points
-
9K37M1 BUK (SA-11) - Finnish Army Helsinki 2004 Kit: Meng SS-014 (1/35) Paints: Testors MM & Tamiya AM: none Decals: kit Build Thread: https://www.britmodeller.com/forums/index.php?/topic/235068523-finland-9k37m1-buk-sa-11/ First GB completion since last year's spring Blitzbuild.9 points
-
So, I built a couple of Special Hobby kits a few years ago, I vaguely remembered them being rather challenging but nice in the detail... My memory wasn't wrong! I fancied doing a float plane, and for some reason seem to be enjoying doing biplane rigging so this looked like a nice idea. The kit is very nice, spendid detail right down to the weeny teeny wing lights. I painted these red/green first (leaving the "lens" unpainted) then did them in the khaki of the plane, so you can see the port/starboard colour through the lens. Special Hobby have not compromised scale for structure in any way, which made attaching the floats seriously difficult. I ended up with blobs of cyano to toughen the join to the struts, then sanded this down so it wasn't quite so unsightly. It's brush painted with Humbrol enamels, gloss cote before and after decals, and weathered with watercolours before a final layer of matt cote. Rigging is standard size Uschi rigging.9 points
-
Afternoon folk's,just got her as done as she's going to be,about to put a few in the gallery.9 points
-
I do believe I've made an important historical discovery whilst building this kit.... As I was painting the figures, in what passes for their leather sheepskined flying kit, it occurred to me that it seemed strange that the feet were moulded in one bit, see picture below I knew I had seen this before somewhere and then eureka Here we are Picture from Ebay Now while these no doubt keep your feet nice and warm it can't have made manoeuvring about trying to defend yourself from fighters very easy ! Cheers Pat9 points
-
EDUARD 1/48 SPITFIRE LF IXe, Kbely, Praha 19469 points
-
Thanks Martian Oooh, maybe I ought to stock up then… Thanks Tony A shrine eh? Neat. As for not touching another man's tubing… FNAAR! Too late, it's been Finbarr'd! Indeed! I must say it's been a long time since we've had any double-entendres here so it's about time I gave you one <<< there it is, snurf titter Thanks Mark - level 50 Elf? No idea, sorry… Ah, Tribbles - classic Star Trek… Sorry to hear about your desktop Mark, but I have to admit to a slight interest in knowing what your cat and daughters former boyfriend were up to… Well I'm at that stage where I'm considering close up. Sadly, I've done me back in, again. Mrs B had six growbags, three bags of manure, three bags of compost and a bag of potting grit delivered yesterday. The delivery bloke kindly dropped them at the end of the drive but guess who got to cart them into the garden. Yep, Mr Weak SI himself. Locked up again this morning so I think a hot bath is in order, but I did clean up the fuselage halves a bit: Untitled by Ced Bufton, on Flickr I've decided that I can instal the gunners and the blisters after join up by looking through the blister holes to locate the gunner on the other side. That means I can leave the blisters off. I've also done some research on the blisters again and I think I'm reasonably happy with the frame positions. Yet to decide whether to use Filmoplast or ART (with rivets) for the frame. Bath time…9 points
-
ok due to my cohorts disorganisation and last minute panic to complete his builds @Col. I've been forced to do numbers up on the builds in this GB myself. There are some really interesting numbers so as it stands now...and I know there's more to go into the gallery. 1, 39 different types of aircraft 2, 13 non aircraft subjects 3, 3 Ikea builds! 4 a pair of animals...no not some un-nameable members!! 5, 1 build from Iceland! 6, 1 build from outside the region ok the big numbers: Popular country 🇸🇪 Sweden - 47 (+1 for country of origin for Czech build) 🇫🇮 Finland - 26 🇳🇴 Norway - 10 🇩🇰 Denmark - 10 🇦🇹 Austria - 2 🇮🇸 Iceland - 1 🇨🇿 Czech - 1 🐦 Birds - 1 ........and finally the subjects themselves! Saab Draken - 9 Saab Viggen - 9 GD F-16 - 7 Saab J-29 Tunnan - 5 MD F-104 - 5 Saab Gripen - 4 Brewster Buffallo - 3 Supermarine Spitfire - 3 Hawker Hurricane - 3 Saab Lanson - 3 Gloster Gladiator - 3 Saab J-21 - 3 MiG-21 - 3 Venom - 2 SAAB 91 - 2 Saab 105 - 2 Bristol Bulldog - 2 others - 21 (all single type builds) * and I take no responsibility if the numbers are wrong....it was Col's job!!9 points
-
General Dynamics F-16A 372, 338 Sqn Luftforsvaret, 1988 Kit: Revel; F-16 MLU 1/72 Decals: modified from Vingtor VTH72132 Aftermarket: Penguin missiles from Hasegawa weapons set 35009 Build thread: https://www.britmodeller.com/forums/index.php?/topic/235067611-nordic-heavy-metal-pt-2-f-16/9 points
-
Hi All Here's the lockdown build. This is an old kit with rubber band tracks that are about 5 links too long so fruils are the only real option. The extras in the fighting compartment are all Tamiya as is the badly painted figure. Strange looking vehicle, part of a large number of captured French tanks modified by a Major Becker in France prior to D Day. The high superstructure and thin armour made it pretty vulnerable apparently. The base is my first home made effort which has given me the confidence to try bigger and better things. Usual C&C welcome - stay safe all Cheers David8 points
.thumb.jpg.87669a5ffb8b13672a3d675087a46d42.jpg)
.thumb.jpeg.8799c240c730b916dd0efd9a2bcf19cf.jpeg)


.thumb.jpg.6a89e05cd459361baad12b5efaa51407.jpg)


This leaderboard is set to London/GMT+01:00