
Leaderboard


Popular Content
Showing content with the highest reputation on 05/04/20 in all areas
-
I've finally finished my 1/48 Classic Airframes Bristol Blenheim Mk IV.f. While it's not a "Tamigawa", or Eduards kit, it's a good solid 'short run' kit that gives a lot to work with, and is a fun and rewarding build. Mine is finished as a 404 Squadron, RCAF, aircraft flown by Wing Commander Woodruff, and F/S Sims on 18 December, 1941, when they scored this units first air-to-air victory, a JU-88, operating out of Sumburgh, Shetland Islands. I hope you like, and thanks for looking, Colin The build log ... Colin38 points
-
Here's my Lancaster B.II, just finished in the Lancaster STGB. Build thread is here. It's the Airfix kit, built as LL735, which was the testbed for the Metrovick F.2/4 engine (which went on to power the Saunders Roe SR.A/1 and was ultimately developed into the Armstrong Siddeley Sapphire) in the early postwar years. Conversion parts were 3D printed, and it's mostly finished with AK Extreme Metal (I think the only exception is the high speed silver where the spars were over-painted). This was my first go at 3D printing - the CAD for some of the complex shapes was a bit tricky, but it was a lot of fun. Thanks for looking Julian37 points
-
Hi all, This is the first aircraft model I have completed in about 25 years. Given away free with the Daily Mail newspaper a while back, and I had just read Geoffrey Wellum's biography "First light" so had to do it as a 92nd squadron machine. I could vaguely remember watching the BBC dramatization of the book years ago so tracked down a DVD copy of that as well. Xtradecals, and xtracrylix for the paints. Thanks Alan28 points
-
Finished, or as finished as it is going to get. I think I'd need to build two or three of these to get one I'm happy with. W.Nr.2831, 2N+GN, 5./ZG 1, flown by Fw.Manfred Dähne, Bordfunker Ogfr. Herbert Klinke.26 points
-
My 2nd work of 2020 is this little gem. Hope everyone's safe staying at home to build your kits! Kit: Zvezda 1/48 4821 Accessories: Micro Design photo etching part Advanced Modelling 1/48 KAB-500L bombs Advanced Modelling 1/48 KAB-500Kr bombs Master 1/72 F-14A pitot tube(early style) Master 1/48 Sukhoi type static dischargers A very well researched and designed kit by Zvezda. Fitting is also fantastic. But the surface is a bit too simple, only with some raised rivets and recessed panel lines a bit too wide. I also made a video by my crappy iPhone and you can watch it if interested: Yak-130 Light Ground-attack Aircraft Diorama Yakovlev Design Bureau Vintage Scheme Demo Scheme Thanks for watching and stay safe! Yufei25 points
-
Here's one of my entries for the 'In the Navy' GB still ongoing just now. The conversion from the new tool Airfix kit was a breeze, the Alleycat parts fitting superbly, even for a hamfisted numpty like myself! I've ordered another to do a MkII NF which I have markings for. The Airfix kit even has the early teardrop canopy to use for this build, signs of a MkI or MkVI on the way maybe? The decals were from High Planes and worked smoothly using the 'wetting on with the Johnsons Klear' technique described variously on this forum. I do very little weathering to my models, to worried to overdo it! Questions and comments welcome. Davey.24 points
-
Hi everyone ! My latest completion . A-7E painted as a Hellenic Air Force fighter - bomber . The Italeri kit is an old one but it's nice to build . OOB except for the AIRES ejection seat . Hope you like it22 points
-
Hi all, since years I planed to build the old 1/48 Revell/Hasegawa British Phantom kit. Now I did it! Add Eduard PE´s, Master angle of attack, Brassin seats, Reskit wheels and AirDoc decals for a No 92 Sqn aircraft. Nice eyecatcher on XV490 was a grey painted nose instead the black one.20 points
-
Didn't enjoy this challenging build, the new Airfix kit can't come soon enough! Finished as the Duxford-displayed XJ824 for a work colleague who flew it into Duxford on its last ever flight. I added Freightdog Olympus 201 exhausts and scratchbuilt the cockpit, crew entrance area and entry ladder along with extra detailing in the wheelwells and gear doors. Decals were a mixture but the 101 Sqn badge and serial were provided by @Darth Vader. Paints were Gunze Mr Color lacquer for the camouflage colours and MRP lacquer mix for the Light Aircraft Grey Build log is here: Very glad it's done, now I can move on with my life! All the best, Alan20 points
-
AIRFIX 1/48 JUNKERS Ju.87B-1 Afternoon all, Here is my entry into the Ju.87 Single Type Group Build which is currently ongoing. Airfix's very enjoyable and easy to build 1/48 Ju.87B-1 (#A07114) I have built the kit mainly out of the box with the exception of replacement seats as the kit pilot seat was damaged on arrival plus the pitot was replaced with brass tube. The big downside of the kit is the clear parts and the way they fit or rather don't fit especially the 'Gunner's' rear sliding part which should 'drape' over the fuselage, it really just doesn't look right at all without some serious modification. The model has been weathered with Tamiya weathering powder and an oil paint filter. I have used some figures from the ICM #48082 set and the Tamiya Citroen Traction 11CV 'Staff car' to add some scale and perspective (both lovely little kits). Yes I know the markings for the Citroen are from the Eastern front but hey, I like to think they are on Le grand Tour.... I have scratch built the bomb trolley and whilst it was great fun to build I appreciate that it is a little overscale. As always comments and critique happily received: All in all a very enjoyable project. Cheers, Mark.20 points
-
Hi all. I'm new to this community and this is only my second thread, the first being on the intros section, but thought I'd jump straight in with a completed build. I was half way through this when I joined up and the build was being documented elsewehere and I thought I'd post here for your amusement and / or pleasure. Hope you like it. If I can get to grips with this photo hosting I'll see if I can't share a build or two.19 points
-
Finally finished this kit! It had a lot of challenges, and beat me for almost two years. A couple problems were self imposed - lost parts, too much man-handling, But quite a few issues were the kit itself - warped fuselage and short shots on the sprue, along with a few very serious gaps. But in the end... LOL. Anyway, on to the pics I always notice a few oops, after I publish the pics. I may go back and clean those up. Thanks for looking, Mark18 points
-
Howdy everyone, hope you don`t mind me showing some pic`s of my latest completion Attempt number two at Special Hobby`s 1/48 Firefly kit Finished to represent a Firefly Mk I of 1771 Squadron, British Pacific Fleet Flown from HMS Implacable towards the end of WWII As usual built mostly from the box... only additions being an etched set of seatbelts I found in the spares box, rear view mirror and aerial wires Decals are the kits too The carrier base is an Eduard item Hope you enjoy the photo`s, thanks for looking Cheers Russ18 points
-
Finished today, my contribution to our clubs group build (Southern Maryland Scale Modelers club....great bunch of guys). This is a OOB Tamiya 1/48 P-51B. Older Pro Mod decals. The nose checkers decals just didn't work, even with a decal clear coat so out came the Tamiya tape and the paint. Wasn't as bad as I thought using the original decals as a trace to make a mask. Overall, just love building this kit (my third), highly recommended for a fun COVID build. Seatbelts stay in the OOB swimlane, made with wine bottle foil. I puttied up my wings.17 points
-
Hi all. In March 2019, I visited the Boneyard at Davis Monthan. Right next to the airbase is a plot full of Grumman Trackers lying on their bellies with folded wings. The sight of these beauties was the inspiration for this model. The kit is from Kinetic in 1/48 scale. I used a Vector radial engine, an Eduard pe set for some of the exterior deatils and Wolfpack's wingfold set. All other changes to the kit are scratch built using plastic card, strips and rods as well as brass tubes and copper wire. AK's Real Color paints were used over a black primer from Alclad. Abteilung oilpaints, thinned with white spirit were used as a wash. The base was created using AK Terrains light earth and pastel powders to make color variations in the soil. Static grass ond tuffs were glued on the sand with white glue. The wooden pallets were also scratch built from wooden strips. Thank you for watching.17 points
-
Evening all, First of many build posts here I hope. Putting the finishing touches to this Italeri 1/72 Horsa Glider. A nice kit to build, despite the vintage of the tooling. A few mistakes made along the way... usual for me. One of which was neglecting to add weight in the nose. Doh! Good job I left the forward door open.17 points
-
1/72 Revell He 177 Greif, KG40 - Nuclear Torpedo Bomber - Luft '46 He 177, GP+RH, Kampfgeschwader 40 - Fliegerführer Atlantik (Flyer Command Atlantic) Imagine, if you will, that Germany, during the dying days of World War II, was the first to discover the atomic bomb. With the threat of submarine deployed nuclear suicide strikes off the coast of American cities, the War in Europe was brought to a swift and terrifying stalemate. This allowed Germany to rebuild and re-arm itself. Here we have the Heinkel He 177 long range nuclear capable maritime patrol bomber. Advanced lightweight alloys were used in the construction, improving aerodynamics and range. A bold red tail signified this as a nuclear weapons platform able to deliver the newly developed nuclear torpedo (2 carried). This advanced weaponry could destroy an aircraft carrier and most of it's Battle Group with a single strike. 2 x modified and highly advanced Henschel Hs-293 were carried for BVR reconnaissance and to guide the aircraft to potential targets. The dawning of a new age was amongst us..... Cheers all, Stay safe. Phil17 points
-
Tamiyas super 1/35 Achilles, been finished for a week or two now hopefully find the wip here: Pretty much oob except for an aftermarket aerial set and the stowage which is an assortment of spare bits etc I've collected. With this current situation I seem to have lost the old mojo, at least busy with work for now, work alone and outside with very little human interaction (Paints a really appealing sociable picture of self doesn't it!). Any-how got around to taking a "few" pics of the finished article, indoors and out. Not sure why but some of the indoor ones appear to have a slight purple hue to some areas for some reason, I assume it's down to the lighting. And here it is along side its Normandy 44 companions. Apologies for the number of pics, couldn't decided..... Must get around to doing a RFI for the Firefly, think it needs a figure first though. Thanks for looking and good luck and best wishes to all. Darryl16 points
-
I have an ongoing, long-term project to build a model of an aircraft from each of the current and former European “flag carrier” airlines. Here are the latest additions - the Revell E190 and BPK CRJ-100 representing Bulgaria Air and Adria (Slovenia) respectively. Bulgaria Air Embraer E190 This is my first build of the Revell kit. It didn’t give me any major problems although I had to straighten the warped winglets (hairdryer and care) and fill a few sink marks particularly inside the engine cowlings. Strangely the right engine was a perfect fit to the wing but the left one was a complete p.i.t.a., exactly the same as the Zvezda Tu-204 I built last year, an odd coincidence. Pitots, aerials and some other small parts came from an ExtraTech PE set. Paint is the usual Halfords combination of Appliance White and Racking Grey with Tamiya and Revell metallics. Decals are by BOA with Authentic Airliners windows and details from the excellent kit sheet. I know the livery might be a bit white for some tastes but personally I think it rather suits the E190. Adria Canadair CRJ-100 I used the earlier version of the BPK 1/144 kit before they introduced the full transparent fuselage. It was another easy build without any significant issues. A couple of small parts are a bit crude, particularly the nose wheels, but overall it is a lovely little kit which I enjoyed building. Paint is also Appliance White with Tamiya and Revell metallics. Decals are by Nazca with an Authentic Airliners windscreen and a couple of details from the kit sheet. Anything from the kit sheet needs a coat of Microscale Liquid Decal Film first. If the rumours of a BPK 1/144 Boeing 757 turn out to be true and it’s as good as the little CRJ we are in for a real treat Thanks for looking and as always constructive criticism is welcome. Dave G16 points
-
Hi All, it's been quite a while since I posted anything on BM. I've finally sorted out a new photo hosting source after the PB debacle (thanks to the very useful articles posted elsewhere on BM) and thought I'd share a few things I've been working on. This is the old 1/35 Dragon Sherman Firefly VC Kit no. 6182. It's built OOB apart from the decals which came from a Bison set. The kit was ok apart from those tracks! They turned out ok in the end but with 3 pieces per link I was almost losing the will to live by the time I'd finished them. Never again! Hope you like it. Bandit125016 points
-
#10/2020 As you may have noticed over the past years, my dad is a 109 aficionado. Like many others he waited sooooo long for a 1/48 Erla G-10 and was exited when Eduard anounced theirs. After opening the box and starting to build it my dad was disappointed. Well, it looks like an Erla but Eduard got the specific details (slightly) wrong. The lower cowl looks like an early G-model, it should be more boxy and voluminous, more straight forward and not with such an upwards angle. The front fuselage, seen from above, is slightly asymmetric but it shold be way more. The vertical panel line on the left fuselage side at the height of the windshield should be 1-2mm more forward, as the lower end of the round quarter panel on the right fuselage side should be 1-2mm more upwards. Another thing that is wrong are the trim tabs on the elevators. Eduard got that wrong with all their late G-models, starting from the G-14 on. The early G models had single narrow tabs, the late models either a doublepack of narrow ones on each side or single wide ones. On to the markings. Erla G-10 had smaller Balkenkreuz. Usually the ones on the fuselage matched exactly between the panel lines. Erla ones had some space to the lines. My dad realized that too late, so on the model you see the kit´s crosses. Also Eduard didn´t consider that Erla G-10 had the crosses on the wings in a more outward position than WNF or Regensburg. My dad used here smaller Balkenkreuz from a 190 and placed them in the correct position. The upper camo with RLM 75/82 Eduard suggests is questinable. Usually the Erla G-10 were painted in 74/75/76. It may be nitpicking but in times with easy access to wartime pics and technical drawings it should be no problem to get a kit done correctly.... Besides that, it was an easy straight forward build. Done oob, only added brake lines with plastic rods and lead wire. Used EZ Line and fishing line for the antenna and Gunze paints for the camo. Build thread here https://www.britmodeller.com/forums/index.php?/topic/235067682-defence-of-the-reich148-messerschmitt-bf109g-10-erla-jg3/ In December 1944, the CO of I. Gruppe, Oblt. Seidl received a new Bf 109G-10 off the production line at Erla in Leipzig. The Gruppe, at this time, was flying out of Paderborn, from which they conducted missions against American and British units. In all probability, Oblt. Seidl led the unit in this aircraft during Operation Bodenplatte on January 1st, 1945. The target was the air base at Eindhoven. The markings of the aircraft were supplemented by a white band ahead of the tail, which identified machines of JG 3, within the framework of the Defence of the Reich. Ahead of the fuselage cross was the Gruppe leader marking, and below the opening part of the canopy, the pilot had a personal marking applied, in the form of a numeral '8'. This marking was applied to aircraft flown by Seidl during his service with JG 53, during which he would acquire all of his 31 victories. An oddity on this aircraft is the absence of the lower wing crosses. The aircraft was equipped with a gun camera. DSC_0001 by grimreaper110, auf Flickr DSC_0002 by grimreaper110, auf Flickr DSC_0003 by grimreaper110, auf Flickr DSC_0004 by grimreaper110, auf Flickr DSC_0005 by grimreaper110, auf Flickr DSC_0006 by grimreaper110, auf Flickr DSC_0007 by grimreaper110, auf Flickr DSC_0008 by grimreaper110, auf Flickr DSC_0009 by grimreaper110, auf Flickr DSC_0010 by grimreaper110, auf Flickr DSC_0011 by grimreaper110, auf Flickr DSC_0012 by grimreaper110, auf Flickr DSC_0013 by grimreaper110, auf Flickr DSC_0014 by grimreaper110, auf Flickr DSC_0015 by grimreaper110, auf Flickr DSC_0016 by grimreaper110, auf Flickr DSC_0017 by grimreaper110, auf Flickr DSC_0018 by grimreaper110, auf Flickr DSC_0019 by grimreaper110, auf Flickr DSC_0020 by grimreaper110, auf Flickr correct position of the mentioned vertical panel line https://me109.info/display.php?from=site&lang=de&auth=e&name=version_display&fotonummer=8017 on the model DSC_0020 by grimreaper110, auf Flickr correct round panel and shape of the lower cowl https://me109.info/display.php?from=site&lang=de&auth=e&name=version_display&fotonummer=7199 and on the model DSC_0022 by grimreaper110, auf Flickr DSC_0021 by grimreaper110, auf Flickr14 points
-
Hello all, just put the steps on work in progress if anyone is about to build this kit. Im more used to 1/32 so this was new for me! Thanks for looking all!!13 points
-
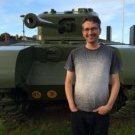
Hi everybody. I hope everyone is keeping well. This was a project that I finished a month or so back but, with what's been happening with the current circumstances, I have found it difficult to find much time for modelling or getting onto Britmodeller. I'm trying to make up for that a bit today as this is the first day for a few weeks that I haven't been constantly trying to do my job remotely from home. This was a project that I began right at the start of the year as a stop gap between GBs. I wanted something relatively quick to make and, as I had made another modern 1/48 armour kit from Tamiya a while back, I fancied having a go at another. This kit has been really nicely detailed by Tamiya and, for the most part, it was a typically straight-forward build. I found a couple of parts were a bit hit'n'miss in terms of location but other than that it was a really fun project. Kit: Tamiya No. 92 Paints: Humbrol, Revell, Citadel, Vallejo, Tamiya and Railmatch Acrylics all applied by brush Extras: Tamiya stowage set items and stretched sprue antennas The WIP thread - what there is of it - can be found: Here I've tried to be a bit more subtle with the weathering than I sometimes am. I was intending to use this as an experiment for some heavier techniques but, when I looked at some of the photos of these actual tanks - in the time period suggested by Tamiya - they were not always that heavily weathered, so I thought I would practice some lighter techniques instead. All the weathering is done with standard acrylic paints applied with brushes including stippling brushes. A few photos with a desert photo backdrop and the Abrams on the chipboard surface of my work table: And finally some photos of the Abrams with my build of Tamiya's Japan Ground Self Defence Force Type 10 tank: I can thoroughly recommend both of these kits for anyone who enjoys building 1/48 armour. Kind regards, Stix12 points
-
At the start of the year I decided to build these two in a side by side build. As the colour schemes were the same I thought they would be a nice quick build. Wrong. I’ve thankfully managed to finish them in the last week during lockdown. Both kits are Airfix 1/72 scale and are now quite long in the tooth. The mouldings have raised panel lines and all the control surfaces are able to be moved, so if built straight out of the box looked quite toy like. Worst of all were the clear parts, hardly any indication as to where the framework goes, totally smooth and poorly fitting. I rescribed the panel lines on both models and removed the toy like hinges of the control surfaces. The Heinkel was also missing wheel bays for the undercarriage, so I cut them out. Both kits were airbrushed using Vellejo model air paints. I managed to get some photos outside this morning. Despite not really enjoying the builds, I’m fairly pleased with the results. First the He111 And the Ju88 I also built up the fairings around the gun mounts at the rear of the canopy as the kit only provides two holes.12 points
-
Hi All, So I was drumming my fingers waiting for the new Airfix Tiger, already done the Albion Refueller for it and knew it would be here shortly so didnt want to do anything too complicated till it arrived (it has now - hurrah!) so I rummaged in the stash and found one of these little airliner kits which were free gifts in Kelloggs Cornflake packets in the 80s - I think they were tooled by Rosebud or Rareplanes, anyway I'd already done the Short Empire and the AW Atalanta so I thought I'd do their TriStar but convert it to an RAF K.1 Tanker. Went together nicely with very delicate undercarriage, fit was as you expect for a push together throwaway toy but some Mr Surfacer and PPP sorted it. I drilled out the engines and painted the engine silver and the insides white then hit it with Humbrol Ocean Grey which isnt too bad scale effect wise. The wings on a TriStar are a nightmare to paint so I compromised by spraying the whole thing silver then handpainting the wings and adding some really really thin black decal strip - actually the only thing I could find small enough were the 'barrier' lines between options on an Airfix Lanc decal sheet! Even the zigzag cheat line is there though you can't see it in the photo...hadnt any RAF titles the right size obviously so I used some scrap decals which amazingly are legible under magnification (I didnt know that til I took the photos) not sure what scale she is - I suspect at least 1/400...maybe smaller Great fun - though this may be a psychiatric cry for help... Safe safe everyone! TT 8F4F266F-2E4D-4EAD-9CC4-02A1C06BFEC6 by Ben Brown, on Flickr A08ECE1F-852E-4C0E-BCFA-6051DDBB9012 by Ben Brown, on Flickr 73580268-21C6-47DF-BB53-61EE13DC138C by Ben Brown, on Flickr 8F143C90-ED3C-40A2-B971-B2EE6CBDA904 by Ben Brown, on Flickr12 points
-
Well so much for plans... This morning my intentions were to finish the canopy masking on this one, then do the undersurface masking on the FE8. I spent all afternoon plus a bit finishing this one, so the FE8 will have to wait. There is definitely a good case here for something like a silhouette cutter but I don't have one so it was trial and error for the remaining masking. The lower panels on the gunner's compartment were relatively simple but did show up the fact that I hadn't paid attention on the starboard side when masking the "greenhouse". The straight line that should run fore and aft at the bottom of the greenhouse panels, and along the top of the gunner's panels wasn't there, but fortunately I only needed to raise the rearmost 2 or 3 panels and trim a smidgeon off the right side of the centre panels to keep the gap. That works, straight enough for me! Then it was on to the tricky bits. The windscreen wasn't too bad. I did the centre panel, then stuck the outer ones on lined up with the centre and trimmed off the overlap, then adjusted the bottom edge and the rear edge accordingly. The gunner's canopy was a right PITA. For that one i added the forward 3 panels as per the windscreen, ie fitting then trimming off along the edge, then removing and trimming back slightly to allow for the frame. The curves caused a bit of a problem though, so for the centre and rear panels I added a strip along the side, marked top and bottom at front and rear, and marked the centre frame. The tape was then removed and cut and, surprisingly, it worked pretty well! A similar approach was used for the pilot's canopy and after a good few hours I had this... and it all seems to match up too! Of course I'll only really see how good it is when I remove it after the painting, but I'm hopeful! Thanks for looking in! Ian12 points
-
Hi All, Kaman SH-2G(NZ) Super Seasprite. KittyHawk 1/48 Here is my model of '01, an SH-2G NZ, one of 5 new build Helicopters which served with the NZ Navy for 10 years from 2001 to 2015 before being replaced with a newer version. Model built from a Kittyhawk Kit with some additional details including an interior for the cabin. Meanwhile on the Cantabury Plains.... More pictures in the build thread here Super Seasprite Build Thread Thanks as ever to the mods Rob85, Hewy and TrickyRich and to all the contributions and comments along the way. Special thanks to Charlie NZ for the invaluable pictures. Colin12 points
-
Another one I finished some time ago: The (very) old Dragon Pz III M/N kit no. 9015. This one is finished as an Ausf.M at the time of the Battle of Kursk. German armour is not really my thing but I've always liked the look of the Pz III's and IV's with the Schurzen fitted. As ever, hope you like it and all comments/criticism welcome. Bandit 125011 points
-
Douglas DC-10-30 Finnair, 1990s Airfix 1/144 kit + FDcals + Nazca details Another one for the Douglas Commercials line up. Anyone who has built this kit will know that if you build it OOB the engines hang so low that they touch the ground, so the pylon attachments were removed from the wings and the pylons themselves reduced in size. I also added some stiffeners inside the wings before assembly as the whole thing is too flimsy otherwise. Wing surface details are of the very fine raised line type, which had to be completely removed because there were some sink marks to be filled and sanded. Just as well because Airfix marked in too many spoilers! So all wing detail was scribed in. Why Finnair? Just because it’s a great looking old school livery. Thank you FDcal. I also used the Nazca DC-10 details sheet which I liked a lot. Much simpler than trying to engrave the cargo doors, vents, etc on the fuselage. Paint was of course Halford’s Appliance White, with wings finished in AK Extreme Metal Polished Aluminium and Xtracrylic Dark Gull Grey and Light Aircraft Grey over Tamiya grey primer.11 points
-
Thanks Ian - easier on the other one, I'd practiced Cheers Cookie - you're very welcome! Thanks Giorgio True - as always, I need to think ahead Now you tell me Thanks Mike References eh? Even the walkarounds in the links at the bottom of this page don't focus on the area I wanted, but done now (I hope). Thanks Johnny No worries on the spelling - predictive text is a pain sometimes isn't it? Please don't feel guilty Simon - I really appreciate the kindness and I'm over that hurdle now! But a Ventura Spitfire? I've just searched the forum for that and I'll pass, thanks Wicked indeed! I'll stick to aircraft thanks! Easier the second time: Those only took me, oooh, half an hour. the bending's easy but the sticking is hard Now for the PE on the cockpit floor:11 points
-
Bristol Beaufighter MK II, 789 Sqn, FAA, South Africa. 1945 Built using the Airfix 1/72nd new tool TFX with the Alleycat MkII late conversion. Vallejo ModelAir paints. Decals are from High Planes and were 'wetted' on with Johnsons Klear, finished with Vallejo Matt Varnish.10 points
-
Thank you to everyone for the nice comments, but any one of you could do this - you really could. The real praise should be aimed at Tetra’s engineers, because if you do what they say, this fits together perfectly. Take your time, use an Optivisor & really good tweezers, don’t try to do too much in one session... A lot of this build (the Swordfish, for instance) has taxed my problem-solving & lateral thinking - often the bits of modelling that give me the most satisfaction. But these wee guns, though they do undeniably look fabulous... they’re careful assembly, nothing more. Don’t get me wrong; I love how they look & they’ll enhance the model massively. But I’ve seen your models; you could all do this if you put your minds to it10 points
-
The Arma Hurricane Mk I has had lots of good publicity and is the subject of several builds here, notably by @Procopius, who did an excellent triple build. So, let’s find a subject a little different to what’s on the box. This one came up in the search for an interesting scheme. It is reputed to have directed the guns of a Royal Artillery battery to sink an Italian merchantman in Bardia Harbour in January 1942. The pilot was an Australian from Adelaide FO Raymond Goldberg DFC flying in 451 Sqn. The story is available here https://vwma.org.au/explore/people/511695 This page is an extract from a book called They Flew for the King by Frank Harding, published in 1990. It is accompanied by an inspirational painting by Harding, reproduced here for the purpose of fair use - review. This ticks all the boxes – interesting story, RAAF, enough information to build a model all ther ein one picture, what more does one need? Well, let’s treat the painting like a profile, follow the dictum of @Troy Smith and see what background can be obtained. It doesn’t take much searching to find the Hurricane is Z4771 from Block 3/G built by Gloster Aircraft somewhere between July 1940 and Aug 1941. So far, that’s good. Even better is to find a photograph of Ray Goldberg and that very aircraft. Now let’s compare the illustration with the photo……….. to be continued.................9 points
-
Hi guys, So here is my 2nd build since I've come back to the hobby, my 1st Corona build loll I chose the Raptor because it's my favorite jet and I wanted to have one on my stash And I went with the Hasegawa because of the reviews I saw on the net. Altough it's just my 2nd serious build, I have to say this kit is absolutely unbelievable! The fit is absolutely great and it needed almost no filler at all, I was really impressed by the ingineering, really unbelievable!! The only down side are the decals, they were an absolute pain to apply and some are really not applied to my liking, don't know why because I did the same process that I did with my Revell and it turned out good on it so.. I even tried the Mr.Mark setter and softer but did not change a thing.. Maybe just a lack of experience here.. As for the paint, the camo was already a big challenge for me to do so I did not try to get the ''metallic sheen'' that the Raptors have, just did a matt coat after the paint job. I think it doesn't look that bad actually, I'm ok with it for a 2nd build.. I did all the camo free hand with no masking, I was absolutely terrified to do it that way but in the end I think it turned out not that bad!! It was not really that hard to do just need to be carefull and patient!! I went with the same kind of stand as my F-18, Easy to do and it does the job!! So that's it thanks for looking at it and as always I'm opened to any construtive comments guys!! Thanks!!! P.S. The next one is already on the bench, the GWH F-15 C, and I plan to paint it like the F-15 E because I absolutely love the E color!! I know it is not historicaly accurate but I don't think the Scale Modeling God will be that angry and also I have to put a pilot in it and one is enough of a job at this time in my modeling carreer9 points
-
The first of last week's "isolation" projects completed is Su-25, the Peruvian Air Force. About the model itself I will not waste the words, quite poor but easy to assemble and does not require some major waste of time. They said aftermarket, everything else out of the box. Here's the picture. Regards to the next project, probably tomorrow.9 points
-
Hi all This is another model I finished last year. It represents the Bf 109E-3 flown by Oberleutnant Hans Schmoller-Haldy of 3/Jagdgruppe 88, in Spain during March 1939. I keeping with my minimalist approach to modelling, I did the following to the kit. Fuselage - kit seat replaced with Ultracast seat - antenna wire made from stretched sprue - upper cowl intake opened - cowl gun barrels replaced with Master brass barrels - engine starter crank opening and lift points drilled out - kit propeller and spinner replaced with Ultracast resin parts - exhaust replaced with Ultracast resin exhaust Wings - wing gun barrels replaced with Master brass barrels - kit wheels replaced with Ultracast resin wheels - tail planes modified to eliminate the anhedral Paint and Decals - airframe painted with Xtracolor X202 Hellblau RLM 65, X201 RLM 02 Grau and Model Master Classic White - all markings are from Cutting Edge 48-215 Bf 109E The Augsburg Zoo - model is weathered with chalk pastels Cheers Randy9 points
-
I’m still undecided about the glazing. Instead, I elected to attempt a coat of RLM 65. I reckoned I could still make adjustments to the glazing stuff after some paint. Well, that was good. Yes, I’m using Humbrol acrylic. Let’s call it an experiment. What I discovered was interesting. Thinning the paint with the maker's thinners does work, as you’d expect. Quantities and ratios aren’t that critical, but getting the overall consistency to roughly like milk is important. Next, getting my airbrush to squirt at a pressure that worked best was interesting. Full chat, about 25psi on the little compressor and the trigger right back, caused the paint to ball up on the surface. Lowering the pressure helped, but I tried an idea to limit the paint flow as well. You see, I am a died-in-the-wool single-action airbrusher. I find it hard to handle a dual-action airbrush. I had a notion that introducing a stop of some kind to prevent me pulling the trigger right back too quickly would let me control the paint flow better. I wrapped some standard masking tape round the airbrush barrel, effectively stopping off about half the trigger's travel, and you know what? It worked a treat! Anyway, I’ll let that coat of paint harden off overnight and try some masking tomorrow.9 points
-
Finished this last year. Thought I'd post it today.9 points
-
OK - the next bit is actually where the sub-assemblies start to come together; the frame on which everything hangs is folded: There is an unfeasibly tiny channel thing to fit in those slots at the front: You then fit the block into the middle, so it starts to resemble a Pom-Pom mounting, like this: Back to the ammo feeds. I’ve part-built the set for the opposite end of the mounting (seen on the left). The circular plate is what holds the ammo feed trays in position - you can see the near-side one fitted. At the moment I have left the upper tray off, because I think it will help me to paint it. I’ll do the same on the other side later. All that’s left from the array of parts I started with (see post #875 - and none lost so far...) are 4 sets of railings and the sight. Nearly there with No. 1 (of 4). More soon Crispi9 points
-
Airfix 1/72 Blackburn Buccaneer S2C. 736 Squadron, RNAS Lossiemouth The build thread can be found here 1/72 Airfix Blackburn Buccaneer S2C by Shaun Schofield, on Flickr 1/72 Airfix Blackburn Buccaneer S2C by Shaun Schofield, on Flickr 1/72 Airfix Blackburn Buccaneer S2C by Shaun Schofield, on Flickr 1/72 Airfix Blackburn Buccaneer S2C by Shaun Schofield, on Flickr 1/72 Airfix Blackburn Buccaneer S2C by Shaun Schofield, on Flickr9 points
-
After one from 1999, I made this one. It is also a very nice Tamiya kit painted with Zero Paints World Rally Blue (Subaru 02C) color and finished with 2k gloss coat. There is also Scale Motorsport PE and carbon fiber and MFH seat belts.8 points
-
Good evening.....Another old project wich finds its way into the cabinet, "thanks" to this sad quarentine situation. This kit has got a special appeal to me. It was given to me by the late Eduardo Represa, the former president of our Club. He gave me lots of kits before his passing away, and I keep them like a treasure. On the other hand, when I started looking for information about the colours used by the Royal Canadian Navy Furies, Mr. Dereck Pennington, who sadly passed away not long ago, sent me some unvaluable info. Finishing the kit would be a fitting tribute for both of them, so off I went. Here's the result, a simple kit, built OOB and painted with Gunze Sangyo colours. I know there're much better options out there, but none of them mean as much as this one to me. Hope you'll like it. IMG_20200404_183053[1] by Arturo Navarro, en Flickr IMG_20200404_183125[1] by Arturo Navarro, en Flickr IMG_20200404_183117[1] by Arturo Navarro, en Flickr IMG_20200404_183145[1] by Arturo Navarro, en Flickr IMG_20200404_183205[1] by Arturo Navarro, en Flickr8 points
-
That's better. More agitation of the can rather than me. Some minor imperfections to deal with, and I’m still thinking about the transparencies. They’re only stuck on with Kristal Klear, so can be pinged off fairly easily. Having looked at my paint mule, where I tested the Humbrol stuff, I think that might be worth persisting with. Some experimentation is called for, I think.8 points
-
F-16A in Royal Danish Air Force anniversary scheme. 1/72 from an Esci kit8 points
-
Another example of the perils of macro photography. They look fine to my naked eye Thank goodness it’s a biplane!8 points
-
Here's my Lancaster B.II, LL735, the Metrovick F.2 testbed. Airfix kit with 3D printed conversion parts. Build thread is here. thanks for looking Julian8 points
-
Good morning you all. Hope you're all ok. Another week has come to an end and we're still confined at home. Following the end of the Wessex build, I needed some mental rest , even if my wife says my brains are always at rest!!! My motivation was alsolow because I wasn't so happy to face the Airfix Phantom build. Differently from the other three kits already built in this project,this one is a new generation one and thus most of the features I like to detail from scratch... are already detailed. When I started this build, nearly two years ago, I wasn't so happy about big quantity of components of the wings, expecially the underside, which resulted in gaps to be filled and sanded ,compromising the lovely panel lines. I find this is the only fault common to many new generation's Airfix kits. On the other hand...this is what we're here for !!! At that time, after a lot of thinking, I had decided to represent her on the cat, ready for launch, thus I had configured her with the extended slats and flaps and with the angled insert for the stabilizers .This would have required a big base just for one model and, considering I still have the Sea King to build, I've now come to the conclusion they'll be displayed on the same base , which will save room and give me the chance to place them alongside the other models in this project. Of course all this means my wife is right: too much thinking isn't for me !!! Ok, enough talking. This is where I was. At this stage I had to reconfigure her for parking,which means replace flaps and slats and correct the stabilizers inerts,as the proper ones had been damaged and lost earlier in the build. But before doing this i had to get the cockpit done.This is the pre-assembled cockpit with the kit. Here a comparison between the Quickboost resin seats,on the left,the Airfix seats at the centre and the Fujimi ones on the right. Here a comparison between Airfix and Fujimi cockpits and below the cockpit decals by Fujimy (on the left) Airfix (on the right) and the PE fret by Eduard. I decided to decide later what to do with the seats and got started with the cockpit , which I painted black first ,followed by grey, black wash and lighter dry-brushing. I glued the dashboard's transparent front cover (what's its proper name???), filled the gaps and sanded. Once masked the instrument round glass to the HUD I painted it black,then dry-brushed the cockpit ,getting ready for the addition of the PE. PE were next. I tested it inside the fuselage. It fits quite tightly and once in place, I started gluing it to the fuselage halves, using Tamiya green cap in the recesses. With the help of adhesive tape to hold the parts in place,bit by bit I added glue in the fuselage halves' recesses and the fuselage was slowly glued. I added the engines' front sections at the back of the intakes, and the exhausts' tubes at the rear of the fuselage. I had already prepainted them awhileago.. This is what's visible from the intake... never to be seen again!!! Next were the wings. Here a clamp is required to narrow a little bit sides of the fuselage by the cockpit andmatch the lower section united to the wing. The junction between fuselage and wings was perfect and the green cap went through the gap nicely not requiring any filler! Then it was time for surgery:I removed the angled slatsand flaps and repaced them withthe straight ones with the kit. I also added the rudder ,slightly angled, as seen on some pictures. I cut and filed the side auxiliary intakes toposition them nearly closed. I cut the wings' folded sections off the dedicated parts,which I had used in the past before changing mind again, and glued them to the wings. More will follow. Ciao Massimo8 points
-
OK, got the masking paint work cleanup done and started adding the fabric to the coaming with some tissue paper. I noticed that the reference pic I've been using shows that the area under the cowl flaps was bare metal, so masked it up and hoped for the best. Oh, and painted the fabric. It worked! Nearly there now.8 points
-
I would imagine you have the best part of a year if not more left on this. I'm trying to complete it in under a decade if at all possible! Isn't he a fistful of swarf type of guy? Thanks Ced. She plays nice every now and again, but always be prepared... Remember guys this is the redesigned Circa 2000 version - just about the time they were banning ciggies everywhere. This is all G&T's and a sherbet dib dab to dip in the caviar if you're lucky Over the last few days I've been fettling the window frames. Tedious but necessary. Brass got sprayed on the inside face. Umber got sprayed on the outside face. Everything was looking good Until I went for the clear coat. Instead of spraying the Mr Color Clear like I did last time I thought I would save 5 minutes and just spray from a rattle can. Buggerit! Despite working great on everything before, the rattle can decided to play up and I ended up with spits and globules of clear all over the place. It didn't settle down and dried all lumpy. Now if I'd paid Shapeways for those I'd have been well peeved. As it was, fire up the printer again, load up the file and print another two runs. I'll have another go at painting them tomorrow, or at least begin the process. At least I got the three chromed frames coated without issue. Trouble is I was hoping for the brass/umber frames to let me get on with the paneling on the first side frame. Oh well. I suppose I need to find something else to work on instead... do you think the wife will notice if I pinch these? Nice soft leather on the outside - but also nice soft suede on the inside. Makes a passable substitute for coir matting at this scale. Ideally it should have been grey and these are black. I'm calling it a very dark grey. (must get the dyson in there - it's looking a bit grubby) Still some tread plates to be added and that vestibule end should be finished. While searching online last week I came across these decals and thought I'd give them a try. I needed a light wood for the bar which was covered in birds eye maple. There was no way I was going to find 1/32 birds eye maple transfers anywhere, but this 'plywood' looked about the right shade so was worth a try. 5 mm was cut off the end of the bar at the kitchen end - which now leaves enough room for a hand rail to fit between the edge of the bar and the display cabinet without looking all squashed in. The bar was then primed a mixture of 'depot buff' and aged white and then given a gloss coat... of course the rattle can worked perfectly that time! 1st transfer sheet goes on. Actually this is the second sheet - I tried to do too much of the bar at once with the first sheet and messed it up so decided to play it safe and do it in sections. I'll let that dry overnight and fix the next two sheets tomorrow. I'm not sure what to do with the bottom end of the bar. Judging from photo's the bottom inset is also maple, but I'm tempted to maybe try some aluminum/tread plate or similar to break up the expanse of wood. Determined as I was to get on with the paneling, I took one of the best window frames to use as a template and started working on the paneling. This is going to take a lot longer than I thought. Once the 'glass' is placed against the inner skin, there is a small gap between the glass and the paneling.which needs filled. I had two options in my supplies - a 1 mm thick strip of basswood which was too thin, or a 1.5 mm strip of basswood and you guessed it... too thick. In the end I sanded down the 1.5 mm thick strip until it slid into the gap without force. Panel and strip were then removed and glued together - with a little bit of the strip protruding. This is so I can then sand the edges flush when cured. Then the edges need to be wire wooled, stained, then satin coated before they can be fitted. I've got to do that on all 4 sides of each of 11 windows. That is going to be one tedious job. What makes it worse is that those panels are all aligned flush with the edge of the window opening on the outer skin. The mojo is going to take a battering on this job that's for sure.8 points
-
Well I finally managed to push the work laptop to one side and get some hobby time. I thought it was my civic duty to ignore the good weather and stay inside today! So I’ve detailed the engine and made some replacement guns: I know Spandau cooling jackets are hollow but you can’t see the damn things under the wing...8 points


.thumb.jpg.d17ff607fc7e89ed057e63fcb6f2a888.jpg)


.thumb.jpeg.512869d47e412449d69d30d0295c1ae8.jpeg)


This leaderboard is set to London/GMT+01:00