Leaderboard
Popular Content
Showing content with the highest reputation on 22/01/20 in all areas
-
This is my latest 109 completion, the V-30 prototype. This plane represents the morphing of the F to the G series with the airframe having aspects of both. I have always been intrigued by the configuration and paint scheme on this bird and am glad to have finally finished it. The build can be seen here:40 points
-
This is MJ966, flown by Denys Boudard of No. 340 Free French Squadron (code GW), 1944. The squadron was moved from England – where it provided covering fire for the Normandy landings – to France, Belgium and back again. Apart from all its wear and tear, another distinguishing feature of this Spit was the 50 gallon drop tank it sported. This is Eduard’s 1/48 tooling of the Mk. IX, and It’s hard to imagine a better spitfire at this scale. Eduard attempt a 1/32 level of detail in a smaller kit, minus the engine. Perhaps some sub-assemblies do seem more complicated than they need to be; the exhaust stubs and wheel wells, for instance. But it seems as though Eduard want you to get involved - to problem solve and build at the same time. The smallness, delicacy and precision of fit makes you slow down and appreciate not only this version of the plane, but the plane itself. The Mk IX is a thing of beauty, and this kit does it justice on both a small and large level, from rivets to elliptical wings. I added an Eduard harness - this being the weekend edition - plus their resin/ PE drop tank, and I used Tamiya paints throughout. The codes and roundels were applied using Montex masks, and the stencils were all another aftermarket addition from Eduard. Thanks for looking!27 points
-
It's a nice little kit this, fits together well - just remember to add plenty of noseweight! WK803 was one of the Meteors that took part in the 1953 Queen's Coronation flypast. This is how she appeared around this time, with the metal on the rear canopy, high speed silver paint and smaller diameter intakes. Meteor F8s flew with 56 Sqn from Waterbeach in Cambridgeshire until being replaced by Swifts in 1955. Here's the WIP:22 points
-
a bit out of my usual modelling comfort zone is this Matchbox Twin Otter flown by the now defunct Costa Rican airline Nature Air. I built this kit about three years ago as my son worked in Costa Rica for a while and flew on one of their aircraft to get to the Pacific coast site he was working at. The model is more or less from the kit, although the windows were blanked off and decals used instead as the modelled aircraft had a different window arrangement to that of the kit. The kit is a bit basic in places and I ended up refining some bits like the nose gear and as it was in the original three colour moulding of white, yellow and black was fun to paint. Decals were I think from Aztec and seemed to work OK, if a little fragile. Hope you like it.19 points
-
Hi there, i was glad to got hold of some very old kits and tried to make the most of it WIP pics you can find here: Link Cheers Macki18 points
-
Welp, we found out how much we'll have after closing fees and suchlike with the house and...not much. We're scaling back our already modest ambitions. Disappointing. Mrs P is maintaining a level of optimism possible only because she doesn't fully understand the situation, which I think she finds helpful somehow? In good, no, great news, tonight I discovered a film I've long sought out, the obscure no-budgeter Galaxy Destroyer from 1987, is available on Amazon Prime. Since you possibly can't see the page in the UK, here's a trailer for this majestic lad, this absolute unit: This movie was made with no money, a lot of heart, and tongue planted firmly in its cheek. I absolutely love it. I can hardly wait for Mrs P and the kids to go out of town again; the moment they do, I'll order some cheap pizza, fire up the TV, and watch this and the sequel(!!!). Anyway, I watched it tonight as I plugged away on the Lysander. The miliput was sanded smooth: The mounting holes in the underbelly plate, where the auxiliary fuel tank will connect (mention of which is totally omitted in the instructions) were drilled out: I also got both spats 90% assembled: I also got some paint on the oil tank, so hopefully it should soon be ready to fit. Then we can close up the cockpit at last!16 points
-
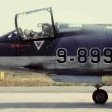
LOCKHEED F-104G, Belgian Air Force, 1971. 'SLIVERS' aerobatic display team. Kit: Italeri Lockheed F-104 Starfighter G/S (2514) Scale: 1/32 Paints: Vallejo Model Air & Vallejo Metal Color Weathering: Flory Models Wash, MIG Streaking Effects, Vallejo Weathering Effects Build thread: One of the last years last models I did. I liked the kit overall - it's good (but not great) in many parts, like the fit was mostly really good. Some things could be bit more sharper and more detailed - so aftermarket stuff can really enhance this kit. But it's not a cheap kit so I built it out of box, with some little DIY details added. I cracked the main canopy, the clear parts are real brittle with this kit. So I masked the canopy a bit with a tarp, if it starts to bother me I'll have to order a replacement part from Italeri later on. Actually I broke the forward canopy too - but mirageiv was awesome to send me a replacement part for that. Anyway, to the kit. Bit of a challenge to photograph, I tried to do it outside as it was nice day today.13 points
-
Hi again, As promised here is the second instalment from my slide and digipix collection featuring the various liveries the RAF VC10s wore during their service from 1966-2013, together with some of the special or one off schemes that the type flew in. This, the earliest VC10 slide in my collection, shows 10 sqn VC10 C.1 XR810 at Brize Norton in September 1970. The aircraft wears the original Transport Command livery that the type was finished in on delivery to the RAF in 1966-1968 including the black radome. By 1968 Transport Command had been disbanded to be replaced by Air Support Command whose titles adorn this example. XR806 was the first VC10 built for the RAF and is seen here at Brize in June 1988 wearing the revised transport livery and with Royal Air Force titles. ZA141 was the first VC10 K2 tanker conversion for the RAF having previously seen service as standard VC10 Type 1101 G-ARVG/A40-VG with BOAC/BA, and latterly Gulf Air. It was the only one of the five K2 conversions completed at Filton to be delivered in the ‘V Bomber’ Dark Green/MSG/White livery, all others receiving the hemp over LAG scheme. This photo is of 101 sqn K2 ZA140/A at Brize wearing the ‘Empire Strikes Back’ nose inscription and mission marks applied to at least two K2 machines during their Op Granby/Gulf War 1 deployment to Riyadh in 1990-1991 A unique shot taken at Brize in March 2001 of all the extant RAF VC10 variants lined up together, headed by 101 Sqn K2 in the final overall camouflage grey scheme, behind which are a K3, K4 and C1K. ZA149 was one of the four ex East African Airways Super VC10s Type 1154 converted to Type 1164 K.3 tankers for 101 Sqn. It is seen here in April 1994 still wearing the rather understated 101 Sqn 75th anniversary markings first applied in 1992 In July 1994 ZA149 was sent to Chateauroux France for repainting. It emerged in the light blue-grey colour scheme shown here featuring a light blue ‘go faster’ stripe and Royal Air Force titling in white lettering. The scheme evidently did not find favour with 101 Sqn personnel who felt that it projected a ‘truckie’ image! Subsequently all other K3 and K4 were repainted in the overall grey scheme that the type wore until the type’s retirement in 2013. Here’s an unusual and rare photo of C.1K XR807 seen in 2005, wearing a yellow/black primer finish prior to receiving the type’s standard camouflage grey scheme. 2006 marked the 40th anniversary of the VC10 in RAF service. To mark the occasion, BAE systems sponsored these fin markings worn by C.1K XV104 and seen at RIAT that year. 2007 was 101 Sqn’s 90th anniversary and accordingly C.1K XV105 was adorned with these commemorative fin and engine markings. A further couple of shots of 101 Sqn C.1K XV104/U seen at Brize in May 2012 and featuring RAF Benevolent Fund crest and nose markings. The RAF acquired 14 Type 1151 Super VC10s after retirement from BA service with the intent of converting five to Type 1170 K4 tankers. For several years many of these were kept in open storage at RAF Abingdon prior to transit to Filton for the remedial works. This photo represents ZD235 – formerly G-ASGG, and taken at Abingdon. It went on to serve with 101 Sqn as ZD235/L until retirement and breaking up at St. Athan in 2002, with 49,561 hours on the frame. ZD242/P of 101 Sqn in the final RAF VC10 livery. This machine previously served with BOAC/BA as G-ASGP. XR808 ‘BOB’ received special markings in 2012 to mark 50 years of VC10 flying and 101 Sqn’s 95th anniversary. Upon retirement in 2013 it was dismantled and eventually arrived by road at the RAF Museum at Cosford where it has been preserved and remains as the largest exhibit in the collection. Hope these are of interest. Thanks for looking and c&c always welcome. Mark11 points
-
Hi all and here's my first finish of 2020 - Revell's re-boxing of Heller's CL-415 Fire Bomber in Canadian Gov markings. First started for the Flying Boats GB here last year; never got finished for that but now all done! The short build thread is here but to recap: Kit: Revell 04998 CL-415 Build: OOB Paints: Tamiya Pink primer from a rattle can, Revell Aqua Colours with an airbrush. Klear, Flory Models Wash Decals: From the box...they were shocking. 😧 Extras: 30g of lead sinkers in the nose and Metal u/c set from Scale Aircraft Conversions Notes: The extra kit parts for the 415 model (new engines/Aerodynamic bits) don't fit very well. I think the metal u/c set is needed as the kit parts are very skinny and not sure the would take the weight. The decals didn't actually stick and had to be stuck down with multiple coats of Decal setting solution and Klear. Trying to fit her on the table for a photo was a laugh...just managed it! Revell CL-415 Done_1 by Dermot Moriarty, on Flickr Revell CL-415 Done_7 by Dermot Moriarty, on Flickr Revell CL-415 Done_5 by Dermot Moriarty, on Flickr Revell CL-415 Done_8 by Dermot Moriarty, on Flickr Revell CL-415 Done_13 by Dermot Moriarty, on Flickr Revell CL-415 Done_11 by Dermot Moriarty, on Flickr Happy to finish it and something different for a change. Thanks for looking and happy modelling. Cheers, Dermot11 points
-
One of the most interesting cold war jets. MiG-23MF with side number 122. Model Trumpeter 1:32 scale, model made straight out of the box + Techmod decals.10 points
-
Hi All Ah the memories ! I used to love building these things as a kid back in the late 70s. The bases were/are so cool. I particularly remember being a fan of this one because of the palm tree - something not much seen in the lush green Valleys of South Wales I'm about a 3rd of the way into a big project at the moment (started last September ) and needed a bit of a break so I picked this little beauty up. 2 sprues, a couple of tracks, a decal sheet only just bigger than a stamp, and an instruction booklet.......There seemed so much more to it when I was 9 years old ! So, I built this last weekend, most of it completed on Saturday. It's a lovely little kit, nice crisp detail, and pretty good fit; given it's age, I was expecting the opposite and with plenty of flash to clean for more fun. I even painted it this time Anyhoo here's my blast from my past brought into the here and now. I'm tempted to get a few more. I hope you like it. I normally avoid doing figures but really had no choice but to have a go with this kit. I applied a bit of weathering and overall it turned out a little darker/dirtier than I anticipated. As usual, from the photos I can see a couple of areas that I can tidy up. Especially with the washes. I hadn't fully appreciated how small these were back then. Cheers Gaz10 points
-
The Trumpeter kit is good and the Pontos Detail Up set is fantastic. Combine both and you have a 1/200 model of HMS Hood that is BIG - over 50 inches long. I know, I still have to add the rigging but, being that is not my favourite aspect of the build, it will have to wait until I'm in the mood.10 points
-
Awww thanks hendie - coming from you that means a lot More in my future, for sure. Oh, sorry, fnaar fnaar! Got it, thanks Simon! Very kind John, thanks ^^ Wot they said, thanks Keith, lovely model Thanks very much Chris What's up this morning? Well, last night I helped at a Scout Shooting competition in a nearby town. Got back at about 9.30 and decided I still needed 'an evening to myself' and opened the wine. Late night. Head a bit thick this morning (what do you mean 'as usual'? Cheeky) I'm going for the next three nights too… I've AK pasted the drive shaft: Can you see the 'phosphor bronze' bearings? oh well, I tried. Might as well paint the front when I spray the tail. Needs masking then. The main bubble was easy but what about the doors? They have a thin band of paint around the outsides. Hmmm. Maybe I can put some tape on: … and then mark around the edges and cut that? I don't have a tool that will mark edges that thin. WHHAAAAATTT! No tool? Outrageous! Suggestions welcome. I'll have to do this then: Scan that with a rule and then: Draw a line of known width and then scale the image until the rule measures the line correctly. Trace the masking tape, fiddle with the points, mirror right. Resize another copy slightly larger for the inside masks (there's a thinner band on the inside): I'll cut those later (when I can bear the noise).10 points
-
Hello Friends, My follow up project to the Great Wall Hobby F-15I Ra`am was the Special Hobby SMB2 Super Mystere. Here are the notable features and my thoughts on the kit......... 1. Built mostly straight from the box. Used 0.6mm brass tubes to replace front pitot tubes under the intake. 2. Used Model Master, Mission Models, and some old ( but still useful ) Polly Scale acrylic paints. 3. Weathered with Flory & Vallejo washes, pencils, paint, and chalk pastels. 4. Depicted from No. 105 Squadron based at Hatzor, Israel. 5. Plumbers putty and small lead fishing sinkers were used to have the Mystere sit properly. 6. The kit supplied decals were excellent and responded well to setting solution. I found the kit to be mostly delightful with a few “fiddly” sections. For some odd reason, I had a couple of issues completely eliminating some of the seams. The kit is very well detailed and with little need for aftermarket accessories. I hope you enjoy this version of the French designed fighter-bomber. Thank you in advance for all of your comments and criticisms. With much respect, Mike9 points
-
Hello again, lads, here's another contribution from Uncle Pete's House of Questionable Plastic Things. While perusing the Buckley Air Force a couple of months back it dawned on me Squadron Leader A.C. Plonk was getting all the action while his distant cousin in Germany, Major F. Von Plonk, had only 2 aircraft to his name (a Ju 87 and an F 104) so I thought I'd get him the German Spitfire, a good old Me 109. The build was quite uneventful and everything was going nicely, fit as good as one would expect, paint going on smoothly, masks detaching without taking any paint along for the ride but then... The mottling. It didn't look easy on the box art but on the other hand it didn't look terribly difficult. Well, only one of those conditions was met. I took it as far as the "stop trying to make it better because you're starting to make it worse" point and called it a plane. The antenna had crumbled when I attempted to cut it from the sprue so a spare U/C door found itself trimmed down and re-purposed. Size and shape are guesswork. You may have noticed something fishy about the tail wheel. I was in the process of installing it (and I'd done a lovely job of painting it, too) when it launched itself from the tweezers at Mach 2.3. I never saw it again. Given the strange physics of dropped small parts and the prevailing westerlies it could have landed anywhere between Chester and Birmingham. And that created a backstory for Major Von Plonk's 109. He'd been scrambled to intercept a squadron of American bombers and as he released the brakes his tailwheel inexplicably snapped off. "Himmel!" He snarled, "Now I vill not be able to lead mein men into battle!" (I learned fluent German from Battler Britton and Biggles stories when I was a kid). Von Plonk's faithful batman however stepped in, literally, to save the day. Obergefreiter Hans Blitzfuß was not only the best batman in the Luftwaffe, he was also the fastest sprinter. "Do not despair, Herr Major," he declared, "I can run 100 metres in 10.8 seconds. I vill carry you down ze runway!" And stuffing his body into the tail wheel well... ... Hans Blitzfuß saved the day. The mission was quite successful and Von Plonk shot down a B 25. Unfortunately, however, the pilot was this guy...9 points
-
Thanks Andy - I thought you'd like it Thanks Keith Cheers Giorgio Thanks to a software update I can now connect to the cutter via BlueTooth (previously it failed) so I can leave the cutter out across the room; I think it might get even more use now. Thanks PC, really appreciated The masks: … fit fine once they're lined up. As you can see from the one on the right it's not that easy due to the curvature of the doors. That one's been repositioned. With the back of the engine bay painted grey for 'dull dirty metal' and the same inside the doors: I'm ready to (gulp) glue on the bubble. Later.9 points
-
I just put the finishing touches to this one this afternoon. The nav lights need a bit of attention, I only noticed after I'd taken the photos. The canopy is a personal triumph. This is the first time I've been happy with what has faced me when the masking was removed and all it took was a bit of patience. 😃 Thank you to everyone who commented and/or gave it a like during the build. Roger.8 points
-
Well, long time since the last update. I think I should choose a simpler build for the next BG, maybe something 90% OOB and 10% aftermarket. But for now, I finished putting the noses onto the fuse halves. I still have to re-panel line them, but the joins are nice and smooth and just waiting for me to mess up with the scribing.😉 This shows the great fit between the fuselage halves. But that is surmountable! And good news was that the Shapeways exhausts arrived! WOOHOO! Because of their 3D nature, they are not drop in replacements. The area has to be cut out so these will be put in before the halves go together. They'll also need to be sanded lightly to get slight roughness off them. An interesting look inside, seeing where the 'indent' for the kit exhausts don't even match up. And a test fit of the new exhausts. After some carving and sanding the fit is suitably tight. Now just have to do that with the other three. And that's it for now. Need to get kicking on this. Just a whole month and a half to go! Model on. Thom8 points
-
Hi all, I’ll pop my hat in with this as I can build it while finnish-ing (see what I did there) my b-25 and starting whatever I do start for ‘in the navy’! firstly I wanted to build this but I appear to have lost the clear parts (well part) so that’s out the window.... so will start on the below as soon as I get some time. it will be a Finnish version with ski’s in silver and green. any help is always welcome! Rob7 points
-
Hi Guys, This is my first GB on Britmodeller, so please let me know if my post is in the wrong format. I had this kit in the stash, it came as part of a job lot that I bought on Ebay for a GB on another forum. I wasn't sure if I would ever get around to it, so this GB was quite handy for me. There was only ever one T-50 in Finnish service (R-110 "Niki"), captured in 1941 at Äänislinna/Petrozavodskand and used until 25th June 1944 at which point it broke down and was returned to the Centre Armour Repair Facility in Varkaus. Although never used operationally again, it remained on the Finnish Army inventory listing until 1955, and now resides at the Parola Armour Museum. The Finns up-armoured the T-50 with 14mm added to the hull front and turret sides. The kit itself doesn't seem bad. It's my first Hobbyboss, and other than some annoying EPN's seems to be relatively flash free with crisp details. It comes with some PE, and the only let down is the tracks (more on this later) I started with the wheels and lower hull. No polycaps with this kit so the wheels were temporarily attached with PVA so the tracks could be shaped. The tracks are individual links with separate guide horns. Although a 1/35 scale, being a relatively small tank in real life the parts are more like working with 1/72. 93 links per side, 4 attachment points per link and separate horns = many boring hours. Having now completed one side (which I did in sections) I have also found that they don't fit around the sprocket particularly well leaving one link in particular with a bit of a gap. Nothing some carefully placed mud won't hide. For the 2nd side, I am just going to do one complete run and fit it around the wheels and sprocket. I think this will be easier. While waiting for various other bits to dry I also made a start on the upper hull, this was mainly adding some interior parts for the engine grilles and the sponsons. That's it for now, I think I have a few more evenings of tracks to keep me busy before I can get on with gluing the top and bottom of the hull together.7 points
-
I had this sitting in my stash for awhile. It was an absolute joy to build - up to the very last stage. I had intended to do the very attractive XP629 of the Macaws display team from the Xtradecal sheet X72291. Here is the only photo I have of the almost complete model (sitting next to my in progress Victor). On spraying a coat of Tamiya Semi-Gloss clear from a rattle can, within seconds I got a nasty crazed look on the paint which starting lifting. Somewhat odd, as I hadn't done anything different that I was aware of from last time I used the rattle can. After much gnashing of teeth I stripped back the paint, and started again. This time I decided to do XN577 from the RAF College at Cranwell in the 1960s. I have a Gnat and a Vampire T11 in the stash Sio I figured it would be good practice for the silver/orange-red colour schemes. Obviously this time round I don't have a complete set of stencils, and I had to bodge up some walkways by cutting up some spare decals. Paints are Tamiya Bare Metal Silver from a rattle can, orange is a home brew of brush painted Tamiya acrylic. I scraped, sanded and polished the frame across the top of the main canopy as I gather this is correct. The lights on the nose are 1 mm little-lenses dropped into small indentations drilled in the appropriate places. A fairly light oil wash, as I guess this aircraft were kept pretty clean. Finished off with a brushed on coat of Tamiya Semi-gloss clear. She looks a bit bashed up, but I am pretty happy with the rescue job. Looks nice in the early evening sun. Have a great weekend everyone! Thanks for looking.7 points
-
Hello, Here's my just finished 1/72 Italeri SF-5B. I was looking through the stash after my previous build, a grey Harrier GR.7, and thought this would be a nice colourful change. The kit does offer a Spanish version out of the box, but the decals didn't look right to me, so I ordered an aftermarket sheet from Series Españolas. These were much better, and worked very well. I painted the model with Vallejo Metal Color and some Tamiya black. Overall, it was a fun build, with only the canopy actuators being a bit fiddly. Thanks for looking, I hope you like it.7 points
-
All 1/72 scale. http:// http:// http:// http:// http:// http:// http:// http:// http:// http:// http:// http:// http:// http:// http://7 points
-
Thanks Giorgio I girded my loins and went for it: Difficult to tell under the mask but looks like a pretty good fit. I'll let that dry overnight I think. Shooting again tonight.7 points
-
That seems to be doable Plastic is quite soft so the slats were easy enough to cut from the wings using a knife. It was easy to follow the panel lines, going thru them several times and make a nice and clean cut. Here they are, all cut out. I glued the wings together - fuselage is there just to help align things, not glued to it yet. And finally, glued on the slat halves and added plasticard to the wings to cover the openings. Probably just use filler to close up the slats. So there's still quite a lot of cutting, sanding & puttying to do - not to mention the struts - but I'm quite happy will the result so far While I was at it - I thought the wheel wells looked bit bare (no details at all on the wing), so I added some.7 points
-
Hi, I finally was able to finish this kit. Do not buy it... it has many issues and the biggest one is that is not 1/48 scale as advertised but 1/50 scale! I am surprised no review picked this up or any of the other things that gave away the scale problems... I did the math and I came out on 1/50scale. Later I found a 1/50 scale plan on the web and the parts fit on it. It is clear they used that plan but it says clearly 1/50 scale and not 1/48 scale. The reason I started to measure was that the pilot seat seemed very small. So I took out a couple of 1/72 scale seats and compared them. The left seat is the 1/72 Heller Dewoitine D510. Second is my scratch build seat using the thinnest materials I could find to make it as big as I could. Third one is the kit seat and last is the Tamiya 1/72 Seiran seat. As you can see the 1/48 scale Pc.7 seat is smaller than the 1/72 scale seats. Oh and the Pe seatbelts can be thrown away to. The buckles are not centered on the belt. I some made some from scratch. The radiator on the wings and nose are bad to, sometimes the lines stop in the middle and go on a bit further. I repaired some but some were impossible to repair. If you insist on building the kit you should probably make your own lines. They might have repaired tis flaw in later boxings but the first ones all suffered from this. The wing to fuselage join is bad and I had to thin it to paper thickness to get it to line up and then had to use a lot of miliput to smooth it out. I will leave it at that but I can say each day I wanted to throw it away. That is not to say I did not make errors.. I botched up the maint job. For one reason or another the Tamiya paint with levelling thinner would not dry. It took 2 months before it was dry enough to carry on. I had to polish everything out with Tamiya compound. Several times.. and that left it with a very shiny surface. Oh and the canopy is a blob of unclear plastic but I had no more energy to scratch one… But this is what I got, not my best work and not exactly the quality I was looking for but I wanted to let people know what kind of a kit it was. Then again it is only the second kit I did after coming back to the hobby so I need to get back into it... The stands were scratch build as wel since the kit does not provide them.6 points
-
I present my Zvezda Boeing 787-9 in Norwegian’s UNICEF livery G-CKLZ. I chose this livery as it’s a great show of support for the excellent work that UNICEF carry out all over the World and it’s great to see Norwegian, like many other airlines, supporting this great cause. The kit was OOB with aftermarket decals from Ascensio and the windows and cockpit decals from Authentic Airlines. The Satcom antenna comes as standard with this kit. It was straight forward to assemble with minimal filling required. The paints used were Halfords Appliance white, brush painted Humbrol acrylic Scarlett 60 for the red section. I wish I had sprayed the red section now though instead of brush painting it. I have a special livery Vietjet A321 to do in the future and will likely spray the red on that I think. The metals were various Revell Aqua colours. The decals are laser printed with additional white screen printed decals where they are required. They are easy to use and work well with Microset/Microsol. The only thing I did differently was paint the lower fuselage billboard red, as the decal supplied doesn’t match the actual aircraft livery after studying photos of the underside. I made the ice indicators myself for the wings using left over 777 decals and cut it to reflect the shape seen on the Norwegian 787, as it’s not common on all 787s that I’ve seen. As always an excellent product from Authentic Airlines, they really do bring a model to life. My next project to hit here in the future is likely to be my A321N in the Hawaiian Airlines livery. As always thank you for looking and any constructive feedback and comments are very much welcomed. Regards, Alistair6 points
-
Hi everyone, my first completion this year. A nice kit with loads of detail, a few fit issues around the engine nacelles and wing joints but nothing to demanding. I chose the most colourful example on offer, an aircraft from 6/ZG 76 operating in Greece circa 1941. MRP paints used throughout, followed by an oil wash and Alclad clear cotes to finish. Additions I used were resin wheels and exhaust set plus a starboard engine. Thanks for looking, gazza l6 points
-
I’ve never done one of these before so this was new territory for me. I hated the decals on this as they didn’t hold very well, and the red ones on the wing fronts fell off, so I painted them on.6 points
-
I originally built one of these over 30 years ago, but by now the model is falling apart so I bought a new one. This is the result.6 points
-
6 points
-
This is now completed. Please feel free to leave comments in either thread. Hope you like it. Built up nicely with a few added details. Needed a little bit of fettling here and there, but for the most part, a nice simple little build. Thanks for looking, Coops6 points
-
Super Connies are easy, even I can build them; Even if I did manage to keep breaking off a prop blade and gluing it back on wonky... Sorry for the intrusion of a trash hauler in your thread Ced...!! K6 points
-
6 points
-
One Japanese ship modeler Dai Sasahara 笹原大 builds awesome and great models in 1/700 scale. His works pushes the limits of the possible This is real nanotechnology in modeling! Everyone who makes models on a scale of 1/700 or 1/350 should get acquainted with his work and learn for yourself a lot of new and useful. And inspire yourself to new projects He wrote this books And I want to share and show his brilliant models for all of you Battleship Mutsu 1933 1/700 P.S. for moderators - If this topic is in wrong subforum, you can move them to the correct subforum.5 points
-
Having recently done a conversion of the Airfix 1/72 kit to an A I thought I'd go again for the group build only in 1/48. Sounds extremely exotic but basically the German government sold two JU87 A-1s to the Japanese for evaluation. I'm building the Special Hobby (I think ) kit which will be more or less oob in three colour splinter camoflauge but with hinamarus (which I ordered from ebay today) the kit, has a nice resin interior and a vac formed canopy. Not too shabby. My main reference.5 points
-
Hello, I'm very excited about this GB. When I visited Copenhagen last summer, I stopped at a wonderful hobby shop called Stoppel Hobby. It was a pretty amazing place, just like the rest of Denmark. While there, I wanted to get something Nordic, so I picked up the Saab Viggen, by Tarangus. I kept putting the project off because I was trying to figure out the best way to paint the splinter camouflage, but a few days ago I found that DNModels produces a masking set. I typically forego products like this, but I think for this one, I'll treat myself. So stay tuned for this project to begin in a few days. I just need to finish rebuilding my work area, first5 points
-
Hi y'all! Another one of my plastic/vinyl figure from the desk game Star Wars Legion (or Imperial Assault, I don't remember which...). This time it's a sandtrooper mounted Dewback, patrolling the Tatooine desert in search for some important droids (so the commander said...). Had a lot of fun. Hope you like them! Ciao IWik5 points
-
Moving onwards and upwards #3 has been primed and preshaded ready for paint 🤗5 points
-
Some panel lines are rescribed, gun bays on wings glued to their positions with adding some styrene strips (one more area where Italeri did awful job), horizontal stabilizers glued to the fuselage and windshield sanded down to fit the fuselage Windshield now looks satisfying - it was much wider than fuselagem so I've been sanding it from both outside and inside. I've only dryfitted it to see how does it look like now - it is freshly oversprayed with few shots of Interior Green... Cheers, S.5 points
-
My Norseman, Thorir, is coming together. I'll leave his axe hand and shield off until painting is completed. There were a couple of air bubbles and small seams long the arms and waist to fill with epoxy putty. While I was at it, I found during research that most Vikings wore wool leg wraps (what we call puttees now) so I converted what looked like gaiters to wraps. I also added some extra fullness to the blousing of his trousers. Now to let the putty dry and final sanding. I sharpened the undercut between layers of clothing in a few locations to give better definition. Cheers, Rich5 points
-
5 points
-
5 points
-
The contact area with the transparency is painted matte grey, and then the clear part glued. The tail is also secured in place, whilst the exhausts are prepared for painting:5 points
-
Some more done on my Stuka today, happy at last with my cockpit I have glued the fuselage together and sprayed a light coat of RLM 65 to check for any imperfections on the wings and lower engine cowling. The wheel spats are just pushed on, the fit of parts is pretty good. I was almost tempted to buy another....but managed to resist. Thanks for looking.5 points
-
Evening all. Just spent almost two hours masking this one. I trawled the inter web looking for a mask set but couldn’t find one. I’m glad it’s done but it was tedious. Anyways primer tomorrow hopefully. Cheers Allan5 points
-
Here's my modification of old Airfix 1/72 Spitfire Mk. I to Spitfire Mk. IIa Cheers, S.5 points
-
Afternoon all, Fresh off the bench is the superb 1/72 Hasegawa Su-33. Built completely OOB, painted with Hataka Orange Line lacquers and Alclad for the metallic areas. Weathering was kept fairly light with a simple application of MIG Prouction's neutral wash before a final coat of Xtracolor satin varnish. A great kit of one of the best looking modern fighters around. 1/72 Hasegawa Sukhoi Su-33 Flanker by Shaun Schofield, on Flickr 1/72 Hasegawa Sukhoi Su-33 Flanker by Shaun Schofield, on Flickr 1/72 Hasegawa Sukhoi Su-33 Flanker by Shaun Schofield, on Flickr 1/72 Hasegawa Sukhoi Su-33 Flanker by Shaun Schofield, on Flickr 1/72 Hasegawa Sukhoi Su-33 Flanker by Shaun Schofield, on Flickr Thanks for looking, comments welcomed Shaun5 points
-
The RCAF CF-184 “Perch” The perch is a small persistent fish that travels in packs and has a nice colouring on its flanks like this scheme I had planned out. I imagine us Canadians back in the 50’s were testing multiple platforms for Low Altitude Bombing and nuclear capabilities before the Arrow project became a reality and the F-84F Thunderstreak was a potential candidate. I was behind the 8-ball but able to bounce back in the new year and finish this within the month ending fortunately.5 points
-
It is that. Thank you, although competent bodgery is perhaps more the truth. With more care, it would have been exquisite. As it is, it’s quite adequate for the job. The belly parts are fitted. There are no positive location points, so a little care in lining things up is required before applying glue. The main belly part needed some gentle attention from a sanding stick along the edges, but otherwise it all fits very nicely indeed. The nose is a separate component. Other noses are in the kit, to cover other variants. The basic schnozz includes a moulded representation of a gun camera aperture. The instructions tell me to cut or sand the pimple away, as the first aircraft were not so fitted. Although the parts fitted well, there were some slight ridges on the joins. A little PPP and some mild sanding dealt with them. It’s about as smooth as I’m going to get it. With the main fuselage and wings done, I shall leave things for now. The next steps are undercarriage, engines and a smattering of tiny bits. The transparencies can be masked and fitted, and the whole thing prepped for primer. Perhaps that’s my prompt to get the FrankenDornier ready, too.5 points
This leaderboard is set to London/GMT+01:00







.thumb.jpg.87669a5ffb8b13672a3d675087a46d42.jpg)






.thumb.jpg.76f12b87ce9ca9929c9aabdcf8f9d2dd.jpg)


