
Leaderboard


Popular Content
Showing content with the highest reputation on 08/01/20 in all areas
-
Hiya Folks, A well photographed aircraft, MV363/H `Mary' of 11 Sqn has been on my radar for a while and so I decided to model it using the excellent little Sword kit as this aircraft is included in the decal sheet of one of the boxings,...... photos of the real aircraft and the box art are shown below. The model was brush painted and the kit is very highly recommended, as with most Sword kits. The real aircraft; The Kit; The Model,... edited with new photos of the model altered as mentioned in the posts below; Cheers Tony29 points
-
Hello all. I've been offering my opinions here for some time but have not, until now, posted any visual record of my own work. As this is my first Britmodeller submission it feels appropriate to start with a Spit! This is an OOTB build of Eduard's Profipack kit using the kit decals to represent EN354, an ex-RAF hand-me-down flown by 1st Lieutenant Leonard Helton of the 4th FS, 52nd FG, USAAF. The only modification I made was to droop the elevators. There's a bit more weathering (particularly the chipping and scuffing on the wing walkways) to add but she's complete enough to go in the display cabinet. I'm pretty happy with the overall result, but I feel the exterior colours (mixed from Tamiya acrylics) aren't quite right and the demarcations are little too loose-- I'll try masking rather than go freehand next time. Please forgive the noisy photos, I used a camera old enough to have a driving permit, as my better camera decided today was not the time to cooperate. This also means I can't share photos of the cockpit yet. The base is a loaner, one with a more desert-y look is in the works to suggest the airfield at La Sebala, Tunisia. This view shows the overpainted RAF roundels to good effect, also the sandblasted back faces of the prop blades: The port side: Front starboard 3/4 view: The underside; next time I think I'll use a more intense Azure mix, this seems a bit washed out. Suggestions and criticisms are welcomed. Thanks for looking!26 points
-
A good while back now, I purchased Fundekals' extensive Spitfire decal sheet just to get at the markings for this USAAF Mk.Vb, flown by the 107th Observation Squadron of the 67th Observation Group as they trained with RAF units out of Membury in 1943. If you aren't familiar with Fundekals, the website is a treat. They offer extensive online documentation of subject aircraft with colour profiles, photos, and written copy. I used Tamiya's 1/72 Mk. Vb kit and finished the model with Tamiya acrylics; kit decals were used for the stencils as Fundekals don't provide them. While it doesn't fully capture the Spitfire's elegant lines, and the canopy is not brilliant, it is an easy and fun build, and goes together quickly. I think she still needs a bit more weathering to match the photos, the 107th flew some dirty birds.24 points
-
Hi Friends, Happy new year for everyone. I start my Britmodeller this year with my last build (finished some months ago). The old mould but totally accurate to the todays standards of modelling manufacturers F4 Corsair in 1/48th by Tamiya. All is very well engineered as usual by Tamiya, the fit is superb. I added some rivets with my Trumpeter's riveting tool and also the Eduard Photo Etched extra parts to upgrade the bird. I added some extra scratch build to the cowling to simulate the mechanism to open or close the vent doors. It's a nice plane, and very cool for weathering. Also this kit from Tamiya has a very well detailed OOB cockpit. I hope you like it, Cheers Ricardo21 points
-
That's end of my struggling with Corsair. My goal was to make model based on the workshop more experienced modeller and based on original photo. I realized that as good as I could. There are difficult to make signs of exploatation, scratch, dirt, stains of fluids. It is not perfect but I think much better than in my previous model. Model represents Corsair MkII JT260 on board HMS "Unicorn". There is some error in my side, because I used revell's model which represents Corsair manufactured by Goodyer FG-1D - in british markings MkIV. Differences beetwen versions are another propeller, with slimmer blades, no air inlets on fuselage. Also, model is not perfect too. There are different shape lower surface of wing flaps, they are too short, too long engine cooling flaps. In engine section engine cowling are too short and mismatched shape of that, cooling flaps and upper part of fuselage. To make model I used eduard's photoetched parts and techmod's decals. Numbers on fuselage are painted by template masks.21 points
-
Hiya Folks, After seeing photos of ex 451 Sqn RAAF Spitfire XIV`s in service with 443 Sqn RCAF in Germany I have wanted to build one,...... as the Canadian`s retained the Kangeroo marking of the Aussies and then added their own Wasp marking and codes with many having nose art too. Thankfully Exito Decals came to the rescue with an excellent decal sheet and I`ve used it here with the fairly recent Airfix Spitfire XIV kit. My only gripe with the decals was that the spiral for the spinner is back to front and therefore I had to turn it around, add the yellow part facing downwards and then brush paint yellow onto the white underside of the decal after it had been applied..... apart from that the decals are superb and the instructions include artwork which can be framed and also photos of the real aircraft,..... all in all a quality item,..... as is the Airfix Spit! Here is a 451 Sqn RAAF Spit in Germany, complete with Kangeroo marking; And here are some after transfer to 443 Sqn, including the subject aircraft; Here are the Exito Decals; Here is the model; And here it is with a little brother which was built alongside it,.....using a Sword kit,... told you I liked this scheme!; 1/72nd Sword; As usual both models were brush painted, Cheers, Tony Tony18 points
-
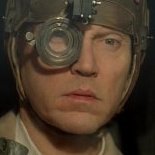
Based on the Italeri kit for the Bell OH-13S, I build the H-13E used in Korea almost exclusively for MedEvac applications. For this purpose, the engine and tank had to be modified, the entire grid frame shortened, baffles attached to the tail fin, the instrumentation modified and of course the distinctive stretchers with the protective hoods on the outriggers had to be built. Also the engine had to be modified, because early models were not equipped with Lycomings, let alone turbo engines. After all a wild mix comprising of a detail set from CMK, a small set of etched parts from JADAR-Model, parts from the Pavla kit, a 3D printing as well as self-build parts from thin sheet metal, medical supplies, finest nylon yarn, lead wire, rod and sheet were used for the model. The whole misery is described here in this build report in the German "Flugzeugforum". (You need to be logged-in to see the pictures, unfortunately.) But it is worth it… Since the helicopter was in massive use in the Korea-war, there are no well documented individual models, which were flown by a later known pilot, for example. My H-13 is a typical representative of these helicopters, which were memorialized in the film and the TV series M*A*S*H. I have built an average type from all available picture material. Not even a list of assignable serial numbers could be found, and I actually even bothered the manufacturer Bell (now Textron) with it, but they say that they have nothing to do with the old military models anymore. It was the first time ever that I took part in a competition with this model and actually made second place in 1/72 against very good modellers in 2017… But you better form your own opinion.17 points
-
Here is some pictures of my latest build. Academy Panther G. Last production. Great kit out the box. Wasn’t to happy with the tracks that came with the kit so got some bronco tracks. Found the detail much better on them. Figures are from Alpine. No drama with the kit. Went together great and was enjoyable painting it up. Any comments or Criticism is always welcome. Always trying to improve with every build.16 points
-
Hi, colleagues! Lets me represent you another my build. The A-model kit/ Very poor and horrible! So as my photos (((( Sorry!!!!15 points
-
Is it just me or does anybody else find a “honeymoon effect” with kits? I open a kit up and throw myself into it with great vigour, sticking and painting, painting and sticking, and the enthusiasm tails off as the kit nears completion and working on it becomes a bit of a chore while I start eyeing the pile of unbuilt kits in the stash with a new hunger. Coincidentally I’ve been divorced four times… This Wimpy languished on the bench for a month, 90% complete, 90% painted among a little heap of antennae, gun turrets, props, spinners and wheels while I couldn’t motivate myself to run it over the finish line but last week I finally got around to final assembly and touch up. It’s the 2018 Airfix with all the highly detailed but ultimately invisible interior, satisfying to make but disappointing to see vanish when the fuze was closed up. As we all like to say, though, “I know it’s in there”. Squadron Leader A.C. Plonk, VCR, MOT, SOB and bar, has been transferred from the Shepherds Bush Air Force in London to the Buckley Air Force in North Wales and is now a bomber boy. This is his current aircraft. The boarding ladder, by the way, is just leaning in place... I've yet to figure out how to attach it properly without introducing a massive and ugly blob of glue and/or positioning it too high or too low. The instructions called for painting it silver but having seen pictures of WW2 bombers with yellow ladders I thought the hi-viz had a bit more zazz. On the subject of yellow, I forgot to paint the tips of the props. Too late now, I find that difficult enough even when they're in a position where I can actually handle them. If you've seen my builds before you'll know I'm not very good at it but, dammit, I'll show them to somebody and the members here are the only people I know who are unlikely to remember a pressing appointment when they see me select "pictures" on my phone. You pros are very indulgent of my efforts and for that I thank you... Reminds me of when I was 17 and playing on bands with musicians my dad had played with in the 40s and 50s. The bomb bay and wheel bays came out not half bad. But efforts to see even the map table inside merely reveal flaws in the paint job. I know the windows are supposed to be blacked out but I thought it would look more interesting if I left them clear (alright, clearish!) I think I can say it passes the "Two Metre Test", although if you've just cleaned your glasses it might be 3 metres. And while I'm not sure an RAF crew would park it without centering the turrets and control surfaces, Squadron Leader Plonk is a casual type of guy. I also suspect, looking at the numbers, he's also a Cornish pirate... "AAR"! Now maybe I'll get around to finishing that Me 109 I started in August. Not long after I'd cut the painting handle off the pilot's bum the Wellington shouldered its way into the queue. Thanks for looking and any tips you can give me will probably be futile but I'll continue to build to the best of my limited ability. It's probably the best 1:72 Wimpy within a 50 metre radius of my house...15 points
-
Thank you Doctor, see you there! (What else in the last 18 hours? Bill and Keith about the MGF… IS it plastic? Oooh! It's a Fidget eh? No need to apologise Bill, my threads are open house Then…) Thanks Ben - I'll get these right (although I'm not looking forward to the yellow nose) Thanks Simon - delicate indeed! (See below) Thanks Johnny - no posts of rough exhaust covers (yet) so I think we're safe Thanks Duncan Having read your post on questions and seen the problems you had I can only think they re-moulded. Mine seems to be fine (famous last words) apart from the step thing on the fuselage which I've sorted this morning (see below). Cheers Tomo That's started something… How do you get two whales in a… oh no, wait, doesn't work if you read it Welcome Terry! Nice work Craig! Have you considered a career in pest control? You might need some more shoes Ian and Keith about buses - we've just been 'upgraded from single deckers every 10 minutes to double deckers every 20. 'They' say it's the same capacity and matches demand better. We shall see! Spent most of the morning on the 'phone. I applied for my state pension back in September and have heard nothing despite the fact that my 'date' is January 6th. Then I got a letter from the bank asking me to fill out a form and send it back to Leicester. My bank is in Wakefield (eh oop!) Is this a fraud? Has someone highjacked my pension? The bank say no, it was an error by one of their 'associates'. Fine. Call the pensions people. You know you're in for a wait when the recorded message suggests 'you might want to call back later'. Not me, I'm in the queue, have free calls and I'm retired so I waited…and waited for 45 minutes (while catching up on BM). Sorted. On its way - hooray! I've also arranged to get the hard drive in my 'new' second-hand iMac upgraded to a SSD so I may go quiet tomorrow. Who said thank goodness - own up! Anyway, some progress. Bombs. Separate fins that fit nicely but would get knocked while drying so I've done one side: Now then, that step thing: The canopy is proud on the higher side but nice on the lower: …so I chopped off the higher side (you'll see it later). The nose fit might be caused by my not having the floor quite low enough: …but with a bit of sanding on the front of the floor it now fits nicely: Time to cut out the lower bit then: Note that this is only required if you're posing the doors open. Nose on with Formula 560: When that's dry I can assemble the canopy ready for masking.15 points
-
Hi all, my first built in 2020 is the new Tamiya P-38F/G in 1:48. Add Eduard PE´s, Master MG´s and Decals by Sky Model for a well worn P-38 of the 1st FG.12 points
-
Hi all - not much to update on this other than to say I've started to scratch build the cockpit. I made a basic frame from styrene rod, and constructed a seat, floor, and instrument panel from sheet styrene: I also scratch built some more details from styrene rod, strip, brass tube, wire and various other bits and bobs: So now I have a basic cockpit. There's still details to add, but next step before I do that is basic painting; the bulldog cockpit is essentially black so i'll have to do some work to keep it looking interesting... Cheers! BC12 points
-
Just another interesting story about the engine: The machines were manufactured under the brand name Franklin by Air Cooled Motors, but the Tucker Car Corporation needed a powerful engine for their Tucker 48 (known as the Tucker Torpedo), which was in development, and found the O-335 to be just right. However, the machine was massively modified, among other ridiculous things it was converted from air to water cooling, only few parts of the original engine were taken over. Nevertheless the machine proved to be very robust. In order to secure the engine source permanently, Tucker took over Air Cooled Motors for $1.8 million and cancelled all existing supply contracts. Since Franklin had a 65% market share, the entire aircraft engine market was deprived of a very important source. I think they opened several bottles of champagne at Lycoming... By the way, in the end only 51 Tucker 48 were built. Franklin aka Air Cooled Motors was sold to Poland and is now called PZL-F. Side note: Tucker first tried to put a Lycoming machine in the back of the Tucker 48. One may now speculate what would have happened if it would have fit... _______________ Now fire at will…12 points
-
Hello! I'm Nathan, I've been scale modelling for about 2 years now, and have had an Instagram account (soyme_scale_models) for just under 2 years showing the progress on my builds. Joined Britmodeller recently after hearing about it from a couple friends. I'll start off with some pictures of a model I completed in early December, the first from what I'd like to call my 'new phase of modelling' where I really focus on making things look grubby 😂. This is a conversion of the well known Airfix 1:72 Spitfire Mk.Ia, into a Spitfire PR.Mk.IG. These (along with later PR.Mk.XIX variants) were to fly at dawn and dusk, just below the clouds, over enemy territory on photo reconnaissance missions, therefore were painted a light pink colour which made them virtually invisible to the ground. This was a rather simple conversion, as it only involved drilling 3 holes, one on the port side of the fuselage, and 2 on the underside just behind the wings (I slipped with the Dremel, completely ruining the starboard fuselage roundel, but attempted to save it by making a hit from shrapnel), and leaving off the antenna mast. It was a relatively easy build, but I found removing the aligner pins on the rear fuselage was necessary, as the halves wouldn't fit properly otherwise. Hardly any filler was needed, and the fit was decent. She was painted using Tamiya acrylics, with a mix of XF-12 and XF-7 at around a 70% to 30% ratio. The paint job was pretty simple, being all one colour. I then applied a coat of X-22 clear gloss under the decals, which were all from my spares box, following various illustrations of the aircraft. Another coat of X-22 was applied before using one of my favourite products, one I'd highly recommend, the Flory Models Dark Dirt clay based wash. I bought this at Scale Model world in Telford (the worlds largest model show) and it is FANTASTIC. After that was a coat of Tamiya XF-86 flat clear, then exhaust stains, and she was done! I hope you like her, I definitely enjoyed building her. Cheers, Nathan11 points
-
Here is the second of the last two kits of 2019, both being Eduard's 1:144 Mikoyan-Gurevich MiG-15UTI "Midget". This one represents 2832 of the AVRK (Royal Khmer Aviation), Cambodia, 1964 onwards. It was also built from an "overtrees" set with markings from JBr Decal's "Mighty Midgets" Part 1 sheet. Build notes are the same as for the other (Sri Lankan) MiG-15UTI so I won't repeat them. The kit was fully painted and varnished by brush and I made some weathering/painting experiments with pre and post shading with mixed results though I am pleased with it. I used RLM02 for the overall Grey-Green colour since I had nothing else and it seemed very much like the colour used on Cambodian MiG-17s. I did some pre-shading with black and post-shading with another green. Thank you for looking and all comments are welcome Miguel11 points
-
Hi all I say special, but they are all special. This a model of BL676, the third Spitfire Mk.Vb to be fitted with an Arrestor Hook gear for deck landing trials on HMS Illustrious. It was nicknamed Bondowoso which in modern Indonesian translation I believe, means challenge of Gargantuan proportions. This was a Presentaion aircraft purchased by the Dutch East indies Spitfire Fund, before the Dutch Colony fell Victim to the Japanese attack. The model is the Freightdog boxing purchased last year and uses the new KP model Spitfire VB with some lovely resin additions and Decals to convert into the Hooked Spitfire. The Model builds very nicely and the resin bits re very easy to use thanks @Colin @ Freightdog Models for producing it. This was a very enjoyable model. From photographs the airframe appears to be quite clean so weathering was kept to a minimum with chipping and paint worn away on the port wing route . The only other additions are the Sling points, Aerial and IFF wires, Eduard Seat belts an underwing pole aerial, fuselage position light from a never to be built Italeri MkIX along with the cockpit mirror (this was the third one as the carpet monster ate the other two). The model was brush painted as usual using Humbrol enamel paints. Decals used are the kit supplied ones and went on very nicely indeed using the watered down Klear method. Hope you enjoy Sorry about the focus on this one. Thanks for looking in. All the best and Happy new Year everyone Chris11 points
-
Hi all - thought I'd start a build log on this one. I've always wanted to tackle building a 1/48 Royal Australian Air Force (RAAF) Bulldog. The RAAF operated twelve Bulldogs in the early to mid 1930s; these aircraft represented the forefront of the RAAFs fighting force during this time. From their introduction into RAAF service until 1935 the Bulldogs were considered almost sacrosanct; a pilot had to be of Instructor rating before being allowed to fly one. I've always liked the Bulldog because of its important inter-war role in the RAAF, plus I've always thought it looks pretty mean For a 1/48 Bulldog, there are only two options. One is the terrible SMER kit (not worth a look), or the old Lindberg kit. I happened to pick up the latter reasonably cheaply. This kit is a re-boxing of the old Inpact kit from around 1968, which makes these moulds over 50 years old! On the positive front, the basic lines of the kit are quite accurate, save a couple of minor exceptions. On the down side, the kit is of its time; that is, it has some very basic, chunky details, and no cockpit to speak of. It has raised panel lines throughout, has a difficult 'fillited three piece' upper wing construction and is severely marred by 'fabric texture' all over the fabric surfaces (wings, tail, and fuselage), which looks like someone attacked the mould with a blunt hobby knife: All of the builds I have seen of this kit have left this effect "as is". As these aircraft were silver, these surface traits really show up, and detract from the look of the model. So my first task was to tackle the fabric surfaces. Some severe filling and sanding was needed to get the upper wing together without seams (as the joints do not fall on any natural lines on the underside). The rest of the fabric surfaces then needed to be tackled to remove the fabric texture. This took lots of time, and lots of sandpaper, but the end effect is a smooth surface with subtle hints of ribs, much more like the actual aircraft in my view. These should look good under careful painting. I also added the fuel tank panel lines on both the upper and lower surfaces of the top wing. I also separated the elevators and rudder, which will be re-positioned. The vertical stabiliser also needed re-shaping on its leading edge (the kit stabiliser is too long in chord and doesn't have the characteristic fillet at the bottom). I then re-scribed the fuselage panels. The kit has erroneous panels around the nose, but these are easily dealt with. I hollowed out the panels for the gun barrells, but the troughs themselves needed to be completely replaced, which I did with shaped sheet plastic. All of the extra details (vents, rivets / fasteners, panels) will be added once the fuselage halves are together. RAAF machines also seemed to not have the forward set of grab handles on the rear fuselage, so these were also filled in. With these adjustments, the kit looks quite a bit less 'toy-like', and should provide a sound basis for the rest of the build. The very chunky cockpit locator tabs have also been removed, in preparation for a scratch built cockpit, which is the next challenge now that the hard part is over! All feedback welcomed. Cheers, BC10 points
-
Dear friends here is the superb kit from Gaspatch Models of the iconic Henschel 123 . The build was straight OOB with no after market items . Painted with the Chinese air force colors and markings , Hope you like it !!! Have a happy and creative new year .10 points
-
Hi, Let call it mine first completed build for 2020, I started it in Summer 2018, right after my Spanish Vildebeest, and finished it now. I made some modification, namely a bit smaller ( reduced to 5.6 cm diameter) propeller, lowered a bit struts over fuselage to make constant distance between wings, Fairey type support of gunner's MG (like in Swordfish - ot was in all Mk III and as was discussed on BM Forum - it was not noticed by SH) and instead of torpedo I gave two 500 lb bombs (the testimony says that the airplanes of 36 and 100 Sqs in Endau raid were fitted with 250 and 500 lb bombs, but I think the maximum payload was 1000 lb, so two 500 or four 250 were possible). The colours are as were discussed here recently (and what made my build so slow): I replaced most of PE detail (not all) by scratch build ones (like ledder &, gun sight for example) Here she is: and BW if you like: Comments welcome Regards J-W Edit: After posting I realized that it is Azur-Frrom kit, not the Special Hobby, but I belive they are same in fact...10 points
-
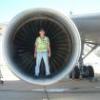
This is just the size of Your thumbnail:10 points
-
All finished. In summary, the Airfix kit was great, the Catapult from NeOmega was very nicely done. Quite pleased with the result, as long as you don’t look too closely! Build thread here: And this is how she turned out: Guy9 points
-
Not sure where this is to go, but as it did not go into space.... After World War 2 many of the German technologies ended up in the USA, including Werner von Braun and his V2. The US started testing of the V2 on US soil at White Sands and they also tried them on the USS Midway. Onto the kit, it is the Revell boxing of the Special Hobby kit and decals is from the US IPMS 2008 convention decal sheet. Regards Robert8 points
-
I’m pleased to report that I’ve called “complete” on the Pendle Princess after more than twelve months. And I’m pleased with her, I’m a bit older and hopefully a bit wiser. I’ve learnt quite a bit, and I’ve certainly sworn more than I’ve learnt .... I’ve mounted the model on a temporary base until I decide what to do with it. All comments happily received, good, bad or indifferent, we only learn by having our errors pointed out. Thanks to those who’ve followed along, encouraged and helped. And especial thanks to my good friend Dale, who donated the kit to me in the first place and started this journey off. I’ve got another older Bandai kit, the 1/16 scale Mercer Raceabout, that’s craving attention, but I think that I’ll be going over to the dark side for my next build. I’ve got a 1/48 Tamiya Fairey Swordfish Mk I that I picked up at a swap meet a while ago that I’m going to have a go at.8 points
-
I've made the executive decision to depict the tail assembly as though the entire unit were replaced with one sporting the day fighter scheme typically applied to bombers and some T.IIIs. I could not gather any evidence of all green rudders. Below is the simple modification showing masking of the area and completion of the colour mods. This time, I lightened Tamiya's stock Ocean Grey with a touch of MSG as I've always found it a bit dark and a bit too blue. It arguably looks a bit too light now but I'll attribute that to a bit too much time in the sun! (Not me, the tail....) The tail was gloss coated again and I'll let it cure for a day or two before applying the fin flash. Thanks again for looking in.8 points
-
Lower wing and fuselage are glued together:8 points
-
I spent the past couple of days fidding around with tiny added details, lights, and paint touchups but I think I've run out of parts to fix and bits to add. I'll have to call this one finally done. 😮 I'm currently working on some proper RFI photos, but here is one WIP shot to show it all together. Thanks to all who followed this long and meandering build, I must have lost a few of you along the way since I started in '17. I hope it's been informative and potentially helpful for the P51 STGB currently going on. I think I've picked my next target. I'm going back to 1/72 scale where I don't need to worry myself with all the super detailing. I've got a nice Tamiya Mosquito sitting on my desk that should hopefully prove to be a nice relaxing build.8 points
-
As I'm waiting for masks and decals for my Airfix Victor I started an Airfix 1/72 English Electric Lightning that I have in the stash. I think the description of a man strapped to a pair of engines is quite accurate for this aircraft. This it also part of an Instagram cold war jets group build which is why I decided to do a lighting. Might as well also post my progress here. The model comes on four light grey sprues and one clear sprue. A lot of the parts have very heavy injector pin marks that must be removed or the model will never fit together. Mildly annoying but manageable. I'll be using the scheme on the box, XN781 in dark green over silver. The other scheme, XN793 in silver and blue, is the same airframe as is in the starter set which features the Lightning (I also have a set of decals from that) in a similar scheme to what I'll be doing- green over silver. I assembled the intake, I didn't paint the inside as I'll be adding the intake cover; building V Bombers really makes you not want to do intakes. Next I assembled the winds. The plan is to build and paint the wings separately before bringing them together with the fuselage which will also be completed first. Injector pin marks......... Fun.... Them all clipped off and sanded down, the wings went together decently well. Then I decided I would make this a bit more interesting (a lightning is already pretty interesting as it is anyway). Repositioning the control surfaces.7 points
-
HI all, so the first completed kit for 2020 is a bit of a thrown together 1/72nd Airfix S2C Buccaneer. I started it just before Christmas, and it was wheeled over the finish line yesterday. The kit fits well, but one needs to take care cleaning up sprue removal nubs in some areas to ensure a good fit. It is also possible to modify the rear jet nozzle fairings so the exhausts can be added after painting too. The bombs and pylons are meant to go on the inner hard points where the tanks are, but it's easy to snip of the back location pin and use them outboard. Markings are for a 700B squadron machine in 1965, in the early colour scheme (which, I think, is also the nicest!). Back dating involved removing the raised fairings at the fuselage to intake mouth junction and reshaping the wing mounted threat warning antenna to the early pointy circular ones. I decided not to remove the airbrake strengthening plates (because I forgot). Paints used were Tamiya's newish lacquer white and their standard acrylics for a homebrew Extra Dark Sea grey. Most decals are from the kit, but the squadron markings and serials are from a 1980 Modeldecal sheet. The glue had gone lumpy on these so each was soaked off the backing sheet, flipped over onto my finger and a wet brush was used to remove the perished adhesive. Mr Mark Setter was then used as a new adhesive to apply the decals. Final finish is a mix of Mr Colour GX flat and gloss varnish thinned with Mr Colour rapid thinner. All comments are welcome as ever. Happy new year! Jonners7 points
-
I better come up with a build as well. As the title states, I am building the Ju 87R-2 flown by Major Walter Sigel Commanding Officer (Grupenkomandeur) from I./St.G 3 in the colours of the Stabsstaffel (green) during his time in Greece 1941. I haven't seen many (actually any) builds of his Berta which is odd as it has some attractive markings. Sigel’s various Stukas are relatively well documented, but there is some confusing information about the looks of his Bertas. Xtradecals has his B-1 covered on sheet X48164 (and also on the 1/72 sheet) when part of I./St.G 76, but these markings are unfortunately not correct for a I./St.G 3 aircraft, so I have to come up with my own marking one way or another. I found this picture below on the Internet and have never seen it published anywhere. It shows most likely Sigel’s aircraft in Balkan theater markings photographed in May 41 at Argos in Greece. Of interest are the white outlined green individual letters A on top of the wings and the yellow elevators. Together with the yellow nose and yellow wheel pants tips it is indeed a very colourful example. The picture below is published in many publications and does also show Sigel's aircraft. Captions place this image from France in early 41 to Bulgaria in April 41, to Zemun (near Belgrade) in Yugoslavia in Autumn 41 and to Greece in 41 depending where the picture is published And most profiles show it like this. But white theater markings just don't add up for the places this picture was apparently taken, so I asked the question on Hyperscale if someone could shed some light on this. In addition, the green Winkel (chevron) is missing on many profiles and the squadron batch is white and not yellow. The chevron is clearly visible on another picture taken at the same day. And Georg Morrison had an explanation which is rather interesting: "This is part of a series of lined-up I/St.G 3 machines (S1+AB, S1+CB, S1+NH, among others) taken after the Balkans / Crete campaign in southern Greece (possibly Crete) in early November 41. The yellow theater markings had been overpainted and white theater markings applied for the unit's move to Derna in North Africa in mid-November 1941. Depending on the quality / vintage of the print, you can see a tonal difference (the paint is 'flatter' or 'more matte') on the cowlings. The area beneath the radiator was still yellow -- there's some film footage in which the bright color beneath the radiator 'pops out' at the eye of the viewer as the formation passes above. The fuselage bands were white, albeit not as bright as the factory-applied fuselage cross." The flat paint is indeed visible on both pictures above and of interest is also that this aircraft also had yellow wheel pants tips, which wasn't common, making it more likely that both aircraft are potentially be the same aicraft. My intention is to build Sigel's aircraft first in the full Balkan theater markings as seen on Argos in May 41 And after taking a series of pictures, I intend to do what happened to the real aircraft and change it by overpainting the relevant parts as described above to the way it looked like before the transfer to North Africa in November 41. Not often do you see Luftwaffe aircraft with yellow AND white theater markings! I will use the 1/48 new tool Airfix B-2/R-2 kit for this build. And I did find some additional goodies in my stash I may use. So I am all set, but with my track record I may not get past the cockpit stage Cheers, Peter7 points
-
Bit more done today - got both sidewalls done Peter7 points
-
6 points
-
I suppose it's a question of how you define 'best'. Some manufacturers may offer finer details but that can add additional complexity and frustration - I'm afraid I've long since given up trying to add PE rudder pedals to a 1/72 cockpit! Others may be easier to put together but lack character. The Lancaster, B-17, Wellington, B-25, Whitley, Kate, Defiant, He 111, Dornier 17 and Stuka in 1/72 are all cracking kits, accurate (as far as I know) and with good detail. I would suggest they are comparable to those produced by any other manufacturer. The 1/48 Hurricane and Blenheim are also very good with an incredible amount of cockpit detail. These are just the ones I have had chance to build or inspect recently. Airfix don't always get it right as we know, and some earlier new tools were pretty dire. In fact I hated the relatively new 1/72 Blenheim as it fought me all the way. But I keep coming back. There's just something about Airfix's product. Hasegawa are great and fit really well but are somehow a bit soulless. Eduard are great with incredible detail but too fiddly. Tamiya are great and fall together but are overpriced. Revell are great and cheap but come in dodgy boxes... Weirdly I also love Airfix's soft plastic that you can shape almost by blowing on it. And the box art just keeps on getting better. Is it just nostalgia bleeding through? Am I a 'fanboy'? Maybe. Anyway, these are just my opinions. But I do think Airfix is now up there with the others.6 points
-
Continuing with the new 3d printed pieces - I've tackled the seat and tailpiece. I printed 3 versions of this - the first was close enough to make small adjustments to get it to fit and the second to confirm size and shape. I then split the 3D model into 2 pieces and printed them separately so that I can paint them individually and then reassemble on the frame. I'm happy with the tailpiece, but I think the seat might need a bit more detail, just a little bit of stitching/piping maybe. As with the other pieces, lots of sanding and finishing to go.6 points
-
Thanks for that Stuart - In fact the Mig Ammo offering is actually pretty good and very similar to the Thin blend Gator's Grip. Thanks Arjan - I'd not seen thses. Love the second pic !! They look pretty slick models as I imagine they were wood. As to the first pic........... I thought - What the hell - too late now I'll live with it. Then the demons came........ Well I had to didn't I 233 had 507C all the way down the hull sides to below the water line. At first I thought I'd leave well alone but then the same demons came I thought she needed a scum line. It will tone down at the varnish layer. The Torpedo supports and loading chocks were carefully aligned and glued with Mig Ammo "Ultra Glue" the chartroom/wheelhouse was completed ready for "Closng up" The bridge was finished off And vent cowls and bollards fitted And thank you for your prompting Arjan. The height of the oerlikon now I think (being reduced) is better It really is quite low in that IWM picture! Thanks for looking, your support and comments Rob6 points
-
This is the 1/72 Academy version of the F-14A finished in the colours of VF-51'Screaming Eagles'. Built completely OOB and painted using MIG acrylics. Finished last year but only just photographed. Not entirely happy with the overall finish but as this was a very cheap ebay find I'm not unduly worried and just put it down to experience6 points
-
Decals are complete. Some minor placement issues but only the most hardcore rivet counters will notice. This occured due to panel detail in the instructions not matching the model. This made determining the placement locations for some decals difficult. I'm going to slice along a few panels lines and reapply solvaset but other than that we're done with this step. Next will be to gloss coat it again to seal the decals and move onto weathering. Always be sure to wipe down the model with water and a lint free cloth/tissue. It will remove any leftover residue you might not be able to see from the decal solutions.6 points
-
Primer goes on, giving the replacement rib detail a unifying treatment and preparing the fuselage:6 points
-
Hi mates, Taking a breather from my Javelin mania, and what better way to recover than a resin kit from CMR? This will be my fifth CMR kit after two Buccaneers, a Scimitar, and a Sea Venom. Hmm...all FAA subjects, including this new one. What does this mean? The CMR kit comes in its typical heavy duty cardboard box which, even when empty, could crush any of those flimsy end-opening, gotta save money, boxes. However, even though the box is in great shape, some of the more delicate resin pieces suffered some damage (more on that in a moment). This is the "early" scheme boxing, and as such has some late-40s Temperate Sea Scheme markings. Interesting indeed. The wing is cast in one piece, and the undercart and flap bays are very cleverly engineered. Plus, there is some nice detail on the cockpit sidewalls. The cockpit and engine details are also very nice. The vanes on the engine fan are incredibly thin and realistic - something that is difficult to accomplish with injection moulding. Accordingly, they are also extremely delicate (and most likely a bit of fun to remove from the casting block) and I have some damage on my sample. This is, no doubt, due to CMR packing all of the remaining parts into two plastic bags, allowing the parts to bounce into one other on their way from the Czech Republic to my workbench. I wish they would change this style of packaging - but I have to admit that most resin kits I've built, regardless of manufacturer, use this same method. There has got to be a better way. The remaining parts include some ridiculously tiny greeblies - I had to put on my magnifiers to see some of them. The black parts are the landing gear, and are cast in a much stronger resin to resist sagging over time. I guess - I've never had any of my resin landing gear sag or splay in spite of what type of resin was used. Maybe I'm just lucky, but I work in 1:72 scale and the models aren't very heavy. The bodies for the rockets were almost entirely detached from their casting blocks, and some were broken as well. Nothing that can't be fixed, but it shouldn't be this way. The fins for the rockets are supplied in photoetch. The instruction sheets, as usual for CMR, are photocopied A4 sheets - and there are 22 pages. No worries though, the build itself is only 6 pages, the rest including a parts map, ordinance loading instructions, decal placement for stencils, and markings for 10(!) different schemes. CMR provide two PE sheets, the one that's not in the photo includes pre-painted instruments. To assist in positioning the fins on the rocket bodies, the PE sheet shown includes an alignment jig. I have to say that I'm not yet demented enough to want to try that. The windscreen and canopy are vacuform, and as is typical of CMR, two copies are provided. If my past history holds true, I will need them both. Oddly, though, there are no canopy masks with this kit. All of my other CMR kits have included them. So that's what we're starting with. As you can see from the above photo, a couple of fellow Britmodellers contributed research for this kit. Mr. White graciously provided me with some help already, and I'm hoping that @tonyot will be along to keep me on the straight and narrow as the build progresses. I will need the help, I assure you! Cheers, Bill5 points
-
Good evening all, as a long term resident of the UAE I thought it would be appropriate to build a ‘local interest’ subject. Here is my Hawker Hunter FGA.76 from Sharjah Air Base in the 1970s. It’s the Academy kit with replacement resin cockpit and wheels, Aeroclub jet pipe and aftermarket decals. Paints were mixed by eye to match photos. Hope you like it! Chris5 points
-
Last one for 2019: Airfix's 1/48 Seafire F.XVII with markings from the kit. Only additions are an Eduard PE harness and Master gun barrels (I know, I know, wrong for shape for a Seafire...). Paint is MRP (top) and Mr Color (underneath). First attempt at hairspray chipping and first real attempt at using oils over a flattish clear coat. Full build article and more photos here: https://jonbryon.com/airfix-1-48-supermarine-seafire-f-xvii/ Comments welcome & thanks for looking. Jon5 points
-
I gave it a soapy wash due to the release agents used in resin moulds. Once dry, I primed it with Halfords grey auto primer and left it for 24 hours. For the base coat I used Vallejo’s Panzer Aces Light Mud. A couple of thin coats was sufficient. The next day, I marked out the camouflage pattern in pencil and then brush painted Vallejo Air Model NATO Black. Again, two applications did the trick. Next a coating of Vallejo’s acrylic gloss varnish from a rattle can, ready for the Bison decals. I find the Bison decals 1st class, a little bit like the old MicroScale, and they react to the Micro products very well. All of the decals went on without any problems, the only one needing additional attention being the RAF roundel. I applied this to the turret roof as a lot of Italy Sherman lll’s had it there, even though Bison say to put it on the engine deck. I baulked at that idea as I could foresee problems trying to get it to lay flat over the engine intake grill. As it laid over a double curve of the turret, it rucked up a smidgen, but a sharp blade and some more Micro Set cured it. I decided that the only wash that I would give it would be a pin wash, so using Mig’s Dark Wash, I applied it to the engine grills and all relevant recessed areas, cleaning up any over spills with a damp, flat brush once it had dried slightly. I also applied this wash to the lower hull. Once it had dried thoroughly, I sprayed the whole thing with matt varnish. Thanks for looking. John.5 points
-
OK, after all the jollies of the festive season and my birthday, as well as a day trip to the emergency Department for feeling very wobbly, (can't describe it any better, and they didn't find anything wrong, so got a full check up, CT scans, multiple blood test, and X-rays), I'm back into this. first up, this is the aircraft from the decal sheet Now a careful examination of that photo seems to suggest it's more a 2 green and tan scheme, don't think I can make out where the green demarcations are, so will just go with a single green from the Airfix instructions. so got it all together, made a control column from a bit of wire Another coat of white on the underside Now Airfix have made the canopy a bit of challenge, by making the clear parts separate from the rest, unlike most other kit manufacturers, oh well, paint the bottom of the canopy, I the like to paint the bottom of the clear part with black paint, very carefully, if stops it showing up refracted light, well that's the theory. Then put on some GSI Creos 30219 tan all this was done over the last week or, just getting around to posting, that's all for tonight viewers5 points
-
It's the same deal as all errors in kit designs. It either bothers you or it doesn't. The only opinion that matters is yours, there's no police force for this, no rule that says you can only build models which are as accurate as the state of the art allows. Personally I couldn't put any hours into a Revell Hurri II or a Hasegawa 1/72 Hurri because of the very different ways they screwed up the rear fabric. Even the quickest look at the kit and it glares out at me and annoys me. But that's my emotional response, not yours, and there are other kits where I am happy to ignore known errors because they don't annoy me. The Heller IIc has a slightly excessive wing chord. I know it and it doesn't bother me at all. Someone told me before Christmas that he can't contemplate the Revell Lancaster because the span is a few mm too short and it really gets up his nose. He's right about the couple of mm, but for me once I've corrected the dihedral on the outer wing panels I'm happy to build that kit all day long, its other faults don't bother me in the slightest. I don't mind the 1/48 Hase Spitfire Vb being under-scale. Others can't stand that. All these are subjective emotional responses, only you can judge whether the finished product will be something you want to look at or avoid once you've finished it.5 points
-
Some pics before to aplly the final livery5 points
-
To paraphrase some of the earlier posts, in their eagerness to urinate higher than others, some individuals have introduced some stunningly irrelevant material in relation to the original question asked. It is understood that some threads will wander about a bit, but exactly what does the performance of the Battle in the early part of the war have to do with the use of the Lend-Lease B-17's in the immediate post-war RAF or their eventual disposal? Frankly, it shows a complete disregard for the OP's question and those of us keeping an eye on this thread for whom the RAF's use of the B-17 is of interest. Mark.5 points
-
Details are looking great giemme, have you ever considered doing a crap job on something just to take the bar down a bit so it makes your life easier and our expectations lower? I’ve tried it on all my builds and it works a charm, I definitely do it on purpose, I’m not just mediocre you know 😃. i jest, I love seeing your top quality work and learn so much! Rob5 points
-
Bugger that - they can now upgrade Canada's air defences at last............5 points
-
Pretty much like Tom Cruise then? TT5 points


.thumb.jpg.b4a5069fd2c2dd5708ce1694345c5b11.jpg)


.thumb.jpeg.512869d47e412449d69d30d0295c1ae8.jpeg)
This leaderboard is set to London/GMT+01:00