
Leaderboard


Popular Content
Showing content with the highest reputation on 04/01/20 in all areas
-
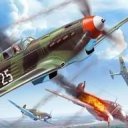
HI all, so the first completed kit for 2020 is a bit of a thrown together 1/72nd Airfix S2C Buccaneer. I started it just before Christmas, and it was wheeled over the finish line yesterday. The kit fits well, but one needs to take care cleaning up sprue removal nubs in some areas to ensure a good fit. It is also possible to modify the rear jet nozzle fairings so the exhausts can be added after painting too. The bombs and pylons are meant to go on the inner hard points where the tanks are, but it's easy to snip of the back location pin and use them outboard. Markings are for a 700B squadron machine in 1965, in the early colour scheme (which, I think, is also the nicest!). Back dating involved removing the raised fairings at the fuselage to intake mouth junction and reshaping the wing mounted threat warning antenna to the early pointy circular ones. I decided not to remove the airbrake strengthening plates (because I forgot). Paints used were Tamiya's newish lacquer white and their standard acrylics for a homebrew Extra Dark Sea grey. Most decals are from the kit, but the squadron markings and serials are from a 1980 Modeldecal sheet. The glue had gone lumpy on these so each was soaked off the backing sheet, flipped over onto my finger and a wet brush was used to remove the perished adhesive. Mr Mark Setter was then used as a new adhesive to apply the decals. Final finish is a mix of Mr Colour GX flat and gloss varnish thinned with Mr Colour rapid thinner. All comments are welcome as ever. Happy new year! Jonners69 points
-
This was my last model of 2019, finished right before Christmas. Eduard’s latest 190, the A-8 version, vastly superior to the “old” moulds from 2010 or so, is a pleasure to build and should provide a rewarding experience to all kind of modelers. the model tries to depict Rudy Artner JG.5 plane. It’s my own interpretation from the few B&W photos coupled with some educated guessing. Painted with Mr. Hobby 74/75/76, MRP 04 and Real Colors late 81 for the green stripes. decals came from Sky models and Xtradecals for insignias. Besides the box contents I used Bregun wheels and Aber brass guns and Pitot tube. Hope you enjoy, wishing all a splendid 2020!38 points
-
This model was built by me in 2014. Kit of Tamiya, wheel bays of Vector , photoetched Eduard, Decal Cutting Edge are used. Regards, Alex. Russia.27 points
-
Ok very nearly done, just the Antenna and Pitot tube to go back on otherwise I am calling it done! The fuseage was a bit warped and as this was for a friends kid to build I took it on an gave him something simplier and Of course I did not read the instructions and had to split the wings post cementing to insert the cannons and the blanking piece for the outer wing!! All done with Humbrol enamels and Alclad II Matt on top. 604_0464 by Georgeconna32, on Flickr 604_0465 by Georgeconna32, on Flickr 604_0467 by Georgeconna32, on Flickr 604_0468 by Georgeconna32, on Flickr26 points
-
It must have been a sudden onset of lunacy after a series of very hot days during the Christmas break in 2017, but I pulled out the Valom Hampden TB1 kit. It’s been two years almost to the day since I started it. Everything that has been said about this kit is true - particularly with reference to the canopies. I managed to finish it, but it is no doubt a model that is best seen from a distance - the canopies are truely awful! Having said that, it does look rather nice in the later afternoon sun (although the hound is wondering what I am doing invading his space). Brush painted with Tamiya acrylics and completed with the kit markings for 489 (NZ) Squadron RAF, Thorney Island, Spring 1942. Build thread can be found here. Thanks for looking!26 points
-
Hiya Folks, The old Academy/Minicraft B-24M Liberator kit is getting as rare as hen`s teeth these days but luckily I managed to find a couple for a decent price on fleabay and here is the first,...... finished using DK Decals as `Glamour Girl' of 356 Sqn based in SEAC at the end of WW2. Many of the late arrivals retained their standard RAF markings and didn`t receive SEAC markings and this was one of them, although it did receive very nice nose art and the units distinctive formation marking on the rudders. Studying photos of the real aircraft,.... unlike most B-24M`s this particular aircraft did not have the glazed waist positions and simplified bulged cockpit windows usually seen on the variant, but instead had the older open waist position with a door fitted plus bubble bulged cockpit windows,......hopefully I have not missed too much,.....although the anti glare panel in front of the cockpit on my model may be too long? The model was finished using a combination of brush painting and rattle can and here is the WIP plus photos of the real aircraft; And here is the model; So that is the first for 2020,........ a bit of a slog but we got there,...... although I`m no fan of the way that Minicraft split their turrets resulting in a seam where there should not be one,..... something that Trumpeter/Hobbyboss have replicated with their big 1/32nd scale kits,.... even when they were forced to re mould the nose turret to make it clear and not clouded!! All the best, Tony25 points
-
This model was built by me in 2015. Fantastic kit of Tamiya, wheels and engine of Eduard Brassin , photoetched Eduard, safety belts of HGW, Montex mask are used. Paints of GSI Mr.Color. Regards, Alex. Russia, St.Petersburg.25 points
-
This model was built by me in 2014. Kit of Tamiya, wheel bays of Aires , Master gun barrels, photoetched Eduard, Decal Aeromaster are used. Regards, Alex. Russia, St.Petersburg.23 points
-
Hi mates, Like most of you 1:72 folks, I've been waiting for Airfix to scale their beautiful 1:48 Gloster Javelin kit down to the gentleman's scale. Waiting...a long time. As it seems Airfix is busy with other projects, I decided to force the issue by building the OLD Airfix/Heller 1:72 Javelin, and along the way to try and make it a wee bit more modern. Surely this will cause the gears of fate to start meshing, and Airfix will get the idea. So you can thank me then! Since I have little common sense, I also thought it would be a good idea to build two of these old kits, one a T.3 (the Heller offering) and the other an FAW.9 (the Airfix re-tool). I also played with the idea of using either the ZTS Plastyk or Frog kits for the FAW.9, but upon inspection I donated those instead to my 3-year old grandson so he could practice using an entire tube of glue to add the seats to the pit. The T.3 is finished, and I duly present it here. The FAW.9 will appear sometime in 2020 2021 2022 2023 2024, unless those gears of fate turn too quickly and thermally disintegrate. Project: 1:72 Heller Gloster Javelin T.3 Kit: Heller (kit no. 346) Scale: 1:72 (back home again after that big Spitfire) Decals: Print Scale Sheet 72-371, representing XH436, No. 151 Squadron, RAF Leuchars, 1960 (please consult the WIP for the sordid details); roundels, stencils and walkway stripes from the Island of Misfit Stickers Photoetch: Airwaves AC72135 interior and exterior detail set; Airwaves AC72133 airbrake set Resin: Pavla Martin Baker Mk.3 ejection seats S72079; Armory weighted wheels AW72047 Turned metal: Master AM-72-079 wing pitot tube Scratchbuilt: Interior of the airbrake bays; interior exhausts tubes; front and rear engine faces (I cheated on those) Paint: Gunze H73 Dark Green, H75 Dark Sea Grey, H11 Flat White, H12 Flat Black, H77 Tyre Black, H18 Steel; Tamiya XF-16 Flat Aluminum; Floquil 10100 Old Silver, 110015 Flat Finish. Camouflage pattern was done freehand. Weathering: None, because at one time or another, this aircraft was fresh out of the shop. Plus, photos of it look clean, baby. Improvements/Corrections All raised panel lines removed and re-scribed Scratch built airbrake bays and noodled old pieces of PE for the actuators Detailed the cockpit Positioned the tailplanes and elevators in typical parked position Added antennae Build thread: Link Pictures! Before the canopy (and paint) went on: Stay tuned for Part 2: The FAW.9. It will be red and white, hint, hint. Cheers, Bill19 points
-
OK, she be done. No more parts left, that I want to use anyway. I'll put up a proper RFI post soon. I'm counting this one as a 2019 build, otherwise my yearbook will look even slimmer than it already is. What was it, three models in 2019? Pretty lame. Cheers, Bill17 points
-
Hello, this is my 1/32 Tamiya Spitfire, converted from MkIXc to MkIXe; markings are from Isradecal, the figure comes from the Blackdog range...16 points
-
The engines used in the final version, the JAP (for J.A. Prestwich) KTOR engine are more usually found at the front end of the Morgan 3 wheeler or mounted in a Brough Superior motorbike. It can be easily recognised by the external ohv valve springs. Luckily there are still drawings available for most of the engine (only because the microfilms were found in a gutter!) so I started by trying to make a cylinder barrel. The fins are a problem (getting them deep enough) but I could use a slitting saw on a rotary table, which would take forever (four barrels to make!). I tried a shorter slot using a lathe tool. I'll try it in place to see whether the fin depth is going to be seen. Here's the engines in situ And the trial cylinder - note that I miscalculated the pcd of the head bolts, so there are grooves down the bottom of the cylinder.... Chassis - I found some cedar of the right size (it scales out to about 3.75" by 1.8") and used brass sheet for the corner gussets The front springs are quarter elliptic and cord wrapped The leaves are cut from 0.4mm brass sheet, the wrapping is crochet cotton (found in the sewing box). I discovered on about the fifth look at the photo (after I'd wrapped it of course) that I'm short by one leaf. There should be another long leaf on top of the one with the eye.... Front spring mount. Not the most common type! The parts The bit that looks like a boat and the slotted T are silver soldered to make the bottom clamp plate. Everything seems to hang off this, which is why I've silver soldered it This bracket is important as it is the sole support for the friction damper/bottom radius arm, the hydraulic damper and the brake lever I made some M1.4 threaded rod to hold it all together. The rods are soft soldered into the bottom clamp plate14 points
-
Hey everyone The 1/48 Eduard Bf109G-5. So much fun it should be illegal! Built this one a while back. Just a joy of a kit to build. I love Tamiya kits as much as the next guy but with everything they throw in an Eduard Profipack 109 kit, I don’t feel the need to go elsewhere. I bevelled the panel join line on top and bottom of the fuselage, replaced the wing cannon and pitot with hollow aluminium tube and also the underfuselage aerial with a fresh acupuncture needle (ouch). I also flatted the tyres which on a 109 is particularly difficult to get the angle right! Colors are Mr Hobby and Tamiya. Hopefully the color variation comes out. Maybe should have gone heavier with it but I like subtle. I think this is a quite an eye catching scheme and the spinner decal is just amazing. I was pleased with how this came out. Feedback welcome. Thanks for looking. Rick13 points
-
My first diorama in 2020, hopo you like it. The Rain Stopped End13 points
-
Hi all! This model is from Special Hobby in the 1/72 scale. It was my 2019 last model. I find this plane one of the most beautiful WW II German planes. It was planned to operate in high altitude and this version is for photo-reconnaissance purposes. It´s not a easy construction job , because it´s a "short run" model : Vacuum formed canopy Photoetcheds Resin parts, and No reference pins/ holes for the assembly. The canopy is very yellowish due to the age... by removing the acetate excess and painting the frames this yellowish ton will disappear, almost... see the pictures: Hope you like it! Luiz.12 points
-
Hi and Happy New Year, Please find my latest completion, the NF-F5 freedom fighter. The kit is from Tiger Hobbies and has its problems, Shape issues and very deep panel lines. Nevertheless, for £13.60 (incl shipping) I had tremendous fun building it. Panel lines were filled in and re-scribed where necessary. The only after market items were the masters pitot-tube and gun barrels and the NF-5/F86 DutchDecal sheet. The kit is not for the purist in the hobby, I hope Kinetic will re-issue the f-5a soon again. Paint and clear coats by Mr Color and home made wash and tamiya weathering powder/pastels. Apologies for the photography, I only have an iphone and 2 desk lamps. In the "work in progress" section on Britmodeler I have listed the build. (Since I am a newbie, I haven't figured out to insert the link in this field) :-) Continuing with my f-15D from academy, hopefully a little more accurate in outline and detail. Hope you like it. Cheers.12 points
-
AIRFIX 1/72 with Revell COOKIE decals12 points
-
1st completion of my current Guadalcanal phase, next up is Airfix F4F-4 Wildcat but in the meantime here is my Academy PBY-5A, was the Black Cat boxing but was not inspired by a black catalina so got some Guadalcanal Starfighter decals 72-139 which had references for this PBY as the first to land on Guadalcanal. Really nice trouble free build overall, totally out of box. First time tried to vary the colours with some pre-shading, came out quite nicely but not sure photos show it too well. And of course for the 4th time in a row, not enough weight in the nose so some white tack need on front wheel 😂 With some friends in the cabinet...10 points
-
Today was my last day of freedom before I go back into captivity on Monday so I tried to make the best of available time (with the caveat that I was working on a Fly kit of course.) Thanks Massimo. It seems this is the season for modeling issues - I'm not the only one who's been getting their butt kicked recently. We're all men here though eh? Apart from the women that is I've come to expect nothing less of your helpful and oft-times insightful suggestions Steve. Haven't you got a Bi-winged Avro-Dodo to be getting on with? Ah, good point Steve - I never considered having a plug along the edge. That would certainly provide a much better chance to fill. Still not going there though. Yet! Great one Pete. something similar did float through my mind over the last 24 hours - even down to 3 blades in the fold brackets and one blade slipped and fallen to the floor - i.e. bent and mangled. I haven't ruled that one out yet! But I digress. I promised pictures of bent, twisty things. Blade one. The uppermost blade is as they come in the kit - nice big sweeping curve. The blade immediately below that is my number one blade. Still not perfectly straight but close enough to make things work. I momentarily thought of dunking it a second time to see if I could improve on that, but didn't want to push my luck, Dammit dammit dammit... forum went and ghost posted on me again. Hold on folks, I'll be back when I've added more piccies and a bunch of words Today's update part deux. Blade two: Same process in as far as I didn't use stopwatches or thermocouples and we have a doozy. The trailing edge is all over the place and the leading edge takes a few detours along it's length. Spot the wonky blade(s)! After my initial bout of peevery I kind of resigned myself and though oh what the hell - I can always put that blade in the most non visible location. Or file the entire kit under B1N Anyhoos, not one to let a fly get the better of me it was time to move on. Sadly, not being the sharpest chisel in the box I decided to move forward with something that was equally challenging, just in a different way. Wipers. Fly provide 2 x PE wipers - no spares. However, like all etch that tries to represent anything other than a flat sheet, the PE wipers left me feeling unfulfilled. A quick play with some brass rod and I felt more comfortable. - I took a small diameter brass rod and squeezed it in the vice. That flattened out one end - I then put the rod back in the vice again, but squeezed a small portion of the already flattened end. That gave me the shape you see below which I think looks considerably ore like a wiper arm than Fly's offering. I then meandered around trying to solder that small section onto the "wiper" part of the PE - all to no avail. Then it dawned on me (told you I wasn't the sharpest!) - If I just soldered a length of rod onto the wiper, I could then cut the rod to length and squeeze the appropriate lengths in the vice Kit offering on left and stage 1 wiper construction on right And conveniently forgetting to take any more photo's until they were done, dusted, and painted... I also added the wiper stops on the frame either side of the center glass Wipers finally in position. What incredible effort for so little reward! And yes Pete before you mention it I haven't added the windscreen washers (and don't think I'm going to bother - at least not today) Taking occasional breaks from that gargantuan effort I threw some paint on the blades. Surprisingly, the addition of paint somehow masks the spaghetti like nature of blade 2. I'll check that observation again tomorrow as I may well have been hallucinating by this point. It's that stage of the build where all those little tasks I've been studiously avoiding start to pile up until there are no other tasks other than all those ones that take an inordinate amount of time and effort for surprisingly little visual impact. Anyone remember this little beauty? If I wasn't as dumb as me I would have fitted the SACRU before I fitted the tail in the folded position. This task would have been a lot simpler if I had been able to turn Wessi upside down, but we all like a challenge eh? Thankfully my jig came to the rescue as I could swing the fuselage over to give me more access to the underside I knew these things would come in handy one day! After the SACRU or more correctly, the attachment cables were secured it was time to tie her up. Here I'm using plain white thread which has been run between my grubby digits a few times to take the edge off the whiteness All done - a drop of CA just to stop the rope from unwinding and the view from below In between times the pitot got fitted, as did the emergency release handles for the cockpit sliding windows. Now it was time to hold my breath for prolonged periods until I got dizzy. Yes, you guessed it - fitting the hydraulic lines to the winch. Only a couple of photo's to cover what was probably 60% of my days time and effort. Not very photogenic - at least until it's all done. The first two hydraulic lines were the easiest. Note I said the easiest, not easy by any means! I found some electrical wire of seemingly appropriate diameter and used resin valves for the hydraulic fittings - each valve being drilled to accept the core of the wire That third hydraulic line was a real pig to get into place, particularly trying not to dislodge the first two I even went as far as using some black thread for the electrical cable. Must remember not to breathe on this for at least a month. Tomorrow ? p'raps some more blade sheannanigans10 points
-
Don't take it so personally. The thread was taken down by the Mods because it was a clear breach of copyright that had obviously been posted either without permission, or with permission of a person who had no rights to give that permission. I doubt it was some kind of underground marketing ploy, so we'll dismisss that option out of hand. Without the OP, the rest of the thread would have made little sense, and/or given away the information, and thinking about it I don't think you can hide the first post of a thread in isolation anyway If the original poster had asked before posting the info we would have said no, but we weren't given the option sadly. Not me, but thanks on behalf of those involved with the take-down. It's funny how we can get such polarised views on removal of something that was in all likelihood posted without anyone's permission. We've been in touch with Airfix over the matter and they appreciated the take-down and were looking into the matter. The cat is now sadly out of the bag, but we won't be plastering it allez uber de platz.9 points
-
Or anyone leaving Phil Collins' old band... Sounds good: I'll get the Frog parcelled over the weekend Alistair and in post on Monday. Thanks Ced. Also going to be - dare one say it aloud? - produced at @Fritag speed given the attention to so many superimposed details this is requiring as an undertaking... 🤦♂️ Kind man Pete, thanks. Have you seen some of the people who build at that scale? What rivets and bolts has done to their souls? Been pressing-on with the rib 2-4 area this morning and had some qualms about the simplicity of my initial outline where it tapered to the rear. I had it angling in a straight line toward the apex on the trailing edge whereas on the aircraft, there seems to be a subtle but definable downward curvature before flaring out to the trailing edge: Image credit: Julien I'm not just inventing this am I? It's not always clear in some shots due to where either the shading falls or wingfold fairings obscure it when viewed from the side. The manual seems to indicate this negative curvature at the rear in some (but not all) drawings, such as this one @canberra kid passed on: A couple of colour shots in Buttler also show this profile so spent some time therefore redoing rib 4: and lofting it across inward as you can see into rib 2: I don't think I've caught that upper rear curve exactly right quite frankly- the change of direction about 4/5 of the way back towards the trailing edge is too abrupt to my eye - so need to go back modify that section if it is to match the grace of the original. I'll see if I can get time to do a bit more on that this evening. Tony9 points
-
Happy New Decade Folks... After a prolonged Christmas break - eating copious amounts of pigs in blankets & knocking up a tiny 'golden stuka' for the Christmas tree - I think I had better get back to work on my workhorse. My mojo is still intact - so I had a quick review of where I was up to and set to work early this morning. As everything is 'more or less' complete it is time to get the last few bits in place and do a bit of weathering. I got the tools on to the front mudguards first - fiddly little beggars... ...it's amazing how just a few days away from the bench can lead to unsteady hands - but I got there in the end.9 points
-
I Made this 1/32 italian Air Force F-104s maintenance diorama starting from the Italeri model, I added a lot of detail using commercial add-ons but also a lot of scratchbuilt ones, expecially inside the plane. All was made using real pictures and books as reference. You will find the RAT, and the fuel pipes on the back of the plane and many other all around the plane you can find in the detail pic. I've made new carts and ladders and other details around the diorama. The scenery was made using photo-paint and printer.8 points
-
Today's task, the Gunpack servicing stand, this is what I'll be using to display the pack on, like the photo @71chally James posted on page 3. I've gone for copper wire as this is the most readily available material for me at the moment. The first task was to cut some lengths of wire to approximately the correct lengths, the wire I'm using is some multi core Electrical Earth wire which is made up of a number of twisted strands, the twists need to be straightened out, so the first job it to 'anneal' the copper. The first photo is the components on my soldering block ready to be heated. This next photo shows the first three components to be soldered. I tend to avoid Lead solder if I can as I'm not a big fan, it does have it's uses but when I can I use 9 ct easy gold solder, this makes for a much stronger and neater joint, and I'm used to it! The next shot. all five of the cross members are now solderd, the are two diagonal parts to add, but I'll fix them with CA glue later along with various plastic card itunes. Now that's done, the next step is to bend the frame into an arch, to get a nice even curve I bent the wire over my sizing mandrel, this way I could also make sure the two ends were the same size (Z+2) The next phase was to add the two large parts where the gunpack is connected to the frame, I used two parts from an old light fitting cut down for this, they are perhaps a bit over scale but needs must, as they say. They were soldered to the frame, I'll drill them out later so I can pass a some wire through to attach the gunpack. And lastly to give an idea of scale, here it is with a 1/48 scale Mr. John8 points
-
Some more paint. I decided to paint the engine and the chassis (still to do) in the same lighter colour as the interior. Plausible scenario for a truck rebuild / restoration for a new purpose: take everything off the chassis except the engine and spraypaint the lot. Then put everything back on. Something like that. I've painted the mudguards and the engine. The other parts are tanks and toolbox / storage, these are painted in the darker colour for the cab. I added more Olive Camo and a touch of black into the mix. The lighting and focus are terrible but you can see the difference in colour between the tank and the engine in the background. The "splotches" on the fuel tank are Vallejo Liquid mask, applied with a cocktail stick. It will rub off easily when the paint is dry. Creating an effect like this, on the roof which was painted in German Grey spiked with Light Grey. Thanks for looking in.8 points
-
Incidentally, today I received a copy of Scramble, by Wing Commander John Nesbitt-Dufort DSO, who flew Special Duties Lysanders and successfully evaded back home after crashing in France in one in 1942. In this little book, published in 1970, he discusses his impressions of the various aircraft he flew in WWII, and as a QFI, he flew many. He describes his experiences of the Lysander partly thus: Incidentally, Nesbitt-Dufort had a grand total of 168 hours on type at the conclusion of his RAF career, which meant that he was flying into occupied France, at night, landing, and taking off again with less experience I had in automobiles by the time I finally got my driver's license. (Though in fairness to him, he was a phenomenally experienced pilot overall, having entered the RAF in 1930 and been a QFI and MU test pilot.)8 points
-
Hi folks, bought this about 5 years ago when I worked in a model shop so just getting around to finishing it off. I used a Laser Cut deck which really enhanced the model and added some details for the boat cranes. Looks ok but a wee bit too heavy. Just wondering about some rigging next, I dont fancy doing Cage Aerials so will keep it simple. the sea was just crinkled tin foil plastered over with Polly Filla and then sculptured a bit to make some wave like effects and painted over with Humbrols and Klear for the Sea Gloss. 604_0406 by Georgeconna32, on Flickr 604_0407 by Georgeconna32, on Flickr 604_0408 by Georgeconna32, on Flickr 604_0414 by Georgeconna32, on Flickr 604_0415 by Georgeconna32, on Flickr 604_0473 by Georgeconna32, on Flickr 604_0472 by Georgeconna32, on Flickr 604_0471 by Georgeconna32, on Flickr 604_0470 by Georgeconna32, on Flickr7 points
-
Happy New year to you all. This is my rendition of one of the 9 Bloch 151 sold by France to Greece in 40 and operating with the 24 Mira against the Italians with some success indeed. A very good short run kit of an important French fighter. CDFFE0EF-EDFF-42F2-9BEB-5A6A637F9117_1_201_a by jean Barby, sur Flickr 1957799D-3F70-4B0A-B5A9-EBA680723832_1_201_a by jean Barby, sur Flickr 05C8C687-0069-43C1-BDE9-3D2F6AE53F9C_1_201_a by jean Barby, sur Flickr 3C5A9E7B-EC54-4053-9AF9-44C43BB236AD_1_201_a by jean Barby, sur Flickr EF195E8F-369D-41F6-B853-BF94F93262E9 by jean Barby, sur Flickr EBF21753-3AE3-43A3-97A0-B543B840CDEC_1_201_a by jean Barby, sur Flickr7 points
-
Academy P 51 B Patty An II Lt J THORNELL 328 Fighter Squadron 352 Fighter Group Summer 1944 Humbrol brush painted Pavla resin seat Yahuu Instrument panel Build thread here Patrice7 points
-
I'd have some of what you're having, but I think you've had all of it.7 points
-
OK - the shopping for the week has been done & I even squeezed in a quick haircut - "a number 1 all over please" - the mantra of all of us that don't have enough hair to get anything else So - not the best advert for Flory @Robert Jan Scholte v. Mast - but this is the start of what you can achieve - a quick wash with sand... DON'T PANIC!!! I am going to knock these back a bit and add a bit more where it looks 'too clean'... DON'T PANIC - MKII... The final result will actually be quite subtle - I promise.7 points
-
Not to worry Steve and Adrian, you didn't miss much! Dive brakes, yes… thanks Heather and Ben They are nicely moulded closed on the wing and they'd be very thin if I tried to scratch them. I did find a film about the 210/410 here that says "…the clam type bomb bay doors made the aircraft so unstable when open that only a crew bent on self-destruction would open them when flying”. Crikey. She does appear in the 'Wings of the Luftwaffe' Destroyer episode and you can see the brakes operating here: Not to worry John, you haven't missed much All I've done is test some fits and painted the internals: Out tonight, more tomorrow7 points
-
Cracking John: Almost running out of useful space now in the 'PureRef' mosaic before it becomes too unwieldy so those make a great in-thread reference for myself and others: Rib 2 & 4 profiles corrected and lofted now: I've left the inboard side of rib 2 open as I want to keep my options at this stage about the best method for widening this into the bulge that forms the intake areas and haven't made any concrete decisions regarding this region yet. Next step though is to start from rib 4a and start heading towards the wing fence....7 points
-
Does rather raise the question of what the whole Rumourmonger forum is intended for though. In the last week we've been told repeatedly that we are not supposed to use it for expressions of what we'd like manufacturers to produce, nor for unsourced speculation. The implication of the last couple of days is that we're also not supposed to use it for sourced and factual information about what manufacturers are planning to announce. Mike's gaff, Mike's rules, but we need clarity on what those rules are, in order to have any ability to work within them. If Rumourmonger's new function is now intended purely to record official manufacturer announcements as and when they are made, then that's fine, but it needs a new name and a new description to make that clear, as the current name and description - What kits have you heard about from the manufacturers, your mum's cousin vinny, or in a dream you had the other night? Post your thoughts, requests for confirmation, or just baseless speculation here... - now appears no longer applicable.7 points
-
Whilst the gloss is still drying I've been twiddling my thumbs and pondering what to do - then I remembered these from earlier in the thread.... ...so I've knocked the boxes together / sloshed on a little primer / followed by a quick coat of Vallejo 'wood'... ...off to Asda now for the weekly shop - back for some truck weathering later. I'm back on the road - thanks for looking in - Steve7 points
-
During the recent Blitzenbuild over the Christmas period, given that you only have 24 hours in which to start and finish it, but spread over 3 days, I chose to do the PM Ta183. The build thread is below If you haven't taken part in a Group Build before, I throughly recommend it, picture of completed build below: Let me know what you think. Cheers Pat7 points
-
This was my project for the T-55 Single Type Group Build down in the Britmodeller Group Build section. The Tamiya kit was a joy to build although I had a couple of fit issues early on - which surprised me for a Tamiya kit. Nothing major - just a few wishy-washy connection points/areas. Of course it could have just been me that was the issue! Early on I decided to replace the band tracks with some individual track links from MiniArt and didn't want to use the mesh provided by Tamiya so got the relevant grill set from Eduard. For this project I decided to try some slightly more restrained weathering than I sometimes do - I didn't use any weathering products such as Mig Muds (or their sand equivalent?) which I often use. Kit: Tamiya 1/35 Kit No. 328 Extras: MiniArt Track Links Set No. 37048, Eduard Grill Set No. 35257, thin wire for the aerials, spare PE bits from my Typhoon build for the jerry can strap buckles, painted masking tape for the straps and various stowage items from a variety of old kits and stowage sets. Paints: Humbrol, Revell, Citadel, Vallejo and Railmatch Acrylic paints all applied with brushes The WIP can be found: Here Vignette photos on a display base can be found: Here I had planned a fairly complex display base for this Tiran 5 but the time limitations of a STGB (3 months) meant I ended up doing a fairly simple idea but I did include the two figures Tamiya provided in the kit: The base I did end up making includes some basic ideas from my originally planned design: More photos of it on it's base can be found: Here Thank you to anyone who kindly took the time to comment in my build thread. Kind regards, Stix6 points
-
************************* H A P P Y – N E W Y E A R ! ************************* ************* 2 0 2 0 **************** Dear Modellers, I thought, let me start the new year with a big piece of alu-mongery This time no scratch !.....😁...... So I like to show my model, which I build many years ago , yes, in pre- Internet-days. I had a Squadron/Signal In Action Publication Nr. 31, which included a nice drawing of a Photo- Recon version. So I decided to build “Double Exposure “ The markings were not a problem, only that pin-up...!.... I could not find a decent decalsheet then, so I had to make one myself. After making some sketches, I painted it with oil paints on a piece of Microscales clear decal sheet by hand. Looking now, remembering the age of the kit, I think Monogram did a pretty good job in those days. Of course there are some issues, but overall it's still an impressive model ! Enjoy the photographs ! Kind regards, John Haa ,6 points
-
I'm retired, build glacially slowly and have no friends, so Ced's is different from mine....!! I dunno, I'm away for a night, come back and he's off again - somebody pinch his tools for a few weeks to give us all a breather..!!6 points
-
I don't think we're achieving anything with this thread now other than going round in circles and speculating wildly, so I'm calling time. No more threads on the subject please.6 points
-
This is all just part of a cunning plan to conceal Monday's real announcement - the Yak-9 VK-105 series in all three of Airfix's favoured scales - 1/72, 1/48, and a dazzling 1/24!!! I just know it... John6 points
-
Basically from the box, Vector engines, Master barrels added. A little riveting on metal elements. Colors - my interpretation. Model ... very well fitted for a shortrun6 points
-
Hi all! Another couple of afternoons spent fiddling, bending, trying to keep everything together long enough to figure out what needs adjusting and where, then having it all fall apart again, etc etc. Anyway, I think I'm there now. The front brackets have been adjusted, measured, remeasured, and re-remeasured, the mudguards were CAd on and then final adjustments made to make sure they are level both with each other, and with the rear ones, and all is square. I basically taped the two mudguards together with a piece of masking tape that I'd marked for the correct width, then added another piece to pull it all square. That allowed me to triple check everything and check the lines to the rear 'guards The rear ones are only loose fitted, but if I straighten them up all looks good. They don't look quite straight in that pic but it is only the parallax from the camera viewpoint, and they are indeed square and true. Or at least, as close as I can possibly get them! I then CAd a couple of strips of brass rod to the front brackets so they will maintain their position and I can solder the crossbrace/headlamp mounts on. That's where she sits for now, hopefully I'll be able to add the other bits without it all falling apart! Thanks for looking in! Ian6 points
-
That's 99% of the decals on, left the Red pinstripe off the nose for the moment because that is a handy, temporary, holding point and it would probably get damaged or rubbed off if it was applied too soon. The fuselage 'G-AXFH' was made using a decal lettering sheet, and the 'Channel Airways' wording above the windows was taken from a Classic-Airlines decal sheet, CA144-095 Viscount 800, and is pretty much bang-on to size. The tiny 'Channel Airways' wording on the fin/rudder is from another Classic-Airlines sheet, CA144-108 HS 748, and although the words on that had a Black surround, as they should have, the words themselves were transparent so I had to apply a section of White decal strip first, and then laid the tiny 'Channel Airways' wording on top. Again, the size is pretty much spot on and I am very happy with how all of the airline wording has turned out. The three emergency exit decal hatches on the fuselage roof were taken straight from the standard Airfix sheet. I will give everything a few days to thoroughly dry out, then seal the decals on with a coat of Clear Gloss, and once that is fully dry the subtle, discrete weathering can be applied, to give a faintly used look to it.6 points
-
Time to get the gloss on everything - so I can splash on some Flory wash. I couldn't figure out where to hold the truck bed for glossing - so ended up with a very wobbly pair of 'legs'... I used my usual Humbrol acrylic gloss with a 0.4mm needle in basic brush to apply a good heavy shiny coat... As usual the heating in the cave is now turned up to full as it really needs to set solid before I splash any wash on - time for a spot of lunch. Catch ya later - Steve6 points
-
so now ive got the cockpit pretty much done! 😄 Using Tamiya rubber black as a base coat, i dry-brushed Humbrol Matt 32... allowed to cure for a few days, then used XF-19 for the controls, and artists acrylic red - for tiny things such as buttons I cant speak highly enough for artists paint, its thicker so u can 'dot' on with a tooth pic without it running out of control! I then did a wash with thinned Tamiya smoke - a tip for retarding drying time is to spray the surface with isopropyl alcohol ( i use an old lens cleaner bottle) before putting the wash down. Then just some decals to round it off. blacks a real pain to photograph , but you get the general idea from the pics 😄6 points
-
Soon two new boxings - ref. 70036 - Hawker Hurricane Mk.IIc Sources: http://www.armahobby.pl/70036-hurricane-mk-iic-model-kit.html http://ksmodel.pl/sklep/szczegoly/hurricane-mk-iic-model-kit-1-72-21011/ - ref. 70037 - Hawker Hurricane Mk.IIc Trop model Source: http://www.armahobby.pl/70037-hurricane-mk-iic-trop-model-kit.html V.P.6 points
-
Dennis, are you ever in luck. Someone was selling the clear parts for the Revell P-51B in 1/48 on ebay, so I ordered them for you, seeing as I have your address. They're coming from Wisconsin, so you should see them soon.6 points
-
So, painting is underway. To begin with I basecoated all "outside" parts in flat brown. It's a nice base colour for spots where the paint has chipped. In the first post you can see that my intention was to paint a dark yellow. I had selected Vallejo's Golden Brown for this, a pretty much exact match. But... yellow paint, hm... What I was a little bit afraid of beforehand indeed happened. When brush painting you need thin paint, otherwise brush strokes will show. I started painting the inside of the doors which were still light grey, I wanted to use body colour on the interior as well. However, there is not all that much pigment in yellow paint so I found I needed 10 plus coats to cover the light grey. I mean, I don't mind painting but at that rate I'd still be painting by Christmas 2020. I'd probably need even more coats for the outside. A change of colour was required, I needed something with better coverage. I decided to go green, something like this: To my eye, it's sort of greyish green, and I wanted something along this line, starting with the interior which I wanted to paint a little bit lighter than this. Some mixing followed, until I had a shade of green I was quite happy with. It's 2 parts Medium Olive, 1 part Olive Camo, 1 part Medium Brown Camo, 1 part Orange Brown and 1 part Light Grey. Heaven knows how I came up with it but I rather like it. For the exterior I'll go darker and increase the Olive Camo, I think that should work. Anyway, enough of the rambling. The interior is done, I glued in the front seat (bench) and the doors after painting and I can now paint the outside of the cab, along with everything else. I will keep the black mudguards of the first reference truck by the way, and I think I'll go for a lightened German Grey roof. We'll see. The interior (Medium Brown seats) All I've done so far is dry-brush the seats with a little Off White and Green Ochre, and Gun Metal on the interior itself. I think it's fine, it will never be seen again in any detail so let's no bother too much. More tomorrow!6 points
-
Kit: Accurate Miniatures P-51A Mustang (No. 3402) Model: North American P-51A Mustang, Burma 1944 (USAAF) Scale: 1/48 Aftermarket: None Paints: Vallejo Model, Air & Metal Color Weathering: Oil paints, Flory Models Wash, MIG Streaking Effects, Vallejo Weathering Effects, pigments Build thread: Fun build, good details and things fell apart mostly fine. Had lots of fun with weathering. Here are some pics:6 points


.thumb.jpg.158e2e086d45b8f96b7d93b8bee8dc21.jpg)


.thumb.jpg.76f12b87ce9ca9929c9aabdcf8f9d2dd.jpg)


This leaderboard is set to London/GMT+01:00