
Leaderboard


Popular Content
Showing content with the highest reputation on 02/01/20 in all areas
-
Hi all! This model is from Special Hobby in the 1/72 scale. It was my 2019 last model. I find this plane one of the most beautiful WW II German planes. It was planned to operate in high altitude and this version is for photo-reconnaissance purposes. It´s not a easy construction job , because it´s a "short run" model : Vacuum formed canopy Photoetcheds Resin parts, and No reference pins/ holes for the assembly. The canopy is very yellowish due to the age... by removing the acetate excess and painting the frames this yellowish ton will disappear, almost... see the pictures: Hope you like it! Luiz.45 points
-
************************* H A P P Y – N E W Y E A R ! ************************* ************* 2 0 2 0 **************** Dear Modellers, I thought, let me start the new year with a big piece of alu-mongery This time no scratch !.....😁...... So I like to show my model, which I build many years ago , yes, in pre- Internet-days. I had a Squadron/Signal In Action Publication Nr. 31, which included a nice drawing of a Photo- Recon version. So I decided to build “Double Exposure “ The markings were not a problem, only that pin-up...!.... I could not find a decent decalsheet then, so I had to make one myself. After making some sketches, I painted it with oil paints on a piece of Microscales clear decal sheet by hand. Looking now, remembering the age of the kit, I think Monogram did a pretty good job in those days. Of course there are some issues, but overall it's still an impressive model ! Enjoy the photographs ! Kind regards, John Haa ,30 points
-
Hey All, This is my third aircraft since getting back into the hobby, though I've done many tanks. I've been, frankly, afraid of planes, as the care needed to address seams and re-scribing when sanding off details has been beyond my capabilities. I think it still is, but I'm trying to learn. I'm far more of an 'assembler' than a 'modeler', but I'm trying. I really like the Eduard planes, and this is the third of three thus far (the Spitfire VIII, and FW-190A-4 were the first two). Feel free to comment and bash as appropriate...I won't get better without critique. By the way, I already know for at least half a dozen significant errors/mistakes/poor execution on this one, but I'd appreciate any thoughts. Thanks, and Happy New Year!30 points
-
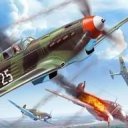
Happy New year to you all. This is my rendition of one of the 9 Bloch 151 sold by France to Greece in 40 and operating with the 24 Mira against the Italians with some success indeed. A very good short run kit of an important French fighter. CDFFE0EF-EDFF-42F2-9BEB-5A6A637F9117_1_201_a by jean Barby, sur Flickr 1957799D-3F70-4B0A-B5A9-EBA680723832_1_201_a by jean Barby, sur Flickr 05C8C687-0069-43C1-BDE9-3D2F6AE53F9C_1_201_a by jean Barby, sur Flickr 3C5A9E7B-EC54-4053-9AF9-44C43BB236AD_1_201_a by jean Barby, sur Flickr EF195E8F-369D-41F6-B853-BF94F93262E9 by jean Barby, sur Flickr EBF21753-3AE3-43A3-97A0-B543B840CDEC_1_201_a by jean Barby, sur Flickr29 points
-
Basically from the box, Vector engines, Master barrels added. A little riveting on metal elements. Colors - my interpretation. Model ... very well fitted for a shortrun26 points
-
This was an impulse buy - which I pretty much regretted as soon as I opened the box. Not such a modern kit, with a few fit issues. It was not the easiest to make and I kept breaking bits off as I completed it - which is why it spent several months at the back of the shelf of doom. But I was so close so I pushed on. White is from a Tamiya rattle can, the red is brush painted Tamiya acrylic - which was gruesome to paint. Finished with a bit of slight weathering (most of which was from my grubby fingers), and a brushed on coat of Tamiya semi-gloss clear. Completed out of the box as XW871 of 705 Naval Air Squadron, Culdrose, UK, 19896. Thanks for looking. Some additional photos outside:18 points
-
This is part of a pair that I am doing This aircraft was flown by Flight Lieutenant Carter and Flight Sergeant Noaks of 93 Squadron RAAF based at Morotai Island, north of Borneo 1945. Kit is Tamiya decals are by Xtra decal WIP is here Please feel free to comment etc Thanks for looking Dick17 points
-
Thanks John Yes, I have the Vallejo cleaner and thinner; Paul at Modelling Tools (my airbrush guru) recommended branded cleaner as it was formulated to clean out that specific paint and it does, er, OK IMHO. I also follow Giorgio's IPA/Windex/IPA clean out routine for end-of-session cleans so I think I'm quite clean. Thanks Keith Colourful indeed! I usually keep paint I've used on the bench for touch-ups - look at this lot! Not the Vallejo White, obviously - that's in the bin! Thanks guys - I'll have a shop around Do you need a special tool to get at the o-ring behind the 'paint hole'? I'll Google it… oooh, lots there (including a maintenance kit), I'll come back to it. Aha! That'll be it Dennis - my bottle was quite old Thanks both - just checked and my IPA is 99.9%! Nerve-wracking time this morning. I started with something 'simple': Oh no, not another '?'. I wish Eduard would give more guidance on which option goes with which scheme. I chose the red one as I hope it'll distract the eye from the internals Getting these bits is 'fun': I remembered Perdu's advice on using tube glue as it grips and wiggles so I used that to 'connect' the two parts and then tweezers it in: …made sure it was 'straight' and then touched some TET on the edges of the headrest and around the back. Fingers crossed it hasn't clouded the canopy. Now then, hold your breath: How do you get that on successfully? No idea, it's my first time with a spiral decal. The method I used was: Soak the transfer in warm water Brush MicroSet on the spinner Take the transfer out of the water and carefully edge the 'front bit' off the backing paper Offer up the transfer to the spinner and gently pull the back paper away Watch in horror as the transfer wraps itself around my finger Drop the cocktail stick on the floor Pick up the cocktail stick and brush off the hairs and dust Pick the transfer off my fingers with tweezers Position the 'dot' of the transfer in the centre of the spinner Brush the transfer around the spinner, noting that it crosses a prop gap - check the scheme; no prop there, no help Prod the transfer at various points until it looks parallel all the way around Repeat steps 10-11 until completely insane. Might not work for you but I hope it's helpful. The result? On with the easier bits: Easier except for the 'V's - they were a pain! Even sliding 'the wide end' off first didn't guarantee they didn't twist. Got them more or less in the right place though, I hope. It does look better with the transfers on and they're conforming really well: I wasn't going to apply any stencils on the basis that the white would have obliterated them (that's my excuse) but some are needed. Like these: Another flippin' '?' Enough - lunchtime!16 points
-
Model of modern Russian multifunctional aircraft Su-30SM. Kit from Zvezda, Microdesign photoetched , Elf wheels, Pitot tube Master, Advanced Modelling and Eduard Brassin weapons. Regards, Alex.15 points
-
Deliberately so, I believe. If memory serves, the rather inept enthusiasts who reactivate their past-their-prime spies from the wartime era are deliberately modelled on SOE by Le Carre, who was of course an SIS man. The photo was supplied to me (back in 2015, this build has been one I've wanted to do for a while) under the condition that I not share it further. I've started on the kit tonight in earnest. The Lysander III had a Bristol Mercury XX engine; interestingly, the first Mercury-series engine, the Mercury I, was used to power Shorts' 1927 Schneider Trophy competitor, the Crusader (it never raced; a reassembly error in connecting control wires resulted in a crash and the total loss of the airframe, although mercifully not the pilot), and produced 960 horsepower for short periods when tested on a bench. The Mercury XX, which came out thirteen years later could at full boost produce only 870 bhp, which just goes to show you how advanced one-off handbuilt racing engines were in comparison with something that could be mass-produced and trusted to perform reliably. A chappie on Flickr has a good photo of a flying restoration of a Lizzie with her cowl open: Westland Lysander Mk IIIA - 870-hp Bristol Mercury XX radial - Canadian Warplane Heritage Museum, Hamilton, Ontario by edk7, on Flickr And when I was at RAF Cosford, I got one of the front of their Lysander under restoration, which I believe is also a Mark III: IMG_20191111_101357 by Edward IX, on Flickr This is good, because engine and cowl assembly is how the instructions start out. The three-part cowl features no locating pins, and the cooling gills are a single strip of (mercifully very bendy) photoetch. The three parts more or less fit together, but there are some seams to clean up, and some flash which I signally failed to detect at first blush: I really hated sanding the multipart cowlings on the Blenheim (to the point where I bought a fortune's worth of SBS cowls and engines for future builds), so I'm hoping I don't make too much of a hash of these. There's also what appears to be a 3D-printed resin part of the...induction piping? I'm not sure what it is, but it goes over the engine. It has a fairly extensive backing, which I micro-sawed and sanded away, breaking it in the process, but I was able to patch it up with some CA glue. I primed it with Mr Finishing Surfacer 1500, but looking at it in ultra-close-up, perhaps I should have used 1000. Here it is in place on the also-primed engine piece (less crankcase): So, just so we can all be on the same page BEFORE we start painting, the crankcase is gonna be black, the engine some silvery colour, and the...things on the resin piece will be a pale burnt metal colour. Agreed?15 points
-
This was my project for the T-55 Single Type Group Build down in the Britmodeller Group Build section. The Tamiya kit was a joy to build although I had a couple of fit issues early on - which surprised me for a Tamiya kit. Nothing major - just a few wishy-washy connection points/areas. Of course it could have just been me that was the issue! Early on I decided to replace the band tracks with some individual track links from MiniArt and didn't want to use the mesh provided by Tamiya so got the relevant grill set from Eduard. For this project I decided to try some slightly more restrained weathering than I sometimes do - I didn't use any weathering products such as Mig Muds (or their sand equivalent?) which I often use. Kit: Tamiya 1/35 Kit No. 328 Extras: MiniArt Track Links Set No. 37048, Eduard Grill Set No. 35257, thin wire for the aerials, spare PE bits from my Typhoon build for the jerry can strap buckles, painted masking tape for the straps and various stowage items from a variety of old kits and stowage sets. Paints: Humbrol, Revell, Citadel, Vallejo and Railmatch Acrylic paints all applied with brushes The WIP can be found: Here Vignette photos on a display base can be found: Here I had planned a fairly complex display base for this Tiran 5 but the time limitations of a STGB (3 months) meant I ended up doing a fairly simple idea but I did include the two figures Tamiya provided in the kit: The base I did end up making includes some basic ideas from my originally planned design: More photos of it on it's base can be found: Here Thank you to anyone who kindly took the time to comment in my build thread. Kind regards, Stix14 points
-
7...6...5...4...3...2...1... Make or break. I started this model on 1 April 2018. This means that I have been working on this for 21 months now - although it's actually 17 months because I put this aside four while building RMS Carpathia. Either way it's a damned long time to spend building a stupid model, and for much of that time I have been worried about whether or not I'm going to wreck the thing when I put the upper wing on. Despite what the legions of hardened WW1 aircraft scratch builders say; 'It's easy you just use a jig! there's plenty that can go wrong at this stage... Sitting up there, balanced on a bunch of flimsy toothpicks, the upper wing might not be affixed correctly, it might wobble about forever-more and one day fall off bringing skeins of rigging with it. Paint finishes can be damaged while inserting the inter-plane struts & glue can be spilt in difficult to reach - but easy to see - places. Flimsy structural bits can be broken, get lost and generally cause all sorts of problems. Above all, without due care and good luck the upper wing can go on 'off skew' in any combination of plan, frontal or profile view. In which case the model is basically ruined. On the other hand - the damned thing's a biplane. If I ever want to finish it that wing has to go on. 😱 So this is it... The moment of truth. This step can make or break the project. Let's put the aircraft in the jig. Remember the jig? That thing that I built to make sure everything lined up and is held in exactly the correct place while I just effortlessly glue the relevant bits and pieces into place. Keep watching and you'll see how that worked out. First though I have to cut off the big planks of magnetic Formica that have held the top of the cabane struts together during all these months. They've done a good job those two big lumps, without them the cabane struts would have been snapped off ages ago. The use of magnetic Formica for these parts has worked well and I'm very pleased I nabbed a silly number of samples of the stuff a year ago from the kitchen design specialists that renovated our kitchen. A pair of tin snips cut the stuff with ease. Here are the four, now isolated, cabane struts each hanging on to the fuselage by the tiniest of flimsy bits. From here I even managed to sand the tops into shaper ends without snapping any of them off - although I came damned close at one point. And now - very carefully - I just have to slip the top wing into the jig and engage the cabane struts into their very carefully positioned and slots. Can you see the problem? Somehow the jig was pushing the entire top wing structure off to the Starboard side so that the cabanes, when viewed from the front were forming a sort of weird parallelogram. This was not a good start at all! 😖 There's no photos of the wrestling match that followed but suffice to say that I could not correct this issue and simply gave up on the Jig. The rest of the alignment work was done entirely by eye but actually there wasn't much to do because I had been sufficiently careful when positioning the slots so not much adjustment was needed in the end. Following @phoenix's advice I set about securing the outermost struts first and got to the following point fairly quickly. Here everything's dry-fitted - no glue yet. I was somewhat encouraged, and then... I completely lost my mind! As many of you will know I'm something of a glue enthusiast. I have my favourites and have a good working knowledge of a variety of adhesives many of which; PVA, two part epoxy araldite, cyanoacrylate, liquid nails, I return to over and over again depending on the job I am tackling. So now, for no apparent reason, during this most critical of build stages I decided to try something I've never even seen used before. UV fixative, plasticy, sticky, glicky stuff. Looking back I can't really say why this idea appealed so much to me, but I think it had something to do with the idea that while wrestling with the damned wing and twelve struts and other bits and bobs I would be able to spot the critical moment of perfect alignment switch on the UV lamp and 'freeze' the joint into exactly the correct spot in a few perfectly timed seconds. It was an enjoyable fantasy - while it lasted. Here's the theory in action. The bluish white UV lamp is hitting the glue in the cabane strut slot right now. I used this for the four cabane struts and the two outer interplane struts you can see in the photo two above. Initially things looked quite encouraging. However, it transpired that mistakes were made. Unfortunately I had only attached the front outer interplane struts but I soon learned that you need to put the rear ones in as well before you try to secure the upper wing with rubber bands. What has happened here is that the force of the rubber bands (removed before this photo was taken) pulling down on the trailing edge of upper wing caused the entire thing to pivot backward on the tops of the rear cabane struts. Because there were no interplane struts to prevent this rotation the whole front of the top wing has just popped off its attached struts. The new UV glue was no-where near strong enough to hold the upper wing in place and some bad, bad, awful language was used. I'm ashamed to say that words like 'gosh' and 'jolly cobblers' emanated from my factory. Now, just to be fair to the manufacturers of the UV glue, I will make the following points: The stuff did essentially work as advertised. It went hard and grippy and set in about five seconds once the light was on it. Also I must emphasise that I bought that tube about 5 years ago, so I would not be at all surprised if it has somehow weakened in the meantime. It would also be true to say that I doubt most of my other preferred glues would have held under those circumstances - although I think fully cured (say 12 hours) two-part epoxy would probably have held. But those points notwithstanding, this glue seemed to give way very easily when put to the test and I will not be using it again for structural work. I think that it will be useful however, when securing fiddly bits that refuse to stay put for any length of time. For example, I think it would have been ideal when I was trying to get those damned push-rods to stay in place while working on the rotary engine. Anyhow, with the rear outer interplane struts in place preventing any rotation of the upper wing, two-part epoxy on the cabane struts and PVA on the wood-to-wood joints between the wing and the interplane struts, we were starting to make progress. Rubber bands are truly wonderful inventions! Fitting the mid-span struts was tricky. They had to be short enough and springy enough so that they could be gently warped and manoeuvred into position and just 'pop' into place to engage with their slots. This was achieved by repeated trial and error - trim a couple of mm off the strut and try to fit it. If it could not squeeze in - trim another mm or so and try again and so and so and so until all four were positioned. Then use a toothpick to slide some PVA into the slot, from above or below as appropriate, to hold the strut (and the wing) firmly in place. By rotating the model around and looking at it from all angles I convinced myself that the wing was sitting in a sufficiently symmetrical position and that the general alignment was pretty good. I let the model rest like this for an impatient two hours waiting for the glue to set. Ideally I would let it sit for about 12 hours or longer but I just couldn't wait to cut those rubber bands and see... This! and this! What a relief phew... Happy with that! There are few more 'pinch points' remaining on this build - notably painting the roundels on the wings. But that's the big one in the rear view mirror - and achieved without disaster all on New-Year's eve I might add. With that sorted I was off for a James Boag's Premium to celebrate! They make a good drop of larger those Tasmanians! Have a happy and safe new decade one and all! Bandsaw Steve.14 points
-
This was built for a special GB. To see if the builder could build a kit within a 'Saturday Afternoon' in the way we did as young 'uns. Basic tools, no aftermarket bits were allowed. Not even alternate decals unless they were in with the kit. Time scale was limited to 'after lunch' to 'tea time' - approx 5 hours max Tools I used were; a Stanley knife ( my original one from about 1971-ish! I had to put a new blade in it for this tho ), a file (also one of my original tools but with a handle on it now), some w&d paper, tube glue. But fresh brush cleaner and meths. The clock was to mark the start time - 13.30 I got it done just in time. Finish time for me being 18.30 The build was not considered completed until the aeroplane had made a machine gunning or bombing attack on the cat/dog/ baby bro, or in my case a bomb run on the tin of Quality Street. This had to be done before build time was up. I did not use any fillers, masking tape or solutions for the 'stickers' ( I reckon you can tell! ) Paints were mainly Humbrol acrylics, just Revell 99 Aluminium used on the prop boss. Only two brushes used, a size 00 round and a size 2 flat This was just for a bit of craic, to get a break away from the serious detailed model building.13 points
-
A very clean Pony Plane...Swiss Mustang, very much OOB, from AZ Models. I like the kit very much and recommend it highly. The decals, on the other hand, were problematic. Painfully thin, as I like them, but oh so fragile. And, as you can see, the white crosses are not as opaque as they should be. Best to paint crosses next time! Still, I am very happy with this build and it certainly stands out as not being Allied or Axis! I have a few days until the Stuka GB begins so I will take a break from the GB pile and work on some Migs (17 & 21) I have going. I will return to the Mustang GB with an Uruguayan caballero soon enough! I have until March 15th...😉 Without further ado...my very first Mustang build ever! As you see, I kept it very clean. It is Swiss, after all... --JDCM12 points
-
I know what I have to do. One day I'll be awarded a medal for this. It's already gleaming deep inside me. -- Timothée de Fombelle, Captain Rosalie (trans. Sam Gordon) Noor-un-nisa, your Father’s pride, Modest, gentle and qualified. Graceful in manner, fair of face, Worthiest daughter by Allah’s grace. -- Pirani Ameena Begum, "Graduation Day", c. 1927 "Oh beautiful one," he exclaimed, "what has brought you to this stone of pain? Did you not know I ordered you must never be killed?" -- Noor Inayat Khan (1 January 1914 - 13 September 1943), Twenty Jataka Tales, "Banyan" I. Within the occupied territories, the adequate punishment for offences committed against the German State or the occupying power which endanger their security or a state of readiness is on principle the death penalty. II. The offences listed in paragraph I as a rule are to be dealt with in the occupied countries only if it is probable that sentence of death will be passed upon the offender, at least the principal offender, and if the trial and the execution can be completed in a very short time. Otherwise the offenders, at least the principal offenders, are to be taken to Germany. III. Prisoners taken to Germany are subjected to military procedure only if particular military interests require this. In case German or foreign authorities inquire about such prisoners, they are to be told that they were arrested, but that the proceedings do not allow any further information. IV. The Commanders in the occupied territories and the Court authorities within the framework of their jurisdiction, are personally responsible for the observance of this decree. -- Adolf Hitler, 7 December 1941 (The "Nacht und Nebel" decree) "L’homme n’est qu’un roseau, le plus faible de la nature; mais c’est un roseau pensant. Il ne faut pas que l’univers entier s’arme pour l’écraser: une vapeur, une goutte d’eau suffit pour le tuer. Mais quand l’univers l’écraserait, l’homme serait encore plus noble que ce qui le tue, parce qu’il sait qu’il meurt, et l’avantage que l’univers a sur lui, l’univers n’en sait rien." [Man is but a reed, the most feeble thing in nature; but he is a thinking reed. The entire universe need not arm itself to crush him. A vapour, a drop of water suffices to kill him. But, if the universe were to crush him, man would still be more noble than that which killed him, because he knows that he dies and the advantage which the universe has over him; the universe knows nothing of this.] -- Blaise Pascal, Pensées, 345 When I was perhaps eleven or twelve -- this would have been the early 1990s -- I received a copy of William Stevenson's highly-sensationalized biography of Sir William Stephenson MC DFC (no relation), A Man Called Intrepid, written in 1976 and sold in such prodigious quantities that it can still be found at used booksales practically ten for a penny. Most of the book left little impression, and that was a good thing, as its accuracy is open to question. But it left a mark on me, as history can sometimes do to us, nonetheless. One of the photoplates was of a young woman named Noor Inayat Khan, Agent MADELEINE. She looked, to my eyes, impossibly beautiful, but also tired, as if she knew what was coming, what would happen, and how, and when. I once found a cat with a sparrow; the bird knew it was going to die, it had no hope of escape, and it remained very still, with a quiet dignity in the face of its own annihilation that was more unsettling than any throes of agony could be. Noor came a long way to die. She was born in Moscow in 1914 to Pirani Ameena Begum, latterly Ms Ora Ray Baker of Albequerque, New Mexico, and the Sufi Muslim mystic Inayat Khan. In an era when interracial marriages were vanishingly rare, when not illegal, in the United States (interracial marriage was only legalized nationwide in the USA in 1967), her parents would have been highly noteworthy. No doubt they probably were as accepted in Bloomsbury, to where they moved shortly before the outbreak of the Great War, as they would've been anywhere. In 1920, they moved to France, where Inayat Khan pere died in 1927, leaving thirteen-year-old Noor to help her mother raise her three younger siblings. By the time war came again in 1939, the twenty-five-year-old Inayat Khan was a published author, having written a collection of folk tales under the name of Noor Inayat. When France fell in 1940, she escaped to the United Kingdom with her mother and her siblings. In 1943, wanting to contribute more to the war effort, she volunteered for the SOE. Her identity photograph from that year shows a gentle-looking but otherwise unremarkable young woman. But photographs can lie. As an SOE operative, Noor was evaluated as something of a curate's egg; a talented harpist, she also proved an exceptionally fast and accurate W/T signaller, and she spoke fluent French. But she was also gentle, dangerously honest, and, of course, not white, not exactly, at a time when such things were painfully conspicuous to European eyes. Other trainees expressed doubts about her abilities to perform her duties operationally. But occupied Europe was a great maw, sucking up agents and digesting them as fast as they could be replaced. She was willing; she was sent. On the night of 16 June, Noor became MADELEINE, an agent of the PROSPER network in France. She was flown in by Lysander III V9353/MA-G, along with two other agents: Diana Rowden and Cecily Lefort. None of them would survive the war. PROSPER was betrayed under circumstances that remain murky to this day; possibly Henri Dericourt, a member of the network, was a German double agent, or possibly a triple agent in service to SOE's bitter rival MI6, and he gave up his colleagues either out of avarice or as part of a complicated deception plan to obscure the target of Operation OVERLORD; possibly, and more stupidly, Noor and much of the network were betrayed to the Germans out of spite in an affair of the heart. It is fair to say that SOE's level of professionalism and operational security were disastrously bad, whether by design, as some have suggested, or merely the fact that it was composed largely of enthusiastic but poorly-trained amateurs taking on the ruthless and ruthlessly professional security apparatus of a totalitarian state, or both. Regardless of what it was, her network destroyed, her colleagues captured or dead, Noor stayed on the run for three months, and continued to transmit until she herself was captured on 13 October 1943. She had eleven months left to live. Despite concerns about her ability to withstand interrogation, Inayat Khan told the Germans nothing about her work. Unfortunately, she had failed to absorb a basic precept of her training, and kept detailed notes on the messages she sent and received. Additionally, she had discussed her family with her interrogators. These two pieces of information allowed the Germans to imitate her style effectively enough that SOE believed Noor remained active, and several more agents were sent to France, and their deaths, as a result. After a failed escape attempt, Noor was classified as Nacht und Nebel -- Rückkehr Unerwünscht: Night and Fog -- Return Not Required. She was kept chained hand and foot in solitary confinement, until she was transferred to Dachau with three other SOE agents in September of 1944. (At least one person has tried to argue, on what seems to me to be largely circumstantial evidence and guesswork, that she died at Pforzheim prison of starvation. I do not subscribe to this view.) At dawn on 13 September 1944, Noor Inayat Khan, Yolande Beekman, Madeleine Damerment and Eliane Plewman were shot. Depending on the version of the story you choose to believe, she may or may not have been beaten beforehand, her jewelry may have been taken by an SS officer (a detail which, to me, at least, rings painfully true), that the women held hands, that they wept, that three died instantly and one did not. Everyone able to tell the story afterwards had good reason to lie. Noor, who I have always thought of by her codename, Madeleine, was doomed from the moment she stepped out of the Lysander and into France. Her failures were those of inexperience, but her personal conduct was beyond reproach: she never answered any questions of an operational nature, she attempted escape, and she endured degrading solitary confinement with dignity. It was her great misfortune to be one of the easily-extinguished shafts of light sent to pierce the unending night of occupied Europe, but, in the words of Pericles, she passed from the scene, not of her fear, but of her glory. I've been eager to build the new Dora Wings Lysander since I first heard word of it, since I have a photo of the machine which carried Madeleine to her fate (which I sadly was specifically enjoined from sharing) and when I discovered the new DK Decals sheet has those markings on it, I knew what I had to do. The decals are currently winging their way to me from Hannants, and the kit itself is cleaned and on the bench. Of course it's ludicrous to pretend that building a model airplane is any sort of meaningful tribute to a woman who gave everything she had to give and more in the service of the greatest cause of the twentieth century, but I have loved her with the pure love that can only come in childhood since I first knew who she was. She was a real human being, who made real mistakes, who liked to sing, who told stories and wrote a book for children, who loved her mother, and who, ultimately, made a choice, knowing the risks, that meant that everything she ever was would come to be defined by the last year of her life. Any chance of not being a heroine, of being ordinary, of having babies or a happy marriage, or a failed marriage, or a dog, or buying groceries, or any of the million mundane things we take for granted ended for her early on the morning of 13 September, 1944. All that remains to us is her name, and what we choose to associate it with. Today would have been Noor's 106th birthday. May her name liveth forevermore.11 points
-
First one for a while as work has meant little time at the model desk. Trumpeter English Electric F1 of the Air Fighting Development Squadron, RAF Coltishall, 1961. AFDS was the first Lightning unit and was used to understand how to use the Lightning in RAF service.11 points
-
First, i wish you all the best in New 2020, good health, happiness and enough time to enjoy in our beautiful hobby. First model finished in this year, not very colorful one, HobbyBoss A-10 N/AW prototype. Good model, easy to build, good fit, but i think with little deep panel lines so i tried to make it not so much pronounced with careful panel wash. Added resin ejection seats and details in cockpit. Collors Gunze and slightly weathering with pastels. I hope you will like it, Best regards And images at the end:11 points
-
Happy New Year to you all! After doing a number of complex builds in 2019 (the Richelieu 1:350 is still work-in-progress...), I wanted to do some simpler kits just to keep my interest going over the holidays. I think I was getting more satisfaction completing a kit rather than the experience building. In the local model store, I saw these two starter kits and thought a dual build would be a bit of fun. I remember building a Tornado years and years ago. I never got to finish it before someone "tidied it away"... The Typhoon was a first for me. As expected, the kits were very basic, there's no cockpit detail to speak of, other than a control stick - not even raised gauges on the instrument panels. There are no decals for the instruments either, but on completion, you would not be able to see any instruments in the cockpit anyway, unless you choose to have the canopies open. The Tornado went together without any issues, but the starboard wing droops when the wings are in the forward position. When they are swept back, they are level. Even though the Tornado has moveable wings, the weapons/drop tank pylons have no pivots, so they need to be cemented in position. This means that when the wings are swept back, the pylons and stores are no longer pointing forward in the correct direction. This inaccuracy frustrated me, and forced me to buy the Revell 1:48 version. It looks like this one has linkages inside the wings to keep the pylons at the correct angle when the wings are moved, something that even the Revell 1:72 or 1:32 do not have according to the instructions I have read online. In any case, for the price that I got these, I think these are two nice-looking kits, and I'm pretty happy with the way they turned out. I am not one for weathering, partly because I like the "clean" look, and weathering is a skill that I do not have. Weathered models can look like works of art. I may try to practice with these two.10 points
-
Hi everyone, My latest 2019 project over the last few months has been to work on a series of "one-stop" guides to color and camouflage, the idea being to summarize what we know about the most important schemes and list all the appropriate model paints for those colors. At first I thought this would be a quick, couple-days-work kind of thing until I realized 1) what a minefield things like the right shade of Olive Drab or Malta Spitfires are 2) how little I actually knew about it! (I'm almost embarrassed to say that before writing this I assumed all US interior cockpits were in ANA 611). The result has been months of research and work into this but I am happy to say that the first few are in good enough shape to share with you all. For World War II, I currently have four guides ready: RAF - http://www.theworldwars.net/resources/resource.php?r=camo_rafww2 FAA (*NEW*) - http://www.theworldwars.net/resources/resource.php?r=cam_rnfaa USAAF - http://www.theworldwars.net/resources/resource.php?r=camo_usaaf USN - http://www.theworldwars.net/resources/resource.php?r=camo_usn The USN guide includes modern aircraft as well. The curious ones among you will also notice that I have a USAF one already done as well although that one is still in draft form as I'm still researching it. (There's also a modern Soviet/Russian one which I will post in the relevant sub-forum). On that note, feel free to roam around the site, there's tons of interesting stuff and I've been working on it in some form or another for the past 20 years but because I never finish it, I never end up promoting it. Anyway, I really hope this helps people and by all means, PM me if you notice some glaring error.9 points
-
Happy New Year to one and all. Here's my years builds... 1/48 Academy/Eduard boxing of the F4. 1/35 Skycrane. Airfix 1/48 Merlin with Belcher Bits conversion. Academy 1/35 M1151 with Live Resin turret, DEF model wheels, Legend Mine Roller and Rhino. Astrokit, 1/48 Jet Ranger. The best kit of the decade for me, Tamiya 1/48 F-14A Tamiya F-14D with Steel Beach B conversion. Resicast 1/35 Sherman DD with Dragon figures and FoG base. Academy 1/48 Sea Knight I've been working on this for a local attraction, they wanted a scene replicating from the embarkation of the 29th Infantry Div, June 4 1944. It was finished for display in May 2019. Please excuse the background 'clutter', it was so big I had to finish it off in my garage;)9 points
-
This is rare model of the Soviet helicopter by the brilliant designer Nikolai Kamov. Resin and vacu parts. Decal developed independently Regards, Alex9 points
-
I like them. I mean there is a place for oil washes and such - but atleast I find Flory washes quite easy to work with. You really can't mess up your model with it if you are not happy with the end result - real easy to apply again or to get rid of. Personal preference, of course What I find fun in modelling that there is no one correct way of doing things. - - - - - - - - - Here we go, one of the most fun part of modelling is the actual finishing. I like weathering and it's always fun to see model come to alive. I tested Vallejo Liquid Mask for canopy masking... ... and I don't recommend it. I mean don't get me wrong, it's good stuff for many things. But not easy to get sharp edges for the canopy frame and I'm not happy with the result. Tape is the way to go, just don't like doing it and I'm too cheap to get ready masks 😆 Oh well, like I've said before - you learn something from every model you do, this was my learning lesson in this build. Chipping done! Good old tiny brush & aluminium paint creates the sharp edged chipping which I like. Gotta admit, did not go with the historical accuracy here, rather more artistic freedom. Wanted an old war horse that has seen many battles. Then some oilpaints! Oilpaints are great because they blend so well. I dabbled some colours to the exhaust to create some staining. Then blending them a bit with large-ish brush. Still bit too defined, more blending required. Well maybe not if I would be modelling a heavy oil leak... And blended some more. You can add additional colours and blend more or little bit less - depending on what kind of effect you are after. I think maybe a mix of airbrushing & oilpaints could be the best way to go with the exhaust staining - but I used only oilpaints here. Then some oil stains and such. Here I first put down enamel based MIG streaking effects, they are great because you can blend them well when they are wet - or use enamel thinner. Here they are blended in. And on top I added some Vallejo Weathering Effects Oil Stains to create different kinds of weathering and so creating bit more depth. maybe bit too big or sharp - but again, artistic license Here is the stuff I used for weathering + oil paints. Oh, one more step. I love pigments, they create such a nice weathering effect - which again has it's own texture and adds even one more layer to the weathering. I dusted the landing gear wells and around the gears and bottom of the airplane. Not too much, but so that it adds a little bit to the overall effect. I did not fix it in anyway. If the pigment stays in place, fine. If some of it comes off - it doesn't matter. And here we are! Done! It was pretty fast but super fun build. I'm not happy with the canopy but other than that, I think it came out alright. Will be posting more photos on the appropriate thread later on. Hope you like it - and feel free to ask, comment and/or give constructive feedback!9 points
-
W. Nr. 2187, flown by Ofw. Fritz Hartmann, 9./JG 2, Poix, France, Fall 1942 Eduard Weekend Edition OOB, Painted with Mr Color Laquer paints, Weathered with oils and pigments. Overall pretty happy with it, but a bit miffed that the W&N Galleria matt varnish has 'spotted' a bit, and a few of the stencil decals have silvered a little. Varnish is probably my fault. Peter9 points
-
Cheers fellas its nearly ready for a blow over with some shiny silver, prep work ls nearly done ,I'll have to prime it to look for any more flaws ,lets be honest its no tamiya kit so some surface detail is lacking too, i cut off the gun sights thick plastic screen and used a bit of acetate instead , cockpit is nearly done just the colonel to drop in, his body is done bar a wash and a satin coat ,I'm on the head now, im using a head out of the icm raf pilots boxing as i dont like the resin one it came with, nearly ready to go, maskol on the canopy and the air inlet covers which i had forgot to put in The head I'll be using ,goggles and mask on Cheers all9 points
-
Hi folks, My first completed model in quite too long a time. The WIP is there: Kit: Revell Tornado IDS Decals: Mission Mark Decals Italian Tornado before turning grey HARM from Kinetic F/A-18C kit The belts were made using a sandwich of kabuki-ish tape and aluminum wrap. Here we go: May the Year of the Condescending Carp be good for you and yours, Cheers, S.9 points
-
Straight from the box, Tamiya's Subaru BRZ 'Street Custom' - Started about eight months ago and finished over the last ten days. Paints are all Tamiya, TS-21 Gold stripes & X-5 Dark Green. I sprayed a light coat of TS-65 Pearl Clear, then decalled the body and sealed all that in with two light coats of TS-13 Clear. The interior is NATO Black, Dark Yellow and Flat Earth. Feel free to make any comments or ask any questions. Best to all here from NZ. Ian.8 points
-
Hello Dears !! 2019 was a Telford trip year !! I elected to go up there every 2 years with my friend BS 103 ! I plan to make a trip next august with wifey and kids, we will see !! Now;, my 2019 productions has been essentially Aeroplanes, and for the biggest part, I'll say Aeroplanes that use to land on boat....Aka, the real aviation ! And it start with this one !! Seafire .17 at Hal Far Malta On the same way, My dogs family grew a bit, When I say a bit... It's a kind of sarcasm... Have a look... We rescued this Huuuge beast, Irish Wolfhound, at the time Sirius weighed 160Lbs.... And me ?? I was learning to walk with my Christmas gift... Well !! back to models !! And in this case, it's been a complete failure !! We stayed in Malta but a bit earlier A recce Hurricane... But the blue I used is not the right one.... I will Remake this one .... The MTO family.... Then there has been a gap in my production... Checking and re checking my references, starting new things.... as usual !! And we waited 'til May to see this one finished... HMS Thiumph, September '50 Korean war ... Firefly Mk I And here with her deckmate.... Sooo , we are now back to equality... I mean 2 naval birds and here is the second earth linked aircraft... Let's go near the North pole... F-94C in arctic markings... Then another goal for the Navy, Since.... The corsair of 2019 is a F4U-2 Night fighter Then ??? Equality again... Spitfire FR IX... Both 3 are ICM Spitfires ... Once again, the Navy take the lead with this one... Another big Beastie !! Looking that way she look like a nice girl did'nt she ?? No longer... Toilet bomber VA-25 in Viet Nam war !! At the time, I start to think about a Telford lunacy, shared with my friend @Martian Hale..... 3 Rocs in Telford was the name of the game, Here's the first one ... This Roc has been used as a AAA battery at Lee-on-Solent at the time of the BoB... Then of to UK... @BS103 pretty happy to see this charming old Lady... Finishing the Roc #2 in the bathroom of an hotel on the Guy Fawkes night... Then, the great meeting was on !! Can't resist to show this one once again... Models ?? You say Models ? Ah Hum yes... We did !! Helped by the gentle @Heather Kay, it was no longer 3 Rocs over Telford... But 4!! Here we are !! Then back home... I can make the second Roc RFI Wow wow wow, look like the sailor's birds took the lead now... 6 to 3... It's done !! Not really in fact since this one showed her big pointy nose... Eastern front, Spring 1944, H.U Rudel... And Earth bound aircraft tried again to win with this one... Finished on the line... The 3rd of my Brits in Korea serie... Spitfire family... Well Navies 6... Earthbound 5 !!! 11 kits finished, all at 1/48 scale ! A good laugh at Telford, all in all it has been a good year but on the family front... But that was another story... Well gents !! I wish yo all an happy new year !! May 2020 bring you lots of models, good health, joy and pleasure !! Sincerely. CC7 points
-
For a modeling competition last year, I thought about building a Hawker Siddeley Kestrel FGA.1 myself. Because there's nothing on the market that one can buy. If you're interested, I'd be happy to republish the building process here.7 points
-
So having recently started a 1:32 Spitfire, I've decided to also do this little Hurricane kit which is a lot less daunting for a newbie and will be good to practice stuff on, especially applying decals and filling seams in the fuselage. Spent hours yesterday just painting the tiny cockpit parts, I can barely see the little buggers, and now that the two halves of the fuselage are together, all that detail is largely hidden. Oh well, at least I know it's there 😁6 points
-
I really enjoyed the first P-51 STGB and also loved the second, so when a third round of Mustang builds was announced I knew I had to take part ! Really I'm not a Mustang expert, being mostly a Spitfire fan when it comes to WW2 fighters. Said that, the aviation enthusiast in me has a great respect for the Mustang while the engineer actually rates this as even superior to my beloved Spitfire. And the modeller can't overlook the great variety of colour schemes and markings that Mustangs carried during their very long career, so in the end this aircraft features in good numbers in my stash and my collection. This time I will, not unsurprisingly, build a P-51D in service the Italian Aeronautica Militare Italiana. Again ! I say again as I already started such a model in a previous STGB but in the end never completed it as I had problems on the clear parts. So it's Italian Mustangs time again, this time using the lovely Tamiya kit. My kit arrived together with 3 others with no box. I kind of like hunting for lots of unboxed kits, they end up costing less and take less room. Instructions and decals: Really I don't think there's much to say about the Tamiya P-51D that has not been said before. Great mould quality, good detail, simple construction, good engineering. With one exception IMHO, the clear parts do not include the lower frames, meaning that it's possible to damage them. I believe that Hasegawa here choose the best approach by moulding the windscreen with part of the fuselage, but the Hase kit is inferior in several areas to this one. I have started this model around a week ago, so I'll post most of the construction steps today, starting from the cockpit. This was built mostly OOB, but I plan on adding seatbelts at some point. Tamiya offers some nice detail in the cockpit and it was quite easy to get this reasult: The only addition was to the seat, that I've decided to not glue into the cockpit yet. I believe that seatbelts improve the look quite a lot and while Tamiya offers these in decal form, I'd rather go with something different. I often make belts out of thin lead or similar foil, however this time I'll get some PE parts. These have been ordered, as soon as they arrive I'll attach them to the seat and put this and the rear armour into the cockpit6 points
-
Hi, images from the Italian military aviation museum on the shore of Lake Bracchiano, north of Rome. Although in the region of the village of Vigna di Valle, it is located on the lake shore and is equidistant in the opposite direction to the town of Bracchiano. This site is quite historic and was one of the first landing grounds in Italy, for airships and balloons, becoming a seaplane base as well, where, during WW2 this enormous crane was used to hoist flying boats and floatplanes out of the lake. Grumman Albatri were based here for SAR duties. HU-16 Crane The waterfront flying boat park and jetty, with watch tower. Lago di Bracchiano Barchina Idroplano hydrofoil driven by an aircraft engine. Barchina Idroplano Captured Austro-Hungarian Lohner flying boat, with SPAD VII, Macchi-Hanriot HD.1 and Ansaldo SVA behind. Lohner front Caproni Ca.36. Caproni Ca.36 Schneider Trophy winning Macchi M.39. M.39 World Speed Record holding Macchi MC.72. MC.72 The MC.72's Fiat AS.6 V-24 engine. Fiat AS.6 IMAM Ro.37 found in Afghanistan and rerstored. Ro.37 rear Fiat CR.42. CR.42 front Caproni Campini CC.2 hydrid jet. Its compressor, seen below it was driven by a piston engine. Caproni Campini CC.2 There are three of Mario Castoldi's fighter designs on display in the museum; Macchi MC.202. C.202 nose Macchi MC.200. MC.200 side Savoia Marchetti SM.79 Sparviero. SM.79 CANT Z.506 Airone. These were kept in this very hangar during WW2 after being lifted out of the lake by the crane outside. Z.506 nose Fiat G-91Y. G-91Y Licence built F-104S, with F-86, AMX, Tornado F.3 and Frecce Tricolori G-91PAN. F-104S First Italian aircraft to exceed the speed of sound, the Aerfer Sagittario II. Sagittario II Frecce Tricolori MB.339. MB.339 More images here: https://www.flickr.com/photos/147661871@N04/albums/72157712453495152/with/49307751233/ For those of you wanting to make the trip there, and I would highly recommend it, a few tips. Conventional wisdom says to catch a train to Vigna di Valle and attempt to catch a taxi from the cafe. Don't get off at Vigna di Valle, as the taxis often refuse to go out there from Bracciano, which is where they come from. Go straight to Bracchiano; there are almost always taxis at the train station and they will charge only 15 Euro to go to the museum. You can also organise a return trip with the same driver. Trains to Bracchiano are also more frequent from Rome. There is a bus from Bracchiano, but, don't be tight, it's only a 30 Euro round trip and the museum is free. Thanks for looking.6 points
-
Hi all. Today I'd like to show another recently finished model. This time it's the Azur 1/48 Latecoere 298 floatplane. The trolley is a resin kit made by Sinifer. The fit of the kit if quite good but the struts are a flimsy. I had to put brass pins on the ends of them to to make a solid construction.. I used Gunze Aqueous paints over Alclad black primer. Weathering was done with Abteilung oil paint and pastel powders. On the trolley I used real wooden strips instead of painting the molded planks. Thank you for watching.6 points
-
Thanks craig , glad yo like it so far, great story isnt it, the colonel now has a head ,i may darken his hat though to a very dark black brown, he'll dry off now and have a wash,and any touch ups i can spot zoomed in on , also i given lou a light coat of halfords aluminium out of the tin , and onto the bare plastic as a sort of pre primer, it'll allow me to see more closley how the bmf will end up, most of this coat will be wet sanded away There's a couple of areas that need seeing too first . Cheers all6 points
-
An update has been released today and I've just installed it. Works for me, and I'd be interested to hear whether you're all fixed on your disparate devices and locations too6 points
-
Mustangs on d-day taking off from bottisham , no od or blue to be seen yet, so any painting at all must have taken place over a very short time span, the spotter, mr bowyer ,saw blue mustangs up close on the ground on 9th july, the famous bottisham 4 photographs were taken on the 26th july, and then by the 12th of august ,the colonel and lou iv were lost6 points
-
My friend, Otto Korrector, tends to kick in. Never bring a bum or bun to a gunfight.6 points
-
This year was quite strange modelling wise as I thought I spent significantly less time on modelling. Still manage to build a couple. 7 resin kits, 1 short run, 1 mass production injection moulded. 7 experimental/prototypes, (including 1 incomplete/never flown), 1 fictional/movie, 1 production6 points
-
Not induction piping. It's the exhaust collector that formed the forward part of the cowling. Some Merc engines: I must say that I'm not impressed by the way Dora have done the cowling, exhaust collector ring and the exhaust pipe. The front ring and exhaust pipe should have been separate parts, like Airfix did with their 1/72 Gladiator and Blenheim. Chris6 points
-
I think I can claim a win on the squirrels, the 'print on white paper then lose the background' method seems to have worked reasonably Port side on dark sea grey Time and applied distressing will make the colours come together methinks, around the little beastie and even on this side too, starboard on dark green And I can now declare that Wokka and I are no longer an item, frankly I just dont like it... AGAIN! I tried too hard to correct things that maybe only I saw as problems and although I will finish it there is no way it will undergo scrutiny from judgement I hate the front end treatment, wont do that again So many places needing a fine brush and a gentler touch than I feel up to these days, ho hum said Pooh... Oh yes the legs, here we are open to more ribaldry Will these do folks? "Time for paint" says Zebedee6 points
-
Happy New Year, everyone. I am back up to London tomorrow, so will only really pick things up again then - but I have managed a tiny bit of work today. I’ve already paid tribute to @foeth’s stunning work on his scratch built flag lockers [mind you, if you really want your mind blown, take a look at his latest efforts: soldering 1/350 anchor cable link by link is beautifully insane!]. I suspect that Flyhawk also had their interest piqued by his efforts, because they included a number of flag lockers in their FH350107 “WWII British Navy Sundry Box” PE set (which also has useful upper deck ammo lockers of 2 different sizes)... and it has to be said that they look remarkably like Evert Jan’s - though to be fair that could be purely because they accurately depict a flag locker of that era. E-J added his ‘flags’ by using 0.3mm square styrene rod, and it is possible that I might end up doing the same. But first I am trying a slightly different method, namely adding a sheet of styrene inside the locker (visible below, but since we are looking from underneath in this photo, it won’t be a problem once fitted). The aim is to see whether I can paint the ‘flags’ through the brass grid pattern and then clean up and reinstate the grey. I don’t see why it shouldn’t work, but we are talking very small dots of paint here- we shall see once I am re-united with my Optivisor! If it fails, there’s always the rod Plan B. Swann Morton No 11 blade for scale. Not huge. Eventually I need 6 lockers like this, so worth getting it right using the simplest method if possible! More tomorrow Crisp6 points
-
This was my project for the T-55 Single Type Group Build down in the Britmodeller Group Build section. For this project I decided to try some slightly more restrained weathering on the tank than I sometimes do - I didn't use any weathering products such as Mig Muds (or their sand equivalent?) which I often use. I had oriinally planned on making a much more complex base which better represented the Negev Desert but the 3 month time constraint of the STGB meant I wasn't going to have the time to build the idea I had. I have used some simplified versions of some of the original ideas I had. Kit: Tamiya 1/35 Kit No. 328 Extras: MiniArt Track Links Set No. 37048, Eduard Grill Set No. 35257, thin wire for the aerials, spare PE bits from my Typhoon build for the jerry can strap buckles, painted masking tape for the straps and various stowage items from a variety of old kits and stowage sets. Paints: Humbrol, Revell, Citadel, Vallejo and Railmatch Acrylic paints all applied with brushes Base: AB gee 1:18 Scale Display Box, card from the back of a drawing paper pad, filler, Army Painter Tufts, styrene rod, wood from a coffee stirer The WIP can be found: Here Lots of photos of just the Tiran 5 can be found: Here This is how the base started: As you can see I actually decided to use the bottom of the display case for the actual base of the base. Onto the base I first added the back card from a drawing paper pad. Over this I applied the filler. Once dry I added some broken up sections of flat filler which I had pressed out between some kitchen foil and cling film which I had allowed to set for a couple of days. This was to try and give the impression of walling. This was all then painted with several thinned coats of Humbrol's Desert Yellow which, once dried, was dry-brushed with increasingly lightened versions of the base coat. In the photo below I am about halfway through the dry-brushing process: The walls were then given a very thinned wash of Revell's Light Grey before being dry-brushed with matt white paint from Humbrol. The final result can be seen below: Thank you to everyone who took the time to comment in my build thread. Kind regards, Stix5 points
-
Just finished - the excellent 1/72 scale T10-10 Flanker prototype from Modelsvit....... This really is the best yet from Modelsvit - crisp moulding with nice engraved panel detail, etched brass parts, self adhesive masks - a complete package. The anti-FOD guard on the nosewheel is realistically done - with a separate wheel and the guard in two halves - unlike the one-piece moulding on some Flanker kits. Spot the difference - first and latest Flankers - T10-10 and Su-35S........ More photos - build and finished model - here. WIP thread - here. Ken5 points
-
Can't seem to find my other few completions for 2019, which started out well then fizzled out for a number of reasons. Here's the only one I can find right now, but I might find and add some others later. Bandai Shadow Trooper in 1:12 - snap-fit glueless kit, although I did use some glue and.... shocker! a little paint.5 points
-
After picking up some spare engines from the Dora Wings stand at IMPS 2019, I spotted this little beauty. I've always loved the lines and the dumpiness of the GeeBee's air frame. So as a birthday treat to myself, I purchased it. The full build log can be found here if you would like to look? GeeBee Build Log A great little kit, with some fitment issues. The photo etch parts, and especially the wing strengthening struts were particularly tricky and bent far too easily, Hopefully I managed to make them look at least half decent? Anyways....on with the pics....'cause I know that's why your here Just a little bit of weathering from the engine exhausts and cowling cover. Unfortunately the panel pin wash didnt quite work as well as I wanted it to. Will need to keep practicing that method. So, there we go! Hope you enjoyed the pics and the build log for the GeeBee? Any comments and tips for improvements I could make, please let me know. And with that, I shall leave you with this gem.....Buffy the baffoon of a kitten.....5 points
-
At this high risk of falling onto the shelf of doom, as about 90% of what I work on does, especially when I go public (ironically, I do this as a means to motivate me to finish)... This has taken an unusually long gestation time. Started the CAD about a year ago. Then got distracted by ironclad Monitors and US Civil War naval artillery, then the work-in period for the new 3D printer, then large caliber coastal artillery as a project to check out the printer...yeah, all over the place... With the holidays I've spent some time working on the actual parts, sticking them together finally. So used the home printer on the prototype parts, and at first wasn't 100% convinced it would work at this scale given a lot of detail is discerned via embossed/engraved features: I played around with depths, etc., and initially wasn't convinced it was going to work. Maybe 1/350 was a bridge too far? Ported it over to Shapeways and had them do the initial print. In retrospect, the home printer isn't far off at all, so I probably could have gotten away with printing the entire kit at home. In fact, I decided at the last minute to add a few more detail (conformal sonar array, lower hull, modifications to liber homes, enhanced torpedo doors, and correcting the prop spin direction, whoops!) and indeed printed those at home (the lower hull was an 18 hour print at .02 mm step height). In this regards, the printer pays dividends as it reduces the time (and cost) of the prototyping phase. Plus, it started to give me more confidence in the printer's abilities. Shapeways periscope, ESM, and radar masts: The issue with printing those at home is that I'd have to attach support structure to those tiny parts, possibly obliterating the details. That being said...the Shapeways print arrived with one of the radar masts missing entirely. So on a whim I stuck it in the print que for some of the other reprints/updates I did and it worked! Some primer: Comparison with my other shelf queen, USS Parche:5 points
-
I've finally made some progress on my P-51. Intake area has been sprayed in Interior Green, details around grills and radiators received some oil wash, and cockpit has been finally installed in fuselage, and then closed... I'm waiting until tomorrow for the glue on fuselage halves dries out, and then it comes a bit boring part of taking care of those seams... Cheers and all the best in 2020 to all! S.5 points
-
Hi all, looking at my completed models I was a bit suprised at the number of kits I was actually able to finish this year. There were 7 of them, on a total of 10 completed kits since my return to this lovely hobby. I've been working on two more but they have not been completed yet so will hopefully get done this year. I started with a Fiat 500 conversion to a "C", as a gift for my sister. It was quite a bit of work to get it to the more or less correct state but it was well worth the effort and my sister loves it. Downside: it's at my sister's house so I don't get to look at it too often! Fujimi 1/24 Fiat 500 After that I did a quick build of a WW II era truck in civilian "clothes", which would turn out to be the start of a collection. It was my first attempt at weathering so I used a number of methods and gained a lot of experience. Tamiya 3 ton cargo truck 1/35 Then I did a very clean build of one of my favourite vehicles. I had purchased some Zero Paints Brilliant White and wanted to try it out. It's indeed quite brilliant. Revell 1/25 Chevy Stepside After that I completed my first armoured build. I wanted to do something in small scale and it became a 1/76 tank transporter with a tank on it. I added details to both tractor and trailer and also secured the tank to the trailer in more or less proper manner. I like this build very much and will surely do more AFV stuff later. Airfix 1/76 Scammel transporter and Airfix 1/76 Cromwell Back to a road car, one that an aunt and uncle used to drive way back when. Also, I wanted to do a fully brush painted model and this was it. Tamiya / Ebbro 1/24 Citroën 2CV Fourgonette Now I became engrossed in 1/35 scale trucks. I did MiniArt's GAZ-AA which was a wonderful build. I fell in love with these MiniArt kits and have acquired some more! This model is also brush painted. MiniArt 1/35 Soviet cargo truck (GAZ-AA) The GAZ-AA was a challenging build so I wanted to do a quicker and simpler build to finish this year, again a 1/35 scale truck. It's a clean build, also brush painted. ICM 1/35 KHD A3000 My first build of 2020 will be a ... 1/35 scale truck 🙂 Thanks for watching!5 points
-
who me blame you!!!!! it's not my fault you became the butt of some of the jokes! But be assured I'll get to the bottom of it, I'll crack this case wide open and trust me I won't turn the other cheek!5 points
-
Another excellent intor Edward. I don't recall knowing much about Madeleine as a teenager, but the biographies of "The White Rabbit" who managed to get out of Buchenwald by the skin of his teeth, "Odette" who survived Ravensbruck, and Violette Szabo who sadly met a similar fate to Madeleine less than 6 months later in Ravensbruck, all left a lasting impression on me. They are all remembered by history, many more made the same sacrifice and are now fading memories to only family and friends left behind. If building a model aeroplane helps preserve these memories, it is a noble endeavour. To paraphrase the book and film title - Carve all their Names wih Pride5 points
-
Now one that while it was started some time ago, was painted this year, quite succesfully I have to say.. this was posted before in the WIP section of the forum so maybe someone will remember it: the Eduard 1/72 Spitfire in the markings of MK126 of 126 Sqn. in late 1944. I called this the "Birthday Spitfire" as I re-started it around my Birthday and features a G as individual letter. There's little I can say on this kit that has not been said, it's simply great ! Build was OOB with the only addition of seat belts. Decals came from an Xtradecals sheet that however did not have fin flashes of the correct size, so these had to come from a generic roundels and fin flashes sheet. Paints were mainly Vallejo and Lifecolors5 points


This leaderboard is set to London/GMT+01:00