
Leaderboard


Popular Content
Showing content with the highest reputation on 30/12/19 in all areas
-
Hello, I just completed this lovely kit from Eduards 1/48 scale. Messerschmitt BF 109 E 7 from 2 Staffel/JG 27 flown over Libya in spring 1941. "Weekend Edition" is quite a funny name, because I don't think it can be done over the weekend. Maybe in Blizbuild, who knows. The kit was nice to build. By me, is the best ME 109 replica avaliable on the market right now. I used Hataka paints for main camouflage and oil-based paints for weathering. I hope that you will like it, enjoy .35 points
-
New to the forum so thought I’ll post up some of my build over the past year or so...32 points
-
Hi all. Today I'd like to show another recently finished model. This time it's the Azur 1/48 Latecoere 298 floatplane. The trolley is a resin kit made by Sinifer. The fit of the kit if quite good but the struts are a flimsy. I had to put brass pins on the ends of them to to make a solid construction.. I used Gunze Aqueous paints over Alclad black primer. Weathering was done with Abteilung oil paint and pastel powders. On the trolley I used real wooden strips instead of painting the molded planks. Thank you for watching.26 points
-
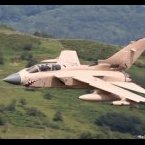
I've been building the early jets and it became the F-80's turn. It would have been nice to do the XP-80 but it really had little in common with the Monogram kit, being a lot smaller and planned for a different engine. I some time in the past bought a bunch of P/F 80 sets from Fox 3, Gerry Asher, and for this I used the resin and vacuform parts to do a P-80 from the first production block, the P-80A-1. These airplanes were painted ADC Grey (16473) and were filled and polished. The finishes didn't last well at all and the P-80A-5 and later airplanes were all delivered in bare aluminum. The P-80A-1 had a landing light in the nose in place of the black panel that covered a radio direction finder antenna in later airplanes, and the cockpit was 9 inches further aft than later P-80's with ejection seats. Early P-80's were not built with ejection seats although many were later retrofitted with them. Four P-80's from the -1 Block were sent to Europe before the end of WW II, and two of them were sent to Italy where they flew but did not enter into any combat. The other two went to England where one was lost in a crash. A P-80A-1 with the markings "Lil' Abner", an Al Capp character from the cartoon Dogpatch, was flown by Rex Barber, who was a participant in the Yamamoto shootdown and is most likely the pilot who fired the fatal shots. He was commander of a P-80 squadron at March Field. It seems strange to see a jet with an antenna wire and masts, but that's the way it was with the first P-80's. I worked really hard to keep the detail on the bottom while fixing the parting line between the front and rear fuselage so I wouldn't lose all the liitle bumps. After the model was nearly done and I was adding the antenna masts to the bottom I happened to read the part of the instructions where it said to remove the bumps because they were for JATO bottle mounting, an item which the A-1 was not equipped. You can get it right when you build yours! And here with the Bell XP-59A (Hobbycraft) and Gloster Meteor F.3 (Tamiya).25 points
-
I use the TLAR method*. I was, Stew, I was, and in the alternate universe where I had everything together, that's just what happened. But I know that this is not that universe, and I was worried about stuffing things up, specifically planting my big dumb thumbs right in the centre of the fuselage roundels and providing the authorities with an alternate method of identifying my body after I threw myself into the Chicago River in despair. Sorry for the long radio silence, folks, but I've been on a hellish ostensible vacation with my wife and children at my in-laws' in Michigan, and I can handily say this was the worst trip up there I've had in years. And I've had some doozys. Mrs P had made some pretty definite, not to say explicit, promises about what would happen to me if I went up with her and the kids this time, as opposed to staying home in blissful solitude, but as with all Mrs P promises in that line, that, as Swiss Toni once remarked, never happens. It's not much of a spoiler to tell you that ol' Swiss was bang on in this case. The trip started well enough; we left late on Saturday of last week, which meant that we passed through Muskegon, MI in time to wander into the rather nice local hobby shop, and I got a TSR.2 for under $25. This was somewhat mitigated, however, by Mrs P asking Winston if he wanted to go in with me, and of course once he saw daddy get something, he needed a model too, and all their child-appropriate trinkets were lethally overpriced, because that's how they getcha. I couldn't afford a Winston meltdown at that time, because Grant was finally asleep in the back seat, and if he was awakened by Winston's outraged yowls, he would fill his own hideously powerful lungs and scream so loudly that it would feel like the last trump was happening in my car at that very moment. So ultimately it ended up being a $42 TSR.2. Less of a deal. This is why I did not ask Winston to come in with me, but Mrs P labours under the delusion that you should offer children a choice even in situations where they should not be permitted one (e.g. "Would you like ice cream?" when it's an hour past their bedtimes and they just had their baths, something that actually happened). Anyway, I should mention here as well that I had a sore throat and both of the children had the croup, which in Winston's case meant that he would sometimes cough until he vomited, because he has asthma, and because god, offended by my disbelief, has afflicted me with a child who vomits at the slightest provocation. Mrs P's parents, not fortified by daily exposure to the abandoned Salisbury perfume bottles that are my children, invariably catch whatever we bring with us, and then spend the rest of the time being extremely short with us, but of course, Mrs P needed to see her parents now and we couldn't wait or postpone the plan, sort of like MARKET GARDEN. My own parents thought I was possessed by a demon and had me exorcised, so while my relations with them are cordial now, I rarely feel any urge to visit them. The short-term difficulties engendered by my system were immense, but long-term I think it's better than Mrs P's, since she deliberately overstays her welcome so that she doesn't miss her parents as much when we leave. This is, for obvious reasons, a terrible plan, not only for her, but for the three innocent people dragged up with her. In any case, we made it up to Michigan, as we always do, and I spent the first half of the week so sick that all I did was sleep. My children have an amazing superpower, incidentally; they'll look like they're playing calmly as long as you lock your eyes on them, but the moment you go for a lie-down, secure in the knowledge that the woman you chose to spend the rest of your life with, and her parents, who you did not, are watching them, they produce a series of hellish dopplering shouts as they ricochet about the inside of my in-laws' very un-childproofed shouts, and if you blearily get up, you'll discover nobody's watching them, and it's in fact your fault. That was the first four days. Winston also broke my laptop charger, because he cannot stop doing something stupid when you tell him to stop, and telling him more frantically to stop just makes him do whatever he's doing with even more intensity. I don't believe in hitting children, but this past week I strongly considered giving it a try, just to see how it felt. The second four days, Mrs P got an ear infection and a sinus infection, and a small painful discoloured spot on her head which may (or may not be) fatal skin cancer. She is convinced it is. I'm worried myself, because she refuses to get life insurance and the children won't go with her. There are two kinds of people who get sick: those who lie down and accept their fates, and those who teeter around and try and "help" you do things. Mrs P is the latter, and she lurched about bent double, looking like a giant lanky spider and giving not-terribly-helpful instructions to anyone who got too close. My mother in law also had lots of advice for me. It's not that I dislike my mother-in-law. She is, in many ways, a very generous, kind, and helpful person. She has given freely of her time and money to help us out. (Whether or not we should have asked her for the help is another matter, but that's not important right now.) She is, however, constitutionally incapable of asking a question without making it sound like she's a Gestapo interrogator, even a very innocuous one ("Why did you not have eggs?" sounds like a fierce recrimination in her hands). She's just as god made her. But after the eight hundredth "why would you do that?", when I tried to play an audiobook for Winston (he loves them) of beloved children's classic Mossflower, by Brian Jacques (a boyhood favourite of young Messr. Procopius himself) she accused me of wanting to be a bad influence for letting him listen to something so FRIGHTfully violent, and something deep inside me snapped. I reacted with all the fury a milquetoast overweight suburban dad can, and used my ultimate weapon: withdrawal. I went to bed, since that way I would no longer be depriving her of the privilege of raising my children properly, which she seemed to know so much about and I so little. I'm notoriously passive-aggressive, and Mrs P's family is not, and while they may mock me for it, it's a little like shibboleth: if you don't know how to do it, you don't know how to handle it. Two hours of quality time with Winston and Grant later, I received my apology, albeit a grudging one. Thereafter we observed a guarded truce. Today, with Mrs P barely recovered, we headed home, and even made it. My vacation for the winter is all used up, and I have to go back to work tomorrow. Hooray. The Grinch Who Stole My Thirties by Edward IX, on Flickr King of the Magpies by Edward IX, on Flickr The boys did well for Christmas, though it can hardly be said they deserved it. Really, they were getting presents intended for me about thirty years ago, which is true of all spoiled children everywhere. I would have shivved my own grandma for this X-Wing as a boy. It would have been cool if Winston did, but no dice. Grant got a giant R2-D2, which he's both terrified by and fascinated by. He plays with it in his own highly inscrutable manner: Anyway, the Spitfires! I made it downstairs and masked and sprayed the yellow, and then, to boot, I fixed the rudders: One small problem. I used Dark Earth highly thinned with Gunze Self-Levelling, and this overly thin paint curdled a bit: This has happened before when solvents like TET get on Colourcoats, and usually, it sorts itself out eventually, so I'm hopeful. I thinned the Dark Green with the Colourcoats house thinner, and didn't run into the same problem. So that's good to know for future resprays. Also, I did the prop tips. Anyway, work tomorrow.25 points
-
Hello all; I hope you have a great Christmas and are looking forward to the new year. There's a long story behind this build, literally a 12 year effort across two continents. The full story, as usual sits on my website. The short version is that this one started as a build for a friend; he wanted a super-detailed RAF Boston. I ran out of enthusiasm and interest long before it was finished and it became a shelf queen. For some reason I kept the carcass though, and eventually, after a move to Australia, I retrieved it from Canada on a return visit and finally finished it a couple of months ago. As usual, comments and critique are welcome. Thanks for looking. Mark.23 points
-
23 points
-
A few shots of my recently completed Stieglitz: Max21 points
-
Had a horrific time with the canopy on this one with glue problems. Also a few blemishes with the paint job because of the black gloss primer not being great.21 points
-
Hi She flew in Italy in April 45. New Eduard's mustang is really a good model. From Royal Class box (Marking M) but done with "Firewall scheme" and ANA colors (Gunze). Cheers Pierre20 points
-
Last one for 2019: Airfix's 1/48 Seafire F.XVII with markings from the kit. Only additions are an Eduard PE harness and Master gun barrels (I know, I know, wrong for shape for a Seafire...). Paint is MRP (top) and Mr Color (underneath). First attempt at hairspray chipping and first real attempt at using oils over a flattish clear coat. Full build article and more photos here: https://jonbryon.com/airfix-1-48-supermarine-seafire-f-xvii/ Comments welcome & thanks for looking. Jon20 points
-
Tamiya 1/72 F4D-1 Skyray Painted as aircraft 130747 which was assigned to project pilot ( NOTSNIK) satellite launch platform and ASAT project The tamiya kit is lovely and fits really well, the first kit i have built for years that i have not used any aftermarket goodies on. just tape seatbelts. Starfighter decals sheet, which went on really well, except i destroyed one of the intake markings, had to use the tamiya ones which wouldnt settle. Had fun researching this. thanks for looking.18 points
-
This morning I crept downstairs with twenty minutes before I had to leave for the train (I was unusually organized and ready to go back to work, for some reason), and masked and painted the blue. Upstairs, I could hear the crashing of unattended children, which meant that Mrs P had once again sent them down unattended so that she could sleep, a terrible idea that harsh reality has failed to disabuse her of. I finished with five minutes to spare, confiscated the kitchen shears from the boys on my way out, and am now safely on the train.16 points
-
Hi all, this is Tamiya kit conversion built for a book project coming in 2020. Cheers, Libor15 points
-
Hello All, my last for 2019 is the Airfix Vampire T.11 with the roundels and No.1 Fighter Squadron badge from the Max Decals 72001 sheet. The model has been built several times here so most of what could be said has been said. I found the fit good, but it did need a little filler (I'm fussy) but I still got a couple of phantom seams; rats. Halfords white primer was used and the orange sprayed and masked before the silver. The orange is my mix of Tamiya X-6 orange and Humbrol 60 red, about 3-1 but adjusted by eye. I normally use Tamiya X-7 red, but it had dried out. The silver is my first try with Vallejo's Metal Color Acrylic, in this case their Aluminium. The Metal Color is great, but the Airfix plastic is very slightly textured and I sprayed straight over the primer without micromeshing it first. The finish is not bad for the painted finish of the Vampire, but for BMF it will definitely need a perfect basecoat to go over. Please feel free to argue about the efficacy of highlighting panel lines in 1/72nd - this is my model and I highlighted them. Another first for me here, I used one of AK's Paneliners. The only addition to the model was some work on the seats; belts from foil, main buckle from a punched disc of thin polystyrene, ejection handles from fine wire and parachute pack covers from Perfct Plastic Putty. I felt it needed this to have the canopy open, though the rest is as Airfix intended including the instrument panel decal. The fin pitot is Albion alloys as the moulded on item didn't even make it off the sprue! I have used the Max Decals stuff before, including decals from this sheet on my earlier Irish Provost, but these were more difficlut for some reason. The first roundel broke up and despite using decal film I had real problems with the squadron badges and serial numbers. None of the decals wanted to free from the backing sheet despite usning warm water and a loooong soak. The underwing and starboard serial numbers have has significant hand painted touch ups and the black panther head of the starboard squadron badge just wouldn't come off the backing sheet and more or less disintegrated, This is mostly hand painted too. It looks like this: It now takes it place among the Mid Devon branch of the Irish Aer Corps: Happy New Year of modelling to you all.15 points
-
Steyr 1500A/01 Personnel carrier. Kampfgruppe Von der Heydte, North Africa, 1942 Tamiya 1/48 kit, Vallejo, Akan and Games Workshop paints and inks. Build thread here: Steyr Andy15 points
-
Hi all! The plane is the Nakagima Ki 115 ( Sabre). The model is very simple but it was very fun to build it... Done by the Special Hobby in the 1/72 scale... Something about the story of this plane : "The aircraft's intended purpose was to be used in kamikaze attacks on Allied shipping and the invasion fleet expected to be involved in the invasion of Japan, Operation Downfall, which in the end did not take place. Because the Japanese High Command thought that Japan did not have enough obsolete aircraft to use for kamikaze attacks, it was decided that huge numbers of cheap, simple suicide planes should be constructed quickly in anticipation of the invasion of Japan. The aircraft was very simple, being made from "non-strategic" materials (mainly wood and steel). To save weight, it was to use a jettisonable undercarriage (there was to be no landing), so a simple welded steel tube undercarriage was attached to the aircraft.[2] This, however, was found to give unmanageable ground-handling characteristics, so a simple shock absorber was then incorporated. The cross section of the fuselage was circular and not elliptical as were most planes of this size and type; such a fuselage was easier to make. Tsurugi had an instrument panel with some flight instruments; rudder pedals in addition to joystick type control column, and also a place for a radio. Flight controls included both ailerons and elevators and (in production versions) flaps. The Ki-115 was designed to be able to use any engine that was in storage for ease of construction and supply, and to absorb Japan's stocks of obsolete engines from the 1920s and 1930s. The initial aircraft (Ki-115a) were powered by 858-kilowatt (1,151 hp) Nakajima Ha-35 radial engines. It is not known if any other engine was ever actually fitted. After testing the first production aircraft were fitted with the improved undercarriage and two rocket units. These may have assisted with take-off or may have been designed for the final acceleration towards the target. The aircraft had a top speed of 550 kilometres per hour (340 mph) and could carry a bomb weighing as much as 800 kilograms (1,800 lb), large enough to split a warship in two. However, it was otherwise unarmed, and heavily laden with its bomb, would have been an easy target for enemy fighter aircraft. The controls were crude, the visibility terrible, and the performance abysmal. Tsurugi had very poor take-off and landing performance and could not be safely flown by anyone other than experienced pilots. There were fatal crashes during testing and training. However new, better versions with improved controls and better visibility were under intensive development. The Japanese High command had plans to construct some 8,000 per month in workshops all across Japan. The war ended before any flew in combat. Individually, they would have been rather inefficient weapons, but used in waves of hundreds or thousands they could have been quite destructive.One hundred and four units were produced" Hope you like it! Till the next! Luiz.14 points
-
This is my 1/72 Hasegawa F-4G Phantom II "Wild Weasel". Hasegawa is always the first comany I check when I want to build a kit and this one was a pleasure to build. The only issue I had, other then my own making, was that the decals had yellowed and 3 weeks in a sun facing window only partially cleared them up. Luckily I also had the appropriate Wolfpak decals sheet so I used a combination of the kit and Wolfpak decals. I also used a combination of the Eduard, Aires and kit interior for the cockpit. This is my last build of the year and makes 25 completed kits. One note is that I always wash my kits after decalling to remove and solvent or decal glue residue and it appears that some water made its way inside and condensed on the canopy. This will eventually evaporate. So here it is: The AGM-65 Mavericks and ALQ-131 ECM pod are from the Hasegawa Weapons Set IV Next up and my first build of the new year will be the Modelcollect B-52H. Wish me luck. Enjoy12 points
-
Here is the Focke-Wulf 19a Ente, as it flew in Hanworth, England, in 1931, being demonstrated to the local public. The "Ente" ("Duck" in German, -or as the configuration is more commonly known by its French appellative: Canard), has a somewhat unusual arrangement, that was however very common at the dawn of aviation, and is used contemporarily in a variety of planes. It is not -as the uneducated would have you call it- a "tail-first" plane. But it is, you might say, a stabilizer-first design. The model presented here is of the only "19a", built after the original "19" crashed, killing its Pilot, Georg Wulf, a partner of course in the Focke-Wulf firm. If you would like to add details missing in the kit, it will all be about timeline: what was present and what wasn't at what time. For that, fellow modeler, you will have to do, as I did, some research. It's fun. And educative. And free. I refer you to the building thread for more on that, and other additional notes on diverse aspects of the plane and kit. As noted there, the kit has many shortcomings, some almost insignificant and some that could really impact the build adversely if not dealt with. Some are very easy to correct and some are definitely not. May be Planet would like to address the many faults of this kit modifying the masters and perhaps re-issue this kit in the future; I am not sure how successful it was commercially (it was part of a very commendable string of kits of interesting German golden age civil planes), but I saw many built online, which is a good sign. The work needed would be extensive, though. The fact that at some point there were on the market a vacuformed and resin kits made of the Ente, shows perhaps some potential interest. A number of links and references are given in the WiP, especially useful is the link to the German ADL site. Here is the step-by-step build log: The modifications to the original kit were many, but still more can be done. The list of them is given -spread out through the process- in the WiP. I had to commission a new set of decals from Arctic Decals, because the ones in the kit are not accurate, besides being insufficient as they do not cover all the necessary images (again, explained in the WiP). All in all I am happy I got this somewhat dated kit of the Ente (with the caveats), and was finally able to build a model of a plane I always liked. I applaud Planet for having boldly kitted it. Of pleasant lines and unusual appearance, it clearly stands out as an example of uncommon aviation thinking.11 points
-
... but apart from all that, it was a great vacation One plus side to a bad holiday is that it could almost feel like a relief to get back to work Unfortunately, perhaps, I had a good holiday; a weekend at my folks and a day tinning paint with Jamie at Chez Sovereign Hobbies, then two days of drinking tinned beer and watching Game of Thrones before returning to work on Friday for a day that was like having Hell directly injected into my brain via headphones. Still, those Spitfires are looking seriously good Cheers, Stew11 points
-
Thanks Ced, thanks CJP Thanks Bill. They were a pain in the but to make but I think the end effect is worth it. i.e. you just don't notice them anymore! Now where were we ? Ah yes, the undercarriage. Bits of brass and wotnots from many, many moons ago safely filed in-a safe-place. So safe in fact that I found everything within a few seconds. Way back around the second decade of this build, I had a plan. I know I had a plan. I should have written it down. It took me almost a whole cup of coffee to remember what that plan was. I think I remember it now, but who knows. Anyways, the plan involved constructing the undercarriage from brass, aluminum, other metals, and other materials where necessary. Part of the plan was also to have those different elements of the undercarriage actually lock together with positive attachments where possible and not just glue things together - mainly because it would involve using superglue and that a) never works for me, b) always sticks the wrong things together, and c) is a secretion of Satan himself. The main parts of the undercarriage were already completed - see earlier in this build if you're really, really bored. Now I just had to make the attachments. The lathe was fired up and two of these almost pointy tubular thingies were made. They were remarkably similar, intentionally. Should have been identical, but similar is good enough for Fly. Into the almost pointy end was drilled a Ø.5mm hole into which a length of wire was superglued. (Yes, I know I said I hated superglue. I still hate superglue but sometimes you have no viable alternative, at least not without investing in mig and tig welders [calm down Ced] and other exotic toolery.) Sine I used aluminum for the insert, and brass wire there really was no other way to attach them other than mechanically which would have been much more problematic. Superglue it was. The aluminum insert can now simply slot into the end of the oleo like this... (yes, that will be superglued too!) In a rare moment of aforethought and strategic planning, when I constructed the swing arm I included a small brass tube on the upper surface with the intention of having the oleo pinned to it - just like this. Obviously the brass wire shall be trimmed to an appropriate length. and the entire front undercarriage slots together like a simplified meccano set with no nuts or bolts. There's still a bit of work to be done on the undercarriage before it's all finished. The swing arm was another pain to get right. Over the years an abundance of detritus, paint and assorted varnished had agglomerated nicely inside the swing arm mounting hole. Clean out was easy though. Another small issue was encountered when I tried fitting the oleo - it wouldn't fit flush against the fuselage. A quick investigation revealed the culprit to be the brass door strip I fitted a few weeks ago. Easily sorted with a few swipes of the file. And now at least the geometry looks right. That is, until you actually measure the darned thing. From outer edge to outer edge I get 110mm plus a bit of metric left over If I check the 4+ book, inside wheel to inside wheel measures 47mm. A simple bit of math shows that the actual dimension on this model should be => 47 x 72 = 3384. Then 3384 / 32 = 105.75mm Hhhmmnn, 5 or so mm too wide. A bit more filing and clean up and we end up with this.... honest .. and it was symmetrical too - as far as I could measure. See.... Next up it was back to the lathe and more aluminum chip making. This time it was to make an "axle" for the wheels. Two different diameters on this piece - one to slot inside the brass tube on the end of the swing-arm, and a slightly smaller diameter to fit into the hole drilled on the back side of the wheel If I had thought ahead, I could have machined a flange on the back end of the axle and glued the wheel on after it was slotted through the swing arm tube - that would have left the wheels free to rotate. Which would have been pretty worthless really since I had already gone a filed some flats on the tires. It would have been a bumpy taxi! Anyhoos, all that was left to be done was so slot the wheels onto the swing-arm using the home made axles Now up on her own feet for the first time Starboard three-quarters shot Port three-quarters shot. Well, more of a 7/8ths shot but close enough. and front, front shot I'm quite pleased with that undercarriage and how well it has turned out. It could so easily have been a bit of a disaster I was a bit concerned at first that the Wessex was sitting too high. However, after checking references I think I am okay. The undercarriage was made according to measurements (thanks again Roger) taken off the 1:1 so I know it's pretty darned close scale-wise. However, that all goes to pot if Fly have the mounting location wrong, or the height of the fuselage wrong, or the diameter of the wheels/tires wrong. If it's sitting too high my excuse is that it's just returned from a trip to Sharp Peak and fuel is low. So there! Everything is just dry fitted at the moment - I wanted to take some time and soak it in before committing to gluing everything in place. Back tomorrow if the gods be willing11 points
-
My first attempt at doing a kit model properly, rather than my childhood experiences of throwing them together, painting them before finally destroying them in an actual blaze of glory! So I'm pretty much a complete newbie. It's Revell's Airbus A319 1/144 kit, with BA and German Wings livery included, I chose BA. The white of the fuselage is painted with Tamiya spray, and I've used Tamiya spary lacquer along the way. Everything else is brush painted with Revell enamels. I've made plenty of mistakes, the worst being trying to mask over decals that had already been applied in order to correct a mistake, resulting in the BA logo on one side of having a chunk missing. Still trying to source a replacement set of decals to fix this. Any critique gratefully received, in particular areas where improvements could be made. I appreciate that this is way off the standard of most of the stuff here, but it's a start!10 points
-
I couldn't disagree more. The FM-2 has not been accurately or well-kitted, Hasegawa don't do it (they do an FM-1), and the extant AZ kit on it is additionally a hellish nightmare to build. The early Mustang is a tricky subject -- they may yet do it, but many have tried and failed to do it well, so I'd rather they did it right and took a little longer. People are also clamouring for more Hurricane variants, and they've announced they'll be doing those. Arma are a very small company, and they have to consider what will sell. I'm willing to bet they can sell more FM-2s than Fairey Battles, at least. That said, I wish they'd offer an Expert Upgrade option for their non-expert boxings, because the FAA one is definitely where my interest lies.10 points
-
Modelling has taken a back seat for the past few months but I have finally finished a project I started in April. Any enjoyment associated with this build was short lived as I tried to overcome fit issues with a badly warped nose and a fuselage seam that kept re-appearing! There were various other fit issues including the engine cowlings which all contrived to see this kit almost going in the bin. It is finished as MQ-A/FW130 of 226 Squadron in June 1944 and this aircraft took part in the bombing of Panzer Group West headquarters at Chateau de la Caine on 10th June, which for me was quite relevant as I visited the site in 2008 as part of a Staff Ride with the RAuxAF. Anyway enough of all that, onto the model. It was built OOB with the exception of an Eduard zoom set and paint masks and Quickboost gun barrels. The model was painted with Gunze/Mr. Colour neutral grey and olive drab after pre-shading. The OD was lightened and darkened to achieve the worn and patchy appearance this aircract had by that time. Messrs. Shores and Thomas's excellent series of books on 2nd Tactical Air Force were used as a reference, particularly the photos on page 148, (IWM CL106 and 107). National markings, codes and serials came from generic sets from Xtradecal and Modeldecal but the wing roundels were sprayed using my own masks as I wanted to replicate the faded and patchy appearance. And yes, they are supposed to be different sizes! Look forward to your comments, all the best Howard10 points
-
Okay. So that sort of snuck up on me.... On Friday night # 248 Did a double take; scratched my bonce and thought to myself ‘if you leave out the entire kit then doesn’t that mean..........’ So I went away to Northumberland to think it through....... Then on Saturday afternoon # 250 I read: And I thunk to myself ‘major change? Is that cos there’ no more Frog involvement? And doesn’t that mean.......’ Which seems to be half confirmed by... And I began to get quite excited. And then just so it was clear for their hard of thinking like me: Well blow me down........ Oh, absolutely! A great deal I should say. Plus some plastic lifting, brass hoisting and tool chucking too I shouldn’t wonder. Standing by to learn. You usually have to pay for your education these days don’t you?10 points
-
Polaris A1. Belcher Bits kit. Tamiya aerosols and Alclad lacquers. Dad's Army build ~ 17 hours, with a lot of interruptions. And with the last blitzbuild: Thanks for looking, Alan10 points
-
Hi and hallo to all! Just short stop here posting some pictures to amuse You with something done a half year ago...9 points
-
Thanks Keith! I went for plasticard mirrors, see below Thanks J, glad you like my efforts Thanks Ian Thin plastic strip was, see below So following the advice of so many reputable BM members, I decided to give plasticard a go to scratch build the three rear view mirrors. the front side of the canopy is roughly an arc of a 12 mm diameter circle, at this scale; so I traced two concentric arcs on thin plastic, 12 and 10 mm diameter respectively, to get this I then cut three identical (-ish ... ) segments and rounded the edges with a flat micro-file In a similar fashion, I did cut a longer arc, to act as front frame for the canopy, where the mirrors are going to be positioned; I then glued it in place using TET, sticking it to the previously added styrene framing I then glued in the mirrors, using Gator's Grip to position them properly, and going along the edges with TET to reinforce the bond I think they should look OK for this scale. Next, handle bars: I used some 0.5mm brass pipe, bent to shape around a wooden template then slightly bent sideways and cut to shape and brush painted Tamiya Flat Black I will add them once the canopy has been painted, otherwise they'll get in the way of the inside masking. All comments welcome - meanwhile, Happy New Year everybody! Ciao9 points
-
Hi all, sorry I've not been on here as much. Have been busy having a change of direction . Here's the output for the year. More scales than just 1/48th for once too! A belated Merry Christmas to you all, and here's to a 2020 that's good for modelling at least. Eduard's 1/48th Tempest V early boxing converted to a series ii and their seriesii converted to a Centaurus engined Tempest MKII (appeared in TMMI mag) Airfix 1/48th Hawker Hunter F6 backdated to an early dogtoothless MK6 AMG 1/48th P-63C Kingcobra Eduard's 1/48th FW190A-4 Airfix 1/48th Spitfire XIV Airfix 1/48th Meteor F MK8 build for SAM article Eduard 1/48th Me109G10 Model Art 1/35 FW Triebflugel build for SAM article ICM 1/32nd scale Polikarpov I-16 Tip 17 build for SAM article Airfix 1/72nd scale Bristol Blenheim build done for Guidelines publications book Modelsvit 1/48th Yak-9T a shelf of doom save- just AMG 1/350 scale Saunders Roe SR45 build for SAM review Special Hobby 1/32nd Kawasaki T-33A build for SAM article AMG 1/144 Bf109C for SAM review Cheers Jonners8 points
-
or to put it another way, "The producer hasn't done what I wanted. Therefore they are rubbish" Judging form the other more positive reactions on here, I don't think they will miss your money Cheer up, it could have been another 109! Jonners8 points
-
@rob85 gave me this Mustang when we met at Telford, and how often do you get to build a kit with the diminutive of your screen name applied to its side? It's the 1/72 Airfix kit with Revell transfers and painted with Vallejo Metal Colors. The build thread is here. Thanks @TEMPESTMK5 and @Enzo Matrix for another great Group Build! A reference pic seemed to show remnants of Invasion Stripes under the wings.8 points
-
Luft 46 Project, the Focke Wulf TA183 Huckebein from PM Models Built by Dad's Army method, hiding from Mrs Jockney and the outlaws. Hairystick painted with Humbrol Acrylics, first time I've used them I hope you like it. cheers Pat8 points
-
Clamps off, ailerons and empennage on: What? The blue thing? That's my patent 'Pitot Tube ProtectorTM'. Oh, OK, a cut up credit card. Better safe than sorry… Leading edge needs attention: … probably another reason to glue the wings together before going to the fuselage. That said, the seam is practically invisible: … except for the panel that goes up into the fuselage. i guess that's a 'feature' of the aircraft? Another PC warning resolved - the nose isn't the same as the kit he built and just has two rings that go on the front: You can see I've painted the coaming too. Next step is… dah dah daaaaah - wheels. Don't do wheels. Normally. Should I be using the ribbed ones or the smooth ones? Tyres, the tyres, you naughty thing8 points
-
Hi everyone 2019 has been a funny old year for me, I've started many models but actually completed very few (three I think). My Hurricane along with my Typhoon (both 1/24), Spitfire IX (1/32), Lancaster and Swift (both 1/72) have all been put on hold for now and I just needed something to really reignite my interest in the hobby. I have been signed off from work sick so I have been spending a lot time on YouTube especially watching videos produced by a chap called PLASMO aka David Damek who I'm pretty sure used to frequent this site once upon a time and his methods have inspired me to change how I approach and finish a model. Back along I would never have bothered to clean and prime a model, re-scribe it nor would I have ever thought about using oils as a weathering medium but watching his videos I though Yeah I can do that (I already had all the gear just no idea!). So on with the build this is the object of my affections. I started her last week and my approach has been to assemble as much as I can before painting. As ever I started with the cockpit and as previously mentioned I assembled as much as I could before I applied any paint. You will notice that the pilots seat is green because I fully assembled the cockpit I found that I couldn't paint the seat in the correct Baker lite colour (Doh!) Starboard cockpit side wall Port cockpit side wall Assembled cockpit 'tub' which is very similar to its 1/32 brother in detail. I have added a Sutton Harness from Eduard which was weathered to match the rest of the cockpit. I am going to finish this with the canopy closed so I didn't spend that much time detailing the instrument panel With the gun sight installed The canopy in place I've even used the Tamiya masking templates rather than buying a set from Eduard and I have to say that they were pretty easy to cut out And finally a couple of pictures of her with a primer coat of Mr Surfacer 1200, which as expected has highlighted some areas that need a lot more work Tomorrow I'll make a start on the clean up. Cheers Iain7 points
-
Hiya Folks,.....quite a quiet year for me due to poor health etc,...... but here is my list of kits for the year; Hurricane I, 1/72nd Hasegawa kit, 303 Sqn; Hurricane I, 1/72nd Arma kit, 73 Sqn, Western Desert; Sea Vampire F.20, 1/72nd, Dragon; Vickers Delta, 1/72nd Special Hobby, RCAF; Hurricane I, 1/32nd FLY kit, 3 Sqn, SAAF; Beaufighter Mk.II, 1/72nd Airfix kit & Alley Cat conversion; Dakota, 1/72nd Airfix, Coastal Command Comms Flight; Boston III, 1/72nd Special Hobby, 18 Sqn, Italy; Wellington Mk.Ic, 1/72nd Airfix, 458 Sqn RAAF; Thunderbolt I, 1/48th Monogram kit, 73 OTU; Spitfire Mk.Vc, 1/72nd, KP kit, 249 Sqn Malta; Spitfire FR.18, 1/48th Academy kit; Beaufighter NF.VI, 1/48th Tamiya; M3 Lee Tank, British Army, 1/35th; Hurricane Mk.I, 1/72nd Arma kit x 2 Battle of Britain aircraft,..... .VY-H, 85 Sqn ; JX-O 1 Sqn; Albemarle, 1/72nd Valom; Mustang Mk.III x 2,.... 1/72nd Revell; Arnhem Pair,.....C-47 & Horsa in 1/72nd; Hamilcar Glider, 1/72nd Planet Models; Halifax A.V Tug,....old Matchbox kit; Beaufighter 21, 1/72nd Hasegawa, RAAF; 1/72nd Hasegawa Liberator B.VI; And a few which have not crossed the line in time; Albacore, 1/48th Trumpeter; Sunderland Mk.V, 1/72nd Special Hobby; Liberator `Glamour Girl'; Hercules C.3; And a little 1/200 Herk too; Ventura V, SAAF, 1/48th Revell/Monogram; And the Airfix 1/48th Spitfire XIV,...... I`ve used the excellent Exito Decals to replicate a 443 Sqn RCAF aircraft that I`ve wanted to build for years,......unfortunately the yellow spinner spiral decal is the wrong way around,.....so I`ve reversed it and will paint the white reverse side yellow!7 points
-
Hi guys, here is my latest build, the Messerschmitt BF 110 G 4 in 1/48 from Eduard. The kit is very well detailed but not so easy to build. This plane is from the 6./NJG 101 captured on the airfield of Fritzlar in 1945. The camouflage was very exciting to paint. Hope you like it. Cheers, Manu.7 points
-
I am much obliged to Tim K on these forums, whose WW1 RAF X-Wing gave me some inspiration for a bit of whimsy over the festive period. I had a Revell D.VII that I realistically was never going to build, and got my hands on a Bandai/Revell X-Wing for a good price The craft carries the markings of Rudolf Berthold, who commanded Jasta 15 for a while. Markings from the Revell kit, underwing/attack foil lozenge from Almark (decades old, but fit for purpose) I replaced the lasers with Spandaus from Master Model. 1/48th, but they look the part. Annoyingly, I lost a muzzle to the carpet monster, so none of the guns have them. The R2 unit has a very special Pickelhaube, though! The base was too austere for my liking, so was tarted up with Stirland Mud from Games Workshop and Battlefield Grass from Army Painter. I have been led a merry chase with photo hosting services, so fingers crossed this works:7 points
-
Hello http://armahobbynews.pl/en/blog/2019/12/30/arma-hobby-plans-for-2020/7 points
-
I've just about got the main assembly done a few more bits then some sanding,and filling, (my favourite🙄). A quick test fit of the pilot ( aka the headless horseman) proves he slots straight in no problems, I've fitted the quickboost resin exausts they slotted straight in no drama I'll mount it on a stand wheels up ,canopy closed,i reckon a mustang looks good like that, The odd gap to sort out I got the wings to fit really well by removing a little material from the mating surface,there would have been a bit of a step else Got a really nice fit to the tail section too Built up really well though, Cheers all7 points
-
Thanks Keith - ribbed it is. I did type the famous tag line in there but thought better of it… my pleasure I did zoom in on the scheme picture and they seem to be ribbed: But wait! Where are the bottoms of the gear doors? I'm thinking they took them off to allow the snow to blow off before the wheels were retracted. My only experience of flying off snowy ground was the CFI saying "Leave the wheels down for a bit or the snow will freeze the wheels in the bay and they won't come down". 'A bit' was never really defined. Tense. Thanks Jan, appreciated (especially the tips) Empty central bomb rack it is but too late for the wing ones - they don't seem to be fitted on this scheme. Thanks Johnny Thanks John Not a QuickBuild but it is going together really well… So, off with the bottom of the doors: Stroked with a #10A, the 'Stew Dapple Method'. Wheel bays and intake masked: I used my favourite packaging 'worms' for the bays, the ones that squish but don't spring back. Get hold of some if you can, they're great for this sort of job. You can cut them easily with a scalpel and push them into places and they stay where you put them. Simples. Canopies masked: You can probably guess I'm going to use the closed canopy as a mask, tacked on with latex glue. Windscreen stuck on with Formula 560. I'm really liking the new ESD-16 tweezers for masking - sharp enough points to lift the mask and smooth enough on the back for burnishing down. Nice. Central hard point and bomb rack glued on with TET Quick Drying: Another PC warning ticked off (I'm beginning to think this kit is a later mould with some problems removed). Tailwheel masked and I just need to check for bits I've missed before a wipe over with IPA, then paint!7 points
-
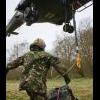
Here's some more, slowly but surely. These are the rear upper parts of the stabilizers and the piece in the center is the upper part of the axle underlift. These are all made from sheet plastic. Some holes are filled in like the ones on top. I did this because I'm going to try to cast the wrecker parts. Means I have to make it a little differently than a finished part. Hoping it works then I can make another a lot quicker if I want. The rest on the underlift done. This is the start of the housings for the stabilizes that are mounted underneath. There are two with only small differences. Here's the basic sheet structure. Notice how they are offset to point slightly downwards. Here's the two housings made. Now there are mountings, tow eyes and other bits to add on as well as the stabilizer ends.7 points
-
Thanks John - and you are absolutley right - they are miniscule Thanks Kev I'm dreaming about 1/350 Beefy!!! And thanks - With all the Football and Rugby - there have been a few beers. Anfd vital tools for CA Gel Glue placement!!! Accupuncture needles - available on Ebay - these are 0.25 x 40mm. And nearly 90% done..... Final touch up painting and adding the Carley rafts and we are done! And if you hadn't already seen this from Jamie Duff then can I just say if you have any interest in Royal Naval WW2 paint schemes - it's a great buy for £10 - https://www.sovereignhobbies.co.uk/collections/sovereign-hobbies/products/cb3098-1943 A Very Happy new Year to you all. Rob7 points
-
Not all wingy things but most of them are but here is an overview of my most productive year of modelling in a very looooooooooong time. Some of them have been posted here some not. Overview 2019 From Left to right : Junkers 88 Mistel 1:48, Volkswagen Samba Bus 1;24 , Ki61 Hien 1:48, Fw190 A3 1:48, Austin MkIV armoured car 1:72, F100F 1:72, Hawker Sea Fury 1;48 and last but not least a scratch- built fantasy Sci-fi thingy called the "Commissar of Grievance' And in the close but no cigar category are Mirage F1AZ 1:48 St Chamond tank WWI 1:35 Regards Brian6 points
-
FAO @Stew Dapple here are the photos discussed earlier. I'm not very interested in making models of German stuff. I've nothing against Germans - I'm just not a rabid fan of anything with a black cross painted on like some, but I wanted to make one Fw190 to go with my Black Friday theme. In particular I wanted Rudi Linz's blue 4. Unfortunately due to my general disinterest in the basic subject matter and lack of attentiveness, I bought the wrong version of Fw190A and had started before realising it was useless. Ultimately, it sat in a mostly-assembled state on the Shelf of Doom for perhaps 2 years. This kit had so many fans that I was rather surprised to discover how poor a kit it truthfully is, and it seems that Eduard knew it was poor as well since they retooled what was not a very old tooling. I had, sadly, already bought the correct A-8 version in Weekend Edition form before getting too far in to this and I have to say I'm not looking forward to building it. The cockpit went together ok. I didn't use all of the Profipack photoetch because a) I'm not interested in Focke Wulfs and didn't want to add effort and b) much of it adds little value once it's all built up. The side consoles in particular are very nicely printed, but are flat slabs and a reasonably well painted plastic cockpit looks far superior, so that's what I did. The seat belts and instrument panels are all that's really needed IMHO. (note I followed the instructions above, but did realise they were back-to-front with the radio hatch and removed it to put the hinge at the back after this photo) Next confession - I really don't care for models showing everything open, and unfortunately that's the only way this kit is suitable to be built. I'd been forewarned, but the cannon bay hatches were a truely awful piece of model kit engineering. A lot of careful work was required to close them, and various braces and shims were added to prevent it all buckling out of shape when the wing complete-with glued in hatches was offered up to the fuselage later. The braces proved entirely necessary and were the results of many test fits. We Scots pride ourselves on having the best vocabulary of swear words and insults on Earth, and I needed to invent new ones for this kit... I cut away various bits of the kit to aide getting the wing and fuselage together. The wheel wells likewise were a swine to get together and let the wing halves close up. There was nothing fundamentally wrong with the design here, but the mould halves were slightly misaligned so all of the riblets inside the wheel wells were moulded askew and too deep without fettling. Not difficult, but again, for a subject that holds little interest it became tedious fairly quickly. Coming back to this photo, another part of the kit I absolutely hated was all this clutter inside the nose. As the supporting structure and ammunition chutes for the MG17 machine guns and engine mounts are all integrated and entirely designed to be displayed with all its guts hanging out, it was an utter pig to get it all to close up to look like an aircraft. Again, the moulding quality of the parts didn't match Eduard's ambitions for the kit. I ended up hacking away lots of that gun junk to allow the cover to fit. Unforunately that would still bite me later as the machine guns don't fit under the cover - so I would later have to saw the barrels off short. Anyway, I prevailed over the damn thing until it was assembled, fitted, filled, and ready to paint - then I put it in its box and forgot about it for 2 years. We've had a tidy up over the Christmas holiday, and I wanted to clear off some of this half-built stuff, so this thing was chosen to clear space for something that interests me better. 2 Days ago I sprayed it gloss black using our prototype solvent-thinned acrylic, then masked off for the white stripes on the cowlings. I didn't fancy decals for this. Colourcoats white enamel was sprayed on, then unmasked. Same for the yellow bit, then we went out for lunch. Using the black base I then sprayed the RLM 75 using Colourcoats ACLW14, then masked using Blutac and Tamiya tape, then the RLM 74 (ACLW13), then masked the wing fillets with Tamiya tape and sprayed the RLM 76 (ACLW15) otherwise freehand. I went back with the RLM 75 for mottling, freehand of course. This got me to the end of the first afternoon since retrieval from the SoD. Yesterday morning we had to go out, but at lunchtime I sprayed it clear gloss enamel then applied the kit decals. The decals were good and settled well with Microset and Microsol. Last night around 7ish I sprayed a clear matt enamel to seal them in. This morning I gave the matt clear coat a gentle polish with Infini Model's 2500 grit and 4000 grit polishing sponges to bring the matt back to a gentle satin, then stuck on the wheels, guns etc. The antenna is Infini Model lycra rigging line (40 denier / 0.068mm) in black. Exhaust stains are Tamiya weathering powders make-up sets. It's a bit of a half-baked effort, but as mentioned several times it's a subject I couldn't care less about frankly, and it's good enough to go on the shelf. And it's finished, and that's important.6 points
-
Dear fellow Britmodellers, here's my last entry for this year, the 1/72 Arma Hobby Yak-1B, built out of the "Expert Kit" with the addition of Rob Taurus Vacu and steel wire pitot tube. The model represents the aircraft of Patryk O'Brien, 2. Squadron, 1. Polish Fighter Aviation Regiment, operating in the Berlin area, in 1945. Arma Hobby's markings lack the fuel indicators on the wings, which were sourced from a Zvezda Yak-3 decal sheet. Painted with Gunze/Mr.Hobby acrylics. Weathering with Windsor & Newton artist's oils. All photographs by Wolfgang Rabel. I built both the Brengun and Arma Hobby kit of the Yak-1B, and would give Arma Hobby a slight advantage in terms of ease of assembly. The Brengun kit, on the other hand, may be more accurate in shape and dimensions. Both kits have very fine surface structures and good detail throughout. Thank you for your interest. Best greetings from Vienna! Roman6 points
-
Pmask? The yellow paper tape kind, or the ones they sell on Hannants? Or a Peewit mask for the B-25? I assume that like Victoria, she's grimly hanging on, trying to outlive the Prince of Wales. That's what I'd be doing in her shoes. But the trick is just to get over. As with ham and eggs, there's no going back for the pig. Philosophy is much like making love to a beautiful woman: I thought about it a lot when I was in college, but it turned out I wasn't any good at it. Sort of a rictus grin. It was in there, I swear! Sometimes I'm disappointed in myself for not being a deranged psychopath, because I had half a dozen chances to be wearing your skin and living your life last month.6 points
-
Some more progress over recent days, and the finish line is creeping into view. First main job was the leading edges on main- and tailplanes, and fin. I think some of these aircraft lacked the black leading edges, but I had decided to model 67-22581 as this aircraft survives as firstly C-GMUS and latterly as a 'Lou IV' recreation, and it had the black bits when built. I also found some decent photos which have been helpful. So the Tamiya tape gods will hopefully be pleased by the sacrifices involved here. Then it was onto the decals. The photos seem to indicate 25-inch diameter stars and bars, in slightly different locations to normal for a 'real' P-51. On the top of the wing, well inboard and quite a long way rearward, with USAF lettering in a similar position: But in a more outboard position under the wings. So that's what I've tried to copy here: I see from this photo that my F in USAF is not completely aligned. Oh well - my tired eyes had had enough! The letters were cut from the U. S. AIR FORCE fin/rudder decal from the Arfix kit, while the serial numbers are incorrect as they are British-style 4-inchers nabbed mostly from an Xtradecal Sea Fury sheet. But not a disaster in this scale. A second mistake to report is that whilst studying the location of the underwing star & bar, I realised that I should have filled in the 3 underwing ID lights - oops! So rather than fill, sand, repaint etc, my plan at this point is to slowly build up the void using layers of ADC Grey paint to approximately the right level. It won't be perfect, but it'll have to do. Other jobs done include the propeller, which is Alclad polished aluminium with yellow tips on the front, and black without yellow tips on the back. So were getting there! Justin PS does anyone make those drop tanks in 1/72?6 points
-
A fascinating story contained there no doubt Ian - makes you aware just how fluid national identity turned out to be for many people over the course of the last century, for multiple reasons. Unless of course this is an elaborately coded confession that you're actually part of an international network of operatives who have defended the Earth for centuries against dark cosmic forces. Always nice to realize that one has now become a public spectacle. It's cold out here, and there's a strong wind blowing bringing with it all the nameless problems that I haven't realized yet... Thanks LC. I was enjoying your 'Prototypes' thread only yeasterday, especially that neat little DH.108! Fully agree with your analysis - with so many compound curves on the Sea Vixen there's going to be a lot of profile-lofting involved. Although I've quite detailed dimensions for many of the main sub-assembly cross-sections, most of the drawings of them in the maintenance manuals are obliques, so it's going to be fun translating these into orthographic views by eye. I don't mind admitting to nervousness at undertaking such a new and involved approach - currently armed with only minimal skills - but hope that the project will teach me a lot I don't know about virtual design processes, as well as the aircraft itself. Look forwards to seeing more of your own 'prototyping'!6 points
-
Airfix Curtis Tomahawk IIB, built in fifteen and a half hours straight, with breaks for a long walk and cooking a light supper (nobody wants to see pictures of cauliflower cheese!). Had a lie-in this morning so no additional weathering or varnish. Lovely kit, one of Airfix’s best for me: Thanks for looking, Adrian6 points


.thumb.JPG.ebe7bd09037c033b484e59e59a925a45.JPG)
.thumb.jpg.b4a5069fd2c2dd5708ce1694345c5b11.jpg)


This leaderboard is set to London/GMT+01:00