Leaderboard
Popular Content
Showing content with the highest reputation on 27/12/19 in all areas
-
I hope everyone had a good Xmas. I'm sharing one of my builds from 2019 with you all. This is the Eduard Hawker Tempest MK.V Series 2 kit in 1/48 Scale. Kit was painted using Tamiya acrylics and featured in an issue of SAMI magazine, photography is not one of my strengths and still learning30 points
-
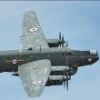
Armstrong Whitworth Whitley MkV – N1428 GE•B, No 58 Squadron, Linton-on-Ouse, Yorkshire, April 1940. Currently the largest model in my display cabinet, I was very happy when Airfix announced a new tool of this Bomber Command stalwart of the early World War Two period. The kit went together fairly well, aside from issues fitting the nacelles. The aftermarket decals also had slight misregistration, which I may pluck up the courage to correct in time. The diorama base was cooked up over Christmas 2019, and the vehicles come from Airfix and Flightpath. The build thread has been posted, and can be found here:28 points
-
Hello, Also a recent completion, the Academy 1/48 P-47 Thunderbolt. Began its life as 56th FG USAAF, but paint was stripped and it became a plane of the french air force in the 1945 markings ... Metal is done with AK extreme metal colors, a nice range, although one need a gloss balck undercoat and even thoroughfully cured, the finish is quite fragile. Hope you'll like her as well ...20 points
-
Brave or fool You always do something brave or stupid in front of the girl you like. 1/35 Tamiya M51 Super Sherman \ THANK YOU19 points
-
Nice and clean Do335 from Hobbyboss in 1/72. Variations of RLM81/82 aren't quite right but I think it looks ok. 12 hour single sitting17 points
-
Model made to order. This is an F-14A with an interesting story, you'll probably know which one. Model Trumpeter scale 1:32 made straight from the box. Model Trumpeter w skali 1:32 wykonany prosto z pudełka. I think this is the last model this year and I hope that next year will be equally successful for me.14 points
-
Hi All For better or worse this is done . A little rough but it will do AIRBUS A320-211 VH-HYA ANSETT AUSTRALIA Kit Hasagawa 1/200 Paints Tamiya Mistakes ME Thanks all for great bit of fun Martin H14 points
-
Here is my 1/72 Phantom FGR.2 XV423 "D", 23. Squadron RAF, RAF Stanley, Falkland Islands 1983/84. Old Fujimi kit made "out of the box", except resin ejection seats (Pavla) and Sidewinders (Eduard). Decals are based on Print Scale`s 72-285 set. Thanks for watching! 😊13 points
-
Hello, It's been quite a long time I didn't complete something, so here is my last 2019 buod : Tamiya 1/48 MiG 15 Bis. Metal is Tamiya AS12 Spray can, with AK extreme Metal touch up, while the red is also Tamiya, airbrushed this time .... Hope you'll like her,13 points
-
My MIG 21 is as done as it's going to be. All kinds of compromises were made to fit into the 24 hour slot but it got there with an hour to spare! It won't stand too close a scrutiny, so two pictures will have to do. I've made them a bit festive to compensate. 🎅 It's the first time I've finished a kit this quickly since I was in primary school! Thanks are due to the organisers for putting on the show, I've certainly enjoyed taking part. Tony.13 points
-
Roundels I have been thinking for a while about whether to go internet shopping for 1/32 WW1 RNAS / RFC / RAF / AFC roundels but in the end have decided that it shouldn't be too difficult to paint them on. This is especially true on the fuselage where, on this particular airframe there was no annoying difficult fine little white marginal rim around the outside of the blue circle. The fuselage roundels will be painted on before the top wing goes on but the wing roundels - for which I still might resort to decals - definitely must be dealt with once the upper wing is attached. Painting roundels on is a relatively straightforward process. The only really tricky bits being making sure that the colours look OK (a matter that's already sorted to my lax satisfaction), the edges of the marking come out nice and clean, and that the various circles in the roundel are truly concentric. It's the last consideration that is potentially the tricky bit. I used this circle cutter to cut the first circle. In this case it's the outside masking that's required. The use of gridded masking is important as it will help me line up the various circles later on. Use plenty of masking. I've said it before; there's little to be gained in leaving areas unmasked, but a lot to be lost. More than enough masking is way, way better than not enough. In this case I used a rattle can. I like rattle cans, there's a lot less fine-tuning and cleaning up than with airbrushes. Earlier this year my dad gave me a set of centre punches and it just so happened that one of them exactly matched the diameter of roundel's white circle. Nice! A few seconds after this photo was taken I had a perfectly circular mask... that fitted here. Note how by ensuring that the centre of the various circles lined up on the grid, the grid can assist in getting the masks concentric. Now spray paint the blue circle, this time using an airbrush. As always use several light coats allowing drying between each one. The temperature in Perth on this day was an unusually chilly 36 C so it was a long 4 to 5 minute wait between each coat. And here the masking is coming off... Leaving this - which would be ideal for an RAAF WW2 bird. But this is not to be. What we need is some RAF insignia-red circles from some old partially used monogram P40 decal sheets. It just so happens I have two such sheets! So the final step was pretty simple really. Just stick the red circle in the middle, move it about until it's dead-centre and press it on. There's only one more post to go until the moment of truth when the upper wing goes on. I'm building up my courage. 😟 Sorry about the slow progress of late. I hope some of you are still following along. Bandsaw Steve13 points
-
Good evening everyone, This is Tamiya’s superb IL2. I had previously built Eduards kit and really enjoyed that, to the extent that I didn’t really see how it could be improved . However having heard good things about this particular kit, I decided to give it a go. What a blast. People have said that it’s a well engineered kit. No kidding. As ever, everything fell together, tolerances were precise and everything just clicked into place. Amendments to the kit included putting flat spots on the tyres, replacing the wing cannon and machine guns with hollow tube and aerial wire from Uschi. The paints are a mixture of Mr Hobby and Tamiya, with fine details picked out with Vallejo. There is some shading and chipping on. Tamiya supply a set of masks for the windows that you need to cut yourself. They worked really well and I was more than satisfied. They also provide a decal for the seat harness but I went with an Eduard belt for a more 3D look. Nothing beats Eduards buckles for setting of a cockpit. The decals were a mixture of out of the box and the remainder of the Cartograph sheet from the Eduard boxing. Fair to say that I was pleased with this. Thanks for looking. Rick12 points
-
Junkers Ju88 G Mistel + Gaz M415 (1:48). Diorama scratch built. Finished the GAZ recently and re-did the diorama. https://i.imgur.com/bbEIpRt.jpg[/img] Enjoy Brian12 points
-
Started unknown. Dragon 1/4 ton 4x4 truck with mg34. I didn't know wheeled things could be built till I opened this. 23 hours 54 minutes, single sitting Thanks to the hosts for organising. Lemur out.12 points
-
I'm free Captain Peacock! Best line of the festive period! 😁 ⭐ for you mister! Had to stop and think that it was actually going to be a new decade in a few days time! #lunchtime doubly so Here. (an old meme but a good meme...) That's an awful way to talk about socially challenged misfits Keith. It's not our fault we're not Welsh. Oi! It took me ages to get the hems sewn! I like that idea very much Serge! Cheers Ced. Hope you dipped your beak in some prime vino. 'et al'. My surname for tax purposes from now on.... Cheers Chris - hope you had a good one. Yup - it's a good point Johnny. Actually played around with Reality Capture a while back for film work but in this instance with so many Sea Vixen photos taken from different focal lengths and in varying directional lighting conditions to contend with, it'd be a nightmare trying to match focal lengths &etc. in order to compensate for optical distortions and related errors across the frames. Sadly Father Christmas didn't bring me a LIDAR setup (but trying to get work to buy one, if I can conjure a valid reason). I actually had a kind invite just prior to Christmas from those lovely people over at Navy Wings to come and photograph XP924 whilst she was being repaired in the hangar, but time and finances just won't allow a trip across the water at present. I've decided to leave out the entire Frog Steve, this I know is called being 'less than helpful'... 🤦♂️ Drove over to Galway this morning as one of Mrs B's oldest schoolfriends was back over visiting her family and she related something disgusting that had happened to her. She's a specialist in a well known London hospital, worked there for years and before that in the mental health sector in England under enormously stressful circumstances due to continual cuts in staffing. Conscientious, self-effacing and compassionate like most people in the medical profession. She had an email from their HR department recently telling her (in terms intended to inspire gratitude) that she'd be able to keep her job as she 'wasn't on the list' i.e., of those nationals under threat of being forced to lose their positions under Brexit. Think about that what it feels like to be one of those people on the receiving end of language like that for a moment: 'On a list.' What were those countries in the past where people were put on lists again? Funny how often it started with people being booted out of professions. You can no doubt hear the fury in my words tonight at a good woman being made to feel as if she's merely being tolerated by a society that she's done so much to care for. I honestly don't care at this point if I'm kicked off the forum for posting politics - I care about what happens in the country of my birth but I know poison when I see it.11 points
-
11 points
-
Crusader Mk.III 17th/21st Lancers, 6th Armoured Division Bou Arada, Tunisia 13 January 1943 Kit: Tamiya 1/48 3255 Build thread: https://www.britmodeller.com/forums/index.php?/topic/235065286-crusader-mkiii/10 points
-
Thanks Keith PE rudder pedals? Oh good grief, they're tiny. Here's one scrunched up into an approximation of the diagram: Even the cameras got blurry eyes now. Ridiculous. The bottom bit has to be bent up to meet the back and then bent into the same curve. Pah! Here they are fitted: … with CA, several tools and a lot of Anglo-Saxon! Fuselage halves cut from the tree - note the little bit of the gate in the wing root that may be the cause of others problems with the wing fit: What's wrong with this picture? Correct - fails the H&S risk assessment. I switched to a file. Dry fit of the bulkhead seemed fine so I glued it in this side so it gets some (?pointless) paint: Ready to spray the internals, later.10 points
-
Now there's a 'Plan B' - always good to have an option if I mess up the mottling. Thanks Cookie Bliss - apart from being woken up! Nice one Neil - fingers crossed I can get close to yours That also made me realise I should search for 'FW190' rather than 'FW 190' and that found your RFI and Adam's build with some nice paint techniques (although it is an A8). It also found me PC's A8 WiP which I'll read through soon, even though Photobucket is doing that annoying blurring thing… Of course Roger - plenty of seats at the front (as usual!) There you go - welcome JR! White it is! Sunderland done, hung and bench tidied so I'm ready for this one. Thanks Mike Aww, I hope it's not too distracting Dennis Thanks Steve Of course Johnny - welcome! One thing I'm pondering after changing my desktop background to the scheme. What about aerial wire with open cockpit? I assume the canopy sort of slides down the wire and the wire shows through the back of the canopy, connected to somewhere? I may conveniently forget to fit it… Anyway, and so it begins: I'm playing a game of 'this bit's grey, that bit's grey' before spraying stuff but I've decided to assemble most of the 'pit and the PE i/p: Nice - everything seems to fit nicely - typical Eduard.10 points
-
greetings fellow muddlers and I trust you are all having a wonderful festive season. After much soul searching and ponder after ponder I reached a momentous decision... Sod it! This build has been kicking my butt for so long now, that I decided I'm just going to get it over with - one way or the other. With Fly's decal fiasco and the amount of missing/incorrect/over-scale and silvering decals I've opted to just move ahead with what I have to hand (as of today) and be damned. This build is never going to be a showcase, and I have doubts it will even make the display cabinet - at least, not at the front. The only white Royal Air Force transfers I have are left over from the Phoenix transfers of my long ago 1/48 build. They're a bit too small, but after searching around I could find no alternatives of the correct size. The R is positioned directly under that triangular reinforcing panel and the E of Force should be in line with the end of the beetleback. Who's gonna know eh? Even these transfers decided to put up a fight with bits breaking off here and there. I did manage to rescue these though. Fly provide very few yellow stencils and I found that their white stencils were very bright - too bright in fact. The Phoenix decal sheet provided a lot of yellow lines which were meant to be used on the rotor blades, but I had painted them so all those yellow lines were surplus to requirements... until now I found that I could tone down the white stencils by overlaying them with a Phoenix yellow stripe. It's not perfect by any means and up close you can definitely see the yellow strip, but from a distance (the best way to look at this) they are passable. Fly's own yellow stencils are also very bright. Too strong in my opinion. The stencils directly under the windows are Fly and you can see how much they stand out - at least they have the correct spelling on these. The decal for the anti-slip on the spine was like a piece of sellotape - really thick and separated from the backing about 2 seconds after it was dipped in water. I had concerns about it conforming to the spine with it being so thick, but it seemed to settle down after application of MicroS2 stuff. However, Fly have printed these are absolute rectangles - with no consideration for how they wrap around the curvature of the spine. This results in some weird visuals particularly where a no-slip is adjacent to the white banding. See the 3rd and 5th no-slip panel from the bottom to see how they don't wrap properly. I'll live with it The no-slip panel at the rotor was painted black and I used white decal strips to create the white outline. Much easier than trying to mask and paint. About a days messing about later... After my mess-up with the serial a week or two ago, I had to order another Xtradecal sheet since they only provide two of each letter. The starboard side was micro-meshed to remove the out of alignment serial and a new serial applied. That left me with one X since I had somehow managed to lose the one from the first sheet even though I had placed them all in a poly bag - and guess what happened... The "X" decided to fold completely vertically in half as I moved it from the decal sheet to the fuselage !!! Arghhhhhhhhhhhhhhhhhh I spent about 15 minutes trying to unfold the damned thing but it was having none of it. How it managed to do that I do not know - it was a perfect fold and you couldn't see any of the left half of the X behind the right half. Perfectly aligned. Soddit. Well, I wasn't about to go and purchase yet another decal sheet just to get one X, so I cut a few slices from a V to get this. At the end of the day it's probably never going to be seen as this will be behind the folded tail. Still annoying though, but that's been the story of this build it seems. That minor annoyance was followed by a slightly larger annoyance. I spent ages creating a mask for the no-slip panels around the steps and paid particular attention to burnishing down the edges to prevent bleed. To no avail whatsoever! Argggghhhhh10 After calming down a bit I simply painted the no-slip panels by hand and as long as you are quite far away.... Roundels area bit blue for my liking but I'm moving on. Dammit - forum went and posted while I was typing. Back in a few mins... Having had enough of transfers for the time being I thought it was about time to start adding more bits - in this instance, the tail casting. I drilled and fitted a section of wire into the casting then drilled a receiving hole in the fuselage and CA'd the wire in place. That allowed me to position the casting with a few millimeters of height adjustment. I drilled through the mounting points for the rear suspension And a brass rod was filed to shape and mounted to the fuselage. I pinned the brass rod to the casting with a small piece of stainless wire. Wessex tail wheel dry fitted This still requires a flat coat to dull things down, but at last I had a small sense of achievement after days of frustration. So why not add yet more frustration ? Since I am doing this build with folded tail and blades folded, I also needed to get the blade fold mechanism built up. After perusing the instructions, I decided I couldn't make any sense of what they were telling me to do so I resorted to examining photo's of the blade fold hardware, and eventually sorted it out. The instructions state to CA parts together. Nope. Not happening. Not. Happening. The soldering iron came out again and some time later Things look a bit messy at the moment, but the solder should clean up easily enough - and at least these parts will stay together even with my kludgy handling techniques. Front shot. The brass has been cleaned up and primed and left to cure overnight. Next session should see them a bit red (or dead!) I've been putting off trying to straighten the blades but I think it's about time to tackle that particular problem. Hot water and soft plastic. What could go wrong?10 points
-
Thanks Simon - if you thought that was fiddly, read on! Thanks Mike for the info on the aerials - very useful references in those links too, great stuff More fiddly PE! Like these: Can you see them? Two little red things near the tip of the blade. I guess they're grab handles or something? I thought it best to glue in the i/p before trying to stick on anything that would get knocked off so: Oooh look, new tweezers, as recommended by John L here. I like 'em After lots more fiddling and Anglo-Saxon we have: You can see the map box in that first shot, yet to be painted, bottom right. Madness. Yes, I did lose one of the levers. it's gone. I'm over it.8 points
-
Five minutes inside my 3.00 deadline! It's never going to win any IPMS events, but it's done and that's all that matters in a Blitzbuild.8 points
-
Finally, I've got some time to start the post on my next scratch build, a 1:48th scale Denny SGB, actually S304 Grey Fox, IWM picture below, at 145ft, the model will be ~36 inches long in old money. Warning, I expect this build to take a year or so. This time I really will try to make everything (apart from the split-pin stanchions), but some complex components will be 3d printed, though to my own drawings. I'm also going to have a go at the propellers, printed in wax and then cast, may as well go for it... My aim is to produce full drawings, components and etchings so others could build the same model if they wish. I will document it all here, mistakes and all I have two professional plans, one available on line by G Stone in 1:48th scale and one from model shipwright no 87 (March 1994) But as I do with all major builds, I also contacted the maritime Museum in Greenwich (actually the old brass foundry in Woolwich) who have the archive of all naval vessels since the 18th century. They claim to have an example of every type that served in the navy and they have a number of drawings of SGB's. I chose three drawings of SGB303 (the sister of S304), which include the GA and the shell expansion, a vital piece of the puzzle for plated models. At 36 inches long, the model is too large for my block infill so I'm going to plank it on frames and then plate the outside with aluminium sheet to the shell expansion drawing, rivets included. Shell expansions show stuff other drawings omit, like the water intake and outlet for instance. A section of the drawing is shown below and on it you can see the inlet is rectangular and on the centre line, I've not seen that detail before. This section also shows the layout of the outlet with the doubler plate etc. In other parts of the drawing is it clear that the portholes on port and starboard where not in the same place, again, where else could you find that sort of detail? From a scan of the lines (actually from the model shipwright drawing which looks a higher quality piece of work) I prepared a cutting drawing of the keel and frames. The frames have been set back by 2mm to allow for the planking. The keel is 5mm ply but the stem and the docking keel will be made of brass, inset in the ply as the former is sharp and the latter much thinner than the ply (poor quality copy below I started yesterday by cutting out the keel and setting in the brass, seen below on a temporary building board to keep everything straight. Keeping hulls straight is a real challenge as the planking can frames can easily end up twisted (I know this from experience) so I make a lot of fuss at this stage, sometimes it pays off... The hull will have a large slot in the deck for the deck-house. I'm not going to build a working model, but this could easily be done and then the slot would allow access to the motors battery etc. For me is helps to keep the deck house separate until very late in the build, then is will just slot in The frames were printed and mounted to 3 mm ply for cutting out Much later today... More timber to keep things straight. I've had to slot the build board as the boat does not have an exposed keel apart from the small docking keel at the back. I'll be planking it upside down, more detail later. The platform at the back holds the alignment holes for the rudders, you can also see the holes for the prop shafts (5" dia) After much fettling, I glued it up, tape is holding everything straight (I have a phobia about straightness....) So, we're off and running, sheer strakes going in tomorrow7 points
-
Hi Guys, I have never had the intention to build this kit as the IAF Mig-21 15 squadron the lancer with Polka dots over the yellow, these markings were for early aggressor training. I bought this kit for the decals which had a sexy one and I had some Eduard kits for it, however, after seeing the kit i thought why not I do a quick build, the parts were simple and some parts oversimplified but I have no complaint you can't beat the price and also expect good quality it. So, I thought why not build the kit as well, so I end with these big polka dots mig-21, masking the black was simple well there is trick to it and rather very simple one hehe. I will tell if one anyone is interested. So here it is Mig-21 15 squadron the lancer, 1992 Jodhpur. Thank you for looking, and this being my last build for the year. Happy New Year 2020. Cheers everyone7 points
-
I wanted to bring something back from Telford this Year and this kit looked really cool. This was not a Hard kit but there were a few curves tossed here and there. Dry-fitting and Sanding were the word of the day. I added some details to the landing gear such as retractors and braces, using Albion alloys real small tubbing. Kit decals were used and the were mostly very good except the red forward sections on the nose, I used some Vallejo red for touch up. Checking steady-ness of my hands. This was a Beautiful aircraft and I am quite happy with the small version I have. PS the Paint is much smoother than the Magnified photos reflect. Thanks for taking a look and Comments welcome Happy New Year Bill7 points
-
7 points
-
Hi guys. The RFI didn’t happen yet as there were some bits that needed polishing off first. Then I started the Gundam which seems to have been on a go slow for a while. Not sure why but I need some wing action in my life. 😍 so I decided to finish off the hurri at the same time while choosing an aeroplane for next years first build. Any ideas? Any Road the last bits that I’d missed were the unpainted wing panels and the darned clips that hold them in place. those ones there look. 🤩 so I used plasticard measured out and drilled holes. These were them painted. To be fair I should have left the painting until they were fitted as I painted them again anyway. 🤪 Here they are fitted. If you are building this and plan on adding these little clips I would advise adding them before you glue the wings as they are really fiddly to fit. here is the other side. And both together. They need a wash now. the panels themselves got primed. And painted. I’ll need to weather these too. had a lot of fun doing this. Can’t wait to get back to wings. 🤩 I’ll get this done before the new year. Take care you lot. As always. Happy Modelling. Johnny. 🥳7 points
-
I've made a start,even though theres going to be a pilot on board and the canopy shut , I've had a go at the cockpit, i used parts of a pe set for some bits I'll give it a light wash when its built up7 points
-
Hello Dears ! Now, That's the last one for 2019 !! So, let's go to Kai Tak in September October 1951... The lady is surely shy, given the last minute glitches that has occured !! But, I can call her finished and I'm reasonably glad. The Airfix kit in Eduard boxing is a great and good deal !! The resin interior has been corrected by Aires and is far easier to use than the first outing ! (The one I used on my Seafire .47 as an example....) I like that big nose and the Barracuda prop' blades look far better !! An pic of the beastie the day they arrive at Kai Tak... In september, they received the black and white stripes to avoid any shooting from the trigger happy cow boys from the colonies... However, they did'nt flow over Korea, they were involved... Patrolling the chinese border... As usual, I worked my interiors They were not all repainted in black, so I elected to let her in interior green, The shade seen on the pics is not darker enough methink ! I think that I should have painted the seat in interior green too, but it was too late ... Cockpit was already buttoned up ! And I also elected to let her as clean as possible, so No Woosh thingies or fuel tanks of any sorts !! I also changed the wheels, but I don't remember where I picked it up... The canopy is a Falcon one since the original one did'nt fitted the plane at all.6 points
-
First up from me will be the Welsh Models Avro Tudor IV in 1/144. Fairly simple kit - two vacuum formed fuselages and bulkheads, resin wings, tailplanes and undercarriage doors, white metal props and undercarriage. This will be my first vacform in at least a couple of decades, and first time working with a vacform/resin mixed-media kit. Should be fun. Here's how the parts look: I'll probably make a start tomorrow. cheers Julian6 points
-
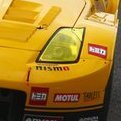
All done. Pros: Nice shape, fits together with no problems at all. Good moulding, little cleanup required. Despite being quite old the decals all still transferred without problems. Realistic rubber tyres, nicely detailed wheels. Cons: Ultra-curbside. No engine, no gearbox (despite that bits of both should be visible through the rear end), no steerable wheels, not a lot of interior details. Verdict: Not bad. There's nothing wrong with it, I just wish there was more of it. I understand the Tamiya 962C is a pain with it's one-piece body and glass moulded together, but in other areas it's better, especially under the bodywork. Build notes: Completed in about 5 weeks. Body colour is Tamiya TS-47 chrome yellow. Extra details include a lot in the interior such as removal of passenger seat, added hoses, wires etc. PE radiators, scratch built rough engine, a side-hole opened up for another intake (what I'm not sure - not fuel) and brake discs with calipers. I've intentionally omitted 3 things from the suggested build - the front wheel covers (hate them), the headlight mask decals (not the same yellow and the car looks better without them), and finally the plain white decal sun visor - it looked boring and without it, I can see more of my interior detailing. I see so many variants of the FromA Racing 962C with and without various items, I figure - this is my variant. Colours remind me of a JCB.6 points
-
My main aircraft modelling passion is 1940. I did a CSE history project on the Battle of Britain when I was a teenager, and I became hooked on the period ever since. I am currently focused, as regular readers will know, on building at least one example of each type that was operational in the North West European theatre during 1940, on all sides. For the RAF Bomber Command representatives, I’ve always wanted a Whitley. Until Airfix announced they were releasing a brand new tooling of the Whitley, I had had a couple of Frogspawn kits stashed away - one of those "one day I might get round to these" sorts of stash residents. I must have been one of the first in the pre-order queue when Airfix announced the Whitley! At last, an accurate representation of a type that is so often overlooked. I couldn’t wait. The box duly arrived. I had to inspect the contents, of course, but the actual build would have to wait for some time between my other commitments. Ah, the joys of being a professional modelmaker - someone else’s model always comes first. The contents of the box showed a well thought out model. Plenty of small details for the cockpit, bulged main wheels, clean transparencies… I was itching to begin putting it together. I decided I would like to lash out a little and get some cockpit PE detailing, and a transparency mask set, both from Eduard. From what I could see, little else needed upgrading. Eventually, in 2016, I made a start. I followed the instructions, and started with the flight deck and nose assemblies. While the PE set included a lot of new parts for the navigator and wireless fittings, I reasoned there was little point going boss-eyed trying to fit them as they’re not visible once the flight deck is installed in the nose parts. I encountered a small amount of mis-alignment with the fuselage nose sides, but a smear of filler solved that. Next was the wing spar section. I loved the way the kit had been designed to essentially follow exactly how the real thing was constructed. No issues encountered here, but if I build another I won’t bother painting so much that won’t be seen! The nose, central spar and rear fuselage came together and the characteristic drooping chin became apparent. Some variation in the thickness of fuselage windows meant I had to sand them down. A drop of gloss varnish after finishing would restore them to something with a glint, event if you couldn't see through them. Next came the wing and engine assemblies. I had a lot of problems with the fit of the nacelles on to the wings. I thought at first I may have inadvertently swapped the nacelles over, but the problem persisted. Some rude words, a fair amount of filler, careful sanding and replacing panel lines followed. I was not really happy. A note about the construction sequence might be prudent: The engine chin radiators really ought to be fitted at the same point as the nacelle halves are assembled. I followed the instructions, and found it very difficult to insert the parts through the aperture in the front and fix them. I got there in the end, though with some vocabulary extension. The main undercarriage legs are well detailed. There’s a lot going on, and inevitably a lot of it all but invisible when finished. Still, we know it’s there. I didn’t like the vague way the rear main wheel strut is located through a gap into an invisible location hole within the nacelle. It took several attempts, and in the end I’ve cheated with a drop of cyanoacrylate securing the strut to the edge of the slot. By the way, I tend to paint tyres using Hu32 Tank Grey. 33 Black is just too black. I find the grey better matches the colour of rubber tyres. I wanted the model to be shown in an early stage of preparation for a mission. I have a photo in mind of just such a situation. So, the main bomb bay doors were posed open. There’s not much to locate them, spatially or physically. The first attempt was very flimsy, the centre doors held only by the extreme edges at each end. I decided I needed to add a styrene strip reinforcement along the centre line to give the door edges something to glue to. Now it’s very firm. With the wings and fuselage assembled, the empennage was fitted quickly. I posed the rudders slightly offset, because they are separate items. The horn balances were very vulnerable, and indeed broke off pretty quickly. I stashed them safely, and eventually drilled the weighted end to take a short length of fine brass wire. This was glued into a hole in the top of the rudder near the end of the main construction. Other vulnerable parts to note are the aerial masts and the DF loop fairing. There isn’t much in the way of a peg and hole to locate these, so again I drilled them to take short brass wire pegs. I still managed to knock one off, but at least it was easy to relocate! Before long, the main construction was complete. Time to get painting. I grew up with enamels, and find acrylics a dark art. Nevertheless, I had opted for aftermarket transfers for this Whitley (the kit covers a plane from March 1940 and one in 1941, outside my preferred time slot), and I thought it might be an idea to acquire the same maker’s paints. With luck that would avoid a while sequence of gloss varnish before the transfer stage, as the paints are already effectively gloss, or at least a good satin finish. I wanted the enamels, but they appear to be like hen’s teeth. I could get one colour, but not the others. I was almost resigned to the good old Humbrol enamel route, when I thought it might be worth tracking down sources of the suitable acrylics from various places. Finally, I managed to get the brown, green and black, from two different suppliers. The next question was should I break out the airbrush? I had never airbrushed a model aircraft from choice before, but I thought it was worth the go. The transparency masks went on over a couple of days. I placed felt tip dots on the parts so I could find them on the sheet as I worked! Like acrylics and airbrushing, this was my first precut mask experience. It wasn’t entirely successful, but that’s my inexperience showing through. I painted the undersides first, having laboriously masked off the upper surfaces. Acrylics dry quickly, so I could get the masking off and consider the reverse for the upper colours. Of course, idiot here didn’t think to prime the model first. So, the black didn’t adhere to the surfaces properly, and lifted as I tried to mask it for the upper colours. Swear words at my own stupidity. Why didn’t I prime it? Gawd knows! Anyway, I gently rubbed down the black paint so the loose stuff flaked away. I’d make good later, and decided to press on with the upper surfaces - this time spraying primer first. I managed to get a good coat of earth brown on. It was slightly patchy, but I felt this would help represent a somewhat weatherworn aircraft. After my experience of masking the black, I really didn’t trust the brown - even on a primer layer - so I brush painted the green. There is some discussion online about whether the edges of the camouflage pattern ought to be feathered. It boils down, at least for 1/72nd scale, that if any feathering was evident it would be all but invisible at scale. A hard edge is was then. Finally, I brush painted the black undersides, and I was more or less back where I started. The transfers went on okay-ish. Sadly, the printing hadn’t been quite on the mark, and a fine white line was evident along the edges of the grey code letters. Too late now. Live with it. I used some of the smaller detail markings from the Airfix sheet. While I used the traditional setting solution to get the transfers to sit down nicely, there was some silvering where they went over the brown paint. Another lesson learned. The sprayed paint had ended up slightly duller than the brushed paint. Perhaps brush painting isn’t so bad after all! Once the transfers were dry, over a couple of days as it turned out, I got some matt varnish on to flatten everything down and protect the transfers. Finding a good matt varnish is a trial, I find. I know there are some good makers out there, and such products can be purchased from some importers. However, in my “day job” I need some good varnishes, and the pre-thinned airbrush ready enamel varnishes from Phoenix Precision paints have been a god’s send to me. Additionally, their matt varnish is actually what is says. It dries absolutely flat, with no shine to speak of. A day or so later, it was time to remove the transparency masks. Not so clever. The build of up paint, allied with the lack of primer probably, meant some of the panels came away with the surround paint. Perhaps I should have run a sharp scalpel blade around to help. Inexperience shows. Anyway, it wasn’t a total disaster, and some careful retouching using an old draughtsman’s bow pen (I use it for lining coaches in the day job) repaired the worst. Where I had rubbed down the sides of the fuselage, inevitably some of the tiny oblong portholes had become frosted. I dabbed some gloss varnish on them. The final step was to rig the wireless aerial. Originally, I built the model with fine copper wire for the antenna wire, but I've since fitted EezyLine. Now it's much less vulnerable to damage. Just to fit the props, access ladders and the plane was complete. I set up my light tent to play dioramas. Thanks for looking at one of my older builds. Since completing this model, my techniques have improved. My painting, however, still remains a bit hit and miss! The RFI can be found here:6 points
-
I have not forgotten about the Shackleton, just work on it has been a little slow what with Christmas, sorting my aunts bank accounts etc. Any way the photo shows the paint work done an a start on the decals. Since the photo was taken I have finished the decalling and started final assembly. there will be a bit of touching up of paint no doubt and some extra bits like aerials to be added, but the holes have already been drilled, but might need cleaning out. it is rare I build anything this big and it does seem to take a lot longer. Still, now the decals are on I feel like I am getting there.6 points
-
We have duvets in county Laois. They run wild, west of Kildare. Not easy to catch, but once caught they're easy to domesticate.6 points
-
Welcome back all and a belated Happy Christmas. I finally got back at the bench and glued all the internal bits ‘n’ bobs in place: Next I added the vertical hanging belts as they are shown in this picture (thanks and copyright to hochmuth): However, while they are visible in the shots below, once the fuselage is closed up they are nay on invisible. This was a tad annoying so I took some artistic licence and added extra belts to the seats (care of take-away tin foil) which look much better as seen in the three shots below. It was quite a faff to get everything lined up and fit the IP panels in place. The kit originals barely fit so it’s hardly a surprise, having used them as templates that my versions were tricky to fit too. Anyroad I got there in the end. Sorry for the repetition and somewhat blurry focus. I now the foot pedals are far too close to the fore seat, but it’s for someone with short legs… Roight up then, now that stage of the faff is complete, I can get her zipped up and move onto other stuff. The empennage should be reasonably straightforward, so that’ll be my next task.6 points
-
Hi all, First of my entries is Hobby Boss's Typhoon SSBN which if nothing else will be an interesting contrast with my one and only other submarine model - Bushnell's "Turtle." Here's the kit, Eagle eyed observer's will notice that I'm missing a fundamental item here - Silly me forgot the clock... Would the picture data do? Nutrition.... Coffee and a toffee, the breakfast of champions... Half an hour or so later it's built. Break for something more substantial. I then went over to another Blitzenbuild project, supervised Mrs B with her Airfix Quickbuild Splitscreen Camper (Don't think she entirely enjoyed that build) and had a nap. Back to the Typhoon - Quick coat of primer brushed on, then the waterline was roughly painted on in white prior to it being masked with 0.4mm Aizu tape. Revell gloss black upperworks and Vallejo Chocolate Brown for the underside - Promise that it'll be given a coat of matt varnish before completion. Then it was time for the masking tape to come off and to call it a night. Finish it later. KR's IanJ5 points
-
OK...basically done with this one. At this point the landing gear is on, the props are on...the yellow band is painted, decals attached. I am letting it sit overnight and tomorrow I'll give it a bit of varnish and some weathering befitting a surplus aircraft flown by a fictional rebel leader in the Middle East, i.e. dust and smoke. White base beneath the yellow... Yellow band, hand painted...slightly scuffed. Decals are ready...lots of MicroSol for these babies...I will be portraying Piotr Skut's aircraft, the one that Tintin shoots down in the sea. It does not have any markings other than the roundels and the tail fin flash. --John5 points
-
Okay, I'm calling this one done! And a photobomb from my build in the previous Blitzbuild. I wonder what I can build for the next one...?5 points
-
Next the link fork and the upper tube Spinnyspin time maybe, think about that during dinner5 points
-
So you may wonder if I managed to find the thin walled circle I needed for the Wokka The old WHS sheets I mentioned came up trumps A major drawback of Letraset is that it can distort during the rubbing down application procedure I found many of the right size in Set1 and applied them to a sheet of blank clear decal paper Two are all I need Look OK to you? They suit me sir, suit me On the piece of decal sheet which is to donate the serial number to the airframe, awaits a stiffening layer of varnish Might not even be needed but in for a penny Small white dots will be added to the centres to replicate these Now to work out the main gear leg construction...5 points
-
Dear members, Some pictures of an old model what I build years ago when there were hardly any Fokker Model Kits in the modelshops. The fuselage and wings are made of wood, the other parts are made of plastic. The cockpit was vacuformed over a form, of wood. Nowadays live is much easier, just buy the Special Hobby kit ! I hope you like this old workhorse, which performed very well in Finland. With kind greetings, JohnHaa5 points
-
This kit was a bit of an uphill struggle to be honest, largely due to the rough surface texture and some alignment issues. It's by F-RSIN and is injection-moulded rather than resin. It was worth the battle though, just because it's such a cool subject.5 points
-
I made next steps with corsair. I made "sidewalk" on the wings and scratch it. Next, I made some dirt using oil paints for artists and prepare template for roundels on fuselage and wings and at this moment I was pleased with effects. At next step I used salt technique and it made a disaster. I'm not happy with dots, spots and stains on the fuselage. I will try to paint it and make effect again. Also, I have to make new template for markings, because it is very distorted now. If you have some ideas to help, describe that please.5 points
-
Good evening Today I started to paint the kit Patrice5 points
-
5 points
-
Hi all, Continuing with the fuselage, note in the upper part of the image the wing root fairing on the Aeroclub nose has been shimmed to give a better fit with the kit wings. You can also see that I have added some strip plastic to the rear fixed section of the cockpit. The PR XI uses the shorter (less tall) fixed section but the kit gives us the taller piece. This also presents us the first real problem in this conversion. The Airfix fixed rear section is shorter from front to back than the same space in Tamiya, ICM, or Revell kits by 1/32" to 1/16". I am not sure which is correct, but the shorter length here means that most vac formed replacement canopies will be too long. However, if you trim back the fixed section then most vac formed center sliding sections will also be too short. This is not easy to fix, since the bulkheads and their assemblies fit into designated slots so they cannot be moved to fit a different set of measurements. I wound up making the rear section longer to fit the vac piece, which allowed a reasonable fit for the sliding center section. In addition, note that the Airfix kit's windscreen opening was slightly too long at the front when I installed the PR XI windscreen, which has a slightly blunter front end. Finally, I sanded off the Airfix lip along the sliding section's edge; this feature is present in the pressurized PR XIX but not in the unpressurized PR XI. On the port fuselage half, note the series of narrow strips of plastic over the joint. Strips are easier to glue in and make a stronger joint that either a simple butt joint, or adding sheet plastic versus the strips; the sheet plastic would need to bend in two dimensions which will leave gaps when glued in. I also decided early on to replace the kit's short propeller assembly pin with nested brass tubing. Various plastic bits and a liberal amount of epoxy glue yields a strong support for a free-wheeling propeller when the model is done. Moving back I used most of the Barracuda cockpit upgrade resin pieces to enhance the detail. I went through my parts stash and found several pilot entry doors. I picked the longest one I had and cut an opening in the port fuselage to match. Moving back behind the cockpit, remember that we need a new antenna added; I made a narrow slot at the appropriate location on the fuselage spine and added extra plastic under the opening. When I made the antenna from a wooden craft stick, I left the bottom of the piece longer to make a stronger joint. Whew, I'm tired just writing this all out. Tune in next time! Cheers, Jim4 points
-
Fixed the missing PE parts, the little hairs and the unpainted hose top that annoyed me last night on one of the aircraft. The rear gear positioning is too short on eduards kit as pointed out by @Joss Joss have you had chance to look at it yet? I’m thinking of repositioning like this below - what do you think? Eduards instructions: Suggested new angle / position: Real ref: note the rear pivot point on the gear leg at the same height as the door top where it meets the fuselage.4 points
-
Thanks @AMB - I appreciate your comments. Reading over my post I now realize how "down" it is. This model has been getting to me more and more over the last few weeks and I think my frustration is starting to show. I'll make an effort to be a bit more upbeat next time around. I may even start another build to provide a diversion when things start to get too much with this, though hopefully I am getting towards the home straight with Fly's poor effort and will soon be able to put this one to bed4 points
-
Thanks Dennis Thanks Cookie, glad you like her Thanks Adrian - I don't know the Airfix kit but I'm sure you'll make a good job of it Thanks matey Thanks Joachim, very kind Cheers Giorgio - and gloss coated too Thanks Stef, nice of you to say so Cheers Rob Oooh, not sure about that but thanks Graeme Cheers Simon, she's up there now (see below) Thanks Neil - nice Mk I Cheers Stu Thanks Keith, glad you like her and sorry I couldn't do your childhood haunt Your wish is my command Stuart:4 points
-
4 points
This leaderboard is set to London/GMT+01:00


