
Leaderboard


Popular Content
Showing content with the highest reputation on 23/12/19 in all areas
-
Smer kit, mostly OOB with a scratch interior.26 points
-
Half and hour later and there's a pile of masking: Pretty happy by and large: None of the kit windows fell in and none of the 'scratched' opening windows fell out. Result! I'll need the usual toothpick tidy up but nothing too serious: I even got that thin band on the rear turret! … and the rigging's still in one piece! Now I can go to bed a happy man25 points
-
What a kit! Rough does not some it up. Thick plastic. Loads of moulding defects. Poor fit. A lot of filler and sanding required. Very grainy surface. Absolute;y loved building it ! It was almost like making an early resin kit, with lots of surface imperfections and a lot of part preparation. I don't know why I went for an airliner, not usually my thing, but a change is a good as a rest. Thanks for looking Angelo.22 points
-
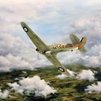
Hello I've just finished the new Tamiya 1/72 Bf 109G. It has some clever design features that make it a joy to put together, but it's expensive and has less options than its 1/48 brother. For the price I think Tamiya might have at least offered the 20mm cannon gondolas for the R6 version. As it is you just get a drop-tank. That said, it's a little jewel and possibly the best Gustav in the scale. I painted mine as an Erla-built aircraft flown by 10./JG 11 in May 1944. I used the national markings and stencils from the kit, which went down well with the usual setting solutions. Merry Christmas to all!21 points
-
Here is my last model of 2019, a P-38G from TAMIYA at 1/48. More pics After publication... I take this opportunity to wish you a very happy holiday season!19 points
-
Hello all, Here's my last build of the year. It's the 2002 Revell rebox of the Hasegawa Harrier GR.7 in 1/72. As it turned out it's more like an AV-8B with a new nose part, which doesn't make it quite a GR.7. I added an aftermarket (undersized, sadly) seat from Pavla, Aires exhausts, and Air Graphics BOL rails. I also scratchbuilt the ECM/RWR/whatever things they are at the tail fairing. Painted with Hataka lacquers, which was a nice experiment, and used the kits decals. I decided to paint some bits in the older green colours after finding these nice photos of a base visit in 1997 http://www.hottail.nl/basevisits/1997/1117-Laarbruch/Index.html I hope you like it. Thanks for watching, merry Christmas and best wishes for the new year.19 points
-
F-86F-30 Sabre 67th FBS, 18th FBG Korea Recently completed and last for 2019, is this fighter-bomber variant of an F-86 Sabre using the 1/72 Academy kit. Built mainly OOB but with scratch built bomb pylons, resin bombs and a mixture of kit and DIY decals. WiP here: Thanks to Martin ( @RidgeRunner ) for helping with the decal fonts and stuff. Thanks for looking. Happy Christmas to all. Stuart18 points
-
Hi all. I recently finished the long awaited F-14D by AMK. It is a lovely kit with loads of oprions. The model was built straight from the box, apart from a Master pitot tube. Alclad black primer and Gunze Aqueous paints were used to finish the model and Abteilung oil paint for weathering. The decals and weapons used are included in the kit. Thank you for watching.17 points
-
Following on from the WIP thread for this kit, here are photos of the completed model VP974, 11 Gp CF, Ouston, 1961 (3) w by Philip Pain, on Flickr VP974, 11 Gp CF, Ouston, 1961 (5) w by Philip Pain, on Flickr VP974, 11 Gp CF, Ouston, 1961 (10) w by Philip Pain, on Flickr VP974, 11 Gp CF, Ouston, 1961 (17) w by Philip Pain, on Flickr VP974, 11 Gp CF, Ouston, 1961 (19) w by Philip Pain, on Flickr It is finished as a DH.104 Devon C.1 , VP974, of 11 Group Communications Flight at RAF Ouston, Northumberland in 1961. It had previously served with 13 Group CF which was at Ouston from 1955. In the late 1960's VP974 was converted to a Devon C.2 in which role it served until scrapped in 1980. Thanks for looking.16 points
-
Awww thanks Cookie Couldn't have done it without the new airbrush you and PC gave me - thanks again for the mojo boost! Another one! Thanks John You're very welcome Chris Thanks Simon Go on, you know you want to! Thanks Stew, appreciated matey Thanks Jason, pleased you like it Thanks Tom, much appreciated Thanks Steve Any artistic display is purely accidental… Thanks Giorgio - and I gloss coated, all your fault! Thanks Roger, and seasons greeting to you and yours What's next? Aerials, that's what, and lots of 'em… Thanks John Thanks Terry, very kind Thanks Heather I suggest you tidy up the shelf before the teetering leads to a disaster! And should you end up leaving the Sunderland on the bench, I'll certainly be watching! Slow down you lot, there's still a lot of stuff to do, most of it nerve wracking! Aerials. Lots of aerials. Easy one first: Right, I definitely need to clean up the canopies first and dot paint the white bits. Lots of build up and the white primer's showing in quite a few places. Rats. Aerials. Four on the top already stuck in, sixteen - yes SIXTEEN - on the sides. PING ALERT! PING ALERT! Managed to get these off with the Platz: … and these with the PE cutters: All I need to do now is stick 'em together with Gator's Thin and make sure they're straight. I held the plastic bit in some tweezers, put a spot of GGT on the end and pressed it onto a bit of PE taking care to line it up. If I was lucky the PE lifted off the bench and stayed there. Most times it stayed on the bench, or twisted, or fell off and stuck to the mat. Of course I couldn't breath (or curse) for fear of blowing something out of area. One bright idea I had (?) was to place them on a PostIt - this made sure the 'flat' alignment was held and I can scrape the dry parts off later (I hope): Couple of bendy ones but I can straighten them later. Right, canopy clean up.15 points
-
Indeed. Thanks John Thanks Simon, kind of you Thanks Mun! I know, but they're nearly there and the last thing to do Thanks Bill, appreciated matey Marabu Landing lights in. I'll push the bulb holders down when they're dry: Only one big one left Of course the kit clear parts look awful: Too small. So they were replaced with Sellotape Diamond: Better. Front turret cleaned up: i used one of the S-M 'fine' blades, the chisel one, cutting down the line and then pushing the excess paint away. Easy(ish). Now for the PE on the cleaned up canopy. How the heck are you supposed to glue those straight? Oh, now it's dropped off and… where the heck is it? See it? Middle of the photo… it had rolled off! Stuck on now with the wipers: What do you mean you can't see the wipers? Not a good close up but probably my best painted canopy so pleased enough. Aerials. Stick 'em in and, er, make sure they're lined up while they dry13 points
-
Hello! I start to build characteristic model of Corsair. I found one photo and advanced workshop on polish forum. I try to make some of that. Revell's model is quite detailed, but parts are not very good mismatched. Model is used to try make advanced weathering. I place some photos below. I finished at painting camouflage and preapring to make dirt, oil and surface scratch.12 points
-
These have been built for a family member of P/O Handyside. He flew both marques and was awarded the DFC on D Day for destroying five armoured vehicles threatening to over run an allied position. The kits are a Hasegawa Hurricane with conversion, and the Typhoon the sublime Eduard Ltd Ed.11 points
-
Tamiya kit from a friend (Hastily built for another friend)...I took the pics before I added the dust, try to picture it yourself (hastily sprayed Buff colur) and I don't have the model anymore....thanks so much for looking, Owen10 points
-
18 of the 62 20mm AA guns have been completed. Having done so many you get faster. When I started, each one would take 15mins to make. Now they take 8-10mins each. Good thing I am getting faster, as it would take an estimated 6 weeks of my current daily modelling time to complete all 62. The main guts of the superstructure has been constructed. There are plenty of little bits & pieces like railings and ladders etc which still have to be done, but they will go on once I formulate a paint plan. The problem which is starting to show itself is that most of the large imagery in the Pontos instructions have been made. Which leaves the smaller, non descript stuff which is harder to see & decipher and a little ambiguous in regards to using the Pontos PE or the PE that comes in the kit. But having come this far it should be something I can figure out easily enough...10 points
-
Thanks Giorgio! Yeah, @Procopius convinced me a while back that Tamiya is the only yellow worth spraying, and I should have bought some more! It was successful for my second goal, but maybe not as important for the first. Thanks David, and you were right about the transparency of the Vallejo versus other metallics, but I'm glad I used blue for the masking at least. I added the masks straight onto the blue undercoat, and masked off the black stripes while I was at it. I'm attempting a varied , non-pristine finish using Vallejo Metal Color Aluminum, Dull Aluminum, Dark Aluminum and White Aluminum. First light coat of Aluminum applied. I forgot to mask the wheel wells, so will have to carefully reapply the YZC to the main spar again. A coat Dull Aluminum applied to the wings. I just kind of randomly applied all four aluminum shades, looking for a shiny, but varied finish - returned to a double action airbrush for this. Unfortunately, the wind was picking up and quite a bit of dust managed to attach itself the Mustang. Ready for white paint. All masked up for the white and Olive Drab for the anti-glare patch. The big reveal. Some clean up required on the black stripe and around the star. Test fitting the flaps- the 'metalized' leading edges don't show up at all! I'll have to figure out something there. Same with the main gear doors - may have to invest in some foil. Lots of clean up to be done - there always is, but overall I'm happy even though I'm out of practice.10 points
-
Just made it after dropping her. It's the Pegasus 1/72 Macchi M5 seaplane fighter circa 1918. Typical short run that required replacing the main wing struts as they appeared too short but worth the effort. Regards, Steve10 points
-
Been putting the twiddly bits on it, nearly finished Devon C1 (14) w by Philip Pain, on Flickr Devon C1 (13) w by Philip Pain, on Flickr The finished photos will be posted on the 'ready for inspection' thread in the next couple of days.10 points
-
Eduards very nice little F5 F-6 hellcat. built as a post war drone, keeping with my mini theme of aircraft in strange markings. a lovely model. yes i know the prop is not painted correctly and is abit wonky, mr postie rammed the parcel through the letter box and the prop was badly damaged, so i have carefully glued it back together (after breaking it a few times) so i am not touching it!!! thank you for looking9 points
-
Finally got around to masking up all of the transparencies, masks were hand-cut in Tamiya masking tape, using a scalpel. Fuselage windows were rather tedious to cut out, basically a rectangle with rounded corners, and were more awkward than I first thought they would be. The rear starboard fuselage window and door window are simply two squares of tape, again with rounded corners. The cockpit canopy has been masked without making any attempt to create the narrow frames between the separate panes, these will be achieved with very thin strips of White decal once all of the exterior airframe colours have been sprayed on. Now that the fuselage window masks are in position, it can be seen how I carefully measured and installed the Orange curtains in the fuselage interior before assembly, the intention was to have a small section of Orange curtain 'just' showing to the forward and rear section of each individual transparent window pane, once the fuselage is sprayed, and fortunately that is how they have turned out . The rear door opening was masked over to stop any paint entering the fuselage interior, and a quick, light coat of Grey primer has been sprayed over the wndow masks before the White is sprayed onto the fuselage exterior surface.9 points
-
I hope these arent aren't too large ....9 points
-
Last completion for 2019. Nice model that builds up into an impressive replica. Seriously, don't waste any time on the fuselage interior aft of the cockpit as it won't be seen & is in any case pretty sparce. My biggest issue was with the transparencies - the starboard side cockpit window went completely opaque, the port side one is in back to front (I really don't see how that was possible but I managed it!) & the portside after bubble window disappeared inside the fuselage when everything was buttoned up. I managed to get it out but it can't be fitted from the outside so I have simply used Kristal Kleer which of course results in a flat rather than domed finish. I REALLY wish model manufacturers would design kits in a way that allowed clear parts to be fitted from the OUTside at the end of the build because in addition to the above problem, it would avoid the risk of the clear parts getting sh1tted up with detritus from sanding etc. - ah well!9 points
-
Hello folks, This is my latest build, finished today, a M8 Greyhound from Tamiya, code 35228 plus one Quad Gun Trayler M55 from Dragon, code 6421, in 1/35 and many scratch build parts too, Colombian Army version. I decided to apply a new more agressive weathering on it. The end result looks much better to me8 points
-
I’m going to build this: The picture shows the mince pies that I hope to be eating when I start on the 28th but I haven’t made them yet! Happy Christmas! ho ho ho Adrian8 points
-
Fake noos. I think we’ve all had enough of experts. You can prove anything with statistics. I shun your so-called ‘evidence’8 points
-
We have found through bitter experiences that the 100 post rule works out quite well. you should not be joining just to sell kits, it is after all a community and you generally only get out what you put in. We welcome all modellers no matter there level of experience and we like to think most of us get along, help people out and share experience which in some cases is borne out of failure with projects, and sometime by winning wiith projects, the use of the buy / sell area is there for people who want to take part as whole and we can't see the minimum requirement changing anytime soon. Julien8 points
-
Straight from the box with a Pavla interior7 points
-
Alright, for my first non-sci-fi jet completed in many many years, is Academy's 1/72 Super Hornet. This model was started by a request from a coworker who wanted to give it as a Christmas present to her Uncle. Like myself, he prefers the F/A-18F, so that was a plus. I won't go into the trials and tribulations of the build other than to say that Academy has made a great kit of this aircraft, and any problems were the impetus of my own dupidity... Build page is here... Sure there are some Push-Fit gimmicks that can be done without, but just cutting those off certainly help with the fit in some places when done so. The detail though is sharp and looks good, and like the Revell it has full trunking and better cockpit detail than the Hasegawa kit. I do wish the elevators were separate, but at least they were not molded with the fuselage, which made drooping them easier. I also decided to drop the slats and flaps, which required a bit of cutting and additional plastic to be added. All-in-all, a nice kit and one I will be buying again for my own shelf! All done and complete, and time to go! I used some smaller boxes to give support to the wings and nose, and toothpicks to keep the lid from pressing down too far. And thus ends that build. Now I'm taking a break for a week or two before I retreat to sci fi and my USS Falcon build. Model on! Thom.7 points
-
Model T 1917 Touring - 1:35 ICM With Anzac Drivers (1917 - 1918) I'm not really a vehicle or figure modeller, but I do enjoy popping into this forum to other peoples work. When I saw Mike's review I jumped at the chance to actually build it as I thought it would go well with some of my WW.1 1:32 aircraft builds.. Also provided for review were a couple of figures in an 'Anzac Drivers' set. The figures are intended for the Model T LCP, rather than this kit, It is beatifically moulded with very fine detail. I build up the engine and fixed it into the chassis along with the axles and exhaust before painting, as I felt that it was simpler than trying to glue it together as pre painted sub assemblies. I kept weathering fairly light as I thought that as a staff car it would have been well kept. just a bit of dust and a few bits of scuffing here and there. Better include a picture of the engine. The bonnet is removable and a very tight fit. (I see that the white dot near the fender is where I've knocked a small 'loop' off while taking the bonnet off for the photo. I'll have to repair that). As they were designed for the wider bodied LCP kit, I couldn't fit the figures in side by side, so just used the driver. I had to remove the ffot pedals, and trim the drivers left toes off in order to fit him in. The gunner I left out will probably go in another vehicle. For now he is sitting on a dice! It is a lovely little kit, I'll certainly be making more as I already have the Standard 'B' Liberty truck lined up for a visit to the workbench. Thanks for looking, John7 points
-
I've far too much respect for you lot to think that you really believe such nonsense so let's dispel some myths. You learned to do this stuff yourselves before you really learned to talk properly. It's called 'drawing'. Here's a scrawl to explain: Bloke called Euclid banged on about it in his point-line-plane postulate donkey's years back - mad keen for this geometry stuff the Ancient G's - when they weren't shagging anything in sandals or with hoofs. In the above sketch, everything is still of course on a flat surface, even the shape giving the illusion of perspective. (Hat tip to Filippo Brunelleschi for giving us the understanding to consistently create such illusion of depth on a flat surface.) A nice image here that shows both the difference with an actual object done in CGI or CAD compared to a flat drawing (i.e it gives the illusion of being a 3D dimensional object): - but - as importantly - the similarity of it, in still being made up of points/lines/planes to describe the overall object mesh. Where all the numbers come in is simply that each point has a unique position in space, based generally (but not always, depending on the software settings) upon the convention of an: x - horizontal axis y- vertical axis z - axis perpendicular to the other two (giving depth/perspective etc.) 3D in other words - where each point (joined by lines to its neighbours) has an x,y & z number describing its position in space. You can thank René Descartes for this co-ordinate system - who also thought (therefore he was) but generally left the livestock alone. Still points and lines though - you with me? The spline curves I mentioned? Points and lines again! This time, the line (referred to now as a spline) joining any two points is a curve, the direction and degree of curvature being controlled from each end by control handles (those things that look like a set of oars projecting from the sides of each points). Curves = chords = wings. That was all I did in the CAD stuff above. Alright, the software does take some time to learn in order to integrate various processes in the right order but - and this is the important thing - it's all just points - lines - (aero)planes.... You knew didn't you, that this explanation would lead to the inevitable, nay irresistible punchline: Brucie: 'What do points mean?' Audience: 'Prizes Aircraft!!' 'Tis easy to make it a look all flash & shiny - whether it's accurate is another matter! I need to go back and adjust the profiles that define each end of that wing section more precisely before risking a test-print Crisp. That sounds great Steve. I'm always attracted to events and people of that nature: there can be too much rationality in the world sometimes. That thought - however misguided opportunistic - has already occurred to me. 🤦♂️ If I treat this build as a CAD/printing learning exercise out of a combined love for the Vixen and old kits, this may help me develop sufficient skills to be able to integrate with brass and vacforming for a fully scratch-built future project. (Parnall<cough>Peto<cough cough....) Hope the above is of some use Heather. Far be it for me to fan the flames of wanton speculation Bill & Ced but between judicious use of brass and the 3d printing I see no reason to suppose that we can't have a decent crack at said gubbins. Bill & Ced? Wasn't that a film? Something about an adventure? Oi you. He's bad enough without the peer pressure. It's a trap Pete - it's gotta be a euphemism for summat. Dear friends - I'm logging off of all online avenues for a few days over Christmas. I'll still be fiddling with sundry Vixenry of course - due in no small measure to the generosity of James lending me his Buttler and Franks volumes to read (which I shall begin forthwith over cocoa later) - but it only remains for me to wish all of you on here: Take care of yourselves and those you love. Eat too much and drink incautiously. But never try to crack a walnut with your buttocks. See you in a few days. X Tony7 points
-
Photobucket is done with me. On to Imgur. My Tomcat progress, hope to get some more done over the week or so of holidays and slow down at work. Rapid black based then the standard late 80's/early 90's TPS grey scheme on this NAWC Strike Test F-14A (202). I thinly coat the black base with the primary grey, then go "up and down" one grey scale for some slight weathering and paint maintenance work. Cheers Collin7 points
-
I hope I don’t start snoring. Y'see, I really would like to learn about this stuff. My problem, though, is like Homer Simpson. His head couldn’t take any new information without older stuff being pushed out to make room.7 points
-
With a number of members of the Britmodeller community currently working on models of early Mustangs as a part of the Group build, I thought it worthwhile to point out a couple of details regarding the early Allison engined Mustangs. First and foremost, the cockpit floor on the early Allison Mustangs is curved and made of metal. Why? Because it is the top surface of the centre section of the wing. So the cockpit floor is basically the top surface of the wing with various mounts, brackets, conduits and the like added to which are fitted those items of cockpit equipment that mount to the 'floor'. Being metal, it is painted the same basic colour as the cockpit sidewalls. It is definitely NOT wood! Note: the Merlin engined Mustangs, they increased the depth of the fuselage from behind the cockpit forward, to accommodate the increased depth of the Merlin and also to route cooling lines from the engine to the radiators. As such, they then added the FLAT wooden floor which sat above the curved wing surface below. The wooden floor was also painted, the paint being mixed with a non-slip additive - basically fine sand - and to prevent water, oil or other fluid damage to the wooden floor it was noted in the maintenance manuals that it should be kept in a painted condition. The woodgrained floors are a post war, shiney US P-51D warbirds affectation that is not correct for wartime service aircraft. Something too that has become a bit of a modellers 'thing' to "add interest to the cockpit". For those interested in detail of the cockpit of the RAF Mustang Mk.I, I provide the following photos and descriptions taken from the Mustang Mk.I Pilots Manual AP2025. Mustang Mk1 Cockpit Front by Colin Ford, on Flickr Mustang Mk1 Legend by Colin Ford, on Flickr Mustang Mk.1 Cockpit Port by Colin Ford, on Flickr Mustang Mk1 Cockpit Stbd by Colin Ford, on Flickr Note that in one of these photos the pilot's seat has been removed to give a clearer view of some of the cockpit controls and fittings and some items of equipment (eg IFF controller) have been removed for security purposes. There are a number of detail differences in the cockpit layout of the Mustang Mk.IA, key amongst those is the deletion of the nose gun charging handles in the upper corners of the control panel and changes to the armament control switches. Note how in the key they also mention changes relating to certain modifications across the Mustang Mk.I production groups and where certain RAF modifications were implemented - or not. Hope the above helps those interested in the early Allison Mustangs.7 points
-
DHC 6 Twin Otter -Trans Maldivian Airways. 8Q-TMA. Revell/Matchbox kit straight OOB apart from adjusting wing dihedral and adding additional float struts and steps. And an extra window in the passenger door. Painted with Citadel Ceramite White glossed up with Klear. Red is also a Citadel product - Mephiston Red. Black is Revell Aquacolor Gloss Black. Transfers from 26 Decals. I built this one as we flew in iton our holiday in the Maldives, so had actual photos of the plane to use as a reference. Hope you enjoy the photos. Thanks to all for advice and support.7 points
-
Macchi M.5, the most beautiful derivative of the Curtiss flying boat. The M.5 was extensively used by the Italians and their allies in the Adriatic, this model depicts the machine of Ensign C H Hamman, Porto Corsini Naval Air Station. Hamman received a Medal of Honor flying this plane on a bombing mission to Pola. Built from scratch in 1/72, with propeller hub and wind screen being PE from the spares box: (apologies for the tape; the glue on the base has not had time to dry) Markings are Italian, since the US naval station in Porto Corsini was formally under Italian command. Some pictures from the station here: https://www.history.navy.mil/content/history/museums/nmusn/explore/photography/wwi/wwi-aviation/u-s--naval-air-stations/us-naval-stations-italy/italy-porto-corsini.html Build thread here:7 points
-
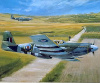
TBD-1A Devastator Floatplane - GWH - [1:48] Great Wall Hobby - 1/48 - Entirely out of the box WIP and more pics here7 points
-
Well, its end of year yet again, and i have reviewed my output on Flickr. Surprisingly i have not built/completed as many models this year as i have previously. This has been due to life getting in the way unfortunately, so i have relatively little to show. Apologies to some of the GB 's i signed up to and either never got started or failed to finish, particularly the D-Day Anniversary. Anyway here are my models for 2019..... Thanks for looking, and to all who liked or commented during the builds. All the best, Greg 1/48 Kittyhawk III 1/72 Frog Do 335 1/72 Frog Ju 87G 1/35 Tamiya Jagdpanzer IV 1/72 Revell F4U Corsair 1/72 Revell He 177 All this years builds, and any future ones are dedicated to my Father, who introduced me to plastic modelling when i was a child. He sadly passed away on 17 December after a brief fight with cancer.6 points
-
Not the most productive year, but I had a couple of bumps in the road along the way... which are thankfully behind me now. Merry Christmas and a Happy New Year to all! Aoshima Lamborghini Huracan Performante in 1/24 Airfix Triumph TR4A, 1/32 Airfix Austin Healey Sprite 1/32 Airfix Ford Escort, 1/32 Matchbox Bugatti Type 59, 1/32 Arii Porsche 911S, 1/32 Matchbox Porsche 935, 1/32 Airfix Little Owl, 1/1 (ish) Gunze Sangyo Lamborghini Silhouette, 1/24 Union/IMC Lola T70 Mk1 Spyder 1/25(ish) Here's hoping for a (at least slightly) more productive year next year! best, M.6 points
-
Hi All , Ready to go Boxing Day Ansett A320 . White paint stocks checked. Second hand kit seems OK Martin H6 points
-
Hi Folk,s well after two Spitfires and a figure for the three previous Blitzbuilds as promised a 1/48 0ffering in the shape of Revells F-16,picked up from Home Bargains for a fiver a wheels up build is in order.The fates have decreed no running around this boxing day so I should get a chance for a few trips up to the loft so a 26-27 build in order.6 points
-
Hello all! Here are 15 photos of my most recently completed kit, Revell/Monogram's 45 year old Dornier Do 335. This kit was from the most recent boxing of the kit, released in 2010.6 points
-
Hi Folks this is my latest build, not very much to say about it other than it was built straight out of the box, the only additions being a couple of Revell pilots. A bit of flash on some of the mouldings but once that was dealt with it all fitted together nicely with minimal filling. Only two disappointments, it was raised panel lines (I really don't like raised panel lines) and I managed to lose the '300' serial number that should have been either side of the nose. Anyway here it is, as always all comments and criticisms are welcome . Thanks for looking, I hope you all have a fantastic Christmas and a brilliant New Year.6 points
-
Last years Christmas present, just scrapes in for this Christmas. New nose, new canopy and spats. Home printed decals.6 points
-
Oh dear, that's not right is it? Better pull them off and check references. Out tonight so probably tomorrow.6 points
-
All done. Last completed built of 2019. ...more pics in RFI. Stuart6 points
-
Die-casts are available for people who don't want to do their own work6 points
-
A fun way of winding up your humans in the winter is to demand to be let out about 4:30 a.m. then once a human has wakened and opened the door you decide it's too cold/wet/snowy/foggy/dark to go out after all and head back to your bed. For some reason humans find that annoying.6 points
-
G'day people, Photobucket is not playing the game presently. Despite all their messaging spin to the contrary, I cannot seem to log in and have been unable to do so for the past few days. Not happy Jan! Anyhoo, I have been progressing regardless and I am using an alternate image hosting site, hopefully this works, I have just about got the airframe up to the painting stage. The tail planes are just dry fitted at this stage, as are the flaps, this is actually where I am at The fit of the front windscreen was not too bad, I only needed a thin swipe of putty to blend the clear plastic part into the surrounding airframe curves, Once I was happy with that, the next major job was to offer up the main wing assembly to the fuselage. Initially the fit was a bit frightening as there is a natural 'springiness' between the part forming the forward u/c bay and lower wing but some light pressure was all it needed to achieve a good fit Again, a thin swipe of liquid putty was all it required to blend in the front seam There is apparently another controversy regarding the u/c wheel doors. These doors were operate hydraulically and open when the undercarriage is cycled. The hydraulic pressure is supplied by an engine driven pump. When the engine shuts down the hydraulic pressure bleeds off with the result that the inner wheel doors sag open. The rate at which this would happen is the matter of conjecture and the arguments range back and forth due to various factors such as the quality and frequency of hydraulic system maintenance, general practice etc. , My take is that immediately after shutdown, these doors were closed. If the aircraft was static for an hour or so, the doors would be partially open. These doors could also be opened manually for maintenance just to muddy the waters further. I think that basically any position between fully opened and fully closed is okay - builder's choice. I have been playing around with both the doors open and doors closed options I like the look of both. Most builds seem to have the doors open while most of my reference pics have the doors in various states, several show them to be closed and I am leaning that way, Thanks for looking, cheers, Pappy6 points
-
Indeed (but Mrs F is more interested in the Whitby jet than the goths.......especially at prezzie times of year ) Anyways, it's not long 'til Whitby Steampunk Weekend on 8/9 Feb 2020 Altho' I'll be checking out the colour of the Alps that weekend, to see if they've returned to their proper colour Actually, We've been to Whitby when the Goth's are in town - it's terrific fun and a visual treat. Whilst you're at it. Are you really sure about the provided fuselage bits? or the misc. other bits come to think about it. All that's needed is a viable route after all Blimey.....My esteemed señior service colleague had just about convinced me that wings wos just 'planks'. I now see from the scientific evidence that he's wrong! (or at the least, they're quite complicated planks ) Yeah, that was exactly the phrase that sprung to mind when I looked at it! Yeah, me too. I don't understand what he's done or how he's done it or how he can do it so well mind you, but I shan't let that stop me being determinedly unimpressed...... Well what can I properly (and non-facetiously ) say Tony? Save that it's properly informative, interesting and inspiring stuff.6 points
-
"The Chetverikovs" Prototype, production, the last modification5 points


This leaderboard is set to London/GMT+01:00