Leaderboard
Popular Content
Showing content with the highest reputation on 18/12/19 in all areas
-
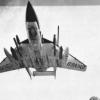
.....the RED ARROWS would have had the phantom as there display aircraft, imaging the noise as they tore across the sky in formation. Just a bit of a fun build to use seasonal colours! BIG thanks to stevej60 who interupted his holiday to send me decals for the fin and RAF lettering, top man. Good kit, any mistakes down to me, main colour is Xtra color red arrows red with everything else either humrol or vallejo. Stencils all from the kit. Merry Christmas everybody!. Red Arrows what if! by peter crossman, on Flickr Red Arrows what if! by peter crossman, on Flickr Red Arrows what if! by peter crossman, on Flickr Red Arrows what if! by peter crossman, on Flickr Red Arrows what if! by peter crossman, on Flickr29 points
-
Hello fellow modellers, this is my recently finished Clear Prop kit. In past years I somehow ignored the Japanese subjects, except excellent Tamiya or Model Graphic A6M's, but this year this my third Japanese kit so obviously something has changed:-) Yes, that was the entry of the Clear Prop kits on the market, which quickly jumped in my personal ranking on the top amongst 1/72 manufacturers. The level of details and moulding quality is simply amazing. This Ki-51 builds nicely and perhaps some of the smallest etched details are redundant, even in the plastic they look sufficient. I tried to model one of the machines operated in China with 6th Hikosentai. Built out of the box except the canopy masks which I replaced for Dead Design product as those in the kit are rather thick and not very precise - at least something what could be improved. Looking forward now for their next WWII fighter kit! P.S. A big thanks to Valerij! Cheers, Libor25 points
-
Hello folks, For my second "ready for inspection" post, here is my 1/48 Kitty Hawk Mig-25 finished in the lovely Ukrainian Air Force deco. All Barracuda resin sets have been used, namely exhausts, corrected nose and wheels, as well as Eduard sets for the intakes and cockpit. A lot has been said about KH kits and this kit in particular. True it's not an easy one but very rewarding when finished. Paints from MRP range, decals from the box and Flory models washes as a finish (I just love that stuff!). Hope you'll enjoy Phil25 points
-
Here is my latest completion, about 6 months' worth of effort in total. Tamiya 1/32 kit with some 1/35 figures, mostly from the Tamiya reboxing of the Italieri german field maintenance set. I've made a little vignette with a couple of figures before, but I would consider this project to be my first proper diorama. I maintained my work in progress thread over on LSP. I'm not sure of the rules here for linking to other forums, so I'll leave it off. Thanks for looking, comments and criticisms welcome!23 points
-
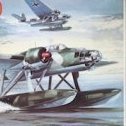
Have a nice day, ladies and gentlemen. Today I want to introduce you the model of very unusual aircraft. Judging by the unusual appearance of this apparatus, the French also smoked something very strong))).19 points
-
I was away all summer and got home at the end of October. This is my first completion since. It's the old 1/72 Airfix GR1 kit with Modeldecals. The bombs are from the Mbox Phantom. Not the most accurate kit of a Tornado but really looks the part to my eyes. ZA586 was the first Tornado delivered to an operational squadron. She was delivered on 6 January 1982. Sadly she experienced total electrical failure and crashed on Wolferton Marsh in Norfolk during a night training sortie on 27 September 1983. Navigator Flt.Lt. N. Nickles ejected safely but pilot Sqn.Ldr. Michael Stephens was killed. I don't know if ZA586 ever carried this loadout of 8 x 1000lb bombs for a 'bomb toss' or 'loft' delivery but IX Squadron did while based in Germany a couple of years later. To me, it just emphasizes what a total bruiser the Tonka was for ground attacks. Comments and criticisms welcomed. David19 points
-
This was meant to be a quick out of the box build - which then sat on my bench for months. With the start of the holidays I managed to get it finished - my first completed kit since February 🥺 Completed straight from the box with the kit decals, brush painted with Tamiya acrylics. Minimal weathering as I gather they kept these aircraft very clean in the 1930’s. Thanks for looking.19 points
-
James sent me some a couple of excellent images last night which - along with some experiments conducted on the new measuring rig - has caused me to revise my opinion of the accuracy of the Warpaint drawings for the rear of the aricraft. Rationale to follow after this... Pat, hi - nice to hear from you mate. That's a really tricky measurement to try and take from plan view drawings I'm afraid - the best I could come up with was something in the region of 4cm but I wouldn't trust this, especially in relation to the WP drawings. You'll give the pedants a heart attack CC! 🤣 You make a fair point Keith; one that's hard to disagree with. 😁 I've been reluctant to commit to any surgery until now as I still had a vague uneasiness about some of the results of the comparisons of sources I've been making. The two photos from James I mentioned above have been perfectly-timed in giving me two relatively undistorted views of the whole aircraft from side and plan views that have helped enormously to confirm my misgivings. Sir! Sir! His kit's bigger than mine! 😭 Disclaimer: not to be used for reference purposes... I'm hopeful that we've arrived at some kind of basis to start actual work now - at least when it comes to establishing the main dimensions that need correcting on the two kits to start with. I mentioned that I'd begun to lose confidence (in part anyway) in the WP drawings and in fact I had mentioned an issue I'd discovered with them a few posts back when mentioning that the tail region seemed longer than that of the more modern Airfix 1/48 plans. This issue confirmed itself last evening when I printed out both WP & Airfix drawings to scale and put them out on the measuring rig in order to cross-reference wingspan with overall length.* The Airfix drawings were spot on in both axes, whereas at the correct wingspan, the tail region of the WP ones is too long. That in itself convinced me that I was going to rely upon the drawings from the Airfix instructions as the most accurate guide when serendipitously, James' photos sowed up in my feed a side and plan view of the aircraft photographed in it's entirety with minimal distortion. This gave me an additional conformation. WP overlays first. (all photo credits @71chally) Now the Airfix offering: It shouldn't I suppose come as a surprise that in the modern era of CAD and LIDAR acquisition that the Airfic profiles turn out the most accurate - certainly the ones that I shall rely on from this point onward. Let's not be too harsh on the WP ones though. From the nose to rear of the canopy they are practically spot on (as evidenced in one of my earliest overlays against James' excellent side photo of XJ481s nose section) neither are the actual fin/rudder shapes of the WP in fairness that bad (see my overlay yesterday of that region shown well John's photo) so the error itself seems to creep into the booms and fuselage section about 3/4 of the way back, near as I can make out. I was conscious in the plan view photo that the nose of aircraft appears to be *ever so slightly* tilted towards the camera, this in itself would appear to account for the miniscule displacement of features when up against the Airfix drawing - so paradoxically gives me even greater confidence in them now. These drawings are, of course for a FAW.2, so when it comes to boom length I'll have to amend the data points for that myself otherwise it's now time to push on from this preparatory stage (they'll be others late of course regarding specific regions) and begin to block out in broad terms the changes I need to make on the individual kits. More in due course. Tony *N.B. A friend - observing this rig - promptly christened it 'John le Measurer'. Thus shall it be named henceforth, in tribute to that man who shall forever be the blessed Sgt. Arthur Wilson.12 points
-
Hello Boyos! Quick update I finished up the LRMTS. LRMTS Article It’s a short article this time so head on over here for the complete write up. Of note the clear cover was milled vs. vacuum formed. More soon thanks for stopping by! Cheers, Timmy!12 points
-
Thanks Terry! Thanks all - pretty inevitable, especially as there were no locating marks/holes! As Heather says some wire would have been a good idea but the plastic is so thin at the bottom I would probably have drilled through the sides Should have made a brass one… Nooooooo! It was stuck to my overgarments, honest! Thanks Tony Glad you're here actually as I could do with some help. What settings did you use when you cut your serials in Oramask? I was on Blade 2, Force 15, Pass 1 and Speed 1 for the last attempt but it still gave me problems… see below! The first cut of the masks went through the backing: My fault - the material was set to Cardstock - idiot! Try again with Oramask. The serial looks cut but the blade lifted the masks: … didn't cut through here: The idents and main roundels are fine so I've stuck some transfer tape over them: …but by that time I was a bit frustrated so I'll put them aside and review in the morning. I did manage to glue the spinners on without incident: Not completely useless then11 points
-
This evening’s instalment. Firstly, the wee fleet of boats is now complete with the arrival of my missing final Shapeways order: Then more island, with the fitting of the semi-circular ‘wall’ round the for’d section of 04 deck (as shown yesterday); the dry fitted addition of the Merit platforms for further pom-pom directors, signal projectors and the like; ditto the funnel, to test Tetra’s fit (excellent, again); the addition of the wind deflector on top of the ‘wall’ [not in all photos]; and the partial building of the exquisite but incredibly delicate North Star Models resin/PE HACS Mk4 director for the starboard side of the island. Seen from port. From above: From starboard: And finally from starboard bow: At last some real visible progress, so things are getting there. More soon Crisp11 points
-
Hi guys railgun now finished, for anyone who did not catch my buildup I have reposted details about model and full size gun. this is a model of the German Theodor Kanone (E). Three of these were built using plans of w w 1 mountings and barrels from pre-dreadnoughts they were built in 1936 and in service 1937 to 1945,two guns were used during the French campaign. I have had a number of guys ask for a rundown of the builds so have included a few photos during build, the barrel is turned in aluminium and the wheels are from oo gauge railway stock ...will be glad to answer any other questions on build, figs are Ceaser.10 points
-
Just shows Ced, the value of regularity of bodily function movements! 🤣🤣10 points
-
Thanks Giorgio - just for you (and Tony) Attempted exhaust collector 'heat treatment'. 'Exhaust Manifold' then very thin 'bronze' then thinned 'Old Rust': … and painted the spinners. They're a bit bright: I'll tone them down a bit later.10 points
-
I recently discovered my photobucket images are no longer visible here, being out of focus. Over weeks I continually been uploading all my photos to "Post Image". Easily done, but very time consuming. Here they are again. I believe these are the same images originally posted, but some may not be the same. I hope they can now be viewed. Thanks, -Bert10 points
-
9 points
-
Wot a fabulous flying machine the Sunderland wos. Doing her full justice here Ced I think you can be bothered to paint the roundels Your erstwhile road trip companion across the pond has set you the example to follow after all.... Roundels have gotta be bigger/less fiddly on a Sunderland than a little Spitty - surely? Plus you’ll get a hard time from Giorgio & Tony if you don’t......8 points
-
This is the Battle of Britain Buchon I have made for the Film, Fictional and Speculative GB. This is a model of the Hispano HA-1112 “Buchon” which was used as a stand in for the Bf 109 in the Battle of Britain movie. The plane number “5” is more than likely in the movie, but not featured like the others. However, it is featured in a documentary that uses a lot of shots made for the film. The model is weathered to look as if it had done a lot of flights for the camera. The last photo I took the other day shows it with the real Bf 109 for comparison. It is an old Hobbycraft kit re-issued by Academy. The kit has the usual fit issues and needed some filling here and there. The worst area was the back of the cockpit. The canopy was about half a mill to small on both sides, which is why the canopy area on my model isn’t as good as I would like. I added detail to the wheel wells and drilled out the exhausts and the spinner. There is no aerial because I couldn’t see one in any of the photos taken during the filming. I used the Tamiya weathering master set to do the weathering. I may have over done it a bit on the fuselage joints, but this was an experiment so I’m not concerned about it. The dark green is my own mix because the film planes used a darker green than the normal Bf 109E-3. The decals come from two sources. The Main decals are from a Bf109 set and the badge is from a paint on mask marking set that wasn’t in good order when I got it. All in all it wasn’t a bad build.7 points
-
I retired in October last year (2018) which meant more time to devote to 1/144 civil aviation although as it turned out I wasn’t as productive in 2019 as some previous years. In the normal way of modelling, a few builds I was confident I’d finish have been delayed for a variety of reasons and won’t make their debuts until next year. All the models featured here were finished in 2019 although several were started in 2018 and the Austrian A319, which was going to be finished in a completely different livery, actually dates back to 2017. All are new builds except the Finnair A319 which is an old model refurbished and re-finished. More information about the individual models can be found in the RFI threads which I have linked. Hope you like the collection of civilians. See you in 2020. Dave G Iberia Airbus A321-212 - Revell kit with 8A Decs decals. In RFI here Air China Airbus A350-941 - Revell kit with TwoSix decals. In RFI here Austrian Airlines Airbus A319-112 - Revell kit and decals. In RFI here Thomas Cook A321-211 - Revell kit with RJS decals. In RFI here. When I posted it in RFI I didn’t expect the model to become of historical interest in a matter of weeks Finnair Airbus A319-112 - Refurbished Revell kit with F-DCAL decals, (Not in RFI) Malev Boeing 737-8Q8 - Zvezda kit with Drawdecal decals. In RFI here British United Bristol Type 170 Freighter Mk31 - Ozmods kit and decals. (Not in RFI) Aeroflot Ilyushin IL-18V “Salon” - RusAir (resin) kit and decals. In RFI here Alitalia Caravelle VI-N - modified Airfix kit with Two Six decals. In RFI here LOT Embraer 170-100ST - Hasegawa kit with mixed Nazca and BOA decals. In RFI here Air Koryo Tupolev Tu-204-100V - Zvezda kit with 8A Decs decals. In RFI here7 points
-
I've heard it said you should always check your socks for dropped bits, but your underpants is a new one to me!! Keith7 points
-
Started with the first walls and parts of the New Mill .... I still need a bit of AI on the front wall to give it some more weathering .... Cheers Michael The main floor of the New Mill .... I tried to give the surface a heavy weathering with the steel brush, black and brown inks and pigments .... Some further damages at the corners will follow I think .... Whats your opinion so far for my first try ... ? Cheers Michael7 points
-
Morning! Thanks Keith - pleased to see that! Thanks Giorgio, Tony, Steve - tough crowd Some design this morning: I'm not sure the serial is going to work so the transfer will be held in reserve. Yellow on the roundels - ugh… I need to prepare her by Micromeshing and gloss coating first. More later.7 points
-
Thanks Ben I don't have RAL 9001 in my stash, sadly, but glad you like the new effect. What's this? A dead one of these: Has to be done once per build The sharp eyed amongst you will have noticed: I've painted the anti-ice boots. They're shown on the scheme even though I can't see any reference shots of them. Hmmm. The collector rings have had their base coat of steel ready for 'heat treatment' later The exhausts have had a coat of my favourite Mr Color Iron. Note that I've also changed to the large biplane rig/stand with the rear support removed; she's better in that upside down. A quick go over with Micromesh and I think she's ready for a gloss coat prior to transfers. Then it's weathering. Or should I paint the roundels? Can I be bothered? I'll see how I feel in the morning.7 points
-
An earlier build (early 1990s) and only photographed fairly recently at the Cameron Airport, the Testors 1/48 F-104A Starfighter is a very basic, simple old model. Originally, it was a Hawk release from 1957. I love these birds and really, how can one go wrong with a type named "Starfighter"? Is that not just the coolest name ever for a jet? 😀 The rudimentary landing gear was given some much-needed detail and I used the pilot figure to add a bit of interest to an otherwise bare cockpit. The horizontal stabilizer and brake doors were covered with Baremetal foil. The kit decals were used. Several different NMF paints were used but it's been so long since I built the plane I really don't remember. Here's another look at scale models from the really distant past. A quick comparison of this kit with today's great new offerings reveals how far plastic scale model kits have come. Thanks for your interest in this old warbird!6 points
-
Hi all, this is wrapping up the build of MiniArt's GAZ-AA cargo truck. It was my first MiniArt kit and they do live up to the name. The kit has a huge amount of parts for something this size, and is very detailed. The only thing I added were some wires and such on the engine. I enjoyed myself immensely and feel that my skills have improved just by building this kit. The fit of the parts is excellent, but the truck does not exactly fall together, you really have to work it. This has nothing to do with the quality of the parts but rather that there are so much of them 🙂... Also, cleanup takes quite a bit of time because you really have to be careful with these small bits of plastic (and PE). I can certainly recommend the kit to anyone who has a love for this type of trucks. It's well worth the effort. You can do 8 different versions, 7 of which are green so I chose the odd one out. The paint for cab and loadbed is Vallejo's Green Ochre, the chassis and running boards are Vallejo Black. German Grey for the tyres. For weathering I only used paint, again Vallejo, gun metal, alu, light grey, orange brown, medium brown and such. All paints applied with brushes. You can find the build here: Anyway here are some pics. I struggled a bit to get some decent ones, it's a bit dark and I need better (brighter) lamps (or just better skills, could be that) so some are better than others. Well, the first one is pretty good but that's thanks to Flickr's photo editor, it didn't work for all of them. Full album here Thanks for watching!6 points
-
Hi there! This year I re-started my modelling and was to do all of the century series jet fighters. Now, I didn't quite got there as I got sidetracked every now and then But I still got nice collection of cold war era jets in my shelf - plus some extra WW2 stuff mostly for my dad's collection. January 2019 1. Italeri 1/72 F-100D Super Sabre My first model I've finished since I was a kid. I started this summer 2018 but finally finished it early 2019. February 2019 2. Revell 1/72 F-84G Thunderstreak Model was pretty bad as was my building & painting of it. Did it really fast. Move on... March 2019 3. Airfix 1/72 A-4B Skyhawk Was pretty happy about this, model went together really nicely. Forgot nose weight, so it's standing on it's tail hook... April 2019 4. Hasegawa 1/72 Saab 37 Viggen Was pretty unhappy to find out that the model was actually based on the prototype - not the actual production plane. But I made the best out of it, made it look like the prototype. Not a very good kit. April 2019 5. Hasegawa 1/72 RF-101C Voodoo While both are old Hasegawa - liked this a lot more than the Viggen. Was bit of a work though, but I put my best effort on this one. 13.5. 2019 6. Trumpeter 1/72 F-105D Thunderchief Was pretty nice & detailed kit. Definitely want to do more vietnam-builds - it was my ambition as a kid to collect vietnam-era planes but I never got around actually building many of the kits back then. 14.5.2019 7. Hawk 1/72 Javelin Very old & basic model based on a prototype Javelin as far as I know. I just built the model as-is straight from the box not worrying much about references & such. Such a cool plane, need to do a 'proper' build of it someday. 31.5.2019 8. Monogram 1/48 F-102A Delta Dagger Such a cool & big plane. This one goes to my dad's collection - I picked this up from his stash. He does WW2 stuff only but has few others in the mix that I can pretty freely pick up as long as I return the finished product in his shelf 30.6.2019 9. Meng Models 1/72 F-102A Delta Dagger Now I did enjoy this - such a nice model with nice details. 19.7.2019 10. Trumpeter 1/72 Su-15TM Flagon I think interceptors are cool - and wanted a 'red' Delta Dagger on my shelf, so I did the Flagon. 19.7.2019 11. KP 1/72 MiG-23M Flogger Bit light on the 'red' planes, Flogger joined the party. Not particularly fond of the model or my make of it. But it will do. 24.7.2019 12. Special Hobby 1/72 Vampire Mk.52 I'm a finn but it took me this long to do a finnish air force plane. Have many on my stash but somehow something else always found it's way on the table. Such a nice kit this Special Hobby! 11.8.2019 13. Italeri 1/72 F-104C Starfighter Was just continuing my Century Series builds - but this was such a cool plane with interesting history that I got stuck with it and wanted to do more! 21.8.2019 14. Airfix 1/72 Buccaneer This was long in the making - but I took my time with it. Was my first plane with some after market parts (resin nose & tail, cockpit etch etc.). I am pretty happy about the end result even if the details are not quite up to par with modern models. 21.8.2019 15. Revel 1/72 F-104G Starfighter Another Starfighter! This time by Revell. Bit more detailed than the Italeri - but I think I enjoyed building the Italeri more. 28.8.2019 16. Hobbycraft 1/48 F7U Cutlass This was such a painful build where everything seemed to go wrong and I just wanted it off my build table as fast as possible. Honestly, the kit was not that bad but things just didn't work out this time 17.9.2019 17. Hasegawa 1/72 F-104S Starfighter Another Starfighter, this time by Hasegawa and finished in Italian colours. Will be my go-to kit once I start building more 1/72 Starfighters (which will happen ). 15.9.2019 18. Accurate Miniatures 1/48 A-36 Apache Dive bomber Mustang. I started this kit maybe 5 years ago when I was about to start modelling again but it not quite stick that time. Was waiting around with it's primier on - was nice to finish this after such a long time. And this was my first airbrushed model - all before this are finished with a hairy stick. 20.9.2019 19. Monogram 1/48 B-24 Liberator My wife suggested that I could build something for the living room - but it couldn't be anything small or modern (as in the things I normally do - jet fighter=too modern ) . So I picked old Monogram Liberator from my dad's stash and it's hanging from our living room ceiling as we speak. My wife got a say in the decals & paintjob - wouldn't want it to clash with the decor! 1.10.2019 20. Eduard 1/72 MiG-21MF Fishbed Probably my favourite build of the year - both how the kit was to build and the actual finished product. Nice adversary for the Starfighter too, have couple more MiG-21's in my stash waiting. 15.10.2019 21. Revell 1/48 F-89D Scorpion This big Scorpion was not a problem free build but still very enjoyable anyways. 14.11.2019 22. 1/72 Airacobra Do not know the manufacturer. I picked this up from my kits that I built as a kit and broke it down a bit more. Just a fun & quick build and playing around with all kinds of stuff making the plane look like it's made a crash landing in a jungle. ... maybe couple more this year? We will see It's been a good modelling year so far!6 points
-
Here's my rendition of Tamiya's recent iteration of the iconic P-38 Lightning. I dressed mine up to represent "Miss Virginia" which was involved in Operation Vengeance; the aerial assassination of Admiral Yamamoto who was the mastermind of the attack on Pearl Harbor. The kit fell together really well with minimal filler used for seam lines. However, the kit decals were a tad thick. For aftermarket, I used PE seatbelts by Eduard and metal gun barrels by Master Models. The wire antenna was done using 0.1mm copper wire, brass tubing and rigging fibre by Infini. The kit was painted with Mr Color lacquers and weathered with oils, enamels and pencils. All in all, the kit was a pleasure to build. Looking forward to Tamiya releasing other variants! Mark6 points
-
Truly we are turning you into a Brit, Giorgio. Even your typos mention beer.6 points
-
Thank you all for the great feedback chaps, all very much appreciated indeed. Mocking out the interior bits n bobs, I've plumbed in the fixed fire extinguisher and painted up the night scope for the driver, chucked in the ALICE packs just to see how they fit. Cheers All Dan6 points
-
So, I started this model back in 2017, lost interest and left it half built. I came back to it a month or two ago, completed the building of the kit and again lost interest. However I managed to finish it a couple of weeks ago now. Had some problems with fit, notably the canopy, the rear side joins near the burner cans and the sparrow missiles. Decals were another problem here and there, particularly on the Phoenix Missiles, for some reason after I had them on the missiles almost all the stencil data decals came off and rolled up on me as I was trying to handle the missiles to apply microset (or is it sol? The red one)! Lost the 2nd vane on the dorsal area also, I was so close to not losing any small parts! I also managed to scratch/damage some of the MRP insignia white paint I put down, during handling, whilst painting (and possibly decalling), I'm calling it weathering/bird strike! There is some oil weathering on it, but you can't really see it in these photos, and it didn't turn out quite as good as on my Airfix 1/72 A-4 Skyhawk (although I fogged the canopy on that one so hey ho). If I were to build this kit again, I'd buy a Master brass pitot for the nose (I had a terrible time with the kit supplied part, it still isn't attached properly or straight!) and try to get the canopy to fit nicely, or fill the gap, before painting commenced... Due to limited space, and my camera not being very good I found it quite awkward to get the photos I wanted and I'm not really sure why, so these are the best I could do at the time... Thank you for looking.6 points
-
Thanks Rudolf, very kind A quick 'What's the Difference' competition: Can you spot it? During the Micromeshing process I'd knocked off the aerial support. Rats. I spent a lot of time looking for it on the bench and surrounding area muttering 'It must be here somewhere' before I resigned myself to having to scratch a replacement. Then I went to the loo, again. Lucky, lucky, lucky… The second shot above is, by the way, after I'd glued it back on. Gloss coat next.6 points
-
Decals ready. I used the dedicated decal sheet from RaduB...very good decals, no problem whatsoever. I also repaired the tail skid, since it broke off at least two times since it was installed. Anyway, this is how it looks now:6 points
-
Thanks, everyone. I’ll accept the patience bit [though this comes from a man who takes the trouble to model the different IPs of a Valley Hawk (wasn’t that a Frank Zappa song?) and a Chivenor Hawk]. Steady handedness... less so; you don’t get to see the numerous failed efforts, hear the creative swearing or share the eternal search for a better way of fixing tiny bits of metal to slightly less tiny bits of fragile non-metal. I stopped counting after eventually giving up on getting part of the HACS sight installed last night (oh yes, there are even tinier bits of brass to go inside a piece of resin that’s about the size of my finger-nail). I’ll give it another try this evening! But we enjoy it all the same, eh? P.S. Incidentally, since the signal deck is now starting to take shape you will shortly see a blatant piece of plagiarism / (*cough*) “homage” to a master, as I shamelessly copy @foeth’s superb flag locker idea from his Hood build. [He even researched the correct place for each flag]. There were at least 4 flag lockers up there under the tripod; needless to say Merit leave the area completely empty (& to be fair to Merit, even Tetra provide nothing for this bit). There were also at least 8 sights of various types distributed around this deck - Ark being the very last major RN ship of the pre-radar era, so still completely reliant on alert lookouts and high quality optics. In due course I also plan to copy Evert Jan’s beautiful little depth sounder... but that was on the edge of the flight deck, so not yet. Imitation / stealing is the sincerest form of flattery!6 points
-
Thanks Simon - me too. Sad really Well Giorgio, see the thing is about heavy weathering… a) I don't like bashing up a model I've spent ages on b) I should have thought about it earlier and c) I'm lazy I shall be gloss coating soon though to 'protect' the finish (after a bit more touching up and Micromeshing) - see, I do listen! Thanks Bill - timely reminders I know Ben, I'm usually with you on 'cleaner' finishes but this one… er, got messed up with the aged white so something needed to be done Thanks Stew, good to hear Thanks Tomo - No danger of 'the dance' - too cold! Quite right Bill, leave it the young 'uns! Thanks Cookie and Bill I'm thinking some kind of light grey wash and then sponged algae. Not real algae, just paint… oh, you know what I mean. Thanks Tony - great pics! They certainly took a beating eh? Wait until the Summer Solstice? Hmmm. I could do with some healing crystals hung from some bits though …and a bigger boat wire brush. Now there's an idea… This morning I didn't feel like more sanding so I thought 'How about 'dry brushing' some matt white'? Actually I just wiped the brush on the side of the pot and then dragged it out a lot until it seemed thinned enough. Far easier than sanding around the rigging. Getting there:6 points
-
Hi, gentlemen, "Zvezda" has issued the most impressive model of the MiG-29 Fulcrum C in 1/72. It was powered by Aires resin (nozzles, cockpit) Eduard resin wheels, Part photoetched and Pavla canopy. And of course some details are from scretch. The main challenge is how to build in the Aires resin parts, which have been produced for the old Italery model. So, it is possible and for the Zvezda kit as well. With regards,5 points
-
Here is my latest project in 1/72 Basic details regarding what the build represents have been added to the name plate: This particular aircraft did not survive the month and thus that is why it has an almost pristine look Total time spent on this work was 1 month here are some pictures: The Aircraft is an Italeri kit in 1/72 The aircraft was first painted in desert scheme and the lighter parts of it was painted in blue, in order to get out the base colors, salt technique weathering was used, thus it gives that bit of usage to the buld. Some of the ground crew had to be converted, basically here some heads were chopped of from 1/76s Airfix RAF Ground Crew and added to bodies belonging to Airfix 1/76 8th. Infantry soldiers. The Austin Tilly and the Motorcycle are part of an Airfix Bomber set in 1/72, they were painted in Malta Camo (this is not probable, as there are still some examples around, see later pictures) BR 323 decals where printed at home while the blast pen was constructed out of foam cardboard for the stone walls and clay for the sand bags, In Malta during the war you had three types of blast pens; in sand bags or in used petrol cans (since in '42 petrol was given by hand) or in stone walls, at times a mix of the above mentioned materials was used, like in my diorama. Some scratch building also went into the cockpit area. Stone walls, sand bags, soldiers, dio base and vehicles were then oil dot weathered In the second picture of the aircraft, one can still see the salt attached before it was removed, near the cockpit area. Inspirational photos: Hope you enjoy5 points
-
Over cautious eh? But then I bet you don't knock things of! (Stuart is it?) Thanks Tony Tried it and the tail flashes were better but: on Flickr I'm probably asking too much - some of the characters are saveable but look at the 9s: I think I'll use the transfers for the serials I think that makes sense Rob - thanks Thanks Rob and Heather - Corroded but not rusty, got it "…doesn’t look very piratey" Rob. Shiver me timbers matey! 🏴☠️ It WAS! The rumour that I model in my undies is a vicious lie… dressing gown perhaps, but not undies! Thanks Adrian it's gonna get dirtier so we'll see how it goes - I may mist later. Crisp, Giorgio and Keith the posts about the typo made me laugh (thanks) but Giorgio what's this about HALF a glass of wine??!! So the masks are on except the tail flashes. I'm hoping I grow a pair my courage overnight5 points
-
I've just had a very enjoyable visit to the French quarter of The Stash. I've decided on my builds for this GB. I'm reeely looking forward to the Yak-3. Look at the box contents...5 points
-
That’s true, but it doesn’t look very piratey if it doesn’t have rust, I mean it’s half boat half plane? Like an air pirate?..... fine! More colours of corrosion befitting the the metal properties of the the hull.... but maybe just a little Jolly Roger like what the sub commanders had.... Rob5 points
-
Now it's finished. More pictures can be found in the gallery. Thanks for all the comments.5 points
-
True enough. It’s why I tend to add brass wire pins to such fittings for that belt, braces and bit of knotted string security.5 points
-
Yep! My dear ol' Mum (gawd bless 'er) was married to my Dad, a Scot, for about 35 years until he passed away. When talking about her grand daughters, she always referred to them as "wee Jane" and "wee Diana" with an Ayrshire accent. We used to say to her "Mum, you're from Bethnal Green". John.5 points
-
Pictures or it didn't happen! G'day people, Well, the major assemblies have been put together but I need to add a few touches of filler around the wing gun ports before the wing can be attached to the fuselage, but I couldn't resist a sneaky dry fit The fuselage went together without too much of a fight, just a few little spots of filler used along the underside The exterior PE set includes a replacement door but I decided to thin down the kit part and use it instead. There is also an inner face for the radiator exhaust flap and the sides are provided as PE parts requiring the kit sides to be removed which means more filling and sanding I think it would have been far better to provide a completely new flap part personally. Whilst the putty was drying I occupied myself by assembling the external stores. The smaller external tanks feature a prominent seam around the middle, Airfix's attempt was very subtle and I ended up sanding it off during the clean up Not a big deal as I was not intending on using these but all the same something to be aware of. I also assembled and painted the 'paper' long range tanks These look very nice and only require the external plumbing to add an air of realism. Finally, I built and painted the bombs These were very heavily weathered as period pics of the squadron during their time in Italy show the ordnance dirty, no doubt due to being stored outside in appalling conditions. The rudder and prop were also cleaned up and painted The colour of the rudder is something of a guess as the reference pics show a variety of shades (albeit in black and white!) so there was variation. It should probably be a little darker as it is closer in shade to the dark blue of the fin flash but then again there is also the effect of shadow, film quality etc so I picked this colour and I am happy with it, unless someone has a colour pic of this particular aircraft during the war. Airfix provide the windscreen molded as part of the upper fuselage which avoids an awkward seam. I added to gunsight and instrument panel coaming before attaching this to the fuselage, but not before adding some instrument panel lights to the underside first, thanks for looking, cheers, Pappy5 points
-
There were three short sections where the primer "did not take", easily solved by placing short pieces of masking tape and smearing a dab of putty, and then sand a bit when dry. Any blemishes can be restored like this:5 points
-
The sea and elements definitely took their toll on materials Ced so some visual abuse is certainly not out of character... As to the whole Stonehenge/nudity project, if you wait until the summer solstice it will be: a) warmer and b), you're likely to have a large and appreciative crowd of Druids and New Age revellers all looking for something to hang their healing crystals from...5 points
-
There is a lesson here for me to remember. Just because two pieces look like matching halves does not mean they are. I made that mistake with the engine nacelles and was at a loss as to why they did not fit on the wings. Well, perhaps I should have followed the instructions to begin with. I had to pride them apart and glue them correctly. No damage, thankfully. Now they fit well enough although there are plenty of places where filler and sanding will be needed. And we push on! --John4 points
-
Ahhh done. No complaints with a kit I purchased for under $10. It's about my skill level. I'm working on my 3rd Hellcat from Eduard, and it's going to take some time! All paints are MRP except for Tamiya clear coat. OOB 'wif' based on about 5 different Hellcat pictures I printed for guidance4 points
-
Hello mates I share my most recent work This is the F4U-1 Corsari II from Hobbycraft, with Eduard accessories, Falcon canopy, Xtradecals decals.4 points
-
And here is the Encore (boosted PM) kit. In spite of my nitpicking I applaud the efforts behind the release of this "enhanced" kit, a way to give new life to an old kit, and, to my joy, including a civil version: Newly-printed instructions in good paper, and what looks like excellent decals: The dreaded, unfathomable, Mariana Trenches A bit less daunting on the wings. Notice that the wings have LERX (leading Edge Root Extensions) altering the geometry in plan view, so, once again, be sure the plane you are modeling had those: The added bits, vac windshield and resin substitute parts, all look good: Care was obviously put into this: The engine block has the location for the cylinders keyed, the problem is that somebody forgot to tell that to the person that cast the cylinders, which have no corresponding pegs. Sigh.... New props and exhausts, one came nicked: Plenty of enhancing resin parts shown in the instructions:4 points
-
Hi Kev....yes those were a great help. I've been regularly mining Flickr for reference photo's and I did find yours and I'm grateful for your generosity! It’s DONE!! Well the nose gear well at least. It’s been more of the same work I’ve previously posted, just more of it. Getting the last bits of wiring and tubing installed at the halves and front and rear bulkhead came together was a bit of a challenge. The are a few lines that proved impossible to install. But none of the ones I couldn’t get to can be seen easily or at all. In fact there’s a good bit of detail that will be difficult to see when the gear and doors are installed. You never know what will be seen or not until everything is installed so I put the details in. On to the photo’s: The CAD model as it exists today, a good chunk of time was spent updating the model with new parts for printing. The completed well: The last parts to install were the “filler” parts that close off the well and define the door opening. That’s all for now… Oh and I created a new template for my website, that I hope is a little more modern and user friendly. Feed back welcome. Full article here. Timmy!'s Tech Jaguar Nose Gear Well Thanks, as always, for stoping by. Timmy!4 points
This leaderboard is set to London/GMT+01:00


.thumb.jpg.2c282efcc138b7cf7f1e1586a9c534d2.jpg)






.thumb.jpg.76f12b87ce9ca9929c9aabdcf8f9d2dd.jpg)


