Leaderboard
Popular Content
Showing content with the highest reputation on 13/12/19 in all areas
-
I didn't expect to finish this one, this side of New Year. It's the hopefully soon to be re-issued 1/48th Javelin. I had bought it when it first came out but put it to one side as it was just too big. Then last year I built a couple of F-102s, an F-101 and an F-106 so what was I scared of? Well the length is fine but it still has an enormous wing span. I normally use the pound coin to show how small my 1/144th stuff is but it seemed appropriate. It went together like a dream and all I added were some belts and a pair of Master pitots. Well worth the money IMHO. I also used a set of markings for a 5 Squadron machine from Xtradecals. Still not sure I'll build another due to the size and anyway there are sooooo many Hunters I want to build. Thanks for looking.27 points
-
Oh, before I forget - here is what I meant when I said the blue in the Print Scale roundels was too light. Here it's compared to an Xtradecal roundel from my spares box. I think this shows the issue. It looked worse when I slid one onto the model. Whoosh! I slid it right back off. The white wasn't very opaque either. For those of you who have the Heller/Airfix T.3 in your stash, or have built the kit in the past, you know that the actuator ram/connector link that's part of the nose gear is moulded as one solid piece. This isn't right, as the real thing has lightening holes in its forging, and resembles a Y. The Airwaves PE set gives you a photoetched replacement piece, but I didn't want to remove the plastic piece in its entirety as the nose gear is spindly enough as it is. So I culled my years of modelling experience and pulled out "Modelling Perception Cheat No. 437." I painted the plastic link flat black, and glued the PE part on top. Voilà! (or is it Violin!?) Works for me, but I'm easy to please. And now for the StickerStorm (thanks for introducing me to a new word @perdu!) The roundels came from the spares box, the fin flash and squadron markings from the PrintScale sheet with the appropriate amounts of sweating and swearing as previously noted (although the underwing codes came from a Model Alliance sheet). The stencils came from a variety of places, using the Airfix 1:48 placement guide. None of the stencils are readable without the help of a microscope, and none of them have any relevance to where they're placed (I suspect), other than the obvious ones that I had to do correctly (like the ejection seat triangles, etc.) The varnish is Floquil Flat, which is my go-to clear for an egg shell sheen. I love the stuff (cue another opportunity to curse Testors). Anyway, here she is at the moment. I elected not to do a panel line wash because old fumble thumbs scribed the lines so deep that they can be seen by @Martian Hale on top of Olympus Mons. There is a lot left to do. Tail planes, elevators, periscopes, simulator pressure heads, canopy seals, rest of the landing gear doors, wing pitot probe, airbrakes, exhaust painting, navigation lights, etc. I'm kinda linking how she looks though. Cheers, Bill PS. And once all that is done, I got another one to build. Yikes.25 points
-
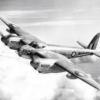
Dear all. I'd like to present my recent adventures with the character-full old Airfix kit of 'Faithful Annie'. I made a lot of changes - as you might have anticipated for a kit this old - but belly aside, I was impressed by how accurate Airfix caught the proportions and outline of both fuselage and wings. There was much scratch-building from brass & plastic, which I won't bore you by listing again as the cumulative list of tasks and rationales can be found over here: The aircraft is the one that famously discovered the Knickebein beams being used to guide the Luftwaffe to targets over Britain in 1940 - a list of historical refs. are given over on the build thread. Aside from the Hallicrafters set used to detect the beams and the need to alter the electricity supply of the aircraft in order to power it, any further detail regarding the installation of any different aerials &etc. seems now lost in historical mists. Not surprising given the jeopardy of that period in the war. I was lucky however to be in correspondence with the son of the pilot - Flight Lt. (as he then was) H. E. Bufton - who generously sent me copies of the pages from his father's log book for that night, confirming both the serial number of the aircraft and timings of the flight. Aside from log book entries, I was able to cross reference with a copy of BAT&DU (later 109 Sqn) Operations Record Book (AIR 27/852), obtained from the National Archives. I hope that Hal Bufton's son is pleased at how his father's aircraft has turned out. All camouflage and national marking are painted with Tamiya acrylics: detailed discussion over colour schemes and why there are no squadron codes on the fuselage are contained in the latter part of the WIP so I don't propose repeating these at length again here. Main technical reference for buildings and alterations (aside from contemporary IWM photographs) of the aircraft was the Anson parts & maintenance AP.1525A,D,E&F. A general walkaround first then: Some closer-ins.... The insides had a makeover too: I hope you like the results. It was a lovely kit to be working on and I was blessed - as always - with a kind and knowledgable bunch of companions on the 18 months it took. Tony21 points
-
Hi Everyone, thought you wouldn`t mind if I shared some pic`s of my latest effort My attempt at a French Indochina Hellcat Built from Eduards 1/48 Weekend Edition kit Finished to represent an aircraft flown by Flottille 12 during the Indochina conflict As usual mostly from the box contents with a few additions................ ......namely rocket rails from the spares box and I noticed that French Hellcats didn`t seem to us the normal centre line fuel tank that US ones did. Luckily I found one that looked right in the stash ( probably off a Hobbycraft Bearcat ) and adapted it to fit. Decals were from Berna Decals set BD 48-24 Hope you enjoy the photo`s, thanks for looking Cheers Russ20 points
-
Got a little more done in the last two nights. I used Colourcoats Roundel Red, rather than their RAF/FAA Red, which I hope was the right choice, but right or not, it sure looks great. I've painted the blue and white on the fin flash, so I hope to polish the rest of that off tomorrow, and then start on the fuselage roundels.20 points
-
This is the Airfix Spitfire F22 in my local squadron's markings, courtesy of Xtradecal. I also used Eduard seat belts on it. A nice kit, the only problem is the canopy doesn't sit correctly when open. I've kept the weathering to a minimum as I assume they would have been kept reasonably clean. 618 Sqn was part of the Royal Auxiliary Air Force & was formed in 1939. It was an Army Cooperation squadron & went to war equipped with Hawker Hectors & Westland Lysanders. The Hectors & Lysanders were used to bomb German positions & drop supplies to the BEF in the retreat to Dunkirk, this must have been absolutely terrifying. They were re-equipped with the Curtis Tomahawk then the Mustang I for the low level reconnaissance role. In October '43 they were given Mosquitos & flew night intrusion sorties & precision strike operations, including a raid on the Gestapo records office in The Hague. After the war they flew Spitfires then Vampires before the RAuxAF was disbanded in 1957. Unfortunately this was before I was able to pedal to Ringway on my bike to see them. 🙁 Enough waffle. Any comments, observations & criticisms welcome as always. Pete Thanks for looking.18 points
-
Dear members, I like to show you my model of the Atlantic C-2A, with the same type of this aircraft history was written. Called Question Mark was a modified Atlantic- Fokkert C-2A transport airplane of the Unitd States Army Air Corps. Commanded by Major A. Spaatz, it was flown for a flight endurance record as part of an experiment with aerial refuelling. The Question Mark established new world records in aviation for sustained flight, refueled flight, sustained flight and distance between January 1 and January 7, 1929, in a non-stop flight of more than 150 hours near Los Angeles, California. (Wikipedia) I build this model as a normal every day workhorse, without the special modifications of the question mark. Here I included a link to my WIP: https://modelbrouwers.nl/phpBB3/viewtopic.php?f=1&t=47732 Well I hope you will enjoy the pictures of this model, With kind greetings, JohnHaa18 points
-
Bill you're right, of course - you have to get it while it's going, otherwise it's gone Terry I'm glad you're enjoying your purchase and the view! Excitement here has kept me up so while I'm listening to results… These have to be the most sticky out sticky out things I've ever stuck on: …and there are eight more on the sides! For these: …there was an outline for the DF but nothing for the pitot mast. And that front aerial support… gulp. Will it stay there? We shall see (da da daaahhh)14 points
-
Another Mosquito from me, this time in the form of a B.XX. The build thread for both is here: Family shot: Sean13 points
-
Evening all With the Christmas holidays here it's time to get this monster back on the bench... IMG_1693 by Thomas Probert, on Flickr IMG_1694 by Thomas Probert, on Flickr I'm making slow in-roads in scratch-building the flap apertures and associated structures at the moment - more soon hopefully! Tom13 points
-
Thanks Steve and Giorgio I bottled out sticking the PE to the aerials as I'm bound to knock some off. I've masked the white ones and readied the six grey and two greens for painting: Not forgetting the front one. Ready for painting now: Note the curtains covering the floats and rigging. I've decided I'm going to try free handing the camo as she's too big to do the usual 'total colour' coat and I want to try my new airbrush. Too brave? We shall see…13 points
-
Here's my Airfix 1/48 Spitfire FR XIVe, completed as a 402 Squadron (RCAF) machine, March, 1945. As I understand it, 402 was one of two Squadron's to operate the "bubbletop" before the end of the war in Europe. I found the Airfix kit to be good, but required careful assembly and a fair amount of shimming. The paints I used are Tamiya acrylic, weathering with Humbrol enamels and pastels, and the decals are a mix of XtraDecal codes, Aviaeology serials, and Barracuda stencils. I'm quite happy with the result, and I hope you like, Colin Link to my accompanying "Highback" build - https://www.britmodeller.com/forums/index.php?/topic/235064455-148-spitfire-f-xive-highback-402-squadron-rcaf-march-1945/10 points
-
Not iPhones apparently Bill. The aperture is fixed seemingly. P’raps there’s a clever app wot can do it🤔 - Hard working little aircraft the Hawk, Phil; troops of young boys climbing into em without wiping they're feet first.... Consider yourself forgiven, Charlie; I wouldn't wish 133 pages of this on you So. Working on the TWU hawk cockpit today. Cut back the support structure as with t'other one..... Glued in the IPs - these ones of course have weapons switches and trimmed the coamings. Coamings and seats dry-fitted: 'twill do I reckon. Next job is to finish fettling the coamings and stick em in! Followed by the windscreens.9 points
-
Hi Folks Another Meteor,this one from 610 County of Chester Squadron. Once again decals from Marmaduke decals and painted with Xtracolor HSS. 610 Squadron had some very interesting colour variations, one in particular has an inverted triangle on the fin with something inside it. If anyone has any information on what this is I would appreciate them getting in touch with me. Cheers Ian8 points
-
After two years of hard slog during which I have also completed a Heyford, a Chipmunk (as a sanity break!) and a PhD, here is my take on the Matchbox Stranraer, finished as K7292 of 228 Squadron RAF at Pembroke Dock, autumn 1938. The WIP is here. At some point I'm going to do a Stranraer reference thread for the Interwar section to share all my refs and discoveries, I'll update this with the link when I've got round to it. Don't hold your breath! Having decided to start on adding some detailing to this and the concurrent Heyford, I went fairly mad. The following is a reasonably complete list of my alterations: Scribed hull (including some corrections to MB’s panel lines on rear fuselage and nose), plus lower wing stubs, floats, cowlings, nacelles, and upper centre section. Removed large raised cargo door on starboard side of hull, (a postwar civilian modification, copied from the Hendon machine by MB) and cut a new window in its place as per pre-war aircraft. Detailed the kit door part. Reinstated recess for sliding side portion of canopy above the entry door. Cut out the sliding canopy section and replaced with an acetate panel mounted in the partly slid-back position. Scratchbuilt most of interior including pilot’s position, navigation compartment, rest bunks, mid-upper and tail gun positions. Retained kit floor and bulkheads (with modifications) but everything else is built from plasticard or wire. Thinned down gunner’s wind shield. Scratchbuilt Scarff mountings based on kit rings. Replaced kit Lewis guns with cast brass examples from Miniworld (well worth the ridiculous price). Replaced small ventilation scoops abreast wireless operator’s compartment. Various extra hull details added, including rectangular ventilation scoops on port nose and between port windows, bollards and mooring/sun canopy cleats on nose and rear fuselage, hinges for bomb aimer’s door, towing/lashing eyes and strengthening plates along keel, navigation light at extreme tail of fuselage, and porthole with bars on cabin roof. Detailed main beaching gear with longitudinal struts, winding handles, stowed tools, bolts etc. Added fairing strips over joints between lower wings and stub wings, and at tailplane-fuselage joint. Cut out bomb recesses in lower outer wings, adding Marabu PE Light Series Bomb Carrier in each of the large recesses. Added APU exhaust and drainage pipes in lower centre section stub wings. Added navigation lights and aileron actuators to lower wing tips, cut out port side landing light and added heat-moulded light cover from acetate. Added inspection covers on floats. Reshaped cowlings to show a more curved profile and thinner trailing edges. Opened out cowling apertures by about 1mm extra diameter (not quite enough, I suspect, but oh well!) Drilled out exhaust pipes and lowered the profile at forward end to better blend them into the collector rings. Replaced Pegasus engines with resin examples from CMK, including replacing the too-short resin pushrods with plasticard and adding cowling braces. Thinned down and reshaped kit propellers. Added the prominent if mysterious bulges at the leading edge of the forward cabane struts where they meet the nacelles (not fitted on the Hendon machine). Added cores with mesh faces to the oil coolers. Full rigging applied using EZ-Line and homemade turnbuckles. Decals from the Revell reboxing. Things I chickened out of but which you could also do if you're feeling like treading this path to insanity: Crash mould more accurate canopy (windscreen is slightly too vertical I think) Detail front compartment and pose open (references for equipment fitted here are almost non-existent) Detail wireless operator’s compartment (completely invisible) Replace kit beaching gear wheels (poorly detailed but I couldn’t think of what to use) Despite all I've just said above, it's a pretty darned good kit, especially considering it celebrates its 40th birthday this year and we're unlikely to see another one, unless the likes of Valom oblige. If only MB hadn't quite so slavishly copied the Hendon machine with its non-standard mod state, it would have been near-unbeatable. Oh, I suppose you've come here for photos! Here we are.7 points
-
Hi folk's, we seem to have all the best known kits in the GB in all the scales so I had a look for a kit that might not be so well covered in the form of HB's easy kit.I plan in this first build to play it safe with an overall green finish as I've already done Dooleybird from Tamiya's kit. I'm a big fan of these kits I did their Thunderbolt for one of our STGB's a year or two ago.7 points
-
Hi folks,just a roundup of the rest of this years output. Tamiya Luftwaffe pilot for the blitzbuild GB. Airfix Spitfire Vb for the other Blitzbuild GB Aermacchi "Roulette's" Revell 1/32 Spitfire. Sea Venom in 1/72 scale. Heller Saab. 1/72 Seahawk. Italeri 1/72 Dakota's Airfix Vampire. Airfix Boeing Vertol. Airfix Fury 1/48. And first of the year Esci Skyraider.Many thanks for looking in.7 points
-
So I decided to do my first build report here on BM. I progressed already quite a bit on this model, so not a start from opening the box I'm afraid. The Sword 2 in 1 kit is imho a joy to build, and goes together as easily as any mainstream kit you'd care to mention. No RS headaches here! I decided to make one of the two with an experimental splinter camo, seen on some planes in 1943. With the aid of the BM community (thanks @fubar57 & @SafetyDad !) I could tweak the scheme as good to my ability. Hope you like it. No worries putting everything together as per the instructions; this kit will fit. See? Never mind that stroke of Mr Surfacer.. Cannon barrels were drilled out and some Albion Alloy tubes were inserted. The intake tube got a support flange. I was a bit late adding the navigation lights, but did so before spraying the camo pattern. But.. Alclad Aqua Gloss and decals and.. Aaaghh..! I totally forgot the cowling guns. Out came the pin-vise again.. To be continued.. Thanks for watching, Cheers, Luka7 points
-
This should be the last work in progress update before the world stops for the final reveal. I didn't have a lot of info for the rear end of the boiler and it's likely to be as inaccurate as the rest of the model. Although it looks like an amorphous white blob in this pic, the furnace/boiler door has twenty parts. Looks a tad more defined in this shot: It looks like BMW learned a valuable lesson form Robey. What's the point fitting working indicators? It does appear to have had a headlight though and for that I needed a small, 'glass' faced cone. I only have one piece of clear sprue in my spares box and that wasn't fat enough. Thinks…… Time for an experiment. I heated the end of the sprue over a flame until I had a molten lump and squashed it into a ceramic surface. This is it after being filed and polished into shape: I mark my micro-mesh boards to make them easier to select the right grade. This is a Victorian headlight Biddy bits – what could they possibly be??????? Christ knows: At first I thought it may be some sort of thermometer for the boiler, but someone more knowledgeable than myself (or just old enough to remember steam engines) suggested that it may be a gauge for checking the water level in the boiler. This is the second one. I completed the first one and then put the reverse tweezers holding it, to one side with the feeling of a job well done. Then dropped it. Snap! The observant amongst you may have noticed that I've painted Robey. Obviously this is long before colour was invented, so at first, the temptation was to paint it grey – all my reference pics are B&W so no help there. Traction engines are always bold colours therefore this probably was. On the World Wide Whatsit, Robey Trust have a site. From that I gleaned the info that the Robey company colour appears to have been a mid to darkish green. Tamiya X-5 seemed to fit the bill well enough for me. If no one can agree the exact colour of a bloody Spitfire, what chance do I stand getting this right? Although I can use that to my advantage – who's going to know? I know that you lot get to add tiny facsimiles of billion-dollar-super-mega-hypersonic-people-dismantlers to you models - well I get to make a shovel! I would add that it's a coal shovel but I'm not making it any sexier am I? I wanted to try a new (to me) thing. It took about fifteen mins to cut the male and female parts of the mould and another ten to plunge mould four shovel heads. As it was only 0.25mm thick plastic sheet, I only need to use boiling water to soften it. Dead easy. After tarting up with Alclad and everything (and then, because a coal shovel wouldn't have been exactly sterile, detarted-down with an extra grubby wash, so making the effort to use Alclad was a bit pointless). My original intention was to insert a cobbled street into a pretty elaborate oak base to make you all go “WOW!”, but I'm really not in the mood for wood worrying at the moment, that's why I went for 'understated' instead. The street is just insulation board (liberated from a skip) and the cobbled effect (yes I know they're 'setts', 'tinternet has already told me off for calling it a that, but 'setted street' doesn't sound right) is simply 3mm square tube pressed very lightly into the surface. Very repetitive and very boring to do, but I think it's quite effective. Then……. Surface sealed with diluted PVA; primed; painted black then 'granite' grey sprayed at a low angle (to keep the black in the joins); a few extra colours to vary it; light grey dry-brushed to highlight the setts; a liberal coat of Pledge; and another liberal coat of Pledge. The surface still looked too porous so another liberal coat of dilute PVA was sloshed on. When that was dry I added a very dark pin wash into the joints. I've still got the final photos to do and sort out the write-up, but hopefully I'll get it done by this weekend. Currently I'm struggling to get decent pics on my new camera, the bloody thing is too clever by half and seems a damn sight more options than an IBM mainframe. Thanks for showing an interest or even if you're only pretending to show an interest. It's all the same to me.7 points
-
Thank you Dennis for the slightly nagging but very welcome prod. I have been really impressed with this kit. The instructions are just brilliant and the kit has a number of corrections for the kit as well as the conversion itself. First up is replacing the wheel well. So, this is an improvement letting the wheel well extend back to the wing spar. This involves an awful lot of scribing but, after my fingers had healed up, worked pretty well. Another improvement is this template to correct the dihedral. The resin wheel well has the correct dihedral cast in. Here are the wing improvements nearly done: blank on the hole for the pitot, blanks on the cartridge shutes and the resin wheel well better recessed into the wing. Where the resin wheel well is thin to non-existent at the compressed air cannisters/pipes I've built up with some Magic Sculp. That'll let me paint the undersurface black around the cannisters/pipes. Here are the undersides of wing and fuselage. I've filled the pitot and the cartridge shutes. I've filled two of the ID lights under the starboard wing tip and countersunk the middle one: this is all detailed in the instructions. I've done a lot of fettling also. The fit of the resin parts is very good. I'm now ready nearly to paint the wheel wells and cockpit and then assemble. I'd estimate the chance of finishing on time to be 2:1 against! Alan7 points
-
Glencoe (Lincoln Int.) 1/65 Bristol Sycamore HR14 Crash moulded the blown cabin windows and soldered a wing fold bracket Frog 1/72 Gipsy Moth 'Jason' for CBK SIG Civilians Display and daughter's school project at one point it looked like this after my toddler got hold of it Airfix 1/32 Maserati Indy or CBK SIG Civilians Display Crash mould new windscreen due to poor fit of kit part, headlights clip on with magnets. LifeLike (Inpact) 1/48 Bristol Boxkite for CBK SIG Civilians Display This took up about a 1/3 of my modelling time: Bandai SD VE-1 ElintSeeker "Macross" Some post Telford stress free modelling6 points
-
Thanks, PC. I don't need them now, as it's too frikkin' cold up here, on the Backside Of Beyond, to try spray painting. At 9:00 this morning, just before the sun cleared the trees across the street, it was -32C. That's -25F for you Americans. Below is a visual representation of how cold that is: Chris6 points
-
6 points
-
Thanks for the support lads Well been working on the wake this week using the still water and cotton wool method described by Jos`e Britos on youtube come out alright I think beefy6 points
-
Shuffling along, interior pretty much all together. Assembled, painted and basic weathering The weakest / most fragile being the seat backs, will need to be particularly careful not to knock or be to rough in handling, Even with doors open i can't imagine much being visible once all assembled. Surprising how little there is to show, considering how long it has taken to get this far. Or could just be me being really slow, however i only tend to get 30-40 mins per day to play. As this is a fairly slow build, being tempted to dig out something Tamiya or similar just to keep things moving along..... I've a Dragon Sherman or two but they don't fulfil the quick turnaround requirements so they might wait till the Otter is done. Next job here is to get the body together to a position where it can be painted. Thanks to everyone that had taken the time to look in and leave comment, really helps to keep the mojo up. Cheers Darryl6 points
-
Hi crew Thanks for kind feedback This week was about finishing rear deck furniture, windows and belaying pins. Having realised my purchased 3mm ?*#&^% wooden belaying pins were too big i had to make my own for pin rails which involved drilling 1mm holes in pin rail and gluing short length of 1mm plastic rod in place as top of pin. In an endeavour to reproduce some sort of shape, i made bottoms of pins in 0.75mm rod. Much cursing as tiny bits of rod glued to my fingers or tweezers, in fact anywhere other than where they were supposed to go... End result not fantastic as "pins' covered in CA and paint look like they are same thickness. Hopefully they will later be obscured by neat coils of sheets, halyards and lines... Had to make a compass binnacle as well as mizzen mast bitts, both not represented in kit. Other work was on transom windows or stern gallery where i cut out Airfix windows and replaced them with frames made of strip and transparent sheet. End result was again not fantastic, while it seemed a good idea and easy to do, it was amazing how because windows are not regular quadrilaterals, every piece of frame was a different size. Again much cursing of the God of CA... still, better than Airfix kit. Airfix provide a single piece for stern gallery which is glued to stern of hull - i discovered too late this was badly warped out of shape, resulting in gaps between gallery and hull which will have to be filled. None of deck fittings are fixed permanently as I may need all the room for later rigging with fat fingers. Thought about painting hull, but i think this may be the last step as hull is main place to hold model securely with fingers covered in glue, paint etc, so best to leave till last. So now looking at next steps, cannons and starting rigging.. I am looking forward to stepping masts but I have read that rigging is best done with sails being bent to yards while not attached to masts... Will see how i go! Just realised there should be main mast bitts as well - also not in kit, of course. Cheers6 points
-
1/32 Wingnut Wings Shorts Felixstowe F.2A early. Great Yarmouth, 1918. So... here we go. It started as a thread where Mark and myself were supposed to be joint building. Mark never started his, I started mine, I continued the build thread for a while but in the end the commitment of a build thread was too much for a build at this level for me, so it fell by the way side a bit. However... 8 months later. 4 bottles of whisky. 80 metres of monofilament fishing line. 300 Bobs Buckles. Around 50000 swear words (wish I'd put £1 in the jar each time I'd said one!), 8 sheets of Aviattic CDL Decals, 2 sheets of Aviattic Woodgrain decals and one incident where I left the radiator on whilst I had the flu and came back to find all the rigging had come out. But I've finished it. Absolutely delighted to have finished it. It was an incredibly enjoyable and rewarding build from the start - but ultimately challenging. It's a true reflection of the skills of the team at Wingnut Wings though. Kit is mainly out of the box with the addition of Bobs Buckles for the rigging, 5 Gaspatch Vickers RNAS Guns, an HGW seatbelt set and a lot of Aviattic decals. The display box arrives next week and this will be firmly stored away - but as of now, I can relax and build a few smaller ones for a change. Time to rest and have a beer! Chris5 points
-
Hello all, Hope this is OK to include in the GB I know that during the P51 STGB first edition @Jb65rams did a fine representation of P51-D unlimited air racer 'Miss America', however, she's one of those aircraft I've always fancied adding to my collection. It wasn't a project I was initially considering doing for the GB but after reviewing the work carried out so far and my reference images I thought I'd like to continue with, and include it alongside my other build. The donor kit; Airfix boxing of the original Otaki mould is not bad for profile and indeed has some very nice fine surface detail, but it is plagued with sink marks (the fuselage in particular) and dubious fit throughout so an ideal candidate for some surgery, and as I only paid £4 for it, nothing to lose! So hopefully turn this into..... ....this.....I intend to do the model 'in flight' hopefully with a suitably stars and stripy helmet adorned pilot figure. The markings will be home created and printed decals for some and masks for others. Some surgery has already taken place..... Wing span reduced and card replacements added (the finlets will be added at a later stage) also I had started replacing the undercarriage doors as the kit parts wouldn't even come close to fitting and the underwing pylons have been removed. Same exercise for the tailplanes... The mainplane wing tips have been sanded to shape. Cheers, Mark.5 points
-
Hi folk's,build number two and again A kit which doesn't see the light of day much these days,I've built a couple in the past and while not up to todays expected standards it looks like a Mustang,again a post Christmas start on this one.5 points
-
Hello everyone! Here is my latest kit, completed this past weekend. It's AZ Model's 1:72 Messerschmitt P.1106T - the navalized carrier variant. I thought the concept so crazy and absurd that I couldn't resist getting it! I believe it's a first in Luft46 kits since I don't recall anyone releasing carrier-borne aircraft in this field. The instructions that came with the kit were for the B variants (the other two boxings), I'm not sure if by mistake or that's how they come with this kit. I had to refer to the boxart for the variant-specific parts (arrestor hook, underwing fuel tanks and gun pods. The build wasn't easy. The parts were a bit crude and with flash and needed plenty of cleaning up, reminding me of earlier Special Hobby and MPM kits. I built it mostly OOB only adding belts from Tamiya tape and replacing the wing pitot tube with one made from stretched sprue. I opened up the holes at the tip of the gunpod barrels. To get it to sit on its legs, I packed weight inside the engine and in the nose area above it. I made a forward u/c bay bulkhead to hold/hide the lead weights. I managed to get a reasonably good join of the wings to the fuselage but the other joins needed plenty of filling and sanding. The canopy was a poor fit and I only managed to get it in place after plenty of trimming and at the third attempt when I resorted to CA gel to hold it in place. The kit was fully painted and varnished with brush. I didn't like the options proposed by AZ Model so I made my own scheme. I used the decals from option 3 plus the anchors of option 2, all placed as I saw fit. The decals behaved well and reacted to Micro Set and Sol. Despite the difficult build, I enjoyed it and am glad I decided to build this "flying fish"! Thank you for looking and all comments are welcome as always Miguel5 points
-
First time posting a build on this forum.. Hope you like. Heinkel 112 B-0, Grupo 27, Teniente Miguel Entrena Klett, Sania Ramel, 1943. Cheers, Luka5 points
-
Hi everyone just fitted some new split level shelves to add some desperately needed space in my cabinet and thought I would show you. Cheers Michael. DSC01618 by michael hobday, on Flickr DSC01620 by michael hobday, on FliDSC01621 by michael hobday, on DSC01622 by michael hobday, on Flickrckr/2hWvtyr]DSC01619[/url] by michael hobday, on Flickr5 points
-
5 points
-
Cheers all, The recovery is going well I think, pump is still functioning and I have my first round of Cardio Rehab on Monday afternoon. The nurse is behaving you'll all be glad to know so one could say that all is well. Probably the last update today , I need a snooze and its getting cold in the workshop now. Drivers IP is fitted along with the fixed fire extinguisher, a few more details picked out in the drivers compartment and a few areas touched up. Till the next update chaps Dan5 points
-
Since the galactic quest for a good 3.5mm masking tape proved unsuccessful, the job must be done twice, overlapping two strips per bay. Tedious, but ultimately...extremely tedious:5 points
-
Well that’s the brown on. I hope I’ve covered enough of the surface area so I don’t need to retouch bits. Now need to let that dry thoroughly before putting the masks on for the green.5 points
-
Very true Bill. I once got seriously yelled at from the rear seat when I hadn't shown any signs of even commiting to a short base for a final turn at around that height. My instructor clearly didn't understand that I was admiring the view. Terry5 points
-
I've not made as many models as I usually do but I have had fun making all the ones I have made. As usual all of these builds have been completed in GBs and all have been painted with brushes. Pz.Kpfw.IV Ausf.D and crew Kit: 1/35 Dragon/Platz Pz.Kpfw.IV Ausf.D Paints: Humbrol, Revell, Citadel and Railmatch Acrylic paints all applied by brushes Figures: MiniArt Special Edition German Tank Crew Base: 3mm MDF, Wilko picture frame, Household Filler, Vallejo European Mud, Woodlands Scenics Blended and other turfs, Army Painter tufts and grasses WIP: Here Lots more photos of the Pz.IV and crew: Here Vignette style photos: Here Panzer IV Ausf. J Sd.Kfz.161/2 1 SS Pz. Div. 723 Normandy 1944 Kit: Tamiya 1/48 Paints: Humbrol, Revell, Citadel and Railmatch acrylics all applied by brush Extras: Tamiya Zimmerit stickers (the set for the H version - which fit fine), Vallejo European Thick Mud Build thread: Here Ready For Inspection photos: Here T26E4 Super Pershing Pilot #1 - HobbyBoss 1/35 Kit: HobbyBoss 1/35 T26E4 Super Pershing Pilot #1 Paints: Humbrol, Revell, Citadel and Railmatch - all applied by brush Extras: Tamiya Tank Crew, Italeri Tools, Slater's Plasticard, Academy ammo crate and jerrycan. WIP: Here RFI: Here Vignette photos: Here King Tiger - Porsche Turret - s.Pz.Abt.506 Arnhem 1944 Toon Version Kit: Meng Toon Kit (no scale given) Paints: Humbrol, Revell, Citadel and Railmatch Acrylics applied by brush Extras: No More Nails Zimmerit (thank you to @MarkSH for the idea), lead wire and Vallejo Mud products WIP: Here RFI: Here Tiger 1 Ausf.E (Late Production) Turret Number 313 of 3./s.Pz.Abt. 503 (3rd Company 503rd Heavy Tank Battalion) This is the Tiger 1 that would become famous as the one which was overturned at Manneville during the Allied heavy bombing at the start of Operation 'Goodwood' on the 18 July 1944. Three of the crew actually survived that bombing. My version is modelled before that date while the detachment was still fighting against Allied tank forces during the battles around Caen. My finished kit will be seen in action next against a Typhoon Mk.1b in the D-Day STGB. Kit: 1/48 Skybow Tiger 1 Ausf.E (Late Production) Paints; Humbrol, Revell, Citadel and Railmatch Acrylics all applied by brush Extras: Stetched Sprue arial and Vallejo Mud The W.I.P. can be found: Here Hawker Typhoon Mk.Ib - 1/48 Hasegawa/Italeri - motorised prop ZY-Y - 247 Sqn. France, June 1944 This was part of my project for the D-Day GB. The kit is by Hasegawa but re-boxed by Italeri with new decals. There are some fit issues with the kit in a couple of places but other than those it was a fun build. As can be seen from the photos I decided, as it was going to be part of a small diorama, that I would have the prop motorised. The motor I used was from Airfix. I also used the PE set for this kit from Eduard. Kit: 1/48 Italeri/Hasegawa Hawker Typhoon Mk.Ib Paints: Humbrol, Revell, Citadel and Railmatch Acrylics all applied by brush Extras: Eduard PE set, Airfix motor and Airfix pilot The WIP can be found: Here The RFI can be found: Here The two previous builds were built to be part of the vignette below: All the photos of the above scene can be found: Here Thank you to everyone who has taken the time to comment or make suggestions in my build threads - it’s the support from fellow modellers that have helped make my models what they are. There may be one more build to go into this Yearbook if I get it finished before the end of the year. Comments and suggestions welcome. Kind regards, Stix4 points
-
HI all, not really a WIP, just some shots of a half built model. After a long break from modelling I fancied the newly released Alfa from Italeri. It's OK. Fit is very good, sink marks not so good. Detail is pretty good too overall. Anyway, here's where I'm up to:- So far I've:- Drilled out all of the kit 'bolts' indistinct plastic blobs, and replaced them with proper resin items Drilled out the core plugs, built up the outers and fitted brass core plugs turned 4 ali filler caps for the rocker covers and 2 for the engine block replaced the ignition leads with braided cord scratch built clips for the distributor cap scratch built air filter from PE mesh scratch build braided lines and banjo connector for the oil pump. added braided cable from the rocker covers to the bulkhead - rev counter I assume, although not sure why there would be two? Lots of alcad and hopefully subtle washes, I'm going for old but not dirty which is tricky to pull off. More to follow no doubt. Eventually I think I will turn some proper wire wheels, and replace the kit leaf springs and dampers with something better - but go with the kit items for now. Thanks for looking, Nick4 points
-
A pack of Draken being taken out for their daily walkies... Could make an interesting diorama 😛4 points
-
Thanks Terry, it was a pleasure to meet you too. Onwards, but not much of upwards yet...... Cheers Ced! Thanks Adrian, much appreciated! Cheers Steve! I believe you may indeed have done so, but I blame @corsaircorp for my not being able to remember either! Anyway, having now got back into the rut normal routine once more, a little more progress has been made. Not much. Just a little. More work done on the underside, including some very messy scribing. Not sure how I managed to miss the correct position by so far, but I did! A scrape of PPP and it was redone. The next shot of primer will show how successfully! The camera port on the underside was drilled out with a 1.6mm drill and a lens was punched out of .010" clear sheet , popped into place, and masked (so I don't forget!). Question for any Battle experts - there appears to be a similar port on the upper side of the fuselage, just aft of the gun position. Was this a formation light? I can't see any reason for an upward pointing camera! I also added the wheel fairings, which seem to fit pretty nicely. A couple of gaps have been filled with CA and when that's properly dry I'll clean it up and give it a squirt! Oh, and one last thing....I booked a hotel room for Telford next year. See you all there! Thanks for looking in! Ian4 points
-
Well, I'm come back to my neighbour... Another bad joke, Voisin a french word, is neighbour in english! But here, it's a car: (All pieces are dry fitted, of course...) What is this? You will understand soon... Understood? Its easy: In situ: Another thing, no glue at home! The radiator itself, another bad joke or a nightmare, french people, you know... Dan.4 points
-
Ha. That’s cos you’re well known for compromising on quality then Alan!!!!!4 points
-
Ok so. That mean you can’t be aft without being abaft........but you can be abaft without being aft.............I think 🤔4 points
-
4 points
-
Indeed. Abaft is a relative term, like “in front of” or “behind”. You can be aft, full stop. You have to be abaft... something else.4 points
-
Update: So I managed to fit the undercarriage doors fairly well, the front wheel well I added a small piece of plasticard to help align the height, the another small piece attached to the front door to fit across between this and the other doors to help align them (and stop the pieces falling in). The rear two doors did need a little sanding to get them to align nicely but in the end it fitted well. So the rear wheel well doors, one I didn't fit as well as the other but hopefully once finished it won't be as noticeable (or just add character). I added some small bits of filler where needed, then primed in Zero Paints Light Grey Primer (lacquer). For the paint scheme my plan was to do a scifi style scheme similar to the Gallente style from Eve online, which is a metallic green and gunmetal type colour scheme (but in a camo style pattern). To start with I airbrushed on some Alclad airframe aluminium, my first time using it and it went on amazingly, though from tips online I put it on in very thin layers with a low pressure (15 psi). I did have a couple of errors as seen below but that's due to my general impatience flipping it over to do the other side. I then added a coat of Zero Paints clear lacquer over the top. So I added some blutac 'squiggles' for the camo pattern, then sprayed it with a coat of Tamiya clear green, thinned with Tamiya thinners, but things didn't go well at all... Some seriously weird reactions occurring - I think the surface was just too smooth, the paint was just running off - I ended up putting too much on and it pooling as seen. Maybe there were other factors (not fully mixed with the thinners or too much thinners, too cold (it was close to freezing where I was painting), etc. but most of it wiped off, after a few minutes sat on it, with just a bit of thinners wiping it off, I then ran it through some water and what I was left with was below... Annoyingly my masking came off with the washing and I really dislike masking canopies Ho-hum, you live and learn. I hadn't given up on the metallic green though and got myself some Vallejo Mecha metallic green, I keyed back the paint using some 1000 grit, to hopefully help with adhesion this time! My first time with this paint and it went on great, with only a couple of drops of thinners. I added it in a couple of thin coats, first coat... second coat after leaving the first to dry for a day... So that's where it's up to, I need to mask up the camo pattern then I might give it a coat of Alclad again, take off the masks then attempt a coat of Tamiya smoke (black clear) over the whole topside - hopefully it won't run again if I don't clear lacquer it, fingers crossed.4 points
-
You don't know if you'll ever see that kit again, so you have to buy it. Right? Am I right? Tell the truth now... Cheers, Bill PS. Besides, it was the 1:72 Fine Molds F-14A. It's not something you want, it's something you need.4 points
-
Cheers guys, So adding more of the little details to the interior, more Archer decals added and the scratch built fire extinguisher added to the rear bulkhead. I can now start the weathering process for the interior. More later Dan4 points
This leaderboard is set to London/GMT+01:00


.thumb.jpg.d17ff607fc7e89ed057e63fcb6f2a888.jpg)
.thumb.jpg.0cb281983c298f55509ab7d9a06994bd.jpg)
