
Leaderboard


Popular Content
Showing content with the highest reputation on 04/12/19 in all areas
-
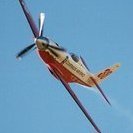
If you like the Spitfire and have not read Jeffrey Quill's book "Spitfire", do so. This is my Spitfire Griffon Prototype in the form it was when "raced" against the FW190 and Hawker Typhoon July 22, 1942 at Farnborough. It's not in Quills book, but I read somewhere that Supermarine had put a pair of A-wings on DP845 for the occasion, so this is how I made it. Its the 1/72 Tamiya Spitfire I with a XII nose grafted on. I rather like the look of it with the pointed spinner. Hasegawa IX canopy, Xtracolour enamels, decals from the spares box and DP845 done on inkjet printer paper. /Finn Bonus: Here's the FW190. Tamiya 1/72 FW190A3.30 points
-
#28/2019 And another one finshed. Hasegawa kit with Authentic Decals, AK Real Color AMT-7 and AMT-11, EZ Line for antenna wires and brake lines, Eduard seatbelts Build thread here https://www.britmodeller.com/forums/index.php?/topic/235061405-lend-lease148-curtiss-p-40k-warhawk-soviet-airforcevvs/ The model shows an aircraft of the 760th fighter regiment, 261st composite division in Karelia winter 1943-44. DSC_0002 by grimreaper110, auf Flickr DSC_0003 by grimreaper110, auf Flickr DSC_0004 by grimreaper110, auf Flickr DSC_0005 by grimreaper110, auf Flickr DSC_0006 by grimreaper110, auf Flickr DSC_0007 by grimreaper110, auf Flickr DSC_0008 by grimreaper110, auf Flickr DSC_0009 by grimreaper110, auf Flickr DSC_0010 by grimreaper110, auf Flickr DSC_0011 by grimreaper110, auf Flickr DSC_0012 by grimreaper110, auf Flickr DSC_0013 by grimreaper110, auf Flickr DSC_0014 by grimreaper110, auf Flickr DSC_0015 by grimreaper110, auf Flickr DSC_0016 by grimreaper110, auf Flickr DSC_0017 by grimreaper110, auf Flickr DSC_0018 by grimreaper110, auf Flickr DSC_0019 by grimreaper110, auf Flickr DSC_0020 by grimreaper110, auf Flickr17 points
-
No Airifx here! Here are a few pictures of 1:48 Sea Fury FB MK 51 Hobbycraft+ Flighpath FB 11 detail set I recently finished. This thing weighs a ton as there is a lot of white metal and photo etch and resin inside. The model is finished as F-46 VSQ 860 MLD/ Royal Neth. Naval Air Service, NAS Valkenburg 1953 flown bij ltZV1 R. Izerda then a member of the MLD's demoteam "The Aerobats". Decals by Dutch Decals and me. This model was a homage to a modelling article I read when I first came back to the hobby in 1995; Scale Aviation Modeller Volume 1 Issue 4 April 1995 by Jonathon Mock's build of the same model with the same detail kit ( back then PP Aeroparts). It blew me away with the detail and the Sea Fury is a beautiful aircraft. I am also working on another homage piece based on another article from the same issue; Gary Madgwick's article on the Aeroclub 1;72 MB.339 in Kiwi colours. Anyways hope you like it, Regards14 points
-
Interesting. I’ll confess to not having thought of sellotape. Not a material I’ve used for modelling. Am a bit sceptical tho’ Not sure if sellotape can stretch around compound curves; also, I did think about cutting/trimming the radiused ends of the flanges in-situ - but decided it was easier/neater to sand such a small radius before fixing it in place. In the end I was comforted by the fact that good old plastic card is so controllable. Welds nicely to the the surfaced with solvent, can be scraped, sanded and trimmed etc etc. Anyways (1) - Wot’s a bit of palaver? The hobby’s full of palaver (mind you - that could just be me....) Anyways (2) - chance to use my favourite scraping gizmo: Anyways (3) - I ain’t taking them orf to see if sellotape’s better!! First stage clean up/refinement. Should look sufficiently neat.14 points
-
This is a Hasegawa 1:72 EA-18G Growler of VAQ-135 Black Ravens NAS Whidbey Island 2011 Kit is made OOB apart from the decals which are from Authentic Decals13 points
-
A long while ago I made the 1:72 Airfix Mustang IV of 112sqn. I completed it as the kit said and subsequently found out the the Mustang's flown by 112sqn had different roundels on the upper wing and were painted in the 'fireswall' camouflage scheme which instantly made me dislike the kit. I was then given a Tamyia 1:72 Mustang that I completed as Petie 2nd and as the kit also had decals for E2*S i stripped back the 112sqn kit and completed it in this scheme instead. I had got bogged down with a Hasegawa 1:72 EA-18G Growler so decided to get a couple of supermarket specials. I picked up the Airfix 1:72 Tomahawk llB and the Airfix P-51 Mustang. As I had the decals in the spares box for the RAF Mustang IV I decided to complete them both in 112sqn colours, this time with the correct rounds and camouflage on the Mustang. They were completed OOB using the paint supplied and were a nice quick distraction from the Growler. Anyway, onto the kits Tomahawk IIB, P.O Neville Duke. Libya 1941 Mustang IV, Lt Blanchford. Italy 1945 Thanks for looking13 points
-
Funnily enough I find that being a lawyer has a tendency to send me to sleep, tired or not...... Soupçon of solidarity acknowledged Will endeavour to to reciprocate where appropriate (lawyer’s promise, suitably caveated.....) Not sure how much modelling has happened in these 131 pages tbh. Keep expecting the Mods to shut it down....... 3D modelling skills? I’ll have you know I downloaded an app to this very iPad (not that you can see or know that I’m typing this on an iPad Pro in a coffee shop after having been to the gym - except that I’ve just told you of course [wish I’d not started that]) - gonna start very slowly learning. After all you can email designs to your mates to 3D print with this clever internetty/emailee thingy can’t you....You know, extra special mates Thread drift? Oh well. With all due apologies for drift..... Finished the gun sights (with the same tacky bit of (unmentionable egg) foil [sorry Crisp]) and stuck em to the coamings. Tried Gators Grip (not sure) so ended up using it as a positioning tack for some thin cyano: I’ll add the glass at the need of the build. Don’t hold your breath...... Probably too purply now - especially as Kirk, in a post somewhere above, backtracked somewhat and suggested it was actually on the green side of purple But if anyone wants to stick their heads close enough to the Hawk to see the gun sight lens then there be plenty of horrors to distract their attention....... Next task. Not finished with the wing fences yet. At 1:1 they have a flange that (presumably) is used to attach them to the wings. It’s not recreated in the kit moulding or any of the etch sheets - so I thought I’d have a punt with some 0.2mm Tamiya plastic paper cut into 0.5mm wide strips: I then used a scrap wing to stretch the strips a little to encourage it to conform to the shape of the wing: One end rounded and glued in place with some Tamiya green-cap: Once dry, then stretched/pulled around the wing: And trimmed and shaped and stuck underneath: Now waiting to fully dry/cure. With a drop more green-cap, the front has softened and conformed to the wing angle better than in this piccie: 0.2mm is a little on the thick/clunky side. I would have preferred to use 0.1mm but I’ve found that the 0.1mm plastic paper softens/distorts too easily when in contact with a liquid cement like the green-cap so 0.2mm it was. Anyway - the plan, once the flanges are dry, is to gently thin them to a less overscale appearance with a sanding stick. I’m hoping that they’ll be a little but eye-catching addition once painted. A bit of a dark wash should show em up nicely.13 points
-
#29/2019 End of year factory clearing 😆 the next one finished. Eduard kit with Avalon decals, EZ Line for the antenna wire, plastic rods for brake lines, AK Real Color RLM76, Gunze and Tamiya for the upper RLM 75/83 camo (75 was lightened up a bit). Build thread here https://www.britmodeller.com/forums/index.php?/topic/235062358-end-of-war148-messerschmitt-bf109g-10wnfdiana-2jg52/ The model shows an aircraft of II./JG52 that was found at the end of the war on Czech territory. DSC_0001 by grimreaper110, auf Flickr DSC_0002 by grimreaper110, auf Flickr DSC_0003 by grimreaper110, auf Flickr DSC_0004 by grimreaper110, auf Flickr DSC_0005 by grimreaper110, auf Flickr DSC_0006 by grimreaper110, auf Flickr DSC_0007 by grimreaper110, auf Flickr DSC_0008 by grimreaper110, auf Flickr DSC_0009 by grimreaper110, auf Flickr DSC_0010 by grimreaper110, auf Flickr DSC_0011 by grimreaper110, auf Flickr DSC_0012 by grimreaper110, auf Flickr DSC_0013 by grimreaper110, auf Flickr DSC_0014 by grimreaper110, auf Flickr DSC_0015 by grimreaper110, auf Flickr DSC_0016 by grimreaper110, auf Flickr DSC_0017 by grimreaper110, auf Flickr DSC_0018 by grimreaper110, auf Flickr12 points
-
Build report can be found here: Comments are welcomed as always Ran12 points
-
The one thing that my two jobs (single seat FJ & the Bar) have in common is the inculcation of a thick headed refusal to listen to anyone else’s opinion - and an unreasonable belief in ones own opinion..... It’s not my fault if everyone else is wrong is it?11 points
-
Basically, Steve, what everyone is saying is that you’ve done it wrong. Hope that helps.11 points
-
I'm all for constructive criticism of the kits -- how else would we know if they're accurate? -- but this strikes me as venturing into needless rudeness. It's a painting, it's not the model.11 points
-
It seems I'm stuck with props. I liked it much better this time, though. Masking and painting the underside was a bit exhausting but it came out better than I expected... Famous (or notorious?) Dora here, in 32nd scale from Hasegawa. The kit needs no introduction but the aircraft does I think. The entire squadron JV44 have their aircraft painted red with white stripes underside, and it is really amazing to have spared the time and effort for that in 1944-45. This is Red 1 flown by Leutnant Heinz "Heino" Sachsenberg in 1945. "Verkauft's mei Gwand, I fahr in Himmel" reads on the fuselage, which is a part of lyrics wrtitten to a Johann Strauss melody. All-black Luftwaffe crosses underside are also of note... Thanks for looking. I will return to my jets now10 points
-
Here is a few pictures of the Ace's GAZ-M-415 1:48 pick-up finished as Russian Army fire brigade vehicle. I was fed us making green and grey modesl so why not spruce it up ? I am planning on using it in a diorama but more of later on. Kit is relatively simple though the chassis is a bit skimpy with little plastic for the parts to grip together. The photo- etch parts do lift the quality of the model considerably and I would buy another. Decals are from the spares box. Anyhows I was tempted just to put ZZ Top colour scheme on it but resisted the temptation...... Now where did I put my Billy Gibbons 1:48 figure ….. Regards Brian9 points
-
Thanks for watch9 points
-
My Spitfire XIVe highback is complete, still finishing the bubbletop. Here's a few photo's of the highback (as a teaser), I'll post more photo's 'ready for inspection' when I get a chance, and photo's of the bubbletop when complete. Hope you like, Colin9 points
-
Speaking of grey, another Gripen E prototype took to the air recently: Here's hoping for the glorious return of Swedish splinter scheme!9 points
-
Since i am responsible of it's box art...here it is...9 points
-
Well, they're coming back today for a second showing, so hopefully... Also, who sent me a RAF side cap? It arrived at my office today. Was it one of you? Fess up!9 points
-
I have taken this as far as I could. It wasn't really how I thought it would end up, the dark dirt wash I used was too dark, so now with the matt finish it looks even darker. I am not the best photographer either!! I need to look at some other water based washed or some of the oil based ones next time. Thanks for all the advice with this build, it was very helpful. Again, this is a learning process and there are a few issues that I spotted after fixing in the paint, but I'm happy for this one to sit on the shelf. Please critique as you see fit 👍8 points
-
Lockheed-Martin F-35A Lightning II 421st Fighter Squadron ‘Black Widows’, 388th Fighter Wing Hill AFB, Utah, present day ORIGINALLY POSTED THIS SOME MONTHS AGO BUT JUST MADE USE OF THE SPRING SUNSHINE AND GOT SOME BETTER PHOTOS (Doesn't make it a better looking aircraft though, and you still can't see the Have Glass glitter, but it's there - honest) Brown tone = new photo. Blue tone = old photo. Don't ask me why! Like many other people, I regarded the F-35 as being too ugly to model. But things change! I was tempted to buy a 1/72 Academy kit at a reasonable price (£20 I think it was) at Yeovilton Air Day this year, and it just went in the stash. Meanwhile out of interest I did a bit of research on what shade of grey to use, etc, and at the same time a friend of mine sent some photos of a 421st FS aircraft at an airshow in Greece. One of the major things that removed my barrier to building one of these was the fact that production aircraft no longer have those RAM panels painted in a lighter grey, so none of that awkward masking, though there are still some subtle shades of grey on various panels. I also then discovered Mr Paints acrylic lacquer airbrush paints, and found that they do FS 36170 ‘Camouflage Grey’ and ‘Have Glass’ special matt varnish to give that metallic sparkle, so the fire was lit and off I went to build one of these: A pleasurable wander through Wolfpack Decals resulted in me buying sheet 72-125 which includes a 421st F-35A (it also includes a VFA-147 F-35C which got me looking forward to a 1/72 F-35C kit which surely can’t be too far away). Building this model made me realise how different the F-35 is from any other modern jet (except perhaps the F-22) with those weapon bays, facetted construction, sensors everywhere, lack of HUD, strange paint, etc and it was a great pleasure in the end to build it.8 points
-
For once, a post from me about the model, so hope you’re sitting down. Stick with it on Gator’s Grip; I agree that it’s a bit of an act of faith to start with, because initially it doesn’t really appear to do anything much. But when allowed to cure it’s excellent; I use it for probably 90% of my PE nowadays.8 points
-
I've always wanted to make such a model. wood and metal.7 points
-
Revells 1/72 Handley Page Halifax built as S-Sugar of 35. sqn. Shot down during an attack on Tirpitz over Norway. The aircraft force landed on Lake Hoklingen,and the crew survivied. All but one escaped to Sweden. The plane is now resting in Hendon museum. Read more here: http://www.archieraf.co.uk/archie/1048tls.html . Freightdog correction set for wheels, radiators and propellers used. The model was painted with Tamiya and Gunze colors. Best regards Rune Haugen7 points
-
G'day All, This is the old ESCI Kit #4077 of the Macchi. Its OOB with the exception of the crew figures(Hasegawa) and the Decals(Hawkeye Models Australia) and big tip tanks from OzMods. Brush painted with Humbrol enamels. I thought it would be an easy scheme to do......I was wrong. It represents an R.A.N. Macchi with 724 Sqn, HMAS Albatross, back in the day. I know the pic's are rubbish but I'm sure you will get the gist of it. Cheers, Devo7 points
-
Bouncing An assortment of greeblies And standing on our own four feet More to do! Busy evening ahead7 points
-
"As mentioned in post 15 there are very many differences between a Gauntlet and a Gladiator The transition from the SS.19 to the Gladiator via the Gauntlet, was a long and tedious one and one major change was the re mounting of the lower wing which was lower on the Gladiator than the Gauntlet and the wing gap increased. They were two very differing aeroplanes. I used an AP fuselage drawing to make my fuselage. The wings are very different. Even the Gauntlet fuselage structure fabrication changed between the Mk.1 and the Mk.2. I've not yet come across any reference to the differing wing stagger between the Gladiator Mk's but that doesn't mean I've been looking. This sort of thing did happen for instance on the Wapiti to change the C of G. on the Wapiti when the geared engine was fitted. This was achieved by replacing the cabane struts by longer ones but retaining the main wing struts which were angled forwards to move the top wing forwards the correct amount, thus changing the centre of pressure of the two wings and the C of G. Also the under-carriage radius rods were replaced by new shorter ones, thus projecting the axle forwards. To quote Micheal Caine "not a lot of people know this". Two differing cabane strut reference numbers and strut dimensions in the rigging manual were the clue that made me think in a different way. Of course all the drawings don't show this... Oh and the production Mk.V did not have a longer fuselage... To prove this Gladiator C of G change you will need the relevant AP and rigging manuals and reference numbers of the struts and wires. If this is not so then it didn't happen. John" "I must admit not knowing about this change in stagger, but am puzzled as to why this would be. An increase of over 2in in stagger suggests that the cg had been moved forward, which may have been true with the Mk.IIs engine and three-blade prop, but would be just the opposite with the arrester hook on the Sea G. Particularly as the props were interchangeable on the Sea Gladiator (and therefore presumably on the others, had anyone thought to try). It must have been an interesting exercise, but it was carried out onboard HMS Eagle in the Mediterranean where maximum speed was considered less important than take-off run and initial climb. Graham" Some 50+ years ago I was able to gain access to some Hawker and Gloster historical data. I still have the notes I took - photocopiers were very few and restricted in their use - scanners just a gleam in the designer's eye - so all notes were hand written in pencil. I don't have the relevant APs but, attached below is a table I made, somewhat later, from some of the Gauntlet and Gladiator info I copied. IIRC, some, (more?), of this info is available in Francis Mason's 'Gloster Gladiator', MacDonald, circa mid 1960s. I no longer have a copy, but worth checking. As noted, I estimated some of the Gauntlet info: the rest is what I copied from the files. The 1.75" increased gap from the Gauntlet to the Gladiator, (mentioned by John), is shown, as is a 4" increase in stagger to accommodate the forward shift in the CofG due, mainly, to the heavier engine and its ancillaries. There was also an increase in stagger, (mentioned by Michael in post 26), of another 4" from the Gladiator Mk.I to Mk.II, partly due to an increase in engine and ancillaries from 1,400 lb to 1,540 lb. On the MK.I, the CofG was 6.55" aft of datum for wooden prop and 5.75" aft of datum for metal prop. The Cof G on the Mk.II with metal prop was at 5.8" aft of datum. No. 3 Sqn, RAAF, (and I presume other units), flew MK.II A/C fitted with wooden props. One pilot I interviewed said it was more agile than the A/C with the metal prop: I assume this was probably due to the rearward CofG shift. I realise that I have taken this thread a long way from the original request and apologise for boring some readers. However, I thought the info might be of some interest to John and Graham in particular. Peter M7 points
-
Sellotape Plain simple Sellotape, other names are available Stick it down where you want the flange, cut away the flange you don't want Walk away It is scale thin to represent the flanges, sticky enough to hit and stick and a coat of paint will seal it down to its fate Thin plasticard can do it but what a palaver... Still, that said the gunsights look proper Fritag to me, truly nice and if (IF) you wanted a slight colour drift why not a spot of Tamiya Clear Green X-25 as a thin film over the Cadbury ?7 points
-
Well... it was a bit of a battle, but we got there in the end... There's a fair bit of work in getting the doors and clams to fit, and I've added some extra details like the oil coolers in the engine bay and fire extinguisher. But it's the only way you're going to get a 1/24 injection moulded Lola T70 on your shelves. You'd think that Tamiya would scale down their big Mk 3 Coupe, but they haven't yet! best, M.7 points
-
Little activity due to the bandaids. The control wheel in the kit can't be seen in any of the photos I have, so replacement parts are made. The kit's attempt at an instrument panel is substituted by a piece of styrene, later to be detailed. Rudder pedals, absent in the kit are also made: I am dabbling at making a simplified resemblance of the Franklin engine, to see if it can be included:7 points
-
I reckon you should grab a pencil and trace that silhouette on the wall at hourly intervals Ced - you could have a whole Squadron swooping down from the clouds cornicing (and something to color in when the mojo is low!)7 points
-
Having accidentally won a gold and silver at Telford for my models of Le Corsair and La Fauvette respectively, I thought I should try and get another sailing ship underway. I have chosen the Heller 1/75 kit of the Nina. The Nina was known as the Santa Clara prior to Columbus' voyage and according to some sources, the kit is closer to her in her pre-Columbus days. It appears she may have received a partial or whole new rig for the crossing of the Atlantic. Full size replicas of the ship vary in their rig. I have decided to keep the rig Heller suggest and will be trying to add quite a high level of detail to the model during the build. Please note that the build will be one that I drift in and out of between now and Telford 2020 which is the target for this build so updates will be intermittent in order to fit around some other builds I want to do/ complete over the coming year. I have already obtained a rigging set for the kit and have ordered some wooden grating material. Not having a proper lathe, turning up a horizontal capstan could be interesting but I have overcome harder problems than that in the past. Box art for starters: Martian 👽6 points
-
Hi all, I've previously built one of the Kotobukiya HMM Zoid kits (the Pteras) and was casting around for something to do recently so decided to start the Molga in my stash. The Molga (or Slitherzoid as we knew it in the UK) was one of my favourites as a kid. Silver and red! Hidden guns! Wiggly crawling action! This version doesn't go, but it's got nice details apart from one or two "phoned in" areas like the tail, and was really nice to build and paint. I painted it with Alclad Aluminium (I think White Aluminium) and highlighted the tops of the curves with Pale Burnt Metal. The flanks and lower areas are heavily shaded with Hotmetal Blue, normally I'm a bit too sparing but this time I wanted it to be really visible which I think has paid off - you can see the shading even after all the dust was applied. The red is a mix of Tamiya Hull Red and Bright Red, shaded with a Citadel Contrast mixture made from dark brown and cold red which created a lovely rich colour with some surface patina to keep things interesting. It's weathered with enamels (sparingly, I used acrylics for any panel lines and other wash-like tasks) and misted coats of Tamiya acrylics, plus a few pigments, lots of dry-brushing, the usual sorts of things. I was going to weather less, but I got the colours a little wrong and had to take it further to get everything to sit right on the base. Speaking of which, the base is a little piece of acacia sold as a sort of hipster serving platter. I built up the landscape with scraps of foamcard, and used slate, sand and CA to provide surface texture. The cracked earth on the roadway is one of the GW crackle paints, which work rather well if you put them on thickly enough. All in all, a relatively short project, but a fun one - the kit was well-behaved and the simple base was quick and satisfying to do. If I hadn't put the weathering off out of fear, I'd have been done at least a week or so sooner. If you're interested in the steps, the WIP thread has most of them, especially some step-by-step pics of the base. Thanks for looking! Will6 points
-
Hi folk's,this is the first of a half dozen Airfix kit's I wanted to re-visit from builds I remember back around 1975-78,I was a big fan of carrier based aircraft of the U.S. Navy and first built them as many were being released by Airfix.No weathering or effects just OOB in a clean finish reflecting Airfix's box tops of the Palitoy era which after the superb artwork that adorned the boxes till then were less than inspiring,where possible I'm using original decals so a big thank you to Pete in Linc's and Alex Gordon for the sheets that made this one possible.I've got the rest of the kits now so to come will be the Tomcat,Skyray,Corsair,Viking,Vigilante and Sea King.Thanks for taking the time to look. https://www.britmodeller.com/forums/index.php?/topic/235062397-airfix-nostalgia-builds/6 points
-
Good evening, ladies and gentlemen. I present you my next model. It's typical "shortrun" without any navigation and headlights.6 points
-
Here`s new model for my "Falklands War collection" - 1/72 A-4Q Skyhawk of Argentine Naval Aviation, code 3-A-305 (ex-US Navy A4D-2 serial 144929), Rio Grande air base, Falklands War, May 1982. Built of Airfix` kit A03029, which seems to be a quite nice kit, but requires a lot of work because of terrible and stupid errors (worst of them is bad nose angle). I think that old Fujimi from 1980`s is still much better than Airfix from 2012. I`ve used PE parts from Eduard, resin fuel tanks from Brengun, resin ejection seat from Pavla and decals from Condor Decals and DP Casper. Some scratch building was required (like Argentine antennas, guns etc.). Four Mk. 82 Snakeye bombs and MER are from Hasegawa`s 35001 set. You can see whole proccess of building here (in Polish): https://www.pwm.org.pl/viewtopic.php?f=851&t=875046 points
-
Hello, Here is my latest model: a 'classic' Messerschmitt Bf109E-4. The kit is the Airfix one in 1/72. I wanted to finish it with a white nose and found this option on an Almark decal sheet. I added a few details, from scratch or from aftermarket. The WIP can be found here: WIP Messerschmidt Bf109E-4 - Airfix 1/72 Cheers, Antoine6 points
-
I have been reading this forum for a couple of years and have finally decided to register here so that I may post comments and hopefully even post some works (fingers crossed). My interests are varied so I am liable to be all over the place here. Really do enjoy this website! If the wife gets on here and starts asking if anyone here has seen me lately, don't tell her that I am in the basement. Cheers! Toddie The Body6 points
-
Have we had enough of flanges then? I confess I never appreciated the myriad view that a humble flange could provoke. I now feel quite old fashioned in me methods The old-faithful plastic card is obvs. no longer the go-to material of choice......Nevertheless, 4 flanges have been produced: And the Fritag flange production line hereby closes..... Shan’t be reopening it....unless someone has plans for a Great Britmodeller Flange Off (GBFO)...... BTW. Looks like I’ve got to straighten a few vortex generators before painting.........6 points
-
Out of interest here is the starfighter compared to its stablemate, my last build, a mig-21, its really interesting how different the metal finishes turned out.6 points
-
Nice work Steve, as always I really enjoyed gazing over the additional details you've added - they'll look great under some paint (one day). How to spot a Britmodeller #646 points
-
I didn't do it, I wasn't there! 😇 Innocent of Mars 👽6 points
-
Gents Here is a few pictures of a diorama I am working on at the minute. Its a St Chamond (early) tank. Its one of my favourite ugly French tanks and there are quiet a few of those. When Takom released the St Chamond I just had to have one. It built up quiet well but of course I got to a particular point and pushed it aside to flounder on the Shelf of Doom. Recently I picked it back up again as I promised myself to finish at least 2 SOD kits a year. Having visited Saumur Military Museum during the summer I also had so good photos of the tank. Unfortunately I havent any photos of work up to this point so you are gonna have to believe me. The Base I went to Action supermarket and bought a wooden tissue box holder for 1 euro and knew it was the right size as a base for the St Chamond. Went home removed the lid and using the ol' decoupre saw chopped the sides and front down. Next I filled the box with green Oase which is used as the green base in flower arrangement (bought at the Action for 1 euro). It is cheap easy to work and when made wet goes hard; ideal material. Based was filled out with wall plaster, various grades of stones and dried twigs. The stones are sourced from material for fish tanks or cat litter. Just push everything into place and with diluted white glue bathe everything in it and wait 48 hours for it to dry Base colour of black followed by various browns and reds using whatever is to hand from Tamiya, enamels and oils. I don't care just mix it all up and it will look natural. The crew The crew is made up of the Takom figure form the kit (minus his head) and MiniArt set 35105. I mixed the fit of heads and arms around to come up with some natural poses. Base colours in enamels and Tamiya. The blue black colour is oil over enamel dark grey base. The tree is made up of electric cables cut to lengths bound together with wire and then dipped in white glue and covered in scenic grass and allowed to dry. Repeat the proces where necessary. I use a coffie jar for this procedure ( grass/ sprinkle in the bottom , throw wet wires in lid on and then shake. And here is a idea of the placement I have in mind More to follow Regards Brian5 points
-
Hi everyone, Just put the last few bits on my attempt at Kitty Hawks 1/48 RF-101C Voodoo kit Finished to represent `The Iron Eyeball` of the 45th TRS/460th TRW, `Polka Dots`, based at Tan Son Nhut, South Vietnam, around 1970 Carried out a few improvements to the base kit, mainly around the intakes as the ones in the kit are incorrect for this version...... and after all ready having built a Monogram/Koster conversion and not realising until after I posted it, thought I`d better try and get it right this time. Also tried to correct a circular `vent/intake` about halfway down the right hand side of the fuselage, but as its in a dark area of camo` you can`t see it much anyway. Another area that`s not right is the instrument panel so I `crow barred` the wallet open and invested in an Eduard cockpit set after much deliberation. The kits decals didn`t really inspire me, especially as Recce Voodoos often carried interesting nose art, so I also invested in Print Scales Polka Dots Sheet ( No 48-050 )..... .....and found a scheme with slime lights, so I didn`t have to sand them off. I had a struggle with these as they wouldn`t release from the backing paper and folded up as soon as you tried to move them. In the end only used a few and the remainder came from the kit which silvered really badly and I spent a lot of time painting the silvering out. Still, I`m glad to have a more modern one in the collection but was disappointed about the amount work to get there, on a not exactly cheap kit. Hope you enjoy, thanks for looking. Cheers Russ5 points
-
Another one that i picked up a while ago, so thought i may as well have a stab! Had read how bad the fit was so bought some extra filler, glad i did...... the fuselage halves dont seem to be the same height, and pretty much everything needed filler(which is my least favourite part of this hobby, so didnt do it as well as i should really!!) . I liked the cockpit though 😀 Anyway, finished as No.61 of the Armee De L'Air, not the best of pics as it started to rain again!!!! Heller 1.72 Mirage IV A 61-8 by Jonathan Francis, on Flickr Heller 1.72 Mirage IV A 61-7 by Jonathan Francis, on Flickr Heller 1.72 Mirage IV A 61-10 by Jonathan Francis, on Flickr Heller 1.72 Mirage IV A 61-13 by Jonathan Francis, on Flickr Heller 1.72 Mirage IV A 61-2 by Jonathan Francis, on Flickr Heller 1.72 Mirage IV A 61-6 by Jonathan Francis, on Flickr Thanks for looking Jon5 points
-
You know it's amusing how different people all advocate different scale effects and suggest polar opposite ways to deal with the perceived problem! As it happens, most agree that as multi-coloured objects are viewed from greater distances, their colours lose their distinction and blend. Indeed many model makers advocate blending colours together or diluting with grey in pursuit of "scale effect". Washes need only darken if using dark washes. Light washes are equally possible and have the opposite effect. This is 1/700 scale and as yet completely unblended with any after effects (which I shall use): Likewise, this is also 1/700 and uses several of the same shades which Rob is considering. Each to their own etc but in my honest opinion trying to "brighten up" the base shades would be a rather unusual approach.5 points
-
Not much visible work this evening; mostly tidying up these boats and checking fit with the hull parts. Not for the first time, it turns out that nothing is wasted: Ark carried a 32’ cutter quite low down in the ship, and the Merit hull opening is not quite large enough to fit a MicroMaster boat... so I’ll use a blinged-up Merit boat instead (making a virtue of the fact that it’s not quite big enough) As with all 3d printed parts, seen close up the boats (especially the hulls) show visible ridges from the printing process. There are contours on the roofs, too, but I doubt you can pick them out in the photo above [to put things into perspective]. I am going to experiment (on the inboard side of a boat a first, so if it doesn’t work it will be invisible) with some Mr Surfacer action on these, so watch this space. Been bonkers at work for a while now, but my main outputs (the accounts for last year) were signed off by the board this evening, so I hope that things will now settle down enough for me to get some proper time at the bench. Crisp5 points
-
Just wait til you see the size of that Sunderland shadow up there. It'll be like a bloody solar eclipse!5 points


.thumb.jpg.d17ff607fc7e89ed057e63fcb6f2a888.jpg)


This leaderboard is set to London/GMT+01:00