
Leaderboard


.thumb.jpeg.512869d47e412449d69d30d0295c1ae8.jpeg)
Popular Content
Showing content with the highest reputation on 13/11/19 in all areas
-
Hawker Siddeley Kestrel FGA.1 Tripartite Evaluation Squadron, West Raynham, 1964 This is another one that was finished many years ago but has recently seen the light of day again. It was based on the original Airfix 1/72 Harrier GR.1 kit with parts from a Heritage Resin conversion. I didn’t actually use any resin but the white metal nozzles were needed. The Tripartite decals were also from this source. Canopy and cockpit interior were from scratch – I think the seat was a spare from the Skybirds 86 Scimitar kit given to me by Mike Eacock many years ago. Nowadays I don’t think I would have been quite so out there with the metal finish, but anyway here it is:26 points
-
Hi, Bought this ages ago, started it, fought with it, gave up, started again, fought again and now am calling it done!! Had some real fitting issues, and was gutted to find out i had to paint the propeller ends myself( the airfix one has decals!!) It did however prompt me to build a little diarame/backscene thing! Finished as No.8 Squadrons WL756 as seen by me at the 1988 RAF Chivenor Airshow Revell 1.72 Shackleton AEW2 WL756-8 by Jonathan Francis, on Flickr Revell 1.72 Shackleton AEW2 WL756-6 by Jonathan Francis, on Flickr Revell 1.72 Shackleton AEW2 WL756-3 by Jonathan Francis, on Flickr Revell 1.72 Shackleton AEW2 WL756 by Jonathan Francis, on Flickr Revell 1.72 Shackleton AEW2 WL756-5 by Jonathan Francis, on Flickr Revell 1.72 Shackleton AEW2 WL756-1 by Jonathan Francis, on Flickr Revell 1.72 Shackleton AEW2 WL756-6 by Jonathan Francis, on Flickr Thanks for looking Jon25 points
-
I present my Revell Boeing 747-436 G-BYGC in the retro livery BOAC to commemorate 100 Years of British Airways. I have always had a soft spot for the 744, ever since I went to LHR as a child and watched them fizz over my head on the approach to 27R... she is an awesome piece of engineering to see up close. The kit was OOB, with the decals from Ray at 26Decals and Authentic Airlines for the windows and cockpit decals. The RR engines were kindly given to me by a fellow modeller on this forum, for which I am very grateful for 😃. It was the ‘Iron Maiden’ version of the kit, which I wasn’t ever keen on making. The kit itself is very tired now, and the fit isn’t the best... it required an awful lot of filler particularly around the lower section of the fuselage and where the wing box section meets the fuselage. It’s such a shame as this lovely giant is slowly fading away as Airlines seek to replace her with more modern and eco efficient aircraft. The paints used for this model were Halfords appliance white for the upper fuselage, Halfords Racking Grey for the lower fuselage, wings and stabilisers. The coroguard sections is a lightened version of Revell 374, with various Revell Aqua acrylics making up the metals. The decals are absolutely stunning and really bring this model to life, complimented with the AA Windows. I have a few more projects on the go at the moment, and I just recently brought the Revell 773 kit to make ANA’s Star Wars BB-8 livery. I can only hope that I have done this lovely aircraft justice... as always thank you for looking and any constructive feedback and comments are always welcomed. Regards, Alistair23 points
-
Hi all and a little egg-beater from Heller just finished for the 'In The Year I Was Born" GB here on Britmodeller. This a/c 195 (along with 196) were the first helicopters to enter service with the Helicopter Flight of the Irish Air Corps on November 25th, 1963 and operated in the SAR, Air Ambulance, army co-op and emergency relief roles until 2007. It's a credit to the crews and maintenance teams that 6 of the 7 machines still in service in 2007 were airworthy on their last day of ops, 44 years on. 195 is finished as she looked in June 1968, a month before my quiet arrival into the world 👶 The canopy and rotor fit weren't great and some of the finer parts are a little big but did my best with them. The build thread (and some classic 60's home-move footage of 195 in action that Summer) is here but to recap: Kit: Heller 1/72 Alouette III 'Securite Civile' boxing Build: OOB except for tape for belts and tea-bag mesh for the engine. Paints: Revell Acrylics with an airbrush; Klear; panel line wash. Decals: Max Decals donated by @rs2man Heller Alouette III IAC_Done (15) by Dermot Moriarty, on Flickr Heller Alouette III IAC_Done (22) by Dermot Moriarty, on Flickr Heller Alouette III IAC_Done (21) by Dermot Moriarty, on Flickr Heller Alouette III IAC_Done (10) by Dermot Moriarty, on Flickr Heller Alouette III IAC_Done (17) by Dermot Moriarty, on Flickr Heller Alouette III IAC_Done (13) by Dermot Moriarty, on Flickr Thanks for looking and happy modelling. Cheers, Dermot22 points
-
Here with my recently finished Italeri 1/32 F-104G - it was finished just in time for display at Telford. The kit went together reasonably well, with the usual Italeri foibles here and there. I found that the airbrakes and the ailerons were both undersize and were enlarged with plastic strips. I pored over numerous pictures regarding the upper surface colours, including some of my own, and asked Giorgio for his opinion. Unfortunately I struggled to spray the suggested Lifecolour paints. After much deliberation and test spraying, I settled on Humbrol Enamel Hu 156 for the grey and a mixture (Gunze H309 x8 plus H65 x1 plus Tamiya XF5 x1) for the green. For the underside I used mixture of Vallejo Metal Colour Aluminium and Tamiya XF-66. Again from photographs many of the AMI Starfighters looked to have a fairly gloss finish but some were not. I settled on a light sheen courtesy of AK varnishes. You may notice that the tanks are a slightly different colour of green - more of an olive green. Again this is from the study of many photographs. In fact, I originally messed up the painting of the tanks and had to start again, trashing the decals at the same time. I borrowed tank decals from another kit so if some kind soul has a spare set of tank stencil decals please let me know. The Orpheus pod is by Videoaviation.com and is excellent. I used mostly the kit decals which were excellent apart from some silvering on some of the minor stencilling. A couple of other problems with the decals. The Starfighter depicted is MM6581 in 1984 - problem is, it appears that this aircraft was written off in a collision in June 1969. Much of the stencilling is readable with magnification but the area of which is easily readable and very prominent is that on the nose cone in the anti dazzle area - unfortunately it reads "HANDDS OFF". Generally very pleased with the result - I hope you like her. Cheers Malcolm19 points
-
Hello, it has been a long time since my last post on this great forum, but life is sometimes just too hectic to build models. But I've managed to finish this one off in under 7 months. Tamiya F-16C block 25/32 kit, with some extras: Aires F-16C/D wheel bays 4439, F-16C cockpit set 4364 and F-16c block 25/32 exhaust nozzle. Wheels are resin ones from wheeliant, armament and bombs are brassin items. I added Master pitot tube and angle of attack probes and HGW RBF tags. Model was painted with MRPaint colors, weathered with ammo products. Enough blabbering, here are the photos.18 points
-
Greetings all! Ive decided to dig out my collection of various 1:72 kits that I have completed over the last few months. While non are really worthy of their own RFI im quite happy with most to show them off, so here they are! First up is an Esci (later Italeri) Sea Harrier, built straight OOB with the exception of a Quickboost seat. She represents 801 NAS on their way to the Falklands. Paints are from Model Master and kit decals were used. I did attempt to make some blanks for the intakes, not great but will do! I also cut out the intake auxiliary doors and droop the upper ones to look more realistic. A nice kit to build and one of the better versions of a Sea Harrier. Next is another Sea Harrier, this time a T4. The base for this kit is a Heritage resin kit. This is quite nicely molded albeit a little weak, but it became apparent that the main parts like the wing and centre fuselage was very (very!) similar to the Esci/Italeri kit. So much so that I could use them instead of the resin, so below is an 899 NAS anniversary T4. The very front and rear are the original resin and everything else is an Italeri kit. Again I did the auxiliary doors, the Heritage kit does come with some nice metal seats but other than that the cockpit is quite bare and poorly molded. There was a lot of whittling down to get the front and centre to line up nicely which meant losing the intake area so this was also blank off (poorly!). The worse part of the kit is the canopy. Here it is loosely fitted waiting for some enthusiasm to do something better. Its a vac canopy but vac canopies and me don't really mix well! The decals are from the Heritage kit and are slightly out of register (check out the roundals), I not sure if this aircraft ever wore the black scheme with the anniversary tail but I'm calling artistic license on this one! Here we have an Antonov Colt by Trumpeter. I painted it in Model Master Acrylics with kit decals. I saw this kit at a model show for only $9 which a thought was a bargain but in the end it just really annoyed me! It started off well enough, but the canopy to fuselage fitment is poor, the tail planes just would not want to stick to the fuselage, the wing struts were crap and boxy and finally the undercarriage was ropey as hell. Apart from that it was a nice build! Any way I percervered and finally finished it. Definitely not worth rigging it, in fact not even worth putting yellow tips on the props lol! Next we have a Hasegawa Thunderbolt. This was a quick build or would have been a quick build if I didn't lose the prop! I found it six weeks later next to the scrubbing sink and not the floor I spent my hands and knees on looking for it. I also found a nice stand for it so decided to go for a wheels up flyer. The penultimate kit is the new Airfix Defiant. This was a panic buy as I was going to leave my LHS empty handed on Saturday (which we all know is against the law) and nothing was doing it for me so I just plumped for this. I managed to smash it out with in a week which is very quick for me (my quick build Seaking took 3 months!). It just seemed to fall together nicely, very nicely indeed. Straight OOB, again Model Master acrylics Finally we have a Hasegawa Jaguar Trainer. This is a very nice if slightly old kit. Really enjoyed this one but screwed up with the ballast. Its very loose and if im not careful little lead balls get stuck in the canopy! Thanks for looking in! Cheers now Bob14 points
-
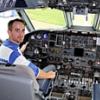
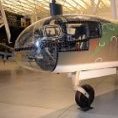
Duxford seen, only one 'selfie' from today: PC in his element Back in Bath now, FAA Museum tomorrow.14 points
-
A few years back my Dad had a flight experience to fly alongside a Spitfire at Duxford. The aircraft he flew alongside was Spitfire HF Mk.lXe TA805 'Spirit of Kent'. During the briefing I had the opportunity to take a load of up close pictures of the aircraft with the intention of building him a kit of it as a gift. I ended up using the Revell 1:48 Spitfire lXc/XVl (4554) kit. This was in the days before I realised that Eduards kits were far superior and included PE but it's a decent enough kit. The only changes I had to make were to swop the gun covers around to convert the kit to an e wing. I purchased aftermarket sets of stencils, codes, letters and rounds to give me the correct scheme and brought decal paper to make my own 'Spitit of Kent' decals and squadron badge carried under the canopy. The thing I couldn't get right was the legend in white lettering so the only thing that isn't as accurate as it could be is these are black. Once completed, it was given to him in a presentation box. The kit was brush painted and finished in a gloss varnish13 points
-
Latest build. 'OLD SHAKY' Mark DSCN3544 (2) by mwsfly9, on Flickr DSCN3545 (2) by mwsfly9, on Flickr DSCN3546 (2) by mwsfly9, on Flickr DSCN3548 (2) by mwsfly9, on Flickr DSCN3549 (2) by mwsfly9, on Flickr DSCN3550 (2) by mwsfly9, on Flickr DSCN3551 (2) by mwsfly9, on Flickr DSCN3552 (2) by mwsfly9, on Flickr DSCN3553 (2) by mwsfly9, on Flickr DSCN3554 by mwsfly9, on Flickr12 points
-
Hi All, Just finished this “The Greatest Flying Club in the World” 6 Elementary & Reserve Flying Training School RAF Volunteer Reserve weekend camp, Sywell, 1938. AZ Model Hawker Hind I L7235 and heavily converted Amodel Hawker Hart Into Hart Trainer K2988 with Matador Models Hucks Starter and modified Oxford diecast BP Thompson Aircraft Fueller, Sgts Mess tents and modified Auhagen shepherds hut into Flying Control Caravan. Airfix/Revell figures and oddbods. 75594299_10156664347900976_8061474565995364352_o by Ben Brown, on Flickr 74314753_10156664316890976_1011377606076923904_o by Ben Brown, on Flickr ATB TT11 points
-
Hi there, This is my Trumpeter 1/48 Mig 3, apparently an early version. I say that because I had no real knowledge of it until I built it. What can I say, this is my first Trumpeter kit and frankly I was impressed. Straightforward build other than a slightly complex nose to handle the side air intakes. I drilled out the various nose scoops and replaced the guns and pitot with hollow tube. Tyres were flatted and then Tamiya and Mr Hobby pointed in its general direction. There is some shading going on and a bit of chipping where appropriate. I know Trumpeter kits get a bad press but I really enjoyed building this and she was a fun painting exercise. Comments welcome, it's how we improve. Rick11 points
-
- Another I-16 i 1/48 from HOBBYCRAFT11 points
-
A very enjoyable build. Excellent fit of parts except for intake nozzles,but that could have been my fault. Attention to detail is superb,especially on the undercarriage bays. Cockpit can be made to look busy with a bit of work. The intake/exhaust innards are quite complex but not a lot can be seen in the finished model. I struggled a little with the decals because they were very thin. I find that a fine line between too thick and too thin is sometimes difficult to achieve. A lot of fine masking is required to get the silver leading edge on the wings and horizontal tail but it's well worth the effort. All in all,well done Airfix. Will post more pictures if required.11 points
-
Pretty much OOB but my first all airbrushed build, lovely kit (decals a bit odd) enjoyed the build.10 points
-
Hi Folks, I started this back in March as a Britmodeller newbie and having been completely distracted by the FROG Group Build, I've finally finished it. Spitfire PR Mk.XIX RM643/Z based at RAF Benson, the home of British WW2 photographic reconnaissance. A few bits of info about the kit and the AM parts used in the build; 1/72 Airfix Spitfire PRXIX Rob Taurus replacement canopy Pavla resin cockpit Aires Quickboost spinner/prop blades and exhaust Barracuda door and crowbar Xtracolor PRU Blue gloss enamel paint, airbrushed on Xtradecal transfers set Barracuda stencils Winsor & Newton matt acrylic varnish to finish The kit has come in for a fair amount of criticism over the years, but I think Airfix captured the lines of one of the best looking Spits fairly well. Obvious errors that I think are noticeable are the fairings over the Griffon engines rocker covers are too narrow, this is especially noticeable when the model sits on the shelf next to my old Fujimi Mk.XIV and the u/c legs that are too raked too far forward. There are other accuracy niggles, but I overall enjoyed the build and think it looks OK. Hope you like it. For those who want more, the build thread is here; Thanks for looking.10 points
-
Well calling this done my take on the old kit from FROG / NOVO 1/ 325 scale with the addition of Atlantic Models PE and replacement forward guns and torpedo tubes from Shapeways. this is not completely accurate I know there are mistakes the torpedo tubes should be the quadruple launchers and the main range finder is wrong may replace that later but when you think of the age of the original kit the PE and guns do raise the detail levels to a more acceptable level and I have another kit to try and make a better attempt in the future I hope. So here she is my version of HMS Trafalgar and link to WIP. And here is a Plug for Name It thanks for putting me onto these @robgizlu Great service and so much better than the kit one. Beefy9 points
-
The Bristol M.1 monoplane was an advanced concept for its time, perhaps not appreciated as it should have been (suffering the curse of the monoplane fear of early times). Once its bang-bing-poom-paff role was over, Bristol sought to re-introduce it as a sports machine. Part of their strategy was having it compete as a racer, a role in which it was quite successful. Very happy to see that Avis released this spunky racer as an alternate boxing to their Bristol M.1 monoplane variants. Another civil, privately owned machine (Spanish M-AFAA) is also an alternative scheme in their boxing of Red Devil (but the Spanish version needs a couple of small tweaks to be accurate). Adventurous modelers and after-market decal-makers may like to have a look at other civil possibilities for this nice little kit: G-EASR (A company demonstrator that can be seen in photos with two schemes, a light and a dark one) G-EAVO (That used both engines, the Lucifer and a rotary Le Rhone-, no wing cut-outs) G-EAER (#12 racer on the 1919 Aerial Derby, piloted by Smith, with wing cut-outs, small faired headrest) VH-UQI (De Havilland Gipsy four-inline engine conversion, fuselage re-worked) This kit of G-EAVP can be finished with and without the race number 2 or a G (as per decals supplied by the kit), but also as number 4 (if you scrounge those decals from somewhere), of which I found only a few images. If you are building this kit you will find a number of comments and what I hope are useful tips in the step-by-step construction article: Things you may like to adjust if building G-EAVP (the kit's provided version): 1) There were no carb air intake holes on the fuselage sides, nor its associated part inside the cockpit (those are for the rotary engine version). 2) The tail feathers need rigging, missing in the instructions, look at photos of the plane. 3) The long exhausts that go under the nose meet at a heat-exchanging sleeve that surround the new carburetor air intake (that comes downwards from the nose) and continue as a single pipe for a little while. Again, find photos on the Net that show that. 4) The fuel cap behind the pilot is somewhat present in the mold, but better make a good one, and since you are at it, also add the oil cap, ahead of the pilot 5) Add the Pitot to the left wing leading edge 6) Add the wind-driven fuel pump to the right landing gear strut as per photos on the Net 7) Make the windscreen smaller and the correct shape Be sure to install the double flying wires, as correctly depicted and even marked on the undersurfaces of the wings. Of these last new four Avis civil delightful little kits, this is the only one that gave me some little trouble. The plastic was a tad different and harder, the fit wasn't comfortable in some instances, and, in spite of having been carefully washed, dried, primed and handled properly, when I masked the red to paint the tail, as I removed the masks, huge chunks of paint and primer were lifted leaving the bare plastic. This has not happen to me in a long, long time, being always very careful about cleaning and avoiding contaminants. I can assure you that my day was utterly ruined. So you are warned: really, really wash the plastic. I am not sure why this last Avis kit was different, may be it was just my sample. But if something got changed, please change it back. I am looking forward to -and indeed I pre-ordered - their soon to be released -as I write this- Lee-Richards Annular Wing. I have scratched the monster long ago when my skills were far from good, and this time I may end up with a better replica. And, since we are at it, what were, you may have thought, the chances that ANY manufacturer would release that?9 points
-
Dear fellow Britmodellers, here's my 1/72 AZ Model P-51C Mustang “Lucky Leaky II”, coded SX-M, of the 352nd Fighter Squadron, 353rd Fighter Group. She was one of the later production series with the 'dorsal fin' filet. Based in England, she crashed due to engine failure on May 2, 1945. I built straight from the box using AZ Model decals. These did not perform as good as usual, being brittle. Some pieces simply broke off the surface, most notably on the US Insignia on the right hand side of the fuselage. The model was painted in various shades of Alclad II over a gloss black basecoat. I found it pretty difficult to match the yellow spinner to the decal color; it took several attempts of mixing various yellow and orange paints to achieve the result. The black spinner stripes were masked with White Tamiya tape. Thank you for your interest in this topic. Best greetings from Vienna!9 points
-
As light travels faster than sound is this also why some people seem quite bright till they open their mouths? Recall once seeing something somewhere, (oh to have a functioning memory again), where a thermal camera was pointed at a seat where a female of the species had been sitting - won't go into details but it did sort of reinforce your point!8 points
-
Seeing John's lovely aerodrome at Telford has prompted me to be brave enough to post this! Trio of DH.60s- Cirrus Moth G-EBSA (Jack & Geoffrey Linnell) Cirrus Moth G-EBRX (Northants Aero Club) and Gipsy Moth G-AAGS (Perry Tyzack) to 1/72. Amodel kits modified with Oxford vehicles, modified Metcalfe Pavillion. Oils, enamels, pigments and a bit of scratch building. Taken about 4 months.. not 100% accurate more a homage really as had to fit in the case and give an impression of what it was like 25734293_10155119858795976_8170630381812573292_o by Ben Brown, on Flickr ATB TT7 points
-
This is the Italeri F-5N as an ex-Swiss Air Force Tiger now serving as a USN Adversary. To be honest, there’s not too much to say about this nice little kit: it goes together really quickly and, other than the addition of an Eduard Zoom set, a Pavla ejection seat and a bit of work to give some sort of representation of the complex canopy opening mechanism, it is pretty much from the box including the decals, which also include some nice Swiss and Austrian markings.7 points
-
Evening gents. no RFI as yet as my new kit is befuddling me at the mo. I did fix the handle though. 😇 And got the radio wire cut to size. Oooh and the prop’s on. Looks good on. Not sure what all the fuss is about really. 🥰 I noticed that I’d not made any clips to hold the wing panels on so I’ll have to make them which won’t be a problem. now where did I put that robot suit thing? 🤣 See y’all later. Hope you had a great Telford everyone. Johnny.7 points
-
Well it has been a while but have had some issues with my internet connection So calling this done will put in the RFI soon beefy7 points
-
The 1:72 scale KP kit of the MiG-15 UTI built as a prototype trainer the Czechs thought they would need to train pilots for the radar equipped MiG-17PF. Only two aircraft were modified and the project was cancelled. Since it is the old KP kit, so the fit isn't the greatest, and the modifications I made needed a lot of filling and sanding anyway. The new intake and radar came off a KP MiG-17PF which was given to me in a box full of various broken bits and pieces, so the nose of the MiG-17 was sawed off and attached to the MiG-15, the new intake was a larger diameter than the MiG-15 one, so needed a fair bit of sanding to make it fit. Overall Tamiya XF-16 Aluminium. Decals are from the spares file. Gad to make the serial number up from individual decals. MiG-15UTI-51 by Ryan Hothersall, on Flickr MiG-15UTI-52 by Ryan Hothersall, on Flickr MiG-15UTI-53 by Ryan Hothersall, on Flickr MiG-15UTI-54 by Ryan Hothersall, on Flickr MiG-15UTI-55 by Ryan Hothersall, on Flickr MiG-15UTI-56 by Ryan Hothersall, on Flickr MiG-15UTI-57 by Ryan Hothersall, on Flickr7 points
-
I put it under the grill of my domestic oven. Possibly it gets warmer in the middle than the edges. I should maybe try oven not grill next time. The plastic is heated and floppy when I bring it to the mould. It’s my first try at anything bigger than a canopy so I’m quite heartened to get anything at all. Adding more vent holes might help, but I’m also working on the pattern to make it better: The first attempt does sorta come together in an empire shape, but I know I can do better... Regards, Adrian7 points
-
Hi, I picked up a very damaged 1:72 Draken a little while back, and have had enough of it now so am calling it done!!!( have just started a Hasegawa one, a tad better ) The revell model is a long way from accurate, but this one had its nose was broken, no pitot tube, no wing numbers, no front wheel, no tanks and several other cosmetic bits...... I gave it a Model-master pitot tube (which i sprayed yellow and then hand painted the black and silver stripes after attempts with decals didnt go so well!), bit of paint, sprayed some big numbers onto the wings, rebuilt the nose and back end, tried to repair the canopy, found a vaguely acceptable nose wheel etc etc!! Its not brilliant, i know, but has been a bit of fun to do while building other proper kits! Revell 1:72 Saab J-35OE 14 by Jonathan Francis, on Flickr Revell 1:72 Saab J-35OE 14 by Jonathan Francis, on Flickr Revell 1:72 Saab J-35OE 14 by Jonathan Francis, on Flickr Revell 1:72 Saab J-35OE 14 by Jonathan Francis, on Flickr Thanks for looking Jon6 points
-
Hi all, This is the first time I've ever shared any of my dio's outside Facebook but I thought I'd chuck one up- be gentle! I dont know whether to post several pics of the same dio or multiple of several on the same thread...! Anyway, I build mainly for our Museum at Sywell so they are normally related to our airfield. - I finished this the other year. Airfix C-47 with S&M decals IIRC. 12006557_10153045182290976_1729944269997067717_o by Ben Brown, on Flickr ATB TT6 points
-
More progress. Not happy with the plastic prop in the kit I decided to make my own from walnut and beech veneer. Bonded the veneer together using PVA wood glue, clamped and waited 2 days to fully dry. Scaled a drawing from the internet of a standard British Wooden Propeller from that era to template from. I have profiled one side and it seems to have come out really nice. Well chuffed with the look and finish. Excuse the upside down photo. Not sure what’s happened there. |https://thumbsnap.com/6tc5EA4N |https://thumbsnap.com/dn7T3EJ4 |https://thumbsnap.com/Jo8SCuaf |https://thumbsnap.com/Pt3yKROt |https://thumbsnap.com/OYITDS28 |https://thumbsnap.com/aI7Yk5H86 points
-
Seems like a dog's age since I actually finished anything. Between work, and consolidating everything into my new ManCave modelling has been in short supply. TBH - another son moved out and this time I got the space- no yoga studio/hippie retreat in this room🤨 The cold weather finally hit North Texas this weekend, and I used it as an excuse to sit at the bench for a few hours. Not as much room as I had before, but everything is indoors, AND in one place. Plus, I don't have to worry about much larger, heavier parts from a Big Block Ford (another expensive hobby) damaging anything. Gratuitous ManCave shot(s) - still not finished, but at least I can work on the important stuff - models! On to the model... I built this OOB. No, really. I actually built this exclusively from the parts in the Airfix box, and nothing else. I tried to keep the weathering subtle. And used only kit decals! I thought it would be a Mojo booster to knock something out in a week(ish) without obsessing. Each kit I build, I try to use a new technique/product. I used Green Stuff World' airbrush masking putty. The results were mixed. The putty absolutely does not leave any residue or marks on the previous paint. It can be re-used immediately and doesn't seem to retain paint/solvents in the putty. However, I found that it continues to settle as it sits, and the demarcation lines are not much softer than masking tape. This might make it ideal for smaller kits (1/72 and very small 1/48), but I didn't see a lot of benefits in 1/48, especially on a kit this size. She's definitely a tail sitter. And HEAVY!!! And I had a bit of a "love/hate" relationship with the build. Loved the fit - kit goes together smoothly, and presented "zero" build issues. Other than the intake areas, there is no filler on the kit. Hated the end-result - it just feels 'toylike'- very basic without a lot of detail. I tried to make it look realistic, but not sure I succeeded. I have already started planning for improvements when I build the (R)B-57. Hope you like it. Comments are always welcome. Best, Mark6 points
-
The postman just dropped of an order I made a while back, 100 plastic desert spoons! Bought as test mules for paint finishes for a couple of pence each. I wish I had got these before I started my paint experiments! The idea isn't mine, I found it either here or on one of the car forums. Whoever posted it deserves a medal. Here's a few experiments with the paint still wet on them! First up, from right to left, Base gold. Then Tamiya clear orange shot over gold. Then Tamiya clear orange shot over Tamiya metallic red. Lastly, Tamiya clear red shot over Tamiya metallic red. The centerer pair have got my attention, I like them both. Here's the effect of more coats. Base colour on both is metallic red. The right picture is one coat of clear orange over that. The left one has two coats of the same. It looks like whatever colour you want can be dialed in by using different base coats and multiple top coats. Just as an experiment, here's clear red shot over a Tamiya metallic blue base. Wow! Is that a colour for a chopped Merc or what? I'll let this lot dry properly, then add the formula in marker to the other side. It looks like I've just started a Custom Paint Colour Library today. 😁6 points
-
Great to see you all at Telford, and I’d much rather be with you in Yeovilton than schlepping into work, but somehow those bills have to be paid. Having come away from Telford with just one kit (1/48 Fairey Flycatcher from Armory, a Ukrainian outfit which whom i am not familiar), I am now feeling really quite abstemious after seeing PC’s swag! Have fun at VL: Fly Navy!6 points
-
Hi, everyone! This is my next model, which I did in parallel with Spitfire Mk.XVI. Here I used the metal exhaust pipes from the Ukrainian "RexX" and photo-etched parts from the Czech "Brengun".6 points
-
What? You mean a new kit of that iconic, British, cold war bomber with an international appeal (even the USAF had 'em), that would replace a previous catalogue item; that is not too big in 1/72; with no mainstream competitor; that is accessible with LIDARable examples existing in the UK as well as good drawings very likely and that served in over 50 RAF squadrons not to mention RN ones and with all those funny noses with their potential for conversions? Nah! Apparently it would never sell and most likely bankrupt Airfix if they even thought about it - "like many other so called money spinners..." Or so I was told in no uncertain terms... Wait a minute I wonder if these were the same people that rubbished the idea of a new 1/72 Vulcan anytime soon and were in denial up to the moment of the Airfix formal announcement... Bring it on Airfix and put me down for half a dozen! Rich6 points
-
Hi, Thank you for the kind comments. The interior concerning the lower hull is now mostly completed and ready to paint. Most of it went together without major issues. Only the ventilator belt detail on the Part side were a bit too large, so I decided to go with only the pulleys and add the belt later. It's pretty cramped in there, but most of the large details are dry fitted and can be removed to allow painting. This is how the hull looks when empty: This is the engine disassembled: And this is the whole thing laid down on the table. Kristjan6 points
-
Here is my effort from four years ago. Etienne.6 points
-
The last four models from Avis' kits -to whom I have no relation whatsoever (other than being a happy customer for their recent civil releases)6 points
-
All I had to do was build the kit as Monogram intended. A change of wheels should have been enough to satisfy the urge to modify. That way the build would have been done by now and I could put my feet up or even maybe start another one! Instead I've put the Chevy on a diet by hacking out the inner fenders and front chassis rails, meaning I'm now committed to scratch building the whole front front end. Nothing ventured, nothing gained... Seeing the front clip sat on my bench makes me realise just how much weight is removed on the real thing by this method. Add that to a fiberglass tilt front, headers, ally inlet manifold and lightweight seats etc and the car is suddenly 3-400lb lighter than stock, all where it counts for drag racing as well. Free horsepower in effect. That's the second time I've mentioned a tilt front. Looks like I'll be getting the razor saw out soon. The 12 days left to run for the GB seems like a long time at the moment, what could possibly go wrong?6 points
-
Evening all. Here is my Airfix A-4b in 1/72. I used decals from Xtradecal x72151 representing a Skyhawk from VA-106 Gladiators. This one has been 90% finished for months so I’m pleased to finally get it done. This is my first Skyhawk and I’ve got several Fujimi A-4s in the stash. The Fujimi ones look nicer in the box but I’ll see when I get round to building one. Cheers Allan5 points
-
Time to draw a line under this one although there's a temptation to keep on throwing muck at it. 😁5 points
-
Dear fellow Britmodellers, here's my 1/72 Tamiya P-47D Razorback, built from the box, with decals from Xtradecal. The model represents "R3-G" of 410th Fighter Squadron, 373rd Fighter Group, based at St. James, France, in August 1944. The model was painted with various shades of Alclad II lacquers and Gunze acrylics. All photographs by Wolfgang Rabel. Thank you for your interest, best greetings from Vienna!5 points
-
Cockpit completed with some Tamiya Tape seat belts and inserted into the fuselage. Then the fuselage was joined up. It wasn't quite straightforward, the cockpit needed some sanding down for the two sides to go together around the cockpit. I started glueing around the cockpit as I thought it best to get this aligned, then worked along the top rearwards then forwards. Some tape was needed to keep a small seam from appearing. Turning upside down the bottom met up really well. A bit of sanding will be needed but not much. Hopefully! Glued the wings together as well. The wheel well walls needed a little trimming as did the detail in the inside of the upper wing5 points
-
I really, really wish that you hadn't mentioned King Kit as I was previously unaware of it. #YourBasketContains3Items5 points
-
And the stripes are now on... after much careful masking. I used XF-1 for the basecoat and XF-58 to post shade. I'm sure they are slightly too narrow / wide or not placed perfectly (I measured the decals), but they get the point across. One thing's for sure, while it may not be too visible in the photos, a fair few of my rivet lines are embarrassingly skewed 😥, The tail plane is particularly bad in places and it made aligning the masking lines quite tricky. I've really got to get more precise drawing the lines in the first place, following them with the wheel is easy enough. I also went back and resprayed the tail wheel bay in XF-4 and I think I'm largely done with the main paintwork. Only the various bits and flaps to paint up and add now. On with a gloss coat ready for decals then...5 points
-
Thanks for all the suggestions about the cowling and engine - the reality is neither the budget for this build or the timescale realy allow these options. Remaining on the cheap / free options, Also in the thread J-W suggested the use of packaging for building the canopy, so A few minutes work and.. The curve of the packaging seems to work - it's not perfect but with some framing (Tamiya masking tape?) I think it will meet my needs - all I need to worry bout now is the windscreen.5 points
-
I was able to make a start on the P.1103. I have gotten the cockpit assembled and located in one fuselage half. Typical of short run kits, some effort was needed to get everything to fit as intended, or at least to fit. Either way, I managed to get everything in and the fuselage half's to close, so we'll call that a win I checked the fit of the wing as well, as this is the other major element of the kit. This is definitely a small kit for 1/48 scale. The cockpit area was painted in Tamiya German Grey and glossed to prepare for a darker wash. The feed chute for the canon was first painted aluminum and then treated to a layer of chipping fluid before spaying the grey. After the grey dried I used a toothpick to heavily chip and scratch the paint away.5 points
-
5 points
-
Thanks to @rob Lyttle, @Courageous, @Biggu and @Adam Poultney for your comments Progress has been a bit thin on the ground in the past month - a combination of domestic things and a receding mojo I suppose. I've resurrected the latter to some extent by doing a small vignette (thread link in my sig below), but I have at least started to get things together. I sprayed the wings with the fluorescent red/orange mix used earlier: Whilst the wings came out fairly well, there was - predictably - a lot of bleeding on the fuselage band. Fortunately, the overflow, once dry, was fairly easy to remove with a sharp scalpel blade - it looks a bit ragged at the moment but hopefully I can paint a straighter line by hand. So, wings and things all attached: A bit of filling needed, then I can finish the foiling. Thanks for watching5 points
-
Intriguing... Sorry for the radio silence, folks, Telford was a bit overwhelming, and the pace of things since has been such that I haven't had much time to update. I think it's safe to say I've done more social drinking in the last week or so than at any other time in my entire life. I neglected to mention that Gorby also very kindly added to my considerable baggage load on the way home with some books, which was most generous of him. Anyway, where was I? Ah yes. When I left off, we'd just finished meeting up with the Sovereign Hobbies guys, who happen to both produce my favourite paints and also are two of my favourite people, though we'd never met in person until Friday night. Stew I've known through Britmodeller for years now, and I was excited to finally meet him after missing out in 2015, and Jamie has been nothing but helpful with his advice on how to use his paints, and I was delighted to find they're as pleasant in person as they are online. (Jamie is, however, a decisive man of action, and one of the rare Britmodellers to look like an action movie star -- though AdrianMF, who I met at Telford, looks like one of those handsome tanned industrialists who reveal to a badly injured James Bond that they've spent the last ten years in the Orient learning how to make their hands as hard as steel while they hunt 007 through their labyrinthine mansion -- and Cookie and I had an amusing few minutes imagining him rigging a 1/350 ship with the same speed and decisiveness with which he does everything else.) Thus plied with a fairly substantial amount of Glenfiddich, I retired to bed and awoke without a hangover (my one superpower, whiskey doesn't give me hangovers) at 5:30 AM the next morning to get ready, as if anyone can truly be ready for Telford. We all met for breakfast, and then I went with the Sovereign guys to help carry some stuff to the show, which meant I got to ride in a Jaguar (cool!) and watch the huge line begin to spiral out of the stately bulk of the TIC. I also ran into Rob85 as we went down to the line, who was the first of a few people to recognize me unprompted that day. We linked back up with Ced and Bill and Cookie in line (they ended up a few people ahead of us), and as we entered the show itself, I ran into a miasma of truly intense body odour from someone passing near by emitting a human chemtrail, a smell so intense I can only describe it as being not unlike having a #11 blade jammed forcefully up your nostril but stopping just short of the brain. Inside was...beyond description. The largest model show I've ever been to had perhaps 200 people in a single gymnasium. Telford felt almost the size of the Mecca of Dungeons and Dragons, Gen Con, which boasts 70,000 attendees (though, having been to both, GenCon smells far, far worse), though of course I realize it's only about 10,000 people. That still feels like a lot! JD and I opted to split off from everyone else and make our rounds, and one of the first things I learned is that when prepping for Telford, don't pre-order anything from Hannants, as you commit yourself to lugging it around for the rest of the show. I felt much less remorse about reserving stuff from Blackbird and Freightdog, and finally managed to get some resin sponsons for my Revell Sea King AEW.7 from Whirlybird Models. I also, in my folly, got the first three volumes of Arab MiGs for a tenner, and boy were they heavy. At this point, between my Hannants show order and what I'd picked up, I had to sharply arrest my buying as it was both heavy and we were rapidly approaching the limits of what could comfortably contained in Ced's car. (When he said that the T-Roc had "best in class storage space", I asked if the class was "cars with very small trunks", and he told me they only make trunks as big as their mouths here.) My haul: Two or three people recognized me from my posts here, and came up and said hi, and allow me to apologize to you now for how disappointing it must have been to meet me in person. Fortunately, I have a secret weapon: JD. Cookie is nicer, friendlier, more enthusiastic, and a better modeller I am, and he did some great ex officio diplomacy for the USA, which needs all the help it can get right now. I actually found I got fairly tired pretty quickly, as a side effect, no doubt, of stupidly picking up my Hannants order right off the bat and having to lug it around everywhere. Not entirely sure what I was thinking. I didn't take any photos of the models because I was terrified of dropping my phone (which has a bulky battery pack case) on something and turning it into a mere collection of atoms. I met a bunch of you at the IPMS Birmingham stand around 1300, and it was a great pleasure to put so many names to faces. Due to the bags policy, I remained on the ground floor with the baggage, while Navy Bird and Cookenbacher went up to look at the contest winners, and found that the spot I'd chosen to sit in was directly in the path of the immense cloud of toxic fumes being put out by the smokers just outside the TIC, huddled grimly about the open exterior door of the building as rain poured down. Unfortunately, the standard of the winning builds was good, and the boys took a long time to examine them, leaving me feeling quite queasy by the time they returned. Mistakes were made: More later!5 points
-
Nearly finished. Just the prop to go. I’m not liking the plastic version supplied with the kit so I’m going to make one from wood. Intension is to make it the same way as the originals and stack layers of template cut veneer and sculpt the prop by hand. Going to be interesting. |https://thumbsnap.com/tjPTtofD |https://thumbsnap.com/QzcggqKV |https://thumbsnap.com/pymjdCsE |https://thumbsnap.com/Ld725Ks9 |https://thumbsnap.com/zgp5AcNg |https://thumbsnap.com/Ld725Ks9 |https://thumbsnap.com/PWO2RAb4 |https://thumbsnap.com/HItKry7i5 points


This leaderboard is set to London/GMT+01:00