
Leaderboard

copy.thumb.jpg.d8f94c146f5d2da12880c4799901d6dc.jpg)
.thumb.jpg.158e2e086d45b8f96b7d93b8bee8dc21.jpg)
.thumb.jpg.a15df237fd8d56e4265c64c5f8f26d75.jpg)
Popular Content
Showing content with the highest reputation on 05/10/19 in Posts
-
Calling it done - Piaggio P.166 in Australian markings - as a Snowy Mountains Authority aircraft in the early 1960's ex G-APVE. This model has been 9 months in the making and am happy with the result - a few speed bumps along the way but got there in the end. It's 1:48 scale so wingspan just under 300mm. Build pictures in the 'on the workbench' forum ... ...31 points
-
Hasegawa kit, Aires cockpit, Cutting edge intakes, Hypersonic canopy details, Brassin AIM-9s and aircrew, Armory wheels, Master pitots, Afterburner and Superscale decals and mostly Testors paint mixtures.31 points
-
Here is the Eduard Kittyhawk IV (P-40N-20) NZ3220, No.18 Squadron RNZAF, Bourgainville, 1944. The model is pretty much out of the box, Eduard added some nice photo-etch and resin detailing to the original kit (i cannot recall who made the original mouldings). The only thing i changed was to use home-made masks for the insignia and white identification stripes. This is quite an expensive kit (mine was a Birthday present!), but i think the quality of the kit, the instructions, choice of markings and different variants you can build justify the cost.28 points
-
Well its finished, it took two month's to build and paint. It was good fun to make as the fit was generally very good all round. The kit is inaccurate in the shape of the canopy and a few other parts which were pointed out to me. I would build another as it's a good kit to build but I would get corrections. There were no decals for the harpoon which was strange so I have attached them with no markings I'm personally happy with it, I think this is my best effort on a kit yet, I think I may have over done the panel lines but I like it. Anyway the base needs to be painted to look like an airfield but for now it will sit alongside my small but growing collection. Hope you guys enjoy the pics. The paints used were mr hobby and Tamiya, I mixed my own colours and used a mixture of Flory Models dark dirt wash and Vallejo pigments to highlight the detail. The pilots are PJ Productions 1/48th scale NATO pilots other then those the rest is OOB.23 points
-
another pic some time ago I built the beautiful kit from Stransky in 1/48 . Nice kit!! Please feel free for any comments23 points
-
I have taken this Eduard weekend edition kit as far as I wish. The purpose of the build was to try an idea I had to emulate the uneven surfaces seen on stressed skin aircraft, and chose this particular aircraft as I'd already built an Eduard Hellcat and knew how it went together, but this overall Glossy Sea Blue aircraft would particularly benefit from something to add visual appeal to an otherwise featureless finish. If interested in the experiment itself, here is the Work in Progress thread: The kit is close to being Out-Of-the-Box, but did receive Airscale cockpit instrument decals to improve the panel, and substantial improvements to the cockpit purely from adding an Ultracast resin seat with seatbelts, new wheels and Ultracast's much improved Hamilton Standard propeller. In addition, Master brass barrels were added. All paints are Colourcoats enamels, and the antenna is Infini Model 40 denier (0.068mm) lycra rigging line. The base is Eduard's injection moulded Essex class aircraft carrier deck section, although strictly speaking the aircraft was from USS Enterprise CV-6, a Yorktown class. If anyone made it this far and is remotely curious to see how ACUS34 - ANA623 Glossy Sea Blue compares to our parallel paints ACUS07 - ANA606 Semi-Gloss Sea Blue and ACUS33 - ANA607 Non-Specular Sea Blue, often all claiming to be matched simultaneously and/or referenced to FSx5042 which matches none of them, here's the GSB Hellcat and my earlier "by the book" tricolor F6F-3 together: Thanks for looking in!20 points
-
Hello all! Here are some photos of my recently completed model, Revell's Ju 88A-1 in 1:32. It was a fight from start to finish, some pieces, such as the rudder pedals, didn't live to see the end of the project. I take all that to my own poor construction methods. I won't build another 32nd bomber again.16 points
-
Bandai's newly released Super Star Destroyer in the slightly ridiculous scale of 1/100,000. Despite the tiny scale, the model is quite large for a release in the Vehicle Model range, measuring about 19cm long, althought the slender design makes it still feel quite small. The level of detail is almost as crazy as the scale - it's hard to believe injection moulding can achieve results like this. Painting was kept on the subtle side to avoid creating an out of scale appearence on something that's meant to be 19 km long. The build can be found here. Thanks for looking Andy14 points
-
...With Heller's lovely (but occasionally flawed) 1/24 Ferguson TE-20 tractor. This is out of my normal shopping zone but given we were on holiday and my eldest son, now a paramedic, has had a lifelong interest in tractors and dad was suitably oiled after completing a 'gin trail' tasting challenge, the scene was set for a little online purchasing. A few clicks later and the kit was priority delivered to our self catering property. All seemed very promising with the contents and the potential for weathering was obvious, so I set myself a simple brief of 'well worn but fully functional in a usually dusty environment'. The steering wheel's had a bit of 'flat' sprayed on since but this is how it otherwise is. A nice, crystal clear acrylic case and base is on order from a quality outfit in Brighton and this'll grow a rutted, single track base, maybe with a bit of rustic fencing and so forth; we'll see, as I'm a dio novice and need to play catch up. It's often said in modelling circles that wandering away from your usual subjects is a good thing in growing experience and keeping things 'fresh'. That was certainly the case here and what appears perhaps to be a rather mundane piece of engineering is actually hugely interesting once you do a bit of history sleuthing on the web - the little Fergie was Sir Edmund Hillary's choice back in 1958, when he took three to the South Pole - check this out http://int.masseyferguson.com/antarctica2-hillary.aspx Fergies coming off the line in Coventry between 1946 and 1956 were grey. Mine has wound up with a funky farmer, who fanced theirs in a more fetching shade of 'russet'. This is what 'cha get when you hard weather that colour... TTFN Steve12 points
-
Here is my Dragon 1:72 Heinkel He 219A-0 Uhu which I built in 2000. It represents “G9+BB”, W. Nr. 190070, flown by Hauptmann Manfred Meurer, of Stab. I/NJG1, Luftwaffe, from Venlo, Holland, in early 1944. This was my second go at this kit and I managed to pack enough weight to get it standing on its own legs! Main scheme painting and varnishing was done by airbrush. Thanks for looking Miguel12 points
-
Hi everyone, another new release Airfix build, this time it's the much anticipated 1/72nd Buccaneer S.2C. This is an early test shot that I built back in June and appeared in last months issue of Airfix Model World. A great little kit with excellent fit, good detail, easy assembly and an accurate overall shape, thanks mainly to LIDAR. Having said that there is a slight issue with the shape of the rear tailplane fairing which should be a smooth cone on the S.2C. The Buccaneer was fitted with three styles of rear tailcone fairing during it's life and unfortunately the kit part depicts the later 'stepped' version, fitted following the ARI 18228 RWR upgrade program (a simple matter of reshaping). Also, with regard to the decals, if you look at yellow hatching that runs around the canopy, there are way too many segments...there should be only five along the canopy sides (plus two 'L' shaped end pieces), four at the front and three at the rear. I just applied them and then carefully painted those out that weren't required. Minor issues. As no kit decals were available at the time of building I was sent Xtradecals sheet 'Buccaneer Collection Part 2' which, while excellent, didn't include any stencils. Fortunately Airfix managed to send me a test sheet just after I'd finished painting and decalling so I was able to add said stencils in time. Just as well as many of them, particularly the highly visible white ones, are unique to the Bucc. The model was painted using a mixture of Mr.Hobby H333 Extra Dark Sea Grey and MRP-113 Dark Sea Grey and highlighted using MRP-112 Medium Sea Grey. While Abteilung 502 oil washes, AK leaks and stains and AMMO MIG pastel powders were applied during the weathering process, everything was kept to a minimum as the Senior Service tended to keep these aircraft in tip top condition even in the rough conditions suffered aboard ship. Personally, I don't particularly like the look of the wing slipper tanks, so I modified the war load a little by replacing them with an extra pair of 2in rocket pods and moved the two 1,000 pounders into the weapons bay. Along with reshaping the rear RWR tailcone fairing I also drilled out the lightening holes on the faces of the airbrake petals, which adds a lot more to the look of the finished model. To me the only real disappointment was the cockpit which is really very basic, relying on decals, (though thankfully the seat off set is included. I did what I could with the seats and added seat-belts from Aizu tape and ejection seat firing handles from lead wire. I chose to use Mike Grant's British jet dial decals for the instrument panels and Airscale items for the side consoles. Just an aside, to get me in the mood (as if I needed any encouragement) and prepare for the kit I was lucky enough to be offered another back-seat ride in the real thing at this year's May Cold War Jets event, courtesy of the hard working folks of the The Buccaneer Aviation Group at Bruntingthorpe, (Thanks Colin and Mike!). This time in XX894, and although actually an S.2B, (the pregnant belly and nosegear light gives the game away) she's been appropriately repainted as an FAA machine...now this is what I call inspiration. If you're a fan of this great aircraft (and what decent upright British aviation nut isn't) then this is a must have purchase........now come on Airfix, you know you can reissue it in the proper scale! Hope you like it and thanks for looking. (now where's that 1/24th blighter hiding?) Cheers Melchie11 points
-
To have an idea how the model will look like, I have brought all the parts together: I know, with all these masking tapes it does not look so nice but still gives some positive feedback that the progress is on right direction. More photos with close views will follow. Serkan11 points
-
I've got a confession to make - I've never built Tamiya kits. So I thought why not test whether they live up to their good reputation, and try not only one - but two. So this is Tamiya 1/48 and 1/72 Republic F-84G Thunderjet double build. I thought it might be fun to compare the two kits side by side as I build them. It could also be confusing and I make a mess of the kits and parts - there's only one way to find out Box arts. Painted Tamiya box arts are always classy. Model in the 1/72 is also nice but I think I prefer the painting. Decals. For the 1/48 I'll be using kit decals which look pretty good. The 1/72 I'll be doing something different than the box offers and make it as a Norwegian Thunderjet using Vingtor decals. Hoping to start a small collection of scandinavian cold war era jets. Collection, that currently consists of one model - a Finnish Vampire. But hey, you gotta start somewhere, right? Big brother and little brother side by side. Wings. The clear parts and the extra sprue that the 1/48 kit has. This did not come with the kit. She is called Batman and she loves my hobby. Mainly due to the seemingly endless supply of boxes10 points
-
I present my Revell 787-8 Dreamliner in the Qatar Airways livery. I saw this Aircraft at EDI in May 2017 and wanted to build it as the pilots waved at my then 2 year old Daughter and it made her day. I also find the colours of Qatar Airways very elegant. The build was OOB. I did enjoy the build of this kit, however some of the ‘extra details’ aren’t including in this kit like the antennas. I like how well the kit goes together and only minimal filling was required (although I am trying to get the hang of the filling and sanding process). I think I might buy the Zvezda kit in the future, although I have another Revell 787-8 in my stash which I’m thinking will be ‘LOT Polish Airlines’. I was struggling to find the right shade of grey for the upper fuselage, as it looks very different under various lighting. I mixed my own version using Revell Aqua colours Light grey 76 and 371, it might not be 100% but I am happy with the end result. It was brush painted, which can probably be picked up from the pictures. The White is Halfords Appliance White, and the greys are a mixture of Revell’s Aqua colour range. The Decals are from Ray at 26 and complimented with the kit decals. This was also my first attempt at using AA ‘Photo real’ windows and cockpit decals, and I don’t think I ever want to use anything else again. They are excellent and really add that extra bit of life and detail to the model. My photos hopefully depict a scene of her arriving on Stand, with the Airbridge attached and views from the ramp. (Sorry if there are too many photos). Thanks for looking and any comments and constructive criticism is always welcomed. Regards, Alistair10 points
-
Good Morning. This is a real thing but never flew, and I think was never completed. Dennis tells me its OK for this GB: After taking opinion here at Britmodeller, I've bought the various RAAF interior greens. One of my local shops has stocks of the new Tamiya lacquers which I had hoped to try out but they don't have anything like XF-5 or indeed any bright green. Are these new? Or, just new in the UK? Has anyone tried them? Here are the bits and pieces: The Red-roo resin looks to be very good quality. The Academy Mustang has a few problems but it doesn't have the hideous Tamiya/Airfix canopy/windscreen sticking issues. More shortly, Alan9 points
-
I'm pleased to present the very first completed build by my oldest son, Winston, aged 4 as of this Wednesday. He built and painted the whole thing all by himself, with my only assistance being drawing guidelines to show where to apply the wood glue and laying out paper for his workspace, as well as acting as a human version of those alligator-clip helping hands tools. It was brushpainted in a scheme of Winston's own devising, which can truly be said to be a WHIF, since it's for the fire station he intends to run when he's big. It was a delight to watch him work on it. Winston was nearly expelled from preschool last year for disruptive behaviour, and subsequent testing revealed he's alarmingly, profoundly gifted, with an IQ of 136 on the standard 140-point scale used when testing children. Coupled with his very average level of emotional maturity, it means this mighty cranial engine oftentimes drives him at breakneck speed down the road to perdition, but for forty-five minutes, he was totally focused and completely calm and happy as he built this model. Perhaps it's because I'm a modeller myself, but this was a really special, moving experience for me as a parent.9 points
-
Early on in the Eclipse project someone said he wasn’t sure you could aero-tow a delta wing. Mark Stucky spoke up. “I know you can because I’ve done it.” He explained that he had aero-towed in hang gliders many times. See Forger’s F-106 in 1/72nd scale.8 points
-
A selection of AP drawings showing diferant parts of the airframe, if there is any particular part you would like to see let me know and I'll see if I can find it. John8 points
-
I'm having a bit of a ponder over on the TID Tug so . . . Now I'll be truthful, nothing was further from my mind than a 1/350 boat ( I was given this model by a good friend who always seems to be leading me astray). I was looking around for something from the etch set that might help the tug. No joy on the part but I got to looking at the detail Dragon had included with slide moulding Now with things on hold on the tug, the fact that I've never built anything smaller than 1/200. There are some very nice multi media kits out there in 1/350. The fact that I have an involuntary tremor in my left hand which is never going to get better (I mean that as an encouragement to others, not an excuse). There was no time like the present No promises that this can be completed but here we go ....... Start of main guns Superstructure So far so good Thanks for looking in Kev7 points
-
Actually, this was my 2nd ever 1/48 kit .... actually, I redid the a/c a couple of times.... This was the original version, oob with the addition of custom made radar antennae (I did not know about after market details back then ...) and an in between version until I decided I did not care for the radar ... Thanks for looking - and I don't care which version you like better, I am NOT changing it again7 points
-
Dear fellow modellers, On 7th of October 2019 the \KLM celebrates its 100 Year Jubilee. I thought it was fitting to show the last Fokker, that flew the route to the Dutch East Indies. Here is a link for the history of this plane: https://en.wikipedia.org/wiki/Fokker_F.XVIII My model was built years ago but the wingcovering began to deteriate, the glue dried out, So I had a big problem. I removed the wing from the fuselage but it was far gone. I had only one solustion; I had to make a new wing. Carved from a solid piece of wood, I covered it with selfadhesive aluminium tape and over it went a silver paint coating. With all this repare work I could replace the upper part of the fuselage in the same time, there were some sink marks issues, I had used too much glue with the 0,5 mm plastic card. After this extensive rebuild the model lookes again as it was new. I hope you will enjoy the pictures ! With kind greetings JohnHaa7 points
-
One of the many crazy ideas to win an unwinnable war, no matter @ what cost ..... Thanks for looking7 points
-
Thanks all. At this scale a regular SD would be about 1.6cm long. I'm sure someone will make a 3D print available on shapeways, if there isn't one already. Andy7 points
-
Good day to all! Here is my latest completion, Tamiyas venerable Swordfish in 1:48 dressed up as an aircraft from one of my former squadrons 810 NAS from 1938 (obviously before my time lol). I bought the kit last year from the HMCS Shearwater Hobby show for a decent price and it also came with the rigging etch as well. I invested in the Eduard cockpit set mainly for the harnesses but it also came with a nice instrument panel so used that as well. Im not a great fan of Tamiyas decals and wanted to do something nice and colourful, luckily I came across a set of decals representing a recent incarnation of an RN Historic Flight aircraft which itself was a version from 1938, the sheet also provided information and alternative decals for the original. The sheet was from Scale Model World, and the decals went down very well the only snag i felt was the blue/red strip had a tiny bit out of register, apart from that perfect really. The build itself was relatively painless as you would expect from Tamiya, but I did find a big snag (which may be down to my own hamfistedness or Tamiyas engineering.....you decide lol!) I followed the instructions to a T when assembling the wings. It says to do them separate (even if spread) and then insert the rigging wires, before fitting to the aircraft. I got this all perfect but then when I fitted the wings it forced the rigging out of shape! So in the end I just removed it and as it was badly distorted ditched the kit rigging and replaced it with wire AFTER I had fitted the wings. The only other touch I added were the control wires for the rudder and elevator. I also decided to tool her up to the max, whether she could take off in this configuration is debatable but I think it looks better fully laden! So here she is!...... Apologies for the crappy phots, taken with my crappy phone! Cheers now Bob7 points
-
Some colour details. That's it for now, wrap around to follow. John7 points
-
hi friends of the forum, I show you my last work the mb326 1/48 of Italeri. The model was embellished by the neomega cockpit, tauro and skydecal decals, and gunze paints. Aging watercolor pencils were used for aging, I hope you like it ....6 points
-
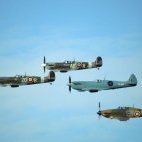
Well here's my latest, the recent Airfix 1/72 Hurricane with the early fabric wings in the markings of 85 Sqn during the Battle of France. A really lovely kit, went together well, although the undercart is a touch fiddly. One thing, I absolutely loathed the canopy - framing was wrong, sits funny, the angle on the front screen doesn't look right at all - so I used the glasshouse from an old mould Airfix Hurri I had sitting around. It's too thick but still looks better IMHO. I changed the decals as I'm 99.99999% certain from looking at photos that the original aircraft was coded "G" but with this style G. Anyway I'm happy with it. Paints are all Humbrol enamel, 163 for the Dark Green, 29 for the Dark Earth, and 33 and 34 for the Night(Black) and White respectively. Gloss and matt coats were my newly discovered Oceanlack varnishes which are simply amazing. Weathering is a panel wash, pastels and a silver artist pencil. Antenna is smoke coloured invisible thread. Not perfect by any means (none of mine ever are!) and there was a bit of silvering but overall I'm happy. Thanks for looking! Tim6 points
-
I have had quite a productive afternoon, managing to paint the nose matt black, adding the decals, and almost completing the instrument panel, which just needs the CRT screen painting. Once I have finished painting the seats I can close the flight deck up and start working on the final details. by John L, on Flickr by John L, on Flickr by John L, on Flickr6 points
-
Yon Caledonian lad's been seeing lights in the sky again... (But in the spirit of Mr.Kipling, he does make exceedingly good rotor heads.)6 points
-
Thanks Dave. Yes the yellow was brush painted and I used AeroMaster acrylic Orange-Yellow. They were manufactured under licence from Polly Scale, who were part of Testors Corporation when they started to release acrylic paints under their own brand label. I am not too sure but I think that the Model Master brand of acrylics could be similar to Polly Scale. I have used AeroMaster and Polly Scale acrylics on a few builds since I returned to modelling and have found that they brush on really well. They can be thinned with distilled water for airbrushing and clean up with soap and water. This 1/48 Tamiya 109-E was brush painted with AeroMaster paints, it was the first time that I had used any type of acrylic paint. by John L, on Flickr by John L, on Flickr As for this build, I hope to get as much as possible done over the weekend because Mrs N has decided that I need to clear some space in the room that I use for model making so that we can create some storage room in prep for having the living room decorated. All part of the joys of living in a small bungalow. Thanks very much Steve, I still have a spare NOVO kit if you can salvage your Lynx clear parts.6 points
-
Hi All, Another Update. So the fuselage a few things going on to get ready........ Started to cut out the Beam Hatches - hmn a little big Another thing to fix......... I have decided to fill in the wing wells, as I want to have an interior I have added styrene Strip to place inserts So I started the fore deck lower/upper,. I began by making a whole new frame/bulkhead as the kit ones were as usual fictitious I have filled/sanded the Marked areas by SH as the are wrong The is how SH have engineered this section For some asinine reason they chose to curve this wall area when it is straight as per my Photo below, the lower angled piece next to step is a guide (great if you are in a dark aircraft) This is the WC/Toilet section, its missing the triangular section as above I have annotated the lower deck with what the area should look like, you can make out the grove where SH would have you place the kit piece. These are the kit pieces SH would have you add, again fictitious What the real thing looks like You can see the door, going into the "Cloak/Gun Room" So this is where I am currently at: I had to cut off the groove SH moulded to glue the kit parts to allow for the replacement card width The kit plastic is really thick, this is my razor saw sitting by it's self part way through the cut Anyway the plastic is cut and a fitting to see how it sits You can see where I have penciled in the various areas to cut out. And here we go with cut out areas Looking from the WC/Toilet side, no, the step down is not out or extreme, I will insert a step in there prior to all going together the real thing has about an 18inch step down =you can see it above in the photo looking from the wardroom out to the bow deck Things are starting to shape up - cool Well it's late here in the Antipodes, so more tomorrow Thanks for looking in Regards Alan6 points
-
Ah, some style, dignity & decorum, as only the Empire can project ... (only those who are hatted, wearing brown, beige or black shall board!)6 points
-
Thanks! I think a few coats of Medium Sea Grey and Dark Green will make her look even better. I have a couple of spares if you can't find it! (Assuming you are speaking of the one true scale.) Thanks! It came out better than I expected, especially since scribing is not one of my better virtues. Thanks Bill! If you can't find your Javelin kit, I have a couple of spares if you can't find it! (Assuming you are speaking of the one true scale, and, of course, if Jason doesn't nab one first.) Jollychopters, eh? That gives me an idea... ***** OK, time for a quick pic. All I've managed to accomplish in the last few days, at least related to scale modelling, is to add some brass tube to mount the tailplanes on. If you look close, you may even see my lame attempt to replicate the blunt trailing edge of the aileron thingies. At present, I'm debating what to do with the canopy. Normally, I pose these open, but the T.3 kit canopy is one piece and the two sliding portions overlap in the center. If I cut it apart, I'll lose a tiny bit where they overlap, but maybe that won't be noticeable. I have only one photo of a T.3 with the canopies open, and there looks to be some kind of structure (roll hoop?) in-between the front and rear cockpits. Anyone have a better photo of that? I don't like closed canopies, but I may have to settle for that if I can't get a better understanding of what I need to do. I'll think about it some more, perhaps over a nice IPA (and that doesn't mean isopropyl alcohol). That will fix everything, even more so if I have two. Cheers, Bill6 points
-
Thanks Rudolf! Cheers Thom. I understand that, but a decal in a box is not visible. It should still be provided and left to the modeler to decide if he/she wants to add it. Let's face it, most will never be seen outside the builder's home! Thanks Stuart! Wait no more Ced! I got a matt coat on her this morning so this afternoon, after watching South Africa annihilate Italy, (sorry Giorgio and Massimo!) I got out hte number 11 blade and tweezers, and removed the masking! Always the best bit! and with the last piece of masking to be removed, off came some paint from one of the tyres.... oh well....it could have been worse! I think the Eduard masks have to be given a 10 out of 10. Even those I removed and reattached left a nice crisp edge. A few small spots needing a touch up but mostly perfect. I'm very happy happy with that! I was going to add some weathering, but after a dismal effort with the pastels, trying them both dry and as a wash I wiped it all off and gave up. Part of the problem is the size of the moulded panel lines which makes it difficult to add any sort of weathering without further emphasizing them. I did add some exhaust staining, and I'm not 100% happy with that either, but it will do for now! Thanks for looking in! Ian6 points
-
Hi everybody, My first model here at BM. I hope you like it. Thanks, Ricardo5 points
-
Build update... FAA Corsair IIs had 8" chopped of the wings to make them fit in the hanger deck. It also improved their landing characteristics, before they tended to float when landing. So 2.8mm off the ends of the wings. Simple. They also lacked the front aerial mast, so that's gone as well. As I said, it's a lovely little kit, great fit and a wealth of (raised) panel line detail, whether they're accurate I have no idea and I'd better not check! I knew I'd drift further away from an OOB build, but I'm trying to control myself. Seeing as I intend to ditch the Novo canopy and replace it with a Squadron vacform, I needed a bit of detail in the cockpit. The dials on the Airwaves instrument panel have disappeared behind the gloss acrylic, ah well. An old seat hastily modified with seatbelts, a throttle quadrant and a joy stick. Gun sight later. Should be enough. A really enjoyable build - after the last one which did get a bit intense. But is anyone else getting 'modelling neck'? I think the pain in my neck / upper back may be a result of too many hours hunched over the modelling desk. Ho hum, only a week to go (last week of the GB we're on holiday in Wales). Anyone happen to know what the colour of the wheel wells were? Interior green or sky? And the inside of the engine cowling? If I can get a look at the Corsair at Yeovilton on Monday that may answer my questions - but restored planes are often wrong as well . Thanks for looking.5 points
-
It has been a busy couple of weekends in September 3 shows Driffield, Keithley and Edinburgh(Scale Scotland) so now have some model time to catch up with masts added and rigged. Been getting the ships boats ready and another coat to the base And picked up a few bits at each show Also ordered these last Saturday at Scale Scotland from Name It and they arrived Friday great service in my book and will be ordering more for future builds beefy5 points
-
As it says, some drawings from the Pilot's notes and Air crew equipment AP5 points
-
@Harry Lime Mark, you asked for it! 🙂 it does make for interesting reading though, well, I think it does. John5 points
-
All this talk of food is making me hungry, so I think I’ll have a early lunch as SWMBO is visiting a friend in hospital and I can please myself. John5 points
-
Frog Hurricane or Billie.... Decisions, decisions Now my vision is returning to normal some progress on this tiny, tiny, model which will be among the last 1/72 I ever build. You can see where it's crawled to. Had a bout of conjunctivitis and Sushi the SleeperCat had the feline equivalent. The vet noticed mine and 'suggested' the Doctor's, cat back to normal in two days, I'm getting there after a week. Just had to coincide with the tiny detailing stage.... however I could manage more on other less fiddly projects. One way and another 2020 can't come quick enough. On the upside the undercarriage bays are nearly done, control column underway (after the first disappeared) and then it's final assembly and paint5 points
-
Thank you Edward, you are very kind - they do seem a bit overwhelming but so far I've not found anything that you would consider in any way difficult... Thanks Bruce, I saw your Mustang and it has made me think about getting the kit, yours is an absolute beauty I got the engine bits (so far) painted up: I overuled the kit instructions and used a darker metallic grey for the cylinders and silver for the push rods rather than just silver for all. None of it will be seen and I won't be weathering it at all, but I do like to pretend that I have standards to keep up and using two shades of silver enables me to maintain this delusion without really making any effort whatsoever Although I said I would take care in the construction I already glued the spidery-looking bit at the back to the wrong holes at the rear of the cylinders (which are meant to accept the exhaust outlets) but fortunately it occurred to me to check the instructions based on the knowledge that there was a 50% chance that I had got it wrong, which probably translated in reality to a 100% likelihood, which turned out to be quite correct, and I was able to detach and reattach it correctly in time. Hopefully that's my one stupid mistake out of the way rather than the precursor of a trend. Speaking of the exhaust outlets, they feature a nice bit of slide-moulding to give them hollowed ends: Hold on... Better? Nice, aren't they? I'm now de-sprueing the parts for the back of the engine, hopefully I'll get them in primer today, but possibly not, as I'm taking the dog to the pub in a couple of hours. What? I am doing it for him. He hasn't been for ages and he misses the attention Cheers, Stew5 points
-
Soo Dear alien, It's obvious that even martians are'nt ubiquitous !! But !!! @hendie is almost right since your martian spacecraft is Faaaast You can ALMOST be in 2 different places at Almost the same time !! Party ?? Who said party ?? storks at the ready for some french Can Can @Pete in Lincs Where's the goat ?? Nokya is at the ready for some more races around martian's patch of grass !! bring on Rex too !! Sincerely. CC5 points
-
I've had some time this week, so here's a few updates... The bottom half has been built up. I also did some plastic surgery on the front end and lowered the placement of the cab. I really didn't like how high it was sitting before. The cab is just held together with tape at the moment, so I can paint the interior. Here I'm starting to plan out engine compartment details. Everything is just temporarily stuck in place with some double-sided tape. I've also started to add some Meng brand bolt heads. I've built the engine up separately, so it can be more easily painted. The white fairing was made from some 1" diameter styrene rod. The engine itself is from the AMT Pod Racer kit. The rest of the engine details were bottom of the barrel kit parts, since they would be hidden in the shadows for the most part. after a dusting of primer... in situ... Thanks for any interest Peter5 points
-
Damn,I wish I'd bought the Hurricane last week now,everyone seems to be starting something new even at this late stage!5 points
-
Evening All, Thanks Chris and Adrian for dropping by - glad to have you along. Ian I suggest that you leave some of your backlog and have a go at a floater: the GB deadline would give you the necessary push to finish it! It has been a little while since the last post and I do not seem to have achieved a great deal in the interval - as usual life has got in the way. There are also times when in the course of scratch building a model a great deal of time seems to be required to achieve not very much, and then a great deal can be achieved in a short time. I am hoping that I might be moving from the former to the latter.... I have fixed the wings and horizontal tail surfaces to the hull - they are butt joined with liquid cement, (bog standard Humbrol liquid poly). Given enough time to dry properly, and supported while they dry this gives a good clean and firm joint. I then primed the fuselage with Revell acrylic ocker (88). Later I will apply oils to represent the wood of the hull: The dark areas on the top of the mid-hull are filler but these will not show through the oil paints. Next were the floats. Originally I thought that I would make them from card and started with sides from 30 thou card with bulkheads between. I had intended to bend some 20 thou card to make the top and bottom surfaces but because the front ends of the floats are slightly tapered this was going to cause gaps to appear and I could see disaster looming: So I adopted instead the method which I had used on previous flying boats (Phoenix A and Hansa-Brandenburg CC) by making them from laminated card. The procedure is simple: glue together sheets of thick card with thick styrene cement from a tube and place under some books for at least 12 hours. Mark out the plan of the float: Cut away excess plastic with a razor saw: Shape the remaining plastic with a file and glasspaper and there is a float with the second block of laminated card ready to be treated in the same way: and here is the pile of dust that is generated by the process: (For those who do not know the above picture shows the corner of the old tray that I use as a "bench" on which I make my models. I have had it since I started modelling when I was 10-11 years old and it is still the main surface on which I work). The hull and floats have now been painted with oils and are currently drying in my airing cupboard: I expect them to be there for 2-3 days depending on the temperature inside the cupboard. Because watching and waiting for paint to dry is a bit tedious I started on the engine: when I laminated the plastic for the floats I also made up a piece for an engine block. This was filed and sanded to shape and the cylinders added from 80 thou rod. The insides of the "cylinders" were drilled so that I can add the inlet manifolds from 20 thou rod, one of which has been inserted (but not cemented): More to follow in due course. Thanks for looking. P5 points
-
Drivers instrument panel almost done. More tomorrow folks Dan5 points
-
Built for a GB on another forum, here is Hasegawa's oft-seen 'egg' F-4E Phantom...'tweaked' slightly to F-4J standard, to represent an a/c of the USMC's VMFA-333 'Shamrocks' during the Vietnam War. I ditched the kit's sole included ordnance -- which I think are anti-ship missiles for the JASDF version -- and cobbled up a more-suitable load-out from spares. I added a 'mini-me' GIB from an old ballpoint pen clicker, and made PC-printed decals for the crew's squadron helmet insignia. Main decals are an old 1/144 sheet from Y-Kraft in Japan. Just as an FYI, the markings are for the crew which notched the Shamrocks' only credited MiG kill during the war. In September 1972, Major Lee T. "Bear" Lasseter and his RIO Capt. John D. Cummings shot down one MiG-21 and damaged a second during a strike escort mission near Hanoi, with both their aircraft and an additional member of their flight suffering flak damage over the target. Headed home, both a/c were hit again...this time, by ground-launched SA-2 missiles. On fire and running out of fuel, both crews managed to eject over the Tonkin Gulf...and, happily, were recovered safely by helicopter and returned to the USS America to fly again. Something fun, and a little different. Hope you enjoy!5 points
-
Sorry for the short delay. The ssd has been finished for a few days, but I haven't had a spare minute to post any updates until now. Not a lot has been done since the previous post, mainly just tidying up a few areas and adding more washes where I thought the detail wasn't standing out enough. I added a very dilute wash/filter over the hull to better highlight the tiny raised panels. That was a mix of dark rubber and dark sea grey with a lot of glaze medium. It was just enough to leave a subtle shadow around the details, without making them stand out too strongly. A few more dilute washes have been added over the superstructure too, using different grey tones to add some tonal variety. Same process on the underside, although I didn't spend too much time here since you don't really see that much of this side. So, I'm going to call it done at this point, as I don't want to end up overworking it. I'm pretty happy with how it's turned out given that I hadn't got a clue how I was going to approach the painting when I started it. The kit must be the most detailed that Bandai have so far done in terms of the minuteness of the mouldings It's by far the largest of the Vehicle Model range coming in at around 19cm long although, ironically, it feels smaller that it actually is, probably due to the slender shape. Hopefully they'll continue to give us larger size subjects in the VM range. Anyway, thanks everyone for following along with the build. I'll get some finished shots into RFI later on. Andy5 points
-
Hello, I would like to built SAAF No 41 Squadron Spitfire Mk IX, Unpainted and armed with only 2 7.62 or 12.7 machine gun. "41 Squadron operated four of these natural metal Spitfires. (MH931 + MH993) (MA504 + MA792) They were stripped of all excess weight, the engine was modified & they then operated in pairs. This to intercept high flying Luftwaffe Ju-86P's at +40,000ft. The idea being that one aircraft (armed only with machine guns) would climb to the altitude of the Ju-86, and force it down to the level of the second aircraft, which was armed with cannons...." http://www.saairforce.co.za/forum/viewtopic.php?f=14&t=2760&sid=68aa477f02a285f68c2be1586a38f658&start=75 So I start with a Eduard Spitfire Mk IX and salvaged pointed wing tips from a Mk VII (I know they have probably standard wing tips, but regarding the photos it's difficult to be sure...) I added two-three trinkets in the office to give a more crowded loo4 points


.thumb.jpg.ad2b820bfdebfdb8541e9255a05f38c7.jpg)


This leaderboard is set to London/GMT+01:00