
Leaderboard


Popular Content
Showing content with the highest reputation on 04/10/19 in all areas
-
I'm pleased to present the very first completed build by my oldest son, Winston, aged 4 as of this Wednesday. He built and painted the whole thing all by himself, with my only assistance being drawing guidelines to show where to apply the wood glue and laying out paper for his workspace, as well as acting as a human version of those alligator-clip helping hands tools. It was brushpainted in a scheme of Winston's own devising, which can truly be said to be a WHIF, since it's for the fire station he intends to run when he's big. It was a delight to watch him work on it. Winston was nearly expelled from preschool last year for disruptive behaviour, and subsequent testing revealed he's alarmingly, profoundly gifted, with an IQ of 136 on the standard 140-point scale used when testing children. Coupled with his very average level of emotional maturity, it means this mighty cranial engine oftentimes drives him at breakneck speed down the road to perdition, but for forty-five minutes, he was totally focused and completely calm and happy as he built this model. Perhaps it's because I'm a modeller myself, but this was a really special, moving experience for me as a parent.50 points
-
Hi everybody, My first model here at BM. I hope you like it. Thanks, Ricardo31 points
-
Hi everyone, another new release Airfix build, this time it's the much anticipated 1/72nd Buccaneer S.2C. This is an early test shot that I built back in June and appeared in last months issue of Airfix Model World. A great little kit with excellent fit, good detail, easy assembly and an accurate overall shape, thanks mainly to LIDAR. Having said that there is a slight issue with the shape of the rear tailplane fairing which should be a smooth cone on the S.2C. The Buccaneer was fitted with three styles of rear tailcone fairing during it's life and unfortunately the kit part depicts the later 'stepped' version, fitted following the ARI 18228 RWR upgrade program (a simple matter of reshaping). Also, with regard to the decals, if you look at yellow hatching that runs around the canopy, there are way too many segments...there should be only five along the canopy sides (plus two 'L' shaped end pieces), four at the front and three at the rear. I just applied them and then carefully painted those out that weren't required. Minor issues. As no kit decals were available at the time of building I was sent Xtradecals sheet 'Buccaneer Collection Part 2' which, while excellent, didn't include any stencils. Fortunately Airfix managed to send me a test sheet just after I'd finished painting and decalling so I was able to add said stencils in time. Just as well as many of them, particularly the highly visible white ones, are unique to the Bucc. The model was painted using a mixture of Mr.Hobby H333 Extra Dark Sea Grey and MRP-113 Dark Sea Grey and highlighted using MRP-112 Medium Sea Grey. While Abteilung 502 oil washes, AK leaks and stains and AMMO MIG pastel powders were applied during the weathering process, everything was kept to a minimum as the Senior Service tended to keep these aircraft in tip top condition even in the rough conditions suffered aboard ship. Personally, I don't particularly like the look of the wing slipper tanks, so I modified the war load a little by replacing them with an extra pair of 2in rocket pods and moved the two 1,000 pounders into the weapons bay. Along with reshaping the rear RWR tailcone fairing I also drilled out the lightening holes on the faces of the airbrake petals, which adds a lot more to the look of the finished model. To me the only real disappointment was the cockpit which is really very basic, relying on decals, (though thankfully the seat off set is included. I did what I could with the seats and added seat-belts from Aizu tape and ejection seat firing handles from lead wire. I chose to use Mike Grant's British jet dial decals for the instrument panels and Airscale items for the side consoles. Just an aside, to get me in the mood (as if I needed any encouragement) and prepare for the kit I was lucky enough to be offered another back-seat ride in the real thing at this year's May Cold War Jets event, courtesy of the hard working folks of the The Buccaneer Aviation Group at Bruntingthorpe, (Thanks Colin and Mike!). This time in XX894, and although actually an S.2B, (the pregnant belly and nosegear light gives the game away) she's been appropriately repainted as an FAA machine...now this is what I call inspiration. If you're a fan of this great aircraft (and what decent upright British aviation nut isn't) then this is a must have purchase........now come on Airfix, you know you can reissue it in the proper scale! Hope you like it and thanks for looking. (now where's that 1/24th blighter hiding?) Cheers Melchie30 points
-
Good day to all! Here is my latest completion, Tamiyas venerable Swordfish in 1:48 dressed up as an aircraft from one of my former squadrons 810 NAS from 1938 (obviously before my time lol). I bought the kit last year from the HMCS Shearwater Hobby show for a decent price and it also came with the rigging etch as well. I invested in the Eduard cockpit set mainly for the harnesses but it also came with a nice instrument panel so used that as well. Im not a great fan of Tamiyas decals and wanted to do something nice and colourful, luckily I came across a set of decals representing a recent incarnation of an RN Historic Flight aircraft which itself was a version from 1938, the sheet also provided information and alternative decals for the original. The sheet was from Scale Model World, and the decals went down very well the only snag i felt was the blue/red strip had a tiny bit out of register, apart from that perfect really. The build itself was relatively painless as you would expect from Tamiya, but I did find a big snag (which may be down to my own hamfistedness or Tamiyas engineering.....you decide lol!) I followed the instructions to a T when assembling the wings. It says to do them separate (even if spread) and then insert the rigging wires, before fitting to the aircraft. I got this all perfect but then when I fitted the wings it forced the rigging out of shape! So in the end I just removed it and as it was badly distorted ditched the kit rigging and replaced it with wire AFTER I had fitted the wings. The only other touch I added were the control wires for the rudder and elevator. I also decided to tool her up to the max, whether she could take off in this configuration is debatable but I think it looks better fully laden! So here she is!...... Apologies for the crappy phots, taken with my crappy phone! Cheers now Bob24 points
-
hi friends of the forum, I show you my last work the mb326 1/48 of Italeri. The model was embellished by the neomega cockpit, tauro and skydecal decals, and gunze paints. Aging watercolor pencils were used for aging, I hope you like it ....17 points
-
Hi Gents, Not sure if this fits the genre but there is no section for scratch built models (or at least I haven't found it) so here it is. This is a scratch built model, built for fun from a plastic detergent bottle and other recycled plastic items. I call it "Submarine Dubious" A German U-Boat was an obvious inspiration as can be seen form the color scheme and the overall form. I used miscellaneous leftover decals to add interest to the model. HDPE plastic proved to be very hard to work with in terms of glueing parts together and painting! @%*$!!?@ Regards, Nikola16 points
-
Extras used: Furball 48-049 decals, Steel Beach ESC pipes, resin seat, Flory Dark dirt wash, Paints and colors used: Model Master LGG and DGG for the airframe and MM Engine Gray for the spine and tails15 points
-
I present my Revell 787-8 Dreamliner in the Qatar Airways livery. I saw this Aircraft at EDI in May 2017 and wanted to build it as the pilots waved at my then 2 year old Daughter and it made her day. I also find the colours of Qatar Airways very elegant. The build was OOB. I did enjoy the build of this kit, however some of the ‘extra details’ aren’t including in this kit like the antennas. I like how well the kit goes together and only minimal filling was required (although I am trying to get the hang of the filling and sanding process). I think I might buy the Zvezda kit in the future, although I have another Revell 787-8 in my stash which I’m thinking will be ‘LOT Polish Airlines’. I was struggling to find the right shade of grey for the upper fuselage, as it looks very different under various lighting. I mixed my own version using Revell Aqua colours Light grey 76 and 371, it might not be 100% but I am happy with the end result. It was brush painted, which can probably be picked up from the pictures. The White is Halfords Appliance White, and the greys are a mixture of Revell’s Aqua colour range. The Decals are from Ray at 26 and complimented with the kit decals. This was also my first attempt at using AA ‘Photo real’ windows and cockpit decals, and I don’t think I ever want to use anything else again. They are excellent and really add that extra bit of life and detail to the model. My photos hopefully depict a scene of her arriving on Stand, with the Airbridge attached and views from the ramp. (Sorry if there are too many photos). Thanks for looking and any comments and constructive criticism is always welcomed. Regards, Alistair14 points
-
I have taken this Eduard weekend edition kit as far as I wish. The purpose of the build was to try an idea I had to emulate the uneven surfaces seen on stressed skin aircraft, and chose this particular aircraft as I'd already built an Eduard Hellcat and knew how it went together, but this overall Glossy Sea Blue aircraft would particularly benefit from something to add visual appeal to an otherwise featureless finish. If interested in the experiment itself, here is the Work in Progress thread: The kit is close to being Out-Of-the-Box, but did receive Airscale cockpit instrument decals to improve the panel, and substantial improvements to the cockpit purely from adding an Ultracast resin seat with seatbelts, new wheels and Ultracast's much improved Hamilton Standard propeller. In addition, Master brass barrels were added. All paints are Colourcoats enamels, and the antenna is Infini Model 40 denier (0.068mm) lycra rigging line. The base is Eduard's injection moulded Essex class aircraft carrier deck section, although strictly speaking the aircraft was from USS Enterprise CV-6, a Yorktown class. If anyone made it this far and is remotely curious to see how ACUS34 - ANA623 Glossy Sea Blue compares to our parallel paints ACUS07 - ANA606 Semi-Gloss Sea Blue and ACUS33 - ANA607 Non-Specular Sea Blue, often all claiming to be matched simultaneously and/or referenced to FSx5042 which matches none of them, here's the GSB Hellcat and my earlier "by the book" tricolor F6F-3 together: Thanks for looking in!13 points
-
Meet Rita the Renzan I bought this kit many years ago from a guy in the USA along with 2 Buzco kits. This is the AMT boxing of the Frog kit, probably very rare, collectible and valuable but built now ! And you may remember chosen by the Frog Squad GB members in a vote. Here is the Work in Progress So here she is I hope you like her. Cheers Pat13 points
-
TIGER I (Early) TAMIYA 1/35th Eduard PE grill set. Friul Tracks. SCRATCH-BUILT MAYBACH HL210 ENGINE. HALFORD'S RATTLE CAN GREY PLASTIC PRIMER. MIG 'LATE GERMAN CAMOUFLAGE SET' LIGHT DUNKELGELB. ASSORTED DALER ROWNEY ACRYLIC INKS. HUMBROL DARK EARTH WEATHERING POWDER. WATER AND STIFF BRUSHES (FOR RUBBING BACK) SIGMA MICRON ARCHIVAL ACRYLIC INK PENS (SEPIA COLOURED, FOR CHIPPING) WINSOR AND NEWTON GLOSS AND MATT ACRYLIC VARNISHES. So here, at last, is my finished Tiger I (Fruhe) with the scratch-built engine that took so long to make that I had to abandon scratch-building the cooling fans. And even then I ended up running out of time in the TIGER GB. Nevertheless, I did enter this into the TIGER GB Gallery in a 'looks finished' state, 6 mins before the deadline. It was soundly, and deservedly beaten in the poll! I subsequently spent the next month and a half getting it into the state that I had actually envisaged at the outset, although I had to give up on opening up the cooling fan bay for technical reasons. (Either Tamiya's fault, or the Tiger's designers,but you can't open the fan bay cover without removing the air hoses, and their connectors, from the filter units.) Anyway, here's a load of photos. I'll be happy to answer any questions and I welcome any criticisms! BTW, THE PHOTOS WERE TAKEN UNDER ARTIFICIAL LIGHT AND THEREFORE THE WHITENESS HAS BEEN LOST. I WILL TAKE SOME PHOTOS IN NATURAL LIGHT TOMORROW AND POST THEM HERE ABOUTS. I won't be adding mud to the tracks until the Tiger's dio is ready. I 'moved' the tow cable because I originally intended to open up the cooling fan cover underneath. Now, it's simply moved aside so that the no one trips over it while working on and around the engine. When I decided to show the Tiger's engine, it required that I open up the engine cover, obviously. I quickly discovered that this was not possible as the escape hatch hinge and the rearmost of the spare track links fouled the engine cover. Hmmmm. But then a period photo provided by @Robert Stuart showed that this was the case in real life. The turret HAD to be turned to THIS angle and the rearmost spare track-link had to be removed in order that the engine cover could be opened. What clever design by the 'perfectionist' Germans! I am calling this finished, but it will get mud/debris on the tracks when the dio is ready. It's for this reason that I'm not too worried about any colour discrepencies between the various patches of mud on the Tiger. The mud of the dio will dictate the colour of the mud on the Tiger. On the whole, I'm fairly happy with the Tiger. There are things I could have done better. Feel free to criticise! TFL Badder11 points
-
Some colour details. That's it for now, wrap around to follow. John10 points
-
The model received some pre-shading this morning. I don't usually go for this technique but in this instance, feel it is appropriate in this case to add some interest for the aircraft's monochrome finish. It will be kept very subdued as these aircraft seem to have been kept in pretty mush immaculate condition. The MVS patrol season now being over for this year, I shall have more time to devote to getting this finished. I am away on holiday for a week from tomorrow but shall be right back on this as soon as I get back. Thanks for looking Martian 👽10 points
-
Maybe a bridge too far, but worth a shot. It's nothing less than the FROG issue of the Hasegawa Emily flying boat kit from 1969. A beat up box and part started pieces prevent all thoughts of it being a collector kit. It's well under the 25% rule though. Might as well have a go at building it then! It will have to be pretty much out the box, given the time available. The Hasegawa issue was an eye watering 49/11d back in 1969. The Airfix He177 was 7/6d for example. The FROG issue would have been a fair bit cheaper but I can't find a reference at the moment. I've held back on this one as it has a few issues that I thought might give problems. The big canopy was busted into half a dozen pieces for a start. I glued it all back together ages ago, it looked terrible so it all went back into the loft. On the off chance I could salvage something here I took the canopy to my model club night on Wednesday and filled the canopy with Milliput. Today saw that sanded down and polished and a bit of smash moulding attempted. Second go turned out fine, so it's all systems go on the build, with next to no time left to get it done. What could possibly go wrong? Gulp. The next problem might be the lack of instructions, although it can't be too different to a Sunderland can it? The transfers look a bit ropey as well. I need to make some BOAC ones for my Comet build, maybe a set for this build as well then? I'm promising nothing here. The odds are against me but it's worth having a go at ending the GB in a blaze of glory. Hold my pint and watch this...9 points
-
Today saw the start of the painting process on this build. I decided that, given the area that this aircraft was operating in that some light weathering is appropriate. As those who follow my builds will probably be aware, I usually prefer my models to be in pristine condition so I hope that @The Spadgentdoesn't go into deep shock. I have given the model a pre-shade and added some white to the centre of those panels that would have caught the sun. I will also be using Tamiya NATO Black rather than pure black for the target towing stripes. I am on holiday for a week from tomorrow but will be cracking on with the paint directly upon my return as I really want to have this ready for Telford, if only to get @corsaircorp off of my case! Thanks for looking Martian 👽9 points
-
This kit was started for the recently finished Sharkmouth GB. Unfortunately I just missed the deadline, so will present the finished model here. The build log can be found here The ZM kit seems to have been overlooked by the Tamiya and recent revell kit. I don't know why as it stands on its own as an excellent kit, Maybe all the interior parts have scared people off. It is a complex kit to build, but careful assembly and repeated dry fits rewards the modeller who enjoys the "build" part of the process. That said, I left off many of the engine, and radiator ducting pipes that will never be seen. I found the kit an enjoyable build, and have already bought another one for the stash. The Completed model represents a machine from 112 SQN. Italy 1945 Painted with Mr Paint RAF colours in the firewall pattern, decals are from the kit. Thanks for looking Bruce8 points
-
Built for a GB on another forum, here is Hasegawa's oft-seen 'egg' F-4E Phantom...'tweaked' slightly to F-4J standard, to represent an a/c of the USMC's VMFA-333 'Shamrocks' during the Vietnam War. I ditched the kit's sole included ordnance -- which I think are anti-ship missiles for the JASDF version -- and cobbled up a more-suitable load-out from spares. I added a 'mini-me' GIB from an old ballpoint pen clicker, and made PC-printed decals for the crew's squadron helmet insignia. Main decals are an old 1/144 sheet from Y-Kraft in Japan. Just as an FYI, the markings are for the crew which notched the Shamrocks' only credited MiG kill during the war. In September 1972, Major Lee T. "Bear" Lasseter and his RIO Capt. John D. Cummings shot down one MiG-21 and damaged a second during a strike escort mission near Hanoi, with both their aircraft and an additional member of their flight suffering flak damage over the target. Headed home, both a/c were hit again...this time, by ground-launched SA-2 missiles. On fire and running out of fuel, both crews managed to eject over the Tonkin Gulf...and, happily, were recovered safely by helicopter and returned to the USS America to fly again. Something fun, and a little different. Hope you enjoy!8 points
-
Cheers H, I'm sorry to report that there won't be anything else opened on this one though. Progress has been steady over the past week despite domestic life trying to slow things up. The yellow has been brushed on and a couple of coats of clear applied over this. I have also painted up the rotors and I am in the process of painting the tail. Undercarriage legs have also received their blue colour and are fixed in position, and I have made a start on painting the instrument panel details. I will need to look at the positioning of that when I get around to fixing it in place, the current position means that it would be impossible to fit any controls, but if I can push it towards the nose a little, I hope that I can at least add a couple of scratched cyclic controls and maybe some pedals, by John L, on Flickr by John L, on Flickr I have purchased this Eduard Brassin set to replace the kit torpedos and these will be a great improvement. by John L, on Flickr There is still plenty of work to do but with the time extension this will make it over the line.8 points
-
This has not been abandoned but I have given more time to the H-19 lately I have, however been working to get a decent nose out of my moulded unit Look, the mysterious glazing mounted sensor set. And gentle adjustments to the cabin roof join This gives me this, when all is said and done Held in place by a combination of Cockpit Glue 560 and UV setting clear adhesive Joints to fill round the edges now but on the whole, finally happy It has been a case of ' hold the nerve and get it done' with this end of the Wokka. So fill, then detail the underfloor area which was a disgraceful fit, entirely like every other Wokka build I have seen ( yet to be seen, whether I will have the same problem with my 72th scale Italeri MH-47M?) Off to detail finish a Whirly now, ciao8 points
-
I do And have been giving this one a bit of care and attn The cabin interior seems to be Green-Gray so I have laid a thin coat of Humbrol78 over the upperworks This initial coat is intended to let me see what needs serious rectifying The joint at the back of the 'turtleback'? has er, spaces needing attention Both sides, but on the whole I am not to displeased with this one Rectifying...8 points
-
I hope this stuff will come in useful for those building East Yorkshire's magnificent Brick. There is more f you want it? John7 points
-
Hot on the heels of my last Kitty Hawk build comes this OV-10 Bronco, built as a USAFE FAC aircraft based in Germany in the 80s. It's a strange kit in keeping with Kitty Hawk's reputation for over-complexity but builds up very nicely given the appropriate application of effort, determination and swearing! I painted it with MRP paints for the greens and Xtracrylix for the grey. Decals weer from the kit and went on well with a bit of MicroSol. The base is one of those ubiquitous examples from Coastal Kits. I had a go at detailing the cockpit with various thicknesses of enamelled wire but the less seen of that the better! All I'll say is if I ever built this again, I'd do the Vietnam USAF FAC colours of all-over grey, this camouflage was an absolute beggar to paint! Cheers, Alan7 points
-
Thanks Rudolf! Cheers Thom. I understand that, but a decal in a box is not visible. It should still be provided and left to the modeler to decide if he/she wants to add it. Let's face it, most will never be seen outside the builder's home! Thanks Stuart! Wait no more Ced! I got a matt coat on her this morning so this afternoon, after watching South Africa annihilate Italy, (sorry Giorgio and Massimo!) I got out hte number 11 blade and tweezers, and removed the masking! Always the best bit! and with the last piece of masking to be removed, off came some paint from one of the tyres.... oh well....it could have been worse! I think the Eduard masks have to be given a 10 out of 10. Even those I removed and reattached left a nice crisp edge. A few small spots needing a touch up but mostly perfect. I'm very happy happy with that! I was going to add some weathering, but after a dismal effort with the pastels, trying them both dry and as a wash I wiped it all off and gave up. Part of the problem is the size of the moulded panel lines which makes it difficult to add any sort of weathering without further emphasizing them. I did add some exhaust staining, and I'm not 100% happy with that either, but it will do for now! Thanks for looking in! Ian7 points
-
Hi Ced, Sorry late to the party on the DC stowage and Smoke/Flare floats First off the Mk I/II and very possible "Early Production" Mk III's had the capacity/fittings to launch the flares through the fuselage, as you can see in this Wikipedia Photo - note the dual tubes that can be loaded from the "Mezzanine Floor (Ward room roof). There were flaps that opened up as the munitions went out into the slipstream -note the camera mounting below - unfortunately that drawing posted earlier is some what stylized as the Sunderland's never had such a cutout as portrayed in the fuselage. I do have photos of the Racks on the flare/smoke float racks, but they are on another hard drive, so I borrowed this from Kiwi Aircraft images Flare & Smoke Float racks Now to the question of AS Bomb/Depth Charge re-loads This is from the Sunderland Mk III Manual Note on this, are the 450lb DC's also, only ever carried outside under the wings (not on MK III's) Now note this photo - you can read "Bomb Stowage Equipment By Special Order Only" Given that comment, "Extra" Munitions were not a given to be carried by all Sunderlands. Also not shown, is a Special Trestle Table used to assist in loading the munitions from the floor. Again by "Special Order only" Hope that helps you? Regards Alan7 points
-
Started masking the splinters!7 points
-
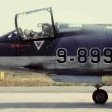
Hasegawa 1/48 Tf-104G Turkish Air Force. 192 Tiger sqadron. RAF Fairford 20 July 1991. http:// http:// http:// http:// http://6 points
-
another pic some time ago I built the beautiful kit from Stransky in 1/48 . Nice kit!! Please feel free for any comments6 points
-
Another step or two towards the finish line. The Commer has been striped, undercoated and now given two thin coats of gloss white from a rattle can. The decals are a bit oversized for this one. The gold BOAC lettering might fit the recess on the van sides and the blue script underneath could be cut to provide BOAC lettering for the back of the van. I still need a couple of Speedbirds though. I'll have a go at making some myself over the weekend.6 points
-
Update as promised Decals now on,waiting for the setting solution to pull them down. Pity the kit ones I had to use are yellowed, but big thanks to @FIGHTS ON who baled me out with the other markings, but the stars are the kit ones. Just a number 2 to put on the tail fin when the green paint that I forgot to paint has dried 😞 Just got to fix on the easily snapped off bits (undercarriage, aerials etc) on Monday as I'm out all weekend playing trains, then I think I can call it done6 points
-
Satin varnish coat. Most Blenheims has a slight sheen to their camo finish. I think it was an attempt to eek out a couple of extra miles per hour when airborne. My varnish seemed to be a bit spattery through the airbrush, so I will need to do some careful sanding when it’s hardened off. The finish is also a bit too even and perfect, spatters aside, so I might consider a brush coat of satin varnish to add a bit of life to things. I hope I can finish this model before we go away next week. There are obviously plenty of other kits I want to dive into, and I have a ton of paying work to get on with.6 points
-
Current state of play, should be finishable....6 points
-
The cable holder dimensions were estimated from photographs. I set the number of spokes in the holder to six, fitting both the links and having a good distance between the two ends of the chain coming of the holder. The round parts were either lathed or made from disc. The spokes were added using a small template to get a consistent spacing.6 points
-
I've just been down to my shed and this is what greeted me... ... the Spitfire and Whittley sat on the windowsill after a trip out to my local Model Club meet on Wednesday and the Comet ready for the next session. The Commer van has been stripped and undercoated and some of the BOAC decals have turned up. There's also a 1.72 scale set of Heston Steps that will be used in a Stratocruiser build once this GB is out the way. The rest of the bench is a bit tidier than it usually looks, so a picture was in order 😁 Tony.6 points
-
It was an honorary one on the kit only. On account of he had the same amount of plastic in him! Ian6 points
-
Something from my house in RFI tonight, but not built by me.6 points
-
Aviaeology Sunderland Decals comes with these neat drawings and info.6 points
-
Curtiss Kittyhawk Mk1a F218F Pushing my luck a bit at this stage of the GB, although it's a simple enough kit to build and I'm going to make it even simpler! It's the fourth P40 from me in this GB but the parts were sitting here, daring me to build them. Curse them, they won! It's missing a prop blade so a clear disc can substitute. That means I can build it without undercarriage and use a late FROG stand to build an in flight version. That simplifies the build somewhat. The model will also sit well against the other version from this issue that I have already completed, the 450 Sqn RAAF one, as that is wheels down. The decal sheet shown is cracked beyond rescue and may well be a NOVO one. The part sheet has the RCAF fuselage decals and badges that are usable as the rest of the sheet was used on the Aussie one. A start has been made, with a bit of vintage tube glue meeting the plastic parts for round one. I hope to have the airframe in primer by this evening. I've also dug out a pair of FROG stands, one big one and one small one. I'll decide which one to use later on. The other P40's mentioned are the first issue, the RAAF version of the issue above and a stalled Chinese AF build that I can't finish as the decals broke up on application. I might be able to salvage something there if I'm lucky, it would be good from a collector point of view to have built examples of all the FROG issues. Greedy bugger. Tony.5 points
-
So this was my first ever bike build, and must admit I was really looking forward to it. But things didnt start well, the paint I was using which was a Halfords Automotive rattle can, just didnt sit well and so I had to strip, sand and start again....I later discovered I hadnt shaken the can well enough. So I decided to pack the kit away, as I had a few other builds and come back to it later. And after a few weeks I picked the kit up again, and it just all fell together. I had a couple of issues with the decals, but nothing a bit of touch up paint would clear up. I ended up absolutely loving this build, and really pleased with the end result, so much so I have just brought another couple of bike builds. Anyway I hope you enjoy.5 points
-
#21/2019 After a shiny Mexican T-Bolt, my dad now finished another shiny Mexican. He had to fight with some fit issues but in the end it turned out nice. He used the limited Eduard edition of the Accurate Miniatures kit with Aztec Decals. For the main colours he used MRP White Aluminium and Neutral Grey and an older selfmixed olive. EZ line for the antenna wires. Build thread here https://www.britmodeller.com/forums/index.php?/topic/235056655-aztec-warrior148-douglas-a-24-banshee-fuerza-aerea-mexicana/ DSC_0001 by grimreaper110, auf Flickr DSC_0002 by grimreaper110, auf Flickr DSC_0004 by grimreaper110, auf Flickr DSC_0005 by grimreaper110, auf Flickr DSC_0006 by grimreaper110, auf Flickr DSC_0007 by grimreaper110, auf Flickr DSC_0008 by grimreaper110, auf Flickr DSC_0009 by grimreaper110, auf Flickr DSC_0010 by grimreaper110, auf Flickr DSC_0011 by grimreaper110, auf Flickr DSC_0012 by grimreaper110, auf Flickr DSC_0013 by grimreaper110, auf Flickr DSC_0014 by grimreaper110, auf Flickr DSC_0015 by grimreaper110, auf Flickr DSC_0016 by grimreaper110, auf Flickr DSC_0017 by grimreaper110, auf Flickr DSC_0018 by grimreaper110, auf Flickr DSC_0019 by grimreaper110, auf Flickr DSC_0020 by grimreaper110, auf Flickr5 points
-
more............. John5 points
-
And just who is going to be looking into a 1/72 scale cockpit and be able to tell you that the colour isn't the exact shade of dark green? If you can find one, I have two, old, one-syllable Anglo-Saxon words for that person. Chris5 points
-
Dear model friends, Here is a new example of the many twoseaters from WWI. I build this model years ago and I must confess, I'm not happy with the colours ..🤔 The reason is simple; a lack of proper colourscemes in those pre-internet days. Nowadays, with much more knowledge, I think it is time for a major overhaul. Also the rigging is a bit saggy. No wonder after so many flying houres in the showcase. But in spite of this issues , it is still a nice plane to look at. So enjoy the photographs, I hope in time to make it look even better. With kind greetings, JohnHaa5 points
-
Cheers Rob, Tamiya Lacquer paints = Very good kit More weathering of the pack bay, these areas are incredibly oily and dirty. added more stains and oil grime to the floor. More later Dan5 points
-
Hi folks, I just got back from a lightning trip of 5 days in Gallipoli. I would highly recommend a visit to anyone, especially if you have an interest in the area due to relatives serving there etc. I rented a car in Istanbul airport and drove down to Cannakale, a 4.5 hour drive. No problems with traffic and the roads are excellent - not so much if you decide to do a little local travelling, but still no major issues. I booked a coach tour of the ANZAC sites, then did the British sites down south on my own by car. That gave me the chance to revisit any sites that were skipped by the tour. Quite a few of the ANZAC and British cemeteries are inaccessible to coaches so if you need to visit a specific one you may need to hire a car anyway.Those include Shrapnel Valley, Plugge's Plateau, Shell Green, The Nek, and The Farm (accessible via a steep track from a coach stop at Chunuk Bair) in the ANZAC sector, and Redoubt and Pink Farm in the British sector down south. Also well worth a visit are the Turkish memorials and the forts of Namazgah (opposite Canakkale) and Ertugrul (overlooking V Beach). Here are some pics I took whilst there. Z Beach, ANZAC Cove Canakkale Turkish cemetery Lone Pine Cemetery Ari Burnu Cemeterey New Zealand Number 2 Outpost Cemetery Chunuk Bair Turkish 57th Regiment memorial Fort Namazgah Kilitbahir Castle from Fort Namazgah Lancashire Landing Cemetery Pink Farm cemetery Redoubt cemetery Turkish memorial at the site of the Battle of Gully Ravine, and the view inland Twelve Tree Copse V Beach from Fort Ertugrul Fort Ertugrul Helles Memorial and the view inland X Beach Ian5 points
-
I thinks she's been working out, or may just have been clenching for the camera ! You decide5 points
-
Hi Clive, thanks, yes I have the Toryu kit too, in fact it was what set me on the path to getting this one Thanks Thom, Fubes, yes I feel when I get to the end I ought to be able to re-assemble a 1:1 scale Raiden Nicely put Mike, thanks for the advice, I shall do my best to take care Thanks Rob, nice to see you again My original plan was to make up all the engine sub-assemblies and paint as many as possible before sticking them together, but on studying the instructions it was clear it would need to be done virtually piece by piece and then assembled - here are the parts covered by the first section of the instructions, five pieces in total but each part made up of two parts in itself: There are things in there that will either make you scratch your head and think what a waste of time, or will make your heart sing with joy (which might be a microcosmic analogy for the whole Z-M philosophy) - for example the pistons and their equivalent recesses are moulded on the inside of the cylinders: there is no possible way that they will ever be seen again but there they are... anyway they all got a primer coat of near-black: For the record, if you do find yourself in possession of this (or indeed the Hasegawa Raiden which also features a nice engine), how much effort you put into painting the engine is really up to you but it will be academic unless you plan to somehow expose it, as this - from the Hasegawa kit - is what you see of the engine: I shall paint mine as best as I am able because that's the sort of fool I am Cheers, Stew5 points
-
I'm happy to say that I've got the paint job sorted out, otherwise my Skyhawk would have looked more like this: after tossing it in the bin! Instead, the True North enamels did the job for me. Here's how she looks now: Much, much better! The only downside to all this is that my canopy has been taking a beating with repeated masking, painting, de-masking, re-masking, etc and is showing it around the edges: Also, I realized last night that I forgot to add the yellow ejection handle over the pilot's helmet. Oh well, too late now. But, at least I'm back in business5 points
-
5 points
-
With the exception of the inner gear door swing arms, I call this one finished. Kit is Eduard’s weekend box OOB with the seat belts exception and the swastika decal that came from spares. Hope you enjoy cheers4 points
-
Red 5 is now red 5 but it was nearly in the bin after trying to get the 5 wing marks equally spaced, straight and then to stay. After the difficulty I’m pleased with how they sit.4 points


.thumb.jpg.158e2e086d45b8f96b7d93b8bee8dc21.jpg)


This leaderboard is set to London/GMT+01:00