
Leaderboard


Popular Content
Showing content with the highest reputation on 02/07/19 in all areas
-
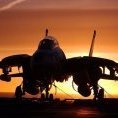
Lightning F.6 Lightning Training Flight, Binbrook, 1982 Over many years of building Lightnings I had never bothered with camouflaged machines, but for some reason I thought it was time to try one out. I had an old Frog / Hasegawa F.6 to use so it had to have a belly tank without guns fitted, and this is the one I chose: I decided to do a limited re-scribe, and also I had a spare undercarriage from an Airfix F.6 that made a huge difference. I’m running short of Aeroclub white metal undercarriages so this was really helpful. Decals were my usual mixture of Modeldecal and Xtradecal. The finless Red Tops were from a long deceased Matchbox F.6 Looks OK overall, but I still prefer the natural metal look:27 points
-
Airfix Phantom FGR.2 1:72 Hi everyone! Some of you might remember my Airfix Phantom FG.1 build from over a year ago. Well, since I enjoyed that one so much, it was a no-brainer to build an RAF jet when Airfix unveiled their FGR.2 kit. As always with newer Airfix kits, it's generally a really enjoyable build; great quality (and numerous!) decals, great mould quality and a novel construction! However the kit is not without its flaws: the nose should really be moulded as a single part (as seen with Revell's 1:72 Tornado, for example) to avoid seam lines, the canopy mid-section should really have a spare part with the periscope "orifice" already pre-cut (I kept making a pig's breakfast of it, as the periscope would mean that the canopy wouldn't sit flush in-line with the cockpit walls. Those instrument panel decals that are included should ideally be made less "basic" or a moulded instrument panel should be provided (again, see the Revell Tornado kit for how it could be done). I had a set of decals (Xtradecal "The history of RAF 19 Squadron") with a particular blue-tailed scheme for an FGR2 which really appealed to me. For this build I used my trusty supply of Vallejo Model Air paints, along with a brown weathering wash from Flory Models (my first attempt at using a brown wash instead of my normal black wash. I just couldn't resist taking a few snaps alongside the Phantom FG.1 As always, thank you ever so much for dropping by and having a look! Best wishes, Sam22 points
-
Hi all! Not so good as the another Dornier from Airfix that I showed before, but I enjoyed veyr much the final results. All panel lines were scribbed, and I did some improvments in the interior. Hope you like this my model...and I enjoyed the base/ grroundwork too... let´s see the pictures : Till the next! Luiz.21 points
-
I used the accessories: -Fightertown decals -Crossdelta walkways -Master pitot -Eduard cockpit (excellent) -Eduard wheels -Quickboost chin pod with ECM / TCS equipment -Quickboost tail reinforcement plates -Quickboost beaver tail20 points
-
I made a model directly from the box.20 points
-
One pretty good model of an unusual but nice airplane.20 points
-
Good evening. Here is my take on the beautiful C-47 sky train, specifically the "Camel Caravan to Berlin", a good story and based in Neubiberg, a stones throw away from where I live. The kit is Revell, 1/48, with various mods and a few table spoons of putty. Enjoy and thanks for looking. CF17 points
-
Hi comrades! Here result of my build (full build is somewhere in the "in process" section) Resume: very recommended kit Enjoy and thanks for looking17 points
-
I used only the Aires wheel bay for the Hobby Boss and the Eduards zoom set for a cockpit that was designed for a Hasegawa.16 points
-
My latest project is the new Airfix Spitfire XIV. Built pretty much straight from the box except for some Eduard exhausts, wheels, seat belts and just for the hell of it one of their new 'look' instrument panels which is VERY nice... Oh, and decals from a fairly old Xtradecal sheet. Mine didn't suffer from any of the short shot problems discussed on here and was nicely moulded throughout. The fit was also quite acceptable and I encountered no problems during the build. Thanks for looking. 20190702_202606 20190702_202355 20190702_202450 20190702_20253213 points
-
Hello Dears, Every year, its Corsair, but there should be 2 Corsair in 2019 !! Sem Fi because it's a US Marines Corsair ! Let's go to Saipan in the summer of '44 VMF(N) 532 came in the combat zone aboard CVE 92 Windham Bay The F4U-2 is the Night fighter version of the Corsair, but it's not a production aircraft ! She were F4U-1 field modified with an AIA radar on the starboard wing and a radar scope generally installed in the lower center of the dashboard. So, they were refurbished Corsairs, the radar needed a lot of energy, and so a bigger generator has been installed too Hence the additional air intake on the starboard side, my working basis for this kit was the Hobby Boss F4U-1 Late version ! There was a lot of tiny detail to change but it was a decent kit. Midnite Cocktail has been flown by both 1LT Charles Canif, 1LT Bruce Reuter and Capt Howard Bollman The Capt Bollman shoot down a "Betty" on April '44 As usual, I can't wait to share it with you, I'll try to have better daylight pics tomorrow ! To compensate the weight of the radar antenna, one of the .50 has been removed from the starboard wing. HB give us 2 landing lights on the leading edge, but it's not right on early Corsairs There's just one gun camera ! So, I added it under the port wing ! And now, let's go for some family pics !!13 points
-
Hi all! I consider this model, a classic, already....these new tooling from Airfix are really, great! Hope you enjoy it! Regards! Luiz.13 points
-
Here we go ! Same paint scheme but the stars and bars are differents ! F4U-1 and F4U-2.... Sure I will try a F4U-3... What do you think about ??? the -1 has been used for training CONUS, so she should have become a F4U-2 after all ! and now my little Corsair family Corsair Mk II, F4U-4, F4U-1 and F4U-2 More to come in !! Trust me !! See you tomorrow for some daylight pics Open to comments ! So it'e up to you now ! Thank for your support in my insanity !! No, Sorry, I did'nt grew better at all Sincerely. CC13 points
-
Ouch! Don't go out Ian! Indeed I moan about the lack of air-conditioning too Stuart - I wish I'd invested in a manufacturing company Thanks Rob Thanks Johnny Still waiting for the sauce but had a brief spurt of mojo this morning. Sorry to hear that John - just relax by the pool then eh? Me too. And Vegas. I stupidly went out in the afternoon and my eyeballs dried up 😲 What do they call those places where nothing supposed to live? Deserts, that's it. Hot and sandy. Yuk. Thanks Giorgio It's been a pleasant English summer here for the last few days; around 20C. Lovely. Finished the bottom and down the port side this morning: As usual, ignoring the 'so small I can't read them here, let alone on the ceiling' stencils. Aided by the fact I applied ten of the 'No Step' tiny things to the BOTTOM of the tailplanes. Idiot. They're off now and in the scrap pile.12 points
-
I stand corrected Martian! x2 Beaten to to the punchline! 🤣 Classic Martian economy of expression.... It would be un-ironic. Ironically enough. Mandatory survival kit Terry. That and a foil blanket. Both together on the 'purchase' button: 'One. Two, Three. Buy!' No wonder there's such a recruitment problem nowadays. The MOD really needs to rethink its social media campaign. Help yourself AW but remember to only deploy as a precision munition in circumstances involving rank narcissism and conspicuous consumption/stupidity in order to avoid damaging the innocent. Nobody's fooled by that 'furniture restoration' line you're shooting Pete. The chair's going to become another bloody hovertank isn't it? Cycling may also have been implied... Disappointed not to see the original Hellfire Club feature on that list tbh Bill. Amen to that. 🤘 Thanks on all counts Chris. My hopes that you were going to reveal unearthly longevity by continuing: 'Elizabeth 1st after the Armada had been blown North around Scotland' cruelly dashed by the remainder of that sentence Keith. Be careful Anthony: you are in an innuendo hot-zone on this forum. This has been a public service announcement. Friars Aylesbury... How often did that name crop up in adverts at the back of 'Sounds'. #bitd That sounds like a very odd examination by a doctor in casualty CC! Ta v. much Johnny. Not off for a couple of days yet but no further bench activity until the return. 'Make No Mistake' As he would have wanted it Keith.... Bizarrely the only time I got to see JM live was when he did one of the support slots for the (brief) Genesis reunion at Milton Keynes Bowl in '82. A most un-intimate situation to hear His Huskiness in. I HAVEN'T BLOODY GONE YET AND CAN HEAR EVERYTHING. <CAPS off I was only 14 then and more preoccupied with how to marry Kate Bush tbh. As it should be. As I've gotten older, certain gigs have completely rewired my expectations of live music. Seeing both Joanna Newsom and Laurie Anderson at various times in Dublin, your correspondent drifted upward eyes-closed in enchantment without any stimuli - music as well as love being the drug... For one brief and perilous moment CC I thought that this might be an announcement to do with British politics and was about to have a nervous breakdown... #laurakuensbergintears This will be the last post on this thread until mid-July due to the heady imminence of the holiday beach, secondhand bookshops, FAA, and bubblegum-flavoured ice cream. Play nice with each other and do not touch what is in the locked cupboard. Here's some 'Owl Service' to keep you quiet: Tony11 points
-
This is the old Revell 1/96 Saturn V, assembled using pieces from two second-hand (partially built) 25th anniversary and 40th anniversary kits, with a RealSpace Block II Command/Service Module, Boost Protective Cover and batted F-1 engines. I also used New Ware's detail kit and a bit of scratch-built detail to produce a rendering of the AS-506 that took Apollo 11 to the moon. Here's a four-quadrant view of the completed model: The upper part in isolation: The area around the S-IVB aft interstage: And the S-II aft interstage: RealSpace provide a vacuum shaped Boost Protective Cover to go with their CSM. I punched out the commander and pilot windows, and added styrene rod to the kit Launch Escape Tower to simulate the wire harness. Build log for this section is at https://oikofuge.com/realspace-196-apollo-csm-part-3/ I used New Ware's scimitar antennae and hatch cover to detail RealSpace's CSM, added kit parts for thruster quads and S-band antenna, BareMetal Foil for bright metal areas, and Space Model Systems decals. Build log for this section starts at https://oikofuge.com/realspace-196-apollo-csm-part-1/ I painted over the transparent section in the kit SLA, and detailed with New Ware photoetch and styrene strip, correcting New Ware's black "-Y" decal on the instrument unit to a "+Y". Build log for this section is at https://oikofuge.com/revell-196-saturn-v-sla-iu/ The S-IVB was detailed with New Ware, replacing multiple fairings and the service tunnel: Here it is with the instrument unit and lower part of the SLA attached: Build log for this stage is at https://oikofuge.com/revell-1-96-saturn-v-s-ivb/ The log for its aft interstage is at https://oikofuge.com/revell-1-96-saturn-v-s-ivb-aft-interstage/ The kit S-II required extensive modification, with New Ware fairings, instrument packages on the thrust structure and a heatshield. I also needed to trim back the kit's stringers, remove all the kit's misplaced fairing locators from the aft skirt, add a layer of insulation to the forward skirt using styrene sheet, and construct the support structure for the heatshield using 0.5mm brass rod. I also moved the LOX vent pipes to their correct position, and corrected the number of gores in the upper tank dome. The kit provides the aft interstage for the S-II with 8 ullage motors, but AS-506 had only four, so the locators for the kit motors had to be removed, stringers repaired, and four New Ware motors added. I added the white flight separation joints above and below the S-II aft interstage by wrapping 0.5mm x 1.5mm styrene strip edgeways around the locating flanges at the base of the S-II and the interstage. Build log for this stage starts at https://oikofuge.com/revell-1-96-saturn-v-s-ii-stage-1/ Build log for its aft interstage is at https://oikofuge.com/revell-1-96-saturn-v-s-ii-aft-interstage/ The rear part of the S-IC needed extensive modification. The kit is based on the SA 500F, which had multiple air scoops around its aft end. Almost all of these had disappeared by the time SA-506 was launched, so New Ware provides photoetch/resin replacement parts for the engine fairings and heatshield. The kit F-1 engines are provide bare, but the real engines were covered with batted insulation - I used RealSpace's resin replacements, with a mixture of chrome paint and Bare-Metal Foil to simulate the different reflective properties of the batting. New Ware's resin heatshield is undetailed beyond the simple outlines of the tiles, so I printed up custom decals to provide rivet and other detail. I also scratch-built lunate heatshields to fill the engine fairing voids, with their own custom decals - both the kit and New Ware provide only rectangular heatshields in this area. For the S-IC service tunnels, New Ware provides mutiple photoetch plates to be wrapped around the kit parts. The contour of the kit parts is wrong, and I instead applied New Ware's photoetch to appropriate lengths of 7mm half-cylindrical styrene rod. I also carved out slots in the kit aft skirt to insert New Ware's resin hold-down posts. I made an error with this stage by not checking the length and fit of the service tunnels. The kit version of this stage is too long by close to an inch (the extra length mainly in the forward tank and intertank structure), and I had assembled it before realizing this. New Ware's tunnels are approximately the correct length to scale, and so don't cover the correct proportions of the overscale stage. Sigh. Build log for this stage starts at https://oikofuge.com/revell-1-96-saturn-v-s-ic-stage-part-1/ The kit's representation of the Lunar Module is wrong in multiple ways, and would need to be rebuilt almost entirely for accuracy. I contented myself by fixing the representation of the external tank strut on the left side, adding a few details with styrene, and marking it up with the insulation patterns of Apollo 11's LM5. A lot of extra detail (antennae, docking target, plume deflectors) could easily have been added, but it would have been like applying lipstick to a pig, and in any case the LM is invisible in the assembled Saturn V - so I didn't bother. Build log for this part is at https://oikofuge.com/revell-1-96-saturn-v-lunar-module/ As a final note, ALL the kit stages are misaligned with each other in rotation, so all the locating lugs between stages had to be relocated to produce the correct alignments. Sorry about the image-heavy presentation, but there are a lot of parts to this kit!10 points
-
This has been close to being finished for nearly a year but to say life got in the way is an understatement! It's the second ICM Foxbat I've built and was just as enjoyable a build as the first, great kits. Unfortunately I've been forced to take photos with my phone as I've misplaced my DSLR!10 points
-
The final touches were completed today, and I present my Airfix 1/72 F-5E finished in IRIAF markings. This started as a background project some time ago, but lately took on a life of it's own. The basic kit is Airfix, with Hi-Decal markings for a fairly up to date Iranian Airforce Example. Resin seat came from the True Detail set TD 72404 for the F-5E, Sidewinders from Eduard and Mk.82 Snakeyes from Kora, although I had to get a replacement set from Hannant's as the first batch were really rough. The second batch were better, but they still needed a lot of work to get them resembling the real thing. Main colours used are Lifecolour Acrylics as follows: UA001 FS 34079 Upper Surface Dark Green UA085 FS 30140 Upper Surface US Brown UA084 FS 30400 Upper Surface Sand UA021 FS 36622 Under Surface Light Grey I really like these acrylics as they airbrush very well. Thanks go to @Selwyn for some invaluable input on the weapon load outs, which enabled me to get her looking as accurate as I could. You may be interested to learn that the wire on the RBF tags actually passes through the Noddy Cap and the red tag itself. That activity last night convinced my wife that I was indeed mad........... oh and the Noddy caps do come off. Fuses on the Snakeyes were scratch built as the Kora one were to put it mildly, somewhat naff.......... The original WIP can be seen here: And finally a quite shot of the Noddy Caps on their own The Airfix kit is pretty old but still builds into a decent F-5E. Thanks for looking Terry PS Some underside shots missing from original post and actual shots to compare colour and weathering (or lack of!) And the real thing: Colour matched to an F-4!9 points
-
Evening chaps I don't build jets, apparently, but I've recently been inspired to build my first ever modern jet. That's the first first. The second first is this is my first build using an airbrush. I've learned so much during the course of this build and there are some mistakes but I can honestly say this is the best build over ever completes. It was so much fun and I'm super proud of this one. I've ordered the C version to accompany this one, which won't be my last rafale! Painted with vallejo model air, tamiya, Mr surfacer 1000 used as a primer and a dark dirt flory wash. There's loads of photos. As always, any comments or feedback would be great!9 points
-
Excellent Eduard model, it's really a pleasure to work with such a good model.9 points
-
The 1:72 Revell MiG-29, which is a rebox of the Zvezda kit, built in the current day North Korean markings. Quite a nice build and I think the Revell instructions are easier to understand than the Zvezda originals as I have built the original Zvezda boxing. Colours used are Model Master 2033 blue on the underside, Model Master 1723 grey and Model Master 2156 grey on the upper side. Decals are from Model Maker decals sheet No D72044. Used two decal sheets as I wanted to build No 555 as it's one of the few 9.13s North Korea has and since it was seen at the Wonsan Air Festival, there are lots of good photos of it. MiG-29 9.13-65 by Ryan Hothersall, on Flickr MiG-29 9.13-66 by Ryan Hothersall, on Flickr MiG-29 9.13-67 by Ryan Hothersall, on Flickr MiG-29 9.13-68 by Ryan Hothersall, on Flickr MiG-29 9.13-69 by Ryan Hothersall, on Flickr MiG-29 9.13-70 by Ryan Hothersall, on Flickr MiG-29 9.13-71 by Ryan Hothersall, on Flickr Compared to the older green scheme. MiG-29 9.13-72 by Ryan Hothersall, on Flickr MiG-29 9.13-73 by Ryan Hothersall, on Flickr8 points
-
The mark four (bis) The process proceeds The butchered clear piece is not quite a sacrificial animal because the model parts it was designed (a hell of a long time ago) to fit are no longer relevant Which gave me a thought that I could play any game I liked with it I recall Fritag of this parish explaining how he used polycard to enlarge the canopy for his Hawks (Remember them? Ah the past, such a nice place) so he could mould off it, which is what I did to the Whirlwind canopy Fillet pieces around the edges then file to suit the new job The intention is to pull mould some new shapes that will be trimmable to suit This is going to be polished to within a millimetre of destruction and into total shinynessnessne... Very shiny And then pull moulding will give me some plastic shapes I can trim to fit the hole in the front Excuse me please, I have polishing to perform8 points
-
Afternoon guys! This post will finish up all the interior detail I needed to do before closing both top and bottom halves of the fuselage and then I can proceed to finish off the detail on the exterior of the fuselage. So what needed to be done was the ammunition belts from the emergency ammunition cans and the oxygen bottle for the gunner. I'll start with the ammunition belts.....By using just paper and wire I'd thought I would show you how I went about this task ..photo by photo... 1. The first task was to cut 4 pieces of paper to the length/width of the belts....I used paper as it will bend like a real ammo belt... 2. As you can see I then cut all 4 pieces..(you will see in the next few photos why I did this!)... 3. I then got some garden metal wire twine (I chose this as it looked the right scale for the rounds)... 4. This then had to be straightened using a flat piece of metal rolled across the top of a length of wire...... 5. After measuring the width of the pieces of paper I then had to cut... (loads!!).... of pieces of wire which would replicate the rounds,....laborious task!...although I don't actually mind doing it!! 6. These were the super glued onto 2 of the 4 strips of paper.... 7. Then the other strips of paper were glued over the top of the rounds This is the time that I bent the paper to the shape I needed.... 8. A couple strips of paper were cut and glued to both sides of the belts to make them look more authentic and I then painted them..... So now all I had to do was super glue one end of the belts to the ammo cans and hook up the other ends on a couple of posts....(the reason for this is that because I have exposed the top of the ball turret I couldn't glue them to the entry point of the turret!)...here are a few photos of the task complete...... The last task to do before closing the two halves was to scratch the oxygen tank for the gunner. I have so far made loads of oxygen tanks for this project so I just made them the same way as before....and that is a sanded down piece of balsa wood with plastic strips glued to them!......here it is.... I then glued the tank onto the post and made a couple of paper straps ....to replicate the securing straps! So here is the finished Ball turret connection structure...... So now its at long last time to place the top to the bottom!!..ha ha! I am now getting close to the end of the Radio room section of this B17G....the external detail will now have to be thought about before proceeding......so I'll see you all the next time around! Thanks again for looking in Fozzy8 points
-
Here's a kit I never thought I would be adding to the Group Build. Thanks to a quite amazing offer from CliffB I'm able to add a Comet Airliner to the pot! The original post is on P29 of the GB Chat page. https://www.britmodeller.com/forums/index.php?/topic/235032968-frog-squad-gb-chat/page/29/#comments It turned up here just now, thanks Cliff. As luck would have it, I've just put the finishing touches to my Hunter build and a later Spitfire build is near completion, so there's a gap in the line that looks very Comet shaped to me. 😀 I'll be making a start on this one before the week is out.7 points
-
Well, wading actually but you get my drift. I have been wondering, read dithering, about when to add the floats to this build, before or after painting. I took another look at the float assemblies today and realised that they were getting knocked about and damaged. As a result the decision was made for me. The floats had to go on the model where they would be much stronger and safer. I will just have to cope with a slightly trickier masking job. Anyhow, I have decided to forego the obligatory flight around the kitchen in favour of a flight around the garden pond. I'm not quite sure what the resident newts are going tp make of it though; still, I'm sure they will get over it with a bit of therapy. The engine is now glued in place and work is continuing on bringing the cowling up to snuff. Thanks for looking. Martian 👽7 points
-
… and the other side: Tanks and pylons left to do. I still have some larger stencils that I need to hunt the scheme for but I think they may be 'generic'? Out for a meal tonight. Yum.7 points
-
At the time I had convinced myself that Zep were dinosaurs in the punk era, and that the bands I really wanted to see were lower down the bill (only one of whom I can actually recall now - Southside Johnny & The Asbury Jukes, who were indeed very good). That lasted until about 2 minutes into Zep’s set, at which point my mental “who am I kidding?” circuit breaker popped and I got on with enjoying myself...7 points
-
Update 5: I had a slight disaster with the paint job, I mistook touch dry for completely cured and when I put the second coat on, it completely buggered everything up! So so I had to sand everything back and re-prime: now after being a bit more patient, I have applied two coats of the pink/mauve, it will just require one more extremely thin coat i reckon! Then it’s time. To polish and varnish to attempt to replicate the high gloss finish this bird had! (P.s anyone have any tips for polishing? I’m planning on lightly wet polishing with Tamiya 6000 grit ‘lapping film’.) Cheers, Ash7 points
-
Morning folk's well I'm calling this one done otherwise I'll tinker on forever and spoil it,before I put her in the gallery I'll need to fit the radio wire but in the spirit of nostalgia here's an on the stand shot like we used to build 'em,Thanks for the interest and support and on with the Focke Wulf's later today.7 points
-
Silly. With all the encumberances, it was found the floatplane Roc as a tug was an abject failure. The target often acted as a kite, pulling the aircraft backwards. The engine was removed to aid takeoff in reverse.7 points
-
I don't know about brave Jeff, more obstinate and blindly determined. I know this will never be truly accurate as there are significant and insurmountable shape issues which I shall make absolutely no attempt to correct. However, when I start a kit, I am always determined to make the best of it so, with this in mind I obtained a photo-etch set for it from White Ensign models when at the IPMS model world show at Telford. Hangar doors added And also chopped out the AA mount floors as the kit had them moulded as platforms instead of walled enclosures. Aft And forward Plus the etch for the bridge 'wings' 'Before' picture in insert Etch added to the funnel Added etch platform to funnel Fire directors cleaned up and one missing end replaced with a scratch item and etch radar grids added... looking a lot better Etch catapult and aircraft handling tracks added I then turned my attention to the (distinctly NOT ROUND) main guns, making them actually round and drilling out the ends. I also added a little more detail to the turrets including the director covers and an attempt at the small, sliding port covers on the front face of the turrets. And that's it for now. More insanity to come... polishing a for fun Phil the mad7 points
-
Hi gents, my entry in this GB will be a Hasegawa’s venerable 30 year old kit of the F-15C in 1/48. She’ll be marked up as a machine operated by PACAF’s 18th Wing out of Kadena Air Force Base in Japan. Mark6 points
-
Recently completed this F.2b with flat wire rigging! 5395C0AE-B0E7-42C0-B5FD-4190573B239E by Colin Dempsey, on Flickr EF64AA1F-75BF-4A5F-86DA-59C1FF7299B5 by Colin Dempsey, on Flickr 2A92D521-F1DD-474F-AB6E-67BC54C0FEF3 by Colin Dempsey, on Flickr 838F9494-888B-441C-8270-5FD221CBCBF8 by Colin Dempsey, on Flickr A6B34EC8-8E3A-4F09-BF85-35F5B83B70E5 by Colin Dempsey, on Flickr 5317461D-8621-4458-825E-46039C49F932 by Colin Dempsey, on Flickr 121757C7-D7DA-42FF-B2CE-F17566DDC1A3 by Colin Dempsey, on Flickr6 points
-
This model was finished in April this year. It is the old Revell kit, which is not as detailed as the newer Zvezda kit. The main Problem is the flight deck front Shield, but by filling and sanding and using a decal it Looks ok. Vueling is a Spanish low-cost carrier and in 2012 they had flown 50 Million passengers and marked this Aircraft with a big !Gracias! on one side and on the other side with "Thanks". The Decals are made by Nazca. The Right side is done very well, but surprisingly there were a lot of mistakes on the left side. So I had to improvise at some Areas with some cutting. You will only notice it by directly comparing to original Fotos. I found an interesting Foto showing how much dirt and oil had accumulated on the Bottom and tried to Imitate that. I also painted the back half of the engines somewhat darker to Imitate the traces of the thrust reverser. The Winglets provided by Revell are too small. So i made them from Scratch using Daco`s photo etched parts as atemplate. Zvezda`s also have the correct size So, please feel free to comment on the model and also on the Things I missed or done wrong. cheers, Norbert6 points
-
Hallo again This is my 3rd helicopter. After hundreds of aircrafts. I changed basically my modelling for this issue: 1. I use the new Tamiya glue EXTRA THIN. Why? · It works much faster. It glues rapidly! · It does not harm my color. I use Gunze C colors. · I can glue more tiny parts, as with the common Tamiya glue. · I save a lot of CA glue. · In this built only the etched parts are glued with CA. Nothing else! 2. I do not cement all glazing before the helicopter is fully assembled and sprayed. Also the final clear varnish is sprayed. Some antennas I assemble after the glazing is assembled. 3. The grinding process is kept to an absolute minimum, to keep surface details unharmed. Well, in this case I opted for the IAF UH-1D, but I left it out, because of the camouflage. At the top I used the etched part from Eduard, and I can not mask it at all. The US Army version from Vietnam is absolute not my favor, but I had no other by hand. Happy modelling6 points
-
Please do your homework Crisp, the hole in the nose is merely the exhaust for a cunningly hidden jet engine and the two holes above it are the air intakes for the same. Which was probably faster than the original design. You have hit on a point there Heather. Blackburns had originally wanted to call the Roc the Uzlum Bird on the grounds that it flew backwards and whistled through it's backside. Their Lordships decided that a slightly more tasteful name was required. Incidentally, one of the committee that ordered the Roc was one Admiral Sir Horatio Blowhorn Melchett. Any relation to our very own @general melchett perhaps? Martian 👽6 points
-
Bill’s prototype of the new hi-tech instrument flying blinds getting an early unveiling?6 points
-
A and B turret have been assembled but not yet painted. Still an awful long way to go!6 points
-
Kit: 1/48 Smer Su-17/22M3 https://www.scalemates.com/kits/sm-r-0855-suchoj-su-17-22-m3--956769 Paints: Testors/Tamiya Decals: kit AM: Masters pitot set, Neomega resin cockpit, SAC undercarriage Another Fitter in the fray. I can assure you it won't be as detailed or well executed as Rich's...but I hope to have fun, not bodge it up too bad, and have a unique addition to the flight line. I was stoked to find one of the kit decal options was for a recce bird, so that is the route I will be attempting to go assuming the decals play nice. Opted to go w/ the Smer kit (old KP molds) plus a couple AM bits over the newer KH & HB options after chatting with Rich. I think I'll be plenty happy w/ the outcome for about half the cost.....and used the savings to buy more kits! I'll probably keep my eyes open for a good deal on a resin can...but other than that I should be pretty well set for bits & bobs on this build. I'll get some pics up tonight when I get home. I'll roll into this one as soon as I have the Phantom phinished up...which if all goes to plan will hopefully be this weekend. A cool looking bird that I'm excited to add to the collection.5 points
-
Recenty completed Wingnut Wings Lanoe Hawker VC and his AMC DH.2 E15F6850-CA3A-4122-8E14-B2075D10B3FA by Colin Dempsey, on Flickr 934E6F15-6692-42A2-A950-DA1CAD68C782 by Colin Dempsey, on Flickr 08B6613A-0E45-41C0-B985-CABF87661719 by Colin Dempsey, on Flickr 5ACAF5AD-9A23-41CA-AC94-022615A31966 by Colin Dempsey, on Flickr 580B5F3D-8C1C-4376-9FF1-0D2A67FF8F42 by Colin Dempsey, on Flickr5 points
-
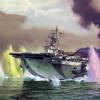
Hi There, Whilst Innis and I were building his Mustang, I was building this as a side project for myself. I didn't mean to get right into it but after taking it in to work on a Sunday evening to drill out the flood holes it got the better of me and the fit of the hull pieces was so good I had to get going with it. It was primed with UMP black primer, shadow coated with Tamiya flat white. The Hull was painted with Lifecolor Dark Admiralty Grey and the deck with Tamiya Nato Black. Weathering with oils and finished with Galeria Satin varnish. It sat for about a week while I summoned the nerve to weather it and I hope it's not overdone, but it looks good to me. A wee bit of back story. My dad was a Submariner during WWII and was quite guarded about the stories he would tell. If it was remembering the good times he was happy to talk but that was usually it. In one unguarded moment he told me about a mission where they were towing an X-Craft out to take it to it's operational area and when they surfaced to transfer the operational crew there was no sign of the X-Craft. A search was mounted but nothing was ever found. This still bothered him. In my meagre research regarding this I have come to the conclusion that the X-Craft would have been X-9 and this would place my Dad on HMS Syrtis as part of Operation Source against The Scharnhorst. This gave me a personal connection to this kit and as such I had to make it. On with the Pics. Thanks for looking,and as always and criticism or comments extremely welcome. Cheers, Alistair5 points
-
Hi all. It's been a while since I posted one of my builds on this forum. Today I'd like to show my 1/48 Italeri (ex Esci) S-3 Viking. This is a fantastic kit, probably one of the best Esci ever produced. Years ago I managed to buy a Paragon wingfold set. Unfortunately these are getting pretty hard to come by these days. The overall fit of the kit and resin wingfold parts is very good. Some exact cutting has to be done to get the resin parts in place correctly. A black primer from Alclad was used as a base for the paintjob. I used multiple mixes of Gunze Aqeous grey to make a basic weathered effect. I used photos of the real plane as refference to replicate the many shades and touch ups. All was done freehand airbrushing. The decals are a mix of kit decals and an aftermarket set from Super Scale. Several grey washes and pastel powders were used for some additional weathering. Thanks for watching. If interested, you can visit my scale modeling Facebook page: https://www.facebook.com/René-van-der-Hart-Scale-Models-250725525692334/5 points
-
Hi, This is my attempt to represent the Me 410 currently residing in the RAF Museum at Cosford. Work Number 429430, it is the A1/U2 variant – a type A1 with a factory fitted modification allowing a pack with 2 MG151 20mm cannon to be bolted into the bomb bay for use as a bomber destroyer. It carries the badge of ZG26 Horst Wessel on the nose and the markings indicate it is an aircraft of the second Gruppe – II/ZG26, possibly the 5th Staffel. The current markings on this machine may or may not be original – I don't know. By modern standards there are accuracy issues, but for its day it was not bad. I hope you enjoy it as much as I did making it (well most of the time anyway). Next up the Bf 110G2/R3 and/or the He 162 A2 - Thanks for watching.5 points
-
46.5? We love that kind of weather around here. Oh, wait, Celsius? I missed that part....yikes. Cheers, Bill5 points
-
I'm a little leery at the thought of watching an old geezer pulling his own parts, but I'll bear with you for now... Happy polishing! Ian5 points
-
I have done some more filling and sanding work, with the nose receiving further attention and I then had a look at the wing-fold join. There is quite a step between the inboard and outboard sections with this kit which isn't too much of an issue if you fold the wings. Had I checked this earlier in the build I would have reduced the leading edge before making the join. Because of my lack of foresight, I decided to reduce the step by laminating the inboard sides with thin plastic sheet. I will reinstate the panel lines when the glue has had time to harden, once that is done I can tidy up those areas and it will be time for primer and paint. by John L, on Flickr by John L, on Flickr5 points
-
“IN THE SA-A-AND!”5 points
-
I have now completed my Heller 1/48 Mirage IV A, depicting the exhibit seen at the Yorkshire Air Museum. Quite a testing build, a real fighter, and my first attempt at a complete re-scribe (and depicting bird droppings!) A bit annoyed with some silvering, on some of the decals. It didn't come to light, until after they were dry. More a case of operator error, than the decals themselves, I think. Resin cockpit set, and wheels. Metal refuelling probe, and decals from 3 different decals sets, to get the correct markings. Painted with Hataka Orange Line lacquer paints. Ian G-4078 by ian gaskell, on Flickr Ian G-4083 by ian gaskell, on Flickr Ian G-4085 by ian gaskell, on Flickr Ian G-4087 by ian gaskell, on Flickr Ian G-4089 by ian gaskell, on Flickr Ian G-4090 by ian gaskell, on Flickr Ian G-4092 by ian gaskell, on Flickr Ian G-4094 by ian gaskell, on Flickr Ian G-4095 by ian gaskell, on Flickr Ian G-4097 by ian gaskell, on Flickr Ian G-4100 by ian gaskell, on Flickr5 points
-
Here are few more steps ... rlm 75 overall , waiting for the dark web....4 points


.thumb.JPG.2ce06c4ff2300a5faba93aaeacbdab25.JPG)


a.thumb.jpg.58d92d116b0315dc55d352fd191d65e4.jpg)


This leaderboard is set to London/GMT+01:00