
Leaderboard


Popular Content
Showing content with the highest reputation on 27/06/19 in all areas
-
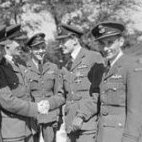
Dear fellow Britmodellers, this is my latest Bf-109, the Erla production G10, released by AZ Models in spring this year. This version has never been available as an injection-molded kit in 72 scale before. The main characteristics of the Erla-production 109s (compared to those built at WNF or Regensburg plant) consist of differently shaped gun throughs, a wider oil cooler, missing chin bulges and different rudder. I diverted from AZ's paint instructions by using RLM81/82 instead of 83/75. The fuselage number is provided in Green, while in my opinion, it should be Blue instead. I cut a mask using the decal sheet as a template and sprayed the Blue "2". Details were enhanced using Brengun photo etch, Master pitot tube, and Rob Taurus vacu. All photographs by Wolfgang Rabel. Thanks for your interest, best greetings from Vienna!25 points
-
This is Otaki's 1/48 FW-190A-8 that I originally started as just a 'paint mule' to try out a paint mix. One thing lead to another and, well, here you are. I added details to the cockpit, belts from aluminum tape and solder, and a scratch built gunsight. Bulged canopy is a spare from Hobbyboss, with scratchbuilt headrest and bulkheads. For the gear, I added a strip to the landing gear doors to widen them, shortened the legs and added brakelines, spare wheels from and Eduard kit, cut out the make believe gear well and added a spare 'dimpled' panel from Eduard's, and scratch built the rest of the well. Tailwheel is an Eduard's spare. Outboard lower canon breaches are spare bombs with plasticard shell chutes, and canon's are brass tube. Drop tank and mount are also Eduard's spares. Decals are spare Hobbyboss, old letraset applied to clear decal paper (to get close to the proper style, I had to use the top half of a '2' and the bottom half of a capitol 'L'), and the werke numbers are actually decal sheet item numbers made into decals by painting them with Microscale liquid decal film. Paints are Tamiya acrylics RLM 74 is XF 24:3, XF 27:1, and the RLM 75 is XF 75:8, XF 07:1 - the whole reason for the build! Applied over Tamiya Titanium silver and haispray, and then chipped with water and a toothpick. Hope you like. Just for comparison, here's Eduard's FW-190A-5, and the Otaki kit from the 1970's ... … and the 'Wulf' pack!21 points
-
Dear fellow Britmodellers, here's the new KP Ilyushin Il-2M, a re-box of the Smer kit with new parts added. Painted with Gunze/Mr.Hobby acrylics. Photographs by Wolfgang Rabel. Hope you like my result, best greetings from Vienna! Roman21 points
-
Using the superlative 1/48 Tamiya kit, but leaving the gimmicks aside, here is my artistic view of the final plane of Wolf-Udo Ettel, when hit by AA fire he crashed to his death in Italy, July 1943. At the time he was an ace with 124 victories. Hope you like it20 points
-
Hello to all! I present to you my next job. And this is again a model from the Ukrainian manufacturer - Dora Wings. The model is quite difficult to build and requires some modelling skills. Painted with Tamiya TS-8 "Italian Red". Pre-polished plastic. For rigging I used a special thread UvdR-3 "Rig that thing" Elastic Rigging.16 points
-
This Grumman Wildcat was my very first Tamiya kit. I finished it in 2011 and I have to say that all I had heard about its ease of construction was pretty much true. The upper side color is Model Master medium gray enamel and the lower color is MM gull gray. I used the Tamiya decals and had no trouble with them. I did make some seat-belts and did a bit of detailing on the engine. The portly little Wildcats held their own until more advanced types arrived to help out in World War Two. I've always liked their pugnacious look too. Here are a few pics of the Wildcat, taken at the Cameron airport not long after completion. Thanks for stopping in and having a look! Gary15 points
-
Hi everyone, Very hot here in Spain, hard to modelling if you not have air conditioner, or at least a beer 🍻! Here are my last two builds. Two commission works for two different collectors. A Lavochkin La-7 1/48 from Gavia with Eduard PE parts, and a Sukhoi Su-24 1/72 from Zvezda. I hope you like them. Thanks and cheers Ricardo13 points
-
This is the second framed Sea King I've built. The first was made for a friend who wanted it for a gift for a Sea King pilot. He liked it so much, he asked for a second one for himself! The kit was made with two M3 nuts built into the starboard side. Brass tube spacers hold the model off the backboard while M3 studding hold it in place. The background is a 12x8 photo print with the graphics done on my laptop. The starboard side sponson is fitted directly to the fuselage, omitting the small wing, in order to reduce the overall depth of the model and frame. The rotor head was modified to allow the rotor blades to be stowed.13 points
-
This is my latest project, the magnificent Mustang “old crow”... I enjoyed this build from start till end, was a pleasure making it! Kit was a Hasegawa 1/48... This P-51 was flown by Major Bud Anderson, a triple ace, he was the highest scoring ace in the P-51 squadrons. He flew with the 363FS, 357FG based at RAF Leiston Thanks for looking! ringo12 points
-
Action this day! At a guess I'd say we're into homeopathic amounts Crisp. Oooh you do exaggerate sometimes Simon! Won't work Giorgio. I can smell a good blade from 200 metres.... 😆 I laugh in the face of peril, cry havoc at compromise, and never ever iron my underpants. The way of the warrior Ian. Kudos. I'm veering toward a Caesar Augustus profile, though have my doubts about the cockpit recess... Or as Euclid summarized: bugger ÷ all2 Ooo-errr: I'm running out of delaying mechanisms.... Not even that's safe CC.... 😄 You can take the boy out of South London but you can't take South London out of the boy. #battersearules Not that I suspect you really tried. Oh dear Lord. I'm trapped in Seaside Special from 1975... Nothing's too god for my boys. Nice to have you aboard for what remains of the flight Cookie. Make sure your cabin staff are in the upright position and that you've set the drinks cabinet doors to manual.... I seem to have woken up in a sports bar somewhere off the Vegas strip Anthony.... They all say that just before they reach the apex of the rollercoaster. Then the screaming starts.... I'm slender, with aquiline features, brilliant white teeth, and prone to misrepresentation. Please tell me that there's is a German compound word for this state of being Benedikt! Something like gesamtkunstwerk but with added mania... We did indeed Ben, thanks. They're very old friends from when we lived up the other end of the island though as we've all put the years on, no longer able to break out the tequila at 2am like we used to. So, what have I learned this week? 1. Half a bag of these is enough to make you feel sick: Only read the 'Serves 4' label after the sugar started to hit. 2. When it rains at sunset the windows along our upstairs landing are Pink Floyd album covers: Like something out of the Hypgnosis studio circa '76... 3. Remember that 'Goodies episode' with the giant white kitten? Here's our remake of The Dambustpurrs.... It has become increasingly distracting having four kitten underfoot around the studio turning on the cute. In a most lovely way. I have been getting some time in here and there since the weekend but concentrating on getting the rear flare of the wing roots corrected- if you remember I'd posted a shot previously with them all caked-up with a CA/flour matrix. With that well-hardened I printed out the plan view of the Type III wings from the maintenance manual and glued these to the undersides of the aircraft so that I could finesse the long curved rear portion where it blends back into the fuselage beneath the gun turret: Working on and off for two days I finally managed to get them into shape: The CA/flour mix was great for this - like a very hard but non-brittle resin. The job took a long time because of not only getting the convex compound curves sorted, but trying to thin the trailing edge sufficiently for the scale without knocking any lumps out of the wafffer-thin trailing edge due to clumsy handling: Inevitably of course I did manage to do exactly that but the beauty of this medium was being able to put in a patch and recommence shaping again immediately. You can see how thin it is if I hold it up to the light to let you see how much the kit needed modifying in this region: I've done a little final shaping to finalize the curves since that photo was taken, so a squirt of primer to check for smoothness will be the next task. A single job but a time-consuming one that needed attending to. Popped the flaps in for a test fit as wel lat this stage and they looked nice but forgot to take snap but will do so next time. Doubt this will be readied for paint before we're away on hols but will plug away at every given opportunity. Thanks for watching as ever. Tony. PS. One of these arrived in the post yesterday: Maintenance manual for the Rolls-Royce Avon. No-one seems to make a 1/72 one that I'm aware of so will have to remedy that on the next build. #vixens2themax!11 points
-
A bit of conversion this one. Based on the Hasegawa 1/32 Mk.VI kit and the Warbirds resin conversion for the majority of the fuselage and modified Grey Matter wings. Not a lot left of the original kit but a lot of filler needed. Sprayed with Vallejo PRU blue and decals were from the spares box. PicsArt_06-26-01.59.05 by Derek N.Ferguson, on Flickr PicsArt_06-26-01.59.47 by Derek N.Ferguson, on Flickr PicsArt_06-26-02.01.42 by Derek N.Ferguson, on Flickr PicsArt_06-26-02.03.20 by Derek N.Ferguson, on Flickr PicsArt_06-26-02.02.17 by Derek N.Ferguson, on Flickr PicsArt_06-26-02.02.47 by Derek N.Ferguson, on Flickr10 points
-
This is certainly the smallest armour model I've built to date, and probably one of the smallest I've done in any genre. The FT 75 is an updated version of Flyhawk's original FT 17 kit, which was released a few years ago. The 75 was an upgunned development of the FT 17, with a 75mm Blockhaus Schneider gun in place of the original 37mm, and a fixed casemate replacing the 17's turret. The kit is one of the best available in braille scale, with very nice detailing, and clever engineering which make assembly and painting very straight forward. For the most part it was finished OOB, with the only additions being the tarp and chain on the rear tail. The painting was a mix of acrylics and lacquers and, as a bit of an experiment, the weathering was done entirely with acrylics. The build can be found here Thanks for looking Andy10 points
-
Hi all. This is my second build I'd like to show you today. It's the 1/48 Accurate Miniatures Vindicator. The kit is quite well detailed for the scale but has a couple of snall sinkholes on the rear fuselage that are a bit tricky to fill without damaging the surface detail. The kit was built straight from the box and Alclad metal paints were used over a black primer from the same brand. The yellow and green parts were airbrushed with Gunze Aquous paints over a grey primer. The kit decals were used and setteled down pretty good, with the help of some setting solution. Thank you for watching. If you are interested, you can visit my Facebook page: https://www.facebook.com/René-van-der-Hart-Scale-Models-250725525692334/10 points
-
been working on this off and on fir a while but theres a lot to it as this kit is almost 2 Gundams in 1 as it as parts for both the ground and space type and you can swap between the 2. at the moment i'm just working on the ground version but heres where i am i'm painting the inner frame on this and arms are done Pg Gp01 Gundam wip by Brundle Donk, on Flickr as are the legs but sadly most of this will be covered up by armour (but i know its there) Untitled by Brundle Donk, on Flickr going for a bit of wear and tear on this one so some scrapes etc will be added to the armour Pg Gp01 Gundam wip by Brundle Donk, on Flickr leg armour done and on Pg Gp01 wip by Brundle Donk, on Flickr Pg Gp01 wip by Brundle Donk, on Flickr trying hard to keep the weathering in scale Pg Gp01 wip by Brundle Donk, on Flickr9 points
-
from time to time i paint 1/6 scale heads for custom action figures and these are 2 of my latest ones, these were done with Vallejo and Andrea acrylics Pete 20190618_080435 by Brundle Donk, on Flickr 20190620_121412 by Brundle Donk, on Flickr 20190620_121445 by Brundle Donk, on Flickr 20190620_121448 by Brundle Donk, on Flickr 20190620_121505 by Brundle Donk, on Flickr9 points
-
Hello my friends. This is my last built: an excellent Eduard Mig-21 MF. This mold is perfect. Easy fittings. I used Tamiya and Mr. Hobby mixes. Out of box. Cheers!9 points
-
Thanks Giorgio. As usual, the post was supposed to be funny, even if the event wasn't! I'll make no comment on the order of the sentences! Thanks Keith Thanks Cookie Thanks John I do have a cheap ultrasonic cleaner but I fear it's not the right frequency as it doesn't seem to clean up much. What liquid do you use in yours for nozzle cleaning? I've been putting my nozzles in a little glass jar with IPA in and just using the provided cleaner for the rest. Fin looks OK this morning: Settled nicely. Reference shots show that the Dam stops before the front of the fin. I think I'll trim it. While that was drying I put some stencils on the pylons: … and on this thing: It's wrong isn't it. The kit part assembles to 'a short Raptor with no black panels and an intake' or 'a Skyshadow with no lumps on the side'. I've applied the Raptor transfers (probably in error) and will call it 'something experimental that's good enough for the ceiling'.9 points
-
Masks are off:9 points
-
...and the test Swordfish gets a bit further. This is the PE that comes with the kit, rather than the Tetra stuff (which is more delicate) - it’s only tacked in position with Gator Grip, to allow me to gauge the height of the upper wing above the lower and the fuselage. The plan is to glue the upper wing, also temporarily (there’s a styrene stud which locates on top of the nose approximately where the cabane struts are in real life) and then remove this PE and replace it with brass rod... and then try the rigging. We’ll see.8 points
-
Got a little bit more done on the Tempest, it's in full flying mode now with the addition of the clear prop and spinner. The prop does dominate the model somewhat. I'm not sure it works really but it's a little bit of FROGs history, so I'm happy enough with that. The undersides are in grey now, with just the black parts of the invasion stripes to go. The pilot was robbed from the spares box, Airfix in origin, he's had his head hacked off and refixed looking towards the Flying Bomb. This one should be finished very soon. Tony.8 points
-
Hi All While looking for the promised Barracuda I found this. Will try to finish it and end the woeful streak this year . Bag still sealed so everything should still be there. Martin H7 points
-
Another one off the bench. The venerable Airifix 1/48 Lightning. Still good for it's age. Decals are by Cutting Edge and the nose ring has been wrapped in Bare metal foil. To be honest not my best effort but looks ok from a distance. On to the pic's. Please feel free to comment etc. Thanks for looking Dick7 points
-
Canadian Parachute Battalion 1/35 figures7 points
-
Here is my attempt at painting the figures from Tamiya's Spitfire Mk IX kit along with a couple from Ultracast: #54009 "RAF Fighter Pilot, Battle of Britain 1940" and #54011 "RAF Fighter Pilot Mid-late War 1943-1945". Both of the Ultracast figures were beautifully cast and Mike Good's sculpting was wonderful and full of crisp, accurate detail. I highly recommend them to accompany your 1/32 aircraft. I will eventually put the Battle of Britain pilot and the Special Hobby Airacobra onto a base. Goodness knows when I will get around to building the Spitfire - but at least I'll have some figures ready for it. Thank you for looking - and any comments would be much appreciated!6 points
-
A350-1000 Virgin Atlantic G-VLUX Scale: 1/144 Model: Revell A350-900 Decals: 26decals and authentic airliners This is my attempt at converting revells a359 kit to a a35K stretch. Fuselage extensions were made with plastic piping inserted throughout the whole fuselage. The gaps were then a build up of scratch plastic and milliput then sanded to the same proportions as the rest of the common fuselage. The wings were extended from leading edge to trailing edge by overlapping the top section of the wing against the bottom section of the wing and filling the gaps to regain the original wing edge profile but with an overall 0.4mm extension. The sharklets were built entirely from scrap plastic which were shaped to meet the new larger wing edge. The satcom antenna was basically a lump of milliput and one engine exhaust was also a scratch build after losing the original. together with Zvezda's dreamliner comparison with another conversion project, braz a340-600 The a350-1000 almost dwarfs the smaller a359. This photo also shows a good comparison of the 1000's 'chunkier' sharklet This project a whole myriad of obstacles based on very limited information (the wing extension mainly) but once I knew what i was doing this became a very enjoyable and I am pleased with the result considering its just butchered parts of fuselage and wings. With zvezda's pending release of the a350-1000 kit and I'm really looking forward to someone taking that on. This is the work in progress thread Thanks for looking! Phil6 points
-
Hi all! This is a short run kit from Classic Airframes. The scale is 1/48. The rigging was done with EZ LINE. The figure is from Andrea. It was very fun to build it. Hope you like it! Cheers!!! Luiz.6 points
-
Just finished the Cromwell for the latest project. Diorama already done, but still have two figures to complete, then I can put the while lot together. Tamiya kit depicted as part of the 8th Royal irish Hussars; the recce regt for the 7th Armoured Division, July/August 1944. (The track is not sitting right in one of the pics but I popped it back into place).5 points
-
Well another small update feels like I am nearly there and is that a light I can see down that tunnel mast painted and fitted and the same for the rear gun rail also started on the rigging Sid has been a good boy beefy5 points
-
OK, all a bit different from the normal order of things, but here are a few shots of what is coming. Firstly, the first (of 2, from different sellers - there are 6 in each box) of my top-up Swordfish have arrived. I’d heard that the Merit and Trumpeter 1/350 Stringbags were pretty similar, but they’re a lot more than that! Trumpy at top & Merit below, and if you can find the slightest difference other than the colour of the plastic, you have better eyes than mine. Which is fine, by the way - as I have already said, the Merit Swordfish are pretty good. As I am in London (I stay up during the week), I don’t have the full Merit kit with me - the hull halves and flight deck are safely at home. But I can show you the Tetra Models detail up set, which essentially doubled the price of the model, but which adds a massive amount of finesse / detail. The basic Merit kit is fine as far as it goes; it seems a decent shape etc. (though the colour scheme and especially deck markings appear to come from someone’s imagination), but you don’t get much more than that. It is, of course, the only game in town, and I am definitely not complaining; you could build a good model OOB. So... Tetra PE sheets A-H inclusive: Sheets I & J, plus the deck veneer for quarterdeck, fo’c’s’le, gallery deck and 4.5” gun sponsons, some chain for anchor cable, and 3 bags of turned brass barrels [top-to-bottom 4.5”, 8-barrel 40mm Pom-Pom, Vickers quad .5” machine guns] I think that should keep me busy for a bit. [There is a separate Tetra set for the air group, which I’ll show in a future post]. For references I have the Profile Morskie plans, and also John Roberts’ British Warships of the Second World War book: The Roberts book is fascinating in its own right and contains builders’ plans of ships including Warspite, Nelson, KGV, Indefatigable, Kent, Ajax, Leander, Manchester, and so on - but for these purposes it’s a fantastic resource for Ark: the following are only 2 pages out of several showing her as built: I also have Neil McCart’s “3 Ark Royals”, plus written accounts including Mike Rossiter’s “Ark Royal”, Jock Moffat’s “I Sank The Bismarck” and Gerald Woods “Wings At Sea” [one by a Pilot, the other an Observer, both of whom flew in the Bismarck attack(s)]. More soon - maybe even including some of yer actual, like, modelling. Crisp5 points
-
It's hard to see how anyone could not be excited by this! Maybe I'm overthinking things, but to me it seems significant that the last two large jets that Airfix has released have been in FAA colours. Does that mean we will see a Sea Vixen next? Now I realise that the Phantom and Buccaneer have a wider range of marking options as they both saw RAF service, but Airfix could easily solve that problem by releasing a Javelin at the same time as the Sea Vixen.5 points
-
Well, after the front axle, rear one of course! The other side... waiting for the"saucepan": This time, another way. Stamping! Next, a glance to the kitchen... Dan.5 points
-
Airfix 1/72 Harrier early GR3 built as XV787 “Hot to Trot” 1(F)sqn RAF Belize 1975. Brush painted with Humbrol enamels and Ammo acrylic using Xtradecal sheet, model master pitot and Eduard etch. The image that inspired the build and my attempt5 points
-
Dear modellers, Sometimes you find a video on the internet and you think, that wonderful ! I know it sounds like a fairytale. Fortunately the video is still to find on You Tube; https://www.youtube.com/watch?v=gQLDzJ4qgUg&t=21s As far as I knew, there was, and still is, no model- kit in 1/48, so I thought give it a try and build it from scratch. And after many years flying in my show-case it still in good condition. I hope you enjoy the recent photographs ! Kind greetings, JohnHaa5 points
-
With the model fixed to the studding, it was slotted into a piece of wood with matching holes which held the model upright. I was then able to position the model over the background picture and while holding the wood still, remove the model. This gave me the drilling position for the mounting holes in the background picture. With the holes drilled, the back of the frame was nailed onto the box frame. The model could then be bolted into the frame. The glass was then cleaned before adding the mount card, glass and front of the frame, which are held on with metal tabs pushed into the box frame and screwed into the frone frame.5 points
-
In response to Daves post and the fact that there is another Beaufort being built. I'm posting some Beaufort cockpit photos I took in Melbourne a few years ago. They don't come much better. This I imagine is an Australian Beaufort and Beaufighter which is in the last photo.5 points
-
Hi, I have started the cockpit interior. Still not sure if and how I shall build in some lightning. Best, Mark5 points
-
Look what I picked up from the PO yesterday ! I thought I had bought the 1975 boxing of the kit, but I received the one from 1964. That´s great, as the moldings tend to be the crispier the earlier you get. The plastic is nice light grey one, as the later edition appears to be black. I'm suffering from a BM denial on my phone (don't know how Mrs. P did that, and don´t dare to ask...) so here´s just one pic I took yesterday of the box - more later! BTW: I got the "your order is dispatched" message 10.6. and received the parcel yesterday. It said "Priority Air Mail" on top of it, so 16 days from England to Finland???5 points
-
The attached photo of the lower fuselage half of my kit illustrates the issues with the Anigrand F-108 kit's wheel wells. Note that the port landing gear mounting point is 5 mm further forward than the starboard landing gear mounting point (measurements were taken directly from the part instead of off the photo to eliminate any error caused by distortions in the latter). Now you would think that this problem could be solved simply by moving the starboard landing gear mounting point forward or the port landing gear mounting point aft by the difference of 5 mm. But it's not as simple as that, because dimension "a" must equal dimension "a´(a-prime)" and dimension "b" must equal dimension "b´(b-prime)" (ignore the black spot above a´; it's a speck of dust I failed to notice). Also, angle A must equal angle B. The only way to accomplish all of this is to "split the difference" and move the port landing gear mounting point aft a distance of 2.5 mm and the starboard landing gear mounting point forward by the same amount. But if that's all you do, you'll be drilling holes into the edges of the angled portions of the wheel well and vertically into the walls, an iffy proposition at best. The ideal solution is to move the entire angled portions of the wheel wells forward and aft as required, maintaining angles "A" and "B," but due to the corners where the angled portions meet the rectangular central portion, this is also going to be difficult. When/If I get around to building my kit, I'm going to grind away the entire wheel well interior structure, relocate the angled openings in the fuselage belly, and build a new wheel well interior to fit from scratch. Here's what is arguably the best scale drawing of the F-108. This is from the instruction/plan sheet for the KR Models vacform kit. This kit was designed, manufactured, and sold by Ken Rymal of Shelby, Ohio, some 40+ years ago, and probably builds up into a better model: The missile bay and wheel well callouts are my addition: And, finally, here is an inboard profile view from the same instruction sheet. Note how the main wheels wind up being stowed at both vertical and horizontal angles when retracted. This allowed a landing gear long enough for the rotation required for takeoff as well as a shock strut long enough to absorb landing loads, Such a landing gear retracting at the normal 90° would have required a wider fuselage, which would have meant extra structural weight, which would have required extra fuel, which would further increase loaded weight, which would have required a heavier landing gear, etc., etc. To allow the main gear to retract in this manner, the struts were designed with the trunnions at an angle to the aircraft's centerline (and the vertical plane of the wheels) instead of parallel to it. Little did the North American engineers realize the anguish their landing gear design would cause kit designers and model builders in future years. But it's still a great-looking aircraft, even if it never was built. I've eliminated all reference to the missile bay in earlier posts. I was momentarily mistaking the rectangular central portion of the wheel well for it, having not examined the kit in some time. The missile bay is the least of this kit's problems.5 points
-
Jason, I still have this little lot to work through, all review samples full of aftermarket stuff...actually, one Valiant did cost me.....a hamburger and a pint of Best Bitter off a SIG member..... well, it was a decent pint!5 points
-
As knitting (aka rigging) is still taking place my two current builds, this has been siting in my stash for over 40 years and calling out to be built. So here are the sprue shots Seems a simple build, I just need to invest in some rattle cans and possibly new decals as I fancy a Lakenheath based aircraft.4 points
-
I dont reckon that for an idea, 'born in fire lost in flames' might not be a decent epitaph for me to lose a dream for Anyway the GS Hypo seems to be holding its (very) brittle own for now pic#1 A miniscule gap filling exercise beckons, should be OK with a drop of cyano and water/spit? All good on this side but I've just had a "burnt stinking plastic all over the house" embargo invoked against acetate moulding for a while pic#2 So a dead end has been reached if I need to make any more, which I am fairly confident isn't about to be a problem pic#3 For this model a window mask 7/32" high is needed and as the side windows all run level at the top this is the desired level for the three side windows, obviously the big entrance door/window is lower down at the sill But that will not be a problem and the other side window mask is in place too awaiting trimming to size pic#4 With the front frame aligned I have damp set the superglue to make the new missing piece This will all be trimmed later this evening Laters4 points
-
Tinkering with the bits.All vents now fitted with deck collars. Hatches fixed on boiler housing all else still loose Fresh water tank and fwd stove pipe Steam pipe and whistle fitted to funnel. Main cowl vents in position Topside starting to fill up Need to make some lifebuoys next Thanks for stopping by . . . Kev4 points
-
More Peter Gabriel than Pink Floyd, I think. Separated at birth. [Did someone say Sea Vixen? This Baronial Vixen is a lip-smacking prospect]4 points
-
Go on, I'll bet my kids, and even if I lose I win.4 points
-
Thank you Craig, glad you like it! I've used these decals so many times now I almost know where a lot should go by memory (hmm that is probs..no..definitely a bit worrying!) so hopefully it will speed things up here applying quite a few at a time. Cheers Rich! Yep they always do for me but I've tried to exaggerate the shading in the hope that the subsequent varnish layers renders it how I want it in the end. My pictures really aren't great tbh at conveying the colours and shading at all like I see it (taken in pretty poor natural light here in the UK today) as in the flesh it is more 'overdone' than what is shown here with different colours to my eye. I've also used Tamiya X-22 gloss + levelling thinner which in comparison to Aqua Gloss or Future etc.. in my experience affects shading and colour shifts the least, well I've put the gloss on now and most of it is still there which is pleasing. I can always do some more post shading later to further break it up if needed, but the big plus is it hasn't darkened much either which is a win compared to the previous effort! Case in point on the colours my camera shows are below, both in poor light but quite different and not at all what it looks like in person oddly enough (I guess you really can never trust photos as gospel for colour matching) Is it grey? Or blue? Rich stop being modest, I'm sure when you tackle your F-104 with the DACO set it will be another wonder model ! Kinetic are bringing out a new kit also which I'm sure could produce another level of F-104 when combined with some of the DACO details. In fact this could probably be my last Hasegawa F-104 model if the Kinetic kit is as good as I looks it could be. Oh yeah the '3D' decal haha, I used it to help gauge if the colours/contrasts looked ok with some sort of marking 'applied' (blu-tack), it helps me I find as I do struggle with colour matching tbh. Anyways thanks for the nice words guys, David4 points
-
I don't have any pictures uploaded of the Sea King mounting, but here's one of a 1/144 scale Lancaster during the build. M3 nuts are built into the structure to fix the model into the frame. The baseboard/background is drilled to match the nut/studding positions. A box frame is made of a depth to suit the model size. I buy the frame and glass, but make the box myself. While the model is bolted to the back of the frame, I use brass tube spacers to support the model at the desired height off the base. This allows the bolts to be tightened without crushing the landing gear against the backboard. After tightening the nuts on the studding, a spot of glue holds them in place.4 points
-
Cheers guys, much happier with this shape. I was worried that the print stick lid plastic wouldn’t glue, but seems to be ok with superglue. Second coat of P38 sanded back & its getting there And the first coat on the other side Get these right & the wings can go on4 points
-
Let's get the important stuff out of the way first.... okay, that's taken care of, now on to more serious stuff me too, cos I have no idea right now. Maybe some crystal glasses and a decanter or two? Thanks Ced. I wish I could take all the credit but modesty prevails Actually, hairspray Ced. I was never without a large sized aerosol back in my back-combing, spikey haired days following them Banshee's around the globe Sounds like we need to be keeping our mince pies peeled for any upcoming WIP's from a certain source who shall remain nameless Tony, let’s see if I can explain. To make any plastic part, the plastic must first be molten and like most things, when you apply heat, things expand. Easy enough. I found an example for an ABS type material: A 1 cm3 cube of this material weighed 1.054g when solid. When the plastic was melted, the same 1 cm3 cube weighted 0.933g – roughly an 11% change in densities. For semi-crystalline (considered high shrinkage) materials that change in densities can be as much as 20 – 30% in an unconstrained situation. In injection molding that shrinkage is compensated for by packing. After the mold is filled roughly 95 – 98%, the machine switches from a velocity control to a pressure control. As the material touches the steel of the mold, it will instantaneously cool and start shrinking. As the material is shrinking the press is compensating for that shrink by applying a constant pressure, thereby pushing more plastic into the mold. Even then, there is still shrinkage. Amorphous plastics generally shrink around 0.5% to 1% of mold dimensions while semi-crystalline materials will shrink anywhere from 1.5% up to 5% in severe cases. (which is why semi-crystalline materials are considered high shrinkage in the industry) Therefore, in injection molding, the mold cavity must always be oversized to meet the dimensions of the part you wish to make. For example, if you have a part design which has a dimension of 100 mm and you are using a high shrinkage material, the cavity must be designed for that specific material shrinkage. Let’s say we are using a polypropylene with shrinkage of 1.5%, or 0.0015 inch/inch (shrinkage is always specified as amount of shrinkage per inch length), we would calculate the cavity dimension as: Dimension / (1 – Shrinkage), or 100/(1 -.0015), which gives us a cavity dimension of 100.15 mm in order to make a finished part of 100 mm. Now, consider that every part is 3 dimensional and shrinkage is not uniform in the X, Y, & Z directions – shrinkage can change depending upon gate type, gate location, wall thickness, types of filler used, geometry etc. and injection molding suddenly becomes a lot more complex than melt, squirt, and shoot. Even mold temperature can impact dimensions. All that is compounded by the fact that it can take a while for the plastic to finally stop shrinking, particularly with semi-crystalline materials. I have a part that contains roughly 100grams of material with an average wall thickness of around 1.5mm. when you perform metrology on that just after molding, the dimensions are all out of spec. However, wait 3 days and do the metrology and the dimensions are all in spec. That’s due to the material (polypropylene) which has a Tg well below that of room temperature, which means that the molecular chains will continue to form and pack closer together until they reach a state of equilibrium even after the part has fully “cooled” and been ejected from the mold. That’s also why you can’t simply change materials once you have the mold built – the dimensions will change depending upon the material being used because of shrinkage. All that being said, 3D printing is an entirely different flavor of beast (of which I know from diddly squat to almost nothing). Injection molding is squirting a large’ish (relatively speaking) volume of molten plastic into a cavity at once and packing it while it cools. 3D printing is laying down microscopic dollops of molten plastic at a time. There’s no mold, and there’s no packing compensation for shrinkage. I assume the software has some algorithm to account for shrinkage and perhaps because each drop is being laid onto an already cooling surface of the previous drop that shrinkage of those individual drops does not have such a large impact on the finished product, as the printer is continuing to print until a specified dimension is reached. I also noticed on this last order that the parts hadn’t been cleaned very thoroughly and there was a sticky gloopy snot inside each of the lampshades – I must remember to jet wash the parts with IPA to clean the snot out. I also don’t know what plastic Shapeways are using – they just state “smoothest fine detail plastic”. It could also be that the material is highly hygroscopic and takes a while to dry out. I noted it was very flexible when received and seems to have firmed up slightly over the last few days. Perhaps the combination of poor cleaning and dumping it in sealed poly bag prevented the moisture escaping and the part from drying out. Short answer: I’m not really sure! Probably a combination of all or some of the factors above.4 points
-
Once the flat coat had dried, I left it overnight, I broke out my very cheap oil paint set, from PoundLand, and added dots of colour, with the tip of a tooth pick, white, orange, brown and dark brown. Underside These “dots” were then blended using a damp, odourless turpentine, broad brush brushing in the direction of the airflow. Topside. Dots of white, yellow, brown & dark brown. These were also blended. These photos were taken shortly after I’d blended the oils, the photos show quite a contrast between where the oils are and aren’t, in “the flesh” I can’t see so obvious a difference. I’ll leave this to dry overnight and then have a look to see if I need to adjust anything Next I’ll be either adjusting the oils and/or assembling the missing bits, propellors, drop tanks, landing gear etc. until next time as always, any suggestions, recommendations or comments will be gratefully received. rgds John(shortCummins)3 points
-
Well, close examination of photographs shows that all 3 struts on each side attached at more or less the same point ie the inboard wheel hub, like this: The wheel spat, when fitted, required an additional small fairing on the inboard side to accommodate the main upright strut as the wheels had slight negative camber (ie they tilted out at the top) whereas the strut sloped inwards slightly toward the wing: My next challenge is to try to replicate (or at least suggest) this, as the kit certainly doesn't. It doesn't help that the kit metal legs have wider shock absorber sections that are far too long; I could fix it by either a) scratch building a new pair of undercarriage struts that could bear the weight of the model, or b) ignoring it and doing what I can with the kit parts. Option b) wins. I've made a start by tidying up the metal parts, cutting wheel openings on the spats and supergluing the parts together. I've started to build up the additional fairing on the starboard spat but there's a LOT of fettling to be done yet. I couldn't resist temporarily standing the model on its feet for the first time though: It looks really rough in close-up - perhaps if I take blurry distance shots I'll be able to convince myself that it looks neater! At least it prompts me to try to deal with the defects. Jon3 points


This leaderboard is set to London/GMT+01:00