
Leaderboard


Popular Content
Showing content with the highest reputation on 15/06/19 in all areas
-
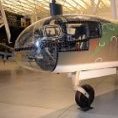
Hi Folks This is my recently completed 1/48 Kinetic Hornet. It represents A21-7 as she was circa 2006 with 77 Squadron and finally gave me a chance to use my Afterburner Decals Hornet sheet. I added some extra goodies into this project. Resin Seat, Resin wheels (Nose-AMS resin , Main - Attack Squadron), Resin burner cans (Attack Squadron). AIM-132 ASRAAM from Airfix spares, Litening Pod from Tamiya spares and scratch modified TACTS pod. Eduard etch set in the cockpit abd some epoxy putty intake FOD bungs. Paints used were MRP and SMS Lacquers. Happily for me this model was awarded First place (1/48 Aircraft - Jet - Modified) and also Best Kinetic Model at Australian Model Expo 2019. I hope you like her. Cheers Andrew P.41 points
-
Hello All, My interpretation of a 354 Sqn RAF Liberator that carried an all Australian crew. OOB. Interesting to note the different colour saturation between indoor under Fluoro lighting and late evening light. Happy to take questions. Ian31 points
-
Hello again, Another kit built a few years back. This is the Italeri boxing of the fabulous Acc Miniatures Avenger. IMHO one of the most buildable and rewarding kits ever. An Eduard mask set though is a no-brainier. As ever Gunze and Tamiya throughout. Oh and a dirty great Alclad torpedo! And then the pics.......25 points
-
Hi, This is Tamiya's excellent 1/48th Buffalo. An older kit made a while back but one that I really enjoyed. The previous one I made was the Matchbox kit back in the 70s, I think I got it free as I saved up a load of other Matchbox kit tokens. Mr Hobby Aqueous and Tamiya paints as ever. I was pleased with how the shading and chipping came out. Big thank you to Eduard for having a masking set of a less common type! Feedback welcome, it's how we improve.24 points
-
Well, this one was a bit of a struggle.... Although it looks lovely in the box and all the pre release 'hype' I personally found all is not well when putting it together. OK, some of it might have been me maybe expecting more than I should but I'm just not happy with the overall experience...Hey ho.. Anyway, as you can see it's finished in SAAF markings as a favour to a SA friend. The decals (and again these didn't help but obviously no fault of kit ...) are from MAV decals and are rather opaque (so I used 2 sets) and are ALPS printed so tend to be rather (dotty?) for want of a better word. Hopefully someone will do some more? I also wanted to do one with a turret so changed the serial number and code letters. As far as the model goes it's very detailed inside but you can't see much, the engines are nice and so are the clear parts. It's the fit of the parts I found troublesome and some of the 'silly' mistakes such as location and size of some of the windows, and not sure whether it was me again or not but the bottom of the fin is about 3mm shorter than the root it sits on so some gentle removal of the rear of the root was required along with reshaping the rear of the rudder. One of the more annoying points is that when cleaning up the wing joints you inevitably remove the fuel tank detail which is pretty tricky to replace and I'm still not happy with it now.. The two intakes on the wing leading edge between the engines are totally the wrong shape and need reshaping and the landing lights are awkward too. The instructions are nicely printed but are a little difficult to follow at certain points during construction too. There are optional parts throughout (particularly turrets and upper fuselage inserts (another badly fitting part) and I'm sure we can expect other marks in future but I for one will probably give it a miss next time round. The decals though are superbly printed Anyway thanks for looking. S1 S3 S2 S420 points
-
Hi mates! This is a great model of the Hs 123 from GasPatch in the 1/48 scale. See the pictures : Hope you like it! Regards! Luiz.20 points
-
As addition to the topic of Toryu may I add some models from the "golder aera "? 😁 I had bought several Fury's , because I knew that it was possible to build a few different versions . So here is the first: the Persian version with the Wright Hornet engine. With greetings JohnHaa19 points
-
Here is the latest Revell Bristol Beaufighter TF.X. I built this kit for a review in the Dutch IPMS magazine. It was built straight out of the box, except for the Eduard seatbelts. Actually, it is a pretty good kit. Only some minor fitting issues, a very fragile landing gear and the instructions leave you with some guess work. Hope you like.18 points
-
OOB, Caracal decals. Write up coming shortly.17 points
-
Although finished a couple of years ago I haven't managed to shoot some decent pictures of my two 1/48 Hasegawa Drakens before now. First one is a J35J in Swedish colours. I painted it with Alclad, Xtracolor and Humbrol. Decals are from the kit itself. The second one is this J35Ö in Austrian colours. I used Xtracolor and kit decals on this one. Jens16 points
-
Hi all, I’m happy to report the roll out of my latest build, representing McDonnell NF-101A Voodoo 53-2438 which was used in the late fifties and early sixties as a test machine at Eglin AFB, Florida. At the date of the build she was being used to test aerodynamic “shapes” for the Hayes Industries Prometheus supersonic drone programme. As a very early Voodoo – one of the first pre-production batch - she was simpler than the later fighters and thus for me it meant leaving out some aerials, nose cannons, etc. Other than this she is straight out of the box with the exceptions that I note below. Maybe someone out there knows more about her but my year of searching has drawn a blank! Very few photos seem to be available of this aircraft and so my references have been hard to interpret. I have, as a result, had to use a bit of “Modeller’s licence”, particularly when it comes to the layout of the International Red areas on the wings and tailplane. The most widely seen photo is the following: As key feature of this aircraft was, of course, the drone "shape". This appeared to morph over time and so I’ve build a compromise. Examples of this are: So what did I do/use? Well: 1. Kit -Valom F-101A Voodoo 1/72 2. Aftermarket – seat from Aires, Wheels from Aires 3. Decals – Xtradecal national insignia, home drawn and printed serials etc. Xtradecal black and red lining. Mix of Microscale and kit stencils (the white stencils came from a Super scale F-4 set). 4. Paint – Humbrol Polished Aluminium (27002), Model Master International Red (1775DE), Humbrol Steel (27003), Mixes of 27002 and 27003 for the rear end, Humbrol OD Green (155), Humbrol 147 Grey and others. Humbrol Glosscote (decalling and wash) and Satincote (final) 5. Plastruct card and rod for the drone and under-nose pitot So here she is. I hope you like her. Martin My eyes now need a rest....... I'm leaving the International Red and 'Red-Orange on the shelf for a while . Adobe Lightroom doesn't cope well with dayglo either!13 points
-
Here we go . . . . the diorama is complete. Just an odd touch up and flash with matt varnish. I wont be posting in RIP for a bit as I want to make a frame/base with a perspex cover. If I manage. I'll post in RIP. So let the pics do the talking " Home from the War " In the following pic you can see the chain strop fed through the forward part of the keel. This was shackled to the capstan wire visible in the foreground and used to pull the boat up the slipway. The granite is actually grooved in real life and discoloured by the keel strap and wire. To move the boat to one side a snatch block was attached to a heavy chain to divert the pull of the capstan wire. An old chain and snatch block are in the foreground of the grass. I hope you have enjoyed the pics Kev12 points
-
It’s been a while since I’ve completed a model and this has been due to some fairly serious family issues (enough said), but finally I’ve managed to do a quick build of what is probably my most favourite 50’s Jet, the Hawker Sea Hawk. This is the Hobbyboss 1/72 version of the Mk. 101 in German markings and as kits go the fit and finish of the parts is excellent, especially compared to the ancient Airfix moulding. The only mods I’ve done to the kit is the addition of a resin ejector seat and to replace the kit aerials with stretched sprue versions. I can already see one or two areas for improvement on my next aircraft build, but as ever any constructive criticism is welcome. P.S. I quickly made a base from plasticard to sit the ‘Hawk on so I’ve swapped out the original photos for these. Hope you don’t mind.11 points
-
Hi all! My first work posted here, a HS 126 from ICM in the 1/48 scale, the plane is painted in Condor Legion camo squeme, 1938. It took to me one month to finish it...I´m retired, of course... The figures are of ICM, too. Hope you like i!. Now the shots : Till the next! Best regards for all! Luiz.10 points
-
Hi All, here my Tiger Ie from 1/35 Tamiya. In june 1944 six Tiger, starting from Paderborn, were transported to Gumbinnen (East Prussia) with crews from Pz. Ers. Ausb. Abt. 500 to join the rest of GD battalion. The tanks weared a two tone camouflage pattern and lacked of turret numbers. You can find two pictures and a colour profile in superlative "Tiger in combat" by W.Schneider. Here some pics of my interpretation. For painting I over sprayed whole model with a Tamiya XF1 black base. Then, in a cloud pattern, the first camouflage color: XF60 lightened with 30% of XF2. On wheels and rear hull the preshading process is more evident. With Tamiya masking tape I reproduced the camo scheme: a very tedious job! At the end I airbrushed a light coat of Tamiya XF64. PS: It belong to my dirty period, too😉 ! Hope you like. Ciao Filippo Appendix to wip pictures (1) locations for canvas rain guard (2) pins for commander’s hatch padlock (3) welding seam for two pieces 40 mm turret roof (4) Bolts to secure gun to turret roof from inside (5) “Pilze” socket for two tons crane (6) Close defence weapon (7) Loader’s hatch “key hole” (8) Loader’s hatch Tiger II type (9) Bolted turret ring guard (10) Escape hatch with two bolts (11) Stopper on gun mantlet (12) Monocular gun sight T.Z.F.9c (13) Bolts for secure driver’s and radio operator’s hatch (14) Spare tracks to improve protection (field modification) (15) Spare tracks as improve hull protection (field modification) (16) Hull side extensions cut (17) No “star like” nut on armoured hub (18) Handhold to allow the crew to open the radiator cap without special wrench (19) Starter with double view for Maybach HL 230 P 459 points
-
Here is the second one, it is a modification of the old kit, I wondered if it was possible to add the retractable undercarriage. See here the result ..🙂 Enjoy the photographs ! With greetings JohnHaa9 points
-
Hi guys, this is my latest project and also my first attempt at scratch building an entire model. It is a 1/72 what-if of Convair's Model 200 V/STOL proposal from the 1970s for a Sea Control Fighter in fictional VF-151 markings. It was difficult finding plans that matched; it seems Convair kept modifying their proposal throughout the years. Built from plastic card, loads of Milliput, and a smash-moulded canopy and main landing gear doors. The exhaust comes from a Crayola marker tip. 😁 Construction was based on the profiles and framing method I saw on the excellent French Maquette72 website, with a lot of sanding, cursing and more sanding. Everything is scratch built except for the instrument panel (Oyumaru/Milliput cast of a Mirage F1 panel), the wheels, ordnance (Hasegawa) and the ESCAPAC seat from an Airfix A-4B. Decals are from the spares box and Print Scale and I added some left over PE belts to the seat. A word of warning with regard to Print Scale decals: They are VERY fragile and prone to folding, but they are exceptionally thin and look great once applied. Painted with Tamiya and Vallejo acrylics. If you've never tried scratch building before, give it a shot! It is a great learning experience that forced me to learn all sorts of cool techniques. I love these unbuilt projects and I hope to try building more of them. Forgive the poor IPhone pictures, I'm hoping to borrow a real camera and learn some better photography soon. Cheers! Some WIP shots:8 points
-
Hello Chaps Thought I'd jump in on this one. Had so little time for modelling the last few years but fingers crossed I can get this done. Didn't really build any Frog kits as a kid. My local model shop, Teddington Model Shop, now sadly gone, didn't stock them. I mainly built Airfix and Matchbox and occasionally saved my pennies for a Tamiya kit, although I think I spent more time drooling over the Tamiya catalogue than building their kits! I'm going to build this little beauty just as our amphibian overlords intended, straight OOB no additions. Not sure about the decals, the protective topsheet has fused with the decals, maybe they were somewhere humid? I will do a test with the German markings and see if the top sheet floats off when they are made wet. I have loads of Italian decals but they are all for the Regia Aeronautica and not for the Aeronautica Nazionale Repubblicana but I think I have some Egyptian ones that would work but I'd rather do a splotchy Italian bird, so to speak. Cheers Segan7 points
-
Hi All This was an experiment to see if I could a) fit the Eduard Zoom interior etch set and b) cut the stock canopy and alter the fuselage to show it in the open position In conclusion, I feel I lost to the etch but the canopy theory worked, so let's call it a draw. WIP here Comments and suggestions welcome Cheers Steve7 points
-
Airframe completed, mind you there are only 6 parts. Went together reasonably fine, there was a gap at the nose but that might be my over enthusiastic amount of liquid lead for ballast, and a bit of a step along the rear fuselage. Which strangely changes sides half way along. So slathered in some DPP and left to dry overnight. The putty on the wings is to rectify the moulded on roundel. And here here we are after a thorough sanding session. I think a little more work might be needed on the upperworks but let's see how it looks after some paint is on. It does look a bit messy but I have used polishing sticks on it but the plastic doesn't shine up terribly well.7 points
-
My 2nd entry (a third is on its way)6 points
-
Hi these are some of my 28mm figures I have been painting over the last few months,They are Napoleonics,Freikorps Werdenfels, 2 sets of Crossbow men teams and the Marlborough's War figures I am working on.Also 3 pics of my growing Napoleonics.Cheers.6 points
-
Hello Brit Modellers, I was super excited to start this group build, but life got in the way, and I'm a little late in starting my build: This is the oldest model kit I have ever built, being made before my time. For those of you who might have made this kit in the halcyon days of youth, here is a shot of the instruction sheet. Should be simple enough. Here are all the pieces laid out with the extra goodies, including replacement cannons from Master Models. bits from spares, and a spare vac-u-form canopy, just in case. I drafted in a 'younger' Airfix pilot as replacement for the kit's vaguely man-shaped blob o' plastic. The armour plate behind him is made from spare styrene. Here he is suitably dressed. Here is tonight's progress: The fuselage halves have been glued together as well as the wing sections. The ailerons are just slotted into place without glue. Lastly, a quick comparison between the elderly kit decals (on the left) and the ones I am using from my spares box(right):6 points
-
Here's the Hobby Boss 1/48 LCM-3 kit. I thought this would be OOB, but I soon found quite a lot of detail was off. Scratch building includes the entire ramp control system (bow sheaves, equalizing sheave and channel, cable guides, ramp lock release cable, athwartship cable sheaves and guides), cargo hold engine compartment vents, Mark 21-1 mounts, water barrel, bilge pump, boat hooks, life preserver ring rack, navigation lamp mast. rudders, and skegs. The control console was mostly rebuilt, the wheel was reshaped, and scratch engine throttles, ramp winch clutch, gyro compass repeater, and magnetic compass were added. Thachweave Products' TW02 fenders were added as was part of the Eduard PE set. The port bow, with ramp lock release cable above, ramp cable below, equalizing sheave and track, and the excellent hand-woven fender from Thachweave Products . One of the boat hooks, Mark 21-1 mounts, conning station, water barrel, life preserver ring, and vents. I was able to make the Mark21-1 mount from the excellent info @longshanks provided. Bilge pump and a better view of the ramp cable run athwartship. The other boat hook is forward of the bilge pump, just barely in this view. @Arjan provided a photo similar to this that helped me understand the actual ramp cable run (through the hold) and the bilge pump. And the conning station with the control console, gyro compass repeater, magnetic compass. and fire extinguisher. Here's the WIP thread.6 points
-
Hi everyone. Although I’m long in the tooth this is my first post on the forum. Up first is my Airfix Sea Fury just completed. The kit was built mainly OOB apart from Eduard seatbelts and replacement wheels from Barracudacast. I replaced the pitot tube with brass tube and the u/c door jacks with nickel rod. Like others I spent a lot of time on the cowling - the worst (and really only) difficulty with the kit. I’m pretty selective about after market and I’m too cheap to fork out for the resin cowling upgrade. However the wheels are far better than the kit and avoids a lot of cleaning up of the seams whilst trying to retain the block tread. I dug out a spare gunsight which is missing in the kit but is a prominent feature in the cockpit. Paint is Xtracrylics with alclad light sheen varnish to finish. Light weathering with oils over the gloss coat. Anyway a few photos if I can work out how to post them. Steve6 points
-
as others have mentioned, there is a seam, this is the Mk.24 at Hendon, but same cowling more here worth looking through in light of the panel line debate. eg FWIW, @Paul Budzik, who did the video review, when he scratch built a 1/32nd Tempest, he engraved the panel lines in the final paint coat! the debate will run and run, but I fear Airfix have to work to a price set by the accountants. And as such, they work on the principle of overall 'pretty good' while 'we' here expect at least 'excellent' (the level of finished product that is consistently met by say, Tamiya or Eduard) and I suspect that jump in quality is significantly higher in cost. Also, as has also been pointed out in here on many occasions, the 'cognoscenti' if you like, are a very small (though vocal) proportion of those who buy models. I know Airfix staff do read what is posted here, and I suspect the creative side are unhappy about the quality issues, but it's out of their hands, and the amount of lost sales from the obsessives is minimal to the cost saved by the 'pretty good' approach, and again, part of the problem about being part of a larger group of companies with financial issues. hope of use to the debate.6 points
-
Hi! Just epic video atomic icebreaker "Yamal". On 1:24 & 2:24 great plot for diorama as for my. Especially if the diorama at 2:24 electrify and place in a darkened box! I don’t know if atomic icebreaker "Yamal" models are in scale, but the video is very cool! B.R. Serge6 points
-
Dear modellers, Here is my tutorial how I build my scratch models. I remembered I had made an extensive photo gallery building this model, so after some searching I dug up these pictures. I hope, they are of some use for the modeller community … For the story of this plane, please have a look here: https://en.wikipedia.org/wiki/Fokker_D.XII To the pictures: The whole "family" of the prototypes together. I hope you enjoy the building story .. With kind regards JohnHaa6 points
-
Calling it done - 1/72 Hobbyboss A-7B Corsair II VA-215 "Barn Owls" of USS Roosevelt, 1970. Build direct from the box. Good fitting with awesome decals. Thank you for viewing, I hope you like it, cheers!6 points
-
Nice honest review of the kit here. For those that are saying it compares well with Tamiya and Eduard quality wise may like to book an appointment at the opticians after viewing it! 😉 Good tip on building the cockpit tub in there as well which i'll be using when I build mine.6 points
-
Tailplanes! A moment of opportunity at the bench ... Tailplanes provided with locating pins & holes ... But the resultant location was not quite right - the rudder & elevator hinge lines & the fuselage panel joint should all align ... .. but not quite here, and less so other side. So tip of the blade to elongate the holes ... While I was at it I scribed a fairly deep trench there to aid glue keying. I’ve seen others drill into the chord of the tailplanes & insert lengths of brass rod in place of resin locating pins .. but I just didn’t judge myself capable of that task .. so this is my substitute effort to improve the strength of the joint. We shall see .. Next, whatever to hand enlisted to fix alignment: pen (green?) & set square; some card offcuts; marble sample disk salvaged from the office studio; an upside down bonsai pot ... assembled into a single-use jig ... happily the geometry of the junction is a simple cruciform, with no an- or dihedral to account for ... A dry test fit: .. joint lines aligned, planes perpendicular! Perhaps I ought to feed the kids dinner ... if I succeed with their bedtime, I might be able to glue in place tonight! p.s edit: Cooperative kids, so the glue has been applied! Will leave in the jig overnight just to be sure .. g’night!6 points
-
It's caused by lack of proximity to a Prop&Jet resin engine I believe Terry. Until one is fitted, it's doubtful that any paint will in fact adhere to the aircraft at all.6 points
-
A Tornado GR.1 doing it`s thing....., Revell kit, 1/72 Scale, blurred base from Coastal Kits Thanks for looking.6 points
-
Thanks Kris. The options are for a carrier without a tarp, with a tarp or just with a tarp frame. It'll be important to see the interior so it's a carrier with a frame but without a tarp Using Tamiya liquid cement the separate pieces are located using Gator grip PVA glue and then the longitudinal section is "welded" with the Tamiya glue. Easier than it threatened.. The "formers" for the tarp are heated in a Cigarette lighter flame to soften and then are "rolled" over a 2mm metal rod to "curve" them. on again easier than imagined... The straps to hold the front tarp frame come in 2 bits and fitted easier than I feared... Here's what the tarp looks like...... Should you wish ....... there are plastic parts to either add the side tarp panes raised or lowered. I've been struck by this iconic photo of a Loyd carrier from the Wessex Regiment so I've tried to replicate the chain and rope around the front axle... And one of the bonuses of this kit is all the stowage goodies supplied though sadly, the ammo boxes don't come with decals A small purchase redresses this oversight Primer and paint next ... Thanks for looking Rob6 points
-
Hasegawa's 1/72 scale F-4C/D kit, built SFB as F-4C 63-7618 of 57 FIS out of Keflavik, Iceland at the 1976 William Tell Gunnery Competition held at Tyndall AFB in Florida, USA5 points
-
@TonyW, What a great collection of Lightnings you have there too! The black and yellow tailed one (111 Sqn?) is one I want to do sometime soon too, but after doing some lesser known ones first. It gives me a great excuse to continue obtaining the 'World's Best Aircraft' kits... The wings are together now, I needed to fill three holes where the over-wing tanks were fitted (one hole was still flashed over!). I am not a fan of having the wing tanks on, it seems to detract from the clean lines of the Lightning to me. I have only done one with the tanks before, but may change my mind on other builds. There is not much (any) detail in the undercarriage bays, but that is they way things will stay on this one. While the wings were drying, it was time to fit the fuselage halves together. Now, when you test fit, again and again, things all go together very well indeed. Why is it that when you then commit glue, things are not quite what they seemed? I needed to sand down the forward port edge of my cockpit tub, and I also had to use just a hint of tape to keep the front end together when the glue was setting. I did not touch this for 24 hours, but this morning I was able to sand down some of the joint lines. I fitted the airbrakes in the closed position (I do have one photo in a book RAF Aircraft Today:2 Lightning by Arthur Reed page 39, showing them open, the canopy is open too, and there is a boarding ladder on the aircraft as well, so maybe that is an idea for the future?), fitted the nose ring/radar cone, tailplane, and wings. I needed quite a bit of filler along most joints, Perfect Plastic Putty being my choice as it is quick and easy to apply, smooth, and remove. I read somewhere that when you have used the PPP, put a small drop of water into the tube, and it keeps the putty usable for a lot longer. It seems to work for me... I am not sure if it was the over-exuberant used of the tape that caused it, but the fuselage did not conform to the nose ring on the lower starboard side, so I needed to sand that down quite a bit, but it seems to have polished up okay to me. This will now set for the day, and hopefully tomorrow I can rattle-can spray grey primer on the plane, ready for the main paintwork. Thanks for looking and the comments, All the best, Ray5 points
-
Well this project isn’t dead, it’s just tired out after a long squawk... I decided to get the wings sanded down a bit better and sprayed them with good ole Halfords filler primer. Beautiful plumage: Wake up Polly!! I will leave that to dry thoroughly and (sigh) get the coarse sandpaper out... Regards, Adrian5 points
-
Lockheed F-94C Starfire 27th FIS, Wright Patterson AFB. 1955. 1/72 Emhar with Squadron Replacement Cockpit and Wheels + Flightpath Access Ladder.5 points
-
This is a conversion of the Dragon (now re-released by Revell) 1:32nd scale Bf-110C into a G using the AIMS set. AIMS have designed their kit so it just drops into place with no major surgery required. You get the interior update parts, engines, nose, weapon fits, choice of schemes and Master turned brass aerials. The resin is very finely cast with some lovely panel details. There is also an extensive etched fret. The instructions are in the form of a CD disc which includes loads of reference photos. I used a set of HGW seat belts instead of the etched ones that come with the kit. AIMS provide the rear canopy as a vac-form, but they do a separately available clear resin one which I used. The model was painted with Xtracolor enamels. Thanks for looking. Angelo :)5 points
-
Airbrushed Humbrol 28 grey earlier this afternoon.5 points
-
Just another quick update - windscreen surround filler now addressed and sanded down with various grades of paper, finishing with 2000. But, managed to slightly scratch the side panel with 400 paper, so sanded carefully with the 2000, then a cotton bud with a little t-cut, and finally another clean cotton bud with some MER... and cleaned with yet another cotton bud with cold water. It'll do - until some black... and then some primer goes on. IMG_20190614_201030145-01 by Jonathan Hughes, on Flickr IMG_20190614_201020084-01 by Jonathan Hughes, on Flickr IMG_20190614_201003117-01 by Jonathan Hughes, on Flickr Jon5 points
-
As promised, a flurry of activity in the Martian cave has seen the IP, seats and fuel tank detail painted and fitted. Doesn't sound much does it but the IP alone took over two hours before I was happy with it. However, I am reasonably happy with how the interior is shaping up. I need to make some target banners for the winch operator's station. Does anyone have any thoughts on what colour they should be? My initial thoughts are a very pale grey canvas sort of colour. Thanks for looking Martian 👽5 points
-
A few more pix of the plane, just to keep you guys amused until I get some more build shots up. If you look REALLY close, you can even see some of my work here!5 points
-
Fairey Firefly Mk.1 Z1905 of 731 Squadron Royal Navy East Haven 1944. The Grand Phoenix kit with Barracuda studios main wheels, prop and cannon spouts. Decals from the Special Hobby Mk.1 and a spot of scratch building some missing details. MM, WEM and Gunze jam used. Embarrassingly drawn out WIP here.4 points
-
Here's the new kit from Tamiya and blue stuff additive decals for the 24hrs licensing.4 points
-
Fuselage halves are bonded together, so now the stage which I find probably the least enjoyable, the panel line engraving/scribing. The wings and tailplanes have been engraved, being relatively flat they were not too much of a problem, and most of the panel lines on the fuselage will be mainly straightforward too, except for one panel line which is right at the tip of the nose, and because of it's location is surprisingly awkward to engrave. I tried holding curved templates in place but that was impossible, and even thin strips of plastic tape placed in position, to scribe against, did not work either. Fortunately, the panel line in question is perpendicular to the fuselage, so the fuselage was temporarily fixed to a small engineers square with a few small drops of superglue (easily detached later) and that in turn was then also fixed to a flat piece of alloy sheet, so that it is held squarely and vertically in place, and will not move. A sharp scribing tool was then fixed to a small flat piece of tooling block, so the tip is at the same height as the panel line that is to be engraved, and holding the tooling block flat against the alloy sheet, the tip of the scribing tool is lightly drawn around the nose, making several passes until a visible engraved line appears. The whole process does look a bit 'Heath Robinson' to be honest, but it does work! It is one way to engrave straight lines on compound curves and such. The rest of the panel lines on the fuselage will be relatively easy though, and will not need this method.4 points
-
Masking TimStyle. An Airfix colour guide has been scaled on a copier, and the grey bits put over the model.4 points
-
Utah Hi. Possibly you are right. I do not think that for a night operation (where the only thing that can be seen is the parachute) they made dolls as detailed as they appear in The Longest Day. However, in the bar-museum on Utah Beach, where they had many objects recovered from the battle, such as an MG42 machine gun, they also had one of the supposed paratroopers that was used as a decoy on the night of D-Day. I took several pictures of the place, including these, on a trip I took last year. Regards.4 points
-
With all the interior parts airbrushed, I added detailing to the instruments using the decals provided, and adding my own with white acrylic and a cocktail stick. Once dry I began assembling the cockpit and navigation areas. This was fairly easy, the instructions are detailed (overly in places), and Revell have ensured plenty of locating pins and lines. I then attempt to dry fit the interior into the fuselage half, the wing struts however were extremely tight in the fuselage slots, so tight I could hardly remove the interior. A lot of sanding later I carefully glued the interior into the half. Coming along nicely.4 points
-
They were bright red. My dad is fond of telling me about a holiday he and his sisters had near Millom in Cumbria during the war years. A Martinet flew over towing a target and they all waved furiously at the pilot and he dropped the target (probably very much against regulations). The flag was made of a bright red silk-like fabric and he kept part of it for years (until my grandmother threw it out.....🙁), along with the wood and brass spreader. He told me the guest house they stayed at had bedcovers made from sewn-together targets !4 points
.thumb.JPG.2ce06c4ff2300a5faba93aaeacbdab25.JPG)


.thumb.jpg.b4a5069fd2c2dd5708ce1694345c5b11.jpg)
.thumb.jpg.ba34a9f6ddce411193946dbdcc7b5fe8.jpg)


This leaderboard is set to London/GMT+01:00