Leaderboard
Popular Content
Showing content with the highest reputation on 07/05/19 in all areas
-
Hello All, Hasegawa's Avenger competed as an aircraft deployed on HMS Indomitable Dec 44 in the Indo Pacific. OOB with the exception of a replaced tail radio mast (broke the kit one). Thanks for looking and Happy Modelling. Ian36 points
-
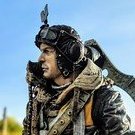
Hello once again I have build this model about two years ago from the Eduard Profipack kit, The figure is a resin from Aerobonus. My regards!;)26 points
-
Hi, I start building Fujimi Fg.1 and Revell F-4F phantoms about a year ago, and the plan was trying to do a WIP of the build.. which you can see on the link I failed miserably. The build is heavily influenced by @giemme's amazing phantom builds. @Gene K intake are also use, and this build wouldn't be happening if without his help and of course his intake patterns.. I also received many helps from other BM members who provide me with info regarding the subjects... Thanks guys! Fujimi 1/72 F-4 Phantom II Fg.1 Revell 1/72 F-4F Phantom II The Phantom on the background is Hasegawa 1/72 RF-4E which I also finished after being the shelf queen since 2008ish... Partially detailed by Eduard F-4E PE set. My wife think I had enough Phantom.... Cheers, Mario25 points
-
Hello mates! Here is a quite new model, resine from Planet Models and hard to build. First fighter ever to fly faster than Mach 1 in levelled flight. Carl Bellinger flew it a lot as Republic prime test pilot. Hope you like it! Cheers, Tom P.S. .......and now with the removed last little masking tape on the right side lower canopy frame (Alzheimer i guess) and Chief Engineer Alexander Kartveli himself (and XF-91 model)25 points
-
Like all Tamiya's that I have built, this one went together like a dream. I used the supplied mask template and cut the markings out using a fine ballpoint pen against a metal plate. Tedious but more true. IMG_1695 by Robert Pederson, on Flickr IMG_1699 by Robert Pederson, on Flickr IMG_1698 by Robert Pederson, on Flickr IMG_1701 by Robert Pederson, on Flickr19 points
-
Gidday All, Here is a model of the heavy cruiser HMS York, a sister-ship of the Exeter. These two ships were an attempt by the RN to break away from the large and expensive 10,000 tonners (Treaty Cruisers) being built by various countries under the terms of the Washington Treaty. The British Treaty Cruisers were the County class. Originally seven ships were planned, but ultimately only these two were built. They sacrificed two 8-inch guns on a ship that was shorter, narrower and about 1500 tons lighter than their predecessors. Surprisingly their belt armour, where it was fitted, was thicker. HMS York was the first of the two, and besides her guns was intended to carry two catapults - a heavy catapult behind the funnels and a light-weight catapult mounted on 'B' turret. As a result the ship had a high forward superstructure to allow the bridge crew to see over any aircraft mounted on it. This light-weight catapult however was never built and fitted. Because of this the second ship, HMS Exeter, had a much lower bridge structure that became the prototype for that of the following Leander, Amphion (Perth) and Aresthusa classes of cruiser. Exeter's masts and funnels were vertical as opposed to York's which were raked. Despite their different silhouettes the two ships were built to the same design and hence still classify as sister-ships. In 1941 HMS York was at anchor in Suda Bay, Crete, when she was attacked by Italian motor boats packed with explosives. Two boats hit her, destroying both boiler rooms and one engine room. She was run aground to prevent her sinking. Several weeks later she was bombed by Stuka dive bombers and sustained enough damage that it was decided she was beyond effective repair. She was destroyed in-situ by explosives. The model is in the scale of 1/600, as are nearly all of my model ships. I began it last May, just after WASMEx 2018, and I completed her a couple of weeks ago. Very broadly speaking the model is a cross between a heavily modified kit and scratch-built. I used a stretched hull of an Airfix 'Ajax' kit, with the funnels and 8-inch guns and turrets of a 'Suffolk' kit, some other assorted parts from various kits and scratch-built everything else, including all decks, superstructures and masts. Although HMS Exeter is the more well-known of the two ships I chose to build York for a number of reasons. Firstly her camo scheme was rather striking whereas Exeter's was a rather bland single shade of grey, and I like to have a bit of variety in my display cabinet. Secondly, York's bridge superstructure was unique while Exeter's was very similar to other ships I have modeled. Again, variety. I also had the deck plans of her to work off. Not all that comprehensive but good enough for a model at this scale, I thought. I have no doubt that I have made some mistakes, sometimes the plans I had weren't all that clear on small fixtures, I had to refer to photos when I could get them. Also the camo scheme probably isn't completely accurate but I tried my best there, despite conflicting diagrams and photos from oblique angles. Also I am certain the shades of light and blue/grey paint aren't completely spot-on. I am not as dedicated as other modelers in that respect. I know what some of you perfectionists are thinking - "Who is this Philistine? Stone him for blasphemy, burn him for heresy!" I'll supply the rocks and matches. 😁 Anyway, enough of me rattling on, here she is, HMS York 1941. Close-up photos show my rough workmanship. Regards to all, Jeff.18 points
-
More classic Airfix from me - this is my effort at building the Skyvan as G-ASZJ which was the 4th Skyvan and the prototype "Skyliner" all seater variant. And, yes, it is very pink! van7 A few tweaks are needed to change the basic kit into the Skyliner. Most notably two new windows need to be cut out, one filled in, and a rear passenger door was scribed in place of the blanked window. There is also a blister of some kind under the fuselage which was formed from a chopped up Hunter drop tank. van4 With a fuselage that is basically a cuboid, you would think construction should be foolproof but in my efforts to tightly squeeze the components together with rubber bands my first attempt resulted in a distinctly rhombus shape when viewed from the front!!! Fortunately it came apart pretty easily!! van9 This beast is another enthusiastic tail sitter. The front is crammed to the brim with steel shot and yet it was still insufficient to keep it level. Fortunately the replacement 4 blade props and spinners are white metal from Aeroclub and just about tip the CoG forward enough. I needed to slim down the faces of the Garretts in order to match the (correctly) pointier white metal spinners. G-ASZJ can also be seen with three bladed props earlier and later in its career. van8 The pink scheme was used around 1971 and there are some nice pics of this aircraft at the Paris Air Show. There was an earlier version of the scheme with a lemon yellow colour rather than pink. Although you would think that pink is pink, it took a few goes to get the right match. I used Gunze H19 with a touch of red, with a generic light grey for the lower fuselage. The engines were painted with my diminishing stock of Citadel Mithril Silver. van11 Decals for the scheme came from Two-Six. There was a moment of head scratching caused by the scenario below but fortunately the decal being black could simply be flipped over. I can confirm that later prints of these decals do have the logo correctly handed!!! Untitled This aircraft had a long career - it was certainly flying as recently as 2013 as 9Q-CSD with Swala Aviation in Kenya. Hope you like! Pat van5 van116 points
-
That was my original plan Greg, but see below... Rob! Good to hear from you chap, hope all is well with you? *blush* Why thank you Tony As noted above my original intention was to use the Matchbox transfers for the codes and unit badge and the later Revell re-issue transfers for everything else, apart from the swastikas which would come from an Xtradecal set Unfortunately on inspection the Matchbox transfers proved to be severely off-register, not sure if you can see it in the picture, but look at the white outline to the Balkenkreuz: ... which was a damned shame as the unit badge for the Matchbox kit - a hooked shark - was very much cooler than the three flying ducks badge of the Revell kit; however needs must so the Revell transfers were used: Despite being bedded down in Klear the fuselage codes silvered badly and I was only partially successful (that is to say I was actually unsuccessful) in eliminating this with a pin and repeated doses of Micro Sol It looks worse from some angles than others, so I will need to be selective when taking my RFI pictures Eventually I gave up and gave the model a coat of Xtraflat varnish: ... and this morning removed the canopy masking. As I had suspected the bomb-aimer has gone, but he must have got wedged somewhere in the rear fuselage as he no longer rattles; I am content to leave him be: Which is where I am now. Next I need to replace the rear-gunners MG barrel, add the R/T wire, take some pictures and I'll be done Cheers, Stew16 points
-
"The letter, yeah. With pleasure." Two photos from tonight's club meet featuring my latest two: Avro Lancaster B.VI "Special" and an Avro Shackleton AEW.3. The latter has yet to get it's aerials and the prop blade tip decals, but in my defence I've had zero energy when I've got in from work. Lancaster B.VI I've a feeling the major components (wings and fuselage) for this were from someone on the forum, either Herald Coupe or Wez, as they reckoned that they were unusable. The rest from my spares box and some illicit home cast resin. Shackleton AEW.3 I have a real dislike for the Shackleton as it fought me every step of the way during decalling and the Lancaster... It *still* isn't really talking to me. I'm not happy with the finish and TBH, it's a bit rushed. I just wanted it done and out of the way. Photos by Bob Towers15 points
-
Here are the final photos of my conversion of a Monogram F-105D kit into the prototype YF-105A, and here is the Build Thread And for a little comparison, the original Monogram F-105D alongside: If you check out the build thread, you will see that it was a long ride... Ed14 points
-
Hi Folk's,a little fun build of Heller's 70's era Saab J-21,I often grab a little cheapie when I order from King Kit usually what's on offer around a fiver or less and to be honest most end up in the bin for one reason or another.This kit was a joy right till the decal's self destructed hence the bogus I.D. made from spare's and then the awful canopy so don't look too close,thank's for looking in!14 points
-
Here is my second Fw190D from Eduard dual combo kit. It is Fw190D-9 from JV44. Painting and masking the red/white underside was quite fun. Nanond14 points
-
This is my only armor model in the last 10 years. I am an aircraft guy. D-Day has me venturing. I have found at least 5 different Versions of Sherman's on D-Day so M4A3 was recommended by the Resin makers of the Vents and so that is what I used. This is a Hobbyboss 1/48th Sherman. I used thinned Milliput for the tarps and Gunze Olive drab as I liked the shade(another thing that has 5 or more different shades) Mostly out of box except for the vents from Black Dog, added applique armor to sides ,tarps, Stretched sprue antenna, and wires added for quick release of the vents. Not glass was in kit so a bit of spare clear was added for view in upper turret. Tarps were a big pain in the A!@#$%^SS. Markings were spare decals and Painted Stars Thanks for technical help from fellow Pittsburgh modelers John Bonanni , John Szczypinski and John Russell Final D-Day project until "Group Build" on this Site Comments welcome Thanks for Looking Cheers Bill11 points
-
Hi everybody, here's my second completed model for the year. It's the excellent Tamiya 1/48 HIEN, here represented in the colours of the aircraft flown by Regimental Commander Teruhiko Kobayashi. This kind of aircraft was mainly employed to defend homeland Japan from bombing raids during the last phases of WWII, hence the topic title. The build took me a little over than 3 months, just like my last build, coincidentally a Tamiya kit as well - pretty quick, for my standard Here are some details about the build: KIT: TAMIYA 1:48 KAWASAKI Ki-61-Id HIEN (TONY) AIRFRAME: KAWASAKI Ki-61-Id 24 of 244th Sentai, Imperial Japanese Air Force MARKINGS: Hinomarus and blue stripes airbrushed using self made masks; kit decals for all the rest. PAINTS: Tamiya gloss alu and light blue, decanted from rattle cans; Tamiya JA Green for the mottling; Italeri Insignia Red for the tail and Hinomarus, Tamiya Flat Yellow and Red for the wing leading edge bands, Tamiya Flat Brown and Red for the propeller assembly, Lifecolor Giallo Mimetico for the interiors, plus other assorted paints for the interior details. WEATHERING: tempera washes, black for the movable surfaces and hatches, dark grey for the remaining panel lines. Some oil filtering on the red areas and the spinner/propeller AFTERMARKETS: Quickboost resin cannon and machine gun barrels, Quickboost exhausts SCRATCHBUILDING: Seat belts, with wine bottle foil; gunsight reflectors, from clear acetate The kit is up to the excellent Tamiya standards, beautifully engineered and requiring just a bit of filler here and there, and only along the fuselage halves seam. The level of detail doesn't make you feel the need for AM, even in the cockpit area, IMHO - I indulged in the Quickboost resin gun barrels and exhausts set because they are such a prominent feature on this model, and the kit rendition (especially for the nose cannons) isn't on par with the rest of the kit. Here's the WIP thread, in case you are interested in: My thanks to everybody who followed along, supplying help, tips, insights, praises, etc: as usual, you are a wonderful lot! A special thank you to my friend @Gene K for talking me into building this kit and providing a lot of reference material Let's see some pics (beware: a lot of them! )- with one final note: at the very end of the build I had a relevant mishap, enough to compromise the end result (all my fault, BTW). Those who have followed the build already know, for the other viewers I will not mention it, let's see how bad it looks to you. Hint: more visible in the detail pics. All comments welcome Ciao10 points
-
Here is my build of the Mach 2 Ryan X-13 Vertijet. The X-13 was an attempt to build a VTOL tail sitting jet. It didn't actually sit on its tail like the XFV-1 and XFY-1 but hung from a cable on a specially built cart that would lift it to a vertical position for take off. It would then hook the cable for "landing". The kit consisted of the aircraft and the cart. The cart was the biggest part of the build and had the most parts. This is my 8th Mach 2 kit and I have to say it is one of, if not the, worst one. The main issue, other then the usual Mach 2 issues is that the 2 halves of the molds didn't line up. That meant that the top half and the bottom half of all the part were offset from each other. This in tern meant that and small or round parts were useless and had to be replaced with various styrene and brass rods. The cart suffered the most from the misaligned mold halves. There was also something wrong with the wing which was divided top and bottom, not right and left. If I lined up the center line of the wing with the center line of the fuselage then the trailing edge was crooked, if I made the trailing edge straight then either the front of the rear didn't line up with the fuselage. I went with lining up the center lines and tried to sand the trailing edge straight with less then satisfactory results. The decals were pretty good except for the stars and bars. The blue seemed a bit light to me, but more important the blue also was allergic to MicroSol and just wrinkled. Luckily being generic I was able to replace them from the spares pile. The black decals did not have this problem. The "clear" canopy was translucent at best to I did not spend a lot of time on the cockpit. But enough grousing and on to the pictures. First the aircraft itself. Now the aircraft on the cart. The next Mach 2 kit I have is their X-5 and I checked that one and it doesn't look like it has the same issue with the misaligned molds. But first the next up is the Hasegawa P2V-7. Enjoy10 points
-
Morning, All! Here's a bit of clarification on the Haze Paints. The original Cabot Haze was applied over a totally black base coat. The heavier applications of Haze to undersides resulted in a very light blue, while the lighter applications on top gave a much darker blue. The vertical surfaces in between were graded from light applications down to dark. Since accurate applications were nearly impossible to measure, there was a great deal of variation the the appearance of these aircraft, and as the slipstream and maintenance crews wore away layers of paint, the entire aircraft began to darken (particularly noticeable on leading edges). The scheme was also very difficult to to retouch. Two other paint companies provided their own versions of Haze. Cabot took exception to the violation of his invention, but just as everything came to a legal head, the iridescence problem was discovered - at altitude the finish began to glow. During F-5A production, Lockheed developed a two-color lacquer scheme that became known as Synthetic Haze Paint - a deep blue was applied overall, with a much lighter blue on undersides, in shadow areas, and graded up vertical surfaces. In the color shots of 267332 above, you can see the countershading on the boom beneath the wing - a clear indication of Synthetic Haze. Higher resolution copies of that photo also show the more subtle countershading on the vertical surfaces. (Note that Xtracolor X160 probably needs a second color to make the scheme work - Synthetic Haze certainly wasn't monochromatic.) As with the original Haze Paints, the lighter shade wore away with time - rubbed against by crews or the slipstream. The AAF debated the value of Synthetic Haze, eventually eliminating it from the mod centers that built F-5Cs and Es. However, the Director of Photography was convinced that the paint helped protect his crews, and it was often applied in the field. Some units simply used a firm demarcation between the two blues - like a blue version of OD over Neutral Gray. B&W and color photos can be hard to interpret - especially since many aircraft were instead painted with British paints. If you can recognize two shades on your F-5E, you've got Synthetic Haze. If you see only one shade, you're probably looking at one of the British colors. (A number of decal sheets have been released with incorrectly identified schemes - the decals are still good, but you may want to re-evaluate your base scheme.) Best of luck with the model! Cheers, Dana9 points
-
I tried to take a pic of the model with a different light and angle and then overlapped it onto Keith's @keefr22 pic (I hope Keith doesn't mind ) With all the possible caveats that apply to this being a very approximate comparison, it looks like the kit radome shape in general is pretty good, but can use a bit of beefing up and reshaping at the very tip (so Bill @perdu is right) You will also notice that the IP coaming in the kit is too short by a good amount - this is a known issue, as I could see also from @The Spadgent build of this kit Plenty to do already, this should be fun! 😁 Ciao9 points
-
Hiya Folks, Here are some of the other Fleet Air Arm kits which I`ve had the chance to finish off lately!! Aeromaster Meteor converted into a Meteor TT.18, from 728 NAS, Hal Far, Malta, using left over TT parts from the PP Aeroparts Firefly 4/5 kit. It still needs a wash over to highlight the control surfaces etc! Battleaxe C-45 built as a post war Beech Expeditor from 728 NAS, Hal Far, Malta Aeroclub Dragon Rapide built using kit markings for a restored example in RN markings for Culham Station Flight.I was not sure whether this a/c had the windows in the roof so I left them off...which made it easier to add the fabric effect to the roof area!! Airfix Seafire 46 in markings for Lossiemouth Station Flight Accurate Miniatures TMB-3 Avenger built as an Avenger AS.4/5 of 815 NAS at Eglinton, the Harp on the nose came from the old Frog Gannet decal sheet! Hope you like em.... Tony O8 points
-
After a two-year hiatus through severe loss of mojo, I have only recently re-started modelling. Put simply, 2017 was a terrible year for me. In April, we lost one of our beloved dogs suddenly and quite unexpectedly. Then in the spring and summer, I had a major falling out with my former boss, so I looked for, and eventually found, a new job. After 16 years in the same position.... Then, to end the year, my father passed away. There were some other issues that contributed to my personal ‘annus horribilis,’ so I was relieved to get 2017 out of the way! 2018 was all about getting my life back on track, with a challenging new job and seeking help through counseling, but modelling did not play a part in that. I would often sit in my den and stare at my modelling desk and simply have no enthusiasm at all for the hobby. Which was a major issue, given that modelling has been part of my life for over 45 years. In close to 2 years, I completed just two models. But recently, I’ve started to get the itch back, slowly but surely. I chatted with my former editor at the US Nationals and I got a review kit that I worked my way through. It was big and complicated but I enjoyed the challenge, although my skills have eroded somewhat. That should be in print very soon and I'll post an update on that in time. Meanwhile, I have recently finished three other models, the Italeri 1/48 OH-58D in Croatian AF markings, and a pair of Hasegawa 1/48 kits, the Thunderbolt I and Spitfire VIII. The Italeri kit is quite simple. It's billed as a "100% new mould" on the box, but that doesn't stop the canopy/windscreen from being a very poor fit. Otherwise, it's a nice little kit and the only additions were a few items to the cockpit - seat harnesses and such. I had to create my own decals for a Croatian Air Force machine. The Hasegawa P-47 Thunderbolt I is quite an old kit, mid-90s, but it's quite good. Typical of Hasegawa, there's not a lot of detail, but it's quite sufficient for my purpose, which was to help re-build my skills. The only issue I had was with the Vallejo RAF 'Dark Green', which was not at all the right shade, and was very fragile. So I covered it with Mission Models Dark Green, which looks a lot better! Xtradecals were used for the markings. The dimensional issues with the Hasegawa Spit VIII are well known, but the purpose of this build was, again, simply to build up my skills again and not worry about total accuracy. It builds up well and it nicely detailed. Again, I used Xtradecals for the markings of 152 Sqn. With both of these builds, I was aiming for a somewhat used 'tropical distressed' look, with dark brown and dark grey washes, and patchy paintwork through pre- and post-shading and colour variations. Comments welcome. Now the question is, what kit to build next...?8 points
-
A bit off topic but another shade of grey and very speedy. Too speedy for the police here in the city.8 points
-
Just started something different, a Supermarine S.6. This is the Pavla kit. My intention is to keep it box stock as much as I can except for adding flying wires. Here I have the fuselage glued up. I found on here another post of the same kit and noted the snags and hints encountered. I can't find the thread but it was very well done. There's no line up spots on the inside of the fuselage. So the seat fits flush to the rear cockpit opening and the instrument panel fits flush to the front opening(with the bulkhead attached) I had to trim the bulkhead and seat bulkheads to fit the contours of the fuselage inside profile. I tried out a truck for seam filling. I took stretched sprue from the same kit and glued it to the top fuselage joints and sanded it all down, works really good and won't shrink. I also drilled out the individual exhaust ports. Another thing from the other thread was to make spars from rod, I used brass, it's not shown here but I put two per side. I epoxied them the first time but didn't put enough hardener in so I took the wings off and redid them with some cement and superglue. There is no dihedral, the wings are flat. I did the same with the tailplane, two brass rods but went through to both sides with two pieces. The struts I thought would be a pain so I drilled in small rods on each end. The rods going into the flats are bent vertically so I can plug the plane onto the floats later. There is a lot of flying wires on this plane and you can see how small it is. 0.25 x .5mm or less flat strip would be ideal, but i don't have any. I have 0.5 x 1mm. I'll see if it works, at least on the floats. There will be some filling where the struts meet everything. The bottom spine didn't quite meet the fuselage halves so it did need some filling with superglue. You can see the dark area just behind the rear strut. I'm going to use the beaching gear as a jig for the floats.7 points
-
The Hasegawa kit with SuperScale decals. Nickname: Rat Poison, 553rd Bomb Squadron, 386th Bomb Group, US Army Air Force, WWII, European Theater.7 points
-
Here is a 1:48 scale Fw190 A9 that I finished quite a while ago but never posted here. It’s the old Dragon kit re-boxed by Revell. I have a few of these in the stash but had never actually built one before. Kit had the extra broad propellers and the cooling fan with extra blades as well as the A9 hood. Despite its reputation the kit went together well only the finicky fit of the nose/wings (6 parts coming together) being a bit of a challenge. Finished in the brown rather than green RLM 81 just for the pure hell of it. Aircraft belonged to Ofhr. Wilhelm Ade of 2/JG1 stationed at Twente airfield (NL) January 1945. He was the sole survivor of his unit when they got caught taking off 4th January. They were pounced by members of the Canadian 401, 411 en 442 Squadrons 401. Ade survived his crash and his period of time in hospital thereafter probably ensured his survival at a time when the Luftwaffe was being slaughtered. Decals form Kagero's JG1 Oesau (Pt II). I am slowly but surely getting my way through the aircraft featured in these books. regards Brian7 points
-
Hi everyone, My latest completion for 2019 is Zvezda's Yak-130 in 1/72, a very nice kit of an attractive little aircraft. Physically the model is OOB with Begemot providing the decals and Peewit the canopy mask. Paints are Colourcoats ARG03 Africa Korps Tan Yellow and Humbrol 103 Cream for the upper surface whilst I used 65 Aircraft Blue for the underside. The cockpit is all Humbrol - 175 Hellgrau for the base with 124 Petrol Blue (both long discontinued) for the instrument panels whilst the MFDs are 85 Satin Black. Various Humbrol colours were used for all the details. Unfortunately the Begemot roundels were a bit out of register on the sheet I bought, particularly the fuselage ones and there were a few errors in both the placement of the markings and recommended camouflage pattern. I did a bit of hunting around on the 'net and found THIS thread on the Yak-130 on what's called the ForcesDZ forum which was an immense help in determing the correct colour demarcation and marking placement, although I still made a mistake with the fuselage roundels! The forum is primarily in French with some Arabic but it seems like a good source for info on the Algerian armed forces 🇩🇿. Now for the pics: Comments and feedback welcome! Mike.6 points
-
It's been a while but we're on the final stretch now. i did rigging with elastic rigging wire. installing one end with superglue was fairly easy but getting the other end to stick took some trial. finally i figured out that aceton works as a superglue kicker... for some wires i filled the hole with acetone, applied superglue to the wire and stretched it into the hole... it still takes some practice and a third arm would have been handy. some last details to be added and i'll call it done.6 points
-
Hi all, Thought I`d share some pic`s of my latest effort, which I finished a couple of weeks ago but, got my sausage fingers caught on the aerial wire and had a bit of repair work to do. My attempt at Fine Molds 1/48 C5M2 `Babs` Kit Finished to represent an aircraft of the 3rd Air Group, IJN and operated from Denpasar Air Base, on Bali Island Really well detailed and great fitting kit, the only bit I had a battle with was fitting the engine and cowling to the front fuselage, but I think......... ....that I squeezed the exhaust parts too close together when fitting the cowling ( there`s a lot of parts involving the engine and cowling in a quite small space ) The interior looks amazing when done and fits beautifully but then mostly disappears when you paint the top fuselage and fit the canopy Built almost entirely from the kits contents with just the usual dodgy seat belts and bits of wire for the ignition harness Hope you enjoy, thanks for looking Cheers Russ6 points
-
Hi SoftScience. You are waaaayyy too kind but thank you. Thank you Craig. Now it's all together - please see below - it does look a bit more 'interesting' and okay. Thank you Ben. I'd be interested to see your 1/72 version. Hi Badder. I had noticed you hadn't been about for a while. Hope everything is okay and it's great to have you back around! Yeah, I thought it might be finished a bit sooner but, because of the way I do things, it took me longer than I expected to get everything together - but I got there over the weekend. So a busy three days on this has resulted in it being all basically together and the main weathering completed. With regards the weathering I still have some areas I want to work on. There's still a few bits of detailing to do as well - fitting an aerial, painting the rear lights and adding some oil streaks and stains, etc. but the main vehicle is now all together: I also made a start on the Tamiya figures I'm going to use and some of the tools from the old Italeri Feild Tool Shop set: I have assembled them and altered one of the arms on the kneeling engineer and given them a coat of Matt Revell's Anthracite - yes the finsh is matt but it looks glossy in the photo! I'm going to make a start on the base this week and I may try something different to my usual bases. Comments and suggestions welcome. Kind regards, Stix6 points
-
…well not quite but I’m nearly there! I just could seem to leave her along so I decided to start the touch up process. Again lots of masking required, I try to do so I could do 2 colour touch ups in the same painting session. In the end I needed to do 3 painting sessions and it’s pretty much done. She looks so much better now I’ve added the sorts I missed plus tidied up the pattern. There a couple of minor spots I need to redo and the paint lifted off again in a couple of spots as well! She looks a bit patchy at the moment because of the touch up spots, but these will disappear once the gloss coat is on. One question I have for anyone reading this is that I’m a bit confused with the leading edge of the Intakes and Fin. Some photos of the SH show these painted black and in other photos they aren’t. So I’m not to sure which way to go???? After all the stress and hassles with the masking and painting I’m finally at a point now where I’m starting to really like her again! With a wee bit of work and luck I should have her completed by the end of the weekend!6 points
-
Started over the long weekend - the Eduard rebox or the Hasegawa Typhoon 1B with lots of etch Work commences with replacing most of the plastic cockpit with Etch :-) Peter5 points
-
An Airfix Islander I built in the late 1970's. Came across the decals in a small toy/model shop in Horley in that decade for 50p a set. They were printed exactly same as the Airfix style of the time... even down to the display stand type name. He only had the two so I bought them both Still have the other lurking in my odd ball decal bank. I know there is a wheel missing and that will be remedied .... because I plan to refurb this one with new markings. Meanwhile take a look at the build while its still in this form.5 points
-
Morning folk's,second build for the Dakota GB is this Italian schemed version from the 1960's,two thing's I usually avoid are white or silver scheme's! Anyway Halford's white and Humbrol silver from rattle can's were used and turned out OK the kit is getting on a bit now but still build's well the only issue I had was the decal's as the white hasn't a lot of density,as I had two set's I was able to "double up" which helped a lot.Many thank's for looking in.5 points
-
Afternoon folk's. Built for the excellent 50's NATO/WARPAC GB is Trumpeter's Seahawk, the W German Navy operated them into the 60's replacing them with the F-104Starfighter.Nice kit this one, easy build and no vice's I ordered the RN version as I'm building Cyberhobbies Sea Venom as well, the wrong boxing turned up and I'm pleased it did as the German version isn't seen too much,many thank's for looking in.5 points
-
So I have finally managed to sit down in my dark basement and do some work. I added the tail planes to the above 3 vb’s and have had a change of heart on the options I will be making. I will still be doing the Vc with the open engine and 3 Vb’s, one Malta based, one North African and another Italian. The North African on is from the transfers that @Cookenbacher sent me (thanks for that!) some time ago, 92 sqn is the plan. The Italian I will leave you to guess which it is, it’s from another transfer sheet that needs to be bought. anyway! Progress! here they are, one has had some chopped off but all three have had a good first coat of paint. Im not sure on the mr hobby dark earth, it doesn’t look edible like hu 29, like it’s been carved from a block of cadbury’s... in fact it doesn’t look much lighter than the middle stone from Tamiya 🤔 any thoughts? The dark blue will need toning down which I will do over the next few coats, hopefully it will end up ok and a little patchy like it’s been painted in a bit of a hurry. i also did some scratch building!! This is my first try at this, it’s not supposed to be @TheBaron standard and accuracy, just to give a nod to what it should be and busy it up a bit. It’s supposed to look like a firewall It needs more detail painting but I’m happy enough for a first go. then i had a little pop and sanding back where the oil filter (?) will be, lots of sanding and a rub down with 3600 micro mesh and it’s looking good. Very flat! So hopefully I will keep plugging along with these on my days off and one day might even finish them! And what hat have I been up to in nearly 2 years I hear you cry? Not much! Moved house, worked, been to Iceland, worked and taken photos.... so as you used to like pics of the area around me, here are some more a train that was at Hereford station end of last week and a few from the last few months round Malvern and Hereford oh oh and two from Iceland... not where I live but it is stunning! Hope your all having fun! Rob5 points
-
Hi guys, This is my 3rd Hs 123 in a row (and probably the last one...). It took me just 4 months, partly due to the experience I gained from the other two builds. The WIP is here : But you can also have a look at my first build here, that is more extensively presented : Enjoy.5 points
-
Just a quick update. Sorted out the sliding door mechanism Thanks for looking Angelo.5 points
-
Along with the Panther........got some time on the 8 rad. Just some filters and chipping. Sorry for the shiny bits........picked up the wrong clear coat.... remedy that in the final clear coat after mud and dust before final weathering with pigments etc.5 points
-
4 points
-
This is my attempt at the old Airfix kit of the Scottish Aviation Bulldog, flying in RAF training colours of the mid 70s. With Mrs C frowning on additional shelf space being made available, kits of the size of the little Bulldog become more attractive - wonder what she will make of my plans to do an RAF Neptune???!!! bulldoga bulldogd The kit is pretty basic but still quite crisply moulded. Mine was an older boxing with a Swedish Air Force trainer on the front. The critical advice is to get enough noseweight into this thing. I stuffed the nose with stell shot but there is very little space to cram much in and it was still determined to tail sit. In the end I hollowed out the back of the spinner and stuffed some Tungsten putty in there which just brought the CoG forward enough. bulldoge bulldogc The nose gear is very spindly and was snapped off early in the build and then vanished into thin air. In the end I fabricated a rather crude replacement from bits of white metal and thin metal tubing but it is just about passable. Decals came from an old Modeldecal set and represent an aircraft from the London University Air Squadron. Paint was Humbrol 208 for the red with Gunze white and Xtracrylic Light Aircraft Grey. I wondered about the instructions to paint the front tips of the blades red/white/red as most Bulldogs appear to have black/white striped blades - however Modeldecal were indeed correct that at the time this aircraft was portrayed (1976) it did have the red/white/red tips. If only you could rely on all decal instructions! Hope you like!! Pat bulldogb bulldogf4 points
-
Morning folk's,built as a pair for the Trainer's GB is Airfix's T11 in the Swedish Air Forces historic flight colour's,as this machine is kept pristine I've only ran a pin wash to bring out a bit of detail and no weathering.A great stress free build and nice to be back into 1/72 scale for this and a few other subject's to come,many thank's for looking in. #4 points
-
#12/2019 After the Bird Dog, now another contribution for our homeland collection by my dad. Pilot Replicas kit built oob, MRP White Alu/Dark Alu mix as base colour, MRP White Alu for different shaded panels to have some distortion of the plain metal surface. Build thread here https://www.britmodeller.com/forums/index.php?/topic/235045982-bundesheer148-saab-j29f-tunnan-austrian-airforce/ In 1961 Austria bought 30 used Tunnans from Sweden which stayed in service until 1972 when they were succeeded by Saab 105. Some served also as recce birds. The aircrafts were used by the one and only Jagdbombergeschwader, split into two Staffeln in Styria and Upper-Austria. DSC_0001 by Reinhard Spreitzhofer, auf Flickr DSC_0002 by Reinhard Spreitzhofer, auf Flickr DSC_0003 by Reinhard Spreitzhofer, auf Flickr DSC_0004 by Reinhard Spreitzhofer, auf Flickr DSC_0005 by Reinhard Spreitzhofer, auf Flickr DSC_0006 by Reinhard Spreitzhofer, auf Flickr DSC_0007 by Reinhard Spreitzhofer, auf Flickr DSC_0008 by Reinhard Spreitzhofer, auf Flickr DSC_0009 by Reinhard Spreitzhofer, auf Flickr DSC_0010 by Reinhard Spreitzhofer, auf Flickr DSC_0011 by Reinhard Spreitzhofer, auf Flickr DSC_0012 by Reinhard Spreitzhofer, auf Flickr DSC_0013 by Reinhard Spreitzhofer, auf Flickr DSC_0014 by Reinhard Spreitzhofer, auf Flickr DSC_0015 by Reinhard Spreitzhofer, auf Flickr DSC_0016 by Reinhard Spreitzhofer, auf Flickr DSC_0018 by Reinhard Spreitzhofer, auf Flickr DSC_0019 by Reinhard Spreitzhofer, auf Flickr DSC_0020 by Reinhard Spreitzhofer, auf Flickr DSC_0021 by Reinhard Spreitzhofer, auf Flickr and together with the AZ Model kit DSC_0022 by Reinhard Spreitzhofer, auf Flickr DSC_0023 by Reinhard Spreitzhofer, auf Flickr DSC_0024 by Reinhard Spreitzhofer, auf Flickr4 points
-
Nice overlay between those two images Giorgio. Always a great diagnostic tool with photos and drawings. Simple. Elegant. Superb.4 points
-
Thanks @Nikolay Polyakov, @bbudde, And @giemme, a bit of progress. This lot was ready for priming, remedials and all. The upper fuselage was quite patchy after the first coat, my fault probably. The main bay doors received a severe filing/polishing session. After a coat of primer the doors looked like this. Not bad, apart from the front port corner really. The upper fuselage looks like this now. A lot better. You may have notice a background change.... I had an accident with the primer spilling a third of a bottle over the other side of my cutting mat. Oh well, time for a new one some when. All comments welcome. Simon.4 points
-
Two early Messerschmitts in the early morning :-) First up one of the Classic AIrframes kits built oob showing one of the prototypes that were later designated "A". and second a "B" model, aircraft of Unteroffizier WIlhelm Staege 2.J/88 Legion Condor Hobbycraft kit with resin nose from Classic Airframes and decals from Cutting Edge4 points
-
Agreed - in fact, I forgot to mention that in my post That sounds like a great idea, thanks! Yeah, I know, sometimes I'm such a poet .... Ciao4 points
-
Inspired by my trip to the Yeovilton Air Day in 2018 this is my latest attempt the 1/72 Sova M Dassault Falcon 50 Surmar, typical short run kit lots of filling, the interior is bare except for the cockpit so I scratchbuilt the area around the observers positions to fill the area around the observation windows, the rest of the windows were blanked off as these aircraft seem to fly with blinds drawn down alot of the time. The surface detail is very nice and the decals are very thin which means the walkway lines on the wings are best cut to shorter lengths to prevent them folding over on themselves. Dassault Falcon 50 Surmar 1/72 by Phillip Wilmshurst, on Flickr Dassault Falcon 50 Surmar 1/72 by Phillip Wilmshurst, on Flickr Dassault Falcon 50 Surmar 1/72 by Phillip Wilmshurst, on Flickr Dassault Falcon 50 Surmar 1/72 by Phillip Wilmshurst, on Flickr Dassault Falcon 50 Surmar 1/72 by Phillip Wilmshurst, on Flickr Enjoy, Willy4 points
-
Sorry to disappoint your wife, but there's no such thing .... Great collection you have there and the two latest additions really stand out, especially the Fujimi version, IMO Ciao4 points
-
After a bit of work over the long weekend I now have a shiny F35... First I base coated with the alclad black gloss primer. I find this goes down ok but it doesn't give a particular smooth finish so then I polish with progressively finer micromesh from 3k up to 12k. After some touching up I've laid down a few thin coats of alclad polished aluminium. It's strange stuff and really does make any surface blemish jump out. I kind of got the hang of this with my b29 but it's still not perfect. Anyway, this will provide a base coat for the grey which will go down next - more experimenting needed on this colour but will hopefully make some more progress this week. Cheers, Sam4 points
-
4 points
-
4 points
-
Hi All This might work? The proof of the pudding will be in the painting. A bit more saw action and the door pops off I'm going to thin down the door and those walls a touch, but I think I might get away with it. Comments and suggestions welcome Cheers Steve4 points
This leaderboard is set to London/GMT+01:00



.thumb.jpg.942668eda22ef4e1cceffe7cdb75061d.jpg)







.thumb.jpg.0bc57cb4bb3dec8e063e1951db6690c2.jpg)
.thumb.jpg.d17ff607fc7e89ed057e63fcb6f2a888.jpg)


