
Leaderboard


Popular Content
Showing content with the highest reputation on 06/03/19 in all areas
-
So, she's finally done....after almost 8 months build time.....a house move and various other distractions, my 1/48 Canberra PR.9 representing XH165 of 39 Squadron is finally done. It was originally going to be 58 Squadron, but after learning more about when my family was stationed at RAF Wyton, I thought it more fitting to modify slightly. The build log link Over all I am happy with the build, some bits that were slightly fustrating, but an enjoyable build. HUGE thanks to @canberra kid for the advice and guidance, as well as everyone else who had kindly contributed. Well, here she is.... DSC_1981 DSC_1982 DSC_1983 DSC_1984 DSC_1985 DSC_1986 And for a size comparrison to the 1/48 Hawker Hunter.. DSC_1987 DSC_198819 points
-
Just finished today, although I'm not at all happy with it. This is the re-boxed MPM kit and while the surface detail is excellent, the fit of many parts was abysmal and the wings/tail are far too thick. I'm really kicking myself for not doing a massive sanding down before joining the halves. Also had to pinch correct sized wheels from the 1/72 Revell Havoc kit. It also took nine separate lumps of lead squeezed into various places to stop it tail sitting. The Special Hobby kit is for a Boston IIIA, but contains all the necessary parts to do the earlier mark III, but without the relevant instructions. So it was quite a guessing game, and referring to various reference books for the Boston didn't help given the bewildering variations between RAF Boston 1, II, and IIIs , Havocs, A-20B and Cs. Douglas Boston III, AL275, 226 Sqdn, RAF Ouston, 4 Aug 42 by Philip Pain, on Flickr Douglas Boston, AL275, 226 Sqdn, RAF Ouston, 4 Aug 42 by Philip Pain, on Flickr Douglas Boston III, AL275, 226 Sqdn, RAF Ouston, 4 Aug 42 by Philip Pain, on Flickr Douglas Boston III, AL275, 226 Sqdn, RAF Ouston, 4 Aug 42 by Philip Pain, on Flickr Douglas Boston III, AL275, 226 Sqdn, RAF Ouston, 4 Aug 42 by Philip Pain, on Flickr Douglas Boston III, AL275, 226 Sqdn, RAF Ouston, 4 Aug 42 by Philip Pain, on Flickr Douglas Boston, AL275, 226 Sqdn, RAF Ouston, 4 Aug 42 by Philip Pain, on Flickr Douglas Boston, AL275, 226 Sqdn, RAF Ouston, 4 Aug 42 by Philip Pain, on Flickr 226 Squadron was detached from their base at RAF Swanton Morley, Norfolk, to RAF Ouston, Northumberland on 4th August 1942, to take part in Army Co-operation Exercise "Dryshod". By the end of that first day they had lost three of their Bostons in accidents, and AL275 'MQ-Z' belly landed in a field some four miles to the west of Ouston when the engines cut. Sgt W.E.Burns was flying and there were no injuries. The markings on this Boston consist of pre-May 1942 roundels and grey codes, over painted to conform to the revised regulations for roundel sizes and code colours. This Boston was built by Douglas and shipped to Liverpool, roaded through the streets and assembled at Speke. It is not (yet) known if it flew again after its accident.18 points
-
.16 points
-
Hello ! Here is my new finished model, a B-25G from Italeri ( ref 1309 ; 1/72 ). The kit was released in 2011 and is actually unavailable nowadays. The mould was quite old ( at least from the 90s, maybe even before, I wanted to check on scalemates but their website seems to be broken right now ) and was used for a long serie of B-25s during many years. This is a good kit, even if the new Airfix one is probably far better, from what I've seen and read ( haven't tried it at the moment ). I think I bought the Italeri kit before the new Airfix' B-25 came out, but anyway I wanted to build the G version. The kit is rather good despite some imperfections and the rough aspect of some pieces. I won't make a long review of it since everybody will now buy the new Airfix B-25 😅 So, let me present you a b-25G from 823rd Bombardment Squadron, 38 BG, New Guinea ( 1944 ), quite dirty after landing 😉15 points
-
Hi, I haven't completed a model in 4 years. This one took a few days to assemble and finish and it was a fun way of getting back into building again. Kit is the 1999 Hasegawa ANA 747-SR kit with Flightpath, TwoSix, Liveries Unlimited and kit decals. Paints used are Model Master, Alclad and Tamiya. I sprayed a final coat of Future/Klear on a high PSI to give it a dull finish. This model has been sold and will be making its new home in Pakistan soon. F-ODJG was Air Gabon's solely owned 747-2Q2M, delivered new from Seattle in 1978. The plane carried the late Presidents name, Leon Mba, who died in 1967. Juliet Gulf served on the airlines prestige routes, including Paris and Gatwick. The aircraft was eventually scrapped in France in 2006 and Air Gabon ceased operations that same year. Their 747 was one of the dirtiest ones I have ever seen. Here with 1/200 Air Afrique A300B4 I built in 2014, classic 1980's airliners:15 points
-
Here's my rendition of the BAC TSR2 XR219. This is the only TSR2 that ever flew. She's built from the Merlin kit and has Airfix decals provided by my great friend Cammnut. In hindsight, I think I should have used a lighter shade for the area of the blown flaps on the upper wings but, on the whole, I am pretty happy with how she turned out. This is what she started as. This is what she looked like at one stage - I must have used half a pound of filler on her. Thanks for looking. Comments and criticisms welcomed but not about my sanity for even thinking of building this. David15 points
-
Hi! Here my Hs-129B-3 tank buster of the last WWII winter. Built from Hasegawa limited edition kit with Verlinden cockpit, Eduard masks, custom masks for codes, Montex masks for insignia and some scratch build mainly in wheel wells. Tried to make the temporary winter camouflage to look well worn. Hope You like it!15 points
-
Those shipping containers down the end of his garden are full of such stuff Giorgio. Ced's tool collection is apparently visible from space. 🌍 Frankly I don't know why more of you aren't doing it Ced. It seems to me you youngsters have it too easy nowadays with your vegan music and your gender fluids. That so has to become a television program in it's own right along the 'Gogglebox' line Bill! I was in the chemist's this morning to get a prescription and amazed to see that Brut men's products are still on sale. I was particularly taken by the way they had Brut roll-on deodorant on special offer next to the Durex, much in the manner of despair accompanied by unrealistic optimism... I did buy some Old Spice however - largely to perturb Mrs. B, who harbours suspicions that I'm only pretending to have evolved beyond 1976. With so many parts floating around the bench these days, sense finally kicked-in via the acquisition of a make-up box to keep all the jewllery in: 'Some assembly required' Your correspondent has not been idle in the matter of turret research. Something was gnawing at me since the weekend regarding the interior workings of the mounting and I think I figures what it was. The original Flight article that I found the schematic in (and from which I made those sketches at the weekend): https://www.flightglobal.com/pdfarchive/view/1936/1936 - 0205.html?search=whitely turret didn't seem to match what I was seeing in reference photographs. ( @Heather Kay - I hope this hasn't ruined your own turret planning?). The gun mount I'm seeing in photographs is of a different visual appearance (though similar in articulation), being built from tubing regarding the uprights that the gunner sits into, as opposed to the larger pierced panels in the drawings. Here's a couple of examples (apologies to original posters for not remembering where these came from...): Given that the original Flight article was published in 1936, I'm working on the assumption that the initial AW design was subsequently refined to a rather lighter looking version so have altered my designs accordingly. BTW - during my researches I discovered that an enormously public-sprited gentleman by the name of Mr. Terrell has been reading through the Flight archives and produced an alphabetical index of articles on particular aircraft, which he's made freely available on Scibd: https://www.scribd.com/document/246972039/Flight-Combined-Drawings-List Absolutely superb and what a wonderful thing to have done for others! I started by making the curved frame that the gun mounts on, and to this added the flat vertical sections that run down from it to meet the framing of the saddle seat: With the aid of wet-tissue for heatsinking, the diagonal bracing was then added on either side: One that was done I had some fun with bending and aligning the seat mounting in three different axes - not only to get the shape right but to ensure that it matches the differing diameters of both the gun mounting and the turret ring in all the right places and distances from each other. This was tough but ultimately better done with a single piece of rod bent in the PE folder: To add to the fun even further, those two sections had to be soldered to each other in four separate places! In doing so, you start to appreciate the art of the original engineering designs in having built something that light and strong that can move and swivel in so many directions simultaneously. Just when you though the job couldn't get more funner - that all then has to be fitted inside the turret ring. Now, you remember that last turret ring I knocked up to let Giorgio see how it was cut? Well, I soldered that piece above to it and then thought it looked decidely rum. Measuring the diamter of the ring I found I'd cut it from 15mm tube the second time, after having lost the 12mm original (that matched the opneing in the fuselage and the Aeroclub vacform). This is where it gets really weird - in unsoldering the mounting from the ring, I managed to knock the ring off the bench onto the carpet, whereupon bending down to look for it I chanced on it straight away - only it wasn't! Instead it was the earlier ring I'd made (to the correct diamter) and not the newer wrong one (which is gawd-knows-where now)! Clearly the Gods of Modelling had smiled. With renewed purpose, ring and mounting were soon joined in metal matrimony: Some jiggling required to get everything aligned, but eventually there was an outbreak of symmetry: Side: to side: Does it err..? Yes!! A saddle-seat to add to the bottom bar of course, and here will be fun/puckering cutting out the vertical opening for the gun and getting the decidedly Edwardian framing of the AW turret represented onto that Aeroclub vacformery. For tonight though, I'm just happy to have brought that job to a reasonable conclusion: We may have to celebrate with a second spoonful of honey in the bedtime hot milk after that. Why not? Let's go raving' mad! Tony14 points
-
Hi folks, just put these puppies to bed after a long long build. Started in Aug 18. Kit had issues, needed the markings customized, lost interest, re picked up n finally done. Made two new freinds in the process both whom share the common love for the Piston Provost. Finished as Royal Malaysian Air Force birds circa mid to late sixties. Decals a mix bag. Spinning prop, finished in gunze lacque n gaiga paints. The build log is in the WIP section. Checkers airbrushed on. Modelled during the period my dad was a flying instructor at Alor Setar Malaysia. FM 1045 wore his name on the cockpit sill. The other two 1049 and 1035 were of his colleagues. The pilot name decals was a massive brain fart on my part. Got them too big. No way to redo n delay the build anymore. Pics Rgds brian13 points
-
Hello modellers, have recently completed this 1/72 Esci F-8E Crusader. I made the very same model more than 25 years ago for the first time and wanted to do better with this one. It depicts a Marines Crusader of VMF 235 "Death Angels" from Da Nang. Building the model in the take-off configuration made a lot of wing surgery necessary, but this wasn´t the main issue. Greatest challenge were the stars on the tail fins, as for some reason, Esci has provided only one single star for that area on their decal sheet. I had to scan the sheet and select the stars of the proper size and paint the areas between them matching to the color of the other decals. Shortly after finishing the model, I found a Microscale decal sheet with all the necessary markings... Another problem was the air to ground ordnance load. I used two MERs from the Hasegawa weapons sets, and high drag bombs from Esci´s A-7 kit. The Zuni launchers are completely scratchbuilt from wooden toothpics and Evergreen sheet. I also extended and modified the nose landing gear, made the intake deeper, modified the afterburner cooling scoops, shifted the wing pylons more outward, detailed the cockpit and made some changes on the canopy to be able to display it in opened and closed position. Had some doubts regarding the old decals, but they worked surprisingly well. Only the national insignias had to come from the spares box. Paints used was Mr.Color for the light gull grey and Revell Enamels. A preshading was applied with Tamiya acrylic black. Clearcoats used were from Gauzy and Tamiya, weathering with oils and pastels. Is not the Academy kit, but I´m quite happy with the result. For comparison I took one pic together with the old build. Cheers, Mario12 points
-
Hello everyone! Below is my latest diorama depicting Operation Frequent Wind, 30 April 1975, titled "Time To Go." A USMC CH-53D of HMH-463 prepares to evacuate Vietnamese civilians and US Embassy Staff from Saigon. I used a 1985, warped, Revell CH-53D, 1980s Microscale Decals for HMH-463, Airfix electric motor for the main rotor, Jin Long micro motor for the tail rotor, operating navigation lights, MP3 player with radio calls and rotor sound effects from a real CH-53, 1/48 crew members from Hasegawa, and 1/48 scale civilians from a Chinese company. I added an Armorcast .50 machine gun and Eduard photo-etch cockpit. I took Silver in the Aircraft Diorama category at last Saturday's IPMS Region 5 contest in Madison, Wisconsin. Hope you enjoy! First are videos of the diorama in action: Click on the link, one has radio calls, the other rotor sound effects https://photos.google.com/share/AF1QipMqAFuVN_SFURZaZkHq065fvwv19riEG6gGAu9eMU5Kwk6YblZgay0qAarL4qa_Qg/photo/AF1QipPnMrPUrQsoUxECKJcJq8B_mAMnqfO9-lev3IQ6?key=ZlpwRXdTeWRMcG9HUUVzcHBzeXFNZFZwajl4UW93 https://photos.google.com/share/AF1QipMqAFuVN_SFURZaZkHq065fvwv19riEG6gGAu9eMU5Kwk6YblZgay0qAarL4qa_Qg/photo/AF1QipO15GGWPKy9vK9krfgvi8dvansoUPTyGspfAXFK?key=ZlpwRXdTeWRMcG9HUUVzcHBzeXFNZFZwajl4UW93 How the project began...12 points
-
Hello all This is my representation of XM496 Regulus, which is on display down the road from me at Kemble. I used the Roden kit and decals from TwoSix. A nice kit, but it does need a bit of work to convert it into a RAF machine, the main thing being adding a Green Saturn Doppler radar fairing under the belly. I needed to add double skinning around the cargo and freight doors, and do a complete re scribe. The inner flaps are the wrong shape, so had to be altered, and I added a bit of plumbing to the u/c legs. Although shown in the instructions, the aileron hings fairings were missing, so these were added, as where the flap fairings on the upper wing and altered on the elevators. The engine nacelles were missing NACA inlets, and some inlets and outlets were in the wrong place or need reshaping, I also added the lights behind the nacelles that illuminated the wing leading ledge to inspect for ice. Various aerials and vents were added to the fusealage. I am greatly indebted to the people who keep this lady in fine shape. They were an immense help when I spent hours with a tape measure and going over their collection of technical books12 points
-
Finally calling this finished. Airfix's new Hunter, backdated to an early F6 without the wing dogtooth. XG292 'R' of 14 squadron, based at Ahlhorn, Germany, April 1958. Model is based on a lovely pic of 4 new F6s breaking to land in Lindsay & Kipp's RAF Hunters in Germany book. Extra detail added to the cockpit and the UC doors which are bizarrely blank, plus the ligh ton the back of the fin bullet has been added too, and the fuel jettison pipe at the lower rear. Other than that - this is a top notch kit that fits well and looks brilliant. Painted with Gunze & Tamiya acrylics in the the little known "bloody big fingerprint on the wing" scheme Final finish is Tamiya semi-gloss varnish to try and give a scale gloss sheen. The decals come mainly from the Freightdog F4 sheet - as this has the correct style squadron bars for the early style markings this F6 carried. Roundels and stencilling from the kit, serials from spares. I took the liberty of using the Freightdog german language ejection triangles and hood release too - these were used on F4s and I could see no reason why the F6 wouldn't have carried them too ( famous last words). All comments welcome as ever - and thanks for looking. Hope you like her. Jonners12 points
-
1:72 Hurricane new tool from Airfix. A fun little build this, one area that needs attention is the is where the upper and lower fuselage fit together on the leading edge if the wing, there seems to be quite a step there. Anyway, painted with Vallejo Air and weathered with oil and pastels, decals fixed with Gunze setter and softer and matt coat of Newton and Winsor.10 points
-
An enjoyable diversion from my usual scale, a 1/72 ausf h10 points
-
Hello, finished! https://www.britmodeller.com/forums/index.php?/topic/235051166-caudron-c712-148/10 points
-
Here is finally the completed model that I built for a friend and fellow enthusiast. The manufacturer states that this kit belongs to an earlier production batch, and now they have switched to a different resin. Some rascal of those who hang out around the hangars stole the caps for the filling of fuel and oil, so the plane can't be flown. Bummer. The rascals may return the caps when the replacement vinyl framing for the canopy arrives, to replace the one in this kit that may have been degraded or dried out. The pros and cons and the various issues with this kit can be seen here:10 points
-
Transall C-160 Heller 1:72 The model about where I would write one word - I would write - DISASTER. This model is a real OLD SCHOOL, difficult to fit with a horizontal stabilizer. With decals that break and you can not put them down well. In short, I'm glad that I have this model behind me.9 points
-
A recent completion here is this old tool Airfix kit. Needs some work as from what I remember the fuselage halves are not exactly equal length. i went for lining the engine housing up and adjusted the tail. A gappy fit needed some filler along the fuselage seam. The cockpit opening is actually too wide for the canopy to sit properly so i padded the sides of the hole out with sprue shavings so fit. Painted in Humbrol gloss enamel by brush as it was the only colour I had that came near, she was glossed with Johnson's, decals added then gloss and Newton and Winsor to mat down then weathered with enamels, pastels and one Vallejo colour. Using more guess work than research, mainly because I couldn't be bothered LOL, I took it upon myself to assume the wings were metal hence the weathering, if they were fabric then, oh well 😂😂. The decals came with the kit and went on lovey with solutions to aid setting The black strips either side of the cockpit were taken from some 1:48 scale invasion stripes from Academy.9 points
-
Built in the panzer gb, I tried my hand at 72nd scale, not my go to scale, but I enjoyed the change, definitely a scale to revisit, more photos in the panzer gb Cheers Glynn7 points
-
This was great fun. Quite a departure for me, and didn't end up the markings or concept it started out as - but I suppose that's fairly typical. It ended up being a vaguely made up early Vietnam Army ship, rather than the Marines one I had in mind. The kit is nice, lots of detail, nice fit, lots of photo etch for grilles and so on. It was painted with Tamiya rattle can olive green before I went to work with yellow, sap green, indian red (nice for dry brushing for that red dust of Vietnam), black, white, and ochre oils. It was great fun. That was all sealed with a brushed coat of Vallejo satin varnish. Thanks for looking! Bruce7 points
-
I've managed to accomplish a few items on the Sea Fury. First, the landing gear is on. Aki cast the main gear components in the same clear resin as the canopy and lights. I assume this is because the clear resin appears to be stronger, at least in some simple bending comparisons that I did. It was interesting adding the smaller linkages to the kit, as these seemed, well, invisible since they were clear. Good thing I had some magnifiers. The tail wheel is cast in the same yellow resin as the rest of the kit, and I mounted it with a bit of swivel. I think the set of the model looks good. Here is a shot with the rubber tyres temporarily in place (and without the inboard halves of the hubs). The main gear components were quite positive in their mounting (once I identified the holes and pegs in the clear plastic). There was very little wiggle room, but there was no adjustment necessary. Even the slight splay angle of the main gear (I remember reading 2 degrees somewhere) was reproduced without me knowing it. Did I ever say that this kit never ceases to amaze me? I received two containers of Oxford Blue, one from Hataka in Poland and one from Mr. Paint in Slovakia. I test sprayed them both and found little difference between the appearance of the colours. The Hataka version is perhaps a bit lighter and maybe a little more purple. But you really have to look to see it. I used Hataka's Orange Line lacquer, which although advertised as "optimised for airbrush" needed a bit more thinner to suit my taste. I thinned it with Mr. Color Leveling Thinner with no difficulties. Mr. Paint's bottle was from their lacquer line as well, and needed no thinner whatsoever. In fact, it was thinner than what I normally spray, but once I figured out the proper airbrush and compressor settings, was no problem. Really, both paints sprayed like a dream, but if I had to choose one whilst on a desert isle, I'd first ask where do I plug in the compressor? So painting this baby is in the near future. I've received good instructions from @NAVY870 but I forgot to ask him one question - did these display aircraft also have black walkways on each wing root? Oh, and the turtle deck behind the headrest, was this black or the fuselage colour? If black, how much of the area was painted, and what was the shape of this patch? I've seen some photos where it looked rectangular, and was visible outside the canopy when it was closed. Hmm, that's more than one question. Sorry! Cheers, Bill7 points
-
Thanks KM! There has finally been some progress here: Wht has happened then? Well, I plucked up some mojo to finish of the cockpit and forced it into place. Some force and swift sanding action was required but YOLO and all that and in the end it got in. When I started this model, this was my first proper resin cockpit and I won't redo it now, and my skills haven't improved to the point that the effort is worth it even... Let's hope that the back/neck armor and seat covers most of the ugly gaps rearward. The throttle handle had disappeared to the mists of time, but I made a new one from some evegreen plastic. The throttle should also have some extra levers and so on, but since nothing looked like the Aitfix 1/24 throttle I didn't bother in the end. No one will even see them... Leaving the cockpit for a while and focusing on the wings instead. Hasegawa would like you to mate the top wings to the bottom one and then fit the fuselage. I do not really agree with this! I started with the bottom wing instead, and pushed that in place. Some sanding between resin wheel bays and resin cockpit was required but in the end it got to the proper position, without and ugly gap or step to the rear fuselage. After that, I took the left top wing, and glued that to the fuselage Tadaaa! A gap gree joint! The price I have to pay for this is that the wing itself is quite misaligned, for instance the cannons are sanding filler monster waiting to strike. Fortunately, the turned Master brass barrels will sort that out. Looking at the right wing, there is a bit work to do. Gun bay has been fixed in place with a little help from at shim, but then I saw that the entry step is shown in closed position I decided that there was a bit more to do. Looking back at my 1/24 Tiffy (again) the step is opened, and so are two more hand helds on the fuselage: Time to throw caution to the wing and open open these as well. Something that probably was better to do before closing the fuselage...7 points
-
Thank's Robertone,I did have the pleasure of a Puma flight a few year's ago and that's as far as I'd go! Anyway just a look at her under gloss and decal's.7 points
-
Hello all. Thank you once again, kind Sir. Then I shall continue... After many, many hours of trying to figure out the various mounting points ( the brake pulley wheel attachment point causing the majority of the head-scratching), here is my interpretation of the front axle from the blueprints. That's all for now folks!! Next up... pulleys and axle attachment. Thanks for watching, guys! Cheers, H6 points
-
I made a start with assembling the cockpit. The throttle looks like it's too far forward but is cast into the fuselage frame. The control stick is too close to the seat, alas. I made the seat cushion from green stuff and harness from masking tape. I glued the cylinders on the motor. The registration for them is not great so the first time I glued it together I had eight cylinders evenly spaced. I almost left it but wouldn't have been able to sleep at night. I plucked them off, rebuilt it with all nine cylinders and added stretched sprue pushrods. That was not easy and I'll have to install it in an orientation to hide some blemishes. Except the two worst cylinders are opposite each other, so one of them will be exposed.6 points
-
Back in January I visited a model railway show in Maidenhead and picked up this kit at a bargain price It seemed interestingly different and since my model club IPMS Farnborough has a special comp in March for models that fall into the "miscellaneous" class, ie its not an aircraft, military or civilian vehicle, figure, ship, diorama or sci-fi so this fits right into that 'non'-category Its quite a small box (8" x 6") but contained a LOT of plastic and included STICKERS!!!! It was a relatively straightforward build, the only difficulty being the size and balance of the jib. The counterweights were only plastic so didn't do the job so I simply added a folded up piece of lead foil to actually do the job. There are metal weights in the concrete ballast blocks at the base to keep it stable. It was a difficult thing to photograph. In the end the model is 20" (50cm) tall and 18" (45cm) wide, although most of that area is empty space It should be noted that the load being carried by the crane in the following pictures is another section for the jib, so it COULD have been even wider! Here are the photos I was very pleased with the weathering effects on the concrete ballast. The sign at the best is the location of one of the 4 stickers I ended up using from the sheet of stickers. Most of them appeared to be branding for the construction companies and were all in German so I didn't bother with them. You can see one of the other stickers here The cab doesn't have any internal detail and since this isn't my normal scale I didn't have anything useful in the spares box, so I left it as is. Here is another of the stickers The final sticker isn't visible but is a 'Liebherr' branding strip on the front of the cab. Here is the load I mentioned So there it is - the problem I face now is that I have NO idea how I am going to transport this to the club or to shows! I think I'm going to have to build a transport box around it6 points
-
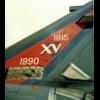
I did write a letter to Ian Huntley of Scale Aircraft Modelling after the Gulf War details of which were used in his monthly column in Volume 14 Issue 4. For those that are interested this the content of the letter sent to Ian in 1992: Dear Mr Huntley, Firstly let me introduce myself, my name is John Cotterill and I am a SNCO aircraft electrician currently serving on, the soon to he disbanded, XV Squadron Tornado's here at RAF Laarbruch. I read, with great interest your article on Middle East colours in the June edition of SAM and, after being based at Muharraq for four months, including the full period of the conflict I would like to try and throw some light on the various schemes used on aircraft based at Muharraq. As you rightly say the initial scheme on the Tornado GR.1's was, and basically still is, an alkaline based paint closely resembling FS30279. Needless to say, in the run up to the conflict the finish tended to become very weathered and also had a tendency to flake off, especially around the base of the fin area. The weathering caused the paint to appear darker in hue. Accordingly, the overall desert finish had to be maintained and we subsequently applied "Leyland" eggshell emulsion (colour Blush) to the offending areas, which gave the appearance of a lighter shade of sand thus giving a false impression of a two tone camouflage scheme, in addition the original squadron tail codes were partially painted out to introduce an alphabetical tail code sequence for ease of identification for the groundcrew and especially the aircrew. As the war progressed wear and tear on the aircraft again became a problem, by which time supplies of FS30279 were readily available and after touching up, some aircraft appeared to have adopted a three tone scheme The introduction of 2250 litre "Hindenburg" underwing fuel tanks caused further problems as they were issued to us in their original air defence grey finish. All the tanks were subsequently hand painted in the Leyland Blush emulsion before being fitted to the aircraft. I have enclosed a sample of the emulsion that was used on a wide range of items of equipment including aircraft, vehicles and ground equipment, in addition I have also enclosed a sample of the original alkaline paint used during the initial preparation of the Tornado's for deployment to the Gulf. In your article you mentioned that the Victor K.2's of 55 squadron were also- finished in the desert scheme, in actual fact they retained their Hemp and light aircraft grey finish, which stood up exceptionally well to the harsh weather conditions experienced. I hope that some of this information will help you in some way to making a thorough listing of the various schemes used during Operation Granby. Further to the above I later identified the Leyland 'Blush' emulsion being a match to BS381C-369 'Biscuit' which in turn is a very close match to FS33711. Here's a picture of a battle weary ZD790 'Debbie' taken just after the cease fire had been announced, showing the various colour variations XVTonker6 points
-
OOB, except for the clear dome on the spine, which was scratchbuilt. Xtradecals.5 points
-
These men knew moments you have never known, Nor ever will; we knew those moments too, And talked of them in whispers late at night; Such confidence was born of danger shared. We shared their targets, too; but we came back. From 'Let It Be Hushed' by David Raikes On the evening of 21st April 1945 RAF 18 Squadron based at Forli, in northern Italy, was tasked with attacking crossings on the river Po. Douglas Boston Mk V 'B' serial no. BZ590 with a crew of 4 didn't return. In the words of the RAF: "The aircraft took off from Forli aerodrome at 20:54 hours on 21.4.45. to attack the river crossing at Taglio Di Po, and then carry out an armed reconnaissance of the Po Valley. Since that time, nothing is known." It was assumed that BZ590 had been brought down by German anti-aircraft fire. Three of the crew were only 20 years old when they died - the pilot, Sergeant David Raikes, the navigator, Flight Sergeant David Perkins, and the wireless operator / gunner, Flight Sergeant Alexander Bostock. The crew's other gunner was 21 - Warrant Officer John Hunt, of the Royal Australian Air Force. The crew of BZ590 - from left: Sergeant David Raikes, Flight Sergeant David Perkins, Flight Sergeant Alexander Bostock and Warrant Officer John Hunt Looking at this picture it is hard to believe that the eldest is only 21. Then, sixty-six years later, the wreck of the plane was located by Italian archaeologists (Archeologi dell'Aria) following up on the recollections of someone about a crash on farmland. Following painstaking work by the archaeologists, the plane and her crew were formally identified. As a result, on 18th July 2013, a military ceremony was held at Padua War Cemetery. Organised by the Royal Air Force and the Royal Australian Air Force with the help of the British Embassy in Rome. Participating in the ceremony were serving representatives of both Air Forces, including members of the Queen’s Colour Squadron and of 18 Squadron, as well as Italian military and civilian representatives and, of course, relatives of the crew. At the graveside, David Raikes, nephew of Sergeant David Raikes, read his uncle's poem 'Let it be Hushed' and Ray Madge, the half-nephew of Warrant Officer John Hunt, played the last post. A lone piper played a lament at the crash site. The remains of the crew were laid to rest in a single coffin. The 'Po River Museum of the Second World War', in the small town of Felonica, has a room dedicated to BZ590 and her crew. There are belt buckles, badges and parts of the aircraft, including the front-landing gear. The link below to the museum has photos of the display and of the ceremony. Scroll down to the 7th set of images. The reference to Flying Officer Peter Long seems to be because he piloted BZ590 on 4th March '45 as shown by the page from his logbook. I assume he is the white haired gentleman in some of those pictures. Lots of great images further down the page too. . http://www.museofelonica.it/?page_id=77 David Raikes' poetry was published after the war by his family. His poem 'Let It Be Hushed', written shortly before his own death, deals with the loss of another crew (I assume also 18 squadron) who crashed into the sea. It starts: Let it be hushed, let the deep ocean close Upon these dead... and then: ... At first just overdue, Till minutes changed to hours, and still no news. One went to bed; but roused by later crews, Asked 'were they back yet?' And being answered 'No', Went back to sleep One's waking eyes sought out the empty beds, And 'Damn', you said, 'another kit to pack.' I never liked that part. You never knew What privacies your sorting might lay bare. I always tried to leave my kit arranged In decent tidiness. You never knew. I can't help wondering if he did tidy his kit before that last flight. On to the model which is the MPM 1:72 Douglas Boston Mk IV / V. When I started the build I knew nothing about David Raikes and my intention was to do an out of the box build. An 18 squadron Boston. A conversation with my wife's stepfather changed all that. He asked me if I had come across any of the WW2 poets he had on a list. One of the names he mentioned was David Raikes. Some research revealed he was an 18 squadron pilot. One of life's little coincidences. Having already decided on an 18 squadron scheme it seemed important that I do BZ590. This was a challenging build with plenty of fit problems, which others have mentioned, but I'm fairly happy with the end result and enjoyed almost all of it. Extras were Eduard p.e. and masks – both for the A20-G. I couldn't find them for the Boston IV / V so I was creative with the transparent nose area. For the first time, for weight, I used Liquid Gravity poured under the cockpit floor with some white glue mixed in water. That seemed easy and she was happily nose down. Result. Then at some point late in the build I put her down on her legs again and she was a tail sitter. Oh bother. You can just see the clear sprue support in some of the pics. However, the most frustrating part of the build was attaching the nose. MPM has this as three transparencies and the fit to the fuselage then had a noticeable step – at least the way I did it. I put a lot of work into dealing with that and had it to the point where the fit looked ok to the naked eye. And then the nose fell off. When I eventually returned to the desk some time later I simply reattached the nose as best I could. I couldn't face any more sanding, polishing . . . . so that's the one area I'm not happy with. From a distance on the shelf it'll look ok – at least if I'm not wearing my glasses. I need to rethink how I blend poorly fitting transparencies to the fuselage. Paints were Ultimate acrylic primer and Xtracrylics; Winsor and Newton oils and pastels for weathering. Decals partly from the kit and the spares box. I had lots of fun chasing those tiny serial numbers around before getting them (nearly) in position. Finding the story of this crew was a real bonus for me. So a thank-you to my wife's step-father. Anyway, here's some pics. All the best Mark5 points
-
Hi everyone I'd like to show you my 1/48 Airfix Hawker Hurricane Mk1. Pinterest.com The model still needs some shoulder harnesses plus it needs a rear view mirror, these will be added in due course. The Airfix kit builds up into a pleasing representation of the classic RAF fighter and it will look good in my cabinet. Any comments are always welcome. Cheers Iain5 points
-
Hi guys; This is my 4° model finished this year. This model is really good. Fine lines and very correct. About RLM's, I used a mix of Tamiya paints. I riveted all model with a Dousek Riveter and I used OWL FUG 220 lichtenstein set. Thank you for your attention!! Cheers.5 points
-
Well folks, I finally finished a kit, since moving to our new flat that is. Anyhow, here she is, Airfix`s Grumman Martlet MK 4 1/72 scale. Finished in the markings of Lieutenant Denis Mayvore Jeram, No, 888 Naval Air Squadron Feet Air Arm HMS Formidable 1942. This plane was used in "Operation Torch" in North Africa, hence the American markings, their gunners were a bit trigger happy. The kit itself is a new tooling and went together well, the U/C was complex, but time taken to clean up and make sure it fitted together was worth it. One slight mess up by me was the windscreen which somehow got varnish on the insides, oh well. Paints used were Tamiya and MR Hobby acrylics. I would like to thank those who followed this little jaunt, it was great to have the company. Now to find the bleeding Jug again. Simon.5 points
-
Hi guys, haven't been finishing much recently! Finished photos of my TAMIYA,Inc. 1/32 F-16CJ. Built with AMS Resin ECM pod and L/h HARM pod, Eduard Model AccessoriesSNIPER pod, MASTER Static Dischargers, AIRES HOBBY MODELS wheels, GT Resin R/h targeting pod pylon and Videoaviation GBU-38s. Decals were a mixture of kit and Astra Decals. Painted with MRP & Mr Hobby. Seat belts are scratch built, Bomb rack is robbed from the Academy Hornet. I was planning on using the Quickboost seat and Aires wheel wells but they both were far too small. Massive thank you for Joe at Yellow Cake Models for sending my a new lower fuselage after I butchered mine and Fanch at Fancherello models & photos for cutting me the stencils for the tail.5 points
-
As i like the semovente 90/53 s p gun and cant buy one in 1 72 scale I converted two semovente15/18 s p gun kits also a tamia italian 90/53 gun kit to build it by lengthening chassis and scratch built the gun housing and driving compartment (rivets are decals) and other parts. figures are milcast the columns and stones are made from wall plaster.5 points
-
I built his kit without any corrections, used only additional to the kit parts, PE elements from YAHU for instrument panels and some instructions. I corrected the markings according to photos I get.5 points
-
I built this as a Christmas present for a 7-year-old boy. He is a very cool kid who wants to be a scientist.5 points
-
Hi Folks The Airfix Meteor finished as a 74 Squadron aircraft. Decals by Marmaduke and painted with Xtracolor and Compucolour paints, finished off with a mix of Rowney varnishes. Cheers Ian5 points
-
Hi all, and thanks for the clarification about the outside thermometer/temp gauge! More long delays - PhD corrections (approved on Monday, yay! ), comments on a scientific paper (accepted, yay!) and starting a new job (still doing induction and admin, and getting used to a monumental project management system 😞) have sapped my time and energy this time. However - it's time for the big reveal! That's right, one Stranraer of 228 Squadron RAF, based at Pembroke Dock in winter 1938-39. Ages ago, I managed to snaffle a complete decal sheet from the Revell re-release of this kit (mine's a bright-green and turd-brown Matchbox issue, if you remember), off a well-known internet emporium. The original kit sheet I had was yellowed and disintegrating, and a new-old-stock replacement I found in a decal odds-n'-ends bin at Telford was also not great. So far, so happy, as you can see, lovely bright colours. However, I've had a helluva fight to get them stuck down as well as this. I normally make sure I've got a nice gloss surface, apply the decal, and use Micro Set and Micro Sol as per the instructions, and Robert's your father's sibling. However after about three applications of Sol, these Revell decals just refused to sit down at all - they went all soft and wibbly OK, but once the stuff had evaporated they tightened right back up and refused to sink into panel lines, or even the undulating fabric detail on the wings. Bubbles that weren't there before suddenly appeared I dug out spare unopened bottles of the solvents but this made no difference - I think the decals themselves must just be much too thick. Anyway, faced with a major disaster I did what British people have done for centuries - I bodged a new technique on the spot and crossed my fingers. Turns out, if you wait until the MicroSol is about 3/4 dry (the wibbly bits are just starting to disappear), then GENTLY brush over the decal with a clean, soft but firm paintbrush,applying a fair amount of pressure over the recessed detail and forcing any bubbles out to the side, the recalictrant decal dries and settles as you wanted, and stays there. I've called this Phil's Patent Paintbrush Persuasian Protocol (PPPPP) and you're welcome to it! Then, more stress as (with a great deal of trepidation) I applied a rattlecan satin varnish coat, and proceeded to remove all the masking which had been on for weeks. I've hammed up rattlecan varnish so many times my heart was in my mouth for this one! I've taken to doing less rather than more from the can, and finishing off with Revell aqua varnishes with a hairy stick, as the risk of getting horrible white speckling over roundels and other dark areas is much reduced. Even so, STRESS... Phew! You can see in this view that I've put an initial coat of grey paint on the metal-skinned areas of the lower centre wings. These were definitely covered with some kind of non-slip coating (or possibly anodised), but it's definitely not black (as Revell depicted with decals) or the enigmatic "Black Green" as Matchbox suggest that you paint these areas. There are very few shots of service Stranraers that show this area, and they're all of poor quality. However they all show a pretty minimal contrast between the silver of the fabric areas and the non-slip sections. I went for Medium Sea Grey as an approximate tonal match (I realise it needs another coat!). I've also more or less finished the Stranraer's engine nacelles, having drybrushed my modified resin engines, then had a minor nightmare trying fix them into my modified cowlings and get them to sit straight. The perils of super-detailing and kit modifications! Now, from silver, to...NIVO! I'm not a fan at all of enamel paint (too much teenage lung damage put me off), and the Xtracolour NIVO is not available as an Xtracrylix. So I had to mix my own - I used five parts Humbrol 91 to four parts Humbrol 88, measured exactly with a syringe. I'm pretty chuffed with the result considering it's mixed by eye - it's close enough to me considering there are very few preserved aircraft in this colour and no (?) period colour photos, and so any glaring difference isn't going to constantly annoy me. I modified the panel where the elevator actuator disappears into the wing to show the pulley - unfortunately this area has a few imperfections which were too difficult to remove with the struts and rigging points all added - but it's all going to be in deep shadow so I'm not sure it'll notice. You all have to act nicely and not point them out in the RFI (due in about October 2022 at current rates) With the NIVO done, it was time for decals... and a trial fit to produce a more or less complete aeroplane! More Revell decals, and even worse adhesion. Even the PPPPP failed me for the spats, and I had to resort to cutting the wrinkles with a fresh scalpel blade. Those of you who know your Heyford variants will know that this is the Heyford II option (nose windows, early style radiator intakes) - I've built K4877 of 7 Squadron based at Worthy Down (I think?) in 1936. This is far as I've got with the finishing of the main sub-assemblies, but hopefully I can get the Heyford's matt coat on this week (cue more existential terror with a spray can) and then do some nice relaxing weathering. Before I go, one more shot. While I bought a full complement of MiniArt machine guns, I was too stingy to spend £25 on two brass Scarff ring mountings for the Stranarer. (The Heyford uses a different kind of mounting which I think is a Hawker mounting similar to that on the Hart series). Instead, aided by some excellent photos from the RCAF archives, I made a start on scratchbuilding the Scarff rings. I only used the kit ring (thinned down, all the white areas are plasticard stock). Only four more mountings to do!5 points
-
Hi y'all! A while back, I came across LIFE photo archives and found a series of shots of the war correspondents in Tunisia in 1943. I really liked the sand scheme of the early Jeep with the arabic serials. The French miniature company Reedoak released a few months later a war correspondent, who really looked like the one standing in the first photo. Moreover, I also found a small decal sheet from Echelon depicting that very Jeep. A resin roman column and the project started...and stopped for a few days...weeks...months, until 2019 New Years resolutions. I MUST finish some of my begun projects. I've used Italeri's kit with a photoetched set and some scratch as you can see: And here is the final product! Pretty happy how it ended up. Hope you like it too! Ciao IWik5 points
-
I reckon it's about as finished as it's going to be, the water was an outright disaster, I rescued it as much as possible, I did consider binning it, you had to heat up little pellets to melting point then pour it in, I made some sides for it so I could pour it in to a certain level, easy eh, nooo, the Styrofoam I built the whole diorama from including the little rocks began to melt before my eyes, also it burst its banks and dripped between my fingers, melting me too, still, this is mk2 Big thanks to @PlaStix for running the show, great gb, and the encouragement for this 72nd scale adventure from @Churchill, @BIG X, @badger, to name but a few, my hat is tipped, thanks fellas, I thoroughly enjoyed it Glynn5 points
-
Hello again! A small update. Torpedo roll-off rack cables have been added using silver/grey thread. The deck is pretty well complete with the exception of the superstructures & weapons. The boat should be complete by my next update. After that, the focus will change towards the crew. Also, I've ordered a little something to add more realism to the model. It's new for me, so i hope it works out. Stay tuned! Thanks for looking. John5 points
-
One of the candidates I am studying for the decoration is I-LARE, which participated in the Giro Aereo D'Italia of 1931, finishing first. I-LARE had a light under the fuselage, so I proceeded to scratch one. A sprue rod tip is shaped like a cone: The tip cut-off and reamed with a drill bit: A location hole is drilled and a wire stem inserted in the case. An MV lens will make for a good light once the case is painted Oh, the joys of poorly-produced resin kits. Somehow I missed a myriad of pinholes under one of the wings: Treated and repainted> Patterns are drawn and cut to make the masks for the application of the red color: A set of masks for the wings and stabs (up and down) and for the wheels pants and fin -plus half of the fuselage design- is cut from Tamiya masking sheets. The prop is given two tiny manufacturer decals as per photos: The Artic Decals special order set arrived from Mika Jernfors Most decals will need to be applied before the landing gear and the rigging is in place: Once all decals are applied, the wing struts are glued in place. Painting of the landing light and wheel pantaloons supports (two per leg going backwards) is done: The landing light is completed and added to the model under the fuselage as per photos:5 points
-
Hi All After several tries the sidewalls were secured They look a bit agricultural out in the open, but are ok when enclosed The gaps along the upper edges where they meet the fuselage will squeeze flush with a drop of CA. I dot the instrument clusters on, and hey-presto a cockpit! It's had a thin wash of Tamiya Panel Accent Colour Brown to tie it all together And should be acceptable once the canopy and centre section covers go on Back to the rear soon. Comments and suggestions welcome Cheers Steve5 points
-
Hello, it's not a mistake, Voodoo is a P-51D! I want to do that: So, I start with a 1/48 Tamiya Mustang, cut and rebuild. ...4 points
-
Finally the model is completed. For the step-by-step building process please go here: As said before this kit is an effort of a group of friends to continue to make Dujin kits available to the modelers. It includes a very good set of photoetched parts and a nice decal sheet, all that highly commendable especially because Monsieur Dujin offered a vast line of very interesting types not found anywhere else, at a fair price. That been said, the resin parts leave much to be desired and are plagued with pinholes and blemishes, and sometimes are slightly deformed (easily corrected carefully and gradually under hot water) that make for a not at all easy build. Some kits are better than others in that regard, since this is a cottage product, and occasionally you will get a nice one, or a dog, as I got here. As said, photoetched parts and decals were splendid, but transparencies (you get a spare) were deficient and neither of my two samples matched well the fuselage contour (the canopy slid forward as one piece to allow access). This is definitely for the modeler that is after a certain type (and the line has plenty of beauties) and does not mind to work quite extensively and lengthily to obtain a good replica from those resin parts.4 points
-
Well she's finally finished, now I can get on with some of my other stalled builds.4 points
-
I've seen criticism of the Airfix frames on the HC2 but they look far more realistic to me than the etch ones I have seen, just need a little chamfering to make them look 'cast metal' Yours have the same look, very good and realistic I have been working to get the sculpted look for the end panels by filing grooves into the plastic card The verticals on there will be added laters First attempt at lowsizing Does not work, the side walls are still too tall, however... Work to do4 points
-
Hi, everybody! Thi is my next model.4 points
-
Hi All Well, I don't know if I'll need it until I need it... It was about £20 years ago, and as I was getting a set of £7 Micro Saw Blades and the postage was about £10, it seemed like a good idea at the time. Anyhoo, Adventures In Fitting PE Part 1 I got the pedals in (without the aid of The Tool) and gave it a wash with Tamiya Panel Line Accent Colour Brown The rest was dry fitted to check the fit As you can see, the edge of the PE stands proud of the cockpit tub, so it's off with it and thin down the walls a touch more Good job it's Self Adhesive and the glue's a bit claggy Very careful not to wreck the forward section as it fits ok I've touched up the scratches and whatnot, and as they're drying I fitted the forward rear bulkhead as a datum I'll leave that to set too, and go and do something else. Comments and suggestions welcome Cheers Steve4 points


.thumb.jpg.eca0c14e328767d0864cd6db01ca9ccf.jpg)


This leaderboard is set to London/GMT+01:00