Leaderboard
Popular Content
Showing content with the highest reputation on 16/01/19 in all areas
-
Good day, ladies and gentlemen. Let me present to you my first model in this year.38 points
-
Hello, Here is my last model, an Imperial Iranian Air Force P-47D from Tamiya at 1/48 scale. I used Vallejo Metal Color for the aluminium finish. For the roundels, I used Montex masks and Persan numbers are home made masks. Weathering is done with oil paints and powders for the wings. It was interesting to build such an exotic livery. I hope you like my Thunderbolt and thank you to Reini78 who built the same, two years ago. Lolo29 points
-
Hello again, Here's one I finished last year, Monograms 1/48 P-38 Lightning from the 1960's - updated and marked in my favourite scheme for the type, the flying Dragon! The kit was rescribed, worn area of wing riveted, all flight controls and flaps had to be defined/rescribed in order to stand out, all engine scoops on the engine nacelles and the supercharger were opened up, and a scratch built gunsight, instrument panel, engine controls and wiring were added to the cockpit. A modified Ultracast seat was used. - Bazooka's and wheels are spare from and Academy kit - Landing gear detailed, oil coolers in nacelle, and radiators /interior structure added to radiators on tailbooms, brass tubing for guns. - Dragon faces and mouths were masked and painted, green color custom mixed to match decals, Aeromaster decals for the rest of markings, - Painted with Tamiya acrylics using "hairspray" technique for worn/chipped paint area's, weathered with oils and acrylics. Lots of work, but I enjoyed it and the model won Gold at our local Winnipeg IPMS contest, and "Model of the Year". I'm quite proud of it, hope you like. Again, hope you like Colin27 points
-
18 points
-
Dear Friends Christmas was good for progressing my Focke Wulf projects. This is the Tamiya 1/72 kit with Resi-cast PE And Brassin wheels Oh and brass MGs and cannon from Master I think? Markings are for JG6 who I think were ex-bomber pilots hastily converted to fighters Hope you like it? Andrew18 points
-
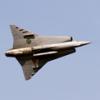
Just a quick relaxing build of this... well, let's say "very odd-looking", aircraft. I am aware about all the shortcomings of this kit, but decided to build it anyway. So instead of fixing all small errors, I built it OOB. The only change was replacing of Trumpeter's black-blue roundels. (I used Airfix roundels.) ' Some people may say that it is ugly. I would say that it is almost a little cute. It looks a little like a happy penguin gliding on its belly with its wings spread. Painted with Gunze acrylics. Having started the year with two British jets, I will continue my all-British January with another great jet. I'll be back!16 points
-
Greetings If this is a duplicate post I apologize. William Thaw is a fellow Pittsburgh native and a founding member of the Lafayette Escadrille. Thaws Markings were provided by a local William Thaw expert in Pittsburgh Mr Tim Swisher. Uschi Line, Bob's Buckles, Albion alloy Turnbuckles were used for the Rigging William Thaws had two guns on his aircraft.Here is a photo of the upper "Lewis system". Alclad High Speed Silver used for doped sections and Alclad Aluminum for the Metal sections. Thanks for Looking Comments Welcome Regards Bill14 points
-
On January 25, 1985, VMA-331 became the first fully operational AV-8B Harrier II squadron in Marine Corps service. The squadron deployed on the USS Nassau (LHA-4) to the Persian Gulf and eventually flew 243 sorties, dropping 256 tons of ordnance, and became the first Marine Attack Squadron to conduct combat operations from a Landing Helicopter Assault ship. While supporting Operation Desert Storm, an AV-8B Harrier II from the squadron was shot down by an SA-7 over Safwan, Iraq. This build was a passion for the aircraft a turning point in aviation technology as the AV-8B second generation refined the V/STOL ability paving the way for the F-35B. The low visibility paint sheme I first noticed in that great cameo in "True lies" Click on photos to enlarge l14 points
-
Here is my build of AZ Model's Spitfire Mk.22 in the livery of the Royal Egyptian Air Force during the Suez Crisis. It was a good build and represents one of AZ Model's earlier moulds. They have better detail now. There was some thin flash around most of the parts but it was easily removed. The decals are nice and thin and although I was a little put off by the size of the wing roundels, further research proved they really were that small. There was no guide or instruction to use the stencils, so I left them off. This is also my interpretation of High Speed Silver, well-used and heavily flown. Apparently the Egyptians had this plane since 1950. The weathering is all oil pin wash and I think it really helped a lot. All the paints are Vallejo Air. A neat kit that builds nicely and a good addition to my ever-growing Spitfire A-Go-Go lineup. And here it is next to another AZ kit Egyptian Mk.IX from 1948... I have three days before the NATO/WarPac GB begins so cleaned off the bench. I think I have time for a Gustav before jumping into the Cold War fray! --John13 points
-
KIT: Eduard ‘weekend’ Spitfire Mk.IXe PILOT: JP productions RAF pilot MARKINGS: Montex PAINTS: Alkan, Mr Color, Tamiya, UMP/Stynylrez primer, vallejo This is my version of Wing Commander Rolf Arne Berg’s Mk.IX Spitfire that he had painted with the Norwegian stripes replacing the RAF wing roundels The build log can be found here… https://www.britmodeller.com/forums/index.php?/topic/235047405-148-spitfire-mkix-rolf-arne-berg/ until next time as always, any suggestions, recommendations or comments will be gratefully received. rgds John(shortCummins)13 points
-
A build from 5 years ago with the original text, as usual: Ah, the irresistible attraction of an out-of-the-beaten-path subject, obscure, arcane, esoteric...and why not irrevocably weird. Your odd model though will most likely not be destined to resemble the ones already populating the shelves and modeling contest tables, and, best of all, will bring to 3D life a subject that until then was never appreciated. That's a good feeling, isn't it? to bring to life a piece of aviation history that wasn't there before, the designs and hopes of sometimes ignored individuals, the shapes and configurations created by daring minds. Of course, you may get the occasional blank stare. That is perhaps unavoidable, and can actually be construed as a compliment: "Whozzat?" translated into proper language means "I see something new". But, who am i to judge, I have sinned in my youth too. There is a more difficult side in dealing with odd balls, though: you are almost surely bound not to find a kit to adapt or convert, or even a plan, or abundant photographic references. Research will take a little time, but man, will it be rewarding. So your little creation will grow from almost nothing to something, in your caring hands and brain. I must say, though, that in this particular case, I did find a 3view, although in some obscure crag in the Net, containing the pertinent issue of the French journal "Les Ailes", together with all the additional stats needed. The plan had to be corrected and refined, but it was a very good starting point. Considering the year when this creature was born, 1922, one can immediately see its pioneering solutions: cantilever low wing, sport -private- market orientation, a canopy to insulate the crew from the inclement elements, simplicity of design and -for the time- dashing appearance. A precursor no doubt of many other Farman future endeavors. Of the very few images I managed to find, a couple show the plane without the canopy, in a configuration that may suggest one occupant instead of the standard canopied two. This type should not be confused with a later model that also got the "F.200" denomination, a few years after. Contrary to the blurbs that are found on the Net regarding its performance (given as pour) at least one contemporary article speaks about many successful flights and good maneuverability. The deceivingly common appearance of this cantilevered low-wing beauty should not make you oblivious to the fact that it was built in 1922!, way before this configuration was widely spread and accepted. I'd like to thank some friends for their input: the Canadian Twins Malain & Alain, Mr. Xtmoxchs P. of Florida, Mr. Jaime Irregularis of Pugetland, Lars Abominable Snowman of Alaska and finally Helga, who stole valuable information from the vaults at the Volkano lair of the Zoenke Evil Empire Aktiengesellschaft. Accessories are from Aeroclub's stock. A flight magazine photo of it (lower half page): https://www.flightglobal.com/pdfarchive/view/1923/1923 - 0007.html?search=farman tourisme An Aerophile photo of it (upper half page: https://gallica.bnf.fr/ark:/12148/bpt6k6555017m/f19.item12 points
-
Here's my 956 build with shunko decals and scale Motorsport detail up set. My first attempt at super detailing the engine. The kit was the original 956 from 198511 points
-
Refueling F-16XL #2, 75-0747, assigned to the F-16XL Combined Test Force (CTF), 6510th Test Wing, Air Force Flight Test Center, Edwards AFB. The KC-10A was out of March AFB. This event taking place at dusk over the Sierra Nevada foothills, March 1983. XL-2 in pre-contact position, waiting for clearance from the "boomer". I can still hear the boomer softly singing "Boom Operator" to the tune of "Smooth Operator" during this event. Taking fuel, couldn't see the boom from my position in the boom operator's station. This image was used in the CTF to emphasize the "C" stood for "Combined". The pilots wear the patches of AF Systems Command and Tactical Air Command. Other players in the CTF were AF Operational Test Center, General Dynamics, Pratt & Whitney, and General Electric. Disconnect from the boom as the sun gets lower. Thanks for looking, Sven11 points
-
I had fun with this. I made a few scratch adjustments, but not much. Those I documented. The paints are all Vallejo Air and the rigging is monofilament. The kit decals went on alright, thankfully no cracking, but they aren't the greatest and I suggest anyone wanting to build this find some better quality transfers. They are a bit thin. I gave it a bit of black/brown oil wash for weathering. Happy modelling! John11 points
-
As promised, here is the update as to where I have got with the build over the past 24 hours. I finally managed to finish off the structure that sits on top of the main fuselage frame at the rear half of the fuselage. This was very frustrating as I kept having to wait for things to set before I could proceed further. However, the sub-structure is now in place and a start has been made on what should be the start of the stringers. Once these are finished I think I will finish off the framework for the bomb bay and take a look at what needs to be done to the ventral gondola. Any work in this area will be vey apparent through the open access door. I have tried to get a shot of the view through the door but the picture I have posted is about as good as my camera can do. The amount of detail isI far more apparent to the naked eye. Thanks for looking. Martian 👽11 points
-
Hello Dears, In 2017, I started a Airfix Seafire 17, I've got a freightdod model decal sheet with post war Griffon Spitfire and feel the urge to make one of these ladies !! Bugger !! The one I choosed is a Seafire FR 17 !! Then with the help of @Miggers (you're missed man !) I started to learn about Seafire wings Then came our Dear @Troy Smith with a full load of pertinent informations !! And it induce me in building not one but 2 Seafires 17 !! At first I wanted one with unfolded wings and the other with folded wings BUT !! My already distorted mind started another funny thing…. Why not building an OOB Seafire and modify the second one to REALLY conform the plans ?? So it's done now ! It is up to you to decide if the difference is Worth the difficulties…. Whatever I took a lot of pleasure, experienced some new swearing sometimes… But all in all, it's a good experience !! Note to the rivet counters !! There is 2 things that have been modified on both aircrafts 1st The propeler blades…. I cannot even think about letting the Airfix thingies !! 2nd The seats, I put my own resin seats on all the Seafire !! Do not take account of the modification to turn her into a FR17 ! That's another game and this is not the point here !! The question is which one of the 2 ladies is now conform to the plans and measurements ??? Okay, Wilco for everyone ?? Let me introduce you to the dames, here's the first one ! Seafire 17 from 800th Sqdn aboard HMS Triumph circa 1947 AND partially based at Hal Far, Malta I read somewhere that inert or exercise rockets have their heads painted in blue ! so !10 points
-
Right. I'm new here, hi. This is the first scale model I've done in what feels like forever - probably since 2011 or even longer? Who knows 🤷♂️ My significant other gave me this kit at Christmas... Which was a lovely surprise and being completely honest not without a little dread. She knew I used to do scale modelling long before we met, little did she know she catalysed my interest in modelling and reignited my dormant O̶b̶s̶e̶s̶s̶i̶o̶n̶ passion. So on boxing day I ordered the CMK and Quickboost interior, exterior, control surfaces and wheels... And paints... And a few tools 👀 Next step - reorganise all my kits, sundries and etc. into something resembling neat. This meant taking an entire room apart which was being used for laundry, sewing, art and keeping my two racing bikes safe and dry (Scott Plasma III and Ridley Noah SL both on Ultegra Di2 for those interested!) Finally organised (gutted) the room, kit still sat unstarted on the shelf which brings us to fig. 1 A tidy workspace. As you can see there's various art media for various projects. Most tools are in that ugly plastic set of 3x3 drawers which I'll eventually replace with a nice wooden machinist's chest. Now that's sorted (legit, two weeks later of clearing and tidying) I can make a start. Fig. 2 the box art Nice. Going with the Leeds gloss Black livery as I already have the paint and I think it looks cool. Where to begin but the cockpit. Fig. 3 a comparison between the OOB and the very finely detailed CMK interior set. Fig. 4 the whole set from CMK The instrument panels were fun to work on - the resin gets filed quite thin and the part feels very fragile. Good result though. Fig. 5 shows the first pitfall I've made so far in that I wish I'd mounted the nose cone onto the rest of the model before putting the props on or at least removed it from the part tree first! Anyway, cockpit assembled and painted as well as engine put together. Fig. 6 Beautiful, fine control surfaces. My only gripe is that I feel like the packing of these delicate parts could be improved to stop or reduce damage in transit as I have quite a few fine details knocked off parts. Fig. 7 Probably hard to see, but after sawing off the moulded on flaps, the edges must be skimmed down on the inside in order for a decent fit. The result is beautiful though and worth the effort. I took the edge down to around 0.15mm or so. Fig. 8 Fuselage together with a bit of thinning down the inside to fit the cockpit. Sadly, I think the extra bulk of the cockpit, the softness of the plastic and my not skimming the fuselage wall thickness down enough resulted in a slightly skewed glue up with the tail out of center ever so slightly. Lots of filing and sanding to get the shape nice but I'll have to rescribe quite a few lines. Also I mistakenly removed part of the fuselage. 10 points if you can see what I've done. I'll replace it with something scratch built. Fig. 9 Wings on, engine, exhausts, prop, cargo bay all on. The fit of the wings is quite poor so its on the filler list for later on. Coming together nicely but I need to get some filler soonish as I don't have much more to add to the fuselage before I need to fill, sand and prime. Thanks for looking! Jered10 points
-
Hello All I resume the hampdens build. Interior is nearby to be finished Still there is some work to do and now the pilot seat See you the next time9 points
-
Now, the second Lady ! I really loved that paint sceme !! I choosed to put the wing fuel tanks in sky to add at bit of colour ! This is a FR 17 from 728th FRU Sqdn at Hal Far, Malta… Did I have some fixation with Hal Far ??? This aircraft was flown until the '50s so they were a bit tired and stained but well maintained !! I seriously prefer my own resin seat, do you see what I mean ?? Note for my friend @The Spadgent these 2 have their doors open…9 points
-
Ok so second post from me in here Tamiya 1/48 Bf109 E4, and again not everyone will like my weathering but I do and that's the main thing Enjoy8 points
-
8 points
-
I spent a pleasant hour or so imbibbicating Woods's last night whilst contemplating Breaker... Anyway the rail, without those useful shots of the starboard fixing of it I spent a little time making it tuck round the back of the display console Now I know it isn't quite right but if I don't tell you... Looks OK from outside and ain't nobody going in to check so I call that done enough 0.025 white Evergreen rod, my last so must restock, with a length of Johnaero's thinnest tube cut into sections to make the bigger bits seen in the photos It will do, I think Now on the other side of the pond I had to get a grey close enough to the photos to spray on the CH-53 I mentioned I believe using Tamiya JA Grey after my experiences with that Xtrahorrid stuff and this was the base colour on the model after mixing it with approximately 20% Tamiya Flat White To my eye it compares well to the colour of the machine in the link Andy gave us a few pages back I took this shot with the camera on my tablet so its not great but is illustrative After letting it gas off I have begun trying my home made transfers Works for me, you?8 points
-
Hi everybody, getting there ... Last night I removed the windshield masking and put the seat in place: I've probably already said that, but that Alclad Aqua Gloss I used to dip the clear parts in really is some great stuff! And guess who talked me into that? @CedB of course, no wonder I also glued in the gear struts and wheels: This is probably the only real downside of this kit, since the front brackets of the main struts don't really fit into their slots, and I had to shave a bit on the side of the triangular sections to actually pose them in correctly. No big deal, though. Look, she's on her legs! I also painted the exhaust nozzle and turbine face (it's one piece, really): I airbrushed a base coat of Tamiya Flat Black, followed by Tamiya Gun Metal. Then a drybrush with Lifecolor Natural Metal and a black tempera wash Then I inserted it in place (snug fit, no need for glue), but as I wasn't happy with the contrast with the surrounding area, I dirtied it up using Italeri Flat Black applied with the sponge technique Not so visible, but that's the best I could do 🤷🏻♂️ That's it for the day, comments welcome Ciao8 points
-
I get a lot of enjoyment out of playing around with a 1/48 Monogram plane. Sure there's issues with their style of kit production that clash with modern methods, but the amount of style they cram into what is really quite a simple parts breakdown keeps me happy and building. Trouble with firing up your mojo....? Get one of these! Now, I've been bashing away for a few weeks already, and to be honest I wasn't planning on putting up a WIP--- but there's a couple of things have come about at the later stages that I'm..... Well, happy about! One of them is tackling drab military colours. And the other is kind of a fulfillment of a long held idea, or a little ambition. So, I'm definitely not starting at the start here--- and I haven't been taking pictures as I built. So, what's the point? Let me show you this... Can you see what it is yet...!? Well, I've liked this picture a lot, for years.... ....and the little monkey guy just finishes the scene for me. I know there's issues with the type of P40, markings and so on. Not even sure if I can do the little fella. But THAT'S what I'm trying to create here. Think of it as an impression of the scene. That's what I'm doing!7 points
-
Airfix as a Brand name in the UK is very powerful, and stuck in the minds of the general public, whom often refer to any kit as a Airfix kit, just has folks refer to vans as Transits, and Vacum cleaners as Hovers. I have been at Model shows and had Italeri Spitfire MK IX and Eduards, on my stall, only to have folks buy the older Airfix Mk IX during its last issue. As a importer and distributor of kits, this used to get you down a little, with the cry we only stock Airfix, but you just accept it, and try to target the specialist model shops and ignore the general toy and hobby stores. Airfix have generally in the past never really had a problem of selling kits under its brand name, no matter what the age of the product, it is often the parent company that is in trouble, or outside influences like the Heller problem last time it went bust. All Airfix is doing is using its vast tool bank, to feed products into an almost captured market, and make money from these tools (some not released in ages), but every pound helps in the bigger picture. We are proud to import our ranges and some are doing very well, but we still retail Airfix simply due to the fact it sells, come to think about it a Monkey could sell Airfix in the UK. Airfix is often the glue that binds together the hobby in the UK, and in a way helps the rest of us make a living. Often some one in the UK the first kit they buy is an Airfix kit as it is the one they or their family know, after that they may look at other brands, so Airfix is the open door to the hobby. It is kind of well known that Tiger Hobbies diecast import brand Hobby Master give the Corgi brand a good run for their money, but we have always had a soft spot for Airfix and will continue to sell their products and look forward to some of the old kits coming back.7 points
-
Hi eveyone So we're of again on another decade of Cold War modelling fun! My entry for this one will be the newish Airfix Gloster Meteor FR 9 in 1/48 scale built straight out of the box. I have to say the plastic lovely. And the box art is pretty good too IMHO. And in the markings of a machine from 2 squadron based at Gutersloh, West Germany in May of 1953. I thought these markings make an interesting change from the normal Meteor markings with the slate grey/medium sea grey uppers with the high demarcation line. The decals also look very nice. Think they're printed by Cartograph? Looking forward to making a start. James6 points
-
With the broadening of the criteria for eligible countries one of my favourites has now become possible to build and that is Yugoslavia. I have been interested in the Yugoslav Air Force for a while, not least because of it's very interesting mix of aircraft it has operated from a variety of different sources including Western countries such as the UK and USA and also the USSR, not to mention aircraft which were captured by partisans from the Germans and then used against them. Another source was aircraft given to them as a form of war reparations payment and the example I'm going to build falls into that category. The individual aircraft has had a very interesting life as werk number 610937 was originally built as a G-14 but was then re-built as a G-10 and was used by either the Luftwaffe or Hungarian Air Force from Austria at the end of the war where she was found abandoned at Zeltweg and was ferried to Bulgaria along with a lot of other 109's by Bulgarian Air Force pilots to be used by the Bulgarians to equip some of their squadrons. It did not remain in Bulgaria long as in 1947 she was sent to Yugoslavia along with quite a few others and became part of the Yugoslav Air Force where she was flown by either the 83rd or 172nd Fighter Wing based at Cerkje airfield and may well have taken part in defensive patrols during the dispute with Ital over Trieste. After 3 years service she was retired (with only 35 hours 15 mins on the clock) and sent to a technical school in Belgrade. She then went to Yugoslav Aviation Museum in 1978 but was then sold to Doug Arnold in the UK in 1984 and then sold again to Evergreen ventures in Florida where her old skin was removed and scrapped (!!!!!!) and re-skinned and re=painted as an aircraft flown by Eric Hartman and she is on display in the USA, whew, what a journey! I will be using Revell's old (but still good) 1/48 Bf-109 G-10 which has come in various boxes over the years including being boxed as a K-4 which is the boxing I will be using; I bought this kit second hand a few years ago and a lot of the parts are off the sprues and some painting has been done to the cockpit area but nothing has been glued together, yet! Here are a couple of pics of all the bits as they stand at the minute; And the all important decal sheet from Lift Here of Serbia; And the options that can be built from the sheet; If you couldn't tell, as all the other options on the sheet are not G-10's, I will be building the 3rd option down which happens to sport a very nice and unusual colour scheme which is correct as I have seen pictures of the aircraft before it was butchered in America. I'm really looking forward to this build and this GB . Thanks for looking in. Craig.6 points
-
My offering is a T-54 B in 1/35 its a miniart kit, not the one with full interior, still a lovely kit, there's an option in the box for a winter camo T-54B in the event of any breakout of conflict, I'd like to do that one if it doesn't bend the rules at all, Cheers Glynn6 points
-
I finished this model ages ago, but it took a long time to get around to taking studio photos of it. The new animated show "Star Wars: Resistance" is a mixed bag, IMO. I love the animation style (I grew up watching Robotech, the US-import version of the Macross Saga, so I love the anime style applied to Star Wars) and some of the ship designs are quite cool, while some of the characters are.....anyway. I fell in love with the main hero ship, the constantly-in-need-of-repair Fireball, which came about from one of Lucasfilm's showrunners wondering what an X-wing designed around the F4U Corsair would look like. While the actual ship doesn't directly share any parts with the T-65 X-wing or the F4U Corsair, you can get pretty close my mashing the two together, which is what I did with a Bandai Vehicle Model T-65 X-Wing, and an AFV Club 1:144 scale F4U. The AFV club model was very nice to work with, with plastic that's compatible with Tamiya extra fine cement. I had to do a lot of chopping, filing, and repositioning of various parts, as well as replacing the X-wing wing cannons with music wire and aluminum tubing, since they predictably broke off in all the handling. The paint job took ages - SO much masking. There are 4 base colors, and quite a few odd panels. I'm very pleased with how it turned out. I didn't really keep a build log outside of Instagram, but there are a bunch of WIP and primered photos in a flickr album.6 points
-
Here Stuart, but when the RWD-8 is completed it will also be in the photos:6 points
-
6 points
-
I worked for the first year and a half of the flight test program as a performance and flying qualities flight test engineer. Most of the time, the two-seater was flown with two pilots in the early days, but I did get about 25 flying hours in the XL-2 RCP before leaving the program for A-10s. Sven6 points
-
I would, but I can't figure out how to emboss the letters. Thank goodness it's a British plane, and not American - as then there would be even more letters to emboss! * Not sure what to do with a pilot figure, or more properly figger. I don't want one in the pit, 'cuz he would cover up all the gubbins and greeblies that I installed. Maybe some bloke sunbathing on the wing with a local lass... Cheers, Bill * Life Savers vs. Polo, eh? PS. The tiny discs with the central hole are actually my poor attempt at some kind of flange where a hose will attach. Tamiya have (understandably) left these out from some very prominent locations. I'll have some photos in a bit - I should have done most of these hoses and lines prior to putting the engine in the bearers. It's much harder now. I've also decided to take the lazy easy cheap more productive method of representing hose clamps. (Hint - it involves a paintbrush.) I've seen some builds where these are done in Bare-Metal foil - which look great - but I hate working with that stuff, and I only have a few more decades to live. Modeller's prerogative.6 points
-
Here is my entry. Kit: Airfix B-17 Mk III of RAF 100 Group All the Best! Don6 points
-
In that case sir, I have only one thing to say to you... Great work on the structure Martian...looks more like a cowshed then ever!6 points
-
Are you scratch-building a pack of Polos for the pilot Bill? Cheers, Stew6 points
-
The List has arrived. Small details are starting to be dealt with: painting the leather coaming, the exhausts, the control horns, etc. The fuel trolley is now completed as per one image from the Net, I believe from the Polish NAC: The plane I am modeling did not have the additional fuel tank on the center wing, but the trolley was used surely to fuel it to 😉6 points
-
So I should also have a fixation with the 800th Sqdn …. And HMS Triumph… Since… Both 800th Sqdn, both aboard HMS Triumph… But 1947 in Mediteranea… And 1950 In Korea !! And as usual a family shot ??? The Seafire family is growin'up ! Okay, I'll be back later, open to comments as usual !! Have a great modelling time !! Sincerely. CC6 points
-
Ła-9 from Mikromir - Korean War. Added all KompektZip resin plus full riveting. In progress: http://www.pwm.org.pl/viewtopic.php?f=851&t=869775 points
-
Hi all, I've been really busy away from the forum for a while... on with this for about 18 months now and moving house inbetween, so a new workspace had to be built in the new house before the build could proceed!! NOW ITS ONWARDS!!😯😯 The wheel house is totally scratchbuilt and and the horrible origional kit deck was all flattened with a Dremel and started up over.. A mix of scratch building and aftermarket parts are still to be done as you can see.. Things still to do include, new mast, hatches, ammo lockers, twin Vickers, ropes, stantions, vents, cowels, cleats etc.. Research for my Vosper 73" 380 (1944 Thornycroft) was taken from the net, various books including osprey publishing and many trips to Telford for inspiration lol😀🤗 All comments welcome and I'll post more pics very soon as the build continues..!!! HAPPY MODELLING!! Hi all, Quick update ...ive been busy with the ammo lockers ( not finished yet) and dry fitting some scratch built hatches and done some more work and the torpedo tubes...the hatches will eventually match in with the coastal craft deck grey... Thanks ..5 points
-
Hi folks, The AW Wolf was one of those often slightly bizarre-looking interwar British prototypes built in response to the Air Ministry’s frequent specifications, in this case Spec 08/23 which called for a dedicated reconnaissance type. Six prototypes were built, three of which were converted with dual-controls and placed on the civilian register. The first prototype, J6921 (pictured above), was tested at Martlesham Heath but no Air Ministry order was forthcoming. It remained at Martlesham for over 2 years and was used to test individual items of equipment. My efforts to replicate this machine in 1:144 are detailed in the WiP thread here: Thanks to all those BM’ers who offered top tips through the build, which (IMHO) doesn’t come close to some of the masterpieces of scratchbuilding that are frequently showcased here. Purists will have to hold their peace at the scale infidelities that they will find, but it’s a learning process and I haven’t enjoyed my modelling this much in ages! Anyway, here are some pics: (The prop isn’t really this garish; the desk light just makes it look that way in this pic.) And, as will become usual, one last pic ‘for luck’: Thanks for taking the trouble to have a look. Now to start on planning the next obscure subject! Jon5 points
-
Small update, it is tempting to use some parts from the PT 109 kit such as navigation lights, search light mount etc but I'm afraid I will have to make them myself 🙂. Arjan5 points
-
Given that the recent Revell Hercules Halifax is pretty good, with a few tweaks like the ailerons and the mainwheels, I don't hear any vast outcry. There are more than a few mutterings about a Merlin one... If there is any one type I see more moans about than any other, it's a P-51B. If there's one WW2 type that's really badly represented, it's a Yak 9. If you restrict yourself to important British types, the Manchester. But widening the net, where's the Scimitar? All 1/72, of course.5 points
-
Thanks Steve as long as the framework only reminds you of your ceiling trusses and not General Melchett's then that's fine. From this am I to gather that I am not the only person to have considered spaghetti as a modelling medium? Thanks CC. As paints are supposed to be non-toxic these days, I suppose it would be OK. I couldn't vouch for it's taste however. The General might know, he's eaten Baldrick's cooking before and may well have already been served up such a dish. Most likely because I am pretty dreamy. And you wonder why I keep waking up screaming! Martian 👽5 points
-
I grew up using enamels, and belatedly discovered the joys of acrylics for recent work. For my French projects, though, I found it all but impossible to find an acrylic manufacturer that could provide what I deemed the "correct" colours. Life's a bit too short to try mixing and matching near enough colours. From the various Heller boxings I have in the stash, I tried to source Humbrol colours, but oddly many are not available in acrylic, only enamel. I ended up going with Colourcoats. They have a range that provides colours for French, Dutch and Italian aircraft. Going back to enamels felt like a mis-step, but apart from the probably self-inflicted issues already noted I’ve found them easy to use. Last night I risked a further brushed coat of light grey. It only bloomin' worked!5 points
-
Source: ICM leaflet First box art V.P.5 points
-
Source: ICM leaflet B-26B-50 Invader - box art + test model V.P.5 points
-
Now, to be honest with you, I thought switching to 1:32 scale meant I didn't have to scratch-build crazy tiny bits of white styrene: But alas, no. It's a good thing my Punch & Judy & Die thingamabob is graduated in micrometers. Cheers, Bill PS. That's a dime, by the way. As in brother can you spare me one. It's about 17 mm in diameter. Oops, there I go trying to sound European again. It's really about 5/8 of an inch, right mates?5 points
-
I've neglected this project for months but luckily I got some time off work to catch up. I did the wings a while back but a recently give the leading edge a nice few coats of xtreme metal chrome (i have no polished aluminium, but this is close enough). I'm ready to ditch alclad metals as a finished coat can rub off easily with your finger where as xtreme metals can even withstand some buffing with similar quality finishes. Revell 371 grey satin looks perfect for the wings as its a very light grey the only issue i have with the engines is a issue that I find a lot with regard to revell kits have, the indentation marking the forward part of the engine including the lip probably shouldn't be there but it's not obvious that it needs blended into the rest of the engine. There is also parts of the belly fairing where panels look separate but in fact the gaps don't exist probably the best engine fit I've known. The wings are a beautiful fit too, i could have probably got away with not gluing them this model is a whole combination of different decals for different airliners! the doors (white ones on top of actual a350 doors) are from the dreamliner. The Skyteam decals are for the 777. The pilot escape hatch is from the tristar I think!....god knows which one. This is before i cleaned up the fuselage as it had just been neglected for months and built up dust. I actually had vietnam airlines titles in my stash but then I realized that they are actually blue not white on the skyteam livery. these are not available so I'm going to attempt to print them off my own printer on decal paper, I've done it before with half decent results with a bit work on photoshop. The a359 and what its succeeded, the a340-600 (or is it the a35X that has succeeded it??) The a340-600 is long but the a359 really holds it own next to it. another thing I regretted was adding the silver window outlines as it looks like it has shrunk their size, it seemed like a good idea on top of the giant blue skyteam logo at the rear to make the windows stand out but I wish I'd left them off the rest of the fuselage next i need to 1. finish off the horizontal stabs and put them in place 2. add all antennas 3. print out and add vietnam titles 4. add all reg's and vietnam flags plus various minor decals5 points
-
And now let's compare… Even if we both know that Nothing dcompare to us It's now up to you Chaps !! Let me know what you think about the Mods !! Which one has received surgeries ??? CC5 points
This leaderboard is set to London/GMT+01:00


