Leaderboard
Popular Content
Showing content with the highest reputation on 13/12/18 in all areas
-
Morning all, Hot off the workbench is Eduard’s new SE5a. Stunning kit, and is really a 1/32 kit shrunk into 1/48. Surprisingly complex and detailed! Goes together beautifully. I’d thoroughly recommend it. The scheme is for Lt. W.R. Oulton of 143 Squadron, Home Defence. I’m lucky enough to have his medals. He won the Air Force Cross in this machine for his actions against the Zeppelin & Gotha raiders of London and the South East. It was, in effect, the first ‘Battle of Britain’. The tactics learnt in these actions were put into place for the 1940 battle to good effect. His citation: ‘He had been employed in a Squadron on Home Defence, and has taken part in defence against every hostile raid there has been since March 1917. Lieut. Oulton has shown great keenness and enthusiasm, has carried out his duties in an exemplary manner, and has given an excellent example to all others’ The First Battle of Britain Germany’s aerial bombing campaign against Great Britain in the First World War, with London as its primary target, was the first sustained strategic bombing campaign in history. These raids, using airships, bomber aircraft, and seaplanes, ran from December 1914 to August 1918 and resulted in almost 5,000 casualties. Thanks for looking in. Will hopefully appear as an article in ‘Scale Aviation Modeller’ in the near future. Guy27 points
-
After years of browsing this site, and enjoying other people's work, I have finally (I think...) worked out how to post pictures and can share a little of my own model making... So I thought I'd kick things off with this Hurricane - with some trepidation as there are some serious Hurricane experts out there (yes Troy, I am thinking of you...!) The possible "bones of contention" (amongst many, I suspect) are: is this a Hurricane or a Sea Hurricane? As it has no hook I'm saying Hurricane - but in service with the Fleet Air Arm. Secondly, the scheme. I am aware that there is some debate about the lower surface colours and whether these might have been Sky Grey, or Sky. All I'm going to say is that there is a photo in "Squadrons of the Fleet Air Arm" (Sturtivant) showing this aircraft, and although the picture is black and white, it just looks like Sky Grey to me - so that's what I have gone with. The reference to Jekyll and Hyde is simply that the reviews of this recent Airfix kit seem to fall into two distinctly different groups - those that say that the kit almost fell together and was a pleasure to build and others who found serious fit issues - in particular getting the fuselage to sit down over the cockpit framing, and also joining the upper wings to the lower over the gun bays and spars. To find out which mine was, there is a short build review at www.ipmssalisbury.co.uk under "club stuff/build articles"... So on to the photos - just iPhone but hopefully worth a look? Any comments, suggestions or (gentle!) criticism welcome. Cheers, Nick.26 points
-
23 points
-
A first for me as I have never built a Spitfire.This is my 1/72 Italeri Spitfire Mk IX, RAF/Free France A.F, Squadron 602 "City of Glasgow" 1944.I am critical of this as would you believe I kind of lost interest, but here she is, all comments welcome. Probably not up to the standard I see here but here she is. DSCF9505 by john dann, on Flickr DSCF9506 by john dann, on Flickr DSCF9507 by john dann, on Flickr DSCF9510 by john dann, on Flickr18 points
-
This is the old Frog kit. It is pretty accurate but has no wheel wells or cockpit. That doesn't bother me as I build them in flight and don't bother detailing cockpits anyway. I added cannon ejector chutes and a catapult hook and drilled out the exhausts. The decals are an very old Modeldecal sheet and had a few adhesion problems so there's silvering here and there. The undercarriage doors and the auxiliary intakes on the spine are homemade decals. Comments and suggestions are welcomed. Thanks for looking. David18 points
-
18 points
-
Hey, you know what? There was a part left - that beautifully bulbous belly tank. But I ain't gonna put it on, 'cause I like it this way. That old AZ gal cleaned up OK, I guess. Well, it's time to get back to work on that big Spitfire. The marvelous Merlin is the next mini-project on that build. Should be fun, since I know nothing about Merlins, but I suspect I will have to research what the correct firing order is so the plug wires can be run correctly, or some crazy thing like that. RFI for the Attacker will be up shortly. Cheers, Bill PS. I left in at least one mistake on the Attacker because only God is perfect.16 points
-
Hi folks !! One of my laetst builds. The amazing Bücler 131 D from ICM in 1/32 . The fit is perfect! Thanks for viewing Andy H15 points
-
Hi folk's,another of my Grumman GB build's is Revell's re-boxing of Monogram's venerable Panther.When the kit arrived and I saw the Drone control scheme I foolishly decided to do it and now never want to see yellow paint again! The kit fell together I replaced the way too light star and bar with spares the kit decals are very matt and the fuselage 38 that go over the painted over camera's were a nightmare but with a touch up here and there worked,onto Monogram's 1/48 Intruder now for the GB.12 points
-
Thanks! I'm certainly hoping it will be, although that kit might have made a better starting point! A long way to go yet, but at least it now looks like a Battle, and it shouldn't be long before the white bits disappear! That's quite a compliment from such a master of brassiness and all things plastic! Not so sure about the "calm knowledge" bit though, a lot of this is being made up as I go along and it often results in verbal self-abuse when I see how stupid I've been and an easier way of doing things! Having not done such a huge correction project before, (the Muromets is more of a scratch build!), it often happens that I see I should have done things in a different order. But at least I'm learning from my cock-ups! (he says hopefully!) I'm glad you're enjoying it as much as I am! Thanks Massimo! It does look a lot better with the large gap removed. Cheers Clive, many thanks! On to the latest update. As mentioned above, I added some PPP to the edges of the fuselage where the canopy sits and here is what it looks like now it's all been smoothed down. I carefully scraped away the very edge with a scalpel to leave a small ledge for the canopy to locate on. Then I got all Baronish, and decided to solder some braces for the canopy. These will fit in small holes I've drilled down the spine of the fuselage between the forward and aft cockpits, (you can just about see a couple of them in the pic above) and attach to the canopy frame. At least I hope they will, I still have to trim them to length! My first attempt was sort of ok, but 3 of the 5 fell apart when I tried to clean them up. I realised that the 2 that stayed together were the last 2 I did, so I made sure I turned the iron on sooner this time to ensure it was good and hot. No problems! I think I'm getting the hang of this soldering thing! Next job was the nav lights. I removed a small triangle from each wingtip and glued in a piece of clear sprue, after having first drilled a small hole in each piece and filled it with paint for the bulbs. This is the first time I've tried this, so we'll see how it goes. If, after sanding down, I can't see the "bulbs" I'll remove them and drill a larger hole. After that it was time to attach the tail surfaces and that means leaving it to dry overnight before any further progress. So this is how she looks at the moment. Tomorrow's plan of action is to finish off the nav lights and give her a coat of primer so that I can see the areas needing more attention. Thanks for looking in! Ian11 points
-
Here's my latest build, the new Eduard Tempest that I picked up at Telford all of a month ago (only 11 months till next year!) lovelly kit with all of the strengths of Eduards recent releases (surface finish, detailed cockpit/wheelwells etc) however it does not quite fall together as easily as their spitfire kits and there are a few issues which need addressing for a "series 1" airframe, however for the expenditure of a little labour the end result is imho as good as their spitfire and it has real prescence! I like it a lot. Changes I made to better represent a typical series 1 airframe were. The lumps on the wing roots covering the fixing bolts are missing and need added (again pretty easy to do) I removed the 4 lumps under the wings that cover the wing bolts as I am pretty sure they would not be there if the upper bumps are in place? I made a cowl to fit into the chin intake as pics seem to show these were quite widespread (not sure if my aircrat had one fitted but had fun trying to make one) Some of the issues I experienced were The spinner slots are much too large but they are easily fixed and I am sure somebody will come up with a resin one pretty soon. Some of the clear parts did not fit quite as well as they maybe should and some needed a bit of fettling, I am still not happy with the sit of the canapoy which may be linked to the internal framework, have a plan to drop this on future builds. The underside seam accross the flaps is a bit awkward (I may well try out their flap set on my next build to avoid this) There are some surprising sink marks on control surfaces which I made no attempt to rectify to avoid having to try and repair the surface detail. I also added a few mods just to make the kit a little different by dropping the radiator flap and opening the handhold under the canopy, all in all I really liked it and will certainly build a few more For anyone who does not want to wait for their future release it looks like a series 2 could be built from the kit without any real issues except a change of markings. Ohh and the visible cat hairs and sanding dust have already been removed! lo9 points
-
This time Ex-Czech MiG-29A In such a camouflage, Poland bought several MiG-29A from the Czech Republic. MiG-29 looks good in any camouflage and color. (My opinion) The white belt on the tail 89 was painted on the exercise "Eagle Talon 97" The model is Trumpeter 1:32, made of course straight from the box with photo-etched parts from Eduard. At the beginning a few photos of MIG-29 in this camouflage. 1:32 Scale9 points
-
Allow me to present one of my latest builds this is Eduard's 1/48 Messerschmitt Bf109G-10 [MTT Regensburg]. Not happy with Eduards rendition of the asymetric cowling which I modified see build in WIP Forum. My build is a representation of the Bf109G-10 in which Heinrich Bartels met his death on 23rd December 1944 Yellow '13' Wrk.No. 130359 (an MTT Regensburg built machine) of 5./JG27. The remains of both pilot and machine were not discovered until January 1968! No photos exist of this machine so I based the finish on the other aircraft of JG27 at this time:- I leave it to the viewer to decide if you think I have improved on an already excellent product I myself am not 100% satisfied with the end result but I think the finished model represents the G-10 a little more accurately than the basic kit. Take a look at my 'conversion' of this kit to the G-14A/S version. Cheers Andy9 points
-
Hi everyone, Certainly the last kit of the year, this is my F-105G by Trumpeter. This kit can be a little uncomfortable to build because of the options offered that require closing all traps. I use the MRP paints for the SEA camo et decals from Wolfpack. Cheers et happy new year at all. Joel9 points
-
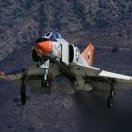
Hi Everyone. Just taken some pic`s of my latest effort: Academy`s 1/48 F-4C Phantom kit, masquerading as a F-4D of the 432nd TFW whilst based at Udorn Thai AFB during the late 60`s early 70`s I originally intended to do it as a `D` with smart bombs and but then found out the subject I had markings for never carried them and was in fact....... .....for `Trapper` which had some fame as being the last MiG killer of the `Rolling Thunder` campaign in 1968.. After some deliberation I decided to give it an assymetrical bomb load which seems to have been fairly common at the time...... ....of 2 x CBU`s, 3 x Daisy Cutters and 6 x General Purpose bombs. Mostly from the box with just seat belts and rear view mirrors added, the `D` IR seeker was in the kit as was the ALQ-119 Jammer pod Hope you enjoy , thanks for looking, Cheers Russ8 points
-
I finished the Holt Tractor after some months of building which was mostly but not only fun. I know every single part by forename now as they all need love and rework to make a tractor in the end. Some parts were simply unusable so I scratched them and the tracks were a nightmare. They were in no way able to follow the rounds of the sprocket and wheel and on the other hand each link fell off very easily. I ended up glueing every single link individually to the tractor. Apart from that this is an OOB built, I did not find any aftermarket parts. Guess the kit is too new. The Vallejo acrylics were airbrushed in several layers of different rust tones, afterwards the green was airbrushed as an "uncomplete" layer so it did not cover the "rust" everywere. After that came several layers of flat / satin / gloss coats and many hours of oil colour washing. The tractor is not at all perfect but I have to admit I like the result. Still looking for a suitable ordnance.8 points
-
This was my build for the Gumman GB and I used Airfix's relatively new tool 1/72 kit. It was a nice kit to build and I made it as the aircraft of Capt. Marion E. Carl, VMF-223, United States Marine Corps, Henderson Field, Guadalcanal, September 1942. I had originally thought of doing the model with it's wings folded but decided I'd prefer to display it in flight over water. I haven't modelled water before and I have an idea for a project next year which may include scenic water - so I took the opportunity to try out some ideas. I think it worked okay. I didn't have time to motorise this aircraft like I have done with some others so instead I used PE PropBlurs. Kit: 1/72 Airfix - A02070 Extras: PropBlurs Paints: Revell and Humbrol Acrylics all applied by brush Base: MDF and filler. Clear perspex rod. The WIP can be found here. Now some photos which include the base: Thank you to everyone who commented and offered support or advice in my build thread and thank you to @TEMPESTMK5 for hosting the GB. Kind regards, Stix8 points
-
This is a very slight conversion of Eduard's Bf109G-10 into the G-14A/S version see my WIP post Also my other RFI post. This Bf109G-14A/S is an aircraft of 2./JG77 Red '1' Wk.No.784930 January 1945, scheme is taken from the MMP book 'Bf109 Late Versions - Camouflage & Markings' Below I have posted some pics showing the result of my 'modification' of the cowling on the G-10 and G-14A/S:- Even built OOB the late model Bf109s by Eduard are to my mind the best around by my reckoning. I have now added the WNF G-10 to my stash which will also receive my 'modification'! Thanks for looking. Cheers Andy8 points
-
Hello mates I share my most recent work This is the F4U-1 Corsari II from Hobbycraft, with Eduard accessories, Falcon canopy, Xtradecals decals.7 points
-
I started this one as a part of the Me.262 STGB and failed miserably to complete it in time, so I guess I'm just crap at deadlines The 262 is the 1:48 Hobby Boss kit with some HGW seatbelts, and a few odds and sods scratch built on the way, such as some additional detail in the bombardier's compartment, the nose whiskers and other bits I've forgotten about. The truck is a Tamiya 3-ton Opel Blitz, with the SBS Models T-Stoff wagen conversion set that's actually intended for the old Italeri kit, but fits just fine on the Tamiya chassis, which is on the whole a better combination for detail. it was a shame to lock away all the T-Stoff handling equipment behind the doors, but I was kind-of trying to loosely replicate the picture below, so it had to be ready to tow with everything squared away. I took a while to paint the driver, but the poor devil can barely seen, so that was a waste of time! The towing hitch was scratched using some pics online as a guide, just from some styrene rod I had in stock. With the deadline long past, I've been working on this sporadically when time and health permits, and finally got the paint on in the not-too-distant past. It's all been downhill from there! Pics below: I just love the shape of the 262, and it really is a sharky-looking aircraft. For those with a bit more time or tolerance for photos, here are a few detail pics that show up the flaws! That's all from me on this one, and all that remains to do is put the missing pieces on and somehow find some space to display it in the cabinet. I think some of my older creations are going to have to go into storage now, sadly. If you want to review the process from start to eventual finish, you can find the WIP here. Thanks for watching, and remember to tip your server7 points
-
Evening folks, Built this 1:32 scale Revell Spitfire as a commission build for a mate who wanted a mk 1 or mk II Spitfire for his WW2 memorabilia collection. He wanted it to resemble "XTD" which is the fibreglass gate gaurd now on display at Edinburgh Airport. The replica its has " Blue Peter " written on the side and has a four blade prop and a bright red nose cone. The kit itself went together with no real issues and was build OOB with the only addition being harness straps made from tape placed into the cockpit. I just used the cockpit decals provided with the kit. As usual, I weathered the kit using the preshading method and masking tape to seperate the camouflage colours. For the first time I tried using the " maskol" method of replicating the paint as having been worn through on heavy traffic areas, around the cockpit and a couple of the acess panels. An easy method of spraying silver then applying the maskol and rubbing off after the top coat has been applied. Very easy and effective... Used Hannants "Xtracrylix" thinners on this build, so much better than my usual Tamiya thinners and would highly recommend. Unable to source the "XTD" decals or correct serial numbers " L1067" etc, but it looks like a Spitfire and the new owner is very pleased, as for payment ... a couple of nice bottles of red wine 🤩 Always wanted to build a spitfire again and this way I don't have the headache of where to display it ... just the headache from consuming the wine !! A few pictures of the finished result .. Thanks for looking and all comments welcome. Best wishes 👋6 points
-
I'm pretty sure the Airfix kit is a little too long, both the 72nd fabric wing and 48th kit are the same amount out compared to the Bentley plans, note the rear cutout in the rudder line is in the right place. what this means is the fin is too far back, and the fuselage looks a little slim just in front of the fin. both kits have the same and much harder to correct fault, no flare of the fuselage side panels where they meet the wing. the other 72nd faults are the too high canopy, I've asked in the WW2 section if anyone has the Rob Taurus replacements and if the correct or replicate the error https://www.britmodeller.com/forums/index.php?/topic/235047694-rob-taurus-hurricane-canopies-for-airfix-72nd-fabric-wing the other glitch, the wheels, yes, should be 5 spoke, but they are too big, try fitting them through the wing opening, same in the 48th kit. the 1979 era 72nd Mk.I is well shaped, but lack the 'shoulders' over the front end of the merlin ( a common fault on older Hurricane kits) and is basic nad has raised panel lines all the other Airfix 72nd kits have a various problems, the early 70's one is salvageable if you get a new canopy, raise the spine, fix the nose and get rid of the battleship rivets.... the 50's era Mk.IV is , erm, well, a 1957 Airfix kit.... the 2005 ish Mk.IIc is a bang on match to the drawings in the FK Mason 2nd edition Hawker Hurricane book, shame the drawings are wrong in almost every way... and thus the kit is if you want a decently shaped Hurricane kit, rubbish. Valaint wings dio a correction kit, but that's lipstick on a pig. Regarding the Arma kit, I was thrilled and honoured to get an email asking for my address to send me one too review, it turned up today, I've not had chance to do what Graham has done, but apart from few nitpicks aside that Graham mentions, this is "the best in 72nd" and one of the best Hurricane kits in any scale, really good overall package, very impressive. I have too applaud Arma Hobby for the care and effort they have put into this project, and the brave move to share CAD images and take on board feedback from the forum, showing changes made from posted comments. It looks like this has worked for them, and by the orders this has generated, and i hope this leads to further variants too. I'd better have a go at building this soon, i did have a rummage in my drawers and have possibly enough vintage (1981 or so) Humbrol enamel that even appears usable, and while I don't like the smell, i know I was pretty good at using it 'back then' though I prefer the lack of fumes from acrylic.... I digress and need to wrap up for the night now. cheers T6 points
-
Hi all I am still cracking on with the other build even though I have gone silent for a while cause real life happened. Starting from tomorrow the builds should pick up momentum because I will be officially on leave. Anyhooo the idea here is to build a little dio with a tiger 1 and the panzer iv in 35.The crews standing around taking a rest and onr big mouth member taking it on himself to discuss "that girl in France" everyone hanging on his every word. Will post pics as soon as we start the build. Regards: Shaun5 points
-
Hello mates, No. 19 Squadron Leader Geoffrey Stephenson has just landed! Fast Spit, fast build, Braun 1000 Watt.... Cheers, Tom5 points
-
WnW set with Parabellum gun maschine from Master Model, Proper Plane wooden propeller and Ushi van Rosten plywood decals.5 points
-
Blurghhhh. Bed-ridden with the foulest of colds and furious, quite furious. My immune system can expect a very strong letter from my legal representatives - make no mistake about that. The worst of it is feeling so sheight that you can't actually enjoy a decent level of misery and self-pity; umpteen books tossed aside with sighs of disinterest, music of any kind frankly irritating, whilst the thought of attempting a film - even When Eight Bells Toll which is my go-to panacea for what-ails-ye - is without merit. Ah, but I can at least seek solace in what modelling chums have to say... Nowt so distressing as seeing so many fellow human beings wandering around staring into phones in complete oblivion to the world immediately surrounding them. As long as there is light there are things to see. Even amidst the concrete. An alternative explanation is that social media simply represent a Malthusian mechanism to divest societies of their most pathetically self-obsessed individuals via manholes and road-crossings... And the thread is richer for your presence Bill. That's what we like to hear Max. Are you going to be including that rectangular upper frame above the oleos that articulates up and inward? I'm still mulling the best way of representing that curvey great radius rod. The internal framework looks a lot easier than the wavy fairing that covers it tbh but there's no credible way I can see of leaving it off, plus they are a key visual characteristic.... The waxing's painful of course but nothing else gets them so smoooooth.... Oh for those lost occasions in life when one yearned to hear such praise.... You are one dedicated parent CC. There is also the 'Dublin second'; being that interval between the traffic light turning green and the driver behind honking their horn whilst speculating loudly about your resemblance to the male generative organ. Any longer than two seconds leads to the use of headlights accompanied by speculation regarding your supposed sexual congress with women who have borne one or more children. Teuchter, Ed, Ben, Pete: thanks for your replies also fellows!5 points
-
More than two weeks since the last update though still done something almost every day. Anyways, the bigger is the progress now... All the pics except the oxygen tank in progress- one (the third) were taken this morning Looks like a pre-painted kit, doesn´t it? The IKEA B-17 kit. Clear parts with masks but not yet painted... so actually this pic was taken before that IKEA-pic. This is even older and shows how my Finlandia stirring stick (who needs such for vodka anyway?) and the kit bomb racks were turned into oxygen tanks. So long the war office, soon you`ll be hidden from daylight. Another view. Those O2- tanks look surprisingly decent, but that cocktail stick plastic was very hard and rounding those heads properly was just not my cup of tea 🤭 Not too much room after you add the top turret. With all the parts needed already in place, it was time to slide the second fuselage half on the wing spars and take the "bye bye forever"- photograph Cry no more! As I joined the fuselage halves in two inch sections, I found time and one free hand were enough to add the cockpit and radio compartment windows. They are primered with Hu 149 and shall indeed be given a proper Hu 155 as I tidy her and her seams up. These IKEA- kits sure are fast to build! I added the tail turret extension minus the actual gun turret. The wings and stabilizers are just pushed on for illustrational and morale boosting purposes. Best regards, V-P5 points
-
Carrots: explanation for RAF pilots' increasing success against German night raiders, to disguise the use of airborne radar. Clearly a reference to a forthcoming 1:72 DH Mosquito NF. XXX. Whadaya mean, you don't think so?5 points
-
Afternoon all....well, finally got the time to sit down and set up the build log. This is to be the contribution to the GB. Only two test units being built in reality, and a further ten for test purposes on the Eastern Front. Once under test, it was realised that the 105mm howitzer could easily fit on the obsolete Panzer II chassis, becoming the Wespe; so the proposed further 200 were cancelled as the Panzer IV chassis's were needed to supply combat Panzer IV's due to urgent need on the Eastern Front from the losses of 1941 and early '42. All ten production vehicles served with the Panzer-Artillerie-Regiment 16, attached to the 16.Panzer-Division on the Eastern Front. The Division was held in reserve during the Balkan Campaign, but took part in the invasion of the Soviet Union, Operation Barbarossa, in June 1941. It was used in the southern sector of the Front, advancing to Stalingrad via Lvov, Pervomaisk, Zaporozhe, Taganrog, Makeevka and Artemorsk. The 10.5cm leFH 18/1 (Sf) auf Geschutzwagen IVb joined the rest of 16.Panzer-Division in late December early January. The regiment was destroyed in early 1943 in the Stalingrad pocket. Overall it'll be a clean build and apart from mud and dust, not too much wear and tear as is seen on the AFV's of this front. I have developed a build plan and schedule to efficiently build, and try and have the most time for the painting sequence, as I intend to use a new product for the making of mud. I'll need to spend some time practicing that first. The hardest part will be the PE phase.....lot's of tool clamps..... I have prepped as much as I can as I have a feeling the Christmas fortnight will be a zero build time as I have to pack away the bench as it's in the spare room,(family visiting...) All my part spru's are washed and ready to go, just filling the time trying to confirm some Dragon Model issue's as regards the reality of the interior ammo storage; which I think they have wrong. I discovered a pic of Voyager Model upgrade with an additional ammo locker, not specified in the Dragon build instruction sheet -even though supplied. Plus to complicate things, a photo has popped up with the ammo cabinets at an angle in the fighting compartment.......nothing but issue's. Anyway, hope to post first progress by the 16th, as we have rain over the weekend.......must always see a positive somewhere on a grey day...😁 Simon.4 points
-
Almost OOB model, I used Eduard masking tapes for canopy and zoom for the cockpit.4 points
-
After a long build which took most of this year, my 1/48 scale Do 217E-1 is complete. The plane I have chosen is F8-DM. This was a late 1940 KG40 plane so would have been quite new at the time, as a result I haven’t heavily weathered it. I have not used drop tanks as this would have been used against England during the Blitz period on night bombing raids. The build was straight forward except for the Canopy which isn’t the best of fits. It is a fraction too narrow and needs some putty work to get it to look right. The model was built out of the box with handmade masks. I have used aftermarket decals by Eagle Strike. These were good decals although the separate white outline gave me trouble. I ended up using three decal sets before it was completed. The tail marking are separate to the swastika which I had trouble getting in the right place as you will see. Thanks to Dave (Rabbit Leader) who came to my rescue twice with the white outline “D” and when the right side decals were damaged by a mask dropping on to them. I did have problems with the canopy as mentioned. To start with I dipped it in future which would have been fine if it had gone on easily. After removing it and the resetting it the inside surface showed fogging when the mask was removed. This would have been a major problem if I hadn’t cut the access hatch open earlier. This allowed me to get some future on the inside window surface and clean out some dust that had got inside. Still in the end it was a lot better, but not what I would call great. Once again it was Dave’s suggestion that got me through it. I have also just noticed the spinners should have had white tips. Something for another day. I cut out the crew access hatch and added a scratch built ladder. This makes the plane much more interesting. After lots of minor accidents when I would knock off bits in the last day the plane was finished at long last. I took it to a friend of mine to get some images. On the way the wing Pitot tube was knocked off and I didn’t notice it until the photo shoot was finished. As a result I have used Photoshop to show it. It will be back on the plane tomorrow. I also used Photoshop to add the aerial wire that goes from the fuselage to the main aerial wire. It was on the plane, but got knocked off last night I will get it back on later. These are the only parts added in Photoshop. The rest of the image work was removing the join line in the back drop sheets in some of the photos. Well that’s it after a very interesting journey I present my Do 217E-1.4 points
-
I have inventoried my pile of Panzer IV bits and pieces and will be doing this rather rare beastie captured from the Boche and returned to Blighty so our tank designers could see what they were up against. Naturally it made no difference to the quality of British AFVs. Shortly after the Tamiya Ausf J was released Mike Belcher released an Ausf D conversion which turned out to be a curate's egg. The replacement upper hull was based on the 'J' which meant track-guard tops were the later pattern not fitted to this type as new. Like all the other pieces it was very well cast and the modifications were well executed. Then came the big blow. Turns out '800' was a rather rare hybrid D/E hull with an E turret. I filled the swear jar and put it away. Last November 2017 I dug it out again as conversions mastered for the kit seemed not to fit as they should. After careful measurements of Bovvie's survivor it became apparent that the fighting compartment is 1.5mm too short from the rear to the break in the roof line. While attempting to correct this I broke the resin upper hull. I sobbed and put it away again. Rather than post images I'm uncertain of have a gander HERE. As regards painting DAK vehicles Bruce Culver put together a very useful item linked in first post on HERE. I shall start this thread with a photo of the junk I'll be starting from nearer the time.4 points
-
I think I want to join in with this; 20181213_173634 by mario binsar 20181213_173644 by mario binsar I took this kit with me when I went on board my current hitch four weeks ago, but haven't got the mojo to start building it... Until I saw this GB. My plan is to scribe it and build it with Twobobs' Santa Tracker decal (well it's a holiday season now, isn't it?). So, premisson to come aboard, gents? Cheers, Mario4 points
-
After finishing zero models last year (I think? Or was that 2016?) I've managed a few this year. There was a bit of a weighting toward the front of the year, with the last one stretching from April to yesterday (the shame!) and failing to complete it as a GB entry Anyway, without further adieu (I know it's supposed to be ado, but I see that written seriously so often that it tickles me), I give you my 2018 output: This was a little resin kit of the little-known (to me at least) Swedish FFVS J-22A 1:48 from Planet Models (Special Hobby) that I built after reviewing it, and really enjoyed myself. It was all OOB, and pretty easy going IIRC. Build thread here. After that I undertook a dual build of a couple of Eduard's excellent Fw.190s from their Royal Class boxing, which I used a fair amount of their aftermarket on. I did one as a European machine, the other as a desert bird. Build thread here. The other one stalled near the finishing post, and got a little damaged in an accident with a BB gun, which swiped off one of its gear legs It's easily salvageable, I've just not had the time nor inclination as yet, but it would be a shame to waste all that effort. Here's the last pic of it with its sibling before it became a bit "abandoned" After those two it was on to doing a build of the (then new) Dora Wings P-63E KingCobra, in 1:48. Is there any other scale? This was a short(ish) run kit from a new manufacturer, so it was a little more taxing than your average shake-and-bake mainstream kit, but it was still fun. Build thread here. Then we get to April/May and everything starts to slow down. I started this Hobby Boss 262 for the STGB we had earlier in the year, but DNF and carried on at my own glacial place. I also added a T-Stoff wagen into the mix, as I really liked the pic of one towing a prototype, but decided against trying to replicate it 100%, so left off the tarps over the nose, the missing cowlings, FOD guards and firemen, as I only have so much time, skill and patience It came out pretty well in the end though, and I'm really proud of it even though it wouldn't win any competitions. It also highlighted the fact that I need a larger base. Build thread here. Unless I have a prolonged bout of insomnia, I doubt I'll finish anything else this year, but you never know. Stranger things have happened at sea Thanks for all your comments, likes & general support over the year, and thanks also for being the best modelling forum on the internet4 points
-
Hallo again The Mitsubishi F-1 in 1/48 from Hasegawa was the basic for this model. The model is equipped with training weapons. The colorful air-ship rocket is the eye catcher. Since much of the F-1 fleet is stationed in the very north at Hokkaido, the surrounding is very different from central Japan. Here we are at the same northern position as Vladivostok i.e. Sapporo. The northern part is very close to Sakhalin and the eastern part faces the Kuril Islands. This F-1 are always in close contact with the Russian air force. Happy modelling4 points
-
Ewen, Much of the confusion over designations lies in the fact that Spitfires were often ordered as a particular model but, during the course of construction, different engines were fitted, and, effectively, they were completed as a different model, but what you call the 'official designation' often remained on the paperwork. As far as I am concerned, the designations, F, LF and HF relate to the engines fitted. If the RAAF records tell me an aircraft had a Merlin 66 fitted, to me that makes it an LF.VIII, regardless of what it may have been ordered as. Of course, I am looking at from a pilot's and engineer's point of view. The RAF was quite clear in A.P. 1565 G & H-P.N., the pilot's notes for Spitfire F.VII, F.VIII, and PR.X. They give the designations and engines as follows: F. MK. VIII Merlin 63 LF. Mk. VIII Merlin 66 HF. Mk. VIII Merlin 70 I'll let you stick to your 'official designation', if you let me stick to my 'practical designation'. 😁 Peter M4 points
-
Just a note in passing. The changes made to the RAF's Proctor from the Vega, did not include a 6" longer fuselage. This is an error that even appears in David Gearing's seminal work. The cabin retained the same dimensions but the luggage shelf at the back was made 6" deeper in the Proctor, to accommodate a future Radio fit. This change is visible from the outside by the size of the external compartment port side door. The RAF demanded the windscreen be changed to the rounded shape and this also appeared on the last of the Civil Vega's. There were other detail changes such as a stronger floor. Regarding the fuselage widths, the Vega was wider than the previous Gull 4 and Gull 6. The Vega has the longer span wing due to the wider fuselage and centre section. Again the change is visible by the rectangular centre windscreen panel of the Vega which the Gull 4 and 6 do not have. The Vega tail plane span is also greater. The Vega is a true four seater with the earlier Gulls being two, occasional three seaters. Jean Battens aeroplane is a Gull Six, and not as it's often called a Vega Gull. As I have written else where, the differing published lengths for the Proctor are due to the early RAF deliveries not having spinners. The reason is that for a time DH's had a problem with the spinner structure. Similarly The Vega had at least three types of propeller but the length that is always quoted, is the prototype fitted with the small Fairey Reed type. Vega's did not normally have a tail light but Proctors did. There is a lot of confusion regarding the final version of the Proctor IV/V. This was the Fat Lady singing, which finally brought down the curtain on the Gull family. The fuselage and rudder were bigger and deeper, but having a similar windscreen it gets confused with the earlier Proctors (I, II, and III). The quick visual give a way is the rear side windows are long and narrow. The old Frog Proctor is a IV and as such is quite a good representation but it is not easily converted to anything else. These and the other original researches I made freely available to Eugen at Dora wings, but if any person quoting anything I would appreciate some acknowledgement as research takes a lot of time and effort. I was helped by John Tregilgas, a gentleman, who is rebuilding four Proctors and who made many structural drawings available to me. I redrew every former and converted all the dimensions and radi from Imperial Fractions to Imperial decimal, hence to Metric. What at first appears to be a boxy fuselage with a rounded top is in fact quite a complicated structure especially the transition from the windscreen frame to the back of the radio compartment. I was not involved with the CAD side nor the Military markings As with other investigations I have done it's more difficult to change peoples minds away from what's in the books on their shelves. John4 points
-
4 points
-
4 points
-
If it's any consolation I opted to do German as I thought it was similar to English and, thus, would be a doddle. How wrong I was ! German grammar is really hard, for me at least, and I really struggled with it. The structure of sentences is completely the other way round to English. Plus there's all that Der, Die, Das stuff. I find French a lot easier except in pronunciation, where German is a lot more straightforward. I was taught Hochdeutch and as I've only been to Munich I got some funny looks from the locals (well, a look of incomprehensibility anyway). I was, however, able to ask a barman if he'd put Kraftwerk on Spotify for me, of which I am quite proud. I love Munich btw. Great beer, great pork, very friendly and a terrific aviation hall at the Deutsches Museum. I just wouldn't recommend it to a vegetarian. I didn't see a vegetable the whole time I was there.4 points
-
A thought or suggestion Hannants may have had the image supplied by Spin Models (given their awful box art) and Hannants have no idea it's not just a Spin promotional picture.4 points
-
1 There is still alcohol available so you're not late . . 2 Does this score double? and yes just to cheer you all up it's raining but it is still 16'C 😉 3 Mixing your own flesh tones is the way to go. So easy give it a try !! 4 The only wet palette round here is Gin induced 5 As to location L'Albir east of Benidorm. Often called posh Benidorm, no rif raf here .( I only know of one sports bar serving all day breakfast.) You're working tooooo hard Martian. Let your hair tentacles down and have some fun especially as it's your Birthday Happy Birthday Martin Kev4 points
-
I did a little painting on Ol’ Scrapiron tonight before some household chores took me away from the workbench – and that is when I made an incredible discovery!!! I’m sure I can’t be the first one to discover this, but tonight I stumbled on this normal household item that is a dead ringer for the ammo chutes in a B-17. I apologize if this was common knowledge for everyone else but it was one of those BINGO moments for me. So with a quick bit of paint, this…. … can represent the ammo chutes like the ones in B-17G 44-83514 Sentimental Journey (as my son and daughter demonstrated when SJ was in town in 2011) The magic item: a ziptie The ones I have are even textured on both sides – I think they all are. The ones we had on hand are just a size too big but I am confident a quick trip to the hardware store will yield a lifetime supply for about $2. I spray painted this one silver then added gold for the bullet casings, a dark grey (later covered by a bronzish brown) for the slug, dark OD for the links and red tracer indicators on about every fifth round. I think next time I will spray the whole thing gold (or see if I can get some gold zipties) and then paint the edges silver. I think a dark wash will make those shells pop, but like I said I knew these were a little too big so I was just crudely painting them up for demonstration purposes. Next I am going to test putting them in some near-boiling water and see if I can get them to conform to a basic curve shapes, although the smaller zipties should be even more flexible than the heavy-duty ones I had on hand. If I had kept mum I probably could have cut these into various lengths and sold them for about $6.95 for two zipties worth (maybe there are some folks out there already doing that. Ha!) I'll wait until tomorrow to post some of the other progress I was making -- it's just this ziptie epiphany got me all excited on a sidetrack. A lot of potential for 1/48 and even 1/72.4 points
-
Well it's only logical that the next subject in this series should be the Northrop XP-564 points
-
A little more fiddling today. My first job was to get the nose on and then to mask all seams that require filling to avoid any overspill. I use Squadron Fine Filler which quickly eats in to the stryene and so I try to minimise any wrongly applied this way. I then leave these tapes for the early stages of sanding, again to minimise errors with the stick! She looks like this today: Now, while I that settles and cures (not long ) I have the subject of the jet pipes to tackle. The Valom kit falls down in this regard, in that they are too short. My remedy is to purchase some stryene tube (actually i is Butrate) to make up the shortfall. The diameter of the tube I purchased is 12.7mm while the jet pipe rear end to match this is 12.8mm. Pretty much bang on! . Note to other builders: even the Detail & scale drawings are wrong in this respect. Above are the resin and PE parts, plus the tube, that I now need to get in to the correct shape. The apertures on to which the jet pipes should sit are like this: I had considered boring this out so that I can slip the tub in but on reflection I will simply cut a ring a cement the jet pipes directly on to he face of this.... unless I find that the aircraft had obvious thin edges in this area and in that case I will go back to sanding! More again soon. Martin3 points
-
Here is my 213 Squadron Vampire based at RAF Deversoir, Egypt, in the early 50s. The kit turned out to be more difficult than I anticipated. It has few parts but on cleaning up and washing the components, I had to deal with a number of poorly formed areas and some air bubbles. I had one particular area on the port side under the cockpit which "delaminated" as I cleaned it. Eventually, I sanded way back to good solid resin and had to fill and reshape/re-engrave the whole area. I also had problems with the starboard boom which was bent and twisted - I spent a good hour with a bowl of hot water getting it straightened out. I have had few issues with other Alley Cat kits/conversions in the past. The kit was finished pretty much OOB once the parts were tidied up. Fit was difficult around the nose section. The only additions were pitot tubes/aerial from metal tubes and replacing the woeful white metal balance weights under the tail with scratch build items (Extruded styrene aerofoil plus milliput) Paints were Tamiya XF-83 for the Medium Sea Grey and a mix by eye based on XF-65 Field Grey for the Light Slate Grey. Underside was Xtracrylics PRU Blue. The decals were excellent. Cheers Malcolm3 points
-
I am itching to get back to these models. Sadly, I'm being held up a bit by this sort of thing: This is a 7mm/1ft scale, 1/43rd in other words, Great Western Small Prairie tank loco that I’m building as a commission. I’m a slow and careful builder, with some commissions stretching into the years rather than weeks. I am aiming for this one to be completed and handed over to the professional painter at the beginning of March. In reality, barring unfortunate incidents, this will be pretty much complete by Christmas. Come the new year, and I’ll be back into dozens of 7mm scale coaches for a bit. i like to reward myself with some aircraft modelling, so I tend to store up the "rewards" to give me a few days at a time on a build or three. With my paint shop in my loft space, and winter arriving, I am very tempted to get several models up to the primer stage to make it worth getting the heating on, so I may well crack open another box or two soon.3 points
-
Thanks Giorgio Sad(ish) to hear that John but she is big… that said if you ignore the 'issues' it's a nice kit Speaking of which, I've spent time today with various files re-shaping the intakes. Groan. I've also spent time arranging the pick up of the T-Roc on Friday; after eight months wait I'm excited! I'll post a picture when I've picked it up. It better be worth the wait… Blast of primer to highlight problems like what proper modellers do: Just for Matt I've rounded / ramped the fronts: … while still maintaining the appearance of squareness: I'm definitely BOI now (Bored Of Intakes) and to be honest they don't look too bad from a distance: …especially when viewed from their 'on the ceiling' angle: I do need to clean up and polish a bit, especially the vents. It'll keep me busy while I'm waiting for the resin bits. Better chase Alec - I may need to put this aside for a while.3 points
This leaderboard is set to London/GMT+01:00






.thumb.jpg.d17ff607fc7e89ed057e63fcb6f2a888.jpg)


